#instead of dev/sda
Explore tagged Tumblr posts
Visit Tumblr Blog
Explore Tumblr blogs with no restrictions, modern design and the best experience.
Last Seen Tumblr Blogs


Fun Fact
In February 2021, Tumblr had 518.6 million blog accounts.
Text
this is so surreal~~
No reblog this time cause I thought that it was too long at this point
are you telling me I've been installing linux on this computer wrong this entire time??
WE BACK ON LINUX BABY~~!!
all I had to do on install was just......
make grub boot from dev/sda1 instead of dev/sda
dev/sdb was the hard drive all of my data was stored on and if I didn't touch that, nothing would happen.
the cool thing here is that mounting the device here is password protected to actually mount and view the data. as opposed to windows having it mounted at all times.
this was simpler than I thought it was and now I feel really stupid...
Linux mint debian edition 6 lets go~~~~~~!!
I'm so excited~~!! come to find out that I've been installing the grub boot loader in the wrong place this entire time.....
*happy screaming*
now idk if I'm smarter than I think or dumber than I think. cause it could be both....
I didn't need to tinker with the bios at all~~ tho I am curious as to what it looks like now. maybe the windows boot loader isn't there anymore and is just the linux one?
#personal#thoughts#thinking#hype#im so excited#it was easier than I thought#and it turns out I was installing grub in the wrong place this whole time#not a reason to feel stupid tho cause I learned something#linux#linux mint#linux mint debian#linux mint debian edition#boot#boot issue#boot issues#boot issue solved#so make dev/sda1 the grub#instead of dev/sda
10 notes
·
View notes
Note
#very very interesting topic#you are talking about FHS (file hierarchy system) but I instead would like to know your thoughts on filesystems as in FS#you said you're “functionality over ideology”#are you sticking with plain good old ext4 or do you use some CoW fs like zfs or btrfs?
I'm just a boring ext4+SWAP+MBR* pleb. It was the easiest option when installing and fit my needs (1. is a filesystem, 2. works); and I haven't needed to switch disks (or add a second disk) yet so there's not been a good opportunity to experiment.
Btrfs seems neat, it'll probably be the first I try. I don't really care about encryption but having a better backup system than "plug a spinning disk into my hotswap bay every couple months and dd if=/dev/sda of=/dev/sdc" would be nice.
*my mobo (Intel DX58SO2) claims to support UEFI but I think there's something wrong with its implementation. Every UEFI booter I've tried hasn't worked right and the UEFI shell totally fails to load. No GPT for me!
Thoughts on Linux (the OS)
Misconception!
I don't want to be obnoxiously pedantic, but Linux is not an OS. It is a kernel, which is just part of an OS. (Like how Windows contains a lot more than just KERNEL32.DLL). A very, very important piece, which directly shapes the ways that all the other programs will talk to each other. Think of it like a LEGO baseplate.

Everything else is built on top of the kernel. But, a baseplate does not a city make. We need buildings! A full operating system is a combination of a kernel and kernel-level (get to talk to hardware directly) utilities for talking to hardware (drivers), and userspace (get to talk to hardware ONLY through the kernel) utilities ranging in abstraction level from stuff like window management and sound servers and system bootstrapping to app launchers and file explorers and office suites. Every "Linux OS" is a combination of that LEGO baseplate with some permutation of low and high-level userspace utilities.
Now, a lot of Linux-based OSes do end up feeling (and being) very similar to each other. Sometimes because they're directly copying each other's homework (AKA forking, it's okay in the open source world as long as you follow the terms of the licenses!) but more generally it's because there just aren't very many options for a lot of those utilities.
Want your OS to be more than just a text prompt? Your pick is between X.org (old and busted but...well, not reliable, but a very well-known devil) and Wayland (new hotness, trying its damn hardest to subsume X and not completely succeeding). Want a graphics toolkit? GTK or Qt. Want to be able to start the OS? systemd or runit. (Or maybe SysVinit if you're a real caveman true believer.) Want sound? ALSA is a given, but on top of that your options are PulseAudio, PipeWire, and JACK. Want an office suite? Libreoffice is really the only name in the game at present. Want terminal utilities? Well, they're all gonna have to conform to the POSIX spec in some capacity. GNU coreutils, busybox, toybox, all more or less the same programs from a user perspective.
Only a few ever get away from the homogeneity, like Android. But I know that you're not asking about Android. When people say "Linux OS" they're talking about the homogeneity. The OSes that use terminals. The ones that range in looks from MacOS knockoff to Windows knockoff to 'impractical spaceship console'. What do I think about them?
I like them! I have my strongly-felt political and personal opinions about which building blocks are better than others (generally I fall into the 'functionality over ideology' camp; Nvidia proprietary over Nouveau, X11 over Wayland, Systemd over runit, etc.) but I like the experience most Linux OSes will give me.
I like my system to be a little bit of a hobby, so when I finally ditched Windows for the last time I picked Arch Linux. Wouldn't recommend it to anyone who doesn't want to treat their OS as a hobby, though. There are better and easier options for 'normal users'.
I like the terminal very much. I understand it's intimidating for new users, but it really is an incredible tool for doing stuff once you're in the mindset. GUIs are great when you're inexperienced, but sometimes you just wanna tell the computer what you want with your words, right? So many Linux programs will let you talk to them in the terminal, or are terminal-only. It's very flexible.
I also really, really love the near-universal concept of a 'package manager' -- a program which automatically installs other programs for you. Coming from Windows it can feel kinda restrictive that you have to go through this singular port of entry to install anything, instead of just looking up the program and running an .msi file, but I promise that if you get used to it it's very hard to go back. Want to install discord? yay -S discord. Want to install firefox? yay -S firefox. Minecraft? yay -S minecraft-launcher. etc. etc. No more fucking around in the Add/Remove Programs menu, it's all in one place! Only very rarely will you want to install something that isn't in the package manager's repositories, and when you do you're probably already doing something that requires technical know-how.
Not a big fan of the filesystem structure. It's got a lot of history. 1970s mainframe computer operation procedure history. Not relevant to desktop users, or even modern mainframe users. The folks over at freedesktop.org have tried their best to get at least the user's home directory cleaned up but...well, there's a lot of historical inertia at play. It's not a popular movement right now but I've been very interested in watching some people try to crack that nut.
Aaaaaand I think those are all the opinions I can share without losing everyone in the weeds. Hope it was worth reading!
223 notes
·
View notes
Text
Testdisk copy files to another drive

#Testdisk copy files to another drive install
#Testdisk copy files to another drive software
#Testdisk copy files to another drive professional
If you use the logfile feature of ddrescue, the data is rescued very efficiently (only the needed blocks are read). That is, you don't have to wait for an error, stop the program, read the log, run it in reverse mode, etc. The basic operation of ddrescue is fully automatic. So, every time you run it on the same output file, using a logfile, it tries to fill in the gaps. It copies data from one file or block device (hard disc, cdrom, etc) to another, trying hard to rescue data in case of read errors.ĭdrescue does not truncate the output file if not asked to.
This is an older, slower shell script that needs to be run in combination with another script to do the same thing as the GNU version.
This documentation currently only applies to GNU ddrescue. GNU ddrescue (packaged as gddrescue, though once installed the command is "ddrescue") They are confusingly given the same name: There are two different programs for making an image of a damaged device, in preparation for rescuing files. Imaging a damaged device, filesystem or drive You can restore the "guessed" partition table, only after checking it very carefully (you're strongly advised to write to another device instead), using sudo gpart -W /dev/sda /dev/sda To scan the first hard disk using default settings type sudo gpart /dev/sda
#Testdisk copy files to another drive install
Use any method to install the package gpart. Run testdisk and it will scan your computer for media and offer you a menu-driven way to recover your partition.Īnother program that can scan drives and re-create a partition table based on "guesses" is Gpart. Use any method to install the testdisk package. If parted finds a potential partition, it will ask you if you want to add it to the partition table.Īlternatively, the testdisk application may recover your partition. Where Start is the area of the disk where you believe the partition began and END is its end. For example, if your /dev/sda drive is the drive from which you want to recover, run: Next run parted and tell it to use the device in question. Once at the desktop, open a terminal and run_: Parted is installed on the base Ubuntu system. The easiest way to accomplish this is to run the live cd. When changing the partition table on your hard drive, you must ensure that no partition on the disk is mounted. Run Parted from the command line to recover your partition. If you made a mistake while partitioning and the partition no longer appears in the partition table, so long as you have not written data in that space, all your data is still there.
#Testdisk copy files to another drive software
It includes most of the software mentioned in this page. If you do not have a lot of ram, or do not have an internet connection on the failed computer, you can use SystemRescueCd, a live cd data recovery toolkit. You should run these tools from another OS which resides on another disk or a "live" CD.Īn Ubuntu Desktop CD will work fine. If you need to make an image of the failed device, you will need yet another quantity of space. To recover data from a failed device, you will need another device of equal or greater storage onto which to save your data. (See below.) If hardware failure is not the problem, you can recover data directly from the device. If your device is damaged, it is advisable to image the device and work on the image file for data recovery.
#Testdisk copy files to another drive professional
If your data is not replaceable, do not attempt to write to the failed device if the following applications do not work but seek professional advice instead. The following software will passively try to recover your data from failed or failing hardware. Be certain that the "live" cd does not automatically mount any partition or swap space. Shut down the affected machine as soon as possible, and restart it from a LiveCD or LiveUSB. You should NOT write to the failed device, as it can worsen a hardware failure, and overwrite existant data in case of lost files. The data is recoverable because the information is not immediately removed from the disk.
Extract individual files from recovered imageĭeleted or lost files can sometimes be recovered from failed or formatted drives and partitions, CD-ROMs and memory cards using the free/libre software available in the Ubuntu repositories.
Extract filesystem from recovered image.
Ran out of space while imaging the drive?.
Imaging a damaged device, filesystem or drive.
0 notes
Text
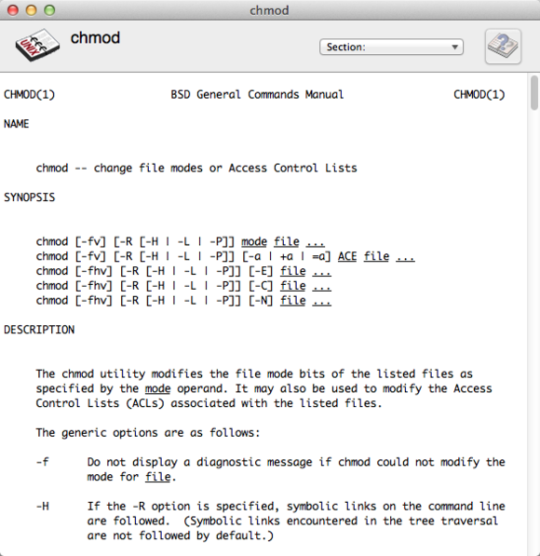
Macos Man Pages Location

Pages Macos Big Sur
Macos Man Pages
Macos Man Pages Locations
MacOS will ask you to enter a password from the Admin account. Type it and again press Enter. This command will move all folders from the old location to the new one. When the operation is completed, restart your Mac. After the reboot, your Home folder will be renamed. Mac Tips to work with folders.
Custom cursor macOS pack for Windows in 4K and scale 200%. Custom cursor macOS Sierra pack for Windows screens for 4K with scale 200%. How to use it: Select your resolution filder; Right click Install.inf and click «Install» Go to Control Panel → Mouse and choose «macOS Sierra 200» scheme. Apply and enjoy the best cursors ever!
Data Duplicator, convert and copy a file. Copy standard input to the standard output.

Input data is read and written in 512-byte blocks. If input reads are short, input from multiple reads are aggregated to form the output block. When finished, dd displays the number of complete and partial input and output blocks and truncated input records to the standard error output.
ascii, oldascii The same as the unblock value except that characters are translated from EBCDIC to ASCII before the records are converted. (These values imply unblock if the operand cbs is also specified.) There are two conversion maps for ASCII. The value ascii specifies the recommended one which is compatible with AT&T System V UNIX. The value oldascii specifies the one used in historic AT&T UNIX and pre-4.3BSD-Reno systems. block Treats the input as a sequence of newline or end-of- file terminated variable length records independent of input and output block boundaries. Any trailing new-line character is discarded. Each input record is converted to a fixed length output record where the length is specified by the cbs operand. Input records shorter than the conversion record size are padded with spaces. Input records longer than the conversion record size are truncated. The number of truncated input records, if any, are reported to the standard error output at the completion of the copy.
ebcdic, ibm, oldebcdic, oldibm The same as the block value except that characters are translated from ASCII to EBCDIC after the records are converted. (These values imply block if the operand cbs is also specified.) There are four conversion maps for EBCDIC. The value ebcdic specifies the recommended one which is compatible with AT&T System V UNIX. The value ibm is a slightly different mapping, which is compatible with the AT&T System V UNIX ibm value. The values oldebcdic and oldibm are maps used in historic AT&T UNIX and pre-4.3BSD-Reno systems. lcase Transform uppercase characters into lowercase characters. noerror Do not stop processing on an input error. When an input error occurs, a diagnostic message followed by the current input and output block counts will be written to the standard error output in the same format as the standard completion message. If the sync conversion is also specified, any missing input data will be replaced with NUL bytes (or with spaces if a block oriented conversion value was specified) and processed as a normal input buffer. If the sync conversion is not specified, the input block is omitted from the output. On input files which are not tapes or pipes, the file offset will be positioned past the block in which the error occurred using lseek(2). notrunc Do not truncate the output file. This will preserve any blocks in the output file not explicitly written by dd. The notrunc value is not supported for tapes. osync Pad the final output block to the full output block size. If the input file is not a multiple of the output block size after conversion, this conversion forces the final output block to be the same size as preceding blocks for use on devices that require regularly sized blocks to be written. This option is incompatible with use of the bs=n block size specification. sparse If one or more output blocks would consist solely of NUL bytes, try to seek the output file by the required space instead of filling them with NULs, resulting in a sparse file. swab Swap every pair of input bytes. If an input buffer has an odd number of bytes, the last byte will be ignored during swapping. sync Pad every input block to the input buffer size. Spaces are used for pad bytes if a block oriented conversion value is specified, otherwise NUL bytes are used. ucase Transform lowercase characters into uppercase characters. unblock Treats the input as a sequence of fixed length records independent of input and output block boundaries. The length of the input records is specified by the cbs operand. Any trailing space characters are discarded and a newline character is appended.
To see the version of Pages on your Mac, choose Pages About Pages (from the Pages menu at the top of your screen). To explore the Pages user guide, click Table of Contents at the top of the page, or enter a word or phrase in the search field. You can also download the guide from Apple Books (where available). Manual pages in MacOS X The man command in MacOS X uses a sophisticated method of finding manual page files, based on the invocation options and environment variables, the /private/etc/man.conf configuration file, and some built in conventions and heuristics. In MacOS X you have a command.
Where sizes are specified, a decimal, octal, or hexadecimal number of bytes is expected. If the number ends with a b, k, m, g, or w, the number is multiplied by 512, 1024 (1K), 1048576 (1M), 1073741824 (1G) or the number of bytes in an integer, respectively. Two or more numbers can be separated by an x to indicate a product.
When finished, dd displays the number of complete and partial input and output blocks, truncated input records and odd-length byte-swapping blocks to the standard error output. A partial input block is one where less than the input block size was read. A partial output block is one where less than the output block size was written. Partial output blocks to tape devices are considered fatal errors. Otherwise, the rest of the block will be written. Partial output blocks to character devices will produce a warning message. A truncated input block is one where a variable length record oriented conversion value was specified and the input line was too long to fit in the conversion record or was not newline ter- minated.

Normally, data resulting from input or conversion or both are aggregated into output blocks of the specified size. After the end of input is reached, any remaining output is written as a block. This means that the final output block might be shorter than the output block size.
The name dd is thought to be an allusion to the DD statement found in IBM's Job Control Language (JCL), where the acronym stands for 'Data Description'.
If dd receives a SIGINFO signal, the current input and output block counts will be written to the standard error output in the same format as the standard completion message. If dd receives a SIGINT signal, the current input and output block counts will be written to the standard error output in the same format as the standard completion message and dd will exit.
Pages Macos Big Sur
Examples:
Macos Man Pages
Clone the drive sda onto drive sdb: $ dd if=/dev/sda of=/dev/sdb
Clone the drive hda onto an image file: $ dd if=/dev/hda of=/image.img
Copy a CD or DVD disc to a .iso image file, first unmounting the disc: sudo umount /dev/dvd-device dd if=/dev/dvd-device of=dvd.iso bs=2048 conv=sync,notrunc # dvd-device will typically be dvd for a dvd disc or cdrom for a cdrom disc.
Clone a hard drive to a zipped image file in 100Mb blocks: $ dd if=/dev/hda bs=100M | gzip -c > /image.img
Macos Man Pages Locations

Create a 10 KB file filled with random data (10 x 1K blocks): $ dd if=/dev/random of=random.bin bs=1024 count=10
Completely wipe the hard drive hdz by overwriting it with random data: $ dd if=/dev/urandom of=/dev/hdz
“Success isn't something you chase. It's something you have to put forth the effort for constantly. Then maybe it'll come when you least expect it. Most people don't understand that” - Michael Jordan
Related macOS commands:
Apple Disk Utility can create DMG files or ISO files (select the 'CD/DVD Master' option) cp - Copy one or more files to another location. cpio - Copy files to and from archives. hdiutil - Manipulate iso disk images. install - Copy files and set attributes. mv - Move or rename files or directories. tr - Translate, squeeze, and/or delete characters.
Copyright © 1999-2021 SS64.com Some rights reserved
0 notes
Text
Thank you, ddrescue.
CESTIS: The fire can't hurt you, can it? You're no more bound to that mortal form than I am. You're pure spirit, and the scars are just for show.
But I command you to be bound. Hear me now. Feel your spirit shrink until that soiled flesh measures the length and breadth of you. It is you.
And it's flammable.
--Lucifer: Children and Monsters, p. 73.
I can't be the only person who reads this and thinks, oh, that's what it's like to realize you don't have proper backups, right?
Disk failure doesn't always look like you'd expect it to. Sometimes it takes the form of slower and slower reads, which only really become noticeable when the operating system times out, and when running CHKDSK overnight is still stuck at six percent in the morning. Through all of this, smartctl was reporting that the overall health assessment had PASSED, though attributes indicating a failing drive were nonzero.
I haven't done this sort of work in... years, I think. I usually don't build my own machines any more, certainly not from components, and I don't even know what the usual specs are. But I do know that while you use dd (an ancient Unix tool) to move data from place to place normally, you use ddrescue, a much subtler and more powerful tool, to do so in extreme circumstances.
The rescue toolkits have also gotten better. Instead of burning CDs or, worse, fiddling with SYSLINUX and wondering why your stick won't boot, you use something like multibootusb to set up SystemRescueCd (for Linux tools), Hiren's BootCD and/or FalconFour (for Windows tools), Tails (for unforeseen circumstances), and whatever else I can think of, and because large USB sticks are cheap, you have room left over to store movies or whatever else you want to keep on there.
I ordered a replacement drive off of Amazon with same-day delivery, plugged it into an external drive enclosure, booted SystemRescueCd off of the stick, ran ddrescue -f /dev/sda /dev/sdb recovery.log, waited nine or ten hours, swapped the drives, ran CHKDSK on startup, and we were back up and running in the morning. About twenty-five hours from start to finish.
$ ddrescuelog -t recovery.log current pos: 139233 MB, current status: retrying domain size: 1000 GB, in 1 area(s) rescued: 1000 GB, in 189 area(s) ( 99.99%) non-tried: 0 B, in 0 area(s) ( 0%) errsize: 1396 kB, errors: 188 ( 0.00%) non-trimmed: 0 B, in 0 area(s) ( 0%) non-split: 0 B, in 0 area(s) ( 0%) bad-sector: 1396 kB, in 188 area(s) ( 0.00%)
This is recovery at the logical-disk level, not the filesystem level. I don't know if the unrecoverable sections even covered any files. CHKDSK seemed to catch some complaints about metadata. I wish NTFS had some kind of internal checksumming to definitively determine health or corruption at this point. But in general, this was just unbelievably successful. This sort of problem--boot disks, recovery tools, forensic programs--has been solved.
Thanks, free software community! I donated 20 EUR to Antonio Diaz Diaz, author and maintainer of ddrescue, because his work, and that of his colleagues, saved me at least that much in termsof angst.
3 notes
·
View notes
Link
An operating system (OS) is the low-level software that manages resources, controls peripherals, and provides basic services to other software. In Linux, there are 6 distinct stages in the typical booting process.
1. BIOS
BIOS stands for Basic Input/Output System. In simple terms, the BIOS loads and executes the Master Boot Record (MBR) boot loader.
When you first turn on your computer, the BIOS first performs some integrity checks of the HDD or SSD.
Then, the BIOS searches for, loads, and executes the boot loader program, which can be found in the Master Boot Record (MBR). The MBR is sometimes on a USB stick or CD-ROM such as with a live installation of Linux.
Once the boot loader program is detected, it's then loaded into memory and the BIOS gives control of the system to it.
2. MBR
MBR stands for Master Boot Record, and is responsible for loading and executing the GRUB boot loader.
The MBR is located in the 1st sector of the bootable disk, which is typically /dev/hda, or /dev/sda, depending on your hardware. The MBR also contains information about GRUB, or LILO in very old systems.
3. GRUB
Sometimes called GNU GRUB, which is short for GNU GRand Unified Bootloader, is the typical boot loader for most modern Linux systems.
The GRUB splash screen is often the first thing you see when you boot your computer. It has a simple menu where you can select some options. If you have multiple kernel images installed, you can use your keyboard to select the one you want your system to boot with. By default, the latest kernel image is selected.
The splash screen will wait a few seconds for you to select and option. If you don't, it will load the default kernel image.
In many systems you can find the GRUB configuration file at /boot/grub/grub.conf or /etc/grub.conf. Here's an example of a simple grub.conf file:
#boot=/dev/sda default=0 timeout=5 splashimage=(hd0,0)/boot/grub/splash.xpm.gz hiddenmenu title CentOS (2.6.18-194.el5PAE) root (hd0,0) kernel /boot/vmlinuz-2.6.18-194.el5PAE ro root=LABEL=/ initrd /boot/initrd-2.6.18-194.el5PAE.img
4. Kernel
The kernel is often referred to as the core of any operating system, Linux included. It has complete control over everything in your system.
In this stage of the boot process, the kernel that was selected by GRUB first mounts the root file system that's specified in the grub.conf file. Then it executes the /sbin/init program, which is always the first program to be executed. You can confirm this with its process id (PID), which should always be 1.
The kernel then establishes a temporary root file system using Initial RAM Disk (initrd) until the real file system is mounted.
5. Init
At this point, your system executes runlevel programs. At one point it would look for an init file, usually found at /etc/inittab to decide the Linux run level.
Modern Linux systems use systemmd to choose a run level instead. According to TecMint, these are the available run levels:
Run level 0 is matched by poweroff.target (and runlevel0.target is a symbolic link to poweroff.target). Run level 1 is matched by rescue.target (and runlevel1.target is a symbolic link to rescue.target). Run level 3 is emulated by multi-user.target (and runlevel3.target is a symbolic link to multi-user.target). Run level 5 is emulated by graphical.target (and runlevel5.target is a symbolic link to graphical.target). Run level 6 is emulated by reboot.target (and runlevel6.target is a symbolic link to reboot.target). Emergency is matched by emergency.target.
systemmd will then begin executing runlevel programs.
6. Runlevel programs
Depending on which Linux distribution you have installed, you may be able to see different services getting started. For example, you might catch starting sendmail …. OK.
These are known as runlevel programs, and are executed from different directories depending on your run level. Each of the 6 runlevels described above has its own directory:
Run level 0 – /etc/rc0.d/
Run level 1 – /etc/rc1.d/
Run level 2 – /etc/rc2.d/
Run level 3 – /etc/rc3.d/
Run level 4 – /etc/rc4.d/
Run level 5 – /etc/rc5.d/
Run level 6 – /etc/rc6.d/
Note that the exact location of these directories varies from distribution to distribution.
If you look in the different run level directories, you'll find programs that start with either an "S" or "K" for startup and kill, respectively. Startup programs are executed during system startup, and kill programs during shutdown.
That's everything you need to know about the Linux booting process. Now go out there and make Tux proud.
0 notes
Text
Neuer Blogpost: Transfer Raspbian from NOOBS partition to regular SD Card
Der nachfolgende Blogbeitrag ist rein englischsprachig … und sehr nerdig. — The following blog post describes how to transfer a living Raspbian (a/k/a Debian on a Raspberry Pi) that was installed via NOOBS, freeing it from the abstruse NOOBS partition scheme and then store it on a regular SD card with just a boot and a root partition.
The proposed method is extremely useful if you want to grow or shrink your Raspbian OS to a bigger or smaller SD card, or if you just want to backup your Raspi and not end up with a disk image that is sized like the entire SD card, even it was only half full. All three of these scenarios can usually be tackled e.g. with ApplePi-Baker v2, but it fails if your starting point was NOOBS. … As I googled for a HowTo like this and couldn’t find anything, I figured that other people might find this worth reading as well.
So let the nerd talk begin. I require that you to meet the following …
Prerequisites:
Your Raspi in question has booted into the Raspbian OS that you would like to transfer.
You are sitting in front of it, with a keyboard and a monitor connected to it. (An ssh remote access won’t suffice.)
A root password has been set and you know it. (A password-less sudo won’t suffice.)
You are logged into the text console as root. (If you’re still at the desktop, you should be able to switch to text console 2 with Ctrl-Alt-F2.)
The target SD card is attached to the Raspi via a USB card reader, but preferably not yet mounted.
First of all, make sure that the target SD card is big enough to hold the living system, duh. So please check with “df -h /”, just to be sure. Remember, a little bit of breathing space won’t harm. So if your Raspbian takes up 3.5 GB, it’s probably a good idea to use an 8 GB card. — Just saying …
Checking the existing partitions
Now check which partitions are actually mounted. Try “mount” and you should see which partition is mounted to “/” (your root partition) and which one is mounted to /boot (your boot partition). … Sometimes (e.g. with Debian 7 “Wheezy”) you might see that your root partition is mounted via /dev/root – in that case you might want to check with “ls -la /dev/root” where that symlink actually points to.
All that should also reflect if you check “cat /etc/fstab”: Depending on your prior NOOBS installation, your actual partition IDs might vary, but typically you’ll have /dev/mmcblk0p6 to be your boot partition, and /dev/mmcblk0p7 to be your root partition. … Take a note of this – if nothing else, take a mental note.
Partitioning the target SD card
Yes, we’re gonna do that manually – here be dragons. But fear not, it’s not that difficult.
Your target SD card should be attached to your Raspi via an SD card reader, and should thus be available as /dev/sda. Make sure with “mount” that none of the sda1/sda2/sda3 etc. partitions are mounted – and unmount them prior to continuing.
Now please fire up the fdisk partition manager with “fdisk /dev/sda” and enter “p” to see what kinds of partitions are present. Those need to be deleted with the “d” command. … It will then ask you which partition to delete – or, if there’s only one left, delete that automatically. – You may at any point check where you stand with “p” and make sure you’ve deleted each and every partition that was present before. Don’t worry, nothing is permanent until writing the modified partition able back to the SD card. If anything goes wrong, simply hit Ctrl-C and start over.
After deleting the former partitions, we’ll now create the boot partition – which is supposed to be partition #1 at the beginning of the SD card, and typically it’s 60M big. The sequence of text commands to be entered (which you certainly shouldn’t follow blindly, but consciously – so nothing strange will happen along the way on your particular machine) should be like:
“n” – new partition
“p” – primary
“1” – partition #1
Enter – default starting position at the beginning of the SD card
“+60M” / Enter – we want to have that partition to be 60M big
“t” – change the partition type
(“1”) – select partition #1, probably selected automatically, as it’s the only one right now
“c” / Enter – “W95 FAT32 (LBA)”
When you check with “p”, you should see something like this:
/dev/sda1 2048 124928 61440 c W95 FAT32 (LBA)
Now for the root partition – this goes down a bit quicker:
“n” – new partition
“p” – primary
“2” – partition #2
Enter – default starting position right behind the boot partition
Enter – use the rest of the SD card
When you now check with “p”, you should see something like this (in my case on an 8 GB SD card):
/dev/sda1 2048 124928 61440+ c W95 FAT32 (LBA) /dev/sda2 124929 15523839 7699455+ 83 Linux
Now the moment has come to write the new partition table. This will erase any previously existing partition(s) that was present before you deleted them. … This is the point of no return: Press “w” and hit the Enter key.
Formatting the freshly created partitions
Now we’ve got a DOS compatible boot partition and a Linux compatible root partition. All we have to do now for them to be usable is to format them, like this:
mkdosfs /dev/sda1
mkfs.ext4 /dev/sda2
mkdosfs will be done in a split second, while mkfs.ext4 will take a little longer while delivering a couple of status messages. Nothing unusual here.
Copying the boot partition
The DOS compatible boot partition contains a couple of firmware files and configuration scripts that the Raspi needs to boot up. It should be mounted at /boot – now it’s time to mount the target boot partition to be able to copy its contents.
mount -t vfat /dev/sda1 /mnt
You might omit the „-t vfat“, as mount usually assumes „-t auto“ nowadays. After that, please type “mount” to check that /dev/sda1 was indeed mounted at /mnt; then type “df -h /mnt” to check that you’re really looking at the 60M partition that we just created and afterwards formatted.
As for the actual copying, type the following:
cd /boot ; tar cvf - . | (cd /mnt && tar xf -)
In plain English: First change into the /boot directory where the source files reside. Our nice tar tool is going to “create a tape archive”, but will then pipe its output straight to stdout. This will be taken up via stdin by the second tar process at the end of that pipe, which will first change into the /mnt directory, and then “unpack” what it receives. … Don’t worry, no actual .tar archive is being written during the process, it’s all happening on the fly in memory.
After the copying has finished, “ls -la /boot” and “ls -la /mnt” should display pretty much the exact same files. … If something went wrong, like if perhaps your original /boot partition is bigger than 60M, start over with deleting and creating the partition – but now create a bigger boot partition.
Modifying the command line
With /dev/sda1 still mounted as /mnt, this is the right time to edit the Raspi’s future boot-time command line.
So please enter “vi /mnt/cmdline.txt” (or use your preferred light-weight text editor instead). In there, you should see (among other things) something like “root=/dev/mmcblk0p7” (i.e. the root partition that you took a mental note about): Change that to “root=/dev/mmcblk0p2”, as this is going to be our new root partition; currently, it’s sda2, which will become mmcblk0p2 later. (No, we haven’t copied that one just yet, hold on.)
Save the cmdline.txt file, leave the /mnt directory (e.g. with “cd /”), and then unmount both /boot and /mnt with “umount /boot” and “umount /mnt“.
Entering single user mode and freezing the root filesystem
Now for the big guns: We’re about to duplicate the content of the existing, living and breathing root partition. This takes a few preparations. First of all, let’s head into single user mode. — Note: Everything up to this point could have been done remotely via ssh, but once we’re kicking down networking and other essential system daemons in a second, all you’re going to have is the text console, i.e. your real monitor and your physical keyboard.
So enter “init 1” to switch to single user mode. Raspbian will now ask you for your root password to do so. … If root doesn’t have a password set, you won’t be able to switch into single user mode.
Once you’ve reached single user mode, please check whether your root filesystem is still mounted read/write or if it has been remounted read-only. Simply enter “mount” and see for yourself: If you should see something like
/dev/mmcblk0p7 on / type ext4 (ro,noatime)
then your root partitions has been re-mounted “ro” = read-only. (In Raspbian 10 / “Buster”, this should be the case.) But if you should see something like
/dev/root on / type ext4 (rw,noatime)
your root partition is still “rw” = “read/write”. (I’ve seen this in Raspbian 7 / Wheezy.) In this case, I recommend to freeze any write access to the root file system by entering “fsfreeze -f /” right now.
Copying the root partition
Now for the actual copying. Did you unmount all unnecessary partitions yet? If not, just to be sure, enter “umount -a”. Then it’s time to mount the target root partition on the target SD card. So enter the following:
mount -t ext4 /dev/sda2 /mnt
Again, you could probably omit the “-t ext4” and it should still mount perfectly fine. However, better check with “mount” that you’ve actually mounted the e4fs partition /dev/sda2 at /mnt.
As we are about to copy the content of the root partition, you should know that we need to leave out a couple of directories:
/mnt – well, duh, we’re going to drop our files there, so trying to copy them would lead to a loop
/proc
/sys
/run
The latter three directories do not contain real files, but virtual ones that represent the currently running Linux system one way or another. They can’t be copied, but it isn’t necessary, as their contents are being created dynamically anyway.
Brace yourself for a lengthy command, again consisting of two tar processes, one gathering the files, one writing them. Here goes:
cd / ; tar --exclude=./mnt --exclude=./proc--exclude=./sys --exclude=./run -cvf - . | (cd /mnt && tar xf -)
This is supposed to be one long line, like shown on this screenshot:
Please note that the dash in front of the “-cvf” is crucial in this case (as opposed to when we were copying the boot partition earlier).
Hit enter – and have a little patience … actually a lot of patience, this might take a bit of time, copying a couple of GBs over USB2 to the target SD card.
As a matter of fact, the long list of filenames scrolling over the screen slows things down. You might switch over to another text console with Alt-F2 (or Alt–F3, in case you’re already on console 2). The other text console won’t be functional, but you will notice that the copying is faster, as you can see about the more rapid SSD activity LED flashing. Switch back and forth to watch what’s going on.
When something goes wrong: Interrupt the copying
If something looks odd – like perhaps when tar behaves bitchy and won’t honor the excludes: A simple Ctrl-C won’t be able to stop the copying.
I suggest the following method: Hit Ctrl-Z. This will suspend the copying and push it in to the background. You can check with “jobs” that it’s still there. If you really want to interrupt the copy process, enter “killall tar” – the two tar processes should be the only ones running (which you could check with some variation of “ps” if you want to be sure). After killing the two tar processes, push the suspended copying back into the foreground with “fg” – and I promise it will terminate immediately.
After such an emergency stop, I’d probably go for “umount /mnt” to unmount the half-copied root filesystem – this might take a little while, as Raspbian is probably still be on its way syncing the write cache. However, after that, I’d start over with formatting the root partition with mkfs.ext4 and start over with a modified command line that works better for you. … No, you won’t have to re-format and re-copy the boot partition if that went well before.
If everything went well: Creating empty folders and modifying the fstab
Let’s assume the copy process took its time, but went through just fine. — If you froze the read/write root filesystem, this is the time to unfreeze it with “fsfreeze -u /”.
We excluded /mnt, /proc, /sys, and /run from the copying. Still, those four folders should exist as empty folders in the new root partition. So type the following:
cd /mnt ; mkdir mnt proc sys run
The most essential thing to do now, however, is to make sure that the copied Raspbian will mount the correct partitions as its boot and root partitions. So enter “vi /mnt/etc/fstab” (or use your preferred light-weight text editor instead again). In there, you should see something like
/dev/mmcblk0p6 /boot vfat defaults 0 2 /dev/mmcblk0p7 / ext4 defaults,noatime 0 1
Change that to
/dev/mmcblk0p1 /boot vfat defaults 0 2 /dev/mmcblk0p2 / ext4 defaults,noatime 0 1
and save the file.
One last thing: In case you have a /dev/root device that is a symlink to the actual root device, you should update that as well (although I think that Raspbian does that automatically, but better safe than sorry).
If “ls -la /mnt/dev/root” displays something like “/mnt/dev/root -> mmcblk0p7”, please enter the following:
cd /mnt/dev ; ln -sf mmcblk0p2 root
Now the root device symlink should be in place and correctly point to mmcblk0p2.
Shutting down, swapping cards, rebooting
Everything is prepared: Shut down your Raspi with “shutdown -h now” and wait until the SSD activity LED flashes 10 times in a row before you can safely cut the power supply.
Now pull out the USB SD card reader, remove the card, and replace the Raspis original SD card with the one we just partitioned, formatted, and copies. Fingers crossed – once you power up the Raspi, it should boot up the cloned system as if it was nothing. With one major difference: You won’t see the “For recovery, hold Shift” message anymore, as we got rid of NOOBS.
The reward of everything we just did is: You can now power down your Raspi, take out the SD, pop it into your Mac’s SD card reader, and create a beautifully shrunken backup copy of it with ApplePi-Baker v2.
Additional notes about PARTUUIDs vs. /dev/mmcblk0p* device names
I recently noticed that in some Raspbian installations, both /etc/fstab and as well /boot/cmdline.txt do not in fact contain /dev/mmcblk0p* device names for the root and boot partitions, but actually PARTUUIDs or UUIDs. You can easily retrieve those UUIDs via “sudo blkid” for every block device that is connected to the system, even for non-mounted ones.
As a matter of fact, when copying partitions with ApplePi-Baker v2, it will leave these IDs unchanged – not even when shrinking or growing partitions during the imaging process. At least that’s my experience, and that’s probably a good thing, otherwise the cloned systems wouldn’t boot anymore
Anyway: If it should become necessary at some point to use these UUIDs instead of device names to address partitions, you’ll have to edit those in /etc/fstab and /boot/cmdline.txt before booting the copied Raspbian.
However: While I’ve seen those PARTUUIDs on a fresh regular installation of Raspbian 10 “Buster”, I never came across them when looking at NOOBS installations. If this should change at some point, I’ll look into it and update this blog post.
Share
von GZB – Gero Zahns Blog – ger.oza.hn https://ift.tt/2UM5Rx5
0 notes
Link
(Via: Hacker News)
Using cgroups to limit I/O
Oct 18, 2017
Developers running their apps on tsuru can choose plans based on memory and cpu usage. We were looking at adding I/O usage as one of the plan’s features, so one could choose how many I/O operations per second or bytes per second a container may be able to read/write.
Being able to limit I/O is particulary important when running a diverse cloud, where applications with different workloads and needs are running together sharing multiple resources. We need to make sure that an application that starts to behave badly does not interfere with others.
Our main scheduler is a docker based and docker exposes some flags to limit a container IOPS (I/O operations per second) and BPS (bytes per second). Docker relies on a linux kernel feature, called cgroups, to be able to limit a process resource usage.
Before exposing this as a possible parameter on tsuru plans, I decided to investigate and do some experimentation using cgroups to limit a process I/O (IOPS or BPS). I came to a conclusion that currently, it is not possible to fulfill our needs and decided to delay the implementation.
In the next section, we are going to discuss cgroups, the main kernel feature used to limit resource usage.
Introduction to cgroups
Cgroups are a mechanism available in Linux to aggregate/partition a set of tasks and all their future children. Different subsystems may hook into cgroups to provide different behaviors, such as resource accounting/limiting (this particular kind of subsystem is called controller).
Cgroups (along with namespaces) are one building blocks of containers, but you don’t need a container runtime to make use of them.
Managing cgroups is done by interacting with the cgroup filesystem, by creating directories and writing to certain files. There are two versions of cgroups available in newest kernels: v1 and v2. Cgroups v2 completely changes the interface between userspace and the kernel and, as of today, container runtimes only support cgroups v1, so we will focus on v1 first.
Cgroups v1
Cgroups v1 has a per-resource (memory, blkio etc) hierarchy, where each resource hierarchy contains cgroups for that resource. They all live in /sys/fs/cgroup:
/sys/fs/cgroup/ resourceA/ cgroup1/ cgroup2/ resourceB/ cgroup3/ cgroup4/
Each PID is in exactly one cgroup per resource. If a PID is not assigned to a specific cgroup for a resource, it is in the root cgroup for that particular resource. Important: Even if a cgroup has the same name in resourceA and resourceB they are considered distinct. Some of the available resources are:
blkio: Block IO controller - limit I/O usage
cpuacct: CPU accounting controller - accouting for CPU usage
cpuset: CPU set controller - allows assigning a set of CPUs and memory nodes to a set of tasks
memory: Memory resource controller - limit memory usage
hugeTLB: Huge TLB controller - allows limiting the usage of huge pages
devices: Device whitelist controller - enforce open and mknode restrictions on device files
pids: Process number controller - limit the number of tasks
In the next section, we are going to investigate the use of the blkio controller to limit the I/O bytes per second of a task running under a cgroup.
Limiting I/O with cgroups v1
To limit I/O we need to create a cgroup in the blkio controller.
$ mkdir -p /sys/fs/cgroup/blkio/g1
We are going to set our limit using blkio.throttle.write_bps_device file. This requires us to specify limits by device, so we must find out our device major and minor version:
$ cat /proc/partitions major minor #blocks name 8 0 10485760 sda 8 1 10484719 sda1 8 16 10240 sdb
Let’s limit the write bytes per second to 1048576 (1MB/s) on the sda device (8:0):
$ echo "8:0 1048576" > /sys/fs/cgroup/blkio/g1/blkio.throttle.write_bps_device
Let’s place our shell into the cgroup, by writing its PID to the cgroup.procs file, so every command we start will run in this cgroup:
$ echo $$ > /sys/fs/cgroup/blkio/g1/cgroup.procs
Let’s run dd to generate some I/O workload while watching the I/O workload using iostat:
$ dd if=/dev/zero of=/tmp/file1 bs=512M count=1 1+0 records in 1+0 records out 536870912 bytes (537 MB, 512 MiB) copied, 1.25273 s, 429 MB/s
At the same time, we get this output from iostat (redacted):
$ iostat 1 -d -h -y -k -p sda Device: tps kB_read/s kB_wrtn/s kB_read kB_wrtn sda 609.00 4.00 382400.00 4 382400 sda1 609.00 4.00 382400.00 4 382400 Device: tps kB_read/s kB_wrtn/s kB_read kB_wrtn sda 260.00 212.00 133696.00 212 133696 sda1 260.00 212.00 133696.00 212 133696 Device: tps kB_read/s kB_wrtn/s kB_read kB_wrtn sda 0.99 0.00 859.41 0 868 sda1 0.99 0.00 859.41 0 868 ...
We were able to write 429 MB/s; we can see from iostat output that all 512MB were writen in the same second. If we try the same command but opening the file with O_DIRECT flag (passing oflag=direct to dd):
$ dd if=/dev/zero of=/tmp/file1 bs=512M count=1 oflag=direct 1+0 records in 1+0 records out 536870912 bytes (537 MB, 512 MiB) copied, 539.509 s, 995 kB/s
At the same time, we get this output from iostat (redacted):
$ iostat 1 -d -h -y -k -p sda Device: tps kB_read/s kB_wrtn/s kB_read kB_wrtn sda 1.00 0.00 1024.00 0 1024 sda1 1.00 0.00 1024.00 0 1024 Device: tps kB_read/s kB_wrtn/s kB_read kB_wrtn sda 1.00 0.00 1024.00 0 1024 sda1 1.00 0.00 1024.00 0 1024 Device: tps kB_read/s kB_wrtn/s kB_read kB_wrtn sda 1.00 0.00 1024.00 0 1024 sda1 1.00 0.00 1024.00 0 1024 ...
Et voila! Our writes were below 1.0 MB/s. Why didn’t it work on the first try? Lets try to understand on the next section.
The I/O Path
So, whats the difference between opening the file with O_DIRECT and opening the file with no flags? The article Ensuring Data Reaches the Disk does a pretty good job explaining all the I/O flavors in Linux and their different paths on the kernel.
That data starts out as one or more blocks of memory, or buffers, in the application itself. Those buffers can also be handed to a library, which may perform its own buffering. Regardless of whether data is buffered in application buffers or by a library, the data lives in the application’s address space. The next layer that the data goes through is the kernel, which keeps its own version of a write-back cache called the page cache. Dirty pages can live in the page cache for an indeterminate amount of time, depending on overall system load and I/O patterns. When dirty data is finally evicted from the kernel’s page cache, it is written to a storage device (such as a hard disk). The storage device may further buffer the data in a volatile write-back cache. If power is lost while data is in this cache, the data will be lost. Finally, at the very bottom of the stack is the non-volatile storage. When the data hits this layer, it is considered to be “safe.”
Basically, when we write to a file (opened without any special flags), the data travels across a bunch of buffers and caches before it is effectively writen to the disk.
Opening a file with O_DIRECT (available since Linux 2.4.10), means (from man pages):
Try to minimize cache effects of the I/O to and from this file. In general this will degrade performance, but it is useful in special situations, such as when applications do their own caching. File I/O is done directly to/from user-space buffers.
So, for some reason, when we bypassed the kernel’s page cache, the cgroup was able to enforce the I/O limit specified.
This commit in Linux adds some documentation that explains exactly what is happening.
On traditional cgroup hierarchies, relationships between different controllers cannot be established making it impossible for writeback to operate accounting for cgroup resource restrictions and all writeback IOs are attributed to the root cgroup.
It’s important to notice that this was added when cgroups v2 were already a reality (but still experimental). So the “traditional cgroup hierarchies” means cgroups v1. Since in cgroups v1, different resources/controllers (memory, blkio) live in different hierarchies on the filesystem, even when those cgroups have the same name, they are completely independent. So, when the memory page is finally being flushed to disk, there is no way that the memory controller can know what blkio cgroup wrote that page. That means it is going to use the root cgroup for the blkio controller.
Right below that statement, we find:
If both the blkio and memory controllers are used on the v2 hierarchy and the filesystem supports cgroup writeback writeback operations correctly follow the resource restrictions imposed by both memory and blkio controllers.
So, in order to limit I/O when this I/O may hit the writeback kernel cache, we need to use both memory and io controllers in the cgroups v2!
Cgroups v2
Since kernel 4.5, the cgroups v2 implementation was marked non-experimental.
In cgroups v2 there is only a single hierarchy, instead of one hierarchy for resource. Supposing the cgroups v2 file system is mounted in `/sys/fs/cgroup/:
/sys/fs/cgroup/ cgroup1/ cgroup3/ cgroup2/ cgroup4/
This hierarchy means that we may impose limits to both I/O and memory by writing to files in the cgroup1 cgroup. Also, those limits may be inherited by cgroup3. Not every controller supported in cgroups v1 is available in cgroups v2. Currently, one may use: memory, io, rdma and pids controller.
Let’s try the same experiment as before using cgroups v2 this time. The following example uses Ubuntu 17.04 (4.10.0-35-generic).
Disabling cgroups v1
First of all, we need to disable cgroups v1. Do to that, I’ve added GRUB_CMDLINE_LINUX_DEFAULT="cgroup_no_v1=all" to /etc/default/grub and rebooted. That kernel config flag disables cgroup v1 for all controllers (blkio, memory, cpu and so on). This guarantees that both the io and memory controllers will be used on the v2 hierarchy (one of the requirements mentioned by the doc on Writeback mentioned earlier).
Limiting I/O
First, let’s mount the cgroups v2 filesystem in /cgroup2:
$ mount -t cgroup2 nodev /cgroup2
Now, create a new cgroup, called cg2 by creating a directory under the mounted fs:
$ mkdir /cgroup2/cg2
To be able to edit the I/O limits using the the I/O controller on the newly created cgroup, we need to write “+io” to the cgroup.subtree_control file in the parent (in this case, root) cgroup:
$ echo "+io" > /cgroup2/cgroup.subtree_control
Checking the cgroup.controllers file for the cg2 cgroup, we see that the io controller is enabled:
$ cat /cgroup2/cg2/cgroup.controllers io
To limit I/O to 1MB/s, as done previously, we write into the io.max file:
$ echo "8:0 wbps=1048576" > io.max
Let’s add our bash session to the cg2 cgroup, by writing its PID to cgroup.procs:
$ echo $$ > /cgroup2/cg2/cgroup.procs
Now, lets use dd to generate some I/O workload and watch with iostat:
dd if=/dev/zero of=/tmp/file1 bs=512M count=1 1+0 records in 1+0 records out 536870912 bytes (537 MB, 512 MiB) copied, 468.137 s, 1.1 MB/s
At the same time, we get this output from iostat (redacted):
Device: tps kB_read/s kB_wrtn/s kB_read kB_wrtn sda 1.02 0.00 693.88 0 680 sda1 1.02 0.00 693.88 0 680 Device: tps kB_read/s kB_wrtn/s kB_read kB_wrtn sda 2.00 0.00 732.00 0 732 sda1 2.00 0.00 732.00 0 732 Device: tps kB_read/s kB_wrtn/s kB_read kB_wrtn sda 0.99 0.00 669.31 0 676 sda1 0.99 0.00 669.31 0 676 Device: tps kB_read/s kB_wrtn/s kB_read kB_wrtn sda 1.00 0.00 672.00 0 672 sda1 1.00 0.00 672.00 0 672 Device: tps kB_read/s kB_wrtn/s kB_read kB_wrtn sda 1.00 0.00 1024.00 0 1024 sda1 1.00 0.00 1024.00 0 1024 ...
So, even relying on the writeback kernel cache we are able to limit the I/O on the disk.
Wraping Up
We’ve seen how limiting I/O is hard using cgroups. After some experimentation and research we found out that using cgroups v2 is the only way to properly limit I/O (if you can’t change your application to do direct or sync I/O).
As a result of this experiment, we decided to not limit I/O using docker at the moment since it does not support cgroups v2 (yet).
0 notes
Link
I found that I had some troubles with this step:
$ grub-probe /boot
I did not get “zfs” as my response.
I found that this article helped: https://github.com/ryao/zfs-overlay/blob/master/zfs-install
Specifically these steps:
# Install GRUB2
$ echo "sys-boot/grub:2 libzfs" >> /etc/portage/package.use/zfs
$ echo "sys-boot/grub:2 ~amd64" >> /etc/portage/package.accept_keywords
$ emerge sys-boot/grub:2
$ touch /etc/mtab
Next, I got stuck here:
$ grub-install --efi-directory=/boot/efi /dev/sda
grub-install: error: /usr/lib/grub/i386-pc/modinfo.sh doesn't exist. Please specify --target or --directory.
I had to do this:
$ grub-install --target=x86_64-efi /dev/sda
Since I had a different kernel, you need to substitute that when you make: /boot/grub/grub.cfg. I had 4.9.35-FC.01.
Further this failed:
$ bliss-initramfs 1 4.1.8-FC.01
Instead, I just did bliss-initramfs and answered the questions: 1 ZFS and 4.9.35-FC.01.
0 notes
Text
Debian 12 w KDE Plasma let's go~~~
I've got no idea why I didn't like KDE before tbh.... cause trying it now, its kinda nice~~~ last time I tried it was idk how long ago.... when I started messing around with linux to begin with.
It, unlike xfce, has a software updater so I don't need to use the terminal on debian~~~ it looks really snazzy tbh.
last time I used it was idk how long ago..... a decade ago? and I guess now it's just Plasma and not KDE anymore? ??
annoying problem that I fixed~~~~ also for some reason the icons and stuff on my second hard drive have reverted back to dev/sda for my main OS partition and dev/sdb for where all the rest of my data is... and idk why~~~ but the lock icons on everything in that drive is gone~~ and idk what fixed it......
also time.... the date and time was incorrect and i had no idea why given I've selected the proper time zone.... I was just really confused and idk why.... but now I did and it's fixed~~ I had to change the BIOS time to UTC
and since there's no "sync w internet" and you need EXACT SECONDS now the time is slightly off cause I didn't time it down to the second.... but putting my BIOS time into UTC instead of local time fixed it~~~
also still don't know exactly why I can and could get debian to boot and install perfectly fine on my machine even with secure boot and the like from a windows install still on. when linux mint debian edition just.... wouldn't......
stupidly simple fix but I'm happy to have figured it out myself~~~ hope I like KDE more than I did a decade ago. idk why I didn't like it that far back... maybe it was worse? or there was too many customize options and it paralyzed me?
but now I like it so far~~~~ wonder if I can do it up like windows xp/95? lol. throw myself into customize options of KDE and be lost here forever :)
slowly figuring stuff out and my preferences in the linux world~~ idk why I liked xfce..... the KDE log in screen is nicer and more sleek and modern~~~
will gnome stuff work with kde? if I install gnome games? I always install gnome games and then never play any of them lol I mean I'd assume they would but idk~~
idk why I'm documenting my journey with trying different distributions or desktop environments here..... cause I feel no one really cares..... but I got no one around me to talk linux to... even if I am still (in my own eyes) a newbie at it....
welp~~~ back to system config~~ :) hope that's fun~~ and to find accessibility settings~~
what was up with the clock tho? why did I have to set my BIOS time to UTC to get it to be local time? how does linux configure time? never noticed that before~~~
I distro hop a lot I think~~~~
and would ya believe it my function keys STILL WORK~~~~ WOOOO~~
edit: there are swipe gestures to go back on browser?? gonna like KDE I think~~~
yet another edit: double check bios cause I'm a doofus sometimes~~ secure boot is still on but now greyed out and can't toggle it off, fast boot and something below fast boot are disabled~~
still have no idea why pure debian is able to load with secure boot on (permanently now I guess) and linux mint wasn't able to despite it being debian as well.... but debian 12 works so neat~~~~
bad thing tho about the "swipe to go back" is that I keep almost doing that while trying to scroll down~~ could just use the arrow keys but got so used to using the touchpad to scroll ...
#personal#thoughts#thinking#i think too much#operating system#operating systems#linux#linuxposting#debian#debian 12#KDE#KDE plasma#Plasma#DE#desktop environment#been a long time since I messed with KDE#got the time fixed#and that was stupidly simple#the drives being weird and having lock icons on everything straightened itself out and idk how#it looks sleeker and nicer than xfce tbh#maybe I was overwhelmed with all the configuration options when I first tried KDE?#cause just at a quick glance there's a lot
2 notes
·
View notes
Text
How to completely erase HDD Linux
New Post has been published on https://www.sudouser.org/2017/06/16/how-to-completely-erase-hdd-linux/
How to completely erase HDD Linux
Hard disk drive contains everything from photographs to our credit card bills. One must erase the data completely before selling it to anyone otherwise one can recover the data from our hard drive and use it against us. Simply deleting the OS files won’t remove all the data from hard disk and only way that we have is to overwrite every block of it with zeros or with some random number.
How to completely erase HDD Linux
How to use DBAN (Darik’s Boot and Nuke (DBAN)) to completely erase HDD
Download DBAN from http://www.dban.org/download
Burn .iso file to CD or USB
Boot server from DBAN CD or USB
Press “enter” to boot DBAN in interactive mode
5. Select the disk to wipe using the space bar
6. Press M until the PRNG stream method is selected and press space
7. Press R, 8 and <Enter> to select 8 rounds. <Enter> to get to previous screen
8. Press F10 to start
9. Ensure the disk is wiped without errors
10. Repeat steps 5-10 for any additional disk in the server.
11. Remove the CD or USB
We might need to wait for 40 min to few hours
Use shred command to completely erase HDD
Shred deletes files by overwriting it to hide its contentCommand:
Command:
ubuntu@ubuntu:~$ sudo shred -n 5 -vzu /dev/sda
Command Output:
Where, -n, –iterations=N Overwrite N times instead of the default (25)
-u, –remove truncate and remove file after overwriting
-v, –verbose show progress
-z, –zeroadd a final overwrite with zeros to hide shredding and a final overwrite with zeros to hide shredding
Use dd command to completely erase HDD
Command :
ubuntu@ubuntu:~$ sudo dd if=/dev/zero of=/dev/sda
This will write /dev/sda with ascii code 0x00
Command Output:-
Where,
if is, Read from file
of is, Write to file
By performing above step you can erase your hard drive completely.
0 notes
Text
How to Layout a Microsoft Azure [Managed Disk] for Cloning When Using RHEL 7.3
The new “Managed Disk” feature in Microsoft Azure lets you clone disks and attach copies to the same or other VMs. In order for this to work reliably, the disk needs to be laid out properly
a) It should have at least one partition
b) The cloned disk should have its UUID changed so that it is different from its source disk
c) The /etc/fstab entry auto-mounting it on reboot should use UUID instead of the disk partition’s device name (/dev/sdd1). See this for more on this.
Here are the detailed steps (specific to RHEL 7.3)
1) Using the Azure Portal, create a new disk
2) In VMs->YourVM->Disks, attach the new disk to the VM
3) SSH into the VM, sudo and and verify this with
lsblk
NAME MAJ:MIN RM SIZE RO TYPE MOUNTPOINT fd0 2:0 1 4K 0 disk sda 8:0 0 30G 0 disk ├─sda1 8:1 0 500M 0 part /boot └─sda2 8:2 0 28.8G 0 part / sdc 8:32 0 256G 0 disk
/dev/sdc is the new disk
4) Assuming the new device is /dev/sdc, start the parted utility to create a partition on it
parted /dev/sdc
5) Create a disk label (this has to be msdos)
mklabel msdos
6) Create a primary partition that uses all of the disk’s storage
mkpart primary 0% 100%
7) Quit the parted utility
quit
8) Verify the new disk layout (the new partition will be /dev/sdc1)
lsblk
sdc 8:32 0 256G 0 disk └─sdc1 8:33 0 256G 0 part /mnt
9) Put an ext4 filesystem on it
mkfs.ext4 /dev/sdc1
10) Verify
blkid -o list
11) Note down it UUID
blkid
/dev/sdc1: UUID="dec87457-492d-461a-91b6-531dacafee19" TYPE="ext4"
11) Create a mountpoint
mkdir /mnt2
12) Mount the new disk partition to that mountpoint
mount /dev/sdc1 /mnt2
13) For test purposes, move a known file to /mnt2
14) Edit /etc/fstab so that this mounting happens automatically on re-boot. Start the vi editor
vi /etc/fstab
14) Add a new line in /etc/fstab
UUID= dec87457-492d-461a-91b6-531dacafee19 /mnt2 ext4 defaults 0 2
15) Save the file and exit vi
:x
16) Stop, wait, then start the VM using the Azure Portal
17) Verify that the partition is mounted, and that your file can be read
18) In Azure Portal, in Snapshots, create a snapshot of the disk
19) Once done, in Disks, create a new disk from that snapshot
20) In VMs->YourVM->Disks, attach the new disk to the VM
21) SSH into the VM, sudo and and verify this with
lsblk
sdc 8:32 0 256G 0 disk └─sdc1 8:33 0 256G 0 part /mnt sdd 8:48 0 256G 0 disk └─sdd1 8:49 0 256G 0 part
/dev/sdd is the new disk
22) Create new UUID, and note it down
uuidgen
23) Apply the newly-generated UUID to the new disk
tune2fs /dev/sdd1 -U 5b7c2442-f0dd-46fd-9c45-ggb1550fabac
24) Verify it new UUID
lsblk
25) Create a mountpoint
mkdir /mnt3
26) Edit /etc/fstab so that this mounting happens automatically on re-boot.
27) Start the vi editor
vi /etc/fstab
28) Add a new line in /etc/fstab
UUID= 5b7c2442-f0dd-46fd-9c45-ggb1550fabac /mnt3 ext4 defaults 0 2
29) Save the file and exit vi
:x
30) Stop, wait, then start the VM using the Azure Portal
31) Verify that the /dev/sdd1 partition is mounted, and that your file can be read from /mnt2
0 notes
Text
excited to be using linux on my big screen computer~~
a cool thing I've noticed is that linux I think takes up significantly less space than windows ever did. and I'm just running the cinnamon desktop~~!!
out of the 256 gb of space on the initial OS drive, I've got 217 gb left. windows I forgot how much it left me with tho...
Linux mint is nice so far~~ especially the second hard drive being password protected to mount; rather than being accessible to anyone using the computer.
installed vlc as a media player and now idk what other applications I'd need.
or if I even have enough space currently to try to get steam games working. as the terabyte hard drive is cluttered with anime and music I've saved. and where all of my data is stored separate from the os.
one thing I lost tho that I had forgotten about was my progress in cookie clicker, as I was playing through that, and i don't remember when my last backup was or how much I've lost. By the time I realized I hadn't backed it up, the install was already in progress and it was far too late.
I like cinnamon so far~~ the keyboard shortcuts to reveal all the different desktops,, even found zoom features that are really useful. I thought you had to pinch or push your fingers apart while pushing the hotkey toggle like you do on iphones to zoom in on pictures and stuff, but no. just slide your fingers from the top of the touchpad to the bottom to zoom in, and reverse to go back to small.
I never used zoom on windows; much to my detriment, lol. bad vision is bad. I'm saying it again even tho it might not be relevant here, I'm legally blind. left eye bad vision, right eye none whatsoever. I never liked on board zoom on windows and i'm not sure why... this is nice.
I'm still excited cause I've always wanted to run linux on my big screened gaming pc, but it would never boot. come to find out I was installing grub in the wrong place... needed it on dev/sda1 instead of dev/sda itself. I guess because 1 is the first part of the disk?
hopefully much less spywarey than windows~~ and more secure. I've always assumed that linux/unix/bsd were more secure than windows in general.
funny enough when I first found these types of operating systems as a teenager a long time ago, I jumped into the deep end and immediately tried FreeBSD first. then backed off and stuck with fedora, opensuse for a bit, then to the more user friendly stuff like ubuntu, and linux mint. then many years later I stopped liking what whomever makes ubuntu was doing, and switched to mint, but they still used ubuntu's base, so now I use debian based stuff.
there's my entire fore into linux from being a teenager to now, lol. also very fanboyish high school report on how linux/unix was better than windows. before I even started using linux proper. ahhhh the cringe.
sucks a bunch of corporate stuff doesn't work with linux; cause I'm always seeing like the eye doctors operating systems being windows, and I'm always like "why don't you use linux?" the reason is they want their technology and stuff to work. like it won't on linux?
positive experience and a positive rant~~~ still going to tag it as rant anyway tho~~
#personal#thoughts#thinking#linux#linux mint#debian#linux mint debian#linux mint debian edition#linux mint debian edition 6#good os#better than windows 10 so far#a good rant#rant#rant post#positive#positivity#a positive rant#a positive experience#now I don't need to worry about the stupid windows 10 end of support message#came here from windows 10#windows 10#couldn't run windows 11 anyway cause I didn't want to make a microsoft account#zoom#screen zoom#low vision#legally blind#visually impaired#and so linux gets another user~~#happy to be in linux land
4 notes
·
View notes
Link
An operating system (OS) is the low-level software that manages resources, controls peripherals, and provides basic services to other software. In Linux, there are 6 distinct stages in the typical booting process.
1. BIOS
BIOS stands for Basic Input/Output System. In simple terms, the BIOS loads and executes the Master Boot Record (MBR) boot loader.
When you first turn on your computer, the BIOS first performs some integrity checks of the HDD or SSD.
Then, the BIOS searches for, loads, and executes the boot loader program, which can be found in the Master Boot Record (MBR). The MBR is sometimes on a USB stick or CD-ROM such as with a live installation of Linux.
Once the boot loader program is detected, it's then loaded into memory and the BIOS gives control of the system to it.
2. MBR
MBR stands for Master Boot Record, and is responsible for loading and executing the GRUB boot loader.
The MBR is located in the 1st sector of the bootable disk, which is typically /dev/hda, or /dev/sda, depending on your hardware. The MBR also contains information about GRUB, or LILO in very old systems.
3. GRUB
Sometimes called GNU GRUB, which is short for GNU GRand Unified Bootloader, is the typical boot loader for most modern Linux systems.
The GRUB splash screen is often the first thing you see when you boot your computer. It has a simple menu where you can select some options. If you have multiple kernel images installed, you can use your keyboard to select the one you want your system to boot with. By default, the latest kernel image is selected.
The splash screen will wait a few seconds for you to select and option. If you don't, it will load the default kernel image.
In many systems you can find the GRUB configuration file at /boot/grub/grub.conf or /etc/grub.conf. Here's an example of a simple grub.conf file:
#boot=/dev/sda default=0 timeout=5 splashimage=(hd0,0)/boot/grub/splash.xpm.gz hiddenmenu title CentOS (2.6.18-194.el5PAE) root (hd0,0) kernel /boot/vmlinuz-2.6.18-194.el5PAE ro root=LABEL=/ initrd /boot/initrd-2.6.18-194.el5PAE.img
4. Kernel
The kernel is often referred to as the core of any operating system, Linux included. It has complete control over everything in your system.
In this stage of the boot process, the kernel that was selected by GRUB first mounts the root file system that's specified in the grub.conf file. Then it executes the /sbin/init program, which is always the first program to be executed. You can confirm this with its process id (PID), which should always be 1.
The kernel then establishes a temporary root file system using Initial RAM Disk (initrd) until the real file system is mounted.
5. Init
At this point, your system executes runlevel programs. At one point it would look for an init file, usually found at /etc/inittab to decide the Linux run level.
Modern Linux systems use systemmd to choose a run level instead. According to TecMint, these are the available run levels:
Run level 0 is matched by poweroff.target (and runlevel0.target is a symbolic link to poweroff.target). Run level 1 is matched by rescue.target (and runlevel1.target is a symbolic link to rescue.target). Run level 3 is emulated by multi-user.target (and runlevel3.target is a symbolic link to multi-user.target). Run level 5 is emulated by graphical.target (and runlevel5.target is a symbolic link to graphical.target). Run level 6 is emulated by reboot.target (and runlevel6.target is a symbolic link to reboot.target). Emergency is matched by emergency.target.
systemmd will then begin executing runlevel programs.
6. Runlevel programs
Depending on which Linux distribution you have installed, you may be able to see different services getting started. For example, you might catch starting sendmail …. OK.
These are known as runlevel programs, and are executed from different directories depending on your run level. Each of the 6 runlevels described above has its own directory:
Run level 0 – /etc/rc0.d/
Run level 1 – /etc/rc1.d/
Run level 2 – /etc/rc2.d/
Run level 3 – /etc/rc3.d/
Run level 4 – /etc/rc4.d/
Run level 5 – /etc/rc5.d/
Run level 6 – /etc/rc6.d/
Note that the exact location of these directories varies from distribution to distribution.
If you look in the different run level directories, you'll find programs that start with either an "S" or "K" for startup and kill, respectively. Startup programs are executed during system startup, and kill programs during shutdown.
That's everything you need to know about the Linux booting process. Now go out there and make Tux proud.
0 notes