#intervalometer
Explore tagged Tumblr posts
Visit Tumblr Blog
Explore Tumblr blogs with no restrictions, modern design and the best experience.
Last Seen Tumblr Blogs


Fun Fact
Tumblr was named as a finalist in Lead411’s New York City Hot 125 in Aug 2010.
Text
Hi friends,
The eclipse is nigh and I made a thing to try and make the best of the upcoming event.
If you are a Nikon user like myself, you might have noticed that the onboard intervalometer is useful but not really programmable in ways that we would like when it comes to bracketing exposures. This is especially problematic for eclipses, where the amount of time we have to shoot is limited and the capture settings are too broad for what our cameras support.
Hence, I made the aforementioned to address these limitations. I tried my best to find a COTS solution, but I couldn't get enough detail out of any sales material to be sure that they could do what I wanted. In addition to shooting wide brackets (7+ exposure sets), I wanted to be able to shoot at least two cameras for the event.
The source code provided above addresses the issues I've mentioned (but really the minimum, too), but it needs to be compiled to be useable. One will also need to download the SDK materials from Nikon that match one's cameras. I feel I've made enough progress that I feel I can throw this out there in the hopes that maybe someone else who also needs this can put it to some use. There are lots of cut corners and some shabby roofing and flooring, but enough framework is there to get the job done.
Thanks for following along and thank you all in general for all the attention you've given the content I've posted. Hopefully this upcoming adventure also affords the opportunity to get some quality shots of the solar eclipse.
See you on the other side,
- Paul / meklarian
8 notes
·
View notes
Text
Csillagos égbolt tájjal? Mutatom mit tegyél!

Forrás: Pixabay
Az éjszakai táj mindig is elvarázsolta az embert. Misztikus, rejtélyekkel teli, és esztétikailag lebilincselő. Nem csoda, hogy a fotózásban is hamar célponttá vált. Hogyan, és mivel vértezzük fel magunkat, ha szeretnénk megörökíteni ezt a csodát?
Van már írásom az éjszakai égbolt fotózásáról, ebben azonban specifikusabb leszek. Megmutatom egy másik formáját, ismertetek konkrét eszközöket, és a cikk végén a mobilosoknak is részletesebb tippeket adok.
Várd ki a legjobb körülményeket
Az időjárás előrejelzések, a műholdképek, a holdciklusok grafikonjai a legjobb barátaink lesznek, ha csillagos égbolt fényképezéséről van szó. Ideálisan tiszta, sötét égboltra vágyunk, melyet maximum egy-két felhő pamacsa tarkít csak, és a Hold fénye se zavarja túlzottan az alkotói folyamatunkat. Azt viszont ne felejtsük el, hogy a csillagos égbolt fotózása végtére is egyfajta tájkép fotózás, ezért nagyon lényeges odafigyelnünk arra, hogy előtérként mi kerül a kompozícióba.
A megfelelő eszközök megválasztása
Mint minden specifikusabb fotózás során, itt is különösen fontos a megfelelő eszközök kiválasztása. Talán szentírás itt sincs, hiszen ahány fotós, annyi megvalósítás, hogy mit ajánl, és mit nem csillagfotózáshoz, de a lenti lista jó alap lesz számodra.
Egy fényképezőgép, amely jól kezeli a magas ISO értékeken történő fotózást;
Állvány;
Távkioldó;
Fejlámpa (sötét lesz, neked pedig látnod kell)
Vaku;
Tartalék akksik, és memóriakártyák.
Vesd bele magad
A csillagos égbolt fotózása megfoghatatlan dolgok átélésével is jár, mint például a csend, és a nyugalom érzése. Az éjszaka csendjében nyugodtan alkothatsz, a világ zavaró tényezői eltűnnek a porondról. Ideális körülményeket kapsz a koncentráláshoz, a zavartalan kísérletezésekhez, hogy minél inkább megközelítsd az elképzelt képet.
Ajánlom, hogy vigyél magaddal némi elemózsiát, termoszba töltött hideg, vagy meleg italt, mely lehet kávé, tea, vagy amit preferálsz. Jó, azért ne itt akarj lerészegedni...
Mobilosoknak
A csillagos égbolttal kombinált tájképek készítése nemcsak a profi kamerával rendelkezők kiváltsága. Egy okostelefonnal is lehet lenyűgöző éjszakai képeket készíteni, ha tudod hogyan ki belőle a legtöbbet. A mobilkamerák korlátai miatt némi trükközésre lesz szükség, a megfelelő beállításokkal, és technikákkal – az eszközhöz mérten – kiváló eredményt fogsz elérni. Íme néhány tipp, hogyan csináld.
Manuális mód használata: Manapság már majdnem minden telefon támogatja valamilyen szinten a manuális beállítások alkalmazását. Válaszd ezt, és finomhangold a beállításokat. ISO: Először kezdd alacsonyabb értékkel (ISO 400-800). Mivel a telefon szenzora kisebb, mint egy rendes kameráé, ezért érzékenyebb is a zajosodásra, ezért akkor emeld finoman az ISO értékét, ha szükséges. Záridő: 10-30 másodperc közé állítsd, de túl hosszú ne legyen, ugyanis a Föld forgása miatt a csillagok bemozdulhatnak. Hacsak nem egy szép csilagíves fotó a cél, bár erre a legtöbb telefon nem képes a beépített alkalmazást használva. Ehhez olyan speciális applikációk szükségesek, mint Androidon az Intervalometer, vagy iOS-en a NightCap Camera. Fókusz: Állítsd manuálisan a végtelen irányába, és figyeld, hogy mikor látod élesen a csillagokat.
Stabilizálás: Az állvány használata mobil esetén különösen fontos lesz, hiszen az eszköznek olyan elenyésző a súlya, hogy stabilan nem tudod kitartani kézből.
Távkioldó, vagy időzítő használata: Hogy elkerüld az exponálás során a bemozdulásokat, használj időzítőt (2-5 másodpercre állítva), vagy egy vezeték nélküli távkioldót.
RAW formátum: Amennyiben a mobilod támogatja a RAW formátumban történő fotózást, válaszd ezt. Sokkal több részletet őriz meg, és a szerkesztése is sokoldalúbb egy RAW formátumú fotónak.
A kompozíció és az előtér szerepe
Ahogy említettem a csillagos égbolt fotózása egyfajta speciális tájképnek nevezhető. Megörökíthetjük tisztán a végtelen mélységű eget, amelyen milliárdnyi csillag ragyog, de még ennek is adhatunk extra mélységet, ha figyelünk arra mi van a fotó előterében, és milyen látószögből készítjük el azt. Ami az előteret illeti, remekül működik az, ha valamilyen természetes elemet helyezünk el benne, például egy szikla, vagy fa stb. Ezt megfűszerezve használjunk alacsonyabb látószöget, hogy több csillagot mutassunk meg a képet, ezzel egyensúlyba hozzuk a táj többi részével.
Utómunka
Az utómunkával kapcsolatban annak ellenére, hogy nagyrészt közös szempontokat kell követni, én mégis szétválasztom a fényképezőgéppel, és a mobillal készült képek utómunkájának menetét, ugyanis egy-két dolgot másképp érdemes csinálni. Azt általánosan kimondhatjuk, hogy mindegyik esetében az a célunk, hogy mind a táj, mind a csillagos égbolt együttesen kiemelkedjen, egymást kiegészítve.
Fényképezőgépes kép esetén RAW feldolgozás: Ha RAW-ban fotóztál, kezdd az utómunkát azzal, hogy importálod a fotókat Lightroomba, PhotoShopba, vagy más szerkesztőprogramokba. Ma már nemcsak az Adobe termékei az irányadók. Fehéregyensúly beállítása: Az éjszakai képek hajlamosak vagy túl sárgásak, vagy túl kékes árnyalatúak lenni. A fehéregyensúlyt ennek megfelelően igyekezd természetes színhőmérséklet felé csúsztatni. Kontraszt és expozíció: Finoman emeld a kontrasztot, és a fényerőt, hogy a csillagos égbolt, és a táj is megfelelően látszódjanak. Zajcsökkentés: A magas ISO érték miatt bizonyos mértékig zajos lehet a kép. Ezt szoftveresen lehet csökkenteni, de ne ess túlzásba, különben elvesznek a részletek is. Maszkolás és rétegek használata: Ha a táj túl sötét lenne, külön is világosíthatod, de tartsd szem előtt a természetes összhatást. Élesítés: Bánjunk ezzel is finoman. A túlzott szoftveres élesítés művi hatást kelt.
Mobillal készült képek esetén RAW kidolgozása: Ahogy mondtam, ha lehetőséged van rá, válaszd a RAW formátumot a kamera applikációd pro módját használva. Minden részlet számít, nem beszélve a szerkeszthetőség sokoldalúságáról. A kész képet aztán JPG-ben exportálhatod. Fehéregyensúly: Itt is érvényes, hogy a mobilok is hajlamosak túlszaturált, torz árnyalatokat kiadni éjszakai fotózásnál. Szerencsére ez korrigálható. Itt is törekedj a természetes színhőmérsékletre. Kontraszt és expozíció: Ugyanaz a szabály, mint a fényképezőgépes fotóknál. A táj, és a csillagok is emelkedjenek ki egymással egyensúlyban. Zajcsökkentés: Csak óvatosan! A telefonok különösen érzékenyek a zajosodásra, de szerencsére az utómunka során a finom korrigálás hatására nem vesznek el a részletek. Lokális szerkesztések: A táj, és az égbolt külön-külön történő szerkesztése ajánlott. A tájat világosíthatod, az égboltot sötétítsd, hogy a csillagok ne vesszenek el. Színek kiemelése: A kéket, és a lilákat finoman erősítheted a drámaibb hatásért, de a hatás ne legyen természetellenes. Élesítés: A mobilos képek alapvetően lágyabbak lehetnek, ezért érdemes az élesítést alkalmazni. Arra viszont ügyeljünk mekkora mértékben tesszük, ugyanis a túlzott élesítés hamar visszahozza a zajokat.
Extra tipp mindegyikhez: Ha merész akarsz lenni, külön expozícióval fotózhatod le az égboltot, és a tájképet, majd utómunkában összeillesztheted a kettőt. Ez látványosabb, tisztább, részletesebb fotót eredményez.
A csillagos égbolttal kombinált tájkép fotózása hatalmas technikai kihívás, de elképesztő élmény egyben. Próbálkozz kitartóan, és nemcsak a táj szemet gyönyörködtető szépségét örökíted meg, hanem azt az érzést is, ami akkor fogja el az embert, ha rácsodálkozik az éjszakai égboltra.
Kövess be a többi közösségi média platformokon is, ahol kedveléssel, és követéssel támogathatod a munkámat. Ha úgy gondolod, hogy ezen felül is kifejeznéd támogatásod, azt egy Sport szelet árával ITT megteheted. Ezt kizárólag a tartalomgyártásba forgatom vissza, hogy lépésről lépésre jobb minőséget prezentálhassak.
2 notes
·
View notes
Text
Long-Exposure Photography: Capturing Stunning Light Trails and Starry Skies

Long-exposure photography is a fascinating technique that transforms ordinary scenes into mesmerizing works of art. Whether you’re capturing the bustling light trails of city traffic or the serene beauty of a starry night, this method allows photographers to depict movement and time in a single frame.
If you’ve ever been captivated by dreamy images of glowing highways or swirling constellations, this guide will help you explore the magic of long-exposure photography, covering the essentials, tips, and creative possibilities.
What Is Long-Exposure Photography?
Long-exposure photography involves using a slow shutter speed to capture motion over a period of time. Instead of freezing a moment, the camera records everything that happens during the exposure, creating effects like light trails, smooth water, or star paths.
Key Elements of Long-Exposure
Shutter Speed: The slower the shutter speed, the more motion is captured. Typical settings range from a few seconds to several minutes.
Tripod: A stable camera is essential to avoid blur caused by camera shake.
Neutral Density Filters (ND Filters): These reduce the amount of light entering the lens, allowing for long exposures even in bright conditions.
Tools and Equipment Needed
To create stunning long-exposure photographs, you’ll need the following gear:
Camera: A DSLR or mirrorless camera with manual settings for shutter speed.
Tripod: Ensures stability and prevents motion blur.
Remote Shutter Release: Helps avoid camera shake when starting and stopping the exposure.
ND Filters: Particularly useful for daylight photography to achieve longer exposures.
Lens: A wide-angle lens is ideal for landscapes and starry skies, while a standard lens works well for light trails.
Techniques for Stunning Light Trails
Light trails are a popular subject for long-exposure photography, typically captured in urban settings with moving vehicles.
Steps to Capture Light Trails:
Location: Choose a high vantage point or a busy road with ample vehicle movement. Bridges and overpasses often offer great perspectives.
Camera Settings:
Shutter Speed: Start with 10–30 seconds.
Aperture: Use f/8 to f/16 for a deeper depth of field.
ISO: Keep it low (e.g., ISO 100) to minimize noise.
Composition: Include interesting elements like buildings, bridges, or reflective surfaces for added depth.
Timing: Shoot during the blue hour (just after sunset) or at night for vibrant light trails.
Pro Tip: Experiment with exposure times to create dense, continuous trails or segmented lines for a unique effect.
Capturing Starry Skies and Star Trails
Star photography requires patience and precision. Depending on the desired outcome, you can create still images of the Milky Way or circular star trails.
Steps for Still Star Photography:
Dark Skies: Find a location away from light pollution, such as a rural area or national park.
Camera Settings:
Shutter Speed: 15–30 seconds to prevent star movement.
Aperture: Use the widest possible setting (e.g., f/2.8).
ISO: Start at ISO 1600 and adjust for brightness.
Focus: Manually focus on the brightest star or set your lens to infinity.
Stabilize: Use a sturdy tripod and remote shutter release to keep the camera perfectly still.
Steps for Star Trails:
Extended Exposure: Use a shutter speed of 30 minutes or combine multiple 30-second exposures using stacking software.
Compose Thoughtfully: Include foreground elements like trees, mountains, or buildings to add interest.
Intervalometer: This tool automates sequential shots, making it easier to stack images later.
Common Challenges and How to Overcome Them
Light Pollution: For star photography, use a light pollution filter or travel to remote locations.
Noise in Long Exposures: Reduce noise by using a low ISO setting and enabling long-exposure noise reduction in your camera.
Unwanted Camera Shake: Use a tripod, remote shutter release, and disable image stabilization on your lens during long exposures.
Creative Possibilities with Long-Exposure Photography
Long-exposure photography is not limited to light trails and stars. Here are some other creative ideas:
Silky Waterfalls: Slow shutter speeds can make flowing water appear smooth and ethereal.
Cloud Movement: Capture the motion of clouds during sunrise or sunset for dramatic skies.
Fireworks and Sparklers: Play with light to create vibrant patterns or write messages in the air.
Reflections: Use calm bodies of water at night to capture city lights or stars mirrored in the surface.
Post-Processing Tips
Editing plays a crucial role in refining long-exposure images. Here are some post-processing tips:
Noise Reduction: Use software like Adobe Lightroom or Photoshop to minimize noise.
Color Grading: Adjust white balance and enhance colors for more vibrant results.
Sharpening: Fine-tune details to ensure foreground and background elements are crisp.
Stacking: For star trails, combine multiple exposures using software like StarStaX or DeepSkyStacker.
Inspiring Examples of Long-Exposure Photography
Many professional photographers have mastered the art of long-exposure photography, inspiring others to experiment with this technique. The interplay of light and time creates unique visuals that evoke wonder and curiosity. For instance, photographers known for capturing breathtaking wedding imagery, such as the Best Wedding Photographer In India, often incorporate long-exposure techniques to create artistic, dream-like photos of couples under starry skies or amidst glowing cityscapes.
Conclusion
Long-exposure photography opens up a world of creative possibilities, enabling photographers to depict motion, time, and light in captivating ways. From light trails in urban settings to the infinite beauty of starry skies, mastering this technique can elevate your photography to an entirely new level.
With the right tools, techniques, and a dose of patience, anyone can explore the magic of long-exposure photography. So grab your camera, find a beautiful scene, and let time become your canvas!
0 notes
Text
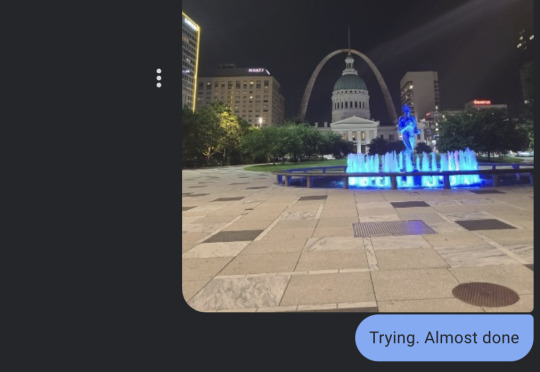
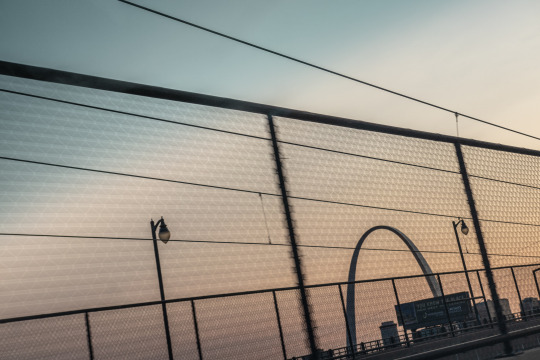
I found parking nearby and had a short walk to my destination. With camera and tripod on my shoulder, I started trekking toward the park. I turned a corner and Kiener Plaza exploded into view after being hidden by trees. I could see the courthouse and the Arch and this giant grassy knoll all at once.
I have not been to such a peaceful place in a long time.
There was almost no one there.
And the Arch was just filling the horizon in front of me.
There was a cool fountain creating this relaxing white noise and I sat on a ledge next to it.
After the anxiety of trying to do a sidewalk photoshoot with random people walking by, being the only one in this park felt like that anxiety was just melting away—leaving only calm.
After a few minutes of peaceful meditation, I looked up at the Arch and decided to figure out how I was going to take my photo.
And I noticed something odd.
The lights were off.
The Arch has lights!
I know I have seen the Arch with lights!
Getty Images can back me up on this.

SEE!!!??? LIGHTS!
I'm not crazy!

I didn't figure it out until later, but apparently during September they turn off the lights to accommodate migrating birds. I guess the damn things get confused by elevated bright lights. It throws off their navigation and they end up crashing into buildings.
Don't these birds know I am trying to take a photo?
This was very inconvenient for me, birds.
So, I decided I would just "fix it in post."
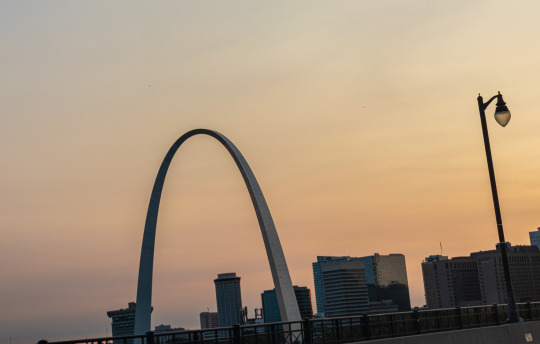
This is how the scene looked with the lights off.


And with a little Photoshop magic...

Lights!
I actually like both versions. But I think the better solution is to just go back to that beautiful, serene spot another time when confused birds aren't messing up my photos.
I also took some shots of the fountain.

It had RGB lighting and reminded me of a gaming PC.


I also tried to get a picture of myself in front of the fountain. But my camera was pretty far away and the longest timer setting was 10 seconds.
The problem is... I am very slow.
And after several attempts I was unable to get into position before 10 seconds was up. So I tried something I haven't done since I was a teenager.
I am about to show you the only picture in existence of me... running.


Now when I say "running" what I am actually referring to is me *trying* to run, but actually going to the same speed as before. The only difference is that I was swinging my arms as if I was running, hoping that would somehow increase my top speed.
As you can see, swinging your arms does not make your legs move faster.
So I went into problem solving mode and I extended the cord of my camera's remote trigger as far as it would go and that gave me another 3 feet of distance closer to the fountain. Once I pressed the button the remote swung down and crashed into the ground, but thankfully it was okay and still functioned.
This maneuver gave me just enough time to get to the fountain and in position right as the camera took the photo.

Success!
I realized later on that my remote camera trigger was also an intervalometer. Which is a fancy way of saying I could have bypassed my camera and set that to any time I wanted.
I attempted running for no reason whatsoever.
How did I not remember that? I just bought the stupid thing a month ago.
Short term memory, you can suck it.
Long term gets the MVP this time.
Chris was worried about me and texted to make sure I got home okay.
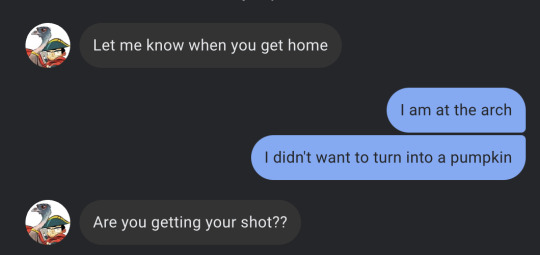

Sometimes it is hard being out in the world knowing the longer I stay, the longer I will suffer afterward. I don't feel like Cinderella. I feel like Cinderella's pumpkin. It may be a beautiful carriage until midnight, but turning back into a pumpkin is inevitable. So I try to make the most of the time I am given as a carriage.
I think I managed some good carriage time that night.
After my fountain pictures I headed back to my car. I made sure to take a few nightlife photos of the city on the way.


Some of you may remember my classic photo entitled "Moon Over a Waffle House" that I took a few months back.

This is a new spiritual sequel I am calling...
Giant Building Over a Hooters

So majestic.
I am so happy I got to meet Chris in real life. Nothing can top that. It took me about a week to recover from the two outings being so close together. But I am finding the mental health boosts from venturing out into the world are helping more than hurting. (Though I think I am going to make more of an effort to space them out when I can.)
Thank you to Michael for making it possible for Chris to come to St. Louis. And thank you to Chris for being just as cool in person as I have known you to be chatting inside the internets.
May we meet again soon.

And, yes, your next portrait can have lightsabers.
Meeting my longtime artist and good friend, Chris, IN REAL LIFE!
So, I hadn't been to a restaurant in over a decade. I can't even remember which restaurant since it was so long ago. But in the past few weeks I've now been to TWO restaurants.
I am becoming a social butterfly.
And it is exhausting.
But also good.
First I reconnected with my high school best friend, John.

And that went great.
But then the opportunity to see my friend Chris (a.k.a @whosthewhatnow ) came up only a few days later. And this close proximity of social events scared me a bit, but I have been feeling much better since they figured out my heart thing, so I decided to try and do both things even though they were only a few days apart.
The key to this was strategic resting. As soon as I got home from seeing John, I got in bed and I didn't get out of it until it was time to see Chris. And that was just enough recovery time to pull this off. Typically a short outing requires 2-3 days of rest after.
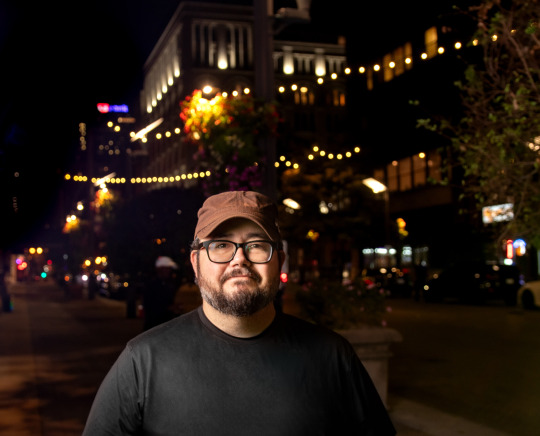
I had never met Chris in real life. He has done nearly all of the artwork for my website and comics over the past decade. And he was a main character in my CRAPPRnauts series.

We know each other so well and it is crazy that we've never seen each other with our very own eyeballs.
He is such an amazing artist. He works fast and he adds so many cool extra details that you can stare at his comic panels multiple times and catch a new joke or easter egg each time. He is a dream to work with and my Corg Life series was only successful because he did such a wonderful job bringing Otis to life in comic form.


So we decided to meet up at a restaurant with his friend Michael and then I was going to take a nice portrait of him after dinner. Chris had never had a professional photo taken of himself and I decided to fix that.
I told him I had a mobile photography setup. Which, in reality, is a trunk full of lights and stands and other various camera gear that I definitely won't need, but bring anyway. It's "mobile" in that it all fits in my car if you are good at Tetris (which I am).
The restaurant was downtown and I had visions of St. Louis's famous Gateway Arch in the background of Chris's portrait. I thought that would be such a cool shot. I could see it in my head and I even dreamed about it.
So I got in my car and headed downtown and my GPS told me to exit at 249B. But I kept looking and I couldn't see the sign for 249B.
This is how much road I had left when I finally was able to see the exit for 249B.

So I ended up taking 249A and going straight to East St. Louis.
Which, if you believe the headlines, is not a place you ever want to be.
Google Maps and I have been having issues lately. They also tried to get me to take the spooky way home that night, but thankfully I actually knew the non-spooky way back from when I used to go to Cardinal games with my parents as a kid.
My short term memory was trashed by shock therapy. And so was a lot of my long term memory. But it finally came through in a pinch and remembered something useful.
I only had to loop around and cross a bridge so I didn't really do anything but touch the edge of East St. Louis. I was mostly concerned about being late for dinner more than its scary reputation. Usually those news stories about a place being "dangerous" are actually just racist and hurtful to people stuck in poverty. I mean, technically my house is in a "dangerous" neighborhood, and we do have trouble with petty crime in some spots, but aside from a few dinged-up mailboxes, I've never felt unsafe in my home.
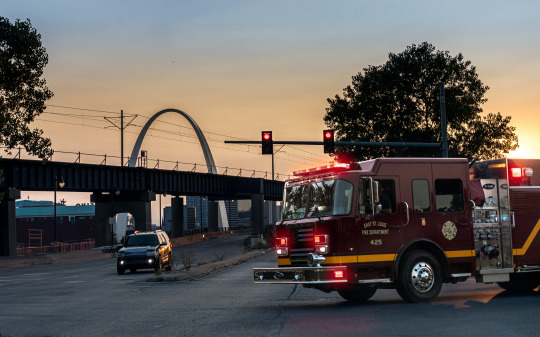
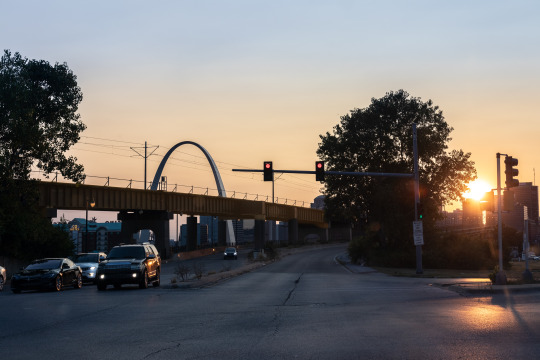
On the way back to regular St. Louis I could see the Arch on the horizon at sunset and it was kind of magical. And I wasn't able to get a good shot of it, but it sure looked pretty from my point of view.
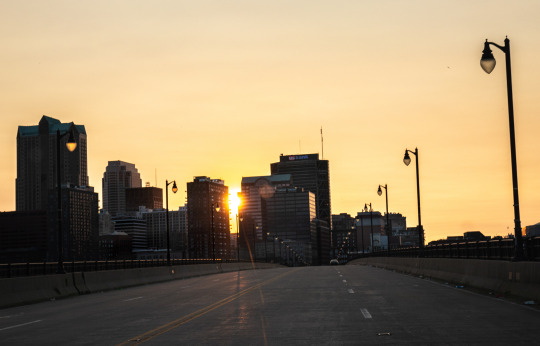
My photos kind of remind me of the beginning of movies like Training Day where they are trying to show you gritty, dutch angle shots of the city out of the car window to give you a sense of the location.
As I approached the restaurant I invented a new genre I call "stoplight photography." The sky was orange and the streets of St. Louis were just asking to be photographed. But I wasn't willing to die to get neat photos, so I just took them at every red light.

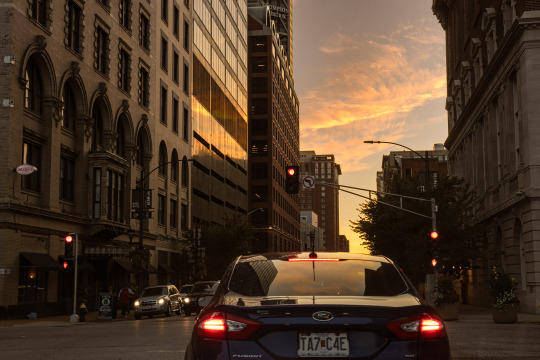
The big trick was trying to edit the dark area at the top of my windshield out of the photos to make it look like I didn't take these pictures from my car.
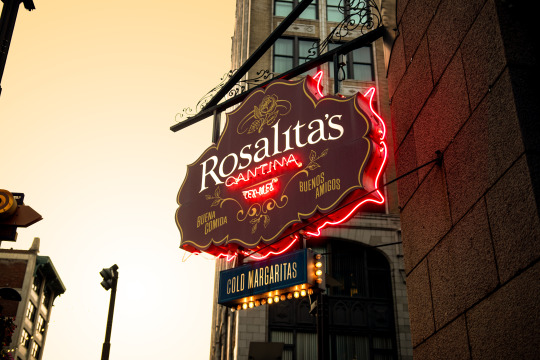
After a 15 minute detour through Illinois I arrived at my destination—a Mexican place called Rosalita's. It had a beautiful sign, so I took that literal sign as a metaphorical sign it was a nice place to get a quesadilla.
Dinner was great. Both signs were right and their quesadilla was very tasty. Chris and I both got one, so we are quesadilla twins. The waitress was one of those "I can remember your order without writing anything down" types. And I am one of those, "I get anxiety when things aren't written down" types. And, to her credit, she did not forget our orders. But she did forget to give us silverware and napkins. So I still feel like my anxiety was valid.
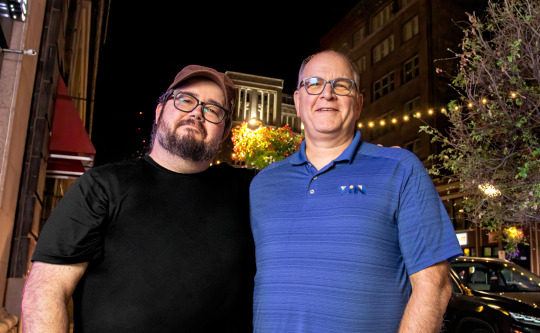
We told sad stories of the pups we lost. But we also had a lot of fun and laughed and I got to meet Michael who turned out to be an absolute mensch. I sometimes have trouble meeting new people with my social anxiety, but he was very affable and made me feel comfortable with his presence almost right away. He was a fan of Otis and mentioned he still has a Super Otis shirt. I always get choked up hearing that Otis is still loved. Hopefully we get to meet again.
Dinner ended and it was picture time.
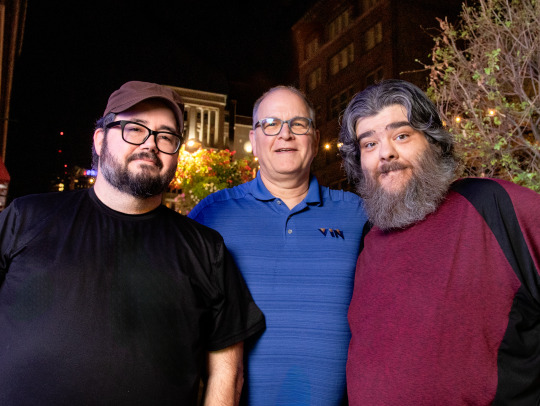
I asked Chris if he wanted the high effort photo or the low effort photo. Either we figure out how to get to the Arch or we find a spot near the restaurant and just take his portrait there. Chris and Michael had a driver because they were coming from a big conference and getting to the Arch would have been complicated. So we decided to go with the low effort option.
I found a cool shop nearby that had an LED wall that changed to all sorts of different colors. And I thought that would make a neat background and give a colorful edge light on Chris's face. I pulled my car near that spot and started unloading my trunk full of photo gear.
I think Chris and Michael were a little overwhelmed when I started pulling camera gear out of my trunk like a clown pulling an endless handkerchief out of his mouth. But as far as photo setups go, it was actually pretty minimal.
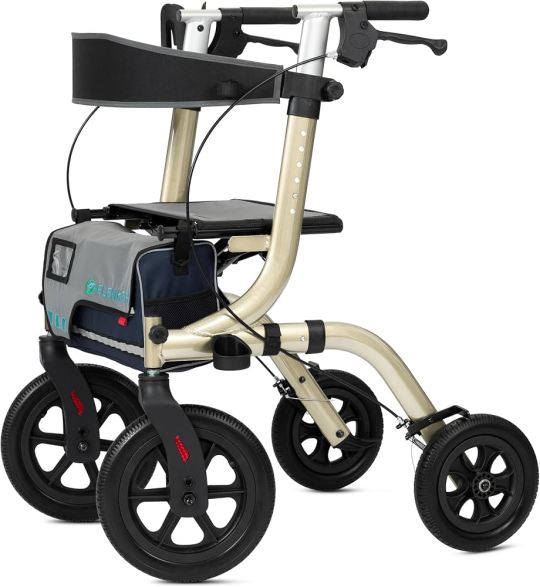
Light, giant battery, light stand, umbrella, tripod, camera, rolling walker with seat.
My dad's old rollator came in clutch because I wanted to shoot from a low angle and it is hard for me to bend down. In fact, I think I'm going to look into getting an all terrain version so I can do more outdoor photoshoots.
I started shooting in the middle of a downtown sidewalk. And I was super anxious. I could not focus (my brain, not my camera). I was very distracted with all of the people walking by and staring. I was not sure if any of the photos were turning out. I wasn't even sure if they were in focus (my camera, not my brain) because I had not yet had my lens calibrated. But down the street there was a guy with an old school boombox playing random music. His music helped to drown out the ambient noise and gave me some comfort.
I had no clue if the photos were any good, but when I got home and checked them on my computer, I realized I have 12 years of experience and muscle memory built up. I probably should have just trusted myself because the photos all turned out great.
I think Chris can now officially say he has had a professional portrait taken of himself.

This photo has been officially loved by Chris's girlfriend and mother.

There is no greater seal of approval and I am honored.
I was able to comp in any of the colors the wall displayed from other shots in case Chris is feeling a little more green in the future.

A literal rainbow of options.
I also liked this one, though it is a little more "environmental portrait" than regular portrait.
And I got some nice photos of our little group to help us remember the night.
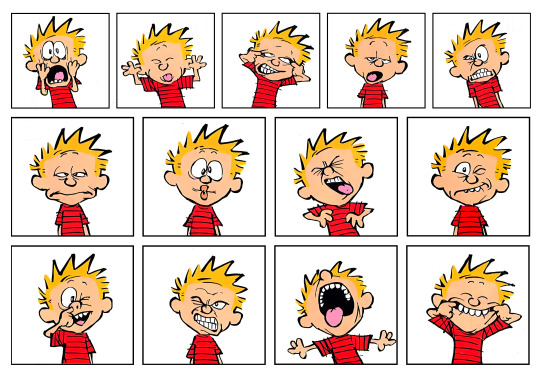
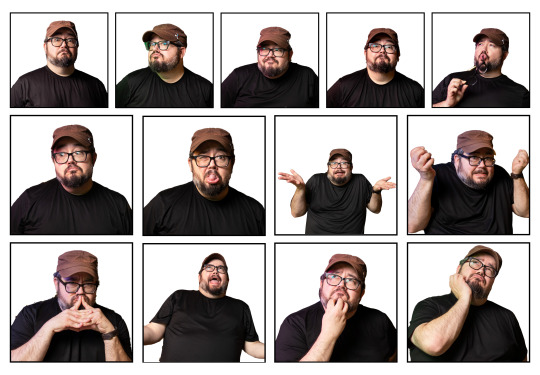
And I got a bunch of photos of Chris making silly faces like Calvin at his school photoshoot.
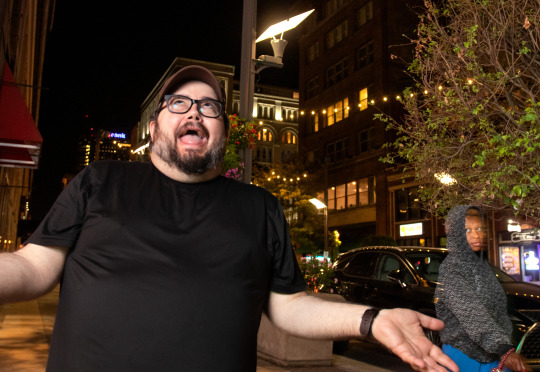
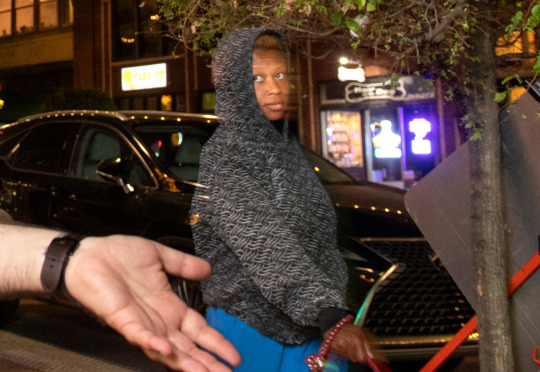
I love this woman's reaction to our little impromptu sidewalk photo shenanigans.
After we said our goodbyes and I gave my friend a hug, I was a little bummed I didn't get to photograph him at the Arch like I had dreamed.
But then I realized I had my own car and it was capable of taking me places. (I actually haven't gotten used to that after not driving for nearly 15 years.)
So I decided to drive a few blocks over to Kiener Plaza—a park with a view of the Arch.
TO BE CONTINUED...
235 notes
·
View notes
Text

For stunning time-lapse videos, the best camera should offer high image resolution, reliable performance, and easy-to-use features. Look for options with interchangeable lenses and built-in intervalometers to capture everything from construction projects to breathtaking landscapes. Discover our top picks for the best time-lapse cameras and take your videography to the next level!
For more details - Visit us now : https://cam-do.com/
0 notes
Text

07.08.2024
I was trying to adjust the angle when I accidentally took a photo. I didn't realise that this has essentially reset the focus before the intervalometer. Cue 889,234,774 beautifully blurry photos of what I can only describe as ‘Yoga Ghost Blob’ in action. This gem here? The *only* one salvageable from that day. 🤦🏼♀️ Also, level of insecurity about skin: YES
#219of366
0 notes
Text
Mastering the Art of High-Quality Time-Lapse Video Creations
Time-lapse photography is a cctv construction site security captivating technique that allows you to compress hours or even days of real-time footage into a short, mesmerizing video. Whether you're documenting the changing seasons, the construction of a building, or the movement of clouds across the sky, time-lapse videos can transform the ordinary into the extraordinary.
To create high-quality time-lapse videos, there are several key considerations and techniques to keep in mind. In this article, we'll explore the essential steps to elevate your time-lapse creations and achieve professional-level results.
Equipment and Camera Settings
The foundation of a great time-lapse video begins with the right equipment and camera settings. While you can experiment with various cameras, including smartphones, investing in a dedicated DSLR or mirrorless camera will provide you with superior image quality and advanced manual controls.
When selecting a camera, look for features like:
High-resolution sensor (at least 24 megapixels)
Ability to shoot in RAW format
Interchangeable lenses for creative framing and perspective
Intervalometer or timelapse mode for automated image capture
In terms of camera settings, aim for the following:
Aperture: Use a medium to small aperture (f/8 to f/16) to ensure a wide depth of field and maintain sharpness throughout the frame.
Shutter speed: Set the shutter speed to a fraction of the interval between each frame capture. This helps to prevent motion blur.
ISO: Keep the ISO as low as possible to minimize noise and maintain image quality.
White balance: Set the white balance manually or use a custom preset to ensure consistent color throughout the sequence.
Composition and Framing
Captivating time-lapse videos often rely on thoughtful composition and framing. Consider the following tips to enhance your shots:
Identify interesting subjects and focal points: Look for elements that change over time, such as the movement of people, vehicles, or natural phenomena.
Use the rule of thirds: Positioning your primary subject along the intersecting lines of the rule of thirds can create a more visually appealing and balanced composition.
Incorporate leading lines: Use natural or man-made elements, such as roads, fences, or the horizon, to guide the viewer's eye through the frame.
Experiment with different perspectives: Try low-angle, high-angle, or even aerial shots to add depth and a unique viewpoint to your time-lapse.
Pay attention to the background: Ensure that the background complements the main subject and doesn't distract from the overall composition.
Shooting Techniques
Consistent and precise image capture is crucial for creating high-quality time-lapse videos. Here are some techniques to consider:
Use a sturdy tripod or stabilizer: Keeping your camera firmly in place will prevent unwanted camera movement and ensure smooth playback.
Shoot in RAW format: RAW files offer greater flexibility in post-processing, allowing you to adjust exposure, white balance, and other settings without losing image quality.
Capture at a high frame rate: Shoot at a frame rate of 24-30 frames per second (FPS) to ensure a natural, cinematic playback.
Adjust exposure manually: Use manual exposure mode to maintain consistent brightness throughout the sequence, even as lighting conditions change.
Shoot during the golden hour: The warm, soft light of the golden hour (the first or last hour of daylight) can create stunning, dramatic time-lapse footage.
Post-Processing and Editing
The final step in creating high-quality time-lapse videos is the post-processing and editing phase. This is where you can refine your footage and enhance the overall visual impact. Here are some key steps:
Import your RAW images into a photo editing software, such as Adobe Lightroom or Capture One.
Adjust exposure, white balance, and other settings to ensure consistent image quality throughout the sequence.
Export the edited images as a sequence or use a time-lapse creation software, like Adobe After Effects or Premiere Pro, to stitch the images into a video.
Apply stabilization techniques, such as warp stabilizer or optical flow, to smooth out any camera movement.
Add transitions, music, and other visual effects to create a polished, professional-looking time-lapse video.
By following these best practices and techniques, you'll be well on your way to creating high-quality, construction site photoshoot visually stunning time-lapse videos that captivate your audience. Remember, the key is to experiment, practice, and continuously refine your skills to achieve the desired results.
0 notes
Text
Choosing the Ideal Time-Lapse Camera, Equipment, and Frame Rate
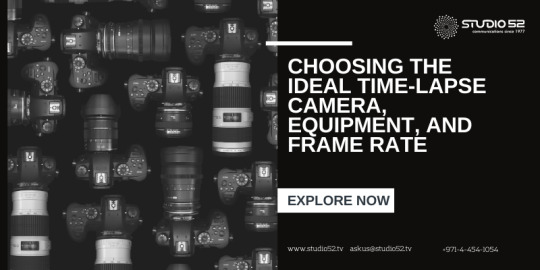
In the world of photography and videography, one technique stands out for its ability to transform the mundane into the extraordinary: time-lapse photography. It’s an art form that allows us to observe the subtle changes in our surroundings, condensing hours, days, or even years into a matter of seconds or minutes. Whether you’re a seasoned professional or just embarking on your photographic journey, mastering the art of time-lapse photography requires not only creativity but also the right equipment and an understanding of frame rates. In this comprehensive guide, we will delve deeper into the fascinating world of time-lapse photography, exploring how to choose the ideal best time-lapse camera, equipment, and frame rate to create stunning sequences that will captivate your audience.
Understanding Time-Lapse Photography
Before we embark on the technical aspects of time-lapse photography, let’s lay down the basics. Time-lapse photography, at its core, is a technique that involves capturing a series of individual images at predetermined intervals and then playing them back as a video sequence. This seemingly simple process has the magical ability to accelerate the passage of time, revealing hidden patterns, natural phenomena, and the world’s dynamic beauty.
Selecting the Right Camera
The foundation of successful time-lapse photography begins with the selection of the right camera. While it’s true that you can create time-lapse sequences with a smartphone, dedicated cameras offer a level of control and quality that can elevate your work to a professional level. Here are some crucial factors to consider when choosing a camera for time-lapse photography:
Resolution: The resolution of your camera is vital. Opt for a camera with high resolution, preferably 4K or higher, to ensure your time-lapses are crisp, detailed, and suitable for large screens.
Interchangeable Lenses: Cameras with interchangeable lenses provide versatility in framing your shots. They allow you to adapt to various shooting conditions and creative preferences.
Low Light Performance: Good low-light performance is essential for time-lapses taken during the golden hours of sunrise and sunset, as well as for capturing the mesmerizing beauty of the night sky. Look for cameras with excellent low-light capabilities.
Battery Life: When embarking on an extended time-lapse project, battery life becomes a crucial consideration. Opt for a camera with long battery life or one that can be powered externally to ensure uninterrupted shooting.
Intervalometer: An intervalometer is a handy feature that simplifies capturing images at predetermined intervals. Some cameras come with built-in intervalometers, while others require an external one. Make sure your camera supports this essential tool.
Essential Equipment
Beyond the camera itself, several pieces of equipment are essential to ensure your time-lapses are stable, smooth, and visually captivating.
Tripod: A tripod is non-negotiable for time-lapse photography. It provides stability and prevents camera shake, which can significantly degrade the overall quality of your time lapses. Invest in a sturdy, reliable tripod to ensure your shots remain steady throughout the shooting process.
ND Filters: Neutral density (ND) filters are indispensable when shooting time-lapses, especially in bright conditions. These filters reduce the amount of light entering the camera, allowing for longer shutter speeds. This is particularly useful when you want to capture smooth motion in daylight time-lapses, such as the movement of clouds or water.
Intervalometer Remote: While some cameras include built-in intervalometers, external intervalometer remotes offer more control and flexibility over your time-lapse settings. They allow you to fine-tune intervals, exposure settings, and other parameters to achieve the desired effect.
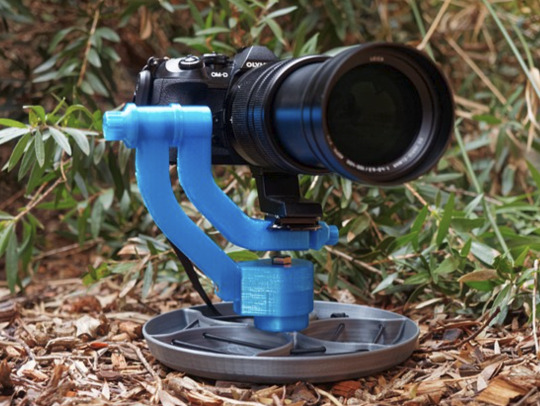
Slider or Gimbal: For dynamic time-lapses that involve camera movements, consider using a slider or gimbal. These tools enable you to achieve smooth and controlled camera motion, adding an extra layer of creativity to your time-lapse sequences.
Mastering Frame Rates
Frame rate is a critical aspect of time-lapse photography, as it determines how motion is portrayed in your final sequence. Each frame rate imparts a unique look and feel to your time-lapse, influencing the overall mood and impact of your work. Let’s explore some common frame rates and their applications:
24fps (Frames Per Second): This is the standard frame rate for cinematic footage. It provides a slightly dreamy, natural quality to your time-lapses, making it ideal for capturing landscapes, architecture, and scenes with slow-moving subjects.
30fps (Frames Per Second): Commonly used for television and online content, 30fps delivers a smoother look. It’s suitable for time-lapses of events, activities, or scenes with moderate motion.
60fps (Frames Per Second): This frame rate offers the smoothest motion and is excellent for capturing fast-moving subjects, such as traffic, crowds, or sports events. It adds a sense of immediacy and fluidity to your time-lapses.
Crafting Your Time-Lapse
Now that you have the camera, equipment, and frame rate sorted, it’s time to put theory into practice. Crafting a compelling time-lapse requires more than just technical knowledge; it demands creativity and attention to detail. Here are some tips to help you create time-lapses that leave a lasting impression:
Plan Your Shot: Before hitting the record button, visualize the final result. Plan your composition, framing, and camera placement meticulously. Consider the direction of light, the movement of subjects, and the overall story you want to tell.
Use Manual Mode: Set your camera to manual mode to have full control over exposure settings, including aperture, shutter speed, and ISO. Manual mode allows you to maintain consistent exposure throughout the sequence, preventing flickering or abrupt changes in lighting.
Check Your Intervals: Ensure that your interval settings match the speed of the action you want to capture. Longer intervals work well for slow-moving subjects, while shorter intervals are ideal for scenes with rapid changes.
Frame Variations: Don’t be afraid to experiment with different intervals and frame rates. Sometimes, unexpected results can lead to remarkable time-lapses. Test different settings and review your footage to refine your approach.
Patience Is Key: Time-lapse photography is an exercise in patience. Be prepared to invest significant time in your shoots, monitoring your equipment throughout to ensure everything runs smoothly.
Conclusion
Time-lapse photography is a mesmerizing art form that allows us to witness the world in a unique way. By carefully selecting the right camera, equipment, and frame rate, you can capture the passage of time in stunning detail and create sequences that resonate with your audience. Remember that mastery of time-lapse photography comes with practice and experimentation. Each time-lapse you create is an opportunity to refine your skills and tell compelling visual stories. So, equip yourself with the knowledge and tools you need, venture into the world, and unveil the hidden beauty of time through your lens. Happy shooting, and may your time lapses be a source of inspiration for all who behold them!
FAQ
Q: What is time-lapse photography?
A: Time-lapse photography is a technique that involves capturing a series of individual images at predetermined intervals and then playing them back as a video sequence. This seemingly simple process has the magical ability to accelerate the passage of time, revealing hidden patterns, natural phenomena, and the world’s dynamic beauty.
Q: What is the best camera for time-lapse photography?
A: For high-quality time-lapse photography, consider a DSLR like the Canon EOS 5D Mark IV or Nikon D850. If you want a more compact option, mirrorless cameras like the Sony Alpha a7R IV are also excellent choices.
Q: What other equipment do I need for time-lapse photography?
A: A tripod is essential to keep your camera steady during the shoot, while ND filters reduce the amount of light entering the camera, allowing for longer shutter speeds and smoother motion.
Q: How do I create a time-lapse?
To create a time-lapse, set your camera to manual mode, adjust the exposure settings, set the intervalometer remote to the desired interval, start recording, and let the camera run for the desired amount of time.
Contact us today at +971-04-454-1054 or mail us at [email protected]
#video production company#video production services#video production company in UAE#video time lapse#construction time lapse camera#timelapse camera#timelapse video production dubai#construction timelapse service#best construction timelapse company#timelapse video camera#time lapse camera#timelapse video#time lapse camera for construction#timelapse camera for construction#construction timelapse camera#time lapse construction camera#construction time-lapse camera#timelapse service in dubai#time lapse video camera#Timelapse Video Service#Timelapse Video Production#Best long term time lapse videos for construction sites#timelapse video production#time lapse company#timelapse videography#time lapse video company#time lapse video services#best timelapse video maker in uae#timelapse production#time lapse studio
0 notes
Text
Exploring the Wonders of Astrophotography

Introduction:
Astrophotography is a captivating and rewarding genre of photography that allows us to capture the breathtaking beauty of the night sky. With advancements in technology and the availability of equipment, it has become increasingly accessible to photography enthusiasts. Whether you're a beginner or an experienced photographer, exploring the wonders of astrophotography can open up a whole new world of creativity and inspiration. In this article, we will delve into the art of astrophotography, from essential equipment and planning to techniques and post-processing tips.
Introduction to Astrophotography: Capturing the Beauty of the Night Sky
Astrophotography is the art of capturing celestial objects, such as stars, planets, galaxies, and nebulae, through photography. It allows us to witness and document the wonders of the universe in ways that are not visible to the naked eye. By using specialized techniques and equipment, we can reveal the hidden beauty and intricate details of the night sky.
Astrophotography offers a unique perspective on our place in the universe and allows us to appreciate the vastness and complexity of space. It can be a deeply rewarding and humbling experience to capture the light that has traveled across millions of light-years to reach our cameras.
Essential Equipment for Astrophotography: Gear to Get Started
To embark on your astrophotography journey, you will need some essential equipment. Here are the key components:
Camera: A DSLR or mirrorless camera with manual settings and the ability to shoot in RAW format is ideal for astrophotography. Look for a camera with good low-light performance and high ISO capabilities.
Lens: A wide-angle lens with a low aperture (f/2.8 or lower) is recommended for capturing the night sky. A focal length between 14mm and 35mm is suitable for capturing wide-field views of the stars and Milky Way.
Tripod: A sturdy tripod is essential for stable long-exposure shots. Look for a tripod that can support the weight of your camera and lens combination.
Remote Shutter Release: A remote shutter release or intervalometer allows you to trigger your camera without touching it, minimizing the risk of camera shake during long exposures.
Star Tracker or Equatorial Mount: For capturing deep-sky objects, such as galaxies and nebulae, a star tracker or equatorial mount is necessary to compensate for the Earth's rotation. These devices track the movement of the stars, allowing for longer exposures without star trails.
Planning Your Astrophotography Shoot: Location and Timing
Planning is crucial for a successful astrophotography shoot. Here are some key factors to consider:
Dark Sky Location: Find a location away from light pollution for optimal results. National parks, remote areas, or dedicated dark sky sites are excellent choices. Use light pollution maps to identify areas with minimal light pollution near you.
Moon Phase: The moon's brightness can affect the visibility of stars and other celestial objects. Plan your shoot during a new moon or when the moon is below the horizon to maximize the darkness of the sky.
Weather Conditions: Check the weather forecast for clear skies and minimal cloud cover. Avoid shooting on nights with high humidity or significant atmospheric disturbances, as they can affect image quality.
Stellarium and Apps: Utilize astronomy apps like Stellarium to plan your shoot. These apps provide information on the position of celestial objects, rise and set times, and other valuable data to help you compose your shots.
Mastering the Techniques: Long Exposures and Tracking
Long exposures and tracking are fundamental techniques in astrophotography. Here's a brief overview:
Long Exposures: Astrophotography often requires long exposure times to capture faint stars and deep-sky objects. Use the "bulb" mode or set your camera to manual mode and select exposure times ranging from a few seconds to several minutes. Experiment with different exposure times to achieve the desired results.
Tracking: To capture sharp images of the night sky, especially when photographing deep-sky objects, a star tracker or equatorial mount is essential. These devices counteract the Earth's rotation, allowing forlonger exposures without star trails. Align the mount with the celestial pole to ensure accurate tracking.
Manual Focus: Achieving precise focus in low-light conditions can be challenging. Switch to manual focus and use the live view mode to zoom in on a bright star or planet. Adjust the focus until the object appears sharp and then lock the focus to prevent accidental changes.
Noise Reduction: High ISO settings can introduce noise into your images. Experiment with noise reduction techniques, such as long exposure noise reduction (LENR) or using dedicated noise reduction software during post-processing.
Capturing the Stars: Tips for Photographing the Milky Way
The Milky Way is a stunning subject for astrophotography. Here are some tips to capture its beauty:
Find Dark Skies: Locate a location with minimal light pollution to ensure that the Milky Way is visible. Use apps or websites to determine the best times and locations for Milky Way photography.
Timing: The Milky Way is most visible during specific times of the year. Research the Milky Way's position and plan your shoot during the optimal months. Generally, the Milky Way is most prominent during the summer months in the Northern Hemisphere and the winter months in the Southern Hemisphere.
Composition: Incorporate interesting foreground elements, such as landscapes or silhouettes, to create a captivating composition. Experiment with different angles and perspectives to highlight the Milky Way's arching shape.
Expose for the Stars: When photographing the Milky Way, use a wide aperture (e.g., f/2.8) and a high ISO (e.g., ISO 3200 or higher) to capture as much light as possible. Experiment with different exposure settings to achieve the desired balance between capturing details in the Milky Way and maintaining low noise levels.
Photographing Nebulas and Galaxies: Deep-Sky Astrophotography
Deep-sky astrophotography involves capturing distant objects such as galaxies, nebulae, and star clusters. Here are some tips to get started:
Longer Exposures: Deep-sky objects are often faint and require longer exposures to capture their details. Use a star tracker or equatorial mount to compensate for the Earth's rotation and extend your exposure times.
Image Stacking: Deep-sky astrophotography often involves capturing multiple exposures of the same object and combining them during post-processing. Image stacking helps to reduce noise and brings out the subtle details of the object.
Narrowband Filters: Consider using narrowband filters to isolate specific wavelengths of light emitted by nebulae. These filters can enhance the contrast and reveal the intricate structures of these celestial objects.
Patience and Practice: Deep-sky astrophotography can be challenging and requires patience and practice. Experiment with different exposure settings, techniques, and post-processing methods to improve your results over time.
Post-Processing: Enhancing Your Astrophotography Images
Post-processing plays a crucial role in astrophotography, allowing you to enhance and bring out the best in your images. Here are some tips for post-processing astrophotography images:
RAW Format: Shoot in RAW format to retain maximum image information and flexibility during post-processing. RAW files contain more data than JPEG files, enabling you to make adjustments without significant loss of quality.
Noise Reduction: Apply noise reduction techniques to reduce the noise introduced by high ISO settings. Experiment with noise reduction software and techniques to find the right balance between noise reduction and retaining fine details.
Contrast and Curves: Adjust the contrast and curves to enhance the overall tonal range of your image. This helps to bring out the subtle details in the stars and celestial objects.
Selective Editing: Use selective editing tools to enhance specific areas of your image. For example, you can selectively adjust the brightness, contrast, or color saturation of the Milky Way or nebulae to make them stand out.
Astrophotography Etiquette: Respecting the Night Sky
Astrophotographers have a responsibility to protect and respect the night sky. Here are some etiquette guidelines to follow:
Minimize Light Pollution: Use red or dimmed lights during your shoot to avoid disturbing your night vision and the vision of others. Shield your flashlight to direct the light only where it's needed.
Leave No Trace: When shooting in natural areas, follow the principles of Leave No Trace. Pack out your trash, avoid damaging vegetation, and respect wildlife and their habitats.
Share Knowledge: Be open to sharing your knowledge and experiences with others who are interested in astrophotography. Encourage responsible practices and help educate others about the importance of preserving dark skies.
0 notes
Text
Perseid Meteors
Perseid meteors. That’s Jupiter near the middle of the frame. I set up my old Sony A77II with an intervalometer for an hour and managed to capture these Perseid meteors. I was using my widest lens, 16mm, shooting ISO 1600 with 10 second exposures. It took some real work to post-process and compose this image: I had to find the frames with meteors and stack and align them in Photoshop. The result…

View On WordPress
0 notes
Link
Don’t miss one of the best meteor displays of 2023, as the Perseids peak this coming weekend. Grab a lawn chair, bring a friend, a red light and lots of bug spray: the August Perseids are active this week going into the weekend. You won’t want to miss ‘em if skies are clear, as 2023 is a banner year for the Perseids, one of the sure-fire performers when it comes to meteor showers. First, the good news: 2023 is an optimal year for the Perseids, primarily because the light-polluting Moon is safely out of the way. In August, the Moon reaches New on the 16th, just 3 days after the expected peak of the Perseids. Looking northeastward at 2AM local, from latitude 35 degrees north. Credit: Stellarium. Peak Times to Watch The Perseid meteors are broadly active from July 17th to August 24th, though the key peak is expected to occur on Sunday, August 13th around 7:00 UT. This favors eastern Europe and central Asia at dawn. Western Europe and North America should see increased activity on the mornings of Saturday the 12th and Sunday the 13th. Keep in mind, if skies are cloudy, it’s still worth watching a morning or two before or after. The orientation and the flight of the Earth in its orbit, versus the incoming meteor stream during the key peak for the 2023 Perseids on August 13th. Credit Guy Ottewell, from his Astronomical Calendar 2023. The Perseids are grain-sized bits of cometary dust laid down by Comet 109P Swift-Tuttle on its 133-year orbit around the Sun. The comet is currently headed towards aphelion and won’t reach perihelion again until 2126. Most years see the shower producing 60 to 100 meteors per hour as seen from dark skies. The radiant in the constellation Perseus the Hero rises low to the northeast for mid-northern latitudes around 2 AM local. Start watching early as you may see a few early arrivals glancing off the Earth’s atmosphere in the evening as well. The Perseids were first identified as a modern annual shower in the mid-19th century, though the observed uptick in August meteor rates goes back much further. Astronomer Edward Herrick noted in his 1839 work submitted to The American Journal of Science and Arts that Christians had (and still refer to) the Perseids as the “Tears of Saint Lawrence,” in reference to the martyrdom of Saint Lawrence (San Lorenzo) in early August 258 AD. In recent years, the Perseids have been steady performers at a rate of 60 to 100 per hour. Though they’ve had their reign as the ‘King of Annual Meteor showers’ challenged a bit in recent years by the December Geminids, the Perseids have the key advantage of occurring in the summer, during camping season. A Perseid meteor from 2019. Credit: Mary McIntyre. Observing the Perseids You’ll want to watch from a site that’s as dark as possible. Rates for meteor showers always pick up after local midnight, as you turn forward into the oncoming meteor stream. Even a small amount of light pollution can significantly impact the number of meteors you’ll see. Any meteor you can trace back to Perseus is a Perseid, though a few random sporadics may make an appearance. Also, watch for the planets Jupiter and Saturn nearby. The ringed world is headed towards opposition later this month. On the morning of the 13th, the 9.5% illuminated crescent Moon rises around 2:00 AM local… perhaps, it’s also worth watching for Perseid impacts on the night side of the Moon as well? Imaging the Perseids is as simple as setting a DSLR camera on a tripod with a lens affording a wide field of view. Simply shoot a series of long-exposures, and see what turns up. Be sure to take some test shots beforehand to get the ISO/f-stop/shutter speed combination just right for the current sky conditions. I like to use a remote intervalometer controller to automate the process. This lets you simply shoot long series of shots, while you lie back and enjoy the show. Our typical mobile meteor observing kit (complete with bug spray). Credit: Dave Dickinson. If you’re looking to do real science, you can report what you see to the International Meteor Observers network. Also, keep an eye (and ear) out for stranger phenomena, including crackling audible meteors, and persistent smoke trails lingering after bolide fireballs. I like to keep a pair of binoculars handy, to examine these wispy vapor tracks across the sky. You can even tune a standard FM radio to an unused station and ‘hear’ radio pings from meteors as they ionize the upper atmosphere. Clouded out, or reside in the wrong hemisphere? You can also catch the 2023 Perseids live online courtesy of astronomer Gianluca Masi and the Virtual Telescope Project. Don’t miss the 2023 Perseids; the next optimal year isn’t until 2026. The post Why 2023 is a Great Year for the Perseid Meteors appeared first on Universe Today.
0 notes
Text
I'm sorry I don't have the energy to help more, but I can help with a few things.
First, I thought you were getting one of these light boxes.

It's made completely from diffusion material. You set up your lights outside of the box and they pass through the diffusion. You can even shine a light from the back and get a pure white background. And it would work well with your flashes so you wouldn't have to rely on desk lamps or LED lights.
The light box you have is based on reflected light. Which is fine and can get good results, but it is quite a bit more limiting than the diffusion box. With yours, light shines in from the top and bounces off the back, bottom, and sides of the box to illuminate your subject. White is more reflective than black. And since you used a black backdrop, a bunch of light was absorbed instead of reflected. That is why you needed the longer shutter speed. The light could not bounce around inside the box.
ISO 100 is good. f/8 is good. But you shouldn't be afraid of long shutter speeds. You just need a shutter release cable. This will prevent camera shake and prevent the need to set a timer.
You can get this cheap $13 remote and it will do the job perfectly.

This can help your landscape shooting as well.
If you want to get a little more complex, you can get an intervalometer. This can work as a simple shutter release but it can also do time lapse and extreme long exposures in bulb mode.

Personally, I like using wireless flash triggers. I can set them up with all my lighting equipment or I can use it as a wireless shutter release. I can be anywhere and still trigger the camera. I've been several hundred feet away and these still work great. I can do self portraits or take a test shot from across the room. I can set up a camera for birds or squirrels and hide far away.

These only work with flashes in manual mode. The TTL ones are more expensive. But if you get two sets of these you can put one on each of your flashes, one on your camera, and use the 4th to trigger the camera from wherever you are.
Again, the 1/5 shutter speed was fine. You can take really sharp pictures as long as you have a remote.
One last tip, learn how to use a histogram and trust it more than your camera's screen. There are plenty of tutorials. This will tell you if your photo is bright enough without having to look at everything on the computer after you've already shot the photos.
I hope some of that helps.
Black (light) box
As noted previously, Swapping out the light colored backgrounds for the black yielded some weird results. With the camera in aperture priority and Auto ISO set to full auto, the ISO skyrocketed with just that change.
Later I realized I was still operating with matrix metering, where the camera takes in the light from the entire frame. That's fine for most instances, but I'm doing this...

The camera wants to account for everything outside of the box as well as Akane here.
So now I've switched to spot metering, where the camera will meter from just a selected spot in the middle of the frame. I've dropped to a strict 100 ISO. D600, 50mm f/1.8D lens at f/8.

Uh huh. The camera wanted to do 1/5 sec. I'm on a tripod, but not on a timer. Thus the shake.
Let's see what happens when I use the shutter speeds *I* want to use. 1/60...

1/100

1/125

1/150

1/200

And finally 1/250

The box is plenty bright with a light colored background, but it's obvious a little help is needed.
I KNOW!

An LED bulb from the studio kit, dangled from the arm of a desk lamp and pointing through the top flap of the box. That gives plenty of light and then some.
Same f/8 and ISO 100, but with the big bulb only, the camera now asks for 1/30 sec.

And for comparison, 1/50

And 1/60.

And now let's turn on the box lights as well. It's powered by a mere 5V via USB, so it's not really a powerhouse. This time the camera recommends 1/40 sec.

And once more at 1/50

And 1/60

I was about ready to give up on the black backdrop, as the results up to now were basically crap. It took some literal outside-the-box thinking to bring it back from the brink.
And boopenings to @sirfrogsworth. I've been busy the last few days, as you can see. The figure family is continuing to grow as I recruit more victims, er, test subjects, I mean models.
33 notes
·
View notes
Text
The best Milky Way photography gear guide
What equipment do you need to photograph landscapes with the Milky Way? The equipment does not have to cost tons of cash. This handy gear guide will help! This is more of a beginner’s guide. Therefore, I am not going to list star trackers. They are not necessary for creating beautiful Milky Way images or astro-landscapes. Also, this guide is written with single-exposure Milky Way photos in mind,…

View On WordPress
#apps#article#astroscape#beginner#camera#gear#gear guide#guide#intervalometer#lens#long exposure#Milky Way#night photography#night sky#post-processing#tips#tripod
1 note
·
View note
Audio
(Liam Photography Podcast)
0 notes
Text
Some additional mushroom glamour shots...


I had been wanting to do this time lapse for weeks. I was struggling to find the energy to do all of the preparation required. But I used that time to do some problem solving. I needed a way to lie comfortably on the ground. I needed something solid to place my camera on. I needed diffusion for my two flashguns. And I got a new intervalometer which I had yet to figure out the operation of.

I used a portable mattress so I could work comfortably on the ground. That actually was the key to making everything work. I could take my time and configure everything without grass itching me and sticks digging into my sides. Getting up from the prone position is very hard for me, so it helped with that as well.
I dragged that giant branch next to my setup so passersby wouldn't see all of the camera equipment. Beyond that, I set up a security camera with a motion sensor. This helped me check to make sure everything was functioning and ya know, not stolen.

I set the camera on a sandbag for stability. I found two inexpensive softboxes on Amazon to place on my flashes. These increase the size of my light source to give me a softer and more flattering light. Not big enough for humans, but huge compared to a little mushroom. Add some wireless triggers and I had a very nice, very consistent light for my time lapse.
I set the intervalometer to take a photo every 5 minutes and hoped for the best.

The day decided to give me a few obstacles. A bright, clear summer's day turned into a rainy day in the span of 30 minutes. So I covered everything in trash bags. Sadly this caused a few bumps of the camera, one of which I couldn't adjust for when editing the time lapse. I was able to mitigate it pretty well, but you can still see it if you pay attention.
Eventually I want to make a ground level shooting contraption out of a heavy frying pan and a gimbal tripod head. The sandbags just don't offer enough stability and control for these long shoots.
Similar to this...
But with a frying pan to give it extra weight.
And my only other concern was which batteries were going to die first. I had to change the camera battery once, which caused another bump. The batteries in the wireless triggers held up the entire time. But one of the flashes ended up dying around hour 15. The mushroom had grown about as much as it was going to, so I ended the time lapse soon after the flash died.
I love doing these, but they are a lot of effort. I had to edit over 200 photos individually to make sure I got a constant exposure. Which took nearly as long as the actual time lapse. But the end result is pretty neat, so I'm glad I challenged myself to do this. And I'm pretty sure I can correct all of the mistakes I made if I try this again.
Here is the 4K version at 60fps if you want to see it with ultra fidelity.
youtube
The Shroom Lapse
This time lapse represents roughly 16.5 hours of shroomy growth. I'm afraid not long after a squirrel ran off with the top of the mushroom.
RIP little mushroom.
475 notes
·
View notes
Text

26.06.2024
I set up the intervalometer on my camera for a yoga time-lapse, but then I had to clean Mochi's butt (that's her running away from me in a dramatic escape). By the time I returned to my mat, the sun had set, and my exposure settings were as lost as I was. So, hello 9348874780 photos of… almost darkness! This image is the only one that survived. Trust me, I tried the AI noise remover and all it generated was the message: ‘You need Jesus’
#178of366
#meowdel#meowdel_feature#yourcatphoto#cutecatcrew#catfeatures#pamperedcats#kittylookbook#furbaby#petstagram#meowmy#Mochi the cat#awakethelight#lightchaser#beautifullight#whplightandshadow#lowlightleague#lightinspired#subjectlight#follow_this_light#quietlight#thewonderinglight
0 notes