#laravel .env example
Explore tagged Tumblr posts
Visit Tumblr Blog
Explore Tumblr blogs with no restrictions, modern design and the best experience.
Last Seen Tumblr Blogs


Fun Fact
In 2020, 27% of US Tumblr users had an annual household income of over $100,000.
Text
Prevent Session Replay Attacks in Laravel: Best Practices
Introduction
Session replay attacks are a major security risk in web applications, especially in frameworks like Laravel. These attacks can lead to unauthorized access or compromise sensitive user data. In this blog post, we will explore what session replay attacks are, how they occur in Laravel applications, and most importantly, how to prevent them using best practices. We’ll also share a practical coding example to help you implement secure session handling in your Laravel app.

What is a Session Replay Attack?
A Session Replay Attack occurs when an attacker intercepts or steals a valid session ID and reuses it to impersonate the legitimate user. This type of attack exploits the session handling mechanism of web applications and can allow attackers to gain unauthorized access to sensitive information or perform actions on behalf of the user.
In Laravel, session management is a critical aspect of maintaining security, as Laravel uses cookies and sessions to store user authentication and other sensitive data. If the session management is not properly secured, attackers can easily exploit it.
How Session Replay Attacks Work in Laravel
Session replay attacks typically work by capturing a valid session cookie, either through methods like Cross-Site Scripting (XSS) or Man-in-the-Middle (MITM) attacks, and replaying it in their own browser. In Laravel, the session data is stored in cookies by default, so if the attacker gains access to a session cookie, they can replay the session request and hijack the user’s session.
To demonstrate this risk, let’s take a look at how a session ID might be captured and replayed:
// Example of a Laravel session where sensitive information might be stored session(['user_id' => 1, 'role' => 'admin']);
If an attacker intercepts the session cookie (usually via XSS or another method), they could replay the request and access sensitive data or perform admin-level actions.
How to Prevent Session Replay Attacks in Laravel
1. Use HTTPS Everywhere
Ensure that your Laravel application enforces HTTPS to protect session cookies from being intercepted in transit. HTTP traffic is unencrypted, so it's easy for attackers to sniff session cookies. By forcing HTTPS, all communications between the client and server are encrypted.
To enforce HTTPS in Laravel, add this to your AppServiceProvider:
public function boot() { if (env('APP_ENV') !== 'local') { \URL::forceScheme('https'); } }
This will ensure that Laravel always generates URLs using HTTPS.
2. Regenerate Session IDs After Login
One effective way to prevent session hijacking and replay attacks is to regenerate the session ID after the user logs in. This ensures that attackers cannot reuse a session ID that was valid before the login.
In Laravel, you can regenerate the session ID using the following code:
public function authenticated(Request $request, $user) { $request->session()->regenerate(); }
This should be added in your LoginController to regenerate the session after a successful login.
3. Set Secure and HttpOnly Flags on Cookies
Ensure that your session cookies are marked as Secure and HttpOnly. The Secure flag ensures that the cookie is only sent over HTTPS, and the HttpOnly flag prevents JavaScript from accessing the cookie.
In Laravel, you can configure this in the config/session.php file:
'secure' => env('SESSION_SECURE_COOKIE', true), 'http_only' => true,
These settings help protect your session cookies from being stolen via JavaScript or man-in-the-middle attacks.
4. Use SameSite Cookies
The SameSite cookie attribute can help mitigate Cross-Site Request Forgery (CSRF) attacks and prevent the session from being sent in cross-site requests. You can set it in the session configuration:
'samesite' => 'Strict',
This ensures that the session is only sent in requests originating from the same domain, thus reducing the risk of session replay attacks.
5. Enable Session Expiry
You can also mitigate session replay attacks by setting an expiration time for your sessions. Laravel allows you to define the lifetime of your session in the config/session.php file:
'lifetime' => 120, // in minutes 'expire_on_close' => true,
Setting an expiration time ensures that even if a session ID is captured, it will only be valid for a limited period.
Coding Example for Secure Session Handling
Here’s a full example demonstrating how to implement some of these best practices to prevent session replay attacks in Laravel:
// Middleware to regenerate session on each request public function handle($request, Closure $next) { // Regenerate session ID session()->regenerate(); // Set secure cookies config(['session.secure' => true]); config(['session.http_only' => true]); return $next($request); }
By including this middleware in your Laravel app, you can regenerate session IDs on every request and ensure secure cookie handling.
Using the Free Website Security Checker Tool
If you’re unsure whether your Laravel application is susceptible to session replay attacks or other security issues, you can use the Website Vulnerability Scanner tool. This tool analyzes your website for vulnerabilities, including insecure session management, and provides actionable insights to improve your app’s security.

Screenshot of the free tools webpage where you can access security assessment tools.
The free tool provides a comprehensive security analysis that helps you identify and mitigate potential security risks.
Conclusion
Session replay attacks are a serious security threat, but by implementing the best practices discussed above, you can effectively protect your Laravel application. Make sure to use HTTPS, regenerate session IDs after login, and properly configure session cookies to minimize the risk of session hijacking.
To check if your Laravel app is vulnerable to session replay attacks or other security flaws, try out our free Website Security Scanner tool.
For more security tips and blog updates, visit our blog at PentestTesting Blog.

An Example of a vulnerability assessment report generated with our free tool, providing insights into possible vulnerabilities.
By following these security best practices and using the tools available at PentestTesting.com, you can enhance the security of your Laravel application and protect it from session replay attacks.
1 note
·
View note
Text
How To Set Timezone in Laravel?
In this post, I will show you How To Set Timezone in Laravel application. By default, Laravel uses the UTC timezone. For Indian users, we can set the timezone to `Asia/Kolkata`. There are two ways to configure the timezone: How To Set Timezone in Laravel Example Example 1: Update timezone from .env file .env APP_TIMEZONE="Asia/Dhaka" Example 2: Update timezone from config file You can…
0 notes
Text
Deploying Laravel Applications to the Cloud
Deploying a Laravel application to the cloud offers several advantages, including scalability, ease of management, and the ability to leverage various cloud-based tools and services. In this guide, we will explore the steps to deploy a Laravel application to the cloud using platforms like AWS, DigitalOcean, and Heroku. We'll also touch on best practices for server configuration, environment variables, and deployment automation.
1. Preparing Your Laravel Application
Before deploying, it’s essential to ensure that your Laravel application is production-ready. Here are some preparatory steps:
Update Dependencies: Run composer install --optimize-autoloader --no-dev to ensure that only production dependencies are installed.
Environment Configuration: Make sure your .env file is configured correctly for the production environment. You’ll need to set up database connections, cache, queue configurations, and any other service keys.
Caching and Optimization: Laravel provides several optimization commands to boost the performance of your application. Run the following commands to optimize your app for production:bashCopy codephp artisan config:cache php artisan route:cache php artisan view:cache
Assets and Front-End Build: If your application uses frontend assets like JavaScript and CSS, run npm run production to compile them and ensure that assets are optimized.
Database Migration: Make sure your database schema is up to date by running:bashCopy codephp artisan migrate --force
2. Choosing a Cloud Platform
There are several cloud platforms that support Laravel applications, including AWS, DigitalOcean, and Heroku. Let's look at how to deploy on each.
A. Deploying Laravel to AWS EC2
AWS (Amazon Web Services) offers a robust infrastructure for hosting Laravel applications. Here's a high-level overview of the steps:
Launch an EC2 Instance: First, you need to create an EC2 instance running a Linux distribution (e.g., Ubuntu). You can choose the instance size based on your traffic and performance needs.
Install PHP and Required Software: Once the instance is up, SSH into it and install PHP, Composer, Nginx (or Apache), and other necessary services:bashCopy codesudo apt update sudo apt install php php-fpm php-mbstring php-xml php-bcmath php-mysql unzip curl sudo apt install nginx
Configure Nginx: Set up Nginx to serve your Laravel app. Create a new Nginx configuration file under /etc/nginx/sites-available/your-app and link it to /etc/nginx/sites-enabled/.Example configuration:nginxCopy codeserver { listen 80; server_name your-domain.com; root /var/www/your-app/public; index index.php index.html index.htm; location / { try_files $uri $uri/ /index.php?$query_string; } location ~ \.php$ { fastcgi_pass unix:/var/run/php/php7.4-fpm.sock; fastcgi_index index.php; fastcgi_param SCRIPT_FILENAME $document_root$fastcgi_script_name; include fastcgi_params; } error_log /var/log/nginx/error.log; access_log /var/log/nginx/access.log; }
Database Configuration: Set up a MySQL or PostgreSQL database (you can use Amazon RDS for a managed database) and configure your .env file with the correct credentials.
SSL and Security: Secure your application with SSL (using Let's Encrypt or AWS Certificate Manager) and ensure your firewall and security groups are configured correctly.
Deploy Code: You can deploy your Laravel application to EC2 using Git, FTP, or tools like Envoyer or Laravel Forge. For Git deployment, clone your repository and configure your environment variables.
B. Deploying Laravel to DigitalOcean
DigitalOcean provides a simple and cost-effective way to host Laravel applications. Here’s how to deploy:
Create a Droplet: Log into your DigitalOcean account and create a new Droplet with a suitable operating system (typically Ubuntu).
Install PHP, Nginx, and Composer: SSH into your droplet and install the necessary dependencies for your Laravel app:bashCopy codesudo apt update sudo apt install php php-fpm php-mbstring php-xml php-bcmath php-mysql unzip curl sudo apt install nginx
Configure Nginx and Laravel Application: Configure Nginx to point to your Laravel application’s public folder and set up SSL.
Database Configuration: Set up MySQL or PostgreSQL on your droplet, then configure the .env file for your database credentials.
Deploying the Code: You can either deploy your code via Git or use an automation tool like Envoyer to streamline deployments. You’ll also need to configure file permissions for storage and cache directories.
C. Deploying Laravel to Heroku
Heroku is an excellent choice for quick and easy Laravel application deployment with minimal configuration. Here’s how you can deploy a Laravel app on Heroku:
Create a Heroku App: Sign up or log into your Heroku account and create a new app. This will automatically provision a server for you.
Install Heroku CLI: Install the Heroku CLI on your local machine if you haven't already:bashCopy codecurl https://cli-assets.heroku.com/install.sh | sh
Configure the .env File for Heroku: Heroku uses environment variables, so make sure you configure your .env file correctly or set them directly in the Heroku dashboard.
Deploy the Code: Push your code to Heroku using Git:bashCopy codegit push heroku master
Database Configuration: Heroku offers a managed PostgreSQL database that you can provision with the command:bashCopy codeheroku addons:create heroku-postgresql:hobby-dev
Run Migrations: Run database migrations on Heroku with:bashCopy codeheroku run php artisan migrate
3. Automating Deployment with Laravel Forge or Envoyer
For smoother deployment management, you can use tools like Laravel Forge or Envoyer.
Laravel Forge: Laravel Forge is a server management and deployment service designed for PHP applications. It automates tasks like server provisioning, security updates, and Laravel deployments to platforms like AWS, DigitalOcean, and others.
Envoyer: Envoyer is a zero-downtime deployment tool that ensures your Laravel app is deployed with no interruption to your users. It handles the deployment process seamlessly, ensuring the application is running smoothly at all times.
4. Conclusion
Deploying a Laravel application to the cloud can seem daunting, but it becomes easier with tools and services that automate much of the process. Whether you choose AWS, DigitalOcean, or Heroku, each platform offers unique benefits for hosting your Laravel application. Using automation tools like Forge and Envoyer, you can further streamline the deployment process, ensuring your app runs smoothly and efficiently in the cloud.
0 notes
Text

How to Create a Website Using a Programming Language Like Laravel with a Pre-Built Theme on VS Code - Sohojware
Creating a website using Laravel, a powerful PHP framework, can be an excellent choice for developers seeking flexibility and efficiency. When combined with a pre-built theme, the process becomes even more streamlined, allowing you to focus on customization and functionality rather than starting from scratch. In this article, we’ll guide you through setting up a website using Laravel, leveraging a pre-built theme, and coding with Visual Studio Code (VS Code). Whether you are a seasoned developer or just starting, this guide from Sohojware will help you create a stunning website.
Why Choose Laravel for Your Website?
Laravel stands out as one of the most popular PHP frameworks due to its elegant syntax, robust features, and ease of use. It provides a clean and straightforward way to build web applications, making it a favorite among developers. Here’s why Laravel is an excellent choice:
Eloquent ORM: Laravel’s Eloquent ORM allows for seamless database interaction using an object-oriented approach.
Blade Templating Engine: Laravel’s Blade template engine makes it easy to create dynamic content and layouts.
Artisan CLI: Laravel’s command-line tool, Artisan, simplifies repetitive tasks and enhances productivity.
Security: Laravel offers built-in security features to protect your website from common vulnerabilities.
Scalability: Laravel is designed to handle large-scale applications, ensuring that your website can grow with your business.
Getting Started with Laravel and VS Code
Step 1: Install Laravel
To begin, you need to have PHP and Composer installed on your machine. Composer is a dependency manager for PHP, essential for installing Laravel and its components.
Install Composer: Download Composer from getcomposer.org and follow the installation instructions for your operating system.
Install Laravel: Open your terminal and run the following command to install Laravel globally:
Step 2: Create a New Laravel Project


Step 3: Set Up Your Development Environment
Open VS Code: Launch Visual Studio Code, and open your newly created Laravel project directory.
Configure Your Environment: Edit the .env file in your project root to configure your database and other environment settings. For instance:
Step 4: Install and Configure a Pre-Built Theme
Select a Pre-Built Theme: Choose a pre-built theme that suits your website’s needs. Websites like ThemeForest or Creative Market offer a range of Laravel-compatible themes.
Integrate the Theme with Laravel:
Step 5: Customize Your Theme
Edit Blade Templates: Use VS Code to modify the Blade templates according to your needs. Blade templates are located in the resources/views directory. For example, you might customize the layouts/app.blade.php file to include your theme’s layout.
Adjust Styles and Scripts: Ensure that the theme’s CSS and JavaScript files are included in your Blade templates. You may need to adjust paths to ensure that assets are correctly loaded.
Step 6: Develop Your Website
Create Models and Controllers: Use Laravel’s Artisan CLI to generate models and controllers. For instance:
The -m flag generates a migration file for the model.

Step 7: Test and Launch Your Website
Run the Development Server: Start Laravel’s built-in server:
Visit http://localhost:8000 to preview your website.
Debug and Fix Issues: Use Laravel’s debugging tools to identify and fix any issues.
Deploy Your Website: Once your website is ready, deploy it to a production server. Update your .env file for production settings and use a hosting provider like DigitalOcean or Laravel Forge to deploy your site.
FAQs About Using Laravel with Sohojware
1. What is Sohojware, and how can they assist with my Laravel project?
Sohojware is a company specializing in web development and technology solutions. They offer services for creating and optimizing Laravel-based websites, including custom theme integration and performance enhancements. For more information, visit Sohojware.
2. Can Sohojware help me with Laravel theme customization?
Yes, Sohojware can assist with customizing Laravel themes to match your specific requirements. Their team of experts will ensure that your website’s design aligns with your brand and functionality needs.
3. How do I get started with Laravel development at Sohojware?
To start a Laravel project with Sohojware, contact their team through their website. They offer consultations and development services tailored to your project needs. Visit Sohojware for more details.
4. Does Sohojware offer support for Laravel deployment?
Absolutely. Sohojware provides comprehensive support for deploying Laravel applications. Their services include server setup, environment configuration, and ongoing maintenance. Learn more by visiting Sohojware.
5. What resources does Sohojware provide for learning Laravel?
Sohojware offers various resources and tutorials for learning Laravel. Their website features blog posts, guides, and case studies to help you understand Laravel better and apply best practices in your projects.
By following these steps and leveraging the expertise of Sohojware, you can create a professional and functional website using Laravel and a pre-built theme. Whether you are building a personal blog, an e-commerce site, or a corporate portal, Laravel’s powerful features combined with a pre-built theme can help you achieve your goals efficiently. For more information and support, visit Sohojware today.
1 note
·
View note
Text
My Own Blog by Laravel(1)
Make my own blog with Laravel!!
Hi guys, I will make my own blog by Laravel. I'm a Japanese cook in BC. But I don't work now because of COVID-19. So I have much time now. That's why I have started to learn Laravel. I'm not a good English writer. But I will do my best in English. Please correct my English if you would notice any wrong expressions. Thank you!
Anyway, I will post about making a blog by Laravel for a while. Let's get started!
All we have to do
Install Laravel
Create a Project
Database Setting
Migration
Create Models
Seeding
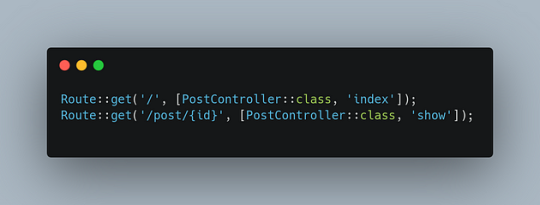
Routing
Make Controllers
Make Views
Agenda
Today's agenda is
Install Laravel
Create a Project
Database Setting
Migration
Create Models
Seeding
Install Laravel
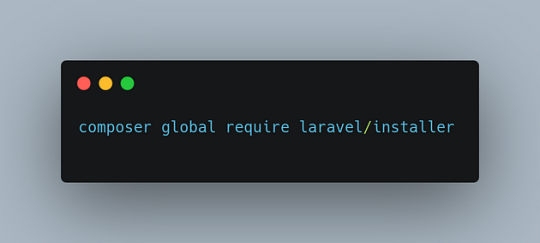
Laravel utilizes Composer to manage its dependencies. So install Composer first if you have not installed Composer yet. Ok, now you can install Laravel using Composer.
% composer global require Laravel/installer
Here we go. So next step is to create a project named blog!
Create a project
Creating a project in Laravel is super easy. Just type a command like below.
% laravel new blog
That's it. So easy. That command bring every dependencies automatically. And you move to blog directory.
% cd blog
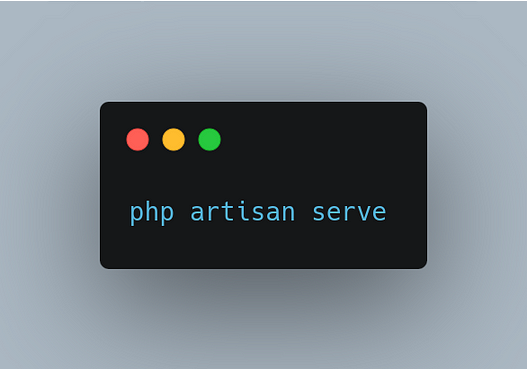
Now you can use a new command called 'artisan'. It's a command used for Laravel. For example, you can start server with this command.
% php artisan serve
Do you see command line like this?
% php artisan serve ~/workspace/blog Laravel development server started: http://127.0.0.1:8000 [Mon Apr 20 09:20:56 2020] PHP 7.4.5 Development Server (http://127.0.0.1:8000) started
You can access localhost:8000 to see the Laravel's welcome page! If you want to know the other arguments of artisan, just type like this.
% php artisan list
Then you can see all artisan commands. You can also display the commands for a specific namespace like this.
% php artisan list dusk ~/workspace/blog Laravel Framework 7.6.2 Usage: command [options] [arguments] Options: -h, --help Display this help message -q, --quiet Do not output any message -V, --version Display this application version --ansi Force ANSI output --no-ansi Disable ANSI output -n, --no-interaction Do not ask any interactive question --env[=ENV] The environment the command should run under -v|vv|vvv, --verbose Increase the verbosity of messages: 1 for normal output, 2 for more verbose output and 3 for debug Available commands for the "dusk" namespace: dusk:chrome-driver Install the ChromeDriver binary dusk:component Create a new Dusk component class dusk:fails Run the failing Dusk tests from the last run and stop on failure dusk:install Install Dusk into the application dusk:make Create a new Dusk test class dusk:page Create a new Dusk page class
So let's go to next step!
Database setting
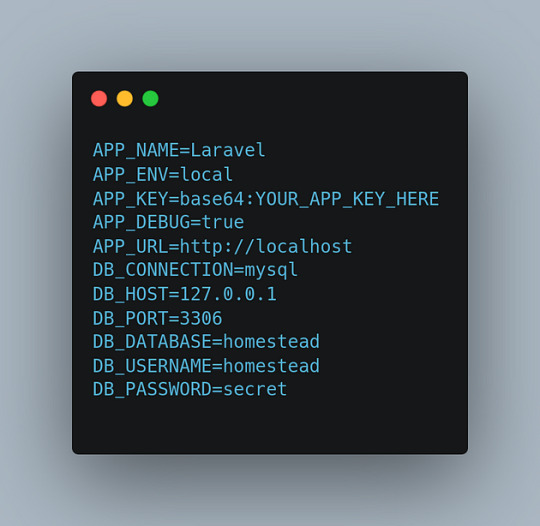
Open .env located under root directory. And edit around DB setting.
DB_CONNECTION=mysql DB_HOST=127.0.0.1 DB_PORT=3306 DB_DATABASE=blog DB_USERNAME=root DB_PASSWORD=
Depends on your database. I use MySQL and I already create database named blog in MySQL. You should create user for only this project when you deploy.
Migration
Laravel supplies the migration system. It allow you to control database using php code. For example, when you want to create database, type the command like this.
% php artisan make:migration create_posts_table
You can see a new migration file database/migrations/xxxx_xx_xx_xxxxxx_create_posts_table.php. Write down columns you need in the function called up() and write down columns you want to delete in down(). Edit it.
public function up() { Schema::create('posts', function (Blueprint $table) { $table->increments('id'); $table->boolean('published'); $table->string('title'); $table->longText('body'); $table->string('tag')->nullable(); $table->timestamps(); }); }
It's ready! Execute this command.
% php artisan migrate
Here we go! Now you got some tables with columns! Let's check them out in MySQL console.
% mysql -uroot
And check tables and columns.
mysql> use blog; Reading table information for completion of table and column names You can turn off this feature to get a quicker startup with -A Database changed mysql> show tables; +----------------+ | Tables_in_blog | +----------------+ | failed_jobs | | migrations | | posts | | users | +----------------+ 4 rows in set (0.01 sec) mysql> desc posts; +------------+------------------+------+-----+---------+----------------+ | Field | Type | Null | Key | Default | Extra | +------------+------------------+------+-----+---------+----------------+ | id | int(10) unsigned | NO | PRI | NULL | auto_increment | | published | tinyint(1) | NO | | NULL | | | title | varchar(191) | NO | | NULL | | | body | longtext | NO | | NULL | | | tag | varchar(191) | YES | | NULL | | | created_at | timestamp | YES | | NULL | | | updated_at | timestamp | YES | | NULL | | | user_id | int(11) | NO | MUL | NULL | | +------------+------------------+------+-----+---------+----------------+ 8 rows in set (0.01 sec)
Good! You could create tables and columns by php. Next step is Create Model.
Create Model
Laravel Framework is MVC application model. MVC is Model, View and Controller. Application works with each role. View works for display to browsers. Controller works as a playmaker. It receives request from router and access databases to get some datas and pass the datas to views. Model connects to the database and gets, inserts, updates or deletes datas.
Now you create a Model.
% php artisan make:model Post
Then you will see the new Post model under app/Post.php.
<?php namespace App; use Illuminate\Database\Eloquent\Model; class Post extends Model { // }
This model has no code. But it's ok. You can leave it for now.
About a model name
A model name is important. A model connects to table of the database with the rule of the name. If you have a posts table, Post model is mapped with posts table automatically.
Seeding
Seeding is very useful function for preparing test datas or master datas. You can use it easily. All you need is just 1. making seeder file and 2. executing it. Let's do that.
Making seeder files
% php artisan make:seeder BooksTableSeeder Seeder created successfully.
Edit seeder files
public function run() { DB::table('posts')->truncate(); $posts = [ [ 'published' => true, 'title' => 'The First Post', 'body' => '1st Lorem ipsum...', 'tag' => 'laravel', 'user_id' => 1 ], [ 'published' => true, 'title' => 'The Second Post', 'body' => '2nd Lorem ipsum dolor sit amet...', 'tag' => 'shiba-inu', 'user_id' => 1 ], [ 'published' => false, 'title' => 'The Third Post', 'body' => '3rd Lorem ipsum dolor sit ...', 'tag' => 'laravel', 'user_id' => 1 ] ]; foreach($posts as $post) { \App\Post::create($post); } }
And edit DatabaseSeeder.php file.
public function run() { // $this->call(UserSeeder::class); $this->call(PostsTableSeeder::class); }
Execute seegding
% php artisan db:seed Seeding: PostsTableSeeder Database seeding completed successfully.
Sweet. Let's check out database.
mysql> select * from posts; +----+-----------+-----------------+-----------------------------------+---------------------------------+---------------------+---------+ | id | published | title | body | tag | created_at | updated_at | user_id | +----+-----------+-----------------+-----------------------------------+-----------+---------------------+---------------------+---------+ | 1 | 1 | The First Post | 1st Lorem ipsum... | laravel | 2020-04-19 19:16:18 | 2020-04-19 19:16:18 | 1 | | 2 | 1 | The Second Post | 2nd Lorem ipsum dolor sit amet... | shiba-inu | 2020-04-19 19:16:18 | 2020-04-19 19:16:18 | 1 | | 3 | 0 | The Third Post | 3rd Lorem ipsum dolor sit ... | laravel | 2020-04-19 19:16:18 | 2020-04-19 19:16:18 | 1 | +----+-----------+-----------------+-----------------------------------+-----------+---------------------+---------------------+---------+ 3 rows in set (0.00 sec)
Perfect! Now we can go next step!
So, see you next time!
References
Installation - Laravel - The PHP Framework For Web Artisans
1 note
·
View note
Text
Laravel Beginner tutorial | Why env file and DB Connections - Laravel
Laravel Beginner tutorial | Why env file and DB Connections – Laravel
Laravel Beginner tutorial | Why env file and DB Connections – Laravel
[ad_1]
Why there is .env file in laravel and how to setup database connection with laravel. Laravel Beginner tutorial – from download to deploy
Check https://bitfumes.com For ads free and more advanced courses
Join Our Slack Community – https://goo.gl/pqCjZH
==================FOLLOW ME ==================
View On WordPress
#.env file laravel#laravel .env example#laravel .env file#laravel .env mysql#laravel 2019 the complete guide with real world projects#laravel 2019 tutorial#laravel 5.8 tutorial#laravel database connection#laravel database connection file#laravel database connection tutorial#laravel database migration tutorial#laravel env file hide#laravel env file in production#laravel env file location#learn laravel step by step#what is laravel#what is laravel framework in php
0 notes
Text
Building a full-stack application using Laravel, Vue 3, and Tailwind CSS can be a great choice. Laravel provides a robust backend framework, Vue 3 offers a powerful frontend library, and Tailwind CSS provides a flexible and utility-first CSS framework. Here's a step-by-step guide on how you can set up a full-stack application using these technologies: [tie_index]Setting up Laravel Backend[/tie_index] [padding top="0" bottom="0" right="5%" left="5%"] Step 1: Setting up Laravel Backend Install Laravel by following the official documentation: https://laravel.com/docs/installation Create a new Laravel project using Composer: bashCopy code composer create-project laravel/laravel your-project-name Navigate to the project directory: bashCopy code cd your-project-name Set up the database connection in the .env file. Create the necessary database tables and migrations: bashCopy code php artisan migrate Set up authentication (optional) if you want to add user registration and login features: bashCopy code php artisan make:auth [tie_index]Setting up Vue 3 Frontend[/tie_index] [padding top="0" bottom="0" right="5%" left="5%"] Step 2: Setting up Vue 3 Frontend Install Vue CLI globally (if not already installed): bashCopy code npm install -g @vue/cli Create a new Vue project: bashCopy code vue create client Choose the default preset or manually select features based on your requirements. Navigate to the client directory: bashCopy code cd client Start the development server: bashCopy code npm run serve [tie_index]Integrating Laravel with Vue[/tie_index] [padding top="0" bottom="0" right="5%" left="5%"] Step 3: Integrating Laravel with Vue Open the client folder in your favorite code editor. Update the src/App.vue file with your desired Vue components and layout. Make API requests to the Laravel backend using Axios or any other HTTP client library. For example: javascriptCopy code import axios from 'axios'; export default data() return users: [], ; , mounted() axios.get('/api/users') .then(response => this.users = response.data; ) .catch(error => console.log(error); ); , ; [tie_index]Styling with Tailwind CSS[/tie_index] [padding top="0" bottom="0" right="5%" left="5%"] Step 4: Styling with Tailwind CSS Install Tailwind CSS via npm: bashCopy code npm install tailwindcss Create a tailwind.config.js file in the root directory: bashCopy code npx tailwindcss init Update the client/main.js file to import Tailwind CSS: javascriptCopy code import 'tailwindcss/tailwind.css'; Use Tailwind CSS utility classes within your Vue components to style them. [tie_index]Deploying the Application[/tie_index] [padding top="0" bottom="0" right="5%" left="5%"] Step 5: Building and Deploying the Application Build the Vue project for production: bashCopy code npm run build Configure your Laravel project to serve the Vue app: In your Laravel routes/web.php file, add the following route at the end: phpCopy code Route::view('/any', 'app')->where('any', '.*'); In your Laravel resources/views/app.blade.php file, include the Vue app's production files: htmlCopy code Build and deploy your Laravel project as per your hosting environment. That's it! You've successfully set up a full-stack application using Laravel, Vue 3, and Tailwind CSS. Feel free to customize and extend the application based on your specific requirements.
0 notes
Text
Building Smarter Web Applications with OpenAI for Laravel
OpenAI is a powerful platform that enables developers to build intelligent applications with natural language processing capabilities. Laravel, on the other hand, is a popular PHP framework that provides an excellent foundation for web application development. In this tutorial, we'll explore how to use OpenAI for Laravel, and how it can help us build smarter, more efficient web applications. Requirements To follow along with this tutorial, you'll need the following: - A local development environment with Laravel installed. - Basic knowledge of Laravel and PHP. - A OpenAI API key.
Getting Started
First, we need to install the OpenAI API package. Open your Laravel project in a terminal and enter the following command: composer require openai/api Next, you need to obtain an API key from the OpenAI platform. Once you have your key, add the following to your .env file: OPENAI_SECRET_KEY=your_secret_key_here With the package installed and the API key configured, we're ready to start using OpenAI in our Laravel application.
Generating Text with OpenAI
The OpenAI API provides several capabilities, such as language processing, chatbots, and much more. In this example, we'll use it to generate text based on a given prompt. To get started, create a new route in your routes/web.php file: Route::get('/openai/gpt3', function () { $openai = new OpenAIApi(env('OPENAI_SECRET_KEY')); $prompt = "The quick brown fox"; $completions = $openai->completions(); return $completions->choices->text; }); This code creates a new route that generates text using the OpenAI GPT-3 model. We pass in a prompt, which is the initial text that the model uses to generate the output. We then specify the model to use, the maximum number of tokens to generate, and how many completions to return. Finally, we stop the generation when we reach a new line. To test the route, visit http://localhost:8000/openai/gpt3 in your web browser. You should see some text generated by the GPT-3 model based on the prompt we provided.
Conclusion
In this tutorial, we learned how to use OpenAI in Laravel to generate text using the GPT-3 model. OpenAI is a powerful platform that can help us build intelligent applications with natural language processing capabilities. With the OpenAI API package installed in Laravel, we can easily integrate OpenAI into our applications and use it to make our web applications smarter and more efficient. Read the full article
#Analytics#ArtificialIntelligence#Chatbots#Datascience#Laravel#MachineLearning#NaturalLanguageProcessing#OpenAI
0 notes
Text
Easy 8 Steps To Setup LDAP In Laravel Application
Understanding LDAP in Laravel Application
LDAP (Lightweight Directory Access Protocol) is a directory services protocol that is used for interacting with directory services.
One of the examples of directory services is Active Directory (AD) which is Microsoft’s proprietary directory service used to manage and store information about the devices, users, objects within an organization’s network.
So, here we will understand how to do LDAP connectivity in laravel to authenticate users in the active directory.
Easy steps to setup LDAP in Laravel Application
Step 01: Install the third-party LDAP package adldap2 in your laravel application using the below command.
composer require adldap2/adldap2-laravel
Step 02: Publish the installed package using the below command.
PHP artisan vendor:publish –provider=”Adldap\Laravel\AdldapServiceProvider”
Step 03: Most importantly, uncomment the dll for LDAP from the php.ini file first otherwise it will throw an error.
Step 04: Configure the following settings in ldap.php inside your config folder.
Inside Settings: ‘hosts’ => explode(‘ ‘, env(‘LDAP_HOSTS’, ‘ldap.forumsys.com’)), ‘base_dn’ => env(‘LDAP_BASE_DN’, ‘dc=example,dc=com’), ‘username’ => env(‘LDAP_USERNAME’), ‘password’ => env(‘LDAP_PASSWORD’)
For an anonymous user, leave username and password it as it otherwise mentions the username and password.
Step 05: At step 4 the configuration has been done, now check the connection by running a query in the login controller to fetch user records from the active directory. curie is a test user for ‘ldap.forumsys.com’ directory.
$search = Adldap::search()->where(‘uid’, ‘=’, ‘curie’)->get(); //Here uid is DN
Step 06: For authentication use the below sample code inside login controller.
$username= $request->input(‘name’); $password= $request->input(‘name’); $user_format = env(‘ADLDAP_USER_FORMAT’, ‘uid=%s,’.’dc=example,dc=com’); //change DN and base dn as per the requirement $userdn = sprintf($user_format, $username); Adldap::auth()->bind($userdn, $password); if(Adldap::auth()->attempt($userdn, $password, $bindAsUser = true)) { echo ‘Login successful’; } else { echo “Username or password invalid”; }
Step 07: After having a successful test connection don’t forget to replace ‘ldap.forumsys.com’ with your actual directory address.
Step 08: Let’s run the application and try to log in.
For More Details And Blogs : Aelum Consulting Blogs If you want to increase the quality and efficiency of your ServiceNow workflows, Try out our ServiceNow Microassesment. For ServiceNow Implementations and ServiceNow Consulting Visit our website: https://aelumconsulting.com/servicenow/
0 notes
Text
How to Get Environment Variable in Laravel React JS?
How to Get Environment Variable in Laravel React JS?
Today now in this article i will provide you an examples of laravel react js environment variables. Here I would like to share with you a example of how to get env variable in laravel react vite. if you want to know about example of how to get environment variable in react js laravel then i hope you are in the right place. Here i will help you to give an example of laravel react import.meta.env.…
View On WordPress
0 notes
Text
Fix OAuth Misconfigurations in Laravel to Prevent Security Risks
OAuth is a widely used authorization framework that allows users to grant third-party applications access to their resources without sharing credentials. However, misconfigurations in OAuth implementation can lead to severe security risks, including unauthorized access, token leakage, and privilege escalation.

In this blog, we will explore common OAuth misconfigurations in Laravel, demonstrate their exploitation with coding examples, and provide security best practices to fix them. Additionally, we will introduce a free Website Security Checker tool that can help you identify security flaws in your website.
📌 Read more website security insights on our blog: Pentest Testing Corp. Blog
Common OAuth Misconfigurations in Laravel
1. Exposing Client Secrets in Source Code
One of the most critical misconfigurations is storing OAuth client secrets directly in the Laravel codebase. If an attacker gains access to the code repository, they can extract these secrets and impersonate the application.
❌ Vulnerable Code Example:
return [ 'oauth' => [ 'client_id' => 'your-client-id', 'client_secret' => 'your-client-secret', 'redirect' => 'https://yourapp.com/callback', ], ];
✅ Secure Fix:
Use Laravel’s .env file to store OAuth credentials securely.
// config/services.php return [ 'oauth' => [ 'client_id' => env('OAUTH_CLIENT_ID'), 'client_secret' => env('OAUTH_CLIENT_SECRET'), 'redirect' => env('OAUTH_REDIRECT_URI'), ], ];
In your .env file, store the secrets securely:
OAUTH_CLIENT_ID=your-client-id OAUTH_CLIENT_SECRET=your-client-secret OAUTH_REDIRECT_URI=https://yourapp.com/callback
2. Allowing Weak Redirect URIs
OAuth requires strict redirect URI validation. A weak redirect configuration can allow an attacker to steal authorization codes via open redirection.
❌ Vulnerable Code Example:
Route::get('/oauth/callback', function () { $code = request('code'); return redirect(request('redirect_uri') . '?code=' . $code); });
✅ Secure Fix:
Only allow pre-registered redirect URIs to prevent Open Redirect vulnerabilities.
$allowed_redirects = [ 'https://yourapp.com/dashboard', ]; $redirect_uri = request('redirect_uri'); if (!in_array($redirect_uri, $allowed_redirects)) { abort(403, 'Invalid Redirect URI'); } return redirect($redirect_uri . '?code=' . request('code'));
3. Improper Token Expiry and Revocation Handling
OAuth access tokens should have an expiration time, and refresh tokens should be securely managed. If not, an attacker can reuse a compromised token indefinitely.
❌ Vulnerable Code Example:
$token = Http::post('https://oauth.provider.com/token', [ 'client_id' => env('OAUTH_CLIENT_ID'), 'client_secret' => env('OAUTH_CLIENT_SECRET'), 'grant_type' => 'authorization_code', 'code' => $authorization_code, ])->json();
This approach does not check token expiry and revocation.
✅ Secure Fix:
Always validate and refresh tokens when needed.
$tokenData = Http::post('https://oauth.provider.com/token', [ 'client_id' => env('OAUTH_CLIENT_ID'), 'client_secret' => env('OAUTH_CLIENT_SECRET'), 'grant_type' => 'authorization_code', 'code' => $authorization_code, ])->json(); if (isset($tokenData['expires_in']) && time() > $tokenData['expires_in']) { abort(401, 'Token Expired'); }
🛠 Scan Your Website for OAuth Security Issues
To detect misconfigurations and security flaws in your website, you can use our Website Vulnerability Scanner.
🔍 Screenshot 1: Website Vulnerability Scanner Tool

This tool scans your website for common vulnerabilities, including OAuth misconfigurations, insecure redirects, and token exposures.
📄 Screenshot 2: Vulnerability Assessment Report to check Website Vulnerability

By analyzing your security posture, this report helps you understand and fix potential risks before attackers exploit them.
Best Practices to Secure OAuth Implementation in Laravel
✅ Store OAuth credentials securely in the .env file instead of hardcoding them in the source code. ✅ Use strict redirect URI validation to prevent unauthorized redirections. ✅ Implement short-lived tokens and secure refresh tokens to minimize attack risks. ✅ Monitor and revoke compromised tokens to prevent unauthorized access. ✅ Regularly scan your website for OAuth misconfigurations using security tools like our free website security scanner.
Final Thoughts
OAuth is a powerful authentication and authorization framework, but its misconfigurations can lead to severe security issues. By following the secure coding practices outlined in this guide, you can protect your Laravel applications from OAuth-related attacks.
🔎 Want to learn more about website security? Check out our blog: Pentest Testing Corp Blog
🚀 Test your website for vulnerabilities now: Website Security Checker
By implementing these security measures and using vulnerability assessment tools, you can significantly improve your website's security posture. Stay secure! 💡🔐
1 note
·
View note
Text
Laravel crud
Laravel Archives - Readerstacks Blogs to Improve Your Coding Skills
In this section we cover a cool tutorial on Laravel crud ajax. Handling database interactions with Ajax has several advantages. We know this contributes to very fast page refreshes, reduces bandwidth usage, and provides a smooth user experience. We used Laravel on the backend and jQuery on the client side to set up a fully functional Laravel Ajax Crud training application.
So, let's start and follow below steps.
Step 1: Install Laravel
In the terminal, enter the following command.
Step 2: Database setup
In the second step we configure the database, eg database name, username, password etc for our raw Laravel AJAX example. So open the .env file and fill in all the details as shown below:
Step 3: Create a migration table
We will create an AJAX raw post example. So first we need to create a migration for the "posts" table using Laravel PHP Artisan command, so first type the following command:
Step 4: Add resource route
Now add the resource route in Routes/web.php
Step 5: Add controller and model
Create a PostAjaxController with the following command.
Step 6: Add Blade files
In this step we will only create one blade file for this example, so create postAjax.blade.php in this path resources/views/postAjax.blade.php
Laravel Example Laravel ajax upload Tutorial Here you will learn how to upload files using jQuery Ajax in a Laravel application
As well as uploading files to a MySQL database and a folder on the web server with validation. And also upload data and files in form with ajax in Laravel application.
When working with Laravel applications. And you want to upload file, invoice file, text file with ajax form to database and server folder in Laravel.
This tutorial will guide you step by step uploading files using Ajax forms submitted with validation in Laravel.
Note that this Laravel ajax file upload tutorial also works with Laravel versions 5, 5.5, 6, 7.x.
Laravel CRUD operating application; In this tutorial you will learn step by step how to create a Laravel crud in Laravel . And how to validate and update server-side form data in Laravel Crud application.
CRUD Meaning: CRUD is an acronym that comes from the world of computer programming and refers to the four functions deemed necessary to implement persistent storage applications: create, read, update, and delete.
This Laravel Crud Operations step by step tutorial implements a simple raw operations enterprise application in a Laravel application with validation. With this raw application you can learn how to insert, read, update, and delete data from a database in Laravel .
Visit for more Information:- https://readerstacks.com/how-to-create-rest-apis-in-laravel
0 notes
Text
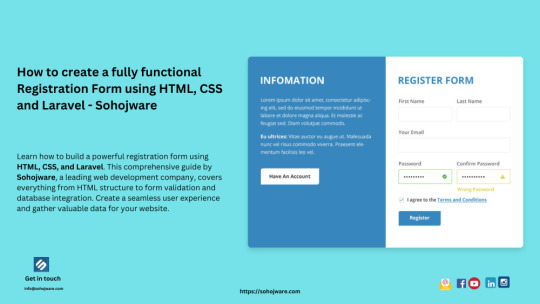
How To Create A Fully Functional Registration Form Using HTML, CSS And Laravel - Sohojware
In today’s digital age, having a functional and user-friendly registration form is crucial for any website or application. It allows users to create accounts, subscribe to services, or register for events. A well-designed registration form not only enhances the user experience but also helps you gather valuable data.
This comprehensive guide by Sohojware, a leading web development company in Bangladesh, will walk you through the process of creating a fully functional registration form using HTML, CSS, and Laravel. Laravel, a popular PHP framework, provides a robust foundation for building secure and scalable web applications.
What you’ll learn in this guide:
Understanding the components of a registration form
Building the HTML structure for the registration form
Styling the registration form with CSS
Integrating form functionality with Laravel
Components of a Registration Form:
Before diving into the code, let’s understand the common components of a well-designed registration form:
Input fields: These are where users enter their information, such as name, email address, username, and password. There are different types of input fields like text boxes, dropdown menus, and checkboxes, depending on the information you want to collect.
Labels: Labels identify each input field, making the registration form intuitive for users.
Validation: This ensures users enter data in the correct format. For example, email addresses must follow a specific format, and passwords must meet certain length and complexity requirements.
Submit button: This button triggers the form submission process.
Confirmation message: A clear message appears after successful registration, informing users their account has been created.
Building the HTML Structure:
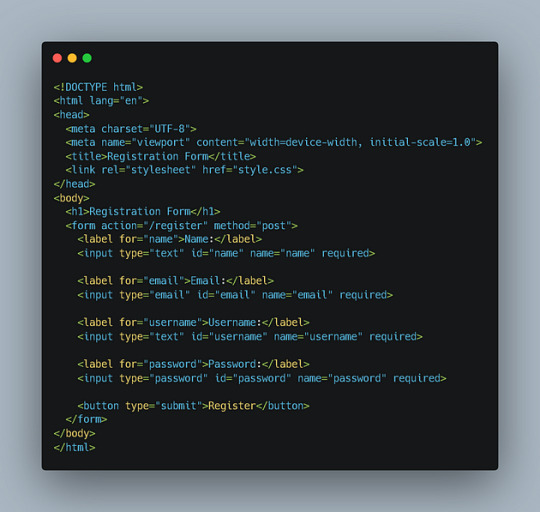
This code defines a basic registration form with input fields for name, email, username, and password. It also includes a submit button. Note that the action attribute in the <form> tag specifies the URL where the form data will be submitted, and the method attribute defines the HTTP method (POST in this case).
Styling the Registration Form with CSS:
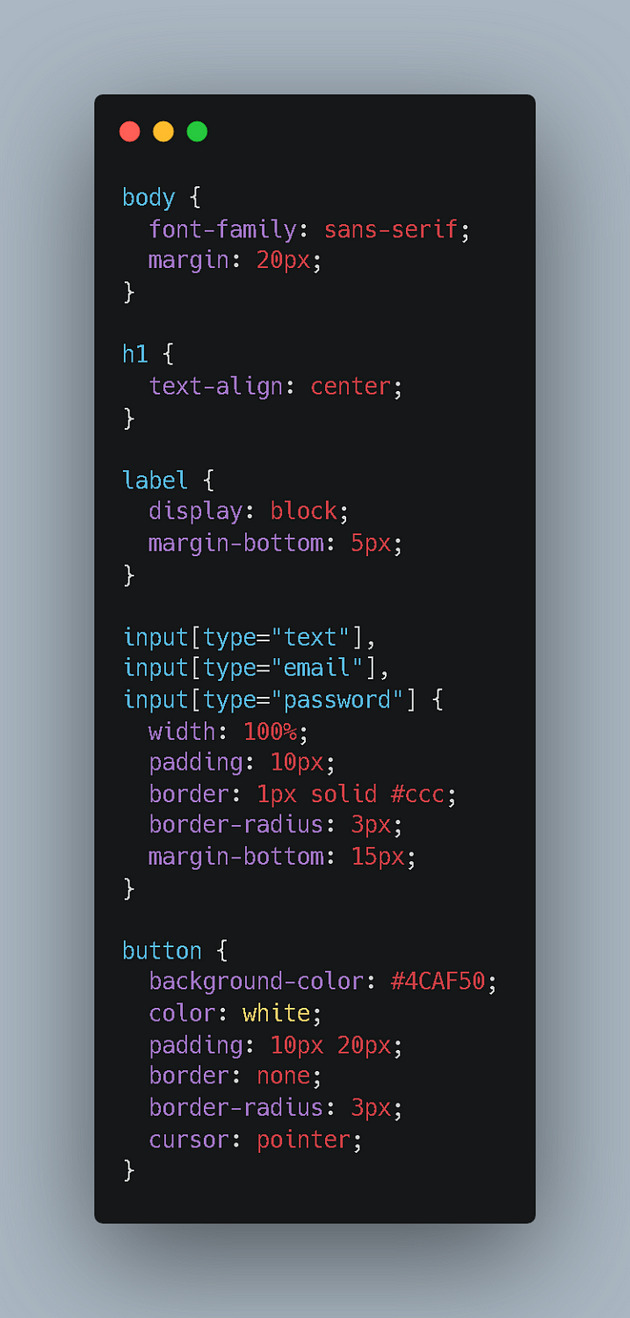
This code styles the form elements, making it visually appealing and user-friendly. You can further customize the styles to match your website’s design.
Integrating Form Functionality with Laravel
To make your registration form functional, you’ll need to integrate it with Laravel’s routing, validation, and database functionalities. Here’s how:
Create a Laravel Route: In your routes/web.php file, define a route to handle the form submission:
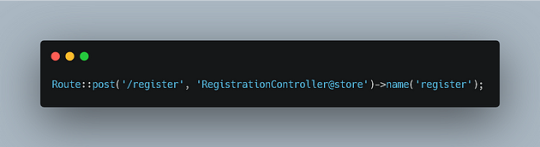
This route specifies that when a POST request is made to the /register URL, the store method in the RegistrationController class will be called.
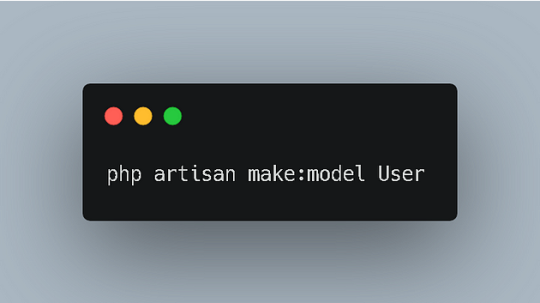
Create a Controller: Generate a new controller using the Artisan CLI command:

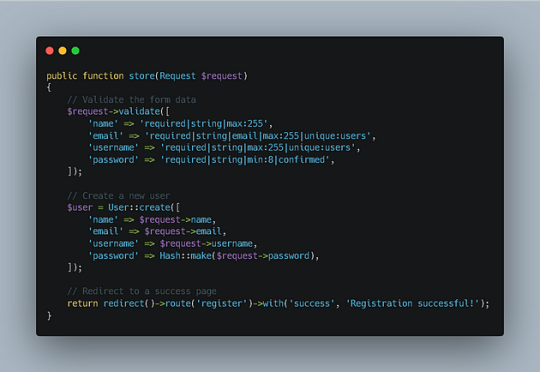
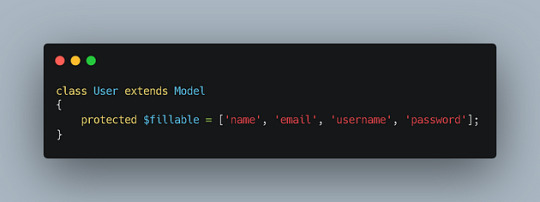
This code first validates the form data using Laravel’s validation rules. If the validation passes, it creates a new user record in your database using the User model. Finally, it redirects the user to a success page with a confirmation message.
Configure Database: Make sure your database connection is configured in your .env file.
Additional Considerations:
Security: Implement proper security measures to protect user data, such as hashing passwords and using secure encryption techniques.
Error Handling: Provide informative error messages to users if their form data is invalid.
Email Verification: Consider sending a verification email to users after registration to confirm their account.
Customization: Customize the registration form to match your website’s design and branding.
By following these steps, you can create a fully functional registration form using HTML, CSS, and Laravel, providing a seamless user experience for your website or application.
1 note
·
View note
Text
0 notes
Text
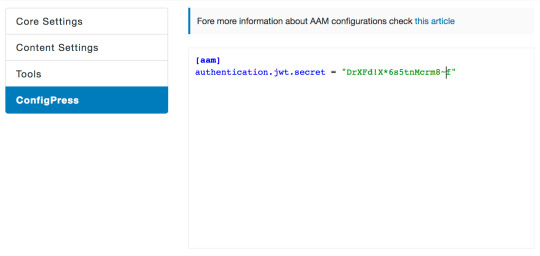
Jwt Secret Key Laravel
Jwt Secret Key Laravel Free
Jwt Secret Key Laravel Download
Secret Key Indonesia
Secret Key Rotom
Throughout this tutorial, we’ll be learning how to authenticate REST APIs using JWT in the latest Laravel 8 version. You will learn how to create a REST API using Laravel 8 with JWT authentication.
Laravel 6 Rest API using JWT Authentication. JWT authentication provides a secure way to transmit data between the client and server using Laravel APIs. In this post, we will look at how we can create a JWT authentication for a Laravel based API. API’s provide a fluent interface to communicate with the different type of services. Step 5 — Generating a JWT Secret Key. After configuring JWT authentication in our Laravel 8 app. We’ll need to generate a JWT secret key in this step. Head over to your terminal and run the following command to generate the JWT secret key: $.
We’ll see how to set up JWT authentication in Laravel 8 and implement a secured REST API using the tymon/jwt-auth package.
Laravel 8 JWT Authentication Tutorial by Example
In this tutorial, we’ll see step by step to implement a REST API with PHP and Laravel 8 with authentication via JWT tokens.
Step 1 — Creating a Laravel 8 Application
Let’s start our tutorial by creating a Laravel 8 application using Composer — the dependency management tool for PHP developers.
Head over to a new command-line interface and run the following command:
Step 2 — Configuring a MySQL Database
After creating your Laravel 8 application using Composer, let’s configure a MySQL database in our second step.
Open the .env file located in the root of your Laravel 8′ application. Next, add the following database configuration information:
Step 3 — Installing jwt-laravel
Now that we have a Laravel 8 application with a MySQL database configured, let’s start implementing JWT authentication by installing the jwt-auth package.
Head back to your terminal and run the following command from the root of your project’s folder:
Step 4 — Setting up JWT Authentication in Laravel 8
At this step, we have a Laravel 8 application with MySQL configured. We also installed the jwt-auth library in the previous step. Now, let’s set up JWT authentication in our application.
Head to the config/app.php file and add JWT providers and aliases as follows:
Next, head back to your terminal and run the following command:
Step 5 — Generating a JWT Secret Key
After configuring JWT authentication in our Laravel 8 app. We’ll need to generate a JWT secret key in this step.
Head over to your terminal and run the following command to generate the JWT secret key:
Next, open the vendor/tymon/src/Commands/JWTGenerateCommand.php and update it as follows:
Step 6 — Implementing JWT Authentication in Laravel 8 User Model
After configuring JWT in Laravel 8. In this step, we’ll implement it in the User model.
Open the App/User.php file, and update it as follows:
Step 7 — Implementing the REST API Controller for JWT Authentication
Let’s now implement a Laravel 8 controller for handling JWT authentication in our REST API application.
Head back to your terminal and run the following command to generate a controller:
Next, open the app/http/controllers/JwtAuthController.php file, and add the following methods:
Step 7 — Add Laravel 8 REST API Routes
Now that we have implemented JWT authentication in our Laravel 8 User model. In this step, we’ll proceed to create our REST API routes.
Open the routes/api.php file, and update it as follows:
Step 9 — Serving your Laravel 8 REST API Authentication App
After implementing JWT authentication in our Laravel 8 REST API application, let’s run our local development server using the following command:
Conclusion
Throughout this tutorial, we’ve seen step by step how to implement JWT authentication to secure and protect your REST API endpoints created with PHP and Laravel 8.
This post was originally posted on https://shabang.dev/laravel-8-rest-api-authentication-with-jwt-tutorial-by-example/
Throughout this tutorial, we’ll be learning how to authenticate REST APIs using JWT in the latest Laravel 8 version. You will learn how to create a REST API using Laravel 8 with JWT authentication.
We’ll see how to set up JWT authentication in Laravel 8 and implement a secured REST API using the tymon/jwt-auth package.
Laravel 8 JWT Authentication Tutorial by Example
In this tutorial, we’ll see step by step to implement a REST API with PHP and Laravel 8 with authentication via JWT tokens.
Step 1 — Creating a Laravel 8 Application
Let’s start our tutorial by creating a Laravel 8 application using Composer — the dependency management tool for PHP developers.
Head over to a new command-line interface and run the following command:
Step 2 — Configuring a MySQL Database
After creating your Laravel 8 application using Composer, let’s configure a MySQL database in our second step.
Open the .env file located in the root of your Laravel 8′ application. Next, add the following database configuration information:
Step 3 — Installing jwt-laravel
Now that we have a Laravel 8 application with a MySQL database configured, let’s start implementing JWT authentication by installing the jwt-auth package.
Head back to your terminal and run the following command from the root of your project’s folder:
Step 4 — Setting up JWT Authentication in Laravel 8
At this step, we have a Laravel 8 application with MySQL configured. We also installed the jwt-auth library in the previous step. Now, let’s set up JWT authentication in our application.
Head to the config/app.php file and add JWT providers and aliases as follows:
Next, head back to your terminal and run the following command:
Jwt Secret Key Laravel Free
Step 5 — Generating a JWT Secret Key
After configuring JWT authentication in our Laravel 8 app. We’ll need to generate a JWT secret key in this step.
Head over to your terminal and run the following command to generate the JWT secret key:
Next, open the vendor/tymon/src/Commands/JWTGenerateCommand.php and update it as follows:
Step 6 — Implementing JWT Authentication in Laravel 8 User Model
After configuring JWT in Laravel 8. In this step, we’ll implement it in the User model.
Open the App/User.php file, and update it as follows:
Step 7 — Implementing the REST API Controller for JWT Authentication
Let’s now implement a Laravel 8 controller for handling JWT authentication in our REST API application.
Head back to your terminal and run the following command to generate a controller:
Next, open the app/http/controllers/JwtAuthController.php file, and add the following methods:
Step 7 — Add Laravel 8 REST API Routes
Now that we have implemented JWT authentication in our Laravel 8 User model. In this step, we’ll proceed to create our REST API routes.
Open the routes/api.php file, and update it as follows:
Jwt Secret Key Laravel Download
Step 9 — Serving your Laravel 8 REST API Authentication App
After implementing JWT authentication in our Laravel 8 REST API application, let’s run our local development server using the following command:
Secret Key Indonesia
Conclusion
Secret Key Rotom
Throughout this tutorial, we’ve seen step by step how to implement JWT authentication to secure and protect your REST API endpoints created with PHP and Laravel 8.
This post was originally posted on https://shabang.dev/laravel-8-rest-api-authentication-with-jwt-tutorial-by-example/
0 notes