#libretro
Explore tagged Tumblr posts
Visit Tumblr Blog
Explore Tumblr blogs with no restrictions, modern design and the best experience.
Last Seen Tumblr Blogs


Fun Fact
Premium Tumblr themes are available from anywhere between $9 to $49.
Text
Handheld LCD Shader Projects
Welcome to the introduction of a collection of the handheld LCD shaders that emulates the colorspace and LCD metrics from the offical handheld gaming consoles. Ranging from Gameboy Color to the PSP being the main focus for emulating the displays from their colorspace to specified gamma and color temperatures. Most users would be playing Gameboy Color and Gameboy Advance in raw RGB on emulators as well as on the Gameboy Player, and that's totally cool. Playing these games on the backlit displays have been much easier to see the game you're playing than ones without any light on the LCDs. Heck, even having much better contrast that gives off darker blacks, or even perfect blacks from OLEDs. However, once you start playing some of those games, you can really see something off from those games from your childhood handheld consoles, most prominent, the Gameboy Color and the Gameboy Advance. Those screens are really different from modern displays we use on a daily basis, on every single specifications. GBC and GBA would look too saturated and odd color hues in a lot of games, under raw RGB picture. In GBA's case, a lot of games can have lighter gamma that looks overbrightened in raw RGB, since those were only calibrated for the old GBA screens that has darker gamma. Oversaturation from those games were also calibrated for these older displays that has less saturation. This project is meant to replicate the colors and gamma from the real console model, to any project, such as emulators, Gameboy Interface, scalers like the Retrotink 4K, LCD mods, and HDMI/FPGAs projects. It would allow users to pick any shaders or LUT textures to replicate the LCD color display to your preferred way to play games beyond pure original hardware. Of course, there is also Nintendo DS from the first model, the DS Lite, Gameboy SP AGS-101 (Backlit version), Gameboy Micro, and the PSP on its first model, as of current. The project is also meant to preserve the display data and metrics from those handhelds.
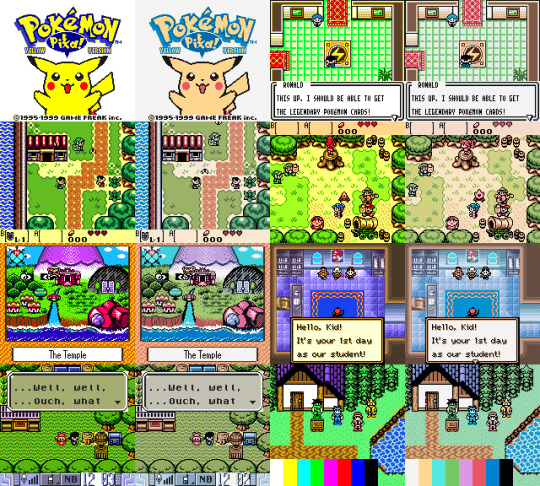
(GBC shader preset with default settings)
(GBA shader preset with default gamma, and LUT set to "2" for colder greyscale)
(NDS shader preset with default settings)
(PSP shader preset with LUT set to "2" for PSP's known colder greyscale)
Downloads:
Instructions: If you haven't already installed shaders, do so inside retroarch under slang shaders. After downloading my package, extract the zip file to "shaders_slang" inside Retroarch's shader folder. It can be implemented inside libretro's shader once the slang shader pack gets updated. I suggest loading the shaders by presets, under .slangp, in both Handheld and Reshade folder (latter being under the handheld-color-LUTs folder). Presets inside handheld folder has switchable settings, including presets containing LCD shaders. Presets inside reshade only loads in LUT textures rather than just shaders. Useful for emulators or projects that only loads in LUT textures as their only filter.
The shaders is based on HunterK's shader, Color-Mangler from the misc folder in slang shaders from Libretro, which was made from a help for my project. It defaults to sRGB on the shader's option for many average users. A shader preset from Handheld folder has LUT choices to change the greyscale color temperature replicated from the real handheld console. GBA one can adjust the gamma to make the image darker, while GBC and GBM has gamma option to brighten or darken. In Reshade, it only had adjustable greyscale temperature except for GBA_GBC variant. The shader supports DCI-P3 and Rec2020 colorspaces on its option to use on your display that may support either of those to reach better color saturation to present more accurate blue primary color from my shaders that common sRGB colorspace is limited from. The GBA and GBC have external gamma options to adjust the gamma on the greyscales if not using any LUT shader preloaded.
Developer notice: For developers of any GB/GBA (or any handheld) projects involving emulators, FPGAs, or screen mods, shall take some advices when it comes to implementing the shader or color filter to your projects. To implement as a shader, the gamma has to be lower first by 1/2.2 (Can be used to change the GBA gamma itself to darken the screen), then use my color values from the shader to change the color primaries, and then revert the gamma by 2.2 afterwards to have great color correction while respecting luminance and color tones. Also I prefer if you take color values from white balance correction that are outside of GBC/GBA shader. For only LUT texture, a more easy approach for devs, I prefer using the non-cold variants if preserving the greyscale color tone. GBA and GBC LUTs have their gamma and greyscale adjusted to emulate the screen's default gamma. If you only want just the color gamut correction as an LUT, use the GBA_GBC variant inside Reshade's LUT folder. -If you decide to implement a basic GBC or GBA colorspace to the emulator, use the sRGB data. The gamma change must happen before the color correction. -If the project is aimed for TV such as Gameboy Interface or GBA Consolizer, use the sRGB LUT shader, since SD and HDTV resolutions aim for sRGB colorspace. -If the FPGA such as Analogue Pocket, IPS screen mods, or emulation device uses a display gearing towards sRGB colorspace, use the shader, color filter, or LUT accordingly. -If the OLED screen mods or emulation devices have its native colorspace target around 100% DCI-P3 Volume, use any filter accordingly. -If implementing the shader to your emulation project, do port the shader to your shader or filter libraries. The shader and LUTs are in public domain after all, to spread about the color correction regarding GBC/GBA displays. -If using a professional scaler like Retrotink 4K with either GBA Consolizer or Gameboy Interface without any filters used, play with its gamut matrix settings for both GBC and GBA as "Red: 0.4925 0.3100" "Green: 0.3150 0.4825" "Blue 0.1625 0.1925" to emulate the color correction, and can be used on SDR or HDR mode to give out consistent image. Gamut info for other consoles below.
(Raw RGB, Gameboy Micro, and GBA shader with darken set to 0)
(Top: NDS; Raw RGB, DS-Lite, and NDS Phat)
(Bottom: GBA; Raw RGB, GBA-SP AGS-101, and GBA with darken set to 0)
Note: While DS-Lite and SP-101 are really close to sRGB that developers don't really need adjustments, it is shown to preserve on how far they reached from older models to newer ones in mid to late 2000s.
Story:
So when did I start the project and why I was invested in doing this? It was back in August 2014 when I first saw a forum on someone wanting to desaturate the GBA and mentioned the filters from emulators like VisualBoyAdvance, or VBA-M, as well as NO$GBA that has options to emulate the colorspace that is close to the real hardware. I was reminded how the latter emulator has those options when I used it long time ago. I mostly use unfiltered colors as that was how close it looks on my GBA-SP with "Better Screen" than the GBA. Yeah I actually have the backlit version of GBA-SP known as AGS-101. The display was a huge jump from old GBA to GBA-SP, as well as the Nintendo DS Phat under GBA. However, I had good amount of memories of playing my old GBA with the lights around me and I do remember the color saturation being very different overall. So I wanted to take a look on how to replicate the VBA-M's colorspace.
(Link to the forum I created of my histories of re-creating the GBA colors)
I first decide to use simple desaturation with a mix of shaders by playing with saturation and contrast levels. At first, it looks very similar to how VBA-M's attempt looked. That is, until I saw the blue color has a different hue, being more torqourise in VBA-M's recreation. Then a LUT shader appeared in libretro forums and I first used that for my photoshop to use crazy amount of filters to recreate the whole thing, even though it wasn't perfect, but close. Then I tried to replicate the original NDS model that I have for many years, and also played with the LUT textures from Photoshop. Yeah I just simply tried to copy the colors from the console, without any tools, on my uncalibrated old LCD TN panel screen, because I had such no experience on how colorspaces work, but it was worth a try. Then in 2015, I somehow found a shader that plays with RGB and I got help with Hunterk, a contributor on Libretro who has been involved with a lot of shaders for Retroarch. He made an amazing color mangler shader for me to put data of colors and gamma on the shader itself than just using a LUT texture. Then in May of 2015, I found another GBA on my house that was not used by a family for a long time. Yeah I lost my GBA somehow as a kid from another family, but a long story to tell. Thankfully I was allowed to use another GBA for full use just for this project. This was just the beginning of my progress on grabbing screen data starting with just a flashlight with my old LCD monitor. The only issue I always have is the common sRGB screens don't have deep blue colors that is needed for both GBA and NDS (and more), so I always had issues replicating the blue primary color. That's what got me to start learning about colorspace and what sRGB and color gamut means. And that's where my progress to get the right tools begins. I then later got a superior IPS 1080p monitor, the GBC, Colormunki Display, using DisplayCal and HCFR, Colormunki Photo, the PSP, GBA Micro, a 4K monitor, and a portable light to use on GBC and GBA. Now in 2024, I have really progressed with help of such tools I need, have become much better way of getting the LCD data from the handhelds to contain the color gamut, the greyscale, gamma, and color temperature.
So now the story is out of the way, here are the tools I used to gather infos from the handheld screens.
Samsung S80AU - A 4K IPS Monitor that supports DCI-P3 colorspace with great Delta Error scores especially for sRGB colorspace. It's also used to test out LCD shaders on a high DPI display. Colormunki Display - A Colorimeter that calibrates your display and gathers color data from your target screen. Colormunki Photo - A Spechrometer that behaves the same as Display, except gathers the white colors temperatures more accurately regardless on any type of LCD or OLED displays. It's used to make profiles for the Display to be calibrated for a specific monitors as the Display reads data much faster than Photo as well as reading darker blacks better. Displaycal has infos on colormeter matrix correction to add in why this combo is best used for serious color calibration. It's also used primarily for handheld console displays to sample color data. DisplayCal - Used to completely calibrate my monitor and other screens to give off pure sRGB colorspace with 6500K whitepoint. It's also used with its own ICC Profile creator to make .icc with given data from ColorHCFR for a specific Handheld Console display to emulate from. It's 3DLUT tool was also used to generate LUT textures to check the color and luminance on primary and secondary colors. ColorHCFR - A free alternative for Calman. It's used to gather data on the greyscale, the color gamut, and tons more info to check how your targeted display looks. It shows you graphical images of the screen's color gamut on the CIE diagram. MCH2 - A tool that used your generated DisplayCal monitor calibration data to create an .icc profile made for Windows 11 to convert the entire screen to your targeted colorspace such as sRGB and DCI-P3. G2 Pocket RGB Camera Light - A portable light that shoots out lights to use on handhelds that lacks any light, such as the Gameboy Color and Gameboy Advance. It toggles between RGB and pure whitelights with color temperature adjustments. It's used to match the whitepoint on both GBC and GBA to match my monitor's whitepoint as the closest. It's much better tool than me previously using my collection of phones to use the flashlight for color sampling, as GBC and GBA suffers from rainbowing, no adjustments on white balance, and less saturation by a flashlight, unlike proper lights like the G2 Pocket that eliminates those issues. 240p Test Mini - The handheld version of the well known 240p Test Suite. Used to check RGB, greyscale, motion flickering, and color scrolling on real hardware. https://github.com/pinobatch/240p-test-mini EZ Flash Jr - A GB/GBC Flashcarts to load ROMs and Homebrew for GBC and GBA. EZ Flash 3-in-1 Expansion Pack NDS - A GBA Cartridge to load in a ROM and homebrew in to load inside GBA and NDS. Used NDS to insert a ROM on its NOR memory. GIMP - A Photoshop-like image editor that is used to check generated LUTs from 3DLUT to check on the color values to adjust the shader. Retroarch - Using mGBA and Sameboy emulator core to check out the games while using the shaders I created for color correction. It also loads in image files for my best way to check out my shaders during adjustments.
(Top to Bottom: gba-color & gbc-color, gbMicro-color, nds-color, psp-color, DSLite-color, SP101-color, and raw RGB, all in sRGB)
Note: Why the white color is darker is due to clipping on the yellow color because of how color correction works with the blue color being out of sRGB gamut. Also, sRGB can't display those handhelds blue saturation due to it. Will soon post DCI-P3 and Rec2020 variants for displays that can see more saturation without internal color adjustments.
List of handheld consoles I owned to create shaders out of: Gameboy Color Gameboy Advance Gameboy Advance SP (AGS-101) Gameboy Micro Nintendo DS Nintendo DS Lite PSP (1000)
Nintendo Switch Online emulates GBC and GBA with their own color filters. GBA only desaturates the screen in more simple manner for sRGB, which was easy to implement. GBC, was very hard to do in shaders currently, so to use full experience, the LUT version can only be used to fully emulate the effect for other emulators.
I also found someone's Switch OLED data from a youtube video. The colorspace is taken with bigger saturation than even DCI-P3 when using vivid mode. Here's a link to the video by GamingTech:
youtube
I also made Palm Treo 700p shader long time ago by taking DisplayMate's data long ago while trying to translate the gamut pin points to HCFR since I don't have those in possession. I only made it for experiment long ago and only archived.
Replicating existing filters from emulators or dev tools such as No&GBA and VBA-M for GBA image replication, and GBC tools like Gameboy HiColour Converter V1.2 for GBC image replications. Even No$GBA and No$GMB docs had mentioned the LCD color differences:
(HiColour Convertor)
My Handheld LCD review datasheet and showcase for each platform (Coming Soon):
Gameboy Color Gameboy Advance Gameboy Advance SP AGS-101 Gameboy Micro Nintendo DS (Phat) Nintendo DS Lite PSP-1000
Handheld consoles I plan on getting and make data out of: PSP-3000 or GO PS Vita Nintendo 3DS (Owned, but not yet examined)
Handhelds I don't plan on getting or reviewing: Gameboy or Gameboy Pocket (Many have made their own shaders and filters out of their monochromic display) Gameboy Advance SP AGS-001 (Uses the same exact display as the original GBA except with frontlight added) Knockoff GB Boy Colour (I only allow any official handheld consoles for my project) PSP-2000 (Same colorspace and data as PSP-1000, except brighter screen) PS-Vita 2000 (Uses LCD instead of OLED, with less color gamut than original PS Vita) Nintendo NEW 2DS XL/3DS (or XL) IPS displays (Hard to find and a lottery to obtain; not common) Nintendo Switch (Owned and targets sRGB and its gamma well; whitepoint can vary between units)
Notes: On GBA, A lot of games are calibrated for the GBA's gamma due to how dark its screen's gamma looks. For some games, often Nintendo and a couple of companies with closest relationship to Nintendo, are adjusted for its colorspace. Certain games, often SNES ports, may have its original palettes on its setting. On GBC, many games were made for the screen during its run. It's unknown which amount of games weren't calibrated for the screen. Although certain games like Link's Adventure DX were completely adjusted for the screen on colorspace, gamma, and color temperature, which made purple-grey colors looks more grey overall. On both NDS and PSP, pretty often the first few years of games can be adjusted for those screens. Those are until both NDS-Lite and PSP-3000 have colorspace that closely aims for sRGB where no adjustments can be made. Many multi-ports for PSP of the same game from home consoles are very likely not calibrated for the first two PSP models. I didn't make a Switch OLED preset (from Vivid mode) with LCD shader, since the Switch OLED is not LCD, its RGB pattern is very different, and either original LCD or OLED are too high resolution to notice its RGB patterns. It's best to use only the shader to use with Reshade on a Switch emulator to emulate the OLED's vivid mode, but preserved in Libretro to see its effect. While I explain what the shaders are meant to use for, it's also your preference on using the shaders or just using the Raw RGB colors that fits your needs. You can use other color shaders on a GBA or GBC emulator, such as using NDS, Micro, or PSP shaders to your preference. The PSP shaders have much more saturation than any Gameboy line or NDS Phat, while preserving its hue.
To end off on this page, I would also like to give respect to other projects that tried their attempt to create their own color correction. While I prefer the best accuracy of the color correction from my shaders, many of their color corrections are pretty impressive with varying degree levels of accuracy, and they all motivate me to continue with the project to give out the best quality of color correction. Their blogs have pretty interesting ideas on how displays work on GBC and GBA.
(BGB's "Reality" Color Correction filter)
(GBCC's page on GBC screen tech notes)
(Bsnes/Higan Color emulation page)
(Gameboy Interface having their own Color Matrix correction, and including our shaders and filters alongside)
youtube
(Nintendo showing their GBC and GBA color correction under Virtual Console from Nintendo Switch Online, the former having bigger difference)
#gameboy advance#gameboy color#nintendo ds#playstation portable#gbc#gba#nds#psp#colors#handheld#shaders#libretro#retroarch#emulation#emulators#gameboy micro#color correction#colorspace#nintendo switch oled
4 notes
·
View notes
Text
Also the people making retroarch compatible with other consoles.
Let's violate the intellectual property rights of Nintendo.... Together 🤝
#being able to make your ps4 or xbox series fully backwards compatible through libretro is some crazy shit if you think about it#yeah the manufacturer couldn't do it but these 3 unrelated groups of foss nerds (affectionate) made it possible#also finally a reasonable way to play mario sunshine on the switch
2K notes
·
View notes
Text

HELL YEAH MADE MY OWN PARSER USING NESTOPIA FUCK YOU RETROARCH
#anti retroarch#always hated how it was the only option when parsing certain roms#with this newfound knowledge i shall use this to make my own parsers#and maybe share them if it hasn't already been done#in case anyone's wondering why i hate retroarch it has nothing to do with retroarch itself#it has everything to do with libretro primarily the lead dev being scum#stealing works without permission; playing a role with near (RIP); nearly causing duckstation to cease development; generally being a dick#in general it's a principle thing that i don't use retroarch even if i'm not giving anything to them for using it#anyhow i'm tired and need to sleep but damn am i happy that this actually worked#emulation
0 notes
Text
going in circles
there is one goal i've been trying to reach, and i'd say i've been attempting on and off for a couple months now
as i continue making videos, i continue developing my style and vision i want for how i want my videos to, well, actually look. after watching petscop, i think i know what one thing i want to heavily include in my videos. an ntsc filter. the ntsc filter in petscop looks fucking fantastic, and woah, the shaders are just out there and already existing! i'll just download them!
and now for the hard part that i didn't think would be hard
how do i put this on video
see ideally, i thought there would be some plugin for applying these shaders easily, and there kind of is. it's called isf for motion (i use final cut pro), and supposedly it allows you to put glsl shaders onto apple motion and final cut timelines. however, i never figured out putting the libretro ntsc shader into it, so i gave up.
so now on the windows end, considering i have a desktop
there is a program that fucking does this (kind of). it's called shaderglass, and it lets you apply any libretro shader over your windows desktop. however, it does not allow you to outright render video, or let alone work on mac or let you put into editing software.
i tried some other solutions, but none worked
so now my ideal outcome; make a version of shaderglass (considering it's open source) that i can drop into fcp or davinci or premiere, and have it let me put libretro shaders over video with one layer.
i am not nearly experienced enough at c++ to do this, nor do i have the knowledge to create plugins for editing software
i guess i kind of need some kind of jumping off point, some kind of kickstart to figure out what i need to learn to do any of this. i wish there was more documentation i can easily access and process that surround this stuff, but my findings have come up my dry.
if anybody has any tips or easier ways to do this, let me know please.
important links:
15 notes
·
View notes
Text
Install Dolphin-emu RetroArch (GameCube / Wii)
RetroArch, aplikasi emulator, game engine dan media player cross-platform yang dibagun oleh Libretro secara gratis dan open-source. Aplikasi ini dirancang sebagai aplikasi yang ringan, cepat, portable dan tidak bergantung dengan plugin. Dengan begitu kita bisa menggunakan RetroArch di berbagai perangkat, tidak hanya PC Windows, namun juga Linux, Android, iOS, macOS, bahkan sampai Konsol Video…
0 notes
Text


Getting stupid with it. Left one is closest approximation of my old Sony CRT, right one I've named Blinding Nostalgia


Spent like 40 minutes making a ReShade filter for Crazy Taxi that mimicked the lightly cooked cabinet I first played it on. Think I got pretty close!
#shoutout to the person porting all the libretro shaders over from retroarch to reshade btw. you may ruin my life with this#not pictured is the signal interference/ntsc wiggles that you can only see in motion. crucial part of the faux CRT shaders imo
35 notes
·
View notes
Text
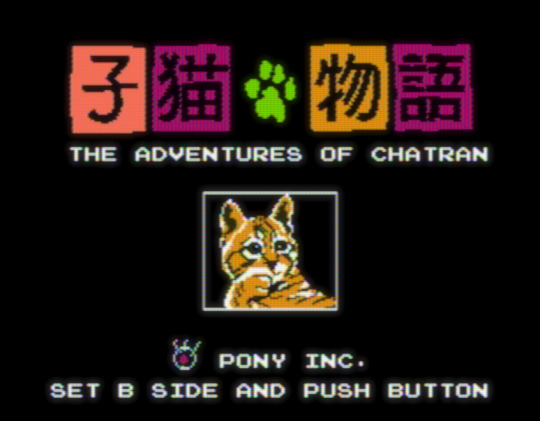
Koneko Monogatari: The Adventures of Chatran September 19, 1986 // Famicom Disk System
This game doesn't play nice with the Mesen Libretro core, so I had to play it in the standalone emulator, so I don't have any nice screenshots of the actual gameplay. You will have to take my word for it that it is a stock standard platformer where you play as a cat.
1 note
·
View note
Quote
PCSX2 * Added widescreen, speedhacks options and some userhacks, some code refactoring and cleanup * Added core option to force widescreen * Refactoring of core options based on libretro standard Added option to set pcsx2 Accurancy/Speed presets * Added bios list at runtime to libretro options * Fixed speedhacks presets option Added fallback to default safe preset if speedhack option is disabled
PCSX2 – Libretro
0 notes
Text
i hate you libretro
#op#no real reason i'm site there's actual problems with it but i just hate retroarch's ui so much that it makes me want to crazy murder people
0 notes
Text
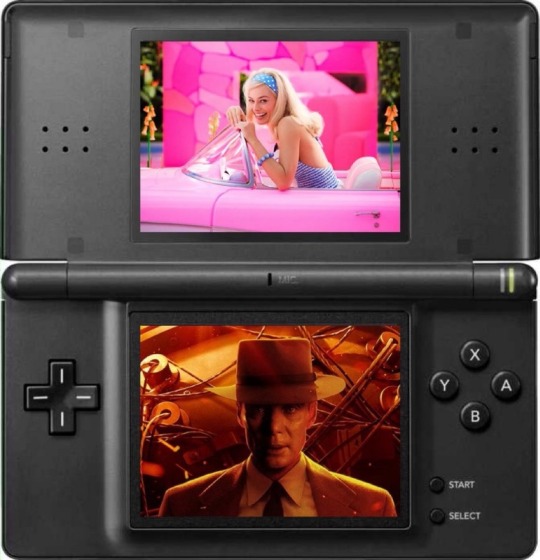
You probably noticed, then, that the DS Lite's color output is reasonably close to an sRGB monitor. Reds are a tad more dark and orange, greens have more of a lime tinge, and blues are closer to azure, but overall it's respectably close.
The original DS is...summarily not that.
@pokefan531, author of myriad color correction filters for Libretro, illistrates this here:
Watching Barbie and Oppenheimer the way god intended
935 notes
·
View notes
Video
tumblr
playin some ds inside a game
the future is wild
#tower unite#nintendo ds#bemani#konami#utacchi#pop'n music#retroarch#libretro#emulation#Kiteretsu Daihyakka
268 notes
·
View notes
Text
Extrañando mi DS.

Muy buenas a todos. Soy Oyabun, y hoy he querido hablarles de un problema que he tenido ultimamente al querer jugar a varios juegos que toque en mi infancia: La Emulacion de la Nintendo DS. Yo tuve una pequeña DSLite de mas peque y juego a mucho con ella, ya que tenia un flashcart R4 de los antiguos (¿2 GB por cada memoria? ¡INAUDITO!) y me lleve de la pequeña dos pantallas un monton de juegos que ahora, con un poco mas de edad, me han dado ganas de volver a probar. Hace poco me pase el Mario VS. Donkey Kong de GameBoy Advanced, juego feo visualmente pero bastante entretenido, y lo suyo era pasarme a la siguiente entrega que fue para DS: Mario VS. Donkey Kong 2: March of the Mini. Jugue con el Nucleo Desmume 2015 de Libretro en RetroArch. Y si, no es lo mismo jugar con el Mouse como si fuera el Stylus de nuestra DS. El juego me lo pase en tiempo record y me dejo un buen sabor de boca, pero algo le faltaba. Luego, jugue al Jump Ultimate Star, que es un juegazo muy de la onda Super Smash Bros, pero con los personajes de la Weekly Shonen Jump embuchados. Muy divertido y todo, pero seguia hechando de menos mi DS. Luego: New Super Mario Bros, que el uso de la Tactil se resume en simplemente en hacer aparecer el item que tenias guardado en Stock: Tambien heche de menos mi DS. Y ahora que estoy jugando al juego de Hora de Aventura para DS (No recuerdo su nombre realmente) estoy sintiendo el mismo “vacio“ que senti con todos los juegos de DS que he emulado. Y eso es lo que me toca las narices, no es el hecho de que el Nucleo de Libretro corriera mal los juegos (Que de hecho, en el New Super Mario Bros tuve que optar por el Desmume aparte) es simplemente que yo estoy negado, despues de haber jugado a ese titulo en la dichosa maquina de Nintendo, ya no siento la misma satisfaccion jugando desde la PC. Sin duda, los 3 y 4/5 de juegos que emule los disfrute muchisimo y me lleve gratas alegrias mientras los iba jugando, pero siento que la alegria hubiera sido mayor si lo estuviera jugando con una DS en mis manos. ¡Muchas gracias por leerme!
#nintendo+ds#nintendo#libretro#retroarch#retro#retrogaming#games#newsupermariobros#jumpultimatestars#japan#adventuretimeds#mariovsdonkeykong2#argentina#jugando
4 notes
·
View notes
Text
Light’s recommended emulators: RetroArch
Getting a bit more specific here.
Other posts: [Windows standalone] [macOS standalone]
Preamble
I’ll be using a significant amount of color coding throughout this little primer.
Blue: Something to keep in mind Green: This is a good thing Orange: Go with caution Red: Warning!
RetroArch is a frontend for many different emulators. It uses libretro cores one downloads through the application (which are the actual emulators), and is basically a one-stop shop as it can unify settings, control mappings, etc. Very useful for someone who wants it all in one place.
RetroArch is available for numerous platforms, such as Windows, Android, macOS, even other existing consoles. [This] is EmuGen’s “for dummies” guide to getting it set up, and [this] is a more in-depth guide to general usage.
As before, check EmuGen for any needed BIOS files.
Nintendo
NES/Famicom: Mesen, Nestopia UE * BIOS file required for Famicom Disk System emulation SNES: bsnes, Snes9x * There’s three versions of bsnes: Performance, Balanced, and Accuracy * Snes9x 2005 can run Super Mario World hacks that relied on ZSNES’s flawed sound emulation Virtual Boy: MednafenGame Boy/Color: SameBoy Game Boy Advance: VBA-M or mGBA * VBA-M’s libretro core will only run GBA games, mGBA’s will run the entire Game Boy line N64: Mupen64Plus-Next * paraLLEl is worth trying but it’s hit or miss Nintendo DS: DeSmuME or melonDS * melonDS supports DSi specific features * BIOS files not required but are recommended Nintendo 3DS: Citra * Citra is experimental, do not expect full speed Gamecube/Wii: Dolphin * Recommend the standalone version as the libretro core isn't great
*Wii U and Switch are not supported by libretro at this time
SEGA
All systems prior to Saturn: MAME, PicoDrive, or Genesis Plus GX * 32X through libretro is only possible with MAME or PicoDrive as a core* BIOS files required for 32X and Mega CD emulation Saturn: Mednafen * BIOS files required for Saturn emulation--Mednafen is picky about this Dreamcast: Flycast
Sony
PlayStation: Mednafen * BIOS files required for PSX emulation--Mednafen is picky about this* Mednafen PSX HW adds an OpenGL renderer PSP: PPSSPP * Recommend using the standalone version as that is more frequently updated PlayStation 2: Play! * Recommend using PCSX2 standalone, Play! isn't great * BIOS files required for PS2 emulation
*PS3 or higher is not supported by libretro at this time
Last updated on February 27, 2024. Please reblog from source when possible to make sure you have the most recent version of this post.
8 notes
·
View notes
Text
Handling PS1 Save Games for RetroArch
So I recently finished Resident Evil: Director’s Cut, and I wanted to play around with the unlimited weapons you get from clearing the game with certain requirements. However, since I was too lazy to try and beat the game under three hours or on the Advanced Mode, I decided to see if I could download a save game for RetroArch to do it. It took some doing, but I managed to figure it out. I posted my process in a Discord, and I was asked to archive, so I’ve copied it here.
By default, Beetle PSX uses the 'Libretro' setting for save files, meaning that each save file will be saved as an '.srm' You can switch it, however, to the 'Mednafen' setting, wherein the saves will be in '.mcr' format. I was able to download '.gme' save files from GameFAQs, but those won't work directly with BeetlePSX, so they have to be converted. I used this program, MemcardRex (https://shendosoft.blogspot.com/2014/01/memcardrex-18-released.html) With it, I was able to convert the '.gme' into a '.mcr.'
The part I struggled with was getting the game to recognize the file. What you have to do is set Beetle PSX to use the 'Mednafen/.mcr.' format, then reset RetroArch and run the game again, so it can generate the memory card files. Two files are generated, depending one your settings; one for each memory card. They are displayed as such.
𝚁𝚎𝚜𝚒𝚍𝚎𝚗𝚝 𝙴𝚟𝚒𝚕 - 𝙳𝚒𝚛𝚎𝚌𝚝𝚘𝚛'𝚜 𝙲𝚞𝚝 - 𝙳𝚞𝚊𝚕 𝚂𝚑𝚘𝚌𝚔 𝚅𝚎𝚛. (𝚄𝚂𝙰).0.𝚖𝚌𝚛 𝚁𝚎𝚜𝚒𝚍𝚎𝚗𝚝 𝙴𝚟𝚒𝚕 - 𝙳𝚒𝚛𝚎𝚌𝚝𝚘𝚛'𝚜 𝙲𝚞𝚝 - 𝙳𝚞𝚊𝚕 𝚂𝚑𝚘𝚌𝚔 𝚅𝚎𝚛. (𝚄𝚂𝙰).𝟷.𝚖𝚌𝚛
The '.0.' and the '.1.' between the game name and the file extension are important, since you want take the downloaded save game you converted with MemCardRex, and rename exactly like that, with the numbers in place. The number refer to the memory card index, with '0' being Slot 1, and '1' being slot 2, by default. From there, you take your converted save file, and drop it into the save game folder in the RetroArch directory, making sure to overwrite the original.
You might want to back up your original save files in a different folder when doing this, and you may want to make sure you copy them back into the RetroArch saves folder instead of moving them directly, as I ran into an interesting issue, related to save-states.
So I had the thought to make a save-state, and see if I could switch my save system back to the LibRetro system, and save with my own personal save games. I moved my save games back into the RetroArch save games folder, and loaded up the state. However, I found that my save games were not there, just the save from the file I downloaded. If you make a save-state on a game with save files present, those save files are retained with the save-state. I deleted the save files out of the folder, and when I started up the game, there were no save files found when attempting to load a game from the main manu. However, when I loaded the state and went to the save/load screen, the save files were there. Even when I quit out and started the game again, I went to 'load game' and the save files had returned. Be sure to take care when using save-states that you don’t lose or overwrite your save.
1 note
·
View note
Text
Repositórios Libretro foram hackeados e arquivos foram corrompidos
Repositórios Libretro foram hackeados e arquivos foram corrompidos
A comunidade responsável pelo famoso emulador de jogos antigos RetroArch sofreu um grave ataque hacker. Os repositórios Libretro foram hackeados e arquivos foram corrompidos. Além do RetroArch, o Libretro também desenvolve a distro Lakka.
Nele, eles relatam que os invasores conseguiram obter acesso ao buildbot e aos repositórios no GitHub. Também no GitHub, os invasores tiveram acesso a todos os…
View On WordPress
0 notes
Text
SpreadShotNews Podcast 291: Gandalf versión minita - Temporada de atemporalismo Edition
¡Ni la regla 63 podrá salvarlos!¡Porque es martes y SpreadShotNews Podast ya llego!
En este episodio:
Maxi termina el Suikoden y nos cuenta sus impresiones finales, mientras Nico se prepara para su viaje contandonos que onda el Dragon Quest Builders.
La Main Quest de hoy esta patrocinada por Neko Bacchiani que nos dejo una carta abierta de la comunidad de desarrollo de las herramientas de emulacion libretro y lo que eso significa para el futuro de la industria de la emulacion.
Para finalizar, en el Special Move ambos recomiendan el mas reciente podcast de giantbomb, All Systems Goku, donde Jeff y Dan, absolutos neofitos del anime, ven por primera vez Dragon Ball Kai.
Por ultimo, recuerden que ahora nos pueden escribir preguntas directamente a traves de google forms en el siguiente link: https://goo.gl/forms/sLLtI29yk2Qw2zFB2
0 notes