#manual settings
Text

#ok sorry for mia i have been desperately trying to get all my ducks in a row re: new home#i have to do all my own landscaping and have vastly overestimated my ability to efficiently complete manual labor#but after a long day of installing chicken wire to keep the cats from escaping i am now stoned and filled with donuts 🥰#i still have to locate and procure a dining set but god i am so close to never having to exert energy ever again#me
3K notes
·
View notes
Text
My GIF Making process: Screen capturing using MPV player, Organizing files, 3 Sharpening settings, Basic Coloring PSD + Actions set

This is a very long post so heads up.
I’ll try to be as thorough and true as much as possible to the way I make my gifs (I already use Photoshop Actions which I’ve long since set up but now for this tutorial I’m reviewing them to show you the exact steps I’ve learned to create my gifs 😃) and present them to you in a semi-coherent way. Also, please bear with me since English is my second language.
First things first. Below are the things and tools we need to do this:
Downloaded 4K or 1080p quality videos (let’s all assume we know where to get these—especially for high definition movies and tv series—so this post doesn’t get removed, okay? 😛)
Adobe Photoshop CC or the CS versions can work as well, but full disclosure I haven’t created gifs using the CS versions since 2020. I’m currently using Adobe Photoshop 2024.
mpv player. Use mpv player to get those frames/screenshots or any other video player that has a screen grabber feature. I’ve used adapter for the longest time but I’ve switched to mpv because the press to screenshot feature while the video is playing has been a game changer not to mention ultimate time saver for me. For adapter you need to play it in another video player (like VLC player), to get the start and end timestamps of the scene you want to gif which takes me ages before I can even open Photoshop.
Anyway! Please stop reading this post for a moment and head over to this amazing tutorial by kylos. She perfectly tells you how to install and use mpv player, both for Mac and Windows users.
One thing I have to share though, I had a tough time when I updated my MacOS to Sonoma since MPV is suddenly either duplicating frames or when I delete the duplicates the player seems to be skipping frames :/ I searched and found a solution here, though it didn’t work for me lol. My workaround for this in the meantime is decreasing the speed down to 0.70 then start screenshotting—it’s not the same pre Sonoma update but it works so I’ll have to accept it rather than have jumpy looking gifs.
Now, after this part of kylos’ tutorial:

you can continue reading the following sections of my gif tutorial below.
I want to share this little tip (sorry, this will only cater to Mac users) that I hope will be helpful for organizing the screenshots that MPV saved to the folder you have selected. Because believe me you don’t want to go through 1k+ of screenshots to select just 42-50 frames for your gif.
The Control + Command + N shortcut
This shortcut allows you to create a new folder from files you have pre-selected. As you can see below I have already created a couple of folders, and inside each folder I have selected screenshots that I want to include in one single gif. It's up to you how you want to divide yours, assuming you intend to create and post a Tumblr gifset rather than just one gif.

Another tip is making use of tags. Most of, if not all the time, I make supercorp gifs so I tag blue for Kara and red (or green) for Lena—just being ridiculously on brand and all that.
Before we finally open Photoshop, there's one more thing I want to say—I know, please bear with me for the third? fourth? time 😅
It's helpful to organize everything into their respective folders so you know the total number of items/frames you have. This way, you can add or delete excess or unnecessary shots before uploading them in Photoshop.
For example below there are 80 screenshots of Kara inside this folder and for a 1:1 (540 x 540 px) Tumblr gif, Photoshop can just work around with 42-50 max number of frames with color adjustments applied before it exceeds the 10 MB file size limit of Tumblr.

Sometimes I skip this step because it can be exhausting (haha) and include everything so I can decide visually which frames to keep later on. You'll understand what I mean later on. But it's important to keep the Tumblr 10 MB file size limit in mind. Fewer frames, or just the right amount of frames, is better.
So, with the screenshot organization out of the way, let's finally head over to Photoshop.
Giffing in Photoshop, yay!
Let’s begin by navigating to File > Scripts > Load Files into Stack…

The Load Layers window will appear. Click the Browse button next.
Find your chosen screenshots folder, press Command + A to select all files from that folder then click Open. Then click OK.
After importing and stacking your files, Photoshop should display the following view:

By the way, I'll be providing the clip I've used in this tutorial so if want to use them to follow along be my guest :)
If you haven't already opened your Timeline panel, navigate to Windows > Timeline.
Now, let's focus on the Timeline panel for the next couple of steps.
Click Create Video Timeline, then you’ll have this:

Now click the menu icon on the top right corner then go to Convert Frames > Make Frames from Clips

Still working on the Timeline panel, click the bottom left icon this time—the icon with the three tiny boxes—to Convert to Frame Animation
Select Make Frames From Layers from the top right corner menu button.
So now you have this:

Go and click the top right menu icon again to Select All Frames
Then click the small dropdown icon to set another value for Frame Delay. Select Other…

The best for me and for most is 0.05 but you can always play around and see what you think works for you.
Click the top right menu icon again to Reverse Frames.
I think Photoshop has long since fixed this issue but usually the first animation frame is empty so I just delete it but now going through all these steps there seems to be none of that but anyways, the delete icon is the last one among the line of feature buttons at the bottom part of the Timeline panel.
Yay, now we can have our first proper GIF preview of a thirsty Lena 😜

Press spacebar to watch your gif play for the very first time! After an hour and half of selecting and cutting off screenshots! 😛 Play it some more. No really, I’m serious. I do this so even as early (lol) as this part in the gif making process, I can see which frames I can/should delete to be within the 10 MB file size limit. You can also do it at the end of course 🙂
Now, let’s go to the next important steps of this tutorial post which I’ve numbered below.
Crop and resize to meet Tumblr's required dimensions. The width value should be either 540px, 268px, or 177px.
Convert the gif to a Smart Object for sharpening.
Apply lighting and basic color adjustments before the heavy coloring. I will be sharing the base adjustments layers I use for my gifs 😃.
1. Crop and Resize
Click on the Crop tool (shortcut: the C key)

I like my GIFs big so I always set this to 1:1 ratio if the scene allows it. Press the Enter key after selecting the area of the frame that you want to keep.
Side note: If you find that after cropping, you want to adjust the image to the left or another direction, simply unselect the Delete Cropped Pixels option. This way, you will still have the whole frame area available to crop again as needed and as you prefer.
Now we need to resize our gif and the shortcut for that is Command + Opt + I. Type in 540 as the width measurement, then the height will automatically change to follow the ratio you’ve set while cropping.
540 x 540 px for 1:1
540 x 405 px for 4:3
540 x 304 px for 16:9
For the Resample value I prefer Bilinear—but you can always select the other options to see what you like best.
Click OK. Then Command + 0 and Command + - to properly view the those 540 pixels.

Now we get to the exciting part :) the sharpen settings!
2. Sharpen
First we need to have all these layers “compressed” intro a single smart object from which we can apply filters to.
Select this little button on the the bottom left corner of the Timeline panel.


Select > All Layers
Then go to Filter > Convert for Smart Filters
Just click OK when a pop-up shows up.
Now you should have this view on the Layers panel:

Now I have 3 sharpen settings to share but I’ll have download links to the Action packs at the end of this long ass tutorial so if you want to skip ahead, feel free to do so.
Sharpen v1
Go to Filter > Sharpen > Smart Sharpen…
Below are my settings. I don’t adjust anything under Shadows/Highlights.
Amount: 500
Radius: 0.4
Click OK then do another Smart Sharpen but this time with the below adjustments.
Amount: 12
Radius: 10.0

As you can see Lena’s beautiful eyes are “popping out” now with these filters applied. Click OK.
Now we need to Convert to Frame Animation. Follow the steps below.
Click on the menu icon at the top right corner of the Timeline panel, then click Convert Frames > Flatten Frames into Clips
Then Convert Frames > Convert to Frame Animation
One more click to Make Frames From Layers
Delete the first frame then Select All then Set Frame Delay to 0.05

and there you have it! Play your GIF and make sure it’s just around 42-50 frames. This is the time to select and delete.
To preview and save your GIF go to File > Export > Save for Web (Legacy)…
Below are my Export settings. Make sure to have the file size around 9.2 MB to 9.4 MB max and not exactly 10 MB.

This time I got away with 55 frames but this is because I haven’t applied lighting and color adjustments yet and not to mention the smart sharpen settings aren't to heavy so let’s take that into consideration.
Sharpen v1 preview:

Sharpen v2
Go back to this part of the tutorial and apply the v2 settings.
Smart Sharpen 1:
Amount: 500
Radius: 0.3
Smart Sharpen 2:
Amount: 20
Radius: 0.5
We’re adding a new type of Filter which is Reduce Noise (Filter > Noise > Reduce Noise...) with the below settings.

Then one last Smart Sharpen:
Amount: 500
Radius: 0.3
Your Layers panel should look like this:

Then do the Convert to Frames Animation section again and see below preview.
Sharpen v2 preview:

Sharpen v3:
Smart Sharpen 1:
Amount: 500
Radius: 0.4
Smart Sharpen 2:
Amount: 12
Radius: 10.0
Reduce Noise:
Strength: 5
Preserve Details: 50%
Reduce Color Noise: 0%
Sharpen Details: 50%
Sharpen v3 preview:

And here they are next to each other with coloring applied:
v1

v2

v3

Congratulations, you've made it to the end of the post 😂
As promised, here is the download link to all the files I used in this tutorial which include:
supercorp 2.05 Crossfire clip
3 PSD files with sharpen settings and basic coloring PSD
Actions set
As always, if you're feeling generous here's my Ko-fi link :) Thank you guys and I hope this tutorial will help you and make you love gif making.
P.S. In the next post I'll be sharing more references I found helpful especially with coloring. I just have to search and gather them all.
-Jill
#tutorial#gif tutorial#photoshop tutorial#gif making#sharpening#sharpening tutorial#photoshop#photoshop resources#psd#psd coloring#gif coloring#supercorp#supercorpedit#lena luthor#supergirl#my tutorial#this has been a long time coming#guys. i'm BEGGING you. use the actions set - it was a pain doing all this manually again ngl LMAO#i've been so used to just playing the actions#so this has been a wild refresher course for me too 😆
120 notes
·
View notes
Text

Pin boy at a bowling alley in Clinton, Indiana. Photographed 1940 by Arthur Rothstein for the Farm Security Administration.
83 notes
·
View notes
Text

pov dabi mugs you in an alleyway and steals your taco bell 20% off coupon but leaves the rest bc you're a fan and he can respect that
#dabi#bnha#mha#my hero academia#boku no hero academia#mha dabi#mine#my art#halftones my beloved#artists on tumblr#I fucked up my halftone brush setting halfway through this and then reset it#but the reset version didn't do what I liked about it and i have NO IDEA WHAT I DID TO MAKE IT GOOD BEFORE#so I had to manually adjust the brush settings every time I wanted a new effect#like a PLEBIAN
83 notes
·
View notes
Text
GIVE ME ALL YOUR LUNCH MONEY!!!!
#postal dude#postal#postal 1#manual art dude#idk what else to call him lol does it really matter#i may or may not set him on fire 🤔
125 notes
·
View notes
Text


Agust D 'Amygdala' MV & Jacket Shoot Sketch
#agust d#min yoongi#bts#suga#bts suga#bangtan#bangtan sonyeondan#bts gifs#suga gifs#my gifs#his handssssssssss#these are all over the place#exposure was weird in this video#oh well#anyway off topic but it made me smile that he has his camera in manual mode and raw#like obviously i knew he's a photographer but i didn't notice when i was watching the vid initially that he was shooting in manual and raw#and while i was making that gif i saw it and it made me smile#basically all that just means he knows what he's doing#he's also got it set to manual focus which fuckin SWOON#i can't for the life of me shoot in mf lol#amygdala
62 notes
·
View notes
Text
dishonored AU where everything is the same, but the Outsiders Mark is a glitter tattoo
#dishonored#the outsider#he has to apply it manually too#just sits down his Marked#puts the glue on their hand#and carefully applies the glitter before gently blowing on it to help it dry/set
123 notes
·
View notes
Text
ROMAN APOLLO

#im so happy with how the face tirned out in this#my art <3#greek mythology#apollo#greek gods#toa#trials of apollo#apollon#olympians#phoebus apollo#is there no default tag setting becaise he is all i draw and im tired of putting them manually all the time
40 notes
·
View notes
Text


19.11.23, sunday
I listened to Succession soundtrack a lot today and had about the most productive day I’ve had in so so long
things done today:
7h of coding
went to my sister’s kid’s birthday party (mario theme 🍄)
#even tho during the first 4 hours it was me slowly realizing that I had configured/set up my one project wrong somehow#and I’m so far gone with it now that idk how to rly fix it other than starting again and trying to speedrun all I’ve done so far#aka the 50hours I’ve spent on it#but i’m hoping I’ll get it to function by just fucking around with adding some files & paths manually (i doubt that’ll work)#that’s a big yikes that I would not have time for#but I’ve done enough to get a grade out of that course but rn it’d be 3/5 and I want 5/5 bc it’s an easy course to get that from#and god knows I need to do everything in my power to raise my gpa#studyblr#bookblr#booklr#aesthetic#books#study#reading#read#book#dark academia#chaotic academia#november 2023#2023
154 notes
·
View notes
Text
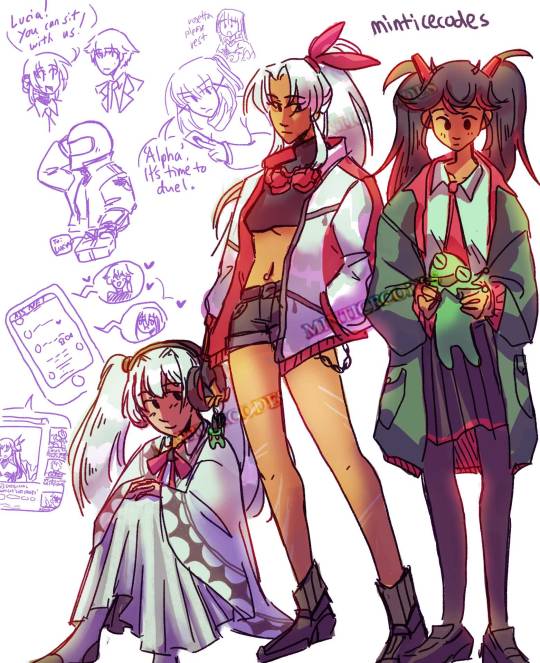
[ID: Coloured cartoon/anime illustration of 3 women (Lucia: Plume, Lucia: Crimson Weave, Luna: Laurel) in regular attire, with yellow lighting. They look like a schoolgirl, biker chick and a comfy gamer respectively. They're described further in detail ahead. In the background are doodles of several characters.
Lucia Plume stands, looking down wide eyed at a kermit plush in her hands. She wears an oversized green coat with red lining over a uniform (blouse, red tie, black skirt with red lining, stockings, leather shoes). Her skin is tan, her pigtails are done with rectangular red bobbles. Tiny horns poke out of her hair.
Lucia Crimson Weave stands next to Plume with a wide legged, confident stance, hand in jacket pocket. She gazes to Plume from aside. She's tan, her white high ponytail done with a large bunnyear red ribbon. She wears a white jacket with red lining/accents and decorative zippers, red goggles around her neck, black turtleneck crop top exposing some underboob, navel piercing, denim shorts with belt chain, black fingerless gloves and ankle boots. Her legs feature several scratch scars. From her left hand dangles keys and a frog keychain.
Luna sits with fingers clasped across knees, looking up at both Lucias with a slight smile. She's pale. Black bobbles tie up her shorter white twin tails. She wears black headphones with red accents. Draped over her is a thin white cardigan edged with a grey diamond pattern. Under is a blouse with a red ribbon and grey moon charm, anklelength white skirt, and grey socks.
In the background are several doodles of other characters.
Liv and Lee in school uniform. Liv has a braided bun and cochlear implant. Lee has a blazer and pimples and a neutral look. Liv smiles wide as she says 'Lucia! You can sit with us!'
Commandant (in biker helmet and jacket with gray raven emblem) rubs their head awkwardly while presenting a wrapped gift with tag reading 'to: Lucia'
Rosetta (in neck brace and arm cast) glares determinedly with yugioh card between 2 fingers, saying ''Alpha'. It's time to duel.' Behind her Diana in a deer sweater worriedly says 'rosetta please rest.'
Phone with group chat named 'ASS NET'. 3 speech bubbles surround it: Exaggerated smiling chibi Roland emanating hearts. 1 heart bounces off a tearful chibi goth Lamia. 1 screenshot of of a youtube page featuring Lamia: Lost Lullaby's mermaid design. End ID.]
punishing gray raven but it's just the postapocalyptic rpg run by a very determined Luna for her younger sister and her friends. Chapter 1 to 8 is their shaky start to getting used to the system before they hit their stride, Luna gets better at narration, and a couple very weird dice rolls lead to wild story adaptation.
Read more for closeup of the phone
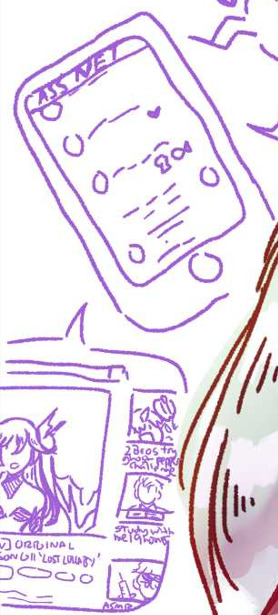
[ID: Luna's phone. The ASS NET group chat features some reaction emojies: Heart, skull, fish.
The youtube page is a torso shot of Lamia: Lost Lullaby. The cut off title is 'v] ORIGINAL SONG || 'Lost lullaby'. The 3 recommended videos are:
2 Bros try ghost pepper challenge. Thumbnail is chibi wide smiling Kamui, angry Camu and a pepper.
Study with me | 9 hours. Thumbnail is Chrome at a desk with a book.
ASMR. Thumbnail is blank eyed Wanshi with a syringe. End ID]
#punishing gray raven#pgr#pgr lucia#pgr luna#pgr alpha#alpha pgr#lucia pgr#made with krita#luna: Lucia I'm reworking this enemy's stats. it's no fun for little Lucia to play against her#Lucia (just copied lil Lucia's character and bumped the numbers because the manual is 40 pages long): fine ok#Lucia (describing her reworked character): Her curse is locked in her right arm. Also one eye blazes blue when she does this move#Luna (remembering Lucia's hatsune miku phase): Run that character design by me again.#Luna: You can't reason with this enemy. The pain in her life has set her on this path. She will pave the way for humanity's reckoning.#Lil Lucia and Commandant about to both roll Nat 20s: :]
69 notes
·
View notes
Text
Can I just say
I hate auto-syncing services that you have to go through hoops to disable
Microsoft OneDrive, Adobe CC, you know who you are. Fuck you.
#snake talks#delete later#vent#both are gone from my desktop. pulverized#Also some settings being inaccessible without Cloud so I have to go digging around system files and editing them manually. Fuck that
145 notes
·
View notes
Text


8.15.2024 — 6:47pm -> 8:17pm
#went up the mountain to see the sunset for my anniversary - got ghosts instead!#jk its a storm; luckily no lightning#(happy one year to my lil polycule btw)#I fucken love this set already. I have a few more to process before it’s complete - but these were the most exciting#this is from Mt. Blue Sky in Colorado; nearby to Idaho Spgs. it’s closed until 2026 - we managed to make it up on literally the final day#from around 14000ft or so#they’re gonna repair the fucked up roads and reopen in ‘26#shot on my wack ass lomo lenses. I used AI denoising to clean up the image quality and then manually re-noised everything bc I’m obsessive#my art#aesthetic#art#artwork#webcore#internetcore#glitchcore#abstract#artists on tumblr#photography#nature photography#flash photography#grunge#noise
47 notes
·
View notes
Text
i'm sure i am not the only one who is very concerned about the ~4 hours between when the midjourney change was made, and I knew to go opt out of it, so; glaze does not need to be on all your works to be effective. in the same way that one artist glazing all their works will ruin a broad, multi-artist dataset, glazing your works moving forward will ruin any dataset trained on you. if out of 100 comics I've posted, 10 are glazed, a dataset trained on all of my comics will not be able to make anything similar to my style. anyways. go download glaze.
#ofc a manual review of the data set could pick out anything glazed. ig the point for me is to force that manual review#though wider adoption of glaze is not a perfect or even workable solution for many. my computer is 10 years old and runs glaze but#thats pretty lucky on my part. and the '100 comics' thing isnt perfect bc. im not using glaze on my comics. it looks really bad.#and there's not a real risk of someone using my art to train a data set bc. like. cartoons exist.#like you probably SHOULD glaze everything especially from now on#but if like me the idea of trawling your entire internet presence seems so daunting youd almost sooner delete it all#posting Some poison is better than posting No poison#but most important is not being paralyzed into inaction by how daunting the task is. even if that does mean no poison#im trying out what works and what does not right now for me. and i guess my advice is that you do too even if that means making a pillowfor#lol
64 notes
·
View notes
Text
reading the "after the mind, the world again" ttrpg rulebook and im in love with it

my god i am so affectionate towards them. but MAN this is so fucking cool i wish i wasnt a scared little guy so i could play ttrpgs hkjhd...
#chemi chats#i would love to play any facet i think. preference for motorics or psyche but ough... all of this is so cool :']#however in the way the game is set up it's meant to be argumentative and while i love seeing it i dont want to uh. play it hkjgh#SCARY!! SCARY TO ME!! im nervous and non confrontational!! so i will just read the manuals and think about it really hard!!#this is so interesting to me because i was literally planning a skill ttrpg before i found this one!! my god they did it so much smarter.#i like how they do it here a lot more because i was planning on making character things and move sets for each individual of the 24 skills.#mine would have been much more skills inside-the-mind focused than outside world focused which isn't everyone's ideal#this makes way more sense lmao <3 i will return to my previous idea now that i dont have to fulfill that ecological niche#[gripping my planning document With Force]#task: message please survive
52 notes
·
View notes
Text

me sowing: haha yeah voter fraud could be fun
me reaping: wtf.
#iirc i do think in my original post i said like. i would prefer for voter fraud to only be like#3-5 votes a day per person :sob: but also it does feel like#well. it is a bit arbitrary i suppose. like. if ur reading this mysterious ratgrindr voter im not so much mad at you#as i am mad at myself#bc i do feel like this is wrong. but also i dont have much precedent to go on. and i should have SET a precedent#like i guess i can go through the google sheets and manually eliminate large clusters of the same vote in the same timespan and put it back#to 5 in each voting block.#but im worried that seems too much like electioneering on my end.
26 notes
·
View notes
Text


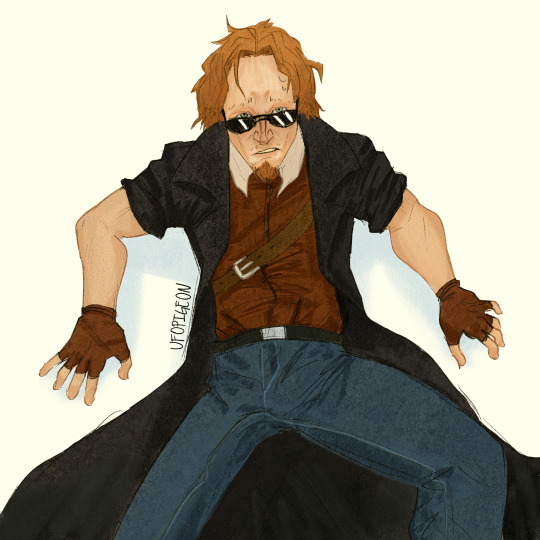
A man powerful enough to freeze the whole of Vaugarde in time. Very little is known about him.
THE KING STIMBOARD (Greyscale Edition)
credits:
💧 🛡 💧
✊ 👑 ✊
💧 🛡 💧
[ids in alt]
#isat stimboards#isat#in stars and time#the king isat#white#black#gray#grey#irl people#rain stim#hands#fire#water stim#fire stim#glass shattering#physical stim#sand stim#not tagging this as spoilers bc bro is straight up in the manual.#like. youd think he is spoilers but he Really Isn't.#at least his appearance isnt.#aimed for one that isnt too spoiler-y. cannot promise that for the color set
30 notes
·
View notes
Last Seen Blogs
classysexybeau
All Beautiful
swapsrus
Swaps’R’Us

clawfootenergy
Clawfoot Tub Energy

beepala
The clouds! The clouds!

thedollfacedames
The Dollface Dames Burlesque