#onclick
Explore tagged Tumblr posts
Visit Tumblr Blog
Explore Tumblr blogs with no restrictions, modern design and the best experience.
Last Seen Tumblr Blogs


Fun Fact
Tumblr was acquired by Yahoo for $1.1B in 2013.
Text
[solved] onclick JavaScript button in image description not working in WordPress
[solved] onclick JavaScript button in image description not working in WordPress
When working with WordPress, there may be instances where the onclick JavaScript button in the image description is not working. This can be caused by a number of issues relating to how WordPress processes and serves content. In this article, we will explore the common reasons for this issue and provide solutions to fix WordPress. Possible Causes of onclick JavaScript Button Issues in Image…
View On WordPress
0 notes
Text
React on Event Types

React is a popular JavaScript library used for building user interfaces. One of its key features is the ability to handle events efficiently and effectively. In this article, we will explore different event types in React and how to handle them.

1. Introduction to React Events
In React, events are actions or occurrences that happen in the browser, such as a button click, input change, or form submission. React provides a synthetic event system that normalizes event handling across different browsers and provides additional functionality for managing UI updates and state.
2. Event Handling in React
Event handling in React can be done in two main ways: using class components and functional components. 2.1 Event Handling in Class Components In class components, event handling involves creating event handler methods. For example, to handle a button click event, you can define an onClick event handler method: class MyComponent extends React.Component { handleClick() { // Event handler logic } render() { return ( Click ); } } 2.2 Event Handling in Functional Components In functional components, event handling can be achieved using the useState hook along with event handler functions. For instance, to handle an input field change event, you can define an onChange event handler function: import React, { useState } from 'react'; function MyComponent() { const = useState(''); function handleChange(event) { setValue(event.target.value); } return ( ); }
3. Common Event Types
React provides support for various event types. Here are some of the commonly used event types: 3.1 onClick Event The onClick event occurs when an element is clicked, typically used with buttons or links. When a user clicks the element, the event handler is invoked, and the specified logic is executed. 3.2 onChange Event The onChange event occurs when the value of an input field changes, commonly used for handling text input. Whenever the input value changes, the event handler is called, and the UI can be updated based on the input value. 3.3 onSubmit Event The onSubmit event occurs when a form is submitted, usually used for form submission handling. When a user submits the form, the event handler is triggered, and the form data can be processed. 3.4 onMouseOver Event The onMouseOver event occurs when the mouse pointer is moved over an element, often used for tooltips or dropdown menus. When a user hovers over the element, the event handler is invoked, and the associated actions related to that element can be performed.
4. Writing Event Handler Functions
In React, event handler functions are typically written within the component where the event occurs. The event handler function is responsible for updating the state or executing other logic based on the user's action. class MyComponent extends React.Component { handleClick() { // Event handler logic } render() { return ( Click ); } } import React, { useState } from 'react'; function MyComponent() { const = useState(''); function handleChange(event) { setValue(event.target .value); } return ( ); }
5. Event Propagation and Default Behavior
React provides mechanisms to control event propagation and default behavior. Event propagation refers to the process of an event being passed to its parent components, while default behavior refers to the browser's default actions. To control event propagation, you can use the stopPropagation() method, which prevents the event from being propagated to the parent components. To prevent the default behavior, you can use the preventDefault() method, which stops the browser from performing its default action.
6. Event Delegation
Event delegation in React refers to handling events on parent elements instead of individual child elements. This approach simplifies event handling for dynamically generated elements. By using event delegation, there is no need to attach event handlers to each individual child element.
7. Passing Parameters to Event Handlers
There are scenarios where you need to pass parameters to event handlers in React. For example, if you want to obtain information about a specific item when clicking on a list item. In such cases, you can pass additional parameters to the event handler.
8. Event Handling with External Libraries in React
React provides integration support for various external libraries. When using external libraries, you need to follow their event handling approaches. Integrating events between React components and external libraries requires careful consideration and may require additional configuration or measures, if necessary.
9. Event Optimization in React
In React, event optimization can be crucial for performance improvement. Event optimization aims to prevent unnecessary re-renders and enhance the responsiveness of your application. Techniques such as function binding, memoization, and maintaining immutability can be applied for event optimization.
10. Conclusion
In this article, we explored event handling in React. React offers a wide range of event types that enable you to handle user interactions and implement dynamic UIs. We learned how to write event handler functions, control event propagation and default behavior, use event delegation, pass parameters to event handlers, integrate events with external libraries, and optimize events in React. Read the full article
0 notes
Text
The way I'm trying to re-teach myself Javascript just for giggles in a fic I'm writing

1 note
·
View note
Text
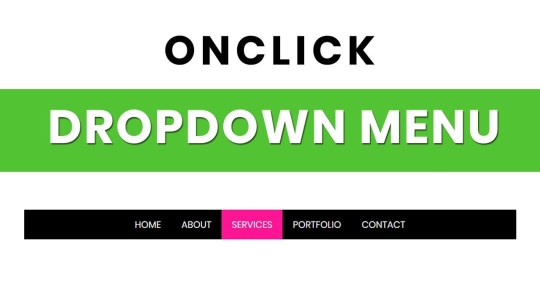
Dropdown Menu on Click
#dropdown menu on click#navbar#navigation menu#onclick dropdown menu#html css#code#frontenddevelopment#css#learn to code#css3#html#divinector#javascript
0 notes
Text
How do I fucking....... iterate through HTML selecting all the text that's rendered as italicized/bolded/etc via CSS rules and such so I can wrap it in 'i' 'b' tags so I can easily strip out all the span class='msword-keysmash12 calibre-keysmash21 googledocs-keysmash76' onclick='popupAd()' style='text-decoration: migraineaura; font-size: 1.0002em; color: #000001;'
Programmatically I mean I don't want a GUI tool. I would prefer Ruby but I imagine that Javascript is the Sane Person way to do this
#'where are you encountering this' IT'S EVERYWHERE#i'm getting rid of all the word processors we're going back to text editors. stop practicing law and writing books until i'm done.
10 notes
·
View notes
Text
Okay guys ...
New here on Tumblr - and of course, I’m not at home right now to record fancy code edits or aesthetic dev setups. Still, I’m too impatient not to launch my first post, so here we go.
This is some ancient code from my early days. I’ve leveled up since then, big time. But hey, there’s beauty in the basics — and some folks appreciate that raw, beginner energy.
We’ve got 4 nav sections with onclick actions - super easy to tweak or scale up if you wanna go wild. Plus a few cozy color effects sprinkled in for good vibes. TL;DR: clean, simple, and totally beginner-friendly.
6 notes
·
View notes
Text

laprak sekebon
"-prompt(8)-" '-prompt(8)-' ";a=prompt,a()// ';a=prompt,a()// '-eval("window['pro'%2B'mpt'](8)")-' "-eval("window['pro'%2B'mpt'](8)")-" "onclick=prompt(8)>"@x.y "onclick=prompt(8)><svg/onload=prompt(8)>"@x.y <image/src/onerror=prompt(8)> <img/src/onerror=prompt(8)> <image src/onerror=prompt(8)> <img src/onerror=prompt(8)> <image src =q onerror=prompt(8)>
3 notes
·
View notes
Text
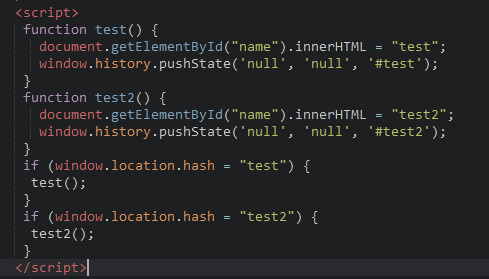
am i stupid. in Theory the url shouldn't update to /#test2 until the function is called and yet. whenever u load the page the url updates. it uses an onclick............
3 notes
·
View notes
Text
#Playstation7 #framework #BasicArchitecture #RawCode #RawScript #Opensource #DigitalConsole
To build a new gaming console’s digital framework from the ground up, you would need to integrate several programming languages and technologies to manage different aspects of the system. Below is an outline of the code and language choices required for various parts of the framework, focusing on languages like C++, Python, JavaScript, CSS, MySQL, and Perl for different functionalities.
1. System Architecture Design (Low-level)
• Language: C/C++, Assembly
• Purpose: To program the low-level system components such as CPU, GPU, and memory management.
• Example Code (C++) – Low-Level Hardware Interaction:
#include <iostream>
int main() {
// Initialize hardware (simplified example)
std::cout << "Initializing CPU...\n";
// Set up memory management
std::cout << "Allocating memory for GPU...\n";
// Example: Allocating memory for gaming graphics
int* graphicsMemory = new int[1024]; // Allocate 1KB for demo purposes
std::cout << "Memory allocated for GPU graphics rendering.\n";
// Simulate starting the game engine
std::cout << "Starting game engine...\n";
delete[] graphicsMemory; // Clean up
return 0;
}
2. Operating System Development
• Languages: C, C++, Python (for utilities)
• Purpose: Developing the kernel and OS for hardware abstraction and user-space processes.
• Kernel Code Example (C) – Implementing a simple syscall:
#include <stdio.h>
#include <unistd.h>
int main() {
// Example of invoking a custom system call
syscall(0); // System call 0 - usually reserved for read in UNIX-like systems
printf("System call executed\n");
return 0;
}
3. Software Development Kit (SDK)
• Languages: C++, Python (for tooling), Vulkan or DirectX (for graphics APIs)
• Purpose: Provide libraries and tools for developers to create games.
• Example SDK Code (Vulkan API with C++):
#include <vulkan/vulkan.h>
VkInstance instance;
void initVulkan() {
VkApplicationInfo appInfo = {};
appInfo.sType = VK_STRUCTURE_TYPE_APPLICATION_INFO;
appInfo.pApplicationName = "GameApp";
appInfo.applicationVersion = VK_MAKE_VERSION(1, 0, 0);
appInfo.pEngineName = "GameEngine";
appInfo.engineVersion = VK_MAKE_VERSION(1, 0, 0);
appInfo.apiVersion = VK_API_VERSION_1_0;
VkInstanceCreateInfo createInfo = {};
createInfo.sType = VK_STRUCTURE_TYPE_INSTANCE_CREATE_INFO;
createInfo.pApplicationInfo = &appInfo;
vkCreateInstance(&createInfo, nullptr, &instance);
std::cout << "Vulkan SDK Initialized\n";
}
4. User Interface (UI) Development
• Languages: JavaScript, HTML, CSS (for UI), Python (backend)
• Purpose: Front-end interface design for the user experience and dashboard.
• Example UI Code (HTML/CSS/JavaScript):
<!DOCTYPE html>
<html>
<head>
<title>Console Dashboard</title>
<style>
body { font-family: Arial, sans-serif; background-color: #282c34; color: white; }
.menu { display: flex; justify-content: center; margin-top: 50px; }
.menu button { padding: 15px 30px; margin: 10px; background-color: #61dafb; border: none; cursor: pointer; }
</style>
</head>
<body>
<div class="menu">
<button onclick="startGame()">Start Game</button>
<button onclick="openStore()">Store</button>
</div>
<script>
function startGame() {
alert("Starting Game...");
}
function openStore() {
alert("Opening Store...");
}
</script>
</body>
</html>
5. Digital Store Integration
• Languages: Python (backend), MySQL (database), JavaScript (frontend)
• Purpose: A backend system for purchasing and managing digital game licenses.
• Example Backend Code (Python with MySQL):
import mysql.connector
def connect_db():
db = mysql.connector.connect(
host="localhost",
user="admin",
password="password",
database="game_store"
)
return db
def fetch_games():
db = connect_db()
cursor = db.cursor()
cursor.execute("SELECT * FROM games")
games = cursor.fetchall()
for game in games:
print(f"Game ID: {game[0]}, Name: {game[1]}, Price: {game[2]}")
db.close()
fetch_games()
6. Security Framework Implementation
• Languages: C++, Python, Perl (for system scripts)
• Purpose: Ensure data integrity, authentication, and encryption.
• Example Code (Python – Encrypting User Data):
from cryptography.fernet import Fernet
# Generate a key for encryption
key = Fernet.generate_key()
cipher_suite = Fernet(key)
# Encrypt sensitive user information (e.g., account password)
password = b"SuperSecretPassword"
encrypted_password = cipher_suite.encrypt(password)
print(f"Encrypted Password: {encrypted_password}")
# Decrypting the password
decrypted_password = cipher_suite.decrypt(encrypted_password)
print(f"Decrypted Password: {decrypted_password}")
7. Testing and Quality Assurance
• Languages: Python (for automated tests), Jest (for JavaScript testing)
• Purpose: Unit testing, integration testing, and debugging.
• Example Unit Test (Python using unittest):
import unittest
def add(a, b):
return a + b
class TestGameFramework(unittest.TestCase):
def test_add(self):
self.assertEqual(add(10, 20), 30)
if __name__ == '__main__':
unittest.main()
8. Order of Implementation
• Phase 1: Focus on core system architecture (low-level C/C++) and OS development.
• Phase 2: Develop SDK and start building the basic framework for UI and input management.
• Phase 3: Work on backend systems like the digital store and integrate with front-end UI.
• Phase 4: Begin rigorous testing and debugging using automated test suites.
This comprehensive approach gives you a detailed idea of how each component can be built using a combination of these languages and technologies. Each section is modular, allowing teams to work on different aspects of the console simultaneously.
[Pixel Art/Sprites/Buildinodels/VictoriaSecretPixelArtKit #Playstation7 #DearDearestBrands]

#victoriasecretrunway#runwaybattle#victoria secret fashion#victoria secert model#victoriasecret#victoria secret#VictoriaSecretRunwayBattle#capcom victoriasecret#capcom videogames#playstation7#ps7#deardearestbrands#capcom#digitalconsole#python#script#rawscript#raw code#framework#VictoriaSecretVideoGame#deardearestbrandswordpress
2 notes
·
View notes
Note
hi! i saw your ask to robin about making a website that involves a search/tag feature that works kind of like ao3's?
i was wondering if you'd mind explaining a little about how you're doing that, cause i've recently started trying to make a website that i want to have a similar function (but for photos of Queen because. autism) and i don't really know what i'm doing
no pressure obviously, i'll probably be able to figure it out on my own, but if you'd like to help that would be cool :)
Oh my god. You're asking for the autism to be unleashed
So! Basically, most of the magic is Javascript, and I know nearly nothing of Javascript -- I write, ask AI to help correct stuff, and rewrite lmfao (I personally use SheCodes AI but I'm sure any coding-oriented bot does the same thing. It was just the top result when I searched lmfao -- it also has classes embedded in the site and can recommend you classes based on what you're asking for help on)
Also, this is... not very good. But you have my complete and express permission to build on it lmfao (for example, you can't select more than one tag at once, which is... something that I've got to figure out how to do)
But! Here's the initial CSS (image-div being the class of all searchable images): .image-div { display: none; width: 100px; height: 100px; margin: 5px; border: 1px solid #ccc; background-size: cover; }
That's the easy part. It's just styling what you want to be shown -- but, if you do want the images to be visible before they've been searched, you can delete the display: none line (I THINK. I haven't messed around with this enough to be certain)
Aaaand the HTML:
<div id="tags"> <button onclick="showImages('silly')">Silly</button> <button onclick="showImages('city')">City</button> </div> <div id="image-gallery"> <div class="image-div silly" style="background-image: url('___');"></div> <div class="image-div silly" style="background-image: url('___');"></div> <div class="image-div city" style="background-image: url('___');"></div> </div>
I made the divs themselves be the images because I was trying to save on time lol. If you wanted to have more than just images inside each div, then just code as usual inside each div (you'll have to change the CSS a bit, too -- if you still want the CSS to apply to the images inside each div, then make the selector '.image-div > img' instead of just '.image-div'... I THINK. Either that or '.image-div 'img''. Maybe. I'll have to refresh my memory, sigh)
Now, Javascript:
function showImages(selectedTag) { const allDivs = document.querySelectorAll('.image-div'); allDivs.forEach(div => { if (div.classList.contains(selectedTag)) { div.style.display = 'block'; } else { div.style.display = 'none'; } }); }
Hopefully reading through that is... somewhat self-explanatory. All it does is change the display style of the selected tags to block instead of none.
If you're an actual beginner and this all sounds like gobbledegook to you, I will gladly teach you from the beginning if you'd like lmfao
2 notes
·
View notes
Text
reflex.dev
initial thoughts "no state or logic should be on the frontend" is... interesting. the react ecosystem trend feels vvv much like "just dump the entire database into the client and let frontend browser logic do rendering how we want" so it's interesting to see a react derivative that's like well if someone clicks a button we should send it to the server and the server can run the button's onclick and get back to us. bad but interesting
"you shouldn't have to worry about implementation details like what is frontend or backend or what your api calls are". well actually personally i care quite a lot about what the api is.
idk. it's interesting to see people making Intricate Mechanisms in python
fundamentally im not sure why you'd want to use python instead of a .tsx file but hey. ig one advantage is that react doesn't make fetches super easy, iirc you're kinda on your own and have to write a useEffect?
more than anything ig I'm like... why would you want this? why spend time creating this.
the developer docs search is ai enabled which scares me. "why document things if we just throw the codebase in an llm and ask it to lie for us". i guess if devs are using cgpt to help with their projects and you're a new thing, you want to provide an ai helper because cgpt doesn't know about your product and will make shit up entirely
3 notes
·
View notes
Text
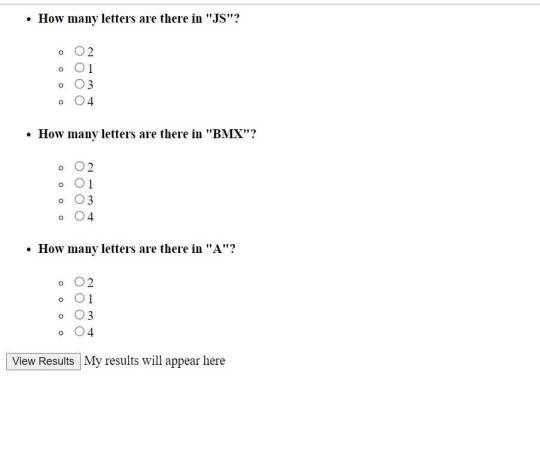
How To Make Multiple Choice Quiz In Html Code

first, you play Multiple Choice Questions (MCQ) Quiz and then click on View results The results page will then be shown. This Multiple Choice Questions (MCQ) Quiz will be finished using JavaScript Code, a powerful language that allows for anything.
100+ JavaScript Projects For Beginners With Source Code
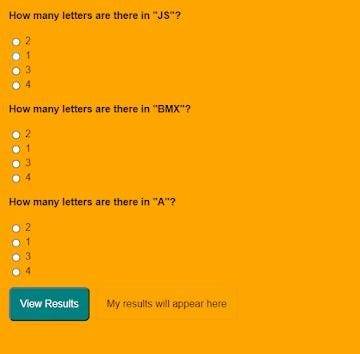
Live Preview Of Multiple Choice Questions Source Code and Preview:-
As you are looking in the project preview how the thing is organized.
Following is the feature of our project:-
We have arranged the Questions and options in the list format using the tag.
Then we set the option using span and defining the radio button and giving the appropriate value.
Multiple Choice Quiz Html Code:-
Now I’ll be telling you to define the structure using HTML. Not from scratch, just the code which is under the body tag.
We have the following part in the HTML section:
Portfolio Website Using HTML CSS And JavaScript ( Source Code)
First, we call the ul class which we have defined the class as a quiz.
Then using the tag we have set our question in the tag.
Then we used a label tag and called the radio button given the value and using span we have given the answer.
Similarly, we have done this for all the options and for all the questions.
Go through the code below and run it in our IDLE before CSS Styling.
<ul class="quiz"> <li> <h4>How many letters are there in "JS"?</h4> <ul class="choices"> <li> <label ><input type="radio" name="question0" value="A" /><span >2</span ></label > </li> <li> <label ><input type="radio" name="question0" value="B" /><span >1</span ></label > </li> <li> <label ><input type="radio" name="question0" value="C" /><span >3</span ></label > </li> <li> <label ><input type="radio" name="question0" value="D" /><span >4</span ></label > </li> </ul> </li> <li> <h4>How many letters are there in "BMX"?</h4> <ul class="choices"> <li> <label ><input type="radio" name="question1" value="A" /><span >2</span ></label > </li> <li> <label ><input type="radio" name="question1" value="B" /><span >1</span ></label > </li> <li> <label ><input type="radio" name="question1" value="C" /><span >3</span ></label > </li> <li> <label ><input type="radio" name="question1" value="D" /><span >4</span ></label > </li> </ul> </li> <li> <h4>How many letters are there in "A"?</h4> <ul class="choices"> <li> <label ><input type="radio" name="question2" value="A" /><span >2</span ></label > </li> <li> <label ><input type="radio" name="question2" value="B" /><span >1</span ></label > </li> <li> <label ><input type="radio" name="question2" value="C" /><span >3</span ></label > </li> <li> <label ><input type="radio" name="question2" value="D" /><span >4</span ></label > </li> </ul> </li> </ul> <button class="view-results" onclick="returnScore()">View Results</button> <span id="myresults" class="my-results">My results will appear here</span>
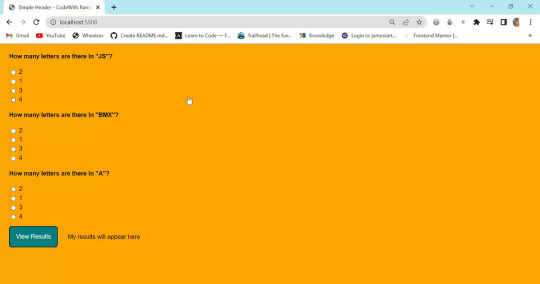
CSS Code For Styling Multiple Choice Quiz:-
By CSS design we will design our whole page here it is just a quiz so we’ll just add a background color, color to the button, and font family for the whole body.
And set the padding of the questions and options so that it doesn’t get messy and looks in a systematic order.
10+ Javascript Project Ideas For Beginners( Project Source Code)
The analysis will be aided by the CSS code below. After adding this file to your link rel-tag, wait for the results. We will add some of the basic styling to our quiz app using the default selector, and we will add styling to various quiz app elements using the class selector.
this is simple css code. we do not add any heavy css code because our main aim is to create Multiple Choice Questions (MCQ) functionality. if you need more Better Ui you can add more css code in this css section.

JavaScript Multiple Choice Quiz Code:-
In the JavaScript Code of Multiple Choice Quiz section, we will add logic for initializing our page. The logic must know what is correct and incorrect, So we’ll define there the correct option and then we’ll set that when the user clicks on the button the logic will generate and tell the user about his/her score.
Restaurant Website Using HTML and CSS
Through this blog, we have learned how to design Multiple Choice Quizzes using HTML, CSS & JavaScript.
Final Output Of Multiple Choice Quiz in HTML and JS Code:
Now I’m looking for some positive reviews from your side.
So, How was the blog Learners,
If you want a more interesting blog like this then please check our Blog sites. Stay tuned because every day you will learn something new here.
I hope that I’m able to make you understand this topic and that you have learned something new from this blog. If you faced any difficulty feel free to reach out to us with the help of the comment box and if you liked it, please show your love in the comment section. This fills bloggers’ hearts with enthusiasm for writing more new blogs.
Ecommerce Website Using Html Css And Javascript Source Code
Happy Coding
click and get full article and get complete source code
That’s it, folks. In this article, we shared 10+ Portfolio Website templates with cool and different designs.
Hope you liked this article. Share this with your fellow developers. Comment down below your thoughts and suggestions, we would love to hear from you.
See our other articles on codewithrandom and gain knowledge in Front-End Development.
Thank you and keep learning!!
follow us on Instagram: Ashutosh Mishra
2 notes
·
View notes
Text
Scandalize.Leilani
! KS - BLOOD ROSE SET
MocapAnimations Twerk v34 BENTO Dances Pack!
Money Gun Fatpack - Unpack - [Chris Two Designs] v1.1
Functions:
Money LVLing System: displacing your riches, which are based on the amount you "spent" with your Money Gun.
Typer Selector: changing from "Typer / Typer | Voice / Voice" where you will type or talk to start shooting your Money, and every 5 Money Gun Reloads, you will LVL Up. On every LVL, it will take longer for you to Reload, allowing you to shoot money for longer periods.
Activate the 3 Gestures inside the folder to use the voice function.
Money Selector: 14 different Money Bills from around the World of [Chris Two Designs] with an exclusive feature for Patreon & Fatpack, the "Auto Mode" where your money will cycle between all bills on a timer.
By using the Arrows beside the Money Selector / Gun Selector, you can change pages in the HUD
Gun Selector: Patreon and Fatpack Exclusive. Here you can select from 8 Different Money Gun Skins + the 9th Patreon one.
Delay Bar: in this bar, you can increase and decrease the amount of delay between animations. When Always ON is set to OFF, the avatar will take the money from its pocket, flip in the air, and some times reload the gun.
Money OnClick: with this option ON, whenever you LEFT CLICK on any UNSCRIPTED surface and hold, you will start shooting your Selected Money Bills Particles.
Drop Lindens: BEWARE, THIS OPTION WILL REQUEST FOR THE ITEM TO MAKE CHANGES ON YOUR LINDENS L$. After activating this option, a dropdown menu will pop down, where you can select the amount of L$ that you would like the give/throw.
Now by going on Mouse Look and LEFT CLICKING when with REZZ Rights, it will Shoot Money Bill props that people can walk on top of it to collect the amount of L$ that you selected, TAKING IT FROM YOUR ACCOUNT AND PAYING THEM (Only when in Mouselook it will shoot and drop real Lindens)
You can also turn OFF the Drop Lindens options, and when on Mouselook, you will drop FAKE Lindens that, when collected, wont take any Real Lindens L$ from your account.
Always ON: When ON or OFF, it will keep the Money Gun (R) and Money Pack (L) in your hand. When OFF, it will put it back in your pocket.
Menu:
Clear LVL, here, you can clear all the LVLs from your GUN and HUD.
Resize, here you can resize your Money Gun and Money Hand. If at any point you close the dropdown menu with the sizing options, simply click on the item that you are resizing to get the menu again.
Show LVL. With this option, you can display a Text on top of your Gun with your current LVL
If at any point you need to get a redelivery or anything goes wrong and you have a new version of the Product. 1st, Detach the Money Gun; Now attach OLD HUD. Now attach the NEW GUN. Now Go into the Menu option in the HUD and press Export Data. That will add the LVLs to your Money Gun. Now detach the OLD HUD and attach the NEW one. With that, your NEW HUD will take the LVLs from your Money Gun and apply to it. http://maps.secondlife.com/secondlife/Chris%20Two%20Designs/49/128/1
!WSG Teryn Wrap Bun AT Mainstore http://maps.secondlife.com/secondlife/WUNSHEGO/67/81/24
flickr
2 notes
·
View notes
Text
Listen to the latest live conversation with Keith Lamar on Voices, and GET YOUR TICKETS TODAY
[vc_row][vc_column][vc_column_text css=”.vc_custom_1696289661152{margin-bottom: 0px !important;}”] Listen to the latest live conversation with Keith Lamar and Eric Mann on Voices Radio GET YOUR CONCERT TICKETS TODAY [/vc_column_text][vc_single_image image=”6900″ img_size=”medium” alignment=”center” onclick=”custom_link”…

View On WordPress
2 notes
·
View notes
Text
ジャンケンゲームの改良
<!DOCTYPE html>
<html>
<head>
<title>janken</title>
</head>
<body>
<p>
Janken
</p>
<button onclick="
playGame('rock');
">rock</button>
<button onclick="
playGame(`chock`);
">chock</button>
<button onclick="
playGame(`par`);
">par</button>
<script>
function playGame(playerMove){
const computerMove = pickComputureMove();
let result = '';
if (playerMove ===`par`) {
if (computerMove ===`rock`) {
result = `Youwin.`
}else if (computerMove ==='par'){
result = 'Tie.';
}else if (computerMove === 'chock') {
result = 'You lose.'
}
} else if(playerMove === `chock`){
if (computerMove ===`rock`) {
result = `Youlose.`
}else if (computerMove ==='par'){
result = 'You win.';
}else if (computerMove === 'chock') {
result = 'You lose.'
}
}else if (playerMove === 'rock'){
if (computerMove ===`rock`) {
result = `Tie.`
}else if (computerMove ==='par'){
result = 'You lose.';
}else if (computerMove === 'chock') {
result = 'You win.'
}
}
alert(`You picked ${playerMove}. Computer picked ${computerMove}.${result}`)
}
function pickComputureMove(){
let computerMove ='';
const randonNumber = Math.random();
if(randonNumber >= 0 && randonNumber
< 1 / 3){
computerMove = (`rock`);
} else if (randonNumber >= 1 / 3 &&
randonNumber < 2 / 3 ) {
computerMove = (`par`);
} else if (randonNumber >= 2 / 3 &&
randonNumber < 1 ) {
computerMove = (`chock`);
}
return computerMove;
}
</script>
</body>
</html>
return computerMove
を用いることで
function playGame(playerMove){
のスコープの外で
function pickComputureMove(){
を実行した後、再び上に戻り、
playGame(playerMove){
のスコープの内の
computerMoveを実行することができる。 以前までbuttononclick内に毎回書いていた関数をscriptタグの中で再利用している。
2 notes
·
View notes
Text
ONE28: Die Ultimative Musikwunsch App für DJs
[vc_row iron_row_type=”in_container” iron_remove_padding_medium=”” iron_remove_padding_small=”” iron_overlay_pattern=”” iron_parallax=”” iron_bg_video=””][vc_column][vc_text_separator title=”by Robert James Perkins” color=”black” border_width=”2″][vc_empty_space][vc_single_image image=”5757″ img_size=”large” alignment=”center” onclick=”custom_link” img_link_target=”_blank”…
View On WordPress
#089DJ Booking München#2023#Club-DJ#DJ On Tour#DJ Playliste#DJ Set#DJ-Tools#Event-Playlist#Event-Unterhaltung#München#Musikvielfalt#Musikwunsch App für DJs#Musikwünsche#Partyerlebnis#Partyinteraktion#Professioneller DJ Service
3 notes
·
View notes