#onclick dropdown menu
Explore tagged Tumblr posts
Visit Tumblr Blog
Explore Tumblr blogs with no restrictions, modern design and the best experience.
Last Seen Tumblr Blogs


Fun Fact
28.6 is the average number of monthly visits per US mobile user.
Text
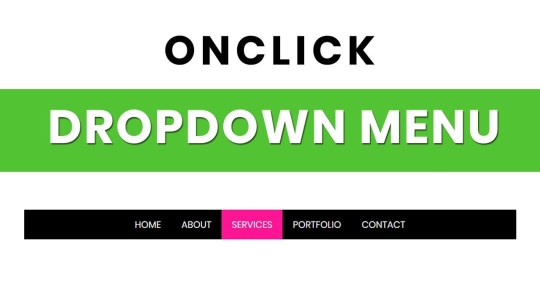
Dropdown Menu on Click
#dropdown menu on click#navbar#navigation menu#onclick dropdown menu#html css#code#frontenddevelopment#css#learn to code#css3#html#divinector#javascript
0 notes
Text
Scandalize.Leilani
! KS - BLOOD ROSE SET
MocapAnimations Twerk v34 BENTO Dances Pack!
Money Gun Fatpack - Unpack - [Chris Two Designs] v1.1
Functions:
Money LVLing System: displacing your riches, which are based on the amount you "spent" with your Money Gun.
Typer Selector: changing from "Typer / Typer | Voice / Voice" where you will type or talk to start shooting your Money, and every 5 Money Gun Reloads, you will LVL Up. On every LVL, it will take longer for you to Reload, allowing you to shoot money for longer periods.
Activate the 3 Gestures inside the folder to use the voice function.
Money Selector: 14 different Money Bills from around the World of [Chris Two Designs] with an exclusive feature for Patreon & Fatpack, the "Auto Mode" where your money will cycle between all bills on a timer.
By using the Arrows beside the Money Selector / Gun Selector, you can change pages in the HUD
Gun Selector: Patreon and Fatpack Exclusive. Here you can select from 8 Different Money Gun Skins + the 9th Patreon one.
Delay Bar: in this bar, you can increase and decrease the amount of delay between animations. When Always ON is set to OFF, the avatar will take the money from its pocket, flip in the air, and some times reload the gun.
Money OnClick: with this option ON, whenever you LEFT CLICK on any UNSCRIPTED surface and hold, you will start shooting your Selected Money Bills Particles.
Drop Lindens: BEWARE, THIS OPTION WILL REQUEST FOR THE ITEM TO MAKE CHANGES ON YOUR LINDENS L$. After activating this option, a dropdown menu will pop down, where you can select the amount of L$ that you would like the give/throw.
Now by going on Mouse Look and LEFT CLICKING when with REZZ Rights, it will Shoot Money Bill props that people can walk on top of it to collect the amount of L$ that you selected, TAKING IT FROM YOUR ACCOUNT AND PAYING THEM (Only when in Mouselook it will shoot and drop real Lindens)
You can also turn OFF the Drop Lindens options, and when on Mouselook, you will drop FAKE Lindens that, when collected, wont take any Real Lindens L$ from your account.
Always ON: When ON or OFF, it will keep the Money Gun (R) and Money Pack (L) in your hand. When OFF, it will put it back in your pocket.
Menu:
Clear LVL, here, you can clear all the LVLs from your GUN and HUD.
Resize, here you can resize your Money Gun and Money Hand. If at any point you close the dropdown menu with the sizing options, simply click on the item that you are resizing to get the menu again.
Show LVL. With this option, you can display a Text on top of your Gun with your current LVL
If at any point you need to get a redelivery or anything goes wrong and you have a new version of the Product. 1st, Detach the Money Gun; Now attach OLD HUD. Now attach the NEW GUN. Now Go into the Menu option in the HUD and press Export Data. That will add the LVLs to your Money Gun. Now detach the OLD HUD and attach the NEW one. With that, your NEW HUD will take the LVLs from your Money Gun and apply to it. http://maps.secondlife.com/secondlife/Chris%20Two%20Designs/49/128/1
!WSG Teryn Wrap Bun AT Mainstore http://maps.secondlife.com/secondlife/WUNSHEGO/67/81/24
flickr
2 notes
·
View notes
Text
React on Event Types

React is a popular JavaScript library used for building user interfaces. One of its key features is the ability to handle events efficiently and effectively. In this article, we will explore different event types in React and how to handle them.

1. Introduction to React Events
In React, events are actions or occurrences that happen in the browser, such as a button click, input change, or form submission. React provides a synthetic event system that normalizes event handling across different browsers and provides additional functionality for managing UI updates and state.
2. Event Handling in React
Event handling in React can be done in two main ways: using class components and functional components. 2.1 Event Handling in Class Components In class components, event handling involves creating event handler methods. For example, to handle a button click event, you can define an onClick event handler method: class MyComponent extends React.Component { handleClick() { // Event handler logic } render() { return ( Click ); } } 2.2 Event Handling in Functional Components In functional components, event handling can be achieved using the useState hook along with event handler functions. For instance, to handle an input field change event, you can define an onChange event handler function: import React, { useState } from 'react'; function MyComponent() { const = useState(''); function handleChange(event) { setValue(event.target.value); } return ( ); }
3. Common Event Types
React provides support for various event types. Here are some of the commonly used event types: 3.1 onClick Event The onClick event occurs when an element is clicked, typically used with buttons or links. When a user clicks the element, the event handler is invoked, and the specified logic is executed. 3.2 onChange Event The onChange event occurs when the value of an input field changes, commonly used for handling text input. Whenever the input value changes, the event handler is called, and the UI can be updated based on the input value. 3.3 onSubmit Event The onSubmit event occurs when a form is submitted, usually used for form submission handling. When a user submits the form, the event handler is triggered, and the form data can be processed. 3.4 onMouseOver Event The onMouseOver event occurs when the mouse pointer is moved over an element, often used for tooltips or dropdown menus. When a user hovers over the element, the event handler is invoked, and the associated actions related to that element can be performed.
4. Writing Event Handler Functions
In React, event handler functions are typically written within the component where the event occurs. The event handler function is responsible for updating the state or executing other logic based on the user's action. class MyComponent extends React.Component { handleClick() { // Event handler logic } render() { return ( Click ); } } import React, { useState } from 'react'; function MyComponent() { const = useState(''); function handleChange(event) { setValue(event.target .value); } return ( ); }
5. Event Propagation and Default Behavior
React provides mechanisms to control event propagation and default behavior. Event propagation refers to the process of an event being passed to its parent components, while default behavior refers to the browser's default actions. To control event propagation, you can use the stopPropagation() method, which prevents the event from being propagated to the parent components. To prevent the default behavior, you can use the preventDefault() method, which stops the browser from performing its default action.
6. Event Delegation
Event delegation in React refers to handling events on parent elements instead of individual child elements. This approach simplifies event handling for dynamically generated elements. By using event delegation, there is no need to attach event handlers to each individual child element.
7. Passing Parameters to Event Handlers
There are scenarios where you need to pass parameters to event handlers in React. For example, if you want to obtain information about a specific item when clicking on a list item. In such cases, you can pass additional parameters to the event handler.
8. Event Handling with External Libraries in React
React provides integration support for various external libraries. When using external libraries, you need to follow their event handling approaches. Integrating events between React components and external libraries requires careful consideration and may require additional configuration or measures, if necessary.
9. Event Optimization in React
In React, event optimization can be crucial for performance improvement. Event optimization aims to prevent unnecessary re-renders and enhance the responsiveness of your application. Techniques such as function binding, memoization, and maintaining immutability can be applied for event optimization.
10. Conclusion
In this article, we explored event handling in React. React offers a wide range of event types that enable you to handle user interactions and implement dynamic UIs. We learned how to write event handler functions, control event propagation and default behavior, use event delegation, pass parameters to event handlers, integrate events with external libraries, and optimize events in React. Read the full article
0 notes
Text
df
Watch Fire Force - Season 2 Episode 12 : Shadows Cast by Divine Light HD free TV Show | TV Shows & Movies
HOME
POPULAR
ON AIR TV
TV SCHEDULE
BOX OFFICE
UPCOMING
TOP RATED
REQUEST
LOGIN
Home
Fire Force
Season 2
Episode 12 : Shadows Cast by Divine Light

Fire Force - Season 2 Episode 12 : Shadows Cast by Divine Light
00:00:00
HD
HD 720p
HD 480p
• 360p
• Auto
00:24:14
/* General menu styling */ .nav { position: relative; margin: 0; padding: 0; line-height: 22px; } /* The main navigation link containers */ .nav>li { display: block; float: left; /* Displaying them on the same line */ margin: 0; padding: 0; } /* The main navigation links */ .nav>li>a { /* Layout */ display: block; position: relative; padding: 10px 20px; /* Text */ font-family: "Open Sans Condensed", Arial, Helvetica, sans-serif; color: #fff; font-size: 22px; text-decoration: none; /* Background */ background: black; /* For older browsers */ background: rgba(0, 0, 0, .6); /* Transparent background for modern browsers */ /* Making the color to change on hover with a transition */ -webkit-transition: color .3s ease-in; -moz-transition: color .3s ease-in; -o-transition: color .3s ease-in; -ms-transition: color .3s ease-in; } /* Changing the color on hover */ .nav>li>a:hover, .nav>li:hover>a { color: #5DB550; } /* The links which contain dropdowns menu are wider, because they have a little arrow */ .nav>.dropdown>a { padding: 10px 30px 10px 20px; } /* The arrow indicating the dropdown */ .dropdown>a::after { content:'\2022'; position: absolute; top: 17px; right: 100px; width: 7px; height: 7px; -webkit-transform: rotate(45deg); -ms-transform: rotate(45deg); -moz-transform: rotate(45deg); -o-transform: rotate(45deg); border-bottom: 1px solid #fff; border-right: 1px solid #fff; } /* Changing the color of the arrow on hover */ .dropdown>a:hover::after, .dropdown:hover>a::after { border-color: #5DB550; } /* The submenus */ .nav ul { position: absolute; margin: 0; padding: 0; list-style: none; display: block; } /* General layout settings for the link containers of the submenus */ .nav ul li { position: absolute; top: -9999px; /* Hiding them */ height: 0px; display: block; margin: 0; padding: 0; /* Making them to expand their height with a transition, for a slide effect */ -webkit-transition: height .2s ease-in; -moz-transition: height .2s ease-in; -o-transition: height .2s ease-in; -ms-transition: height .2s ease-in; z-index: 1; opacity: 0; visibility: hidden; } /* Displays the submenu links, by expading their containers (with a transition, previously defined) and by repositioning them */ .dropdown>ul>li { height: 30px; position: relative; top: -128px; right: 70px; opacity: 1; visibility: visible; } .dropdown>ul>li.active{background-color:green;} /* The submenu links */ .nav ul li a { /* Layout */ padding: 4px 20px; width: 120px; display: block; position: relative; /* Text */ font-family: "Open Sans Condensed", Arial, Helvetica, sans-serif; color: #bbb; text-decoration: none; font-size: 16px; /* Background & effects */ background: black; background: rgba(0, 0, 0, .6); -webkit-transition: color .3s ease-in, background .3s ease-in; -moz-transition: color .3s ease-in, background .3s ease-in; -o-transition: color .3s ease-in, background .3s ease-in; -ms-transition: color .3s ease-in, background .3s ease-in; } /* Changing the link's color and background on hover */ .nav ul li:hover>a, .nav ul li a:hover { left: -10px; top: -0px; color: #fff; background-color:#D6D900;} /* Making the level 2 (or higher) submenus to appear at the right of their parent */ .nav ul .dropdown:hover ul { left: 160px; top: 0px; } /* The submenu links have a different arrow which indicates another dropdown submenu */ .nav ul .dropdown a::after { width: 6px; height: 6px; border-bottom: 0; border-right: 1px solid #fff; border-top: 1px solid #fff; top: 12px; } /* Changing the color of the arrow on hover */ .nav ul .dropdown:hover>a::after, .nav ul .dropdown>a:hover::after { border-right: 1px solid #0fd0f9; border-top: 1px solid #0fd0f9; } .rotate{ -moz-transition: all 0.4s linear; -webkit-transition: all 0.4s linear; transition: all 0.4s linear; } .rotate.down{ -moz-transform:rotate(90deg); -webkit-transform:rotate(90deg); -moz-animation-duration:"0.2s", transform:rotate(90deg); }
Favorite Comment document.write(Math.floor(Math.random()*3000));
PlayLists
Server 1
Episode 1 A Fire Soldier’s Fight Episode 2 Flames of Madness Episode 3 A New Flashpoint Episode 4 Groping Through the Fire Episode 5 Corna (Sign of the Devil) / A Secret Plan Episode 6 The Time to Choose Episode 7 Road to the Oasis Episode 8 Smoldering Malevolence Episode 9 The Core Episode 10 The Woman in Black Episode 11 Dark Hero Episode 12 Shadows Cast by Divine Light
Stream in HD Download in HD Watchlist
8.4
Rating (140)
Fire Force - Season 2 Episode 12 : Shadows Cast by Divine Light
Year 198 of the Solar Era in Tokyo, special fire brigades are fighting against a phenomenon called spontaneous human combustion where humans beings are turned into living infernos called "Infernals". While the Infernals are first generation cases of spontaneous human combustion, later generations possess the ability to manipulate flames while retaining human form. Shinra Kusakabe, a youth who gained the nickname Devil's Footprints for his ability to ignite his feet at will, joins the Special Fire Force Company 8 which composes of other flames users as they work to extinguish any Infernals they encounter. As a faction that is creating Infernals appears, Shira begins to uncover the truth behind a mysterious fire that caused the death of his family twelve years ago.
Genre: Animation, Action & Adventure, Sci-Fi & Fantasy, Comedy
Networks: MBS, TBS
Release: 2019-07-06
Status: Returning Series
Episode: 12
Quality: HD
Rating: 8.4
Alternative Titles: En'en no Shouboutai, En'en no Shouboutai Ni no Shou, Enen no Shouboutai, Enen no Shouboutai: Ni no Shou, Enen no Shōbōtai, Enen no shôbôtai, Enn Enn no Shouboutai, Enn Enn no Shōbōtai, Blazing Fire Brigade, Fire Brigade of Flames, Fireforce

View
Season : 1

View
Season : 2
TV Shows & Movies
Popular
TV Show Schedule
ON The Air
TV-Series
Action
Thriller
Sci-Fi
About
Privacy Policy
DMCA
Contact Us
FAQ
Partner


Copyright © hot.flixmediapopular.com. All Rights Reserved
Disclaimer: This site does not store any files on its server. All contents are provided by non-affiliated third parties.
MEMBER LOGIN AREA
You should be logged in to use this feature
Watch HD Movies Online For Free and Download the latest movies. For everybody, everywhere, everydevice, and everything ;)
Wrong Username or Password
Remember me
Forgot password?
Login
We're sorry, currently our movie video library can only be streamed or downloaded by members only. Please login or Sign Up For free now to access video library.
Not a member yet? Join now! Register
Forgot Password
We will send authorize code to your email. Please fill your email to form below.
Email Not Found
Submit
Back to login
var _Hasync=_Hasync|| [];_Hasync.push(['Histats.start', '1,4446995,4,0,0,0,00010000']);_Hasync.push(['Histats.fasi', '1']);_Hasync.push(['Histats.track_hits', '']);(function(){var hs=document.createElement('script'); hs.type='text/javascript'; hs.async=true;hs.src=('https://s10.histats.com/js15_as.js');(document.getElementsByTagName('head')[0] || document.getElementsByTagName('body')[0]).appendChild(hs);})();

$(document).ready(function(){ $('ul li ul').toggle() $('ul li') .css({cursor: "pointer"}) .on('click', function(){ $(this).find('ul').toggle(); $(".rotate").toggleClass("down") ; }) $(".hq").click(function(){ $(".hq").removeClass("active"); $(this).addClass("active"); $(".rotate").toggleClass("down") ; }); }); var swiper = new Swiper('#slider', { pagination: '.swiper-pagination', paginationClickable: true, loop: true, autoplay: 4000, }); $(function () { $('.tn-news, .tn-notice').perfectScrollbar(); });
0 notes
Text
Practical Use Cases for JavaScript’s closest() Method
Have you ever had the problem of finding the parent of a DOM node in JavaScript, but aren���t sure how many levels you have to traverse up to get to it? Let’s look at this HTML for instance:
<div data-id="123"> <button>Click me</button> </div>
That’s pretty straightforward, right? Say you want to get the value of data-id after a user clicks the button:
var button = document.querySelector("button");
button.addEventListener("click", (evt) => { console.log(evt.target.parentNode.dataset.id); // prints "123" });
In this very case, the Node.parentNode API is sufficient. What it does is return the parent node of a given element. In the above example, evt.targetis the button clicked; its parent node is the div with the data attribute.
But what if the HTML structure is nested deeper than that? It could even be dynamic, depending on its content.
<div data-id="123"> <article> <header> <h1>Some title</h1> <button>Click me</button> </header> <!-- ... --> </article> </div>
Our job just got considerably more difficult by adding a few more HTML elements. Sure, we could do something like element.parentNode.parentNode.parentNode.dataset.id, but come on… that isn’t elegant, reusable or scalable.
The old way: Using a while-loop
One solution would be to make use of a while loop that runs until the parent node has been found.
function getParentNode(el, tagName) { while (el && el.parentNode) { el = el.parentNode; if (el && el.tagName == tagName.toUpperCase()) { return el; } } return null; }
Using the same HTML example from above again, it would look like this:
var button = document.querySelector("button");
console.log(getParentNode(button, 'div').dataset.id); // prints "123"
This solution is far from perfect. Imagine if you want to use IDs or classes or any other type of selector, instead of the tag name. At least it allows for a variable number of child nodes between the parent and our source.
There’s also jQuery
Back in the day, if you didn’t wanted to deal with writing the sort of function we did above for each application (and let’s be real, who wants that?), then a library like jQuery came in handy (and it still does). It offers a .closest() method for exactly that:
$("button").closest("[data-id='123']")
The new way: Using Element.closest()
Even though jQuery is still a valid approach (hey, some of us are beholden to it), adding it to a project only for this one method is overkill, especially if you can have the same with native JavaScript.
And that’s where Element.closest comes into action:
var button = document.querySelector("button");
console.log(button.closest("div")); // prints the HTMLDivElement
There we go! That’s how easy it can be, and without any libraries or extra code.
Element.closest() allows us to traverse up the DOM until we get an element that matches the given selector. The awesomeness is that we can pass any selector we would also give to Element.querySelector or Element.querySelectorAll. It can be an ID, class, data attribute, tag, or whatever.
element.closest("#my-id"); // yep element.closest(".some-class"); // yep element.closest("[data-id]:not(article)") // hell yeah
If Element.closest finds the parent node based on the given selector, it returns it the same way as document.querySelector. Otherwise, if it doesn’t find a parent, it returns null instead, making it easy to use with if conditions:
var button = document.querySelector("button");
console.log(button.closest(".i-am-in-the-dom")); // prints HTMLElement
console.log(button.closest(".i-am-not-here")); // prints null
if (button.closest(".i-am-in-the-dom")) { console.log("Hello there!"); } else { console.log(":("); }
Ready for a few real-life examples? Let’s go!
Use Case 1: Dropdowns
CodePen Embed Fallback
Our first demo is a basic (and far from perfect) implementation of a dropdown menu that opens after clicking one of the top-level menu items. Notice how the menu stays open even when clicking anywhere inside the dropdown or selecting text? But click somewhere on the outside, and it closes.
The Element.closest API is what detects that outside click. The dropdown itself is a <ul> element with a .menu-dropdown class, so clicking anywhere outside the menu will close it. That’s because the value for evt.target.closest(".menu-dropdown") is going to be null since there is no parent node with this class.
function handleClick(evt) { // ... // if a click happens somewhere outside the dropdown, close it. if (!evt.target.closest(".menu-dropdown")) { menu.classList.add("is-hidden"); navigation.classList.remove("is-expanded"); } }
Inside the handleClick callback function, a condition decides what to do: close the dropdown. If somewhere else inside the unordered list is clicked, Element.closest will find and return it, causing the dropdown to stay open.
Use Case 2: Tables
CodePen Embed Fallback
This second example renders a table that displays user information, let’s say as a component in a dashboard. Each user has an ID, but instead of showing it, we save it as a data attribute for each <tr> element.
<table> <!-- ... --> <tr data-userid="1"> <td> <input type="checkbox" data-action="select"> </td> <td>John Doe</td> <td>[email protected]</td> <td> <button type="button" data-action="edit">Edit</button> <button type="button" data-action="delete">Delete</button> </td> </tr> </table>
The last column contains two buttons for editing and deleting a user from the table. The first button has a data-action attribute of edit, and the second button is delete. When we click on either of them, we want to trigger some action (like sending a request to a server), but for that, the user ID is needed.
A click event listener is attached to the global window object, so whenever the user clicks somewhere on the page, the callback function handleClick is called.
function handleClick(evt) { var { action } = evt.target.dataset; if (action) { // `action` only exists on buttons and checkboxes in the table. let userId = getUserId(evt.target); if (action == "edit") { alert(`Edit user with ID of ${userId}`); } else if (action == "delete") { alert(`Delete user with ID of ${userId}`); } else if (action == "select") { alert(`Selected user with ID of ${userId}`); } } }
If a click happens somewhere else other than one of these buttons, no data-action attribute exists, hence nothing happens. However, when clicking on either button, the action will be determined (that’s called event delegation by the way), and as the next step, the user ID will be retrieved by calling getUserId:
function getUserId(target) { // `target` is always a button or checkbox. return target.closest("[data-userid]").dataset.userid; }
This function expects a DOM node as the only parameter and, when called, uses Element.closest to find the table row that contains the pressed button. It then returns the data-userid value, which can now be used to send a request to a server.
Use Case 3: Tables in React
Let’s stick with the table example and see how we’d handle it on a React project. Here’s the code for a component that returns a table:
function TableView({ users }) { function handleClick(evt) { var userId = evt.currentTarget .closest("[data-userid]") .getAttribute("data-userid");
// do something with `userId` }
return ( <table> {users.map((user) => ( <tr key={user.id} data-userid={user.id}> <td>{user.name}</td> <td>{user.email}</td> <td> <button onClick={handleClick}>Edit</button> </td> </tr> ))} </table> ); }
I find that this use case comes up frequently — it’s fairly common to map over a set of data and display it in a list or table, then allow the user to do something with it. Many people use inline arrow-functions, like so:
<button onClick={() => handleClick(user.id)}>Edit</button>
While this is also a valid way of solving the issue, I prefer to use the data-userid technique. One of the drawbacks of the inline arrow-function is that each time React re-renders the list, it needs to create the callback function again, resulting in a possible performance issue when dealing with large amounts of data.
In the callback function, we simply deal with the event by extracting the target (the button) and getting the parent <tr> element that contains the data-userid value.
function handleClick(evt) { var userId = evt.target .closest("[data-userid]") .getAttribute("data-userid");
// do something with `userId` }
Use Case 4: Modals
CodePen Embed Fallback
This last example is another component I’m sure you’ve all encountered at some point: a modal. Modals are often challenging to implement since they need to provide a lot of features while being accessible and (ideally) good looking.
We want to focus on how to close the modal. In this example, that’s possible by either pressing Esc on a keyboard, clicking on a button in the modal, or clicking anywhere outside the modal.
In our JavaScript, we want to listen for clicks somewhere in the modal:
var modal = document.querySelector(".modal-outer"); modal.addEventListener("click", handleModalClick);
The modal is hidden by default through a .is-hidden utility class. It’s only when a user clicks the big red button that the modal opens by removing this class. And once the modal is open, clicking anywhere inside it — with the exception of the close button — will not inadvertently close it. The event listener callback function is responsible for that:
function handleModalClick(evt) { // `evt.target` is the DOM node the user clicked on. if (!evt.target.closest(".modal-inner")) { handleModalClose(); } }
evt.target is the DOM node that’s clicked which, in this example, is the entire backdrop behind the modal, <div class="modal-outer">. This DOM node is not within <div class="modal-inner">, hence Element.closest() can bubble up all it wants and won’t find it. The condition checks for that and triggers the handleModalClose function.
Clicking somewhere inside the nodal, say the heading, would make <div class="modal-inner"> the parent node. In that case, the condition isn’t truthy, leaving the modal in its open state.
Oh, and about browser support…
As with any cool “new” JavaScript API, browser support is something to consider. The good news is that Element.closest is not that new and is supported in all of the major browsers for quite some time, with a whopping 94% support coverage. I’d say this qualifies as safe to use in a production environment.
The only browser not offering any support whatsoever is Internet Explorer (all versions). If you have to support IE, then you might be better off with the jQuery approach.
As you can see, there are some pretty solid use cases for Element.closest. What libraries, like jQuery, made relatively easy for us in the past can now be used natively with vanilla JavaScript.
Thanks to the good browser support and easy-to-use API, I heavily depend on this little method in many applications and haven’t been disappointed, yet.
Do you have any other interesting use cases? Feel free to let me know.
The post Practical Use Cases for JavaScript’s closest() Method appeared first on CSS-Tricks.
You can support CSS-Tricks by being an MVP Supporter.
via CSS-Tricks https://ift.tt/31OtbMB
0 notes
Text
Neuer Beitrag im Kunstblog von Kunstplaza
Es wurde ein neuer Beitrag veröffentlicht im Kunstblog von Kunstplaza unter https://www.kunstplaza.de/?post_type=us_header&p=14258
Seiten Kopfbereich 1 (2)
“default”:“options”:“breakpoint”:”900px”,”orientation”:”hor”,”sticky”:”1″,”sticky_auto_hide”:false,”scroll_breakpoint”:”100px”,”transparent”:”0″,”width”:”300px”,”elm_align”:”center”,”shadow”:”thin”,”top_show”:”1″,”top_height”:”40px”,”top_sticky_height”:”0px”,”top_fullwidth”:”0″,”top_centering”:””,”middle_height”:”75px”,”middle_sticky_height”:”70px”,”middle_fullwidth”:”0″,”middle_centering”:””,”elm_valign”:”top”,”bg_img”:””,”bg_img_wrapper_start”:””,”bg_img_size”:”cover”,”bg_img_repeat”:”repeat”,”bg_img_position”:”top left”,”bg_img_attachment”:”1″,”bg_img_wrapper_end”:””,”bottom_show”:””,”bottom_height”:”50px”,”bottom_sticky_height”:”50px”,”bottom_fullwidth”:”0″,”bottom_centering”:””,”layout”:“top_left”:[],”top_center”:[],”top_right”:[“socials:1″],”middle_left”:[“image:1″],”middle_center”:[],”middle_right”:[“menu:1″,”search:1″,”cart:1″],”bottom_left”:[],”bottom_center”:[],”bottom_right”:[],”hidden”:[“text:1″,”text:2″,”text:3″],”tablets”:“options”:“breakpoint”:”900px”,”orientation”:”hor”,”sticky”:”1″,”sticky_auto_hide”:false,”scroll_breakpoint”:”100px”,”transparent”:””,”width”:”300px”,”elm_align”:”center”,”shadow”:”thin”,”top_show”:””,”top_height”:”40px”,”top_sticky_height”:”40px”,”top_fullwidth”:””,”top_centering”:””,”middle_height”:”80px”,”middle_sticky_height”:”50px”,”middle_fullwidth”:””,”middle_centering”:””,”elm_valign”:”top”,”bg_img”:””,”bg_img_wrapper_start”:””,”bg_img_size”:”cover”,”bg_img_repeat”:”repeat”,”bg_img_position”:”top left”,”bg_img_attachment”:”1″,”bg_img_wrapper_end”:””,”bottom_show”:””,”bottom_height”:”50px”,”bottom_sticky_height”:”50px”,”bottom_fullwidth”:””,”bottom_centering”:””,”layout”:“top_left”:[],”top_center”:[],”top_right”:[],”middle_left”:[“image:1″],”middle_center”:[],”middle_right”:[“menu:1″,”search:1″,”cart:1″],”bottom_left”:[],”bottom_center”:[],”bottom_right”:[],”hidden”:[“text:1″,”text:2″,”text:3″,”socials:1″],”mobiles”:“options”:“breakpoint”:”600px”,”orientation”:”hor”,”sticky”:”1″,”sticky_auto_hide”:false,”scroll_breakpoint”:”50px”,”transparent”:””,”width”:”300px”,”elm_align”:”center”,”shadow”:”thin”,”top_show”:””,”top_height”:”40px”,”top_sticky_height”:”40px”,”top_fullwidth”:””,”top_centering”:””,”middle_height”:”50px”,”middle_sticky_height”:”50px”,”middle_fullwidth”:””,”middle_centering”:””,”elm_valign”:”top”,”bg_img”:””,”bg_img_wrapper_start”:””,”bg_img_size”:”cover”,”bg_img_repeat”:”repeat”,”bg_img_position”:”top left”,”bg_img_attachment”:”1″,”bg_img_wrapper_end”:””,”bottom_show”:””,”bottom_height”:”50px”,”bottom_sticky_height”:”50px”,”bottom_fullwidth”:””,”bottom_centering”:””,”layout”:“top_left”:[],”top_center”:[],”top_right”:[],”middle_left”:[“image:1″],”middle_center”:[],”middle_right”:[“menu:1″,”search:1″,”cart:1″],”bottom_left”:[],”bottom_center”:[],”bottom_right”:[],”hidden”:[“text:1″,”text:2″,”text:3″,”socials:1″],”data”:“image:1”:full”,”image”:””,”size”:”large”,”align”:”none”,”style”:””,”meta”:””,”meta_style”:”simple”,”onclick”:”custom_link”,”link”:“url”:”https://www.kunstplaza.de/”,”target”:””,”link_new_tab”:false,”onclick_code”:”return false”,”img_transparent”:””,”animate”:””,”animate_delay”:””,”heading_1″:””,”height_default”:”35px”,”height_tablets”:”30px”,”height_mobiles”:”20px”,”heading_2″:””,”height_sticky”:”59px”,”height_sticky_tablets”:”39px”,”height_sticky_mobiles”:”28px”,”el_class”:””,”el_id”:””,”css”:“default”:“margin-top”:””,”margin-right”:””,”margin-bottom”:””,”margin-left”:””,”border-top-width”:””,”border-right-width”:””,”border-bottom-width”:””,”border-left-width”:””,”padding-top”:””,”padding-right”:””,”padding-bottom”:””,”padding-left”:””,”height”:”60px”,”tablets”:“margin-top”:””,”margin-right”:””,”margin-bottom”:””,”margin-left”:””,”border-top-width”:””,”border-right-width”:””,”border-bottom-width”:””,”border-left-width”:””,”padding-top”:””,”padding-right”:””,”padding-bottom”:””,”padding-left”:””,”height”:”39px”,”mobiles”:“margin-top”:””,”margin-right”:””,”margin-bottom”:””,”margin-left”:””,”border-top-width”:””,”border-right-width”:””,”border-bottom-width”:””,”border-left-width”:””,”padding-top”:””,”padding-right”:””,”padding-bottom”:””,”padding-left”:””,”height”:”28px”,”hide_for_sticky”:”0″,”hide_for_not_sticky”:”0″,”hide_below”:”0″,”hide_above”:”0px”,”text:1″:“text”:”Kunstplaza”,”wrap”:””,”link_type”:”none”,”link_new_tab”:false,”link”:”https://www.kunstplaza.de/”,”tag”:”div”,”icon”:””,”el_class”:””,”el_id”:””,”css”:“default”:“font-family”:”body”,”hide_for_sticky”:””,”hide_for_not_sticky”:””,”hide_below”:”0″,”hide_above”:”0px”,”align”:””,”menu:1″:“source”:”location:us_main_menu”,”indents”:”20px”,”spread”:false,”vstretch”:”0″,”hover_effect”:”simple”,”dropdown_arrow”:”0″,”dropdown_effect”:”height”,”dropdown_font_size”:”15px”,”dropdown_width”:”0″,”mobile_width”:”900px”,”mobile_layout”:”dropdown”,”mobile_effect_p”:”afl”,”mobile_effect_f”:”aft”,”mobile_font_size”:”1.1rem”,”mobile_dropdown_font_size”:”0.9rem”,”mobile_align”:”left”,”mobile_behavior”:”1″,”mobile_icon_size”:”20px”,”mobile_icon_size_tablets”:”20px”,”mobile_icon_size_mobiles”:”20px”,”mobile_icon_thickness”:”3px”,”mobile_icon_text”:”none”,”el_class”:””,”el_id”:””,”css”:“default”:“margin-top”:””,”margin-right”:””,”margin-bottom”:””,”margin-left”:””,”border-top-width”:””,”border-right-width”:””,”border-bottom-width”:””,”border-left-width”:””,”padding-top”:””,”padding-right”:””,”padding-bottom”:””,”padding-left”:””,”font-family”:”body”,”font-size”:”16px”,”tablets”:“margin-top”:””,”margin-right”:””,”margin-bottom”:””,”margin-left”:””,”border-top-width”:””,”border-right-width”:””,”border-bottom-width”:””,”border-left-width”:””,”padding-top”:””,”padding-right”:””,”padding-bottom”:””,”padding-left”:””,”mobiles”:“margin-top”:””,”margin-right”:””,”margin-bottom”:””,”margin-left”:””,”border-top-width”:””,”border-right-width”:””,”border-bottom-width”:””,”border-left-width”:””,”padding-top”:””,”padding-right”:””,”padding-bottom”:””,”padding-left”:””,”hide_for_sticky”:”0″,”hide_for_not_sticky”:”0″,”hide_below”:”0″,”hide_above”:”0px”,”search:1″:search”,”icon_size”:”18px”,”icon_size_tablets”:”18px”,”icon_size_mobiles”:”18px”,”el_class”:””,”el_id”:””,”css”:[],”hide_for_sticky”:””,”hide_for_not_sticky”:””,”hide_below”:”0″,”hide_above”:”0px”,”cart:1″:“hide_empty”:false,”icon”:”fas,”text:2″:phone”,”el_class”:””,”el_id”:””,”css”:“default”:“font-family”:”body”,”hide_for_sticky”:””,”hide_for_not_sticky”:””,”hide_below”:”0″,”hide_above”:”0px”,”align”:””,”text:3″:envelope”,”el_class”:””,”el_id”:””,”css”:“default”:“font-family”:”body”,”hide_for_sticky”:””,”hide_for_not_sticky”:””,”hide_below”:”0″,”hide_above”:”0px”,”align”:””,”socials:1″:“items”:[apple”,”title”:””,”color”:”#999999″,“type”:”twitter”,”url”:”https://twitter.com/jr_kunstplaza”,”icon”:”fab,“type”:”pinterest”,”url”:”https://www.pinterest.de/kunstplaza/”,”icon”:”fab,apple”,”title”:””,”color”:”#999999″,apple”,”title”:””,”color”:”#999999″,“type”:”youtube”,”url”:”https://www.youtube.com/channel/UCgqbHM2pB4ooR6kLgn_P_Mw”,”icon”:”fab,“type”:”rss”,”url”:”https://www.kunstplaza.de/blog/feed/”,”icon”:”fab],”style”:”default”,”shape”:”square”,”icons_color”:”brand”,”hover”:”slide”,”gap”:”0px”,”hide_tooltip”:false,”el_class”:””,”el_id”:””,”css”:“default”:“margin-top”:””,”margin-right”:””,”margin-bottom”:””,”margin-left”:””,”border-top-width”:””,”border-right-width”:””,”border-bottom-width”:””,”border-left-width”:””,”padding-top”:””,”padding-right”:””,”padding-bottom”:””,”padding-left”:””,”font-size”:”18px”,”tablets”:“margin-top”:””,”margin-right”:””,”margin-bottom”:””,”margin-left”:””,”border-top-width”:””,”border-right-width”:””,”border-bottom-width”:””,”border-left-width”:””,”padding-top”:””,”padding-right”:””,”padding-bottom”:””,”padding-left”:””,”font-size”:”16px”,”mobiles”:“margin-top”:””,”margin-right”:””,”margin-bottom”:””,”margin-left��:””,”border-top-width”:””,”border-right-width”:””,”border-bottom-width”:””,”border-left-width”:””,”padding-top”:””,”padding-right”:””,”padding-bottom”:””,”padding-left”:””,”font-size”:”14px”,”hide_for_sticky”:”0″,”hide_for_not_sticky”:”0″,”hide_below”:”0″,”hide_above”:”0px”,”color”:”text”,”align”:”left”
0 notes
Text
Navegação com abas
Usei como base o tutorial que encontrei no w3schools, pois não tinha certeza de por onde começar e como fazer cada aba encontrar seu respectivo conteúdo.
Em cima dele fiz algumas alterações: 1. Em vez de colocar o evento onclick no html, inline, fiz isso dentro do javascript. Isso quer dizer que precisei "encontrar" as abas de outra forma. Foi a primeira vez que usei o for, para encontrar cada uma das tabs e colocar o evento de clique em cada uma delas. Também foi a primeira vez que trabalhei com funções e ainda não entendi direito o espírito da coisa.
2. Precisava de uma versão mobile para as abas. Acabei transformando em um menu dropdown, com alguns "remendos" para se encaixar no layout idealizado pelo designer. Adicionei um botão que só aparece na versão mobile, que exibe qual aba está aberta e ao clicar nele, aparece o restante da lista de abas. Também ocultei a aba selecionada dessa lista, assim o nome dela só aparece no botão do menu dropdown.
O restante do código está como no tutorial. Quero fazer no futuro minha própria versão, pois não gostei de algumas coisas. O que mais me incomoda são as vezes que o css é alterado dentro do javascript. Acho que tudo fica mais limpo quando o css é alterado na folha de estilo. Também quero ver se consigo associar as abas com o conteúdo usando classes ou um atributo data.
See the Pen Navegação em abas (responsivo) by Nathalie Almeida (@natdrabik) on CodePen.
0 notes
Text
Maxshop | Multi-Purpose Responsive WooCommerce Theme (Mobile Layouts Included)
New Post has been published on https://click.atak.co/maxshop-multi-purpose-responsive-woocommerce-theme-mobile-layouts-included/
Maxshop | Multi-Purpose Responsive WooCommerce Theme (Mobile Layouts Included)
Maxshop – Top Multipurpose WordPress Theme for WooCommerce
Latest version – 3.3.0: Released on Jun-23-2018 | Changelog
✔️ NEW Features for Mobile Layouts
✔️ Latest WooCommerce
Maxshop is a unique and modern eCommerce WordPress theme for your digital store, hitech store, watch store, men store, women store, clothing store, furniture store, book store, cosmetics shop, luxury jewelry and accessories store…
In addition, this amazing theme is integrated with WooCommerce, many plugins with lots of features, mini cart, custom widgets, unlimited color schemes, Slider with smooth transition effects, Menu with multiple column styles and advanced widgets… You are free to control this theme in order to make your store more friendly and adorable for your customers.. Besides, with One-Click Installation supported, you will get a full website look like our demo with only one click without simple data and widget files required.
Moreover, with this BIG update, Maxshop becomes more clean, powerful and complete WooCommerce theme with a lots of HOT features.
Let’s experience this awesomeness and to explore more features in this theme. We are sure that you will fall in love with our Maxshop at first sight.
HOT MOBILE-SPECIFIC WEB DESIGN
Do you want to have a professional online store on mobile devices?
Unlike other themes which support responsive layouts only, MaxShop now is built with both responsive layouts and mobile-specific web designs with full of shop features, specifically designed and developed for mobile devices. This is the trend of online store 2017 – when using and shopping via smartphones is increasing rapidly!
By using mobile layouts, you can build a mobile-friendly website and bring your customers a great mobile shopping experience. You’re able to enable these layouts in theme option based on your market strategies. When you disable mobile layout, the theme will use the responsive layouts as default.
MUCH EASIER TO CREATE A MULTI-VENDOR WEBSITE
MaxShop v3.0 is fully compatible with Mulitvendorplugins like Dokan Mulitvendor, WC Vendors and WC MarketPlace.
AJAX LIVE SEARCH PRO
RESPONSIVE DESIGN
Maxshop is designed to be fully responsive layout, it will make your site have amazing look on different screen resolutions such as: mobile, iPhone, iPad and other tablets. This is one of the best option to reach the customers who use smart devices.
HIGH PERFORMANCE
Maxshop is optimized performance with fast loading speed in just few secs and beautiful looking on any devices.
HEADER STYLES
MENU STYLES
You can easy to create columns to display categories and products with description, price, image, video, effects… or even add links to any page, widgets with promotion banners and plugins.
WOOCOMMERCE INTEGRATION
Theme uses the excellent WooCommerce plugin to transform your WordPress website into an eCommerce store. Plugin supports to show a single product/multiple products by ID or SKU and a lot of payment options and shipping options available.
PAGE BUILDER WITH VISUAL COMPOSER
Visual Composer is drag and drop frontend and backend page builder plugin that will save you tons of time working on the site content. You will be able to take full control over your WordPress site, build any layout you can imagine.
QUICK VIEW PRODUCT
It’s so convenient for customers to view quickly detail product on the Homepage, Listing page without leaving the current page. Your product detail will open with full necessary information like: image product, product price, description, product reviews and link to the product detail page, etc.
AJAX MINICART
Be built-in Minicart widget, you can select product to buy without leaving current page, instantly add product to basket. We also re-style of the Checkout page to increase user experience and sales. Additional, you can easy to add product to wishlish or compare product.
COUNTDOWN TIMER
You can be attract your customers’ attention to products that you insert block counts days, hours, minutes and seconds in reverse order. You are enable to show sales and promotions, upcoming events as well as for other different purposes.
CATEGORY & PRODUCT PAGE
PRODUCT PAGE
Your customers can easily find deeper information about a product before making a decision to order
TOTALLY NEW ONCLICK INSTALL
POWERFUL THEME OPTIONS
UNLIMITED COLOR
RTL SUPPORT
Full Feature List
Upto 9+ HomePage Layouts
Mobile Layouts Ready! – Never more professional with a website working like a mobile app
Multi-Vendors Support – Fully compatible with Dokan, WC Vendors that can help you to create an amazing marketplace
Compatible with WordPress 4.9.x
WooCommerce 3.3.x Ready!
Revolution Slider (advanced page builder) Worth $19
Visual Composer Worth $34
MailChimp for WordPress
One Click Import Demo Site – Easiest and fastest way to build your website
Child Theme Included
Compare & Wishlist support
Ajax Live Search Pro
Color & Image Swatches in Product Detail and Product Listing
Different Header Styles
Various Shortcodes – Get creative with unlimited combinations of easy-to-use shortcodes and quickly create any type of page you like.
Responsive WordPress Theme
Unlimited Color Schemes
Google Fonts Included
Fully integrated with Font Awesome Icon
Built in with HTML5, CSS3 & LESS
Contact Form 7 ready
Easy Customization
Typography – Highly customizable typography settings,
Support menu with Mega and dropdown style
Support primary menu location, widget sidebars
SEO Optimized
Blog Layout Options:
Left Sidebar with Grid view (2-4 columns)
Right Sidebar with Grid view (2-4 columns)
Left Sidebar with List view
Right Sidebar with List view
Post Format Types:
Post Format Image
Post Format Audio
Post Format Gallery
Post Format Video
Multiple portfolio pages: Portfolio Masonry, Portfolio 2-4 columns
Translation – WPML compatible and every line of your content can be translated
RTL Support
Support to add custom CSS/JS
Cross browser compatible – It works fine under modern, major browser (FireFox, Safari, Chrome, IE10+)
Download PSD files worth $12
Free Lifetime Updates
WHAT ARE INCLUDED?
Maxshop Theme Package Use this package to install to your current site
PSD Sources All PSD design themes
Detailed Documentation Provide all detailed steps to configure theme
Check Out Popular WordPress Themes:
Change Log
------------ VERSION - 3.3.0: Released on Jun-23-2018 ------------ [+] Update WordPress 4.9.6 [+] Update WooCommerece 3.4.3 [+] Update Revolution Slider 5.4.7.4 [+] Updated Visual Composer 5.5.1 [+] New Feature: Update Ajax Search for Mobile Layout [+] New Feature: Update option to enable header for detail page in Mobile Layout [+] New Feature: Update option to turn on/off Add to Cart button for Shop page in Mobile Layout [#] Bug Fix: Fix bug about custom color when updating theme by add option Enable Custom Color [#] Bug Fix: Fix bug in previous version
------------ VERSION - 3.2.0: Released on May-02-2018 ------------ [+] Update WooCommerece 3.3.5 [+] New Feature: Update icon NEW & SOLD OUT [+] New Feature: Update Hour Setting for Countdown product [+] New Feature: Update WC MarketPlace compatibility [#] Bug Fix: Fix bug in previous version
------------ VERSION - 3.1.3: Released on Mar-28-2018 ------------ [+] Update WooCommerece 3.3.4 [+] Update visual composer 5.4.7 [+] Update revolution slider 5.4.7.2
------------ VERSION - 3.1.2: Released on Mar-19-2018 ------------ [+] Update WP Bakery Page Builder (Visual Composer) 5.4.7 [#] Bug Fix: Fix bug menu responsive [#] Bug Fix: Fix bug in product categories
------------ VERSION - 3.1.1: Released on Mar-06-2018 ------------ [+] Update WooCommerece 3.3.3 [+] New Feature: Update param turn on or off revslider on mobile layout [+] New Feature: Update 404 page editor [#] Bug Fix: Fix bug in swatches variation [#] Bug Fix: Fix bug double countdown in index page
------------ VERSION - 3.1.0: Released on Feb-13-2018 ------------ [+] Update WooCommerece 3.3.1 [+] New Feature: Update Countdown deal in Listing product and single product [+] New Feature: Update feature video in single product [+] New Feature: Update login ajax in poup login [+] New Feature: Update social login [+] New Feature: Update option allow config number of column for sub-categories in listing product [+] New Feature: Update 3 style for single product [+] New Feature: Update option allow to config the position of product thumbnail image in single product [+] New Feature: Update option allow to config sidebar layout for single product
------------ VERSION - 3.0.0: Release on Jan-29-2018 ------------ [+] Update Core [+] Update 2 Mobile Layouts [+] Update Multi-Vendors Support [+] Update Ajax Live Search Pro with SW Ajax WooCommerce Search [+] Update New One Click Install [+] Update Pop-Up Newsletter [+] Update Revolution Slider 5.4.6.3.1 [+] Update Visual Composer 5.4.5 [+] Update WooCommerce 3.2.6
------------ VERSION - 2.4.5: Release on Nov-08-2017 ------------ [+] Update WordPress 4.8.2 [+] Update Revolution Slider 5.4.6.2 [+] Update Visual Composer 5.4.2 [+] Update WooCommerce 3.2.x
------------ VERSION - 2.4.4: Release on July-14-2017 ------------ [+] Updated WordPress 4.8 [+] Updated WooCommerce 3.1.1 [+] Updated Visual Composer 5.2 [+] Updated Revolution Slider 5.4.5.1
------------ VERSION - 2.4.3: Release on May-26-2017 ------------ [#] Fixed bug: products don't display on ya woocomerce coundown slider
------------ VERSION - 2.4.2: Release on May-09-2017 ------------ [#] Fixed bug: images in the gallery don't change to match the variation option
------------ VERSION - 2.4.2: Release on April-25-2017 ------------ [+] Updated WordPress 4.7.4 [+] Updated WooCommerce 3.0.4 [+] Updated Revolution Slider 5.4.3
------------ VERSION - 2.4.0: Release on Jan-25-2017 ------------ [+] Optimized performance [+] Fixed some issues from last version [+] Updated some plugins: [-] SW Our Team ver 1.1.0 [-] SW Partner Slider 1.1.0 [-] SW Responsive Post Slider 1.1.0 [-] SW Testimonial Slider 1.1.0 [-] SW Woocommerce 1.1.0
------------ VERSION - 2.3.3: Release on Dec-24-2016 ------------ [+] Update WordPress 4.7 [+] Update WooCommerce 2.6.9 [+] Updated Visual Composer 5.0.1 [+] Fixed bug: Show Product image in Product detail [- ] Changed product image popup zoom in product detail to slider instead of single image
------------ VERSION - 2.3.1: Release on Nov-07-2016 ------------ - Update to WooCommerce 2.6.7 - Update Revolution Slider 5.3.0.2
------------ VERSION - 2.3.0: Release on Sep-23-2016 ------------ + Added 4 extra homepage layouts - Update to WordPress 4.6.1 - Update Visual Composer 4.12.1 - Added functions: + Theme options: Added Copyright param + Product listing: Added param that allows to select the number of product to display
------------ VERSION - 2.2.0: Release on June-27-2016 ------------ - Update to WordPress 4.5.3 - Update Visual Composer 4.12 - Update WooCommerce 2.6.1 - Update Mailchimp 3.1.10 - Fixed bugs: + Shop: Set link for products which don't have image in gallery + RTL - Shop : exchange the position of min price and max price
------------ VERSION - 2.1.0: Release on April-22-2016 ------------ - Update to WordPress 4.5 - Update Visual Composer 4.11.2 - Update Revolution Slider 5.2.5 - Add on/off button for quickview in Theme Option - Fix "sort by" in Shop Listing: Using product sorting of Woocommerce - Show responsive menu on mobile - Show SKU in product detail & quickview - Fix frontend bug in demo of version 2.0.4
------------ VERSION - 2.0.4: Release on February-04-2016 ------------ - Updated Woocommerce 2.5.x - Updated Revolution Slider 5.1.6 - Fixed bug from older package.
------------ VERSION - 2.0.2: Release on October-28-2015 ------------ - Fixed bug: do not display Login in Index 4 - Fixed bug: page error when turn off compare plugin - Updated to Woocommerce 2.4.8 - Updated to Visual Composer 4.8.0.1
------------ VERSION - 2.0.1: Release on October-06-2015 ------------ - Updated to Visual Composer 4.7.4
------------ VERSION - 2.0.0: Release on September-24-2015 ------------ - Updated to WordPress 4.3 - Updated to Woocommerce 2.4.6 - Updated to Revolution Slider 4.6.93 - Updated to Visual Composer 4.6.2 - Added One-Click Installation
------------ VERSION - 1.0.3: Release on June-27-2015 ------------ [#] Fixed: prettyPhoto insecure
------------ VERSION - 1.0.0: Release on May-12-2015 ------------ [+] Initial Release
BUY From ENVATO Marketplace
#Business#clean#e-commerce#ecommerce#Fashion#flexible#furniture#maxshop#mobile#modern#multi#multipurpose#multivendor#page builder#purpose#responsive#Shop#shopping#theme#visual composer#woocommerce
0 notes
Text
Figure out JS Dropdown menu
http://finolex.github.io
Step 1: Created JS file
Step 2: Created a new div and used CSS to set the class of it to hidden (this new div was created under the menu icon divs that were made using the w3 tutorial before).
document.getElementsByClassName("One").onclick = function() { document.getElementsByClassName("dropdown").toggle(); }
Step 3: Doesn’t work. So considering changing the w3 divs to an image that is probably easier to work with as an object/click.
Step 4: Successfully replaced divs with an image.
Step 5: Have to try to make an onclick event for the image
Step 6: After much struggling, finally able to replace old divs with an image of the menu icon (png file from google) in CSS and html
Step 7: Managed to create new div with drop down content, and hide it.
Step 8: Have to try to make interactive with JS (ie. toggle the hide on click).
Step 9: Created an onclick function:
function dropdowntoggle { var x = document.getElementsByClassName("hide");
if(x.style.display == 'none'){ x.style.display = 'block'; } else { x.style.display = 'none'; } }
but error shows this function is not defined. Have to figure out why html isn’t detecting the .js script
Step 10: OMG IT WORKS!!!! BLESSSSSSSS. Looks ugly, but it works omggggg
0 notes
Photo

Dropdown Menu on Click
#onclick dropdown menu#dropdown menu#Web Design Tutorial#menu#divinector#codingdays#codingisfun#100daysofcode#learn to code
0 notes
Photo

Filled in the rest of the database.
Set up very basic OnClick listeners to return the strings for the subcategories being clicked. (I will need this later!)
Yesterday, I noticed that there were lore entries that lacked subcategories. To mirror the layout of the in-game lore library, they would have to be included somehow, yet my Expandable List could only add Categories and Subcategories. Therefore, the query was modified -- with much trial and error -- to add such unique lore to the Expandable List.
Research was also performed for various menu designs and menu features. Thought was given to a dropdown menu to hold various result types (sort lore by Category, Alphabetical, search).
TODO
Integrate the new query into the code
Make sure everything is populated as expected.
0 notes
Text
Practical Use Cases for JavaScript’s closest() Method
Have you ever had the problem of finding the parent of a DOM node in JavaScript, but aren’t sure how many levels you have to traverse up to get to it? Let’s look at this HTML for instance:
<div data-id="123"> <button>Click me</button> </div>
That’s pretty straightforward, right? Say you want to get the value of data-id after a user clicks the button:
var button = document.querySelector("button");
button.addEventListener("click", (evt) => { console.log(evt.target.parentNode.dataset.id); // prints "123" });
In this very case, the Node.parentNode API is sufficient. What it does is return the parent node of a given element. In the above example, evt.targetis the button clicked; its parent node is the div with the data attribute.
But what if the HTML structure is nested deeper than that? It could even be dynamic, depending on its content.
<div data-id="123"> <article> <header> <h1>Some title</h1> <button>Click me</button> </header> <!-- ... --> </article> </div>
Our job just got considerably more difficult by adding a few more HTML elements. Sure, we could do something like element.parentNode.parentNode.parentNode.dataset.id, but come on… that isn’t elegant, reusable or scalable.
The old way: Using a while-loop
One solution would be to make use of a while loop that runs until the parent node has been found.
function getParentNode(el, tagName) { while (el && el.parentNode) { el = el.parentNode; if (el && el.tagName == tagName.toUpperCase()) { return el; } } return null; }
Using the same HTML example from above again, it would look like this:
var button = document.querySelector("button");
console.log(getParentNode(button, 'div').dataset.id); // prints "123"
This solution is far from perfect. Imagine if you want to use IDs or classes or any other type of selector, instead of the tag name. At least it allows for a variable number of child nodes between the parent and our source.
There’s also jQuery
Back in the day, if you didn’t wanted to deal with writing the sort of function we did above for each application (and let’s be real, who wants that?), then a library like jQuery came in handy (and it still does). It offers a .closest() method for exactly that:
$("button").closest("[data-id='123']")
The new way: Using Element.closest()
Even though jQuery is still a valid approach (hey, some of us are beholden to it), adding it to a project only for this one method is overkill, especially if you can have the same with native JavaScript.
And that’s where Element.closest comes into action:
var button = document.querySelector("button");
console.log(button.closest("div")); // prints the HTMLDivElement
There we go! That’s how easy it can be, and without any libraries or extra code.
Element.closest() allows us to traverse up the DOM until we get an element that matches the given selector. The awesomeness is that we can pass any selector we would also give to Element.querySelector or Element.querySelectorAll. It can be an ID, class, data attribute, tag, or whatever.
element.closest("#my-id"); // yep element.closest(".some-class"); // yep element.closest("[data-id]:not(article)") // hell yeah
If Element.closest finds the parent node based on the given selector, it returns it the same way as document.querySelector. Otherwise, if it doesn’t find a parent, it returns null instead, making it easy to use with if conditions:
var button = document.querySelector("button");
console.log(button.closest(".i-am-in-the-dom")); // prints HTMLElement
console.log(button.closest(".i-am-not-here")); // prints null
if (button.closest(".i-am-in-the-dom")) { console.log("Hello there!"); } else { console.log(":("); }
Ready for a few real-life examples? Let’s go!
Use Case 1: Dropdowns
CodePen Embed Fallback
Our first demo is a basic (and far from perfect) implementation of a dropdown menu that opens after clicking one of the top-level menu items. Notice how the menu stays open even when clicking anywhere inside the dropdown or selecting text? But click somewhere on the outside, and it closes.
The Element.closest API is what detects that outside click. The dropdown itself is a <ul> element with a .menu-dropdown class, so clicking anywhere outside the menu will close it. That’s because the value for evt.target.closest(".menu-dropdown") is going to be null since there is no parent node with this class.
function handleClick(evt) { // ... // if a click happens somewhere outside the dropdown, close it. if (!evt.target.closest(".menu-dropdown")) { menu.classList.add("is-hidden"); navigation.classList.remove("is-expanded"); } }
Inside the handleClick callback function, a condition decides what to do: close the dropdown. If somewhere else inside the unordered list is clicked, Element.closest will find and return it, causing the dropdown to stay open.
Use Case 2: Tables
CodePen Embed Fallback
This second example renders a table that displays user information, let’s say as a component in a dashboard. Each user has an ID, but instead of showing it, we save it as a data attribute for each <tr> element.
<table> <!-- ... --> <tr data-userid="1"> <td> <input type="checkbox" data-action="select"> </td> <td>John Doe</td> <td>[email protected]</td> <td> <button type="button" data-action="edit">Edit</button> <button type="button" data-action="delete">Delete</button> </td> </tr> </table>
The last column contains two buttons for editing and deleting a user from the table. The first button has a data-action attribute of edit, and the second button is delete. When we click on either of them, we want to trigger some action (like sending a request to a server), but for that, the user ID is needed.
A click event listener is attached to the global window object, so whenever the user clicks somewhere on the page, the callback function handleClick is called.
function handleClick(evt) { var { action } = evt.target.dataset; if (action) { // `action` only exists on buttons and checkboxes in the table. let userId = getUserId(evt.target); if (action == "edit") { alert(`Edit user with ID of ${userId}`); } else if (action == "delete") { alert(`Delete user with ID of ${userId}`); } else if (action == "select") { alert(`Selected user with ID of ${userId}`); } } }
If a click happens somewhere else other than one of these buttons, no data-action attribute exists, hence nothing happens. However, when clicking on either button, the action will be determined (that’s called event delegation by the way), and as the next step, the user ID will be retrieved by calling getUserId:
function getUserId(target) { // `target` is always a button or checkbox. return target.closest("[data-userid]").dataset.userid; }
This function expects a DOM node as the only parameter and, when called, uses Element.closest to find the table row that contains the pressed button. It then returns the data-userid value, which can now be used to send a request to a server.
Use Case 3: Tables in React
Let’s stick with the table example and see how we’d handle it on a React project. Here’s the code for a component that returns a table:
function TableView({ users }) { function handleClick(evt) { var userId = evt.currentTarget .closest("[data-userid]") .getAttribute("data-userid");
// do something with `userId` }
return ( <table> {users.map((user) => ( <tr key={user.id} data-userid={user.id}> <td>{user.name}</td> <td>{user.email}</td> <td> <button onClick={handleClick}>Edit</button> </td> </tr> ))} </table> ); }
I find that this use case comes up frequently — it’s fairly common to map over a set of data and display it in a list or table, then allow the user to do something with it. Many people use inline arrow-functions, like so:
<button onClick={() => handleClick(user.id)}>Edit</button>
While this is also a valid way of solving the issue, I prefer to use the data-userid technique. One of the drawbacks of the inline arrow-function is that each time React re-renders the list, it needs to create the callback function again, resulting in a possible performance issue when dealing with large amounts of data.
In the callback function, we simply deal with the event by extracting the target (the button) and getting the parent <tr> element that contains the data-userid value.
function handleClick(evt) { var userId = evt.target .closest("[data-userid]") .getAttribute("data-userid");
// do something with `userId` }
Use Case 4: Modals
CodePen Embed Fallback
This last example is another component I’m sure you’ve all encountered at some point: a modal. Modals are often challenging to implement since they need to provide a lot of features while being accessible and (ideally) good looking.
We want to focus on how to close the modal. In this example, that’s possible by either pressing Esc on a keyboard, clicking on a button in the modal, or clicking anywhere outside the modal.
In our JavaScript, we want to listen for clicks somewhere in the modal:
var modal = document.querySelector(".modal-outer"); modal.addEventListener("click", handleModalClick);
The modal is hidden by default through a .is-hidden utility class. It’s only when a user clicks the big red button that the modal opens by removing this class. And once the modal is open, clicking anywhere inside it — with the exception of the close button — will not inadvertently close it. The event listener callback function is responsible for that:
function handleModalClick(evt) { // `evt.target` is the DOM node the user clicked on. if (!evt.target.closest(".modal-inner")) { handleModalClose(); } }
evt.target is the DOM node that’s clicked which, in this example, is the entire backdrop behind the modal, <div class="modal-outer">. This DOM node is not within <div class="modal-inner">, hence Element.closest() can bubble up all it wants and won’t find it. The condition checks for that and triggers the handleModalClose function.
Clicking somewhere inside the nodal, say the heading, would make <div class="modal-inner"> the parent node. In that case, the condition isn’t truthy, leaving the modal in its open state.
Oh, and about browser support…
As with any cool “new” JavaScript API, browser support is something to consider. The good news is that Element.closest is not that new and is supported in all of the major browsers for quite some time, with a whopping 94% support coverage. I’d say this qualifies as safe to use in a production environment.
The only browser not offering any support whatsoever is Internet Explorer (all versions). If you have to support IE, then you might be better off with the jQuery approach.
As you can see, there are some pretty solid use cases for Element.closest. What libraries, like jQuery, made relatively easy for us in the past can now be used natively with vanilla JavaScript.
Thanks to the good browser support and easy-to-use API, I heavily depend on this little method in many applications and haven’t been disappointed, yet.
Do you have any other interesting use cases? Feel free to let me know.
The post Practical Use Cases for JavaScript’s closest() Method appeared first on CSS-Tricks.
You can support CSS-Tricks by being an MVP Supporter.
Practical Use Cases for JavaScript’s closest() Method published first on https://deskbysnafu.tumblr.com/
0 notes
Text
Maxshop | Multi-Purpose Responsive WooCommerce Theme (Mobile Layouts Included)
New Post has been published on https://click.atak.co/maxshop-multi-purpose-responsive-woocommerce-theme-mobile-layouts-included/
Maxshop | Multi-Purpose Responsive WooCommerce Theme (Mobile Layouts Included)
Maxshop – Top Multipurpose WordPress Theme for WooCommerce
Latest version – 3.3.0: Released on Jun-23-2018 | Changelog
✔️ NEW Features for Mobile Layouts
✔️ Latest WooCommerce
Maxshop is a unique and modern eCommerce WordPress theme for your digital store, hitech store, watch store, men store, women store, clothing store, furniture store, book store, cosmetics shop, luxury jewelry and accessories store…
In addition, this amazing theme is integrated with WooCommerce, many plugins with lots of features, mini cart, custom widgets, unlimited color schemes, Slider with smooth transition effects, Menu with multiple column styles and advanced widgets… You are free to control this theme in order to make your store more friendly and adorable for your customers.. Besides, with One-Click Installation supported, you will get a full website look like our demo with only one click without simple data and widget files required.
Moreover, with this BIG update, Maxshop becomes more clean, powerful and complete WooCommerce theme with a lots of HOT features.
Let’s experience this awesomeness and to explore more features in this theme. We are sure that you will fall in love with our Maxshop at first sight.
HOT MOBILE-SPECIFIC WEB DESIGN
Do you want to have a professional online store on mobile devices?
Unlike other themes which support responsive layouts only, MaxShop now is built with both responsive layouts and mobile-specific web designs with full of shop features, specifically designed and developed for mobile devices. This is the trend of online store 2017 – when using and shopping via smartphones is increasing rapidly!
By using mobile layouts, you can build a mobile-friendly website and bring your customers a great mobile shopping experience. You’re able to enable these layouts in theme option based on your market strategies. When you disable mobile layout, the theme will use the responsive layouts as default.
MUCH EASIER TO CREATE A MULTI-VENDOR WEBSITE
MaxShop v3.0 is fully compatible with Mulitvendorplugins like Dokan Mulitvendor, WC Vendors and WC MarketPlace.
AJAX LIVE SEARCH PRO
RESPONSIVE DESIGN
Maxshop is designed to be fully responsive layout, it will make your site have amazing look on different screen resolutions such as: mobile, iPhone, iPad and other tablets. This is one of the best option to reach the customers who use smart devices.
HIGH PERFORMANCE
Maxshop is optimized performance with fast loading speed in just few secs and beautiful looking on any devices.
HEADER STYLES
MENU STYLES
You can easy to create columns to display categories and products with description, price, image, video, effects… or even add links to any page, widgets with promotion banners and plugins.
WOOCOMMERCE INTEGRATION
Theme uses the excellent WooCommerce plugin to transform your WordPress website into an eCommerce store. Plugin supports to show a single product/multiple products by ID or SKU and a lot of payment options and shipping options available.
PAGE BUILDER WITH VISUAL COMPOSER
Visual Composer is drag and drop frontend and backend page builder plugin that will save you tons of time working on the site content. You will be able to take full control over your WordPress site, build any layout you can imagine.
QUICK VIEW PRODUCT
It’s so convenient for customers to view quickly detail product on the Homepage, Listing page without leaving the current page. Your product detail will open with full necessary information like: image product, product price, description, product reviews and link to the product detail page, etc.
AJAX MINICART
Be built-in Minicart widget, you can select product to buy without leaving current page, instantly add product to basket. We also re-style of the Checkout page to increase user experience and sales. Additional, you can easy to add product to wishlish or compare product.
COUNTDOWN TIMER
You can be attract your customers’ attention to products that you insert block counts days, hours, minutes and seconds in reverse order. You are enable to show sales and promotions, upcoming events as well as for other different purposes.
CATEGORY & PRODUCT PAGE
PRODUCT PAGE
Your customers can easily find deeper information about a product before making a decision to order
TOTALLY NEW ONCLICK INSTALL
POWERFUL THEME OPTIONS
UNLIMITED COLOR
RTL SUPPORT
Full Feature List
Upto 9+ HomePage Layouts
Mobile Layouts Ready! – Never more professional with a website working like a mobile app
Multi-Vendors Support – Fully compatible with Dokan, WC Vendors that can help you to create an amazing marketplace
Compatible with WordPress 4.9.x
WooCommerce 3.3.x Ready!
Revolution Slider (advanced page builder) Worth $19
Visual Composer Worth $34
MailChimp for WordPress
One Click Import Demo Site – Easiest and fastest way to build your website
Child Theme Included
Compare & Wishlist support
Ajax Live Search Pro
Color & Image Swatches in Product Detail and Product Listing
Different Header Styles
Various Shortcodes – Get creative with unlimited combinations of easy-to-use shortcodes and quickly create any type of page you like.
Responsive WordPress Theme
Unlimited Color Schemes
Google Fonts Included
Fully integrated with Font Awesome Icon
Built in with HTML5, CSS3 & LESS
Contact Form 7 ready
Easy Customization
Typography – Highly customizable typography settings,
Support menu with Mega and dropdown style
Support primary menu location, widget sidebars
SEO Optimized
Blog Layout Options:
Left Sidebar with Grid view (2-4 columns)
Right Sidebar with Grid view (2-4 columns)
Left Sidebar with List view
Right Sidebar with List view
Post Format Types:
Post Format Image
Post Format Audio
Post Format Gallery
Post Format Video
Multiple portfolio pages: Portfolio Masonry, Portfolio 2-4 columns
Translation – WPML compatible and every line of your content can be translated
RTL Support
Support to add custom CSS/JS
Cross browser compatible – It works fine under modern, major browser (FireFox, Safari, Chrome, IE10+)
Download PSD files worth $12
Free Lifetime Updates
WHAT ARE INCLUDED?
Maxshop Theme Package Use this package to install to your current site
PSD Sources All PSD design themes
Detailed Documentation Provide all detailed steps to configure theme
Check Out Popular WordPress Themes:
Change Log
------------ VERSION - 3.3.0: Released on Jun-23-2018 ------------ [+] Update WordPress 4.9.6 [+] Update WooCommerece 3.4.3 [+] Update Revolution Slider 5.4.7.4 [+] Updated Visual Composer 5.5.1 [+] New Feature: Update Ajax Search for Mobile Layout [+] New Feature: Update option to enable header for detail page in Mobile Layout [+] New Feature: Update option to turn on/off Add to Cart button for Shop page in Mobile Layout [#] Bug Fix: Fix bug about custom color when updating theme by add option Enable Custom Color [#] Bug Fix: Fix bug in previous version
------------ VERSION - 3.2.0: Released on May-02-2018 ------------ [+] Update WooCommerece 3.3.5 [+] New Feature: Update icon NEW & SOLD OUT [+] New Feature: Update Hour Setting for Countdown product [+] New Feature: Update WC MarketPlace compatibility [#] Bug Fix: Fix bug in previous version
------------ VERSION - 3.1.3: Released on Mar-28-2018 ------------ [+] Update WooCommerece 3.3.4 [+] Update visual composer 5.4.7 [+] Update revolution slider 5.4.7.2
------------ VERSION - 3.1.2: Released on Mar-19-2018 ------------ [+] Update WP Bakery Page Builder (Visual Composer) 5.4.7 [#] Bug Fix: Fix bug menu responsive [#] Bug Fix: Fix bug in product categories
------------ VERSION - 3.1.1: Released on Mar-06-2018 ------------ [+] Update WooCommerece 3.3.3 [+] New Feature: Update param turn on or off revslider on mobile layout [+] New Feature: Update 404 page editor [#] Bug Fix: Fix bug in swatches variation [#] Bug Fix: Fix bug double countdown in index page
------------ VERSION - 3.1.0: Released on Feb-13-2018 ------------ [+] Update WooCommerece 3.3.1 [+] New Feature: Update Countdown deal in Listing product and single product [+] New Feature: Update feature video in single product [+] New Feature: Update login ajax in poup login [+] New Feature: Update social login [+] New Feature: Update option allow config number of column for sub-categories in listing product [+] New Feature: Update 3 style for single product [+] New Feature: Update option allow to config the position of product thumbnail image in single product [+] New Feature: Update option allow to config sidebar layout for single product
------------ VERSION - 3.0.0: Release on Jan-29-2018 ------------ [+] Update Core [+] Update 2 Mobile Layouts [+] Update Multi-Vendors Support [+] Update Ajax Live Search Pro with SW Ajax WooCommerce Search [+] Update New One Click Install [+] Update Pop-Up Newsletter [+] Update Revolution Slider 5.4.6.3.1 [+] Update Visual Composer 5.4.5 [+] Update WooCommerce 3.2.6
------------ VERSION - 2.4.5: Release on Nov-08-2017 ------------ [+] Update WordPress 4.8.2 [+] Update Revolution Slider 5.4.6.2 [+] Update Visual Composer 5.4.2 [+] Update WooCommerce 3.2.x
------------ VERSION - 2.4.4: Release on July-14-2017 ------------ [+] Updated WordPress 4.8 [+] Updated WooCommerce 3.1.1 [+] Updated Visual Composer 5.2 [+] Updated Revolution Slider 5.4.5.1
------------ VERSION - 2.4.3: Release on May-26-2017 ------------ [#] Fixed bug: products don't display on ya woocomerce coundown slider
------------ VERSION - 2.4.2: Release on May-09-2017 ------------ [#] Fixed bug: images in the gallery don't change to match the variation option
------------ VERSION - 2.4.2: Release on April-25-2017 ------------ [+] Updated WordPress 4.7.4 [+] Updated WooCommerce 3.0.4 [+] Updated Revolution Slider 5.4.3
------------ VERSION - 2.4.0: Release on Jan-25-2017 ------------ [+] Optimized performance [+] Fixed some issues from last version [+] Updated some plugins: [-] SW Our Team ver 1.1.0 [-] SW Partner Slider 1.1.0 [-] SW Responsive Post Slider 1.1.0 [-] SW Testimonial Slider 1.1.0 [-] SW Woocommerce 1.1.0
------------ VERSION - 2.3.3: Release on Dec-24-2016 ------------ [+] Update WordPress 4.7 [+] Update WooCommerce 2.6.9 [+] Updated Visual Composer 5.0.1 [+] Fixed bug: Show Product image in Product detail [- ] Changed product image popup zoom in product detail to slider instead of single image
------------ VERSION - 2.3.1: Release on Nov-07-2016 ------------ - Update to WooCommerce 2.6.7 - Update Revolution Slider 5.3.0.2
------------ VERSION - 2.3.0: Release on Sep-23-2016 ------------ + Added 4 extra homepage layouts - Update to WordPress 4.6.1 - Update Visual Composer 4.12.1 - Added functions: + Theme options: Added Copyright param + Product listing: Added param that allows to select the number of product to display
------------ VERSION - 2.2.0: Release on June-27-2016 ------------ - Update to WordPress 4.5.3 - Update Visual Composer 4.12 - Update WooCommerce 2.6.1 - Update Mailchimp 3.1.10 - Fixed bugs: + Shop: Set link for products which don't have image in gallery + RTL - Shop : exchange the position of min price and max price
------------ VERSION - 2.1.0: Release on April-22-2016 ------------ - Update to WordPress 4.5 - Update Visual Composer 4.11.2 - Update Revolution Slider 5.2.5 - Add on/off button for quickview in Theme Option - Fix "sort by" in Shop Listing: Using product sorting of Woocommerce - Show responsive menu on mobile - Show SKU in product detail & quickview - Fix frontend bug in demo of version 2.0.4
------------ VERSION - 2.0.4: Release on February-04-2016 ------------ - Updated Woocommerce 2.5.x - Updated Revolution Slider 5.1.6 - Fixed bug from older package.
------------ VERSION - 2.0.2: Release on October-28-2015 ------------ - Fixed bug: do not display Login in Index 4 - Fixed bug: page error when turn off compare plugin - Updated to Woocommerce 2.4.8 - Updated to Visual Composer 4.8.0.1
------------ VERSION - 2.0.1: Release on October-06-2015 ------------ - Updated to Visual Composer 4.7.4
------------ VERSION - 2.0.0: Release on September-24-2015 ------------ - Updated to WordPress 4.3 - Updated to Woocommerce 2.4.6 - Updated to Revolution Slider 4.6.93 - Updated to Visual Composer 4.6.2 - Added One-Click Installation
------------ VERSION - 1.0.3: Release on June-27-2015 ------------ [#] Fixed: prettyPhoto insecure
------------ VERSION - 1.0.0: Release on May-12-2015 ------------ [+] Initial Release
BUY From ENVATO Marketplace
#Business#clean#e-commerce#ecommerce#Fashion#flexible#furniture#maxshop#mobile#modern#multi#multipurpose#multivendor#page builder#purpose#responsive#Shop#shopping#theme#visual composer#woocommerce
0 notes