#onnxruntime
Explore tagged Tumblr posts
Visit Tumblr Blog
Explore Tumblr blogs with no restrictions, modern design and the best experience.
Last Seen Tumblr Blogs


Fun Fact
Tumblr was acquired by Yahoo for $1.1B in 2013.
Text
How ONNX Runtime is Evolving AI in Microsoft with Intel

With the goal of bringing AI features to devices, the Microsoft Office team has been working with Intel and ONNX Runtime for over five years to integrate AI capabilities into their array of productivity products. The extension of AI inference deployment from servers to Windows PCs enhances responsiveness, preserves data locally to protect privacy, and increases the versatility of AI tooling by removing the requirement for an internet connection. These advancements keep powering Office features like neural grammar checker, ink form identification, and text prediction.
What is ONNX Runtime
As a result of their extensive involvement and more than two decades of cooperation, Intel and Microsoft are working more quickly to integrate AI features into Microsoft Office for Windows platforms. The ONNX Runtime, which enables machine learning models to scale across various hardware configurations and operating systems, is partially responsible for this accomplishment. The ONNX runtime is continuously refined by Microsoft, Intel, and the open-source community. When used in this way, it enhances the efficiency of Microsoft Office AI models running on Intel platforms.
AI Generative
With ONNX Runtime, you can incorporate the power of large language models (LLMs) and generative artificial intelligence (AI) into your apps and services. State-of-the-art models for image synthesis, text generation, and other tasks can be used regardless of the language you develop in or the platform you need to run on.
ONNX Runtime Web
With a standard implementation, ONNX Runtime Web enables cross-platform portability for JavaScript developers to execute and apply machine learning models in browsers. Due to the elimination of the need to install extra libraries and drivers, this can streamline the distribution process.
ONNX Runtime Java
Using the same API as cloud-based inferencing, ONNX Runtime Mobile runs models on mobile devices. Swift, Objective-C, Java, Kotlin, JavaScript, C, and C++ developers can integrate AI to Android, iOS, react-native, and MAUI/Xamarin applications by using their preferred mobile language and development environment.
ONNX Runtime Optimization
Inference models from various source frameworks (PyTorch, Hugging Face, TensorFlow) may be efficiently solved by ONNX Runtime on various hardware and software stacks. In addition to supporting APIs in many languages (including Python, C++, C#, C, Java, and more), ONNX Runtime Inference leverages hardware accelerators and functions with web browsers, cloud servers, and edge and mobile devices.
Ensuring optimal on-device AI user experience necessitates ongoing hardware and software optimization, coordinated by seasoned AI-versed experts. The most recent ONNX Runtime capabilities are regularly added to Microsoft Office’s AI engine, guaranteeing optimal performance and seamless AI model execution on client devices.
Intel and Microsoft Office have used quantization, an accuracy-preserving technique for optimizing individual AI models to employ smaller datatypes. “Microsoft Office’s partnership with Intel on numerous inference projects has achieved notable reductions in memory consumption, enhanced performance, and increased parallelization all while maintaining accuracy by continuing to focus on our customers,” stated Joshua Burkholder, Principal Software Engineer of Microsoft’s Office AI Platform.
With the help of Intel’s DL Boost, a collection of specialized hardware instruction sets, this method reduces the on-device memory footprint, which in turn reduces latency. The ONNX Runtime has been tuned to work with Intel’s hybrid CPU design, which combines efficiency and performance cores. With Intel Thread Director, this is further enhanced by utilising machine learning to schedule activities on the appropriate core, guaranteeing that they cooperate to maximise performance-per-watt.
Furthermore, on-device AI support for Office web-based experiences is being provided by Intel and Microsoft in partnership. The ONNX Runtime Web makes this feasible by enabling AI feature support directly in web applications, like Microsoft Designer.
Balancing Cloud and On-device
With the advent of AI PCs, particularly those featuring the latest Intel Core Ultra processor, more workloads are being able to move from cloud-based systems to client devices. Combining CPU , GPU , and NPU , Intel Core Ultra processors offer complementary AI compute capabilities that, when combined with model and software optimizations, can be leveraged to provide optimal user experience.
Even while the AI PC opens up new possibilities for executing AI activities on client devices, it is necessary to assess each model separately to ascertain whether or not running locally makes sense. AI computation may take on a hybrid form in the future, with a large number of models running on client devices and additional cloud computing used for more complicated tasks. In order to aid with this, Intel AI PC development collaborates with the Office team to determine which use cases are most appropriate for customers using the Intel Core Ultra processor.
The foundation of Intel and Microsoft’s continued cooperation is a common goal of an AI experience optimized to span cloud and on-device with products such as AI PC. Future Intel processor generations will enhance the availability of client compute for AI workloads. As a result, Intel may anticipate that essential tools like Microsoft Office will be created to provide an excellent user experience by utilizing the finest client and cloud technologies.
Read more on govindhtech.com
#onnxruntime#evolvingai#microsoft#windowspcs#aimodel#aigenerative#machinelearning#Intel#ai#technology#technews#govindhtech#news#ONNXruntimweb#onnx
0 notes
Text
📁 HiFiSampler on MacOS (ft. chevrefee)
Today's tutorial will be going over the installation for Hifisampler for MacOS. This was made in collaboration with chevrefee who helped me through the entirety of the install so it was all made possible with their help! Before we get into the specifics of installation we will be going over the currently tested MacOS environments and explain the differences in installation.
For users of Silicon MacOS that are on Sonoma, it is recommended to use the distributed client. Make sure you download both the resampler and client zip files.
For Intel MacOS and Silicon MacOS that are on Ventura and Sequoia, refer to the window’s exe installation method. To prep the environment for the installation please refer to my resampler tutorial before proceeding with this tutorial.
Link ▶︎ https://keitaiware.com/post/766063532617973761/resamplers-on-macos
MacOS that are on versions before Ventura cannot natively support this resampler. Consider using Bootcamp and following an installation guide for Windows.
What you will need in order to begin the installation. . .
Anaconda
Python 3.10
Section 1, “Installing necessary files.”
Install the general Hifisampler installer.
To check if Anaconda is installed to your system, open Terminal and run the command . . .
conda -V
This command will run back what version of anaconda you have installed.
We will now create the conda environment inside Terminal. To set up the conda environment,
conda create -n py10 python=3.10 anaconda
Now that the environment has been created, we will now activate it and install all the necessary modules. *(numpy, scipy, resampy, onnxruntime, soundfile pyloudnorm, librosa, soundfile)
pip install numpy, scipy, resampy, onnxruntime, soundfile pyloudnorm, librosa, soundfile
Our next install will be separate from these modules.
pip3 install torch torchvision
To continue with the preparation, we will need to install the correct version of numpy. In order to do this, we will need to uninstall our existing version to replace it with the correct version.
pip uninstall numpy pip install numpy==1.26.4
Section 2, “Organizing the resampler folder.”
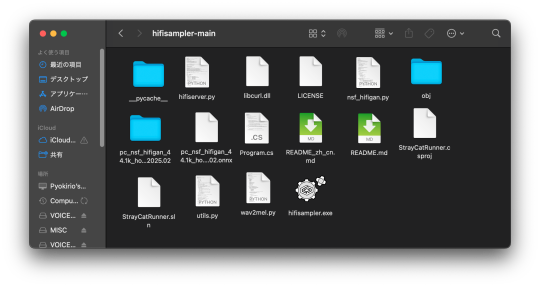
After this, your environment is almost set to run hifisampler! Before we run the necessary files inside python we will be organizing our resampler folder for hifisampler. We will place the entire hifisampler-main folder into the resampler folder.
/Users/Username/Library/OpenUtau/Resamplers
Section 3, Setting up the resampler
For Silicon MacOS on Sonoma * (see Section 6)
Sonoma users on Silicon MacOS can directly download the client file instead of generating a .sh (shell) file. Put the unzipped hifisampler_client_MacOS_ARM64.zip folder into your hifisampler-main folder.
For other Macs . . .
You will need to generate an .sh (shell) to run the resampler.exe. In order to generate the .sh file you can follow my MacOS resampler tutorial here.
Link ▶︎ https://keitaiware.com/post/766063532617973761/resamplers-on-macos
After creating the .sh file, simply drop it into the hifisampler-main folder. Note that the RELPATH for the resampler in the .sh file should be just hifisampler.exe, with no additional paths before it * (not hifisampler-main/hifisampler.exe).
Section 4, “Installing the HiFiGAN dependency.”
Now we will install the HiFiGAN OpenUTAU dependency.
https://github.com/openvpi/vocoders/releases/tag/pc-nsf-hifigan-44.1k-hop512-128bin-2025.02
To install the HiFiGAN dependency, simply drag and drop the .oudep into the OpenUtau UI.
Now we will route the dependency paths inside of the hifiserver.py, to do this, we will right-click and open the file with IDLE or IDLE3 (whichever comes up for you). Using Visual Studio Code is also viable.
Inside of the IDLE view, use CMND+F and search for “HiFIGAN Not Found.” From here, we will look for the onnx_default_path and the ckpt_default_path. We will set the paths to the pc_nsf_hifigan_44.1k_hop512_128bin_2025.02.onnx and model.ckpt. Here below is an example of what to expect.

The area we will be focusing on is highlighted in blue.
Section 5, “Running the HiFiGAN Server.”
Your environment should be set up to run the HiFiGAN server now! For any missing modules in this step you can satisfy the errors by running. . .
pip install [module name]
There isn’t a preferred set of steps, but I tend to set up the HiFiGAN server before opening OpenUtau. To run the HiFiGAN server, we will activate the conda environment.
conda activate py10
Now we will run the server activation command.
python /Users/Username/Library/OpenUtau/Resamplers/hifisampler-main/hifiserver.py
You can also drag and drop the hifiserver.py file to the Terminal window instead of manually typing the pathname.

After Terminal finishes loading the server, you can open OpenUtau and load in your preferred UST and singer. Set your resampler to classic by hitting the cog icon, and select the hifisampler-main/hifisampler_client_MacOS_ARM64/hifisampler (Sonoma) or hifisampler-main/hifisampler.sh from the resampler tab.
Note: In order to render with hifisampler, you will need to open Terminal and run the conda activation command with the hifiserver activation command.
conda activate py10
With the python hifiserver.py activation command.
python /Users/Username/Library/OpenUtau/Resamplers/hifisampler-main/hifiserver.py
Section 6, “General Resampler Usage and Other Additions.”
As this resampler uses neural networks, it will take up more memory to process. If you find that your renders keep freezing, try freeing your memory before attempting to restart the render.
This tutorial has only been tested out on these MacOS:
Intel on Ventura
Silicon M2 on Sonoma
Silicon M2 Max on Sequoia (x2)
In theory, there will be no difference when using M1/M2/M3 chips of the same OS version. We theorize that the cause of uncertainty on whether a user can use the client file or not is based on the OS version used. We have yet to test on Silicon Ventura. Hachimisampler is a resampler from the same developer that shares the neural network system with hifisampler. It is said to work better on Jinriki voicebanks. If you would like to use this resampler instead, the installation procedure will be the same, with an addendum that wrapping the .exe with a .sh file is mandatory for all users since no dedicated client exists.
If you have already installed hifisampler beforehand, you can skip to Section 5 to use it, replacing the hifiserver.py with hachiserver.py instead.
1 note
·
View note
Text
"""
Real-Time Fraud Detection Pipeline with AutoML & Monitoring
Author: Renato Ferreira da Silva
All Rights Reserved © 2025
This code implements an enterprise-grade fraud detection system featuring:
Key Components:
Real-time data streaming with Kafka
Automated ML model optimization
Data drift monitoring
Production-ready ONNX deployment
Interactive analytics dashboard """
import numpy as np import pandas as pd import xgboost as xgb import lightgbm as lgb import json import datetime import onnxmltools import onnxruntime as ort import streamlit as st import ssl from kafka import KafkaConsumer from sklearn.ensemble import IsolationForest from sklearn.preprocessing import StandardScaler from sklearn.model_selection import train_test_split from sklearn.metrics import precision_score, recall_score, roc_auc_score from scipy.stats import ks_2samp from river.drift import PageHinkley from flaml import AutoML from onnxmltools.convert.common.data_types import FloatTensorType from sklearn.datasets import make_classification from tenacity import retry, stop_after_attempt
====================
SECURE STREAMING CONFIG
====================
kafka_topic = "fraud-detection" kafka_consumer = KafkaConsumer( kafka_topic, bootstrap_servers="localhost:9092", security_protocol="SSL", ssl_context=ssl.create_default_context(), value_deserializer=lambda x: json.loads(x.decode('utf-8')) )
====================
DATA GENERATION
====================
X, y = make_classification( n_samples=5000, n_features=10, n_informative=5, n_redundant=2, weights=[0.95], flip_y=0.01, n_clusters_per_class=2, random_state=42 )
====================
PREPROCESSING PIPELINE
====================
X_train_raw, X_test_raw, y_train, y_test = train_test_split( X, y, test_size=0.2, stratify=y, random_state=42 )
scaler = StandardScaler() X_train_scaled = scaler.fit_transform(X_train_raw) X_test_scaled = scaler.transform(X_test_raw)
outlier_mask = np.zeros(len(X_train_scaled), dtype=bool) for class_label in [0, 1]: mask_class = (y_train == class_label) iso = IsolationForest(contamination=0.02, random_state=42) outlier_mask[mask_class] = (iso.fit_predict(X_train_scaled[mask_class]) == 1)
X_train_clean, y_train_clean = X_train_scaled[outlier_mask], y_train[outlier_mask]
====================
AUTOML MODEL OPTIMIZATION
====================
auto_ml = AutoML() auto_ml.fit(X_train_clean, y_train_clean, task="classification", time_budget=600)
best_model = auto_ml.model
====================
DRIFT MONITORING SYSTEM
====================
drift_features = [i for i in range(X_train_clean.shape[1]) if ks_2samp(X_train_clean[:, i], X_test_scaled[:, i])[1] < 0.005]
ph = PageHinkley(threshold=20, alpha=0.99) drift_detected = any(ph.update(prob) and ph.drift_detected for prob in best_model.predict_proba(X_test_scaled)[:, 1])
====================
ONNX DEPLOYMENT
====================
if isinstance(best_model, xgb.XGBClassifier): model_onnx = onnxmltools.convert_xgboost( best_model, initial_types=[('float_input', FloatTensorType([None, X_train_clean.shape[1]]))] elif isinstance(best_model, lgb.LGBMClassifier): model_onnx = onnxmltools.convert_lightgbm( best_model, initial_types=[('float_input', FloatTensorType([None, X_train_clean.shape[1]]))] else: raise TypeError("Unsupported model type for ONNX conversion")
with open("fraud_model.onnx", "wb") as f: f.write(model_onnx.SerializeToString())
====================
STREAMLIT ANALYTICS UI
====================
st.title("📊 Real-Time Fraud Detection Monitor")
@retry(stop=stop_after_attempt(3)) def safe_kafka_consume(): try: msg = next(kafka_consumer) return msg.value["features"] except Exception as e: st.error(f"Kafka Error: {str(e)}") return None
if st.button("Refresh Data"): features = safe_kafka_consume() if features: processed_data = scaler.transform(np.array(features).reshape(1, -1)) prediction = best_model.predict(processed_data) prob_score = best_model.predict_proba(processed_data)[:, 1][0] st.metric("Transaction Status", value="FRAUD" if prediction[0] else "VALID", delta=f"Confidence: {prob_score:.2%}") if any(ph.update(prob_score) and ph.drift_detected): st.error("🚨 DATA DRIFT DETECTED - Model refresh recommended")
0 notes
Text
Fix ComfyUI Error occurred when executing DWPreprocessor
Fix Error occurred when executing DWPreprocessor:‘NoneType’ object has no attribute ‘get_providers’…print(f”Failed to load onnxruntime with {self.det.get_providers()}.\nPlease change EP_list in the config.yaml and restart ComfyUI”) Esay way:Don’t use the “onnx” model, use the “pt” model instead The harder way:1.go to your ComfyUI installation directory…

View On WordPress
0 notes

Text
ONNX Runtime merges WebGPU backend
https://github.com/microsoft/onnxruntime/pull/14579 Comments
0 notes
Text
米Microsoft、機械学習向け推論エンジン「ONNX Runtime」をオープンソースで公開
from https://mag.osdn.jp/18/12/06/160000
米Microsoftは12月4日、機械学習のための高性能な推論インターフェイスエンジン「Open Neural Network Exchange(ONNX)Runtime」をオープンソースで公開した。WindowsおよびmacOS、Linuxで利用できる。
Open Neural Network Exchange(ONNX)は、Microsoftが米Facebookと共同開発した深層学習や機械学習のためのオープンなモデルフォーマット。AIモデルの相互運用性のためのエコシステムを目指している。AI開発者はこれを利用してツール間でモデルを容易に共用でき、あるフレームワークでトレーニングしたモデルを別のフレームワークで利用するといったことが可能になる。
ONNX RuntimeはONNXに対応した推論エンジンで、CPUおよびGPU(CUDA)を利用して処理を実行できる。プログラミングインターフェイスとしてはPythonおよびC、C#をサポートする。ONNX Runtimeをコードに直接組み込んで利用するほか、「Azure Machine Learning」を使ってサービスを実装して使うこともできる。
Microsoft社内では「Bing Search」「Bing Ads」などのシナリオで用いるモデルの改善に利用しているという。
対応フォーマットはONNX 1.2以上、およびONNX-MLプロファイル。継続して最新のONNX標準が使えるようにアップデートするため、最新の機能を活用できるとしている。
ONNX RuntimeはプロジェクトのWebサイトより入手できる。
Open Neural Network Exchange(ONNX)Runtime https://github.com/microsoft/onnxruntime
https://mag.osdn.jp/images/mag/magazine-200x200.png
0 notes
Text
A tweet
Microsoft's AI runtime was originally built as an accelerator for TensorFlow and PyTorch inferencing. Today the team announced that the OnnxRuntime accelerator can now be used for training. Export your TF or Torch code to ONNX and go from there:https://t.co/gN4s3gPFpF pic.twitter.com/Dm6Un46aGk
— Miguel de Icaza (@migueldeicaza) May 19, 2020
0 notes
Text
Fraud Detection Pipeline com Streaming, AutoML e UI
Autor: Renato Ferreira da Silva
Todos os direitos reservados © 2025
Este código implementa um pipeline completo para detecção de fraudes, abrangendo desde a geração de dados até o monitoramento, deployment e integração com AutoML e UI.
Principais funcionalidades:
Pré-processamento avançado: remoção de outliers, normalização e validação contínua.
Modelagem adaptativa: XGBoost otimizado e AutoML para seleção de melhores hiperparâmetros.
Streaming de dados: integração com Kafka para processar dados em tempo real.
Conversão para ONNX: inferência otimizada para aplicações de alto desempenho.
Monitoramento contínuo de drift: análise em tempo real via River e Page-Hinkley.
Interface interativa: painel de visualização dos resultados via Streamlit. """
import numpy as np import pandas as pd import xgboost as xgb import lightgbm as lgb import json import datetime import onnxmltools import onnxruntime as ort import streamlit as st import ssl from kafka import KafkaConsumer from sklearn.ensemble import IsolationForest from sklearn.preprocessing import StandardScaler from sklearn.model_selection import train_test_split from sklearn.metrics import precision_score, recall_score, roc_auc_score, precision_recall_curve from scipy.stats import ks_2samp from river.drift import PageHinkley from flaml import AutoML from onnxmltools.convert.common.data_types import FloatTensorType from sklearn.datasets import make_classification from tenacity import retry, stop_after_attempt
====================
CONFIGURAÇÃO DE STREAMING SEGURO
====================
kafka_topic = "fraud-detection" kafka_consumer = KafkaConsumer( kafka_topic, bootstrap_servers="localhost:9092", security_protocol="SSL", # SSL para proteção ssl_context=ssl.create_default_context(), value_deserializer=lambda x: json.loads(x.decode('utf-8')) )
====================
GERAÇÃO DE DADOS
====================
X, y = make_classification( n_samples=5000, n_features=10, n_informative=5, n_redundant=2, weights=[0.95], flip_y=0.01, n_clusters_per_class=2, random_state=42 )
====================
PRÉ-PROCESSAMENTO
====================
X_train_raw, X_test_raw, y_train, y_test = train_test_split( X, y, test_size=0.2, stratify=y, random_state=42 )
scaler = StandardScaler() X_train_scaled = scaler.fit_transform(X_train_raw) X_test_scaled = scaler.transform(X_test_raw)
outlier_mask = np.zeros(len(X_train_scaled), dtype=bool) for class_label in [0, 1]: mask_class = (y_train == class_label) iso = IsolationForest(contamination=0.02, random_state=42) outlier_mask[mask_class] = (iso.fit_predict(X_train_scaled[mask_class]) == 1)
X_train_clean, y_train_clean = X_train_scaled[outlier_mask], y_train[outlier_mask]
====================
MODELAGEM COM AutoML MELHORADO
====================
auto_ml = AutoML() auto_ml.fit(X_train_clean, y_train_clean, task="classification", time_budget=600)
best_model = auto_ml.model
====================
MONITORAMENTO DE DRIFT E LOGGING SEGURO
====================
drift_features = [i for i in range(X_train_clean.shape[1]) if ks_2samp(X_train_clean[:, i], X_test_scaled[:, i])[1] < 0.005]
ph = PageHinkley(threshold=20, alpha=0.99) drift_detected = any(ph.update(prob) and ph.drift_detected for prob in best_model.predict_proba(X_test_scaled)[:, 1])
log_data = { "timestamp": datetime.datetime.now().isoformat(), "drift_features": drift_features, "concept_drift": drift_detected, "train_size": len(X_train_clean), "test_size": len(X_test_scaled), "class_ratio": f"{sum(y_train_clean)/len(y_train_clean):.4f}" }
with open("fraud_detection_audit.log", "a") as f: f.write(json.dumps(log_data) + "\n")
if drift_detected or drift_features: print("🚨 ALERTA: Mudanças significativas detectadas no padrão dos dados!")
====================
DEPLOYMENT - CONVERSÃO PARA ONNX SEGURA
====================
if isinstance(best_model, xgb.XGBClassifier): model_onnx = onnxmltools.convert_xgboost(best_model, initial_types=[('float_input', FloatTensorType([None, X_train_clean.shape[1]]))]) elif isinstance(best_model, lgb.LGBMClassifier): model_onnx = onnxmltools.convert_lightgbm(best_model, initial_types=[('float_input', FloatTensorType([None, X_train_clean.shape[1]]))]) else: raise TypeError("Modelo não suportado para conversão ONNX.")
with open("fraud_model.onnx", "wb") as f: f.write(model_onnx.SerializeToString())
====================
INTERFACE COM STREAMLIT SEGURO
====================
st.title("📊 Detecção de Fraude em Tempo Real")
@retry(stop=stop_after_attempt(3)) def safe_consume(): try: msg = next(kafka_consumer) return msg.value["features"] except Exception as e: st.error(f"Erro Kafka: {e}") return None
if st.button("Atualizar Dados"): features = safe_consume() if features: new_data = scaler.transform(np.array(features).reshape(1, -1)) pred = best_model.predict(new_data) prob = best_model.predict_proba(new_data)[:, 1] st.write(f"**Predição:** {'Fraude' if pred[0] else 'Não Fraude'}") st.write(f"**Probabilidade de Fraude:** {prob[0]:.4f}") drift_detected = any(ph.update(prob[0]) and ph.drift_detected) if drift_detected: st.warning("⚠️ Drift detectado nos dados!")
0 notes
Text
Documentação do Fraud Detection Pipeline com Streaming, AutoML e UI
Introdução
Este código implementa um pipeline avançado de detecção de fraudes que cobre desde a coleta de dados em tempo real até a implantação de um modelo otimizado. Ele utiliza streaming com Kafka, AutoML para otimização do modelo e uma interface interativa com Streamlit para análise dos resultados.
📌 Funcionalidades Principais
Coleta de Dados em Tempo Real
O pipeline consome dados do Apache Kafka e processa-os em tempo real.
Pré-processamento Avançado
Normalização dos dados com StandardScaler.
Remoção de outliers usando IsolationForest.
Balanceamento de classes desbalanceadas (fraudes são minoritárias).
Treinamento e Otimização de Modelos
Uso de FLAML (AutoML) para encontrar o melhor modelo e hiperparâmetros.
Testa diferentes algoritmos automaticamente para obter o melhor desempenho.
Monitoramento Contínuo de Drift
Teste Kolmogorov-Smirnov (KS Test) para identificar mudanças nas distribuições das features.
Page-Hinkley Test para detecção de mudanças nos padrões de predição.
Conversão para ONNX
Modelo final convertido para ONNX para permitir inferência otimizada.
Interface Gráfica com Streamlit
Visualização dos resultados em tempo real.
Alerta de drift nos dados, permitindo auditoria contínua.
📌 Bibliotecas Utilizadas
🔹 Processamento de Dados
numpy, pandas, scipy.stats
sklearn.preprocessing.StandardScaler
sklearn.ensemble.IsolationForest
🔹 Modelagem e AutoML
xgboost, lightgbm
flaml.AutoML (AutoML para otimização de hiperparâmetros)
🔹 Streaming e Processamento em Tempo Real
kafka.KafkaConsumer
river.drift.PageHinkley
🔹 Deploy e Inferência
onnxmltools, onnxruntime
streamlit (para UI)
📌 Fluxo do Código
1️⃣ Coleta de Dados em Tempo Real
O código inicia um Kafka Consumer para coletar novas transações.
2️⃣ Pré-processamento
Normalização: Ajusta os dados para uma escala padrão.
Remoção de outliers: Evita que transações muito discrepantes impactem o modelo.
3️⃣ Treinamento e AutoML
O FLAML testa vários modelos e escolhe o melhor com base no desempenho.
O modelo final é armazenado para inferência.
4️⃣ Monitoramento de Drift
KS-Test compara os dados novos com o conjunto de treino.
Page-Hinkley detecta mudanças nos padrões de classificação.
5️⃣ Conversão ONNX e Inferência
O modelo é convertido para ONNX para tornar a inferência mais rápida e eficiente.
6️⃣ Interface de Usuário
Streamlit exibe o resultado da predição e alerta sobre mudanças inesperadas nos dados.
📌 Exemplo de Uso
1️⃣ Iniciar um servidor Kafka Certifique-se de que um servidor Kafka está rodando com um tópico chamado "fraud-detection".
2️⃣ Executar o Código Basta rodar o script Python, e ele automaticamente:
Coletará dados do Kafka.
Processará os dados e fará a predição.
Atualizará a interface gráfica com os resultados.
3️⃣ Ver Resultados no Streamlit Para visualizar os resultados:streamlit run nome_do_script.py
Isso abrirá uma interface interativa mostrando as predições de fraude.
📌 Possíveis Melhorias
Adicionar explicabilidade com SHAP para entender melhor as decisões do modelo.
Integração com banco de dados NoSQL (como MongoDB) para armazenar logs.
Implementação de um sistema de alertas via e-mail ou Slack.
📌 Conclusão
Este pipeline fornece uma solução robusta para detecção de fraudes em tempo real. Ele combina streaming, aprendizado de máquina automatizado, monitoramento e UI para tornar a análise acessível e escalável.
🚀 Pronto para detectar fraudes com eficiência! 🚀
"""
import numpy as np import pandas as pd import xgboost as xgb import lightgbm as lgb import shap import json import datetime import onnxmltools import onnxruntime as ort import streamlit as st from kafka import KafkaConsumer from sklearn.ensemble import IsolationForest from sklearn.preprocessing import StandardScaler from sklearn.model_selection import train_test_split from sklearn.metrics import precision_score, recall_score, roc_auc_score, precision_recall_curve from scipy.stats import ks_2samp from river.drift import PageHinkley from flaml import AutoML from onnxmltools.convert.common.data_types import FloatTensorType from sklearn.datasets import make_classification
====================
CONFIGURAÇÃO DE STREAMING
====================
kafka_topic = "fraud-detection" kafka_consumer = KafkaConsumer( kafka_topic, bootstrap_servers="localhost:9092", value_deserializer=lambda x: json.loads(x.decode('utf-8')) )
====================
GERAÇÃO DE DADOS
====================
X, y = make_classification( n_samples=5000, n_features=10, n_informative=5, n_redundant=2, weights=[0.95], flip_y=0.01, n_clusters_per_class=2, random_state=42 )
====================
PRÉ-PROCESSAMENTO
====================
X_train_raw, X_test_raw, y_train, y_test = train_test_split( X, y, test_size=0.2, stratify=y, random_state=42 )
scaler = StandardScaler() X_train_scaled = scaler.fit_transform(X_train_raw) X_test_scaled = scaler.transform(X_test_raw)
outlier_mask = np.zeros(len(X_train_scaled), dtype=bool) for class_label in [0, 1]: mask_class = (y_train == class_label) iso = IsolationForest(contamination=0.01, random_state=42) outlier_mask[mask_class] = (iso.fit_predict(X_train_scaled[mask_class]) == 1)
X_train_clean, y_train_clean = X_train_scaled[outlier_mask], y_train[outlier_mask]
====================
MODELAGEM COM AutoML
====================
auto_ml = AutoML() auto_ml.fit(X_train_clean, y_train_clean, task="classification", time_budget=300)
best_model = auto_ml.model
====================
MONITORAMENTO DE DRIFT E LOGGING
====================
drift_features = [i for i in range(X_train_clean.shape[1]) if ks_2samp(X_train_clean[:, i], X_test_scaled[:, i])[1] < 0.01]
ph = PageHinkley(threshold=30, alpha=0.99) drift_detected = any(ph.update(prob) and ph.drift_detected for prob in best_model.predict_proba(X_test_scaled)[:, 1])
log_data = { "timestamp": datetime.datetime.now().isoformat(), "drift_features": drift_features, "concept_drift": drift_detected, "train_size": len(X_train_clean), "test_size": len(X_test_scaled), "class_ratio": f"{sum(y_train_clean)/len(y_train_clean):.4f}" }
with open("fraud_detection_audit.log", "a") as f: f.write(json.dumps(log_data) + "\n")
if drift_detected or drift_features: print("🚨 ALERTA: Mudanças significativas detectadas no padrão dos dados!")
====================
DEPLOYMENT - CONVERSÃO PARA ONNX
====================
initial_type = [('float_input', FloatTensorType([None, X_train_clean.shape[1]]))] model_onnx = onnxmltools.convert_lightgbm(best_model, initial_types=initial_type)
with open("fraud_model.onnx", "wb") as f: f.write(model_onnx.SerializeToString())
====================
INTERFACE COM STREAMLIT
====================
st.title("📊 Detecção de Fraude em Tempo Real")
if st.button("Atualizar Dados"): message = next(kafka_consumer) new_data = np.array(message.value["features"]).reshape(1, -1) scaled_data = scaler.transform(new_data) pred = best_model.predict(scaled_data) prob = best_model.predict_proba(scaled_data)[:, 1]st.write(f"**Predição:** {'Fraude' if pred[0] else 'Não Fraude'}") st.write(f"**Probabilidade de Fraude:** {prob[0]:.4f}") drift_detected = any(ph.update(prob[0]) and ph.drift_detected) if drift_detected: st.warning("⚠️ Drift detectado nos dados!")
0 notes
Text
Latest DirectML boosts AMD GPU AWQ-based LM acceleration

Minimize Memory Usage and Enhance Performance while Running LLMs on AMD Ryzen AI and Radeon Platforms Overview of 4-bit quantization.
AMD and Microsoft have worked closely together to accelerate generative AI workloads on AMD systems over the past year with ONNXRuntime with DirectML. As a follow-up to AMD’s earlier releases, AMD is pleased to announce that they are enabling 4-bit quantization support and acceleration for Large Language Models (LLMs) on discrete and integrated AMD Radeon GPU platforms that are using ONNXRuntime->DirectML in close cooperation with Microsoft.
NEW! Awareness-Based Quantization(AWQ)
Microsoft and AMD are pleased to present Activation-Aware Quantization (AWQ) based LM acceleration enhanced on AMD GPU architectures with the most recent DirectML and AMD driver preview release. When feasible, the AWQ approach reduces weights to 4-bit with little impact on accuracy. This results in a large decrease in the amount of memory required to run these LLM models while also improving performance.
By determining the top 1% of salient weights required to preserve model correctness and quantizing the remaining 99% of weight parameters, the AWQ approach can accomplish this compression while retaining accuracy. Up to three times the memory reduction for the quantized weights/LLM parameters is achieved by using this technique, which determines which weights to quantize from 16-bit to 4-bit based on the actual data distribution in the activations. Compared to conventional weight quantization methods that ignore activation data distributions, it is also possible to preserve model fidelity by accounting for the data distribution in activations.
To obtain a performance boost on AMD Radeon GPUs, AMD driver resident ML layers dequantize the parameters and accelerate on the ML hardware during runtime. This 4-bit AWQ quantization is carried out utilizing Microsoft Olive toolchains for DirectML. Before the model is used for inference, the post-training quantization procedure described below is carried out offline. It was previously impossible to execute these language models (LM) on a device on a system with limited memory, but our technique makes it viable now.
Making Use of Hardware Capabilities
Ryzen AI NPU: Make use of the Neural Processing Unit (NPU) if your Ryzen CPU has one integrated! Specifically engineered to handle AI workloads efficiently, the NPU frees up CPU processing time while utilizing less memory overall.
Radeon GPU: To conduct LLM inference on your Radeon graphics card (GPU), think about utilizing AMD’s ROCm software stack. For the parallel processing workloads typical of LLMs, GPUs are frequently more appropriate, perhaps relieving the CPU of memory pressure.
Software Enhancements:
Quantization: Quantization drastically lowers the memory footprint of the LLM by reducing the amount of bits required to represent weights and activations. AMD [AMD Ryzen AI LLM Performance] suggests 4-bit KM quantization for Ryzen AI systems.
Model Pruning: To minimise the size and memory needs of the LLM, remove unnecessary connections from it PyTorch and TensorFlow offer pruning.
Knowledge distillation teaches a smaller student model to act like a larger teacher model. This may result in an LLM that is smaller and has similar functionality.
Making Use of Frameworks and Tools:
LM Studio: This intuitive software facilitates the deployment of LLMs on Ryzen AI PCs without the need for coding. It probably optimizes AMD hardware’s use of resources.
Generally Suggested Practices:
Select the appropriate LLM size: Choose an LLM that has the skills you require, but nothing more. Bigger models have more memory required.
Aim for optimal batch sizes: Try out various batch sizes to determine the ideal ratio between processing performance and memory utilization.
Track memory consumption: Applications such as AMD Radeon Software and Nvidia System Management Interface (nvidia-smi) can assist in tracking memory usage and pinpointing bottlenecks.
AWQ quantization
4-bit AWQ quantization using Microsoft Olive toolchains for DirectML
4-bit AWQ Quantization: This method lowers the amount of bits in a neural network model that are used to represent activations and weights. It can dramatically reduce the model’s memory footprint.
Microsoft Olive: Olive is a neural network quantization framework that is independent of AMD or DirectML hardware. It is compatible with a number of hardware systems.
DirectML is a Microsoft API designed to run machine learning models on Windows-based devices, with a focus on hardware acceleration for devices that meet the requirements.
4-bit KM Quantization
AMD advises against utilizing AWQ quantization for Ryzen AI systems and instead suggests 4-bit KM quantization. Within the larger field of quantization approaches, KM is a particular quantization scheme.
Olive is not directly related to AMD or DirectML, even if it can be used for quantization. It is an independent tool.
The quantized model for inference might be deployed via DirectML on an AMD-compatible Windows device, but DirectML wouldn’t be used for the quantization process itself.
In conclusion, AMD Ryzen AI uses a memory reduction technique called 4-bit KM quantization. While Olive is a tool that may be used for quantization, it is not directly related to DirectML.
Achievement
Memory footprint reduction on AMD Radeon 7900 XTX systems when compared to executing the 16-bit version of the weight00000s; comparable reduction on AMD Ryzen AI platforms with AMD Radeon 780m.
Read more on Govindhtech.com
0 notes
Photo

Converted the BlazeFace model. It seems to return correct inference results now. (left: Barracuda on Unity, right: onnxruntime on Colab)
0 notes
Text
A tweet
Gnome apps running on Windows with the new Linux subsystem. Also, now with GPU acceleration, so you can run the Linux versions of TensorFlow, PyTorch and OnnxRuntime in Windows https://t.co/cnrl1v9GpN
— Miguel de Icaza (@migueldeicaza) May 19, 2020
0 notes
Text
Favorite tweets
Microsoft's AI runtime was originally built as an accelerator for TensorFlow and PyTorch inferencing. Today the team announced that the OnnxRuntime accelerator can now be used for training. Export your TF or Torch code to ONNX and go from there:https://t.co/gN4s3gPFpF pic.twitter.com/Dm6Un46aGk
— Miguel de Icaza (@migueldeicaza) May 19, 2020
from http://twitter.com/migueldeicaza via IFTTT
0 notes
Text
Favorite tweets
Gnome apps running on Windows with the new Linux subsystem. Also, now with GPU acceleration, so you can run the Linux versions of TensorFlow, PyTorch and OnnxRuntime in Windows https://t.co/cnrl1v9GpN
— Miguel de Icaza (@migueldeicaza) May 19, 2020
from http://twitter.com/migueldeicaza via IFTTT
0 notes