#originally i was going to just post the Eyeballs but my canvas is actually Really Low Res
Text
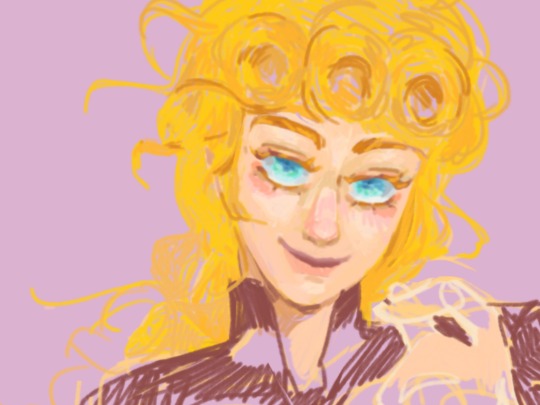
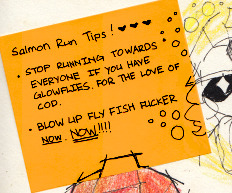
the world in his eyes //wip
#you know that giorno flower thing that happened some unknown time ago. yeah that#jjba#giorno giovanna#wip#golden wind#vento aureo#my art#this probably took like. three or four hours already. maximalism#also bc a good 30% of my drawing time is fixing my own mistakes and another good 20% is staring at it unseeing#i should rate all my art posts based on how stylistically similar they are because they are all fucking different#originally i was going to just post the Eyeballs but my canvas is actually Really Low Res#i realized it did not look that great with no context so full face we are
9 notes
·
View notes
Note
how do you get your traditional art to retain its color once you photograph it?? Everything looks so vibrant and well lit it’s honestly incredible.
I was originally going to have a straight forward answer, but I think this is a good opportunity for me to share how I go about preparing my artworks for social media.
Disclaimer! I'm not an expert in photo manipulation. This is what I learned after doing some research and experimenting.
Capturing the artwork
I have to be transparent though that I do not photograph my work, I scan it! I use a CanoScan LiDE220. I've had it for 6 years. This is why I am able to retain the artwork's texture. However, the result of the scan is very washed out, and is not accurate to the artwork's actual colors. Example below:

The left image is the raw result from the scanner, while the right is an edited version that I have posted. As seen, the left image is washed out. So, to the best of my ability, I change different parameters of the image to get the closest to the real artwork. I use photoshop to edit the image, but it is possible to do it in any photo manipulation software (or you can get a cracked ver-)
Editing the photo
1) Levels

Levels is where you manipulate the values of the image. The left is for your lightest values, and the right is for the darkest values. Moving the left slider alters the lightest values of the image. Moving the middle slider alters your middle values, and same goes for the right slider for the darkest values. I often slide the middle slider to the right to darken the image. I hardly touch the other two. Alternatively, you can use Curves to darken the image, it is a more intricate version of Levels and gives you the most control. I am not super familiar with it, so I cannot talk about it.
2) Hue and Saturation
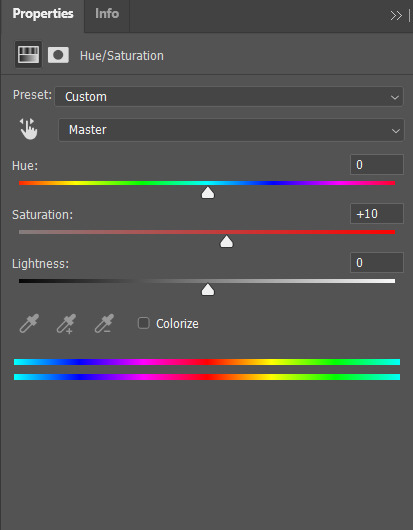
Hue controls the most dominant color of your image. Saturation controls the intensity of the colors in your image. I often bump up the saturation of my images. There are times I also alter lightness just ta bit for sketch sheets, to slightly washout colors (mainly the yellow of the paper)
3) Color Balance
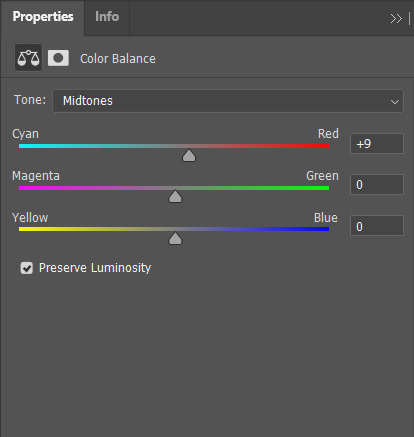
Color balance indicates which of the colors in each slide is more intense globally. Meaning that if you put the slider closer to blue, then all yellow tones will be washed out. Sometimes the Hue and Saturation sliders aren't enough, so I use Color Balance to tweak it a bit.
4) Brightness and Contrast

Brightness refers to how light or dark the piece is overall. Contrast refers to the difference of the lightest and darkest values. I often use this when manipulating sketches, this is to make the inks pop out more.
Other stuff that might be relevant
every piece has it's own set parameters, I eyeball everything lol. I do not have any "set values"
If there is a specific part of the image that needs editing, I "Mask" that part of the image out. Meaning that only a specific part of the image will be altered. Masking does not permanently change the image, so you can easily delete it if needed. Crash course in "Masking": the visibility of the image is set in black and white. The black parts of the mask is hidden, while the white is seen (Image below.) So for example here, only the white parts will be affected by the color balance

as much as my scanner is helpful, it cannot scan large pieces. One of the largest sizes I am able to scan is A4. So, I have only been using that size or smaller. If you want to invest in a scanner, you should consider the sizes of paper you often use. You can also "stitch" the artwork together (i believe photoshop has this, but it might be a hassle. I can't speak about this because I haven't tried it.)
If you are doing paintings on a canvas, you will have to photograph it There is no other way around lol, paintings like those are really photographed. Professional artists either have their own photoshoot set, or they find a place where they can have it photographed.
Sticky notes, or paper with luminosity aren't picked up by the scanner. I've been struggling with this one for awhile lmao. Altering it with the aforementioned steps alone don't give the result I want. I use layer modes too. Still currently experimenting. Example is below, original is a neon orange sticky note.
(original scan)
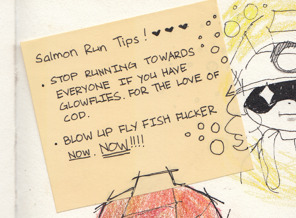
(altered with brightness/contrast, darken layer mode w/ orange, and vibrance)
ANYWAY!!! This is a master post of how I currently go around my works. Very lengthy, but I hope it helps someone!
#art tips#photoshop tutorial#art tutorial#photoshop#art help#image manipulation#traditional art#danee answers#danee talks#anon ask
104 notes
·
View notes
Note
Do u trace? How do u get such realistic anatomy!???
No tracing; I do studies, which involve eyeballing photos I put next to my canvas and drawing them as accurately as I can manage without actually tracing.
I typically draw some poses, and then a random face I find. I use a site called quickposes and another called line-of-action for my figure studies and face studies respectively. Figure studies take 90 seconds tops, face takes 10 minutes tops. Those sites have timers that keep you from going over.

If I’m having trouble focusing that day/night I only do a few poses, but I try to average at about 10. Figure poses are really just an excuse to either warm up or cool down with something pretty loose.
I always make sure to do the face though, as that’s the thing I compare with my reference image, and can find some insight from.

i.e. Some flaws here would be the eyes being drawn a little too big (common mistake for me), or the cheek being a bit too narrow. Some strengths would be the nose, mouth, chin and eyebrows being somewhat accurate to the original. Never perfect of course, but they’re “where I’d want them to be” for an 8ish minute sketch.
Overlaying my sketch with the reference photo can tell a lot, and help guide me towards a result I want. I also make sure the sketch only takes 10 minutes. This forces me to not “wander” around and meander with my process.
Daily figure studies and the face sketch together make for about 25 minutes of drawing, give or take. Somehow I still find myself waiting until the last possible half hour to start on them though, ha ha.
Regardless, I just make sure to do this every day, and it’s greatly improved my hand-eye coordination and muscle memory, and taught me to think more critically about my own process. It’s VERY much, in my opinion, a somewhat brute-force regimen for an asshole who can’t be bothered to do more than 25 minutes of something “boring”, but it works for me and helped get me here.
FYI though, I try not to use references for my actual daily drawings, as in, the ones I actually post here. Unless it’s tagged as #studies or is a very clear meme reference to something, I likely did it from imagination. Doing studies basically just help me come up with stronger poses thanks to just doing them a lot.
It also means I can smugly tilt my nose up and go
“yeah. i can draw humans, too”
204 notes
·
View notes
Photo


I started this write-up on Instagram, before realizing it was way too long, so I’m posting it here! If you came from my Insta, welcome, make yourself at home :)
So while I was going through my sketchbook, I found my initial sketch for my Anora costume, and I thought it would be fun (and hopefully insightful) to write down my whole process, from deciding to cosplay as Anora to the finished product. And so, that’s what I’m doing!
As much as I love Dragon Age, the dresses in Origins kind of don't look great, including Anora’s. The collar is unflattering, and the skirt just falls straight down, in a way that would make it difficult to walk in. And as you've probably noticed, I love big dresses. So I decided to make it my own!
First step, inspiration. While looking for other artists' interpretation, I saw a post comparing Fereldan fashion to traditional Georgian clothing (Eastern Europe Georgia, not US Georgia ;) ). I was sold!
So I gathered references and got to sketching. To me, the most recognizable parts of Anora's design were her hair of course, her color palette, her wide golden belt, and the blue overlay to her skirt. I mixed this with my favorite parts from the traditional clothing: the double neckline, the skirt shape, and the crown sometimes worn by Georgian brides.
Fabric was the next step. To get the gold shine of the belt, I got some golden stretch velvet. I ended up very much regretting getting stretch velvet instead of regular velvet, as stretch velvet was a pain in the ass to work with, especially without a teflon foot. Also, it’s very, very warm. The blue fabric was initially made for curtains, and 280cm wide, so I only needed a meter. I thought the brocade pattern was just subtle enough to be the right color overall while still being visible on camera. I got crepe georgette for the sleeves, it was also hard to work with because of the warping, but it turned out looking great, and made the dress less awfully hot to wear. And for the skirt, I chose a deep red silk crepe, and used the duller side as the visible side, as I thought the shiny side was too shiny. I also bought gold piping, two frog closures, and a lot of gold thread to make decorative seams on the belt.
Then, patterns. I drafted the skirt on the fly, since it's a very simple 4-trapeze shape. The sleeves, I copied the top from a shirt I had, and did some basic geometry to have the correct volume around the wrist. The wristband is just a rectangle. The belt, I eyeballed the shape, made it out of cheap canvas, and adjusted it as I went until I liked it.
The real challenge here was the top. That neckline I really loved didn’t really exist as a commercial pattern. After a lot of digging, I found this pattern from Lekala that could work, with a lot of modifications. More on that later.
When it came to closures, I didn’t really know how to do it at first. Obviously, the top would close in the front; but the belt couldn’t have a front closure since it would split the decorations down the middle, and the skirt overlay couldn’t close in the front either. So what I ended up doing was to make the “dress” with a front closure, and to have the overlay sewn onto the belt, so they both close on the side. The overlay also hides the bottom of the zipper I put in the front of the dress, from the top of the belt to about butt level, so I can actually put it on.
So, the neckline. From the pattern I linked, I took the upper back and the two front pieces. You can see the front is in two pieces, but I didn’t want that, so I fused the two pieces together. Then, I made the top out of cheap canvas again, and tweaked a lot of things, both for fit and aesthetics. I had to modify it pretty heavily to get it right! Once I was happy with the shape, I made it again out of my blue fabric, using my mock-up as a pattern. Then, I lined it, with gold piping along the neckline seams. I added a waistband, then sewed the skirt to that waistband, and put in the zipper. At that point, I had my whole bra out. I cut out two semi-circles out of velvet, lined them with satin and piping in the seams again, and I attached each to the blue lining on either side, so that it would look like my reference. Then, I added a modesty panel and the frog closures.
The belt is velvet on both sides. I made it using the pattern I’d made earlier, which was annoying to do because the velvet would slip and stretch and stick to itself or my machine foot. I put some hooks and eyes for the closure. To do all the decorative stitching, I applied water-soluble stabilizer that I glued to the fabric with water-soluble temporary fabric glue. This helped my machine foot slide along the fabric, rather than stick to the pile of the velvet and create warping.
For the skirt overlay, I just draped the remaining blue fabric over the skirt, cut it to a shape I liked, hemmed it, sewed gold trim over the hem, and hand-sewed it to the belt.
The petticoat, I bought on Aliexpress or ebay for cheap, and it looked like this. I didn’t really like the shape, it was too much of a bell, so I seam ripped the top layer, folded it in half horizontally, and sewed the now double, shorter layer closer to the bottom of the petticoat. Since the cheap tulle created a lot of angles under the skirt, I also added a top layer made from a mesh curtain that was just a rectangle gathered at the top and sewn onto the yoke of the petticoat. Then, I hemmed that petticoat layer and the skirt.
And that was it! The crown was black worbla that I painted gold and glued a plastic gem to, and the wig was made using a Skylar from Arda, two buns and two braids, and some hot glue. This got very long, but hopefully you found it interesting!
8 notes
·
View notes
Note
dude omg the colours in your art pieces are so incredible and soft and how the fuck
YO OK thank you for saying so because colors have ALWAYS been the most challenging part for me with regards to making art. I just don’t have a good color brain.
And I’ve noticed that when posting my art to Tumblr the saturation gets upped a little? Check out the difference between the Eileen piece that I posted on Tumblr vs. the same one on Twitter (the one on Twitter is how it was supposed to look, which I think is softer). Anyway, the differences have got me a little self-conscious because they aren’t as soft on Tumblr as they SHOULD be.
I actually go through a lot of steps to get the colors I want, if you’re interested. You did technically ask a question so I do have a few technical answers.
Disclaimer: I’m not trained in anything, I’ve been drawing on my own since kindergarten. Digital art is something that I learned over time, through tons and tons of practice. My process has become really methodical over the years to compensate for this. I do everything in Photoshop CS6 on my Huion H610PRO. My canvas size is a US Paper size, 8x6 inches. I like working big because the resolution is always better!
Long story short: I have a lot of layers. Folders on folders on folders of layers. Once I’m done with line art, I start by just blocking in sections of color.
When I set down my base colors, it’s mostly just eyeballing. As a general rule, I always make Jensen/Dean paler and pinker. Misha/Castiel is generally yellow-toned and darker in comparison. Pale people look more like Jensen (characters like Eileen or Rowena), tanner people look more like Misha (characters like Sam or Cain).
Jensen/Dean’s hair is always light brown (mid to upper right on the color block). Misha’s is a dark and desaturated brown (down and left on the color block).

Cheeks and lips are done the same way: color the area with a hard brush in a flat red or pink, then adjust the opacity until it looks normal. Erase as needed. It’s always fun to do that part:

Eyes are also fun! Just like anything else, there are a couple of components to eyes: base color, shadow, and highlight. Here’s Casifer’s eye as an example:

For hazel eyes like Sam or Eileen’s, I usually pick a yellow-green base, a brown shadow, and a gold highlight. The overall appearance is hazel when you mix the colors like that.
ANYWAY, once I lay my base colors down, I’m usually not happy with how they look. The example above??? Too bright, too bland, whatever.
Something I do pretty much with EVERY COLOR DRAWING is to put a pink overlay on top of the colors, usually anywhere from 5 - 15% opacity. It makes my colors brighter and more lively and I love the way it looks.
Sometimes I’ll adjust the brightness with a brightness/contrast layer or a saturation layer. Lots of times I’ll add a color gradient to keep shadows on the bottom and lights on the top of the colors. I love to add a good yellow>red>blue gradient in multiply on almost everything.

See how much nicer that looks? The original was way too flat and yellow. The pink helped counteract that and give the figures some warmth. The gradient also makes a huge difference to deepen a sense of depth (shadows at the bottom).
There’s also a purple multiply layer on top of the pink overlay to darken the colors up a bit, which I also did here.

So much better, right?
After I get my bases down correctly, I move onto shadows and highlights, which requires more use of my eyeballs. I usually do weird vertical hatch marks in a size 3px hard brush and erase with a size 2px hard brush to even things out. Here’s a close up of my shading:

From far away, it doesn’t look too bad.
I do all of my shadows in a mid-range purple on multiply layer(s) - like #8000ff ish - hatching along where there should be shadows. When I’m done, it looks something like this:

Once I adjust the opacity across the different layers and spot check them a bit, it looks more like this:

It’s a lot softer now, see!
Highlights work essentially the same way. On top of the shadow layer(s), I hatch highlights out in white across a couple different layers, adjust the opacity on each of them until my eyeballs are happy, and then they end up just looking clean!

^ I added white to her hand, her hair, and her jacket, then I fiddled with the different layers until they looked less stark and more “realistic.”
After I do all of this stuff, I go into effects. My favorites are the saturation and curves. I’ll usually up the saturation on my pieces a little and darken the shadows in the curves layer. The shade of yellow for the background on that Eileen piece was originally a bit lighter, but I upped the saturation to match the brightness of Eileen herself. Before, it looked a little too washed out.
When I’m finally done fiddling, I get something that’s ready to post!


So that’s how I get my colors.
Lost of people with classical training and/or more practice than me can just intuitively pick colors that will look natural and go well together, but I still need a bit of help. Photoshop is good for that - I can play with levels and sliders and opacity and LEARN how colors interact together, which is something that I never learned anywhere else.
I’m still more comfortable with black and white above all else, though ;)

#OH NO MY SECRETS#lol jk it's just my obsessive ass oversharing again#my art#not spn#replies#anon#faq
26 notes
·
View notes
Link
Welcome! Come on in and take a look around! My daughter Eleanor, 10-years-old and an absolute delight, wanted a room makeover. She and I worked together to update her room from little kid to tween, and it will carry her right through the teen years with way more style than I ever had when I was growing up.
Thank you to Linda at Calling it Home for organizing the One Room Challenge and inviting me to participate again! Six weeks goes by so quickly (especially when you have a somewhat indecisive kid and a major color scheme change midway through), but it’s always the most fun and a really good kick to get a room totally redone.
Pinky/purple/lilac/lavender/orchid/thistle. What do you call this color? I call it a color I never would have chosen myself, but one that my daughter wanted and that I have come to love. If you know me, you know I love pink, but I prefer it less saturated and on the peachy side. It may seem funny, but this particular color is a little outside of my comfort zone!
The room had white walls and wood trim when we moved in. We painted it dark blue when Eleanor was four (she chose the color then, too), but six years later is a long time in kid years, and she was ready for a change.
From Sherwin-Williams Loyal Blue to Benjamin Moore Magic Potion with Barberry painted trim.
How pretty is that Rifle Paper Co. for Loloi Rosa rug? It was the first piece we decided on for the room and it set the tone for everything to come. It works beautifully with the mix of bedding you’ll see throughout the photos. The jersey-knit sheets are Eleanor’s favorite because not only does she like the lilac pattern, they feel like a soft t-shirt. All of the bedding is from Garnet Hill, and it can mix and match together in different ways to give E some options.
I had planned on making an upholstered headboard but instead found a secondhand Serena & Lily Pondicherry headboard to reupholster. Or more accurately, slipcover. It turns out we really liked the fabric it came with, so a slipcover will allow us to switch it up and keep the original patterned fabric safe and sound for future use. Slight problem: I’m not an experienced seamstress. It’s going to take me some time to learn how to do the slipcover, so I draped the fabric over top as best I could to give you an idea of what it will look like with the different bedding combinations. Which version do you like best?
Obviously the bed in a bedroom, especially when it takes up as much space in the room as it does here, has a huge impact on the entire look. The tone on tone look quiets the design and is in line with my original intent for the room. E prefers the slipcover option too — every big decision in the room was made together.
The slipcover will be made from Fabricut Devon wool fabric in Orchid with Lotus piping. Curves and piping on a huge upholstered piece for someone with the cheapest base model sewing machine from a decade ago. Ambitious! I’ll figure it out.
I recovered a small ottoman with Inner Circle fabric to give E a place to perch besides her bed. I also figured out how to make functional Roman shades!
I’ve wanted to use this Edie Stroheim fabric for years. It looks amazing in E’s windows, and I love that red/orange Spice color against the walls and trim. And friends, I see that some of you have doubted this particular fabric choice perhaps more than anything else in the room. I get where you’re coming from! It works because the wood tones in the dresser and floor are very orange, and the red in the rug has a lot of warmth to it (rather than being a primary bright). Also, take into account the sun streaming through the linen, and it all just works. I adore it.
I stole my favorite decorative pillow from the guest room because it looked so dang good with the bedding, but most of the time E will probably have the other one in here (with the horse print). She says this one is too bumpy for her. It’s almost like kids don’t realize that sometimes the pretty pillows you put on the bed are just for show and they aren’t always the most functional thing but we buy them and put them there only to take them off each night and put them back in the morning, but I digress.
The nightstand is from Target, and I used one of the original Art Deco handles from her dresser on it to tie the two together. A nightstand with both a drawer and a shelf is always optimal, and E’s radio is tucked underneath so she can listen with (or often without) headphones in bed. The BB8 is her alarm clock.
Opposite the bed is the entrance to the room, and Eleanor’s closet. Most of her toys are on shelves in the closet, but I rehung the circular shelf that was in the room before for E to display some of her favorite things.
Books, books, books on a low Parsons bookcase. She’s a voracious reader! (Takes after her mom and dad. *dusts shoulders off*) We had to pare the books down quite a bit to get them to fit, but she had a lot that she had outgrown so those got passed down to her little brothers and it worked out.
The details in Eleanor’s room will no doubt change over time. That’s what will let this room grow and change with her as she moves on from her tween years. Will she always love decorating with horses and cute animals? Maybe, but that’s for her to keep or change as she decides.
We kept the art that was in the room before, just shuffled it around some. The hanging bird was from Land of Nod years ago, the cats are a vintage tea towel hung with dowels, and the “just be cool” banner was a favor from when I took a video editing workshop that DesignLoveFest taught.
The silhouette art is actually a quilt! It used to hang in our living room ages ago, before Eleanor was even born. It was a made by an Etsy seller, long out of business (Dream of Stars), and I stretched it over canvas stretcher bars.
The antique Art Deco dresser was a Facebook Marketplace find. That and the Pondicherry headboard are probably two of my best FB Marketplace finds ever! E is a lucky girl.
The bed itself is from Tuft & Needle. E went from a twin size to a full (that was important to her — I think it makes her feel more grown up), so she needed a new mattress. It’s sitting on a box foundation and metal base that has supports to attach the headboard. The bed is so comfortable, it’s been a tempting distraction to me while working on her room all these weeks! Like, maybe a quick nap might be in order? Zzzzzzz.
Her room glows beautifully at night. The Crystorama Truax Pendant in the center of the room is oversized (16″ diameter, which is larger than the globes I have in our much larger double parlor), but it provides a dramatic sense of scale. There are three candelabra bulbs inside, so it’s bright without being harsh.
Flanking the headboard are a pair of POP Wall Sconces from Blueprint Lighting. They look like eyeballs and I love them! A happy bit of happenstance is that the headboard I found had curves that perfectly mirror the circles of the sconces. I hung colorful tassels from World Market to zhush them up a bit but if they look too little kid for E as she gets older, she can take them off and they’ll look cleaner and more modern.
I wasn’t sure about also including a task light on the nightstand. E says she can read by the sconces, but the task light is far brighter and I thought she may like it. It’s the same light she had before (from Target a few years ago).
The bookshelf got a pair of small resin lamps lamps from Target which were very cute and super affordable at $20 each. They came in pink and black versions too, but the green looked prettiest. The pink gourd lamp that used to be on the dresser before got moved over to the dresser. It was yet another lamp from Target (I think they’re always a great source for cute, inexpensive lighting for the kids’ rooms).
Thank you for following along as this room came together. It has been one of the most fun makeovers I’ve done because it was a true collaboration between me and my daughter. I hope you’ve enjoyed seeing it come together as much as we have!
I’ll work to get all of the sources listed on the Shop Our House page and will also add them below!
Pondicherry Headboard, Serena & Lily
Warwick Wood & Rattan Side Table, Target (Threshold)
POP Wall Sconces, Blueprint Lighting
Truax Pendant, Brian Patrick Flynn for Crystorama
Rosa Rug (Black), Rifle Paper Co. for Loloi
Resin Green Accent Lamp, Target (Project 62)
Follow along with the One Room Challenge participants!
• At Charlotte’s House • Design Addict Mom • Erika Ward Interiors • Erin Kestenbaum • Girl & Grey • Gray Malin • Hommeboys • I Spy DIY • Jewel Marlowe • The Learner Observer • Making it Lovely • Nicole White Designs • Old Brand New • Oscar Bravo Home • Place of My Taste • The Rath Project • Room for Tuesday • SG Style • Undecorated Home • Veronica Solomon • Media BH&G • TM by ORC
My One Room Challenge Sponsors
Thank you to the following sponsors for generously providing product.
• Blueprint Lighting • Crystorama • Fabricut • Garnet Hill • Loloi • Tuft & Needle
My One Room Challenge Posts
Follow along from the beginning!
• Week 1: My Daughter’s Room • Week 2: The Design Plan • Week 3: Adding Interest • Week 4: A Disagreement • Week 5: A Lucky Find
And check out my previous One Room Challenges!
• Spring ’16: Our Bedroom and Den • Fall ’16: Front and Back Entry, Stairs, and Hallways • Fall ’17: My Home Office
© 2019, published by Making it Lovely as One Room Challenge: Week 6 (My Daughter’s Room Reveal!) | 2 comments | This post may contains affiliate links; I will be compensated if you make a purchase after clicking on my links.
The post One Room Challenge: Week 6 (My Daughter’s Room Reveal!) appeared first on Making it Lovely.
0 notes
Text
How to Visualize Proportions to Make Your Content Stand Out
The web is getting even more visual day by day. Infographics, animated GIFs, interactive slideshows and flip books, your content is supposed to catch an eye of a consumer who is used to seeing beautiful visuals on every page.
Your content needs to get more visual, more beautiful and more interactive.
Before I start listing my favorite visualizing tools and tricks, consider this a disclaimer: I am not a profession web or graphic designer. In fact, I am not a very talented amateur one, either; which is why I feel particularly qualified to cover this topic: how to figure out those pesky proportions using visualization and other helpful methods when you are trying to create data graphics.
A Note About Clarity
I feel like this should be mentioned before we begin. The most important thing to consider when you are trying to present data in a visual form, no matter the style of graphic, is that it maintains its clarity.
While you would think this point is a no-brainer, I have come across graphics again and again that are next to unreadable. Infographics that are horribly cluttered. Pie charts that require the user to actually calculate the degree of each section rather than providing percentages. Bar graphs that start from a point other than zero and so mislead the user, skewing the data. It is a nightmare of mismatched styles and misinformation that is really hard on the eyes to boot.
There are several areas to look at when making your data to ensure it is clear:
Clean lines that are easy to differentiate.
Colors to help separate data points. Pakwired lists some great tools to pick well-matching colors.
Clear numbering systems to give context to visuals.
Empty space that borders sections.
Good grid systems to keep things organized.
Easy access to resources used for gathering info, with correlating direction points.
For more basic visual (and other) tips for bloggers, check out this easy blogging guide. Now that we have some tips on presenting data, here are some easier ways to present it, with proper proportions, without being a designer yourself.
Create a Pie Chart
Pie charts are a standard for data presentation because they give a very quick, simple way to present that information. That trouble is that calculating the segments is like being back in Statistics class and no one wants that.
The truth is that you can eyeball to get a general idea of how big the space is going to be. As long as you provide the percentage on the chart itself, or correlate it with a color key, you should be fine.
But if you want to be really accurate you can always go with a generator that will give you complete segments in the right dimensions. I personally like Canva, as it is an easy to use tool that looks very professional. If that isn’t your style you can check out other free generators, or even make one in Excel.
Create a Bar Graph
Bar graphs tend to be a bit simpler, but they aren’t always the most attractive. I have always made mine in simple image editors and even Paint will work (though the final product will be very basic). The trick is getting the data points right and making sure your information isn’t at all misleading.
You can find several generators but I favor ChartGo. The features are a little more complicated, but it is totally customizable and the final chart looks awesome. The only downside is you can’t provide additional information without editing it in on another program, or providing it as a caption.
For a much easier tool you could try the generator at NCES Kid’s Zone. I know a number of teachers who prefer this one, not only for its simplicity but its color scheme.
Create an Infographic
This has to be my favorite method of visualizing data and I recommend it all the time. Infographics are ridiculously helpful and a marketers dream. They are easy to share socially (in fact, they are shared 3x’s more than any other content), attract a lot of attention and are super popular. Not to mention they convey a ton of information quickly, in a visual way that sticks in people’s minds.
Unfortunately, these are not easy to make. They take a lot of time and effort, even if you are using a program to do them. While many designers opt to do it from scratch in editing programs like Photoshop, that just isn’t something I am going to be able to do. Not if I want to keep my sanity.
My go-to choice is Pikochart, which I prefer to Canva’s also helpful generator. You pick a template, add or remove sections and use their onboard gallery for images. You can also go searching for your own and add them in, though that requires some editing on your part in order to fit the grid system.
You have probably come across many infographics made from this service. Since it is both very easy to drag and drop/fill in the blanks, yet the product is very professional looking, even designers have started to use it in order to work more quickly without sacrificing quality.
Best of all? You don’t have to try and figure out dimensions. You just drag and drop the lines so you can eyeball it to get it where you want it.
Create a Slideshow
This is another big method for me, mainly because it is the easiest out of all of the above ideas. You can just create a slideshow with visuals and drop the statistics in that you want to provide. That’s it, no frills and it gets the point across while being visually stimulating.
You may have noticed that I am a bit of a slideshow junkie in previous posts and that is why. Anything that provides a valuable resource for my readers but doesn’t take me hours to complete is A-OK in my book.
Have an idea to share for visualizing data without years of schooling to help you do it? Let us know in the comments!
Featured image source: Pixabay
Save
You're reading How to Visualize Proportions to Make Your Content Stand Out, originally posted on Kikolani, authored and copyrighted by Ann Smarty.
Recommended Posts
The Ultimate Guide to 160+ Business and Digital Marketing Conferences in 2016
Never Run Out of Blog Post Ideas: 25 Content Marketing Resources
from DIYS http://ift.tt/2zbRHbg
0 notes
Text
How to Float Mount Art In A Picture Frame
A couple of weeks ago, our intern, Emily, wrote a blog post about a couple different ways to display your art in a frame. Floating, matting and mounting to be exact. If you haven't taken a peek at that, hop over and read that post because it will give you more of an idea of what I'm talking about for this 'how to' project.
Since we released our art print collection last November, I've been keeping an eye out for how galleries, stores and restaurants frame their art. That's when I discovered what the style I liked was actually called, and it's float mounting. Float mounting is where all the edges of the art print or picture are exposed and then art is separated from the glass with a plastic spacer. The art appears as if it were 'floating' in the frame because you can't see it mounted to anything. I love float mounting because it gives your art that true gallery feel and can easily make any piece of art look more expensive. It looks especially good with our canvas art prints because it highlights the unique texture.
The floating style of framing is popular among museums and galleries because it allows the art to breathe and not be pressed directly up against the glass. Letting your art touch the glass is a no-no with original drawings and finer pieces of art because there is a risk of it getting it stuck to the glass, which can cause the ink or pencil to transfer and potentially ruin it.
There are a few particular types of art that should be float mounted, and these include:
Original drawings
Art on an interesting/ textured paper
Signed Art
Textiles
Art with unique or uneven borders
Of course, there is no right or wrong way to display framed art, it's really just a personal preference. Although, I feel like float mounting looks a little fresher than the typical matted frame.
There are a couple of different ways to achieve the float mount look. You can either mount the art directly to a matboard or mount the art to a thick board (usually foamcore) and then mount that to the matboard. It's important to remember that both ways use plastic spacers to create a gap between the art itself and the glass.
Float Mounting
Distance Float Mounting
Now that you know what float mounting is, I thought I would show you how to float mount art yourself. Specifically, how to distance float mount. If you have ever tried to cut a mat yourself, you know it's pretty difficult and there is zero room for error. Unlike cutting picture mats, all the cuts for this project won't be visible. So if you mess up a little, it really doesn't even matter!
Let's get started so I can show you how to float mount art in a picture frame!
the Materials:
Picture Frame
Art
Mat-board (acid-free)
Foam-core (acid-free)
Artists tape or gummed linen tape (acid-free)
Small utility knife
T- square
Pencil
Wire cutters
Acrylic framing spacers with adhesive backing
Step 1
Cut the mat-board to the size as the backboard of the frame.
Use the backboard of the frame as a template and carefully mark and cut the matboard to that exact size. It's important to choose a matboard that works well with the art you're framing. A beautiful white or cream color is usually my go-to. If the art is drawn or printed on a smooth paper, try to find a mat-board with an ever-so-slight texture to keep it interesting. It's all about those details!
Step 2
Cut a piece of foamcore about 1/4" smaller than your art
I usually just eyeball this one and use the art as a reference. Foamcore is a bit thicker than matboard so it might take a few slices to cut completely through it. The color of the foamcore doesn't matter, although white is usually best since you won't see it through the art.
Step 3
Tape the art to the foamcore
In a cross shape, tape two pieces of tape together and then apply to all four corners of your art. I suggest using gummed linen tape or artists tape, which is a specialty mounting tape found at art supplies and framing stores. It sticks to the art perfectly and won't ruin it if you plan on removing it later!
Step 4
Tape the foamcore and art to the matboard
Using the same cross method, tape the foamcore onto the matboard. You can either measure it or eyeball it to get it centered. Press firmly with an extra piece of foamcore or matboard to make sure it adheres. Avoid using your hands to press down on the art because dirt and oil can easily transfer.
Step 5
Measure, cut and insert the acrylic spacers
Put the piece of glass in the frame and measure the acrylic spacers to fit around the perimeter of the frame. Then, cut the spacers with wire cutters and make sure they fit correctly in the frame. Next, peel off the backing and adhere the spacers directly to the glass. These aren't permanent, so if you mess up or decided against it, you can easily remove them.
You can find these acrylic spacers at any framing supply or at a local craft store and typically come in 5-6' lengths. They also come in a couple different sizes (1/8" or 1/4") depending on how far you want your art to stand away from the glass.
It's important to look at your picture frame before deciding the size of the spacer to get. In the frame that I am using for this project, notice the black tabs that keep the picture in place once it's framed. If you choose a large spacer, the tabs might not fold over the backboard once the art is in the frame. If this happens, you can pull out the black tabs and reinstall them at a different point with a tool called a dual point driver, which looks like a staple gun.
Step 6
Assemble your frame together
Next, place your artwork in the frame, then stick the backboard in and fold over the black tabs to secure it.
With all the different types of framing, matting, and mounting artwork, I have to say that this one is my favorite. I love, love, love the way this type of framing looks! It gives the art a bit more of a modern feel and in my opinion, gives a lot more visual interest than a standard mat.
So what do you think? Would you want to try this method the next time you have some pictures to frame? Let me know what you think in the comments section below! I hope you guys enjoyed this project about how to float mount art.
#float mount#float mounting#picture#framing#how to#diy#art#tutorial#youtube#video#floating#pictures#savvy heart#interior#design#decorating#tips
0 notes
Last Seen Blogs