#rgb to hex tool
Explore tagged Tumblr posts
Visit Tumblr Blog
Explore Tumblr blogs with no restrictions, modern design and the best experience.
Last Seen Tumblr Blogs


Fun Fact
Women make up for the other 50% of Tumblr’s audience.
Note
Hiiii ! Hope this blog isn’t dead — I just wanted to ask what the differences were between posts that are tagged Oekaki and Not Oekaki — does it depend on the forum it was posted on, or the art style? It’s a little confusing to me since I haven’t heard this term before. ^^
Hi, the tags "oekaki" or "not oekaki" are how we categorize which pieces were drawn on an oekaki using the java applet drawing programs. Oekakis were online message boards that provided onsite drawing programs for you to draw on, which was often the next most accessible drawing program at the time next to MS Paint.
For the time period we focused on, the only available java applet drawing programs on oekakis were OekakiBBS (basically superceded by PaintBBS), PaintBBS, and ShiPainter. They all had little their little quirks and techniques that are visible on finished drawings drawn on an oekaki. If we can tell from these quirks that the drawing was likely drawn in an oekaki applet, we tag it as Oekaki.
Cy
#asks#for some examples: a canvas size that is square and is in a multiple of 100#most oekakis default canvas sizes were 300x300#and most people would only make it bigger if they planned ahead#other tips off are the font because they only had one font available#colors that values are all multiples of 5 because fine grained color choice was annoying to do#writing out the RGB values of a color instead of hex because oekaki applets cant color pick and we have to remake the colors in applet#lots of dithering because oekakis had their own dithering tool#1 pixel thick biezer lines having extra pixels instead of being smooth b/c its implemented differently than MS paint or other programs#a lack of anti aliased lines because pixel was easier and the programs smoother options were very streaky and hard to use#this is just off the top of my head#no pen pressure for 99% unless you were the weirdo who used shipainter AND had the plugin that allowed pen pressure
16 notes
·
View notes
Text
Color Converter
At Convert a Color, we understand the importance of getting the exact color you need for your projects. Whether you're a graphic designer, web developer, or just someone who loves to work with colors, our online Color Converter tool is designed to make your life easier. We provide precise and easy-to-use solutions for all your color conversion needs.
https://hexcolor.co/color-converter
9 notes
·
View notes
Text
Free RGB to Hex Converter Tool - Bulk SEO Solutions

The RGB to Hex Converter Tool efficiently converts RGB color values into their corresponding hexadecimal codes. Designed for web designers and developers, this tool simplifies the selection of colors and ensures precise color matching. Users can quickly obtain the desired hex code by entering the red, green, and blue values, which facilitates seamless integration into various digital projects. This converter enhances workflow efficiency and accuracy in color usage across multiple applications.
#RGB to Hex Converter#RGB to Hex Converter Tool#free seo tools#digital marketing#online marketing#seo tools#small seo tools#bulk seo tools#free small seo tools#bulk seo solutions#bulkseosolutions#internet marketing
0 notes
Text
0 notes
Text

Preestablished Tumblr Text Colors


Hex code: #ff4930 Joey Red Orange

Hex code: #ff8a00 Monica Pizazz Orange

Hex code: #00cf35 Ross Malachite Green

Hex code: #00b8ff Rachel Dodger Blue

Hex code: #ff62cd Niles Hot Pink

Hex code: #7c5cff Chandler Electric Violet

Hex code: #e8d738 Phoebe Broom Yellow


Find more here!
Like/rb if use // No need to credit me
Requests for dividers are open!
In case you wanna check any colors or fonts on Tumblr, you can get them through desktop and clicking inspect on any post.
That’s how I got the RGB codes and used google’s color picker/finder for HEX.

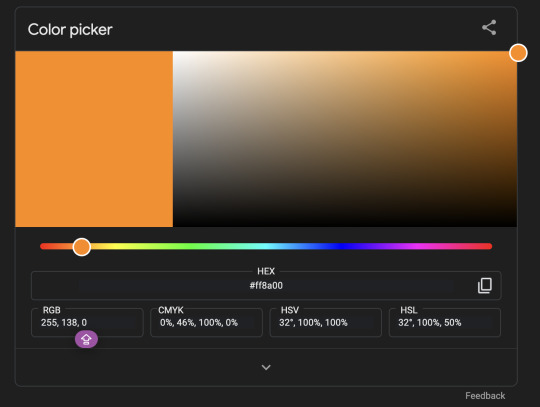
I know there are other color pickers tools thingys but I didn’t trust the accuracy so yeah :D AND i couldn’t find any info on Tumblr colors ANYWHERE 😞✌🏻
#omi.resources#line dividers#dividers#mini banners#banners#color palettes#line divider#mini banner#tumblr resources#text color#color palette#colors#tumblr#resources#simple dividers#red dividers#green dividers#yellow#blue#purple#pink#neon#orange#green#red
101 notes
·
View notes
Note
I've seen you use completely different colors for your fic titles than what tumblr offers
how do you do that?
Ooh! Okay!
first just switch whatever the word(s) you want to a Tumblr color. I think it's easier to do it
Hi.
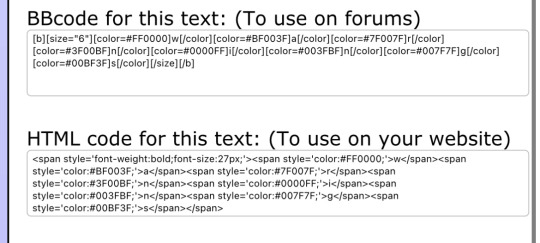
Let's say i wanted that to be this color: a64d79
I use this website to get the color
select your color in the search bar and scroll down until you see a little bit of code.
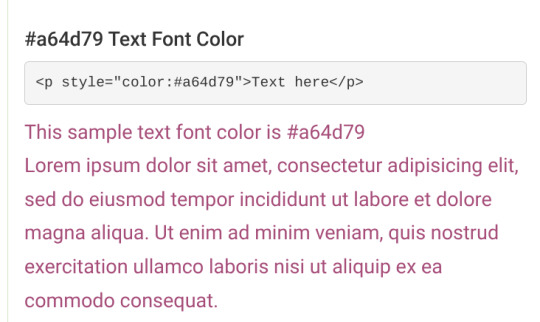
copy paste from style until the end quotation mark
so just style="color:#a64d79"
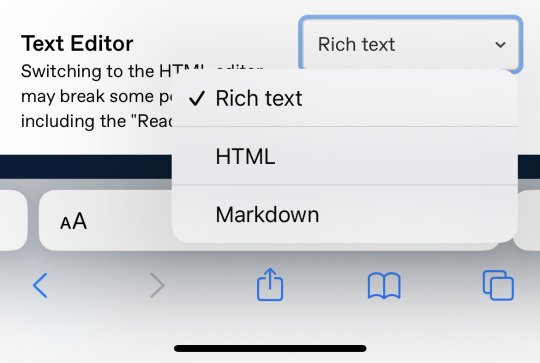
go into the settings of the post, switch it from rich text to html and find the word you want to color
Hi.
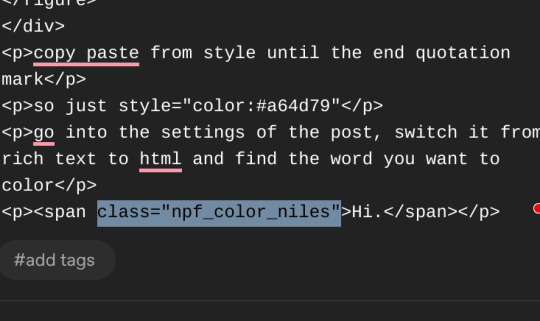
replace the highlighted bit with the style="color:#a64d79"
and voila!
Hi.
and if you can't see the difference, here it is in another color
Hi.
idk if i explained it okay >.<
36 notes
·
View notes
Text
Some Tips for new DBH modders

This will have 2 sections :
1 . QUANTIC dream textures - getting them stable throughout the game
2. Handy tool I found for normal maps.
QD TEXTURES - MY TOOL KEEPS BREAKING?
this is for the 2 ppl that actually mod Detroit and want to make their mods public and usable the entire game. and don't know abt this.
As you probably know, models ( containers ) share textures. So when you update a quantic dream texture for 1 model you need to update every single container/model that shares that texture or else it'll look black and crash your game. Why? because your game is expecting the file in qd format for that container when it's a dds file now.
But I'm sure youve noticed after the 3rd or so containers texture being 'refreshed' ( inserting the texture for each use of it in the tool) it just breaks. The only way around this is to tell the game it should expect a dds format manually.
Ok enough yapping. Here’s the tutorial :
Add your texture like you normally would in the editor. Do this for only one model, u can do it for more just before it crashes if u want too it shouldn’t affect it, I haven’t tested it tho.
Enable editing for all the containers/models that use that texture. So it clones it.
Now,, Repeat these steps for every texture that needs to be made into dds format other than the ones you changed in the editor:
1.Using Rk900 (INTO_3) as an example, I swapped the connor into_2 model face texture so now we need to tell the game to expect a dds for nines face. Get the offset of nines’ face texture. It’s SUPER important that the INTO_3 container is cloned as the offset will be different.
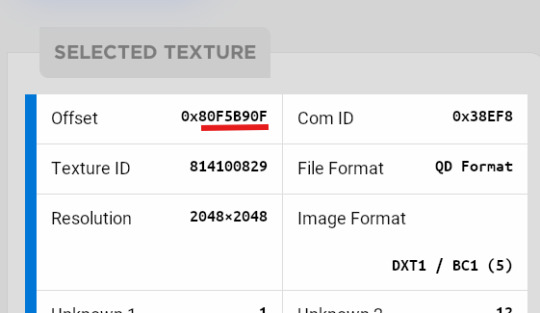
2.go to ( ctrl + g ) to the offset in d26 file. (so 80F5B90F)
3.change the following : we start at ‘0E’ for this example.

Change the 14th and 19th bytes (02) to 01 . it should look like this now
The hex code will change for each texture, but it will always be the 14th and 19th bytes.

4.Repeat for all textures and models that use them :)
Your tool will now load the containers correctly ( they will appear black still, but it will work ingame.)
USEFUL TOOL FOR CREATING NORMAL MAPS:
Normal maps are what gives flat surfaces fake 3d-ness without actually being there ! An example of this is the pores of dbh characters. Normal maps basically allow us to use less polygons which is good for efficiency:))
How do normal maps work ? Well all digital images contain 3 color channels : Red, Green and Blue (RGB) , what normal maps do is assign x,y,z values to these channels. So red would be the x value, green is the y value , blue is the z value . These give us the fake 3d values for each pixel that alter how our game calculates the light ( surface normals ) .
I use this website to generate my normal maps from height maps :
Height maps are black and white images that tell us the height (z value) of each pixel, typically white is high,black is low. Here is an example of the sylus mask I made :

IMPORTANT!! 99% of dbh’s normal maps DONT have a blue channel ( z value) so you HAVE to remove the blue channel completely after generating it from here.
This was how my modified face texture looked like after nuking the blue channel ( in gimp you have to go to colors -> Components -> decompose and delete the blue channel then recompose it )
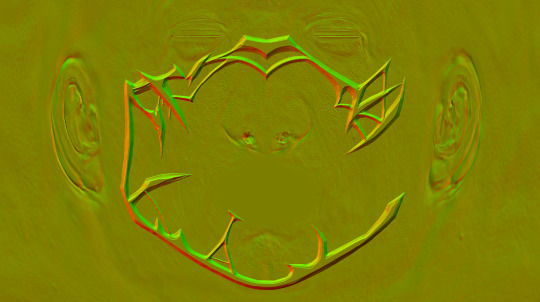
^^ basically i overlayed the new normal map over connors original one.
Ok thats it. idk if this helps anyone but here u go :P
Pls correct me if I’m wrong abt anything, I’m small brain tbh
12 notes
·
View notes
Text
had someone ask about my glitter GIFmaking process so i will give! i exclusively use web-based programs, so you don't need to download any software for this!
to preface, my process is a bit convoluted but it's so my images aren't compressed or made fuzzy. ALSO, these steps are for PC.
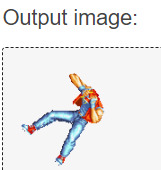
this is the final result, but you can make basically anything [and probably something prettier than this, i just made this image to demonstrate rotating & resizing pixel GIFs]
tutorial below!
the site i use for glitter backgrounds is online-image-editor.com
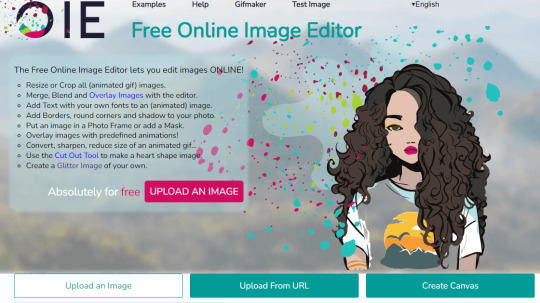
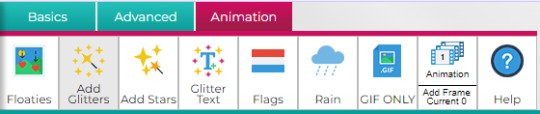
click "UPLOAD AN IMAGE" to get your picture in, then click the "Animation" tab. it'll take you to "Add Glitters". click that!
if your image is over 650x650 pixels, it WILL be rescaled. this is why i only upload images below that size, but it's up to personal preference and the compression isn't that bad unless you're using pixel art.
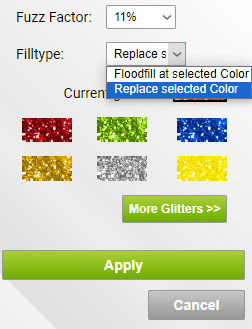
here are the settings i use when filling with glitter. i always change "Floodfill at selected Color" to "Replace selected Color" because it makes it faster, but it really depends on what you need to be filled. you just click the area on the image that you want to be filled on the preview and it'll be filled

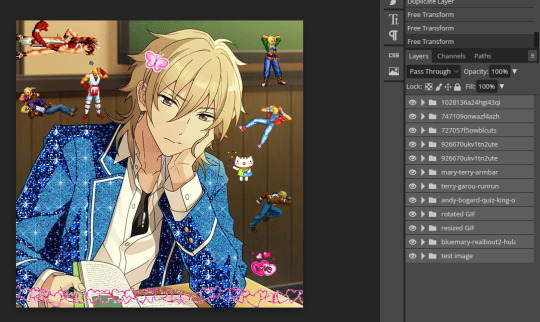
kaoru jumpscare! here's my image so far! i just open the preview into a new tab to save it. it won't be PERFECT but it'll look presentable and that's all that matters.
NOW, for adding GIFs to this unsuspecting kaoru, i use photopea.com. i usually use GIFcities.org, glitter-graphics.com or tumblr to find GIFs. where the GIFs are from doesn't matter, just make sure you save them as GIFs onto your computer.
when you upload your GIF into photopea, you might realize that it's not moving anymore!
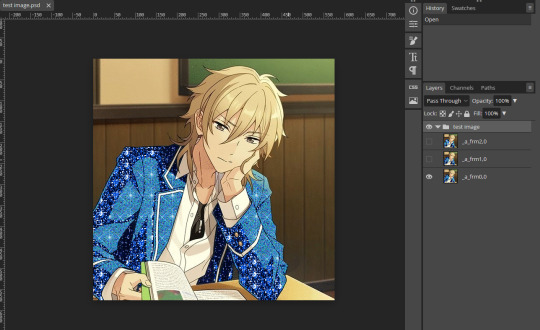
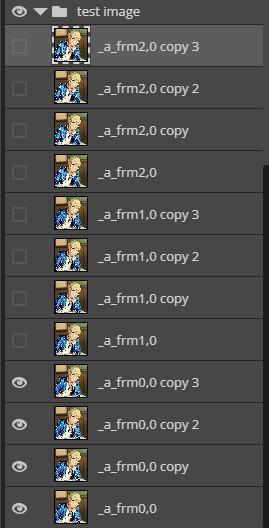
this is OK, it will be a GIF when you export it. if your image is not exported as a gif, make sure that all the frames of each single animation are in the same folder, and all begin with "_a_".
IMPORTANT because i didn't initially include this, but i recommend you duplicate every layer of your background image 1-3 times if you're inserting GIFs with a relatively higher count of frames so the glitter doesn't flash like crazy when you export. to duplicate layers, select a layer and "Ctrl+J". do this for every layer that doesn't have "copy" in its name first then repeat so you don't duplicate the wrong layers.
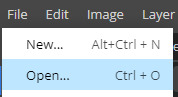
to open a new GIF or image, you go to "File", then "Open..." . note that you can do this with multiple images/GIFs in one go!
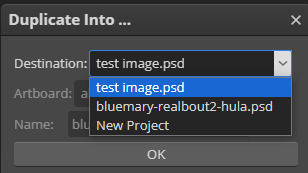
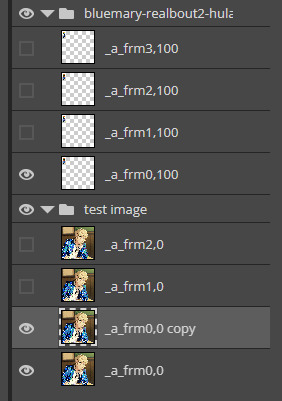
to add the GIF to the image you want edited, make sure you have selected the folder. go to "Layer" then "Duplicate Into ..." and make sure you duplicate to the image you are editing.

if you go to the image, it should contain a new folder containing all the layers from the image you duplicated from.
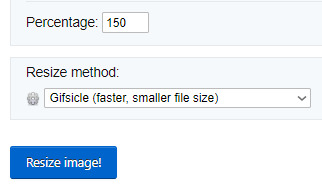
if you want to move the GIF, select the folder and use "Ctrl+Alt+T" to transform. if you only move the GIF it should not turn fuzzier, but if you want to resize the GIF i usually use ezgif.com/resize with the Gifsicle setting for "Resize method".
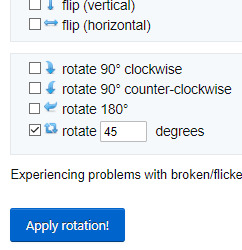
you can rotate GIFs by exact 90 degree increments if you hold the "Shift" key while rotating in photopea, however any other rotation WILL make your image fuzzier, and it's a bit harder to rotate the GIF but is possible!
i use ezgif.com/rotate for this, you can do any rotation you want but i did this one.
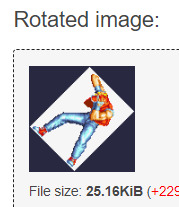
OK! it's rotated, but there's an annoying navy border so i'll show you how to get rid of that! DON'T bother saving the GIF you have just made, go from "Rotated image" and click "more tools", then "Remove background"
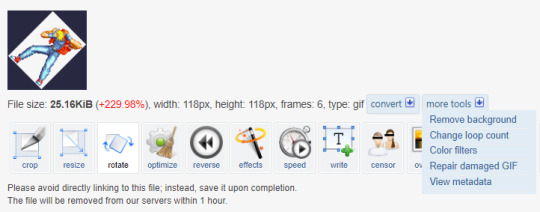
assuming you get the same navy as i do, the HEX code is #282840, but you can get you own hex code by converting the RGB to HEX [or getting a hex colour picker to work, didn't work for me. you can get the RGB by screenshotting and using MS paint]
voila! it is now transparent!
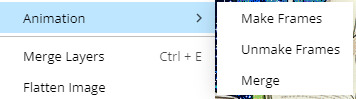
after you've added all your images in and you're satisfied with your image, you should select all the layers by holding "Shift" and selecting the top and bottom folders
and then, you go to "Layer", "Animation" then "Merge". you can always undo this and make edits so do not freak out if you've realized you want to edit parts
now, your GIF is ready to be exported!

go to "File", "Export as" and select "GIF"!
it'll take a while for it to load in, and you might notice an immediate issue! the GIF is too fast! you can fix this by messing around with the speed dial. this is the most frustrating part of GIF making for me because my computer is slow and freezes a lot. just stay patient, and do NOT reload your browser or you'll lose all your hard work!
annnddd that's it! bye bye!
#tutorial#glitter gifs#glitter graphics#glittercore#GIF#gif tutorial#kaoru hakaze#ensemble stars#fatal fury#hope this is helpful
25 notes
·
View notes
Note
I love your art! It’s so high quality. What program(s) do you use to achieve that effect? And what tips do you have for aspiring artists wanting to reach such levels themselves?
Hi Anon!
Thanks a lot for the lovely compliment.
I mostly create my art using a technique called overpainting where I paint over reference images. I have an art background (took art at school and at college), but it was focused on abstract art so my experience with realistic proportions is exceedingly terrible and I've just never had the patience or put in the time to learn proportions from scratch. I've always admired artists who put in the time and effort to learn how to do that!
As for what programs I use, I tend to stick with Photoshop since that's what I was trained on and am most familiar with. I use a combination of brushes, filters and textures to give my art the look that it has. I tend to work at a resolution of about 3000px for height or width (whichever is the largest for the layout I'm going with) and a fixed brush size so that I can add a lot of detail and that it looks consistent throughout the piece. I also use tons of layers so that the lining, shading, colouring and any extra adjustments are all separate from each other and easily changeable. My PSD file usually averages between 300mb to 400mb in size because of all the layers.
The tool I probably use most outside of Photoshop is Color Cop. I'm partially colourblind, so when I want to use specific colours I need the hex codes or RGB codes otherwise it takes me ages to get the colours to blend right.
Below are some progress examples (from the "Sacrifice" theme for Sterek Week '23) of how I usually start out when I'm creating something. I go hunting for images and make a collage/edit of what I'd more or less like the finished piece to look like. Usually during this part I also play a lot with different ideas to see what works best. (Sometimes the final result ends up looking how I wanted, sometimes it takes on a life of its own and goes in a completely different direction!) The "Sacrifice" piece is made up of a promo shot of Stiles from Season 6 and a screenshot of Derek from Season 3 (I think). The background is made up of official images from Stranger Things that I blended together and added colour filters to.


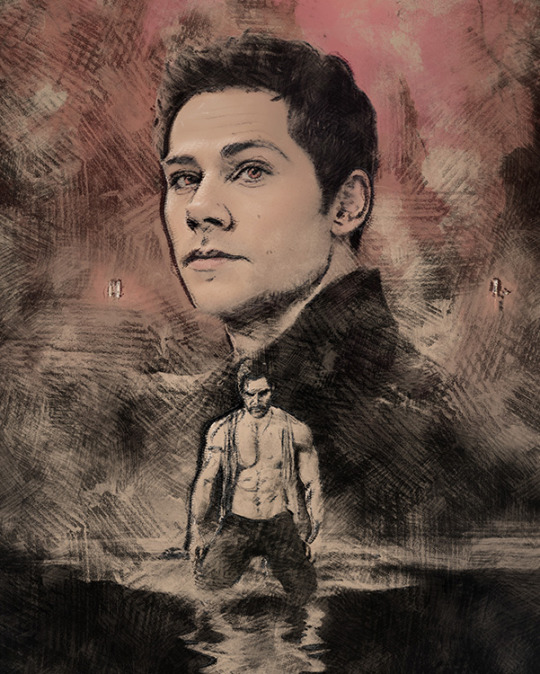
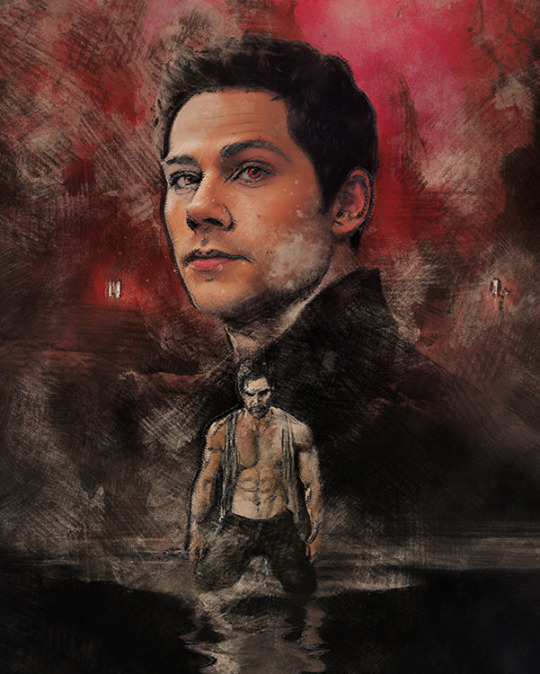
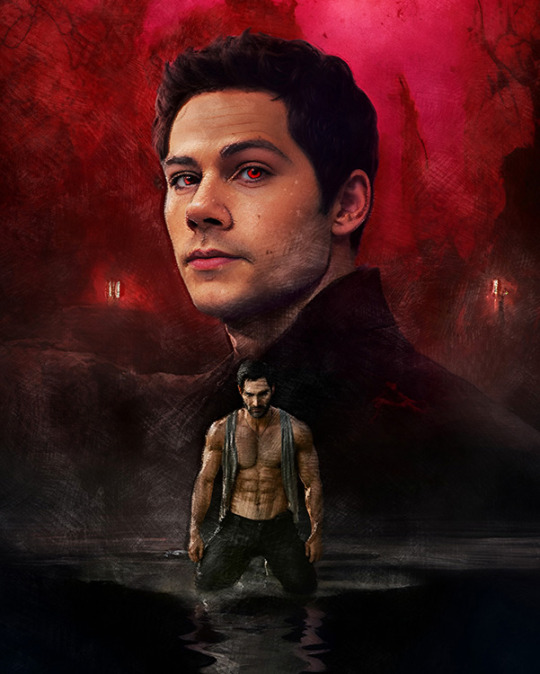
Once that's done I start painting with pencil brushes to get the lines, then follow up with texturing and shading. I like to use a soft neutral colour like a beige as a base canvas so that I can paint with black as well as white. Lastly I'll paint in the colours and then finish off the piece by cleaning up the linework and by adding filters to adjust contrast/balance or colouring. Occasionally I've worked "backwards" by roughing painting the shading and some of the colours out first before adding linework.
As for specific tips, I think mindset and believing in yourself is important. It's very easy to get overwhelmed in the beginning, so don't compare yourself to others. If your art makes you feel something, then you're on the right track. Regardless of whether or not you work professionally as an artist, if you express yourself creatively in a visual medium - whether it's an oil painting or making lewd doodles in a sketchbook - then, in my opinion, you are an artist.
Once you're over that hurdle, the next part is just to keep at it. I hate using the word "practice", so I'm rather going to say keep making art consistently, and - most importantly - have fun while you're doing it. If it's fun, you're more likely to stick with it and improve. If you're trying to go in a specific direction with your art, I think there are two important areas to focus on: expanding your creativity and your familiarity with the tools you use. The latter especially will make your life a lot easier.
For me, being familiar with Photoshop is what allows me to make digital art the way I do. I've used it for a long time so I know a lot of tricks and shortcuts to help me achieve what I'm going for. This goes for any program you choose to use, though. And you don't have to limit yourself to one. Play around with different tools and programs and see what works the best for you. The internet is also a fantastic (and often free) resource, and YouTube especially has a lot of tutorials that can help you get started or help you build on your existing skills.
To expand your creativity with regards to your art, I recommend studying other artists - and not just one specific kind of artist either. Look at the old masters, look at modern art, look at fan artists, look at photographers and cinematographers. (And, of course, Mother Nature - the greatest artist of all.) Look at how they use composition, how they use colour, how they use lighting and shading. Try and incorporate some of those aspects into your own work and see what works for you.
TL;DR - Experiment and play… and most importantly, have fun!
Thank you for coming to my TED talk.
~ Bren
7 notes
·
View notes
Note
Hi San. First of, I so much love the layouts, banners and aesthetic of all your fics. You put good effort into them and it shows 🫶🩵.
Can you tell me how you add gradient of colors into the title like this one? 🫢 am sorry if I come across as dumb 😭

it’s kinda a tedious process but I’m not a gatekeeper so I’ll give a quick tutorial
first I use this website to get the colors I want:
it gives option to upload pic so usually I upload my banner and pick colors off there
you’ll copy and paste the HEX

this is the actual we site for the gradient text that I use:
in step 1, you’ll put in the text and in step 2 you’ll click which sort of gradient you want:
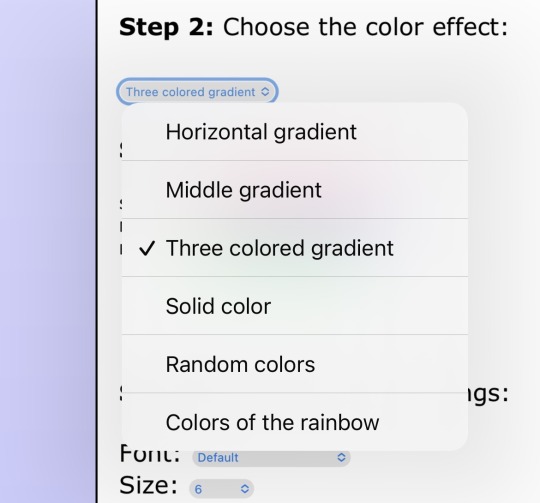
and you’re gonna need to copy and paste everything in the HTML box
sorry y’all this is where it gets complicated
so you’re going to go to tumblr desktop and create a post [or add to what you have but I don’t recommend doing it like this till you’re comfy]
you’re going to click on the settings bar

then text editor swift it from RICH TEXT to HTML
then you’ll copy and paste the HTML color link into the draft
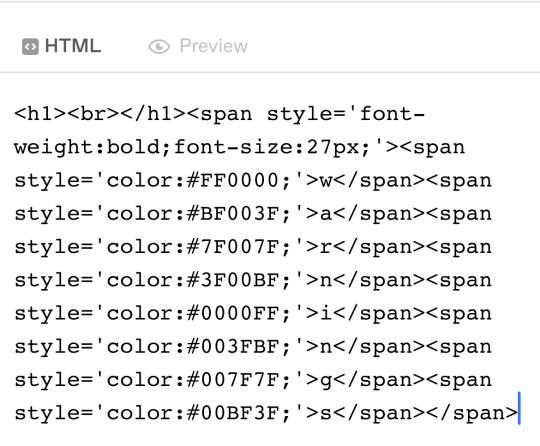
and save draft and then:

BOOM
10 notes
·
View notes
Note
What's your favorite medium?
:000 random ask /pos/pos/pos (campaign for the phone people to make a happy stim emoji because I would use it SO MUCH)
*cough* anyways-
Art medium? It's a very close race between graphite and digital art
I love graphite because it's fairly easy for me, doesn't take much time to doodle something I'm proud of, I can shade it if I want, I don't have to worry about whether colours look good (I'm colourblind, for context) and I like having a physical sketchbook of my art!
I loveee digital art because it lets me play with so much I cant do with traditional art mediums with the tools and the options and the RGB/hex based colour system so I know exactly what colours I'm using (I like using colours in art lol) it also negates the fact that my hands shake dramatically because I draw straight with my finger (not using a pen/stylus or anything).
I think digital wins out for me <3
5 notes
·
View notes
Text
OOOOooooOOO even better Munsell color tool!
And colorizer which is fantastic for picking and converting colors.
h/t once again to Peter Donahue
2 notes
·
View notes
Text
30+ Tools. One Clean Workspace. Zero Distractions.
At PabloTools, I believe your workflow shouldn’t require 10 tabs, 4 extensions, and a browser meltdown. That’s why I built a web app with 30+ focused tools, fast, and distraction-free.
Here’s what you can do at PabloTools
Text & Web Tools QR Code Generator – Fully customizable & clean Text Compare – Instantly spot differences Character/Word Counter – Simple and accurate Lorem Ipsum Generator – Smart filler text, fast Base64 Encoder/Decoder – One-click conversions
Image Tools Image Editor – Crop, rotate, flip, adjust Image Color Picker – Pull colors from any photo Image Compressor – Shrink size, keep quality Image Converter – JPG ↔ PNG ↔ WEBP ↔ SVG Color Picker – Grab HEX, RGB, HSL, CMYK fast Color Showcase – Build and display palettes
Audio Tools Audio Trimmer – Cut with precision Audio Speed Changer – Speed it up or slow it down Audio Volume Changer – Turn it up (or down) Audio Merger – Combine tracks easily Audio Converter – MP3, WAV, AAC, FLAC & more Audio Compressor – Smaller files, same vibes
Video Tools Video Editor – Trim, crop, adjust speed & volume Video Sound Replacer – Mute or sync new audio Video Merger – Stitch clips together Video to Audio – Extract audio effortlessly
PDF Tools PDF Page Remover – Delete pages PDF Merger – Combine multiple files PDF Page Reorder – Drag-and-drop rearranging
Bonus Utilities Unit Converter Time & Time Zone Tools Date & Time Calculator Meme Generator Cubic Bezier Visualizer Simple Calculator
Whether you are a developer, designer, content creator, or just tired of clutter—PabloTools helps you get things done in one smooth, no-login-needed space.
Try it now → pablotools.com No clutter. Just clean tools that work.
0 notes
Text
Pick Any Color from Image, Website or Video | Color Picker Tool 2025 Tutorial
https://youtu.be/G-6fqCnspMw?si=3SJIX3uUaYljlq7E
Whether you're a designer, content creator, or just love playing with colors — this tool is a must-have in 2025. Learn how to install, use, and pick any hex or RGB color code easily.
📌 Watch till the end & don’t forget to:
👍 Like | 💬 Comment | 📥 Save | 🔁 Share | 🔔 Subscribe/Follow for more!
#ColorPicker #DesignTools #WebDesign #ColorCode #HexCode #RGBPicker #CreativeTools #ColorToolTutorial #GraphicDesignTips #UIUXDesign #DigitalDesign #HowToPickColor #PickColorFromScreen #ColorInspiration #Tutorial2025
0 notes