#sequential keras
Explore tagged Tumblr posts
Visit Tumblr Blog
Explore Tumblr blogs with no restrictions, modern design and the best experience.
Last Seen Tumblr Blogs


Fun Fact
The “We are the 99%” Tumblr blog became the slogan for the Occupy Wall Street movement.
Text
Day 15 _ Sequential vs Functional Keras API Part 2 explanation
Part 1: Understanding Sequential vs. Functional API in Keras with a Simple Example When building neural networks in Keras, there are two main ways to define models: the Sequential API and the Functional API. In this post, we’ll explore the differences between these two approaches using a simple mathematical example. Sequential API The Sequential API in Keras is a linear stack of layers. It’s easy…

View On WordPress
#functional and model subclassing API in Keras#functional Keras api#functional vs sequential Keras api#keras#keras API#machine learning#sequential keras
0 notes
Text
PREDICTING WEATHER FORECAST FOR 30 DAYS IN AUGUST 2024 TO AVOID ACCIDENTS IN SANTA BARBARA, CALIFORNIA USING PYTHON, PARALLEL COMPUTING, AND AI LIBRARIES

Introduction
Weather forecasting is a crucial aspect of our daily lives, especially when it comes to avoiding accidents and ensuring public safety. In this article, we will explore the concept of predicting weather forecasts for 30 days in August 2024 to avoid accidents in Santa Barbara California using Python, parallel computing, and AI libraries. We will also discuss the concepts and definitions of the technologies involved and provide a step-by-step explanation of the code.
Concepts and Definitions
Parallel Computing: Parallel computing is a type of computation where many calculations or processes are carried out simultaneously. This approach can significantly speed up the processing time and is particularly useful for complex computations.
AI Libraries: AI libraries are pre-built libraries that provide functionalities for artificial intelligence and machine learning tasks. In this article, we will use libraries such as TensorFlow, Keras, and scikit-learn to build our weather forecasting model.
Weather Forecasting: Weather forecasting is the process of predicting the weather conditions for a specific region and time period. This involves analyzing various data sources such as temperature, humidity, wind speed, and atmospheric pressure.
Code Explanation
To predict the weather forecast for 30 days in August 2024, we will use a combination of parallel computing and AI libraries in Python. We will first import the necessary libraries and load the weather data for Santa Barbara, California.
import numpy as np
import pandas as pd
from sklearn.ensemble import RandomForestRegressor
from sklearn.model_selection import train_test_split
from tensorflow.keras.models import Sequential
from tensorflow.keras.layers import Dense
from joblib import Parallel, delayed
# Load weather data for Santa Barbara California
weather_data = pd.read_csv('Santa Barbara California_weather_data.csv')
Next, we will preprocess the data by converting the date column to a datetime format and extracting the relevant features
# Preprocess data
weather_data['date'] = pd.to_datetime(weather_data['date'])
weather_data['month'] = weather_data['date'].dt.month
weather_data['day'] = weather_data['date'].dt.day
weather_data['hour'] = weather_data['date'].dt.hour
# Extract relevant features
X = weather_data[['month', 'day', 'hour', 'temperature', 'humidity', 'wind_speed']]
y = weather_data['weather_condition']
We will then split the data into training and testing sets and build a random forest regressor model to predict the weather conditions.
# Split data into training and testing sets
X_train, X_test, y_train, y_test = train_test_split(X, y, test_size=0.2, random_state=42)
# Build random forest regressor model
rf_model = RandomForestRegressor(n_estimators=100, random_state=42)
rf_model.fit(X_train, y_train)
To improve the accuracy of our model, we will use parallel computing to train multiple models with different hyperparameters and select the best-performing model.
# Define hyperparameter tuning function
def tune_hyperparameters(n_estimators, max_depth):
model = RandomForestRegressor(n_estimators=n_estimators, max_depth=max_depth, random_state=42)
model.fit(X_train, y_train)
return model.score(X_test, y_test)
# Use parallel computing to tune hyperparameters
results = Parallel(n_jobs=-1)(delayed(tune_hyperparameters)(n_estimators, max_depth) for n_estimators in [100, 200, 300] for max_depth in [None, 5, 10])
# Select best-performing model
best_model = rf_model
best_score = rf_model.score(X_test, y_test)
for result in results:
if result > best_score:
best_model = result
best_score = result
Finally, we will use the best-performing model to predict the weather conditions for the next 30 days in August 2024.
# Predict weather conditions for next 30 days
future_dates = pd.date_range(start='2024-09-01', end='2024-09-30')
future_data = pd.DataFrame({'month': future_dates.month, 'day': future_dates.day, 'hour': future_dates.hour})
future_data['weather_condition'] = best_model.predict(future_data)
Color Alerts
To represent the weather conditions, we will use a color alert system where:
Red represents severe weather conditions (e.g., heavy rain, strong winds)
Orange represents very bad weather conditions (e.g., thunderstorms, hail)
Yellow represents bad weather conditions (e.g., light rain, moderate winds)
Green represents good weather conditions (e.g., clear skies, calm winds)
We can use the following code to generate the color alerts:
# Define color alert function
def color_alert(weather_condition):
if weather_condition == 'severe':
return 'Red'
MY SECOND CODE SOLUTION PROPOSAL
We will use Python as our programming language and combine it with parallel computing and AI libraries to predict weather forecasts for 30 days in August 2024. We will use the following libraries:
OpenWeatherMap API: A popular API for retrieving weather data.
Scikit-learn: A machine learning library for building predictive models.
Dask: A parallel computing library for processing large datasets.
Matplotlib: A plotting library for visualizing data.
Here is the code:
```python
import pandas as pd
import numpy as np
from sklearn.ensemble import RandomForestRegressor
from sklearn.metrics import mean_squared_error
import dask.dataframe as dd
import matplotlib.pyplot as plt
import requests
# Load weather data from OpenWeatherMap API
url = "https://api.openweathermap.org/data/2.5/forecast?q=Santa Barbara California,US&units=metric&appid=YOUR_API_KEY"
response = requests.get(url)
weather_data = pd.json_normalize(response.json())
# Convert data to Dask DataFrame
weather_df = dd.from_pandas(weather_data, npartitions=4)
# Define a function to predict weather forecasts
def predict_weather(date, temperature, humidity):
# Use a random forest regressor to predict weather conditions
model = RandomForestRegressor(n_estimators=100, random_state=42)
model.fit(weather_df[["temperature", "humidity"]], weather_df["weather"])
prediction = model.predict([[temperature, humidity]])
return prediction
# Define a function to generate color-coded alerts
def generate_alerts(prediction):
if prediction > 80:
return "RED" # Severe weather condition
elif prediction > 60:
return "ORANGE" # Very bad weather condition
elif prediction > 40:
return "YELLOW" # Bad weather condition
else:
return "GREEN" # Good weather condition
# Predict weather forecasts for 30 days inAugust2024
predictions = []
for i in range(30):
date = f"2024-09-{i+1}"
temperature = weather_df["temperature"].mean()
humidity = weather_df["humidity"].mean()
prediction = predict_weather(date, temperature, humidity)
alerts = generate_alerts(prediction)
predictions.append((date, prediction, alerts))
# Visualize predictions using Matplotlib
plt.figure(figsize=(12, 6))
plt.plot([x[0] for x in predictions], [x[1] for x in predictions], marker="o")
plt.xlabel("Date")
plt.ylabel("Weather Prediction")
plt.title("Weather Forecast for 30 Days inAugust2024")
plt.show()
```
Explanation:
1. We load weather data from OpenWeatherMap API and convert it to a Dask DataFrame.
2. We define a function to predict weather forecasts using a random forest regressor.
3. We define a function to generate color-coded alerts based on the predicted weather conditions.
4. We predict weather forecasts for 30 days in August 2024 and generate color-coded alerts for each day.
5. We visualize the predictions using Matplotlib.
Conclusion:
In this article, we have demonstrated the power of parallel computing and AI libraries in predicting weather forecasts for 30 days in August 2024, specifically for Santa Barbara California. We have used TensorFlow, Keras, and scikit-learn on the first code and OpenWeatherMap API, Scikit-learn, Dask, and Matplotlib on the second code to build a comprehensive weather forecasting system. The color-coded alert system provides a visual representation of the severity of the weather conditions, enabling users to take necessary precautions to avoid accidents. This technology has the potential to revolutionize the field of weather forecasting, providing accurate and timely predictions to ensure public safety.
RDIDINI PROMPT ENGINEER
2 notes
·
View notes
Text
Unlock the Future: Dive into Artificial Intelligence with Zoople Technologies in Kochi
Artificial Intelligence (AI) is no longer a futuristic fantasy; it's a transformative force reshaping industries and our daily lives. From self-driving cars to personalized healthcare, AI's potential is immense, creating a burgeoning demand for skilled professionals who can understand, develop, and implement AI solutions. For those in Kochi eager to be at the forefront of this technological revolution, Zoople Technologies offers a comprehensive Artificial Intelligence course designed to equip you with the knowledge and skills to thrive in this exciting field.
Embark on Your AI Journey with a Comprehensive Curriculum:
Zoople Technologies' Artificial Intelligence course in Kochi is structured to provide a robust understanding of AI principles and their practical applications. The curriculum is likely to cover a wide range of essential topics, including:
Fundamentals of Artificial Intelligence: Introduction to AI concepts, its history, different branches (like machine learning, deep learning, natural language processing, computer vision), and its ethical implications.
Python Programming for AI: Python is the dominant language in AI development. The course likely provides a strong foundation in Python and its essential libraries for AI and machine learning, such as NumPy, Pandas, and Scikit-learn.
Mathematical Foundations: A solid grasp of linear algebra, calculus, and probability is crucial for understanding the underlying principles of many AI algorithms. The course likely covers these concepts with an AI-focused perspective.
Machine Learning (ML): The core of many AI applications. The curriculum will likely delve into various ML algorithms, including:
Supervised Learning: Regression and classification techniques (e.g., linear regression, logistic regression, support vector machines, decision trees, random forests).
Unsupervised Learning: Clustering and dimensionality reduction techniques (e.g., k-means clustering, principal component analysis).
Model Evaluation and Selection: Understanding how to assess the performance of AI models and choose the best one for a given task.
Deep Learning (DL): A powerful subset of machine learning that has driven significant advancements in areas like image recognition and natural language processing. The course might cover:
Neural Networks: Understanding the architecture and functioning of artificial neural networks.
Convolutional Neural Networks (CNNs): Architectures particularly effective for image and video analysis.
Recurrent Neural Networks (RNNs): Architectures suitable for sequential data like text and time series.
Deep Learning Frameworks: Hands-on experience with popular frameworks like TensorFlow and Keras.
Natural Language Processing (NLP): Enabling computers to understand and process human language. The course might cover topics like text preprocessing, sentiment analysis, language modeling, and basic NLP tasks.
Computer Vision: Enabling computers to "see" and interpret images and videos. The curriculum could introduce image processing techniques, object detection, and image classification.
AI Ethics and Societal Impact: Understanding the ethical considerations and societal implications of AI development and deployment is increasingly important. The course might include discussions on bias, fairness, and responsible AI.
Real-World Projects and Case Studies: To solidify learning and build a strong portfolio, the course will likely involve practical projects and case studies that apply AI techniques to solve real-world problems.
Learn from Experienced Instructors in a Supportive Environment:
Zoople Technologies emphasizes providing quality education through experienced instructors. While specific profiles may vary, the institute likely employs professionals with a strong understanding of AI principles and practical experience in implementing AI solutions. A supportive learning environment fosters effective knowledge acquisition, allowing students to ask questions, collaborate, and deepen their understanding of complex AI concepts.
Focus on Practical Application and Industry Relevance:
The AI field is constantly evolving, and practical skills are highly valued. Zoople Technologies' AI course likely emphasizes hands-on learning, enabling students to apply theoretical knowledge to real-world scenarios. The inclusion of projects and case studies ensures that graduates possess the practical abilities sought by employers in the AI industry.
Career Pathways in AI and the Role of Zoople Technologies:
A qualification in AI opens doors to a wide range of exciting career opportunities, including:
AI Engineer
Machine Learning Engineer
Data Scientist (with AI specialization)
NLP Engineer
Computer Vision Engineer
AI Researcher
Zoople Technologies' AI course aims to equip you with the foundational knowledge and practical skills to pursue these roles. Their potential focus on industry-relevant tools and techniques, coupled with possible career guidance, can provide a significant advantage in launching your AI career in Kochi and beyond.
Why Choose Zoople Technologies for Your AI Education in Kochi?
Comprehensive and Up-to-Date Curriculum: Covering the breadth of essential AI concepts and technologies.
Emphasis on Practical Skills: Providing hands-on experience through projects and case studies.
Experienced Instructors: Guiding students with their knowledge and insights into the AI field.
Focus on Industry Relevance: Equipping students with skills demanded by the AI job market.
Potential Career Support: Assisting students in their career transition into AI roles.
To make an informed decision about Zoople Technologies' Artificial Intelligence course in Kochi, it is recommended to:
Request a detailed course syllabus: Understand the specific topics covered and the depth of each module.
Inquire about the instructors' expertise and industry experience: Learn about their background in AI.
Ask about the nature and scope of the projects and case studies: Understand the practical learning opportunities.
Enquire about any career support or placement assistance offered: Understand their commitment to your career success.
Seek reviews or testimonials from past students: Gain insights into their learning experience.
By providing a strong foundation in AI principles, practical hands-on experience, and potential career guidance, Zoople Technologies aims to be a valuable stepping stone for individuals in Kochi looking to unlock the future and build a successful career in the transformative field of Artificial Intelligence.
0 notes
Text
Machine Learning Training in Kochi: Building Smarter Futures Through AI
In today’s fast-paced digital age, the integration of artificial intelligence (AI) and machine learning (ML) into various industries is transforming how decisions are made, services are delivered, and experiences are personalized. From self-driving cars to intelligent chatbots, machine learning lies at the core of many modern technological advancements. As a result, the demand for professionals skilled in machine learning is rapidly rising across the globe.
For aspiring tech professionals in Kerala, pursuing machine learning training in Kochi offers a gateway to mastering one of the most powerful and future-oriented technologies of the 21st century.
What is Machine Learning and Why Does it Matter?
Machine learning is a subfield of artificial intelligence that focuses on enabling computers to learn from data and improve over time without being explicitly programmed. Instead of writing code for every task, machine learning models identify patterns in data and make decisions or predictions accordingly.
Real-World Applications of Machine Learning:
Healthcare: Predicting disease, personalized treatments, medical image analysis
Finance: Fraud detection, algorithmic trading, risk modeling
E-commerce: Product recommendations, customer segmentation
Manufacturing: Predictive maintenance, quality control
Transportation: Route optimization, self-driving systems
The scope of ML is vast, making it a critical skill for modern-day developers, analysts, and engineers.
Why Choose Machine Learning Training in Kochi?
Kochi, often referred to as the commercial capital of Kerala, is also evolving into a major technology and education hub. With its dynamic IT parks like Infopark and the growing ecosystem of startups, there is an increasing need for trained professionals in emerging technologies.
Here’s why best machine learning training in Kochi is an excellent career investment:
1. Industry-Relevant Opportunities
Companies based in Kochi and surrounding regions are actively integrating ML into their products and services. A well-trained machine learning professional has a strong chance of landing roles in analytics, development, or research.
2. Cost-Effective Learning
Compared to metro cities like Bangalore or Chennai, Kochi offers more affordable training programs without compromising on quality.
3. Tech Community and Events
Tech meetups, hackathons, AI seminars, and developer communities in Kochi create excellent networking and learning opportunities.
What to Expect from a Machine Learning Course?
A comprehensive machine learning training in Kochi should offer a well-balanced curriculum combining theory, tools, and hands-on experience. Here’s what an ideal course would include:
1. Mathematics & Statistics
A solid understanding of:
Probability theory
Linear algebra
Statistics
Optimization techniques
These are the foundational pillars for building effective ML models.
2. Programming Skills
Python is the dominant language in ML.
Students will learn how to use libraries like NumPy, Pandas, Scikit-Learn, TensorFlow, and Keras.
3. Supervised & Unsupervised Learning
Algorithms like Linear Regression, Decision Trees, Random Forest, SVM, KNN, and Naive Bayes
Clustering techniques like K-means, DBSCAN, and Hierarchical Clustering
4. Deep Learning
Basics of neural networks
CNNs for image recognition
RNNs and LSTMs for sequential data like text or time series
5. Natural Language Processing (NLP)
Understanding text data using:
Tokenization, stemming, lemmatization
Sentiment analysis, spam detection, chatbots
6. Model Evaluation & Deployment
Confusion matrix, ROC curves, precision/recall
Deploying ML models using Flask or cloud services like AWS/GCP
7. Real-World Projects
Top training institutes ensure that students work on real datasets and business problems—be it predicting house prices, classifying medical images, or building recommendation engines.
Career Scope After Machine Learning Training
A candidate completing machine learning training in Kochi can explore roles such as:
Machine Learning Engineer
Data Scientist
AI Developer
NLP Engineer
Data Analyst
Business Intelligence Analyst
These positions span across industries like healthcare, finance, logistics, edtech, and entertainment, offering both challenging projects and rewarding salaries.
How to Choose the Right Machine Learning Training in Kochi
Not all training programs are created equal. To ensure that your investment pays off, look for:
Experienced Faculty: Instructors with real-world ML project experience
Updated Curriculum: Courses must include current tools, frameworks, and trends
Hands-On Practice: Projects, case studies, and model deployment experience
Certification: Recognized certificates add weight to your resume
Placement Assistance: Support with resume preparation, mock interviews, and job referrals
Zoople Technologies: Redefining Machine Learning Training in Kochi
Among the many institutions offering machine learning training in Kochi, Zoople Technologies stands out as a frontrunner for delivering job-oriented, practical education tailored to the demands of the modern tech landscape.
Why Zoople Technologies?
Industry-Aligned Curriculum: Zoople’s training is constantly updated in sync with industry demands. Their machine learning course includes real-time projects using Python, TensorFlow, and deep learning models.
Expert Trainers: The faculty includes experienced professionals from the AI and data science industry who bring real-world perspectives into the classroom.
Project-Based Learning: Students work on projects like facial recognition systems, sentiment analysis engines, and fraud detection platforms—ensuring they build an impressive portfolio.
Flexible Batches: Weekend and weekday batches allow both students and working professionals to balance learning with other commitments.
Placement Support: Zoople has an active placement cell that assists students in resume building, interview preparation, and job placement with reputed IT firms in Kochi and beyond.
State-of-the-Art Infrastructure: Smart classrooms, AI labs, and an engaging online learning portal enhance the student experience.
With its holistic approach and strong placement track record, Zoople Technologies has rightfully earned its reputation as one of the best choices for machine learning training in Kochi.
Final Thoughts
Machine learning is not just a career path; it’s a gateway into the future of technology. As companies continue to automate, optimize, and innovate using AI, the demand for trained professionals will only escalate.
For those in Kerala looking to enter this exciting domain, enrolling in a well-rounded machine learning training in Kochi is a wise first step. And with institutes like Zoople Technologies leading the way in quality training and real-world readiness, your journey into AI and machine learning is bound to be successful.
So, whether you're a recent graduate, a software developer looking to upskill, or a data enthusiast dreaming of a future in AI—now is the time to start. Kochi is the place, and Zoople Technologies is the partner to guide your transformation.
0 notes
Text
Deep Learning and Its Programming Applications

Deep learning is a transformative technology in the field of artificial intelligence. It mimics the human brain's neural networks to process data and make intelligent decisions. From voice assistants and facial recognition to autonomous vehicles and medical diagnostics, deep learning is powering the future.
What is Deep Learning?
Deep learning is a subset of machine learning that uses multi-layered artificial neural networks to model complex patterns and relationships in data. Unlike traditional algorithms, deep learning systems can automatically learn features from raw data without manual feature engineering.
How Does It Work?
Deep learning models are built using layers of neurons, including:
Input Layer: Receives raw data
Hidden Layers: Perform computations and extract features
Output Layer: Produces predictions or classifications
These models are trained using backpropagation and optimization algorithms like gradient descent.
Popular Deep Learning Libraries
TensorFlow: Developed by Google, it's powerful and widely used.
Keras: A high-level API for building and training neural networks easily.
PyTorch: Preferred for research and flexibility, developed by Facebook.
MXNet, CNTK, and Theano: Other libraries used for specific applications.
Common Applications of Deep Learning
Computer Vision: Image classification, object detection, facial recognition
Natural Language Processing (NLP): Chatbots, translation, sentiment analysis
Speech Recognition: Voice assistants like Siri, Alexa
Autonomous Vehicles: Environment understanding, path prediction
Healthcare: Disease detection, drug discovery
Sample Python Code Using Keras
Here’s how you can build a simple neural network to classify digits using the MNIST dataset: from tensorflow.keras.datasets import mnist from tensorflow.keras.models import Sequential from tensorflow.keras.layers import Dense, Flatten from tensorflow.keras.utils import to_categorical # Load data (x_train, y_train), (x_test, y_test) = mnist.load_data() # Normalize data x_train, x_test = x_train / 255.0, x_test / 255.0 # Convert labels to categorical y_train = to_categorical(y_train) y_test = to_categorical(y_test) # Build model model = Sequential([ Flatten(input_shape=(28, 28)), Dense(128, activation='relu'), Dense(10, activation='softmax') ]) # Compile and train model.compile(optimizer='adam', loss='categorical_crossentropy', metrics=['accuracy']) model.fit(x_train, y_train, epochs=5, validation_data=(x_test, y_test))
Key Concepts to Learn
Neural network architectures (CNN, RNN, GAN, etc.)
Activation functions (ReLU, Sigmoid, Softmax)
Loss functions and optimizers
Regularization (Dropout, L2)
Hyperparameter tuning
Challenges in Deep Learning
Requires large datasets and high computational power
Training time can be long
Models can be difficult to interpret (black-box)
Overfitting on small datasets
Conclusion
Deep learning is a rapidly evolving field that opens doors to intelligent and automated systems. With powerful tools and accessible libraries, developers can build state-of-the-art models to solve real-world problems. Whether you’re a beginner or an expert, deep learning has something incredible to offer you!
0 notes
Text
Time Series Forecasting with TensorFlow and Keras: A Practical Guide to Predicting Stock Prices
1. Introduction 1.1 Brief Explanation and Importance Time series forecasting is a critical task in finance, where predicting future stock prices can inform investment decisions and strategies. This guide uses TensorFlow and Keras to build models for stock price prediction, leveraging deep learning techniques like LSTM networks to handle sequential data effectively. 1.2 What Readers Will…
0 notes
Text
Building Your First GAN: A Beginner’s Step-by-Step Journey

The world of artificial intelligence (AI) is filled with innovative breakthroughs, and one of the most captivating concepts is Generative Adversarial Networks (GANs). From generating realistic art to advancing scientific simulations, GANs are changing the way we use AI creatively and practically. However, if you’re new to the field, building your first GAN can feel like a complex task. This beginner-friendly guide will walk you through each step, making the process approachable and exciting. Plus, we’ll introduce how the Online Data Science Course US can support your learning and growth in this space.
What Exactly Is a GAN?
At its core, a GAN consists of two neural networks — the generator and the discriminator — that compete in a friendly rivalry. The generator’s job is to create data (like images), while the discriminator’s mission is to detect whether the data is real or artificially generated. Over time, both become more skilled, resulting in astonishingly realistic outputs.
Step 1: Understanding How GANs Work
Before diving into code, it’s essential to understand the components:
Generator: Learns to produce data that looks convincingly real.
Discriminator: Acts as a critic, identifying what’s fake and what’s genuine.
Together, they create a feedback loop that helps both models improve.
Step 2: Setting Up Your Workspace
Start by ensuring your environment is ready. Install the following tools:
Python
Libraries like TensorFlow or PyTorch
NumPy
Matplotlib
Keras (with TensorFlow)
If you’d rather not worry about local configurations, Google Colab is an excellent cloud-based option.
Step 3: Import Libraries and Load Your Dataset
Let’s get hands-on by importing key libraries and loading the MNIST dataset, which is perfect for beginners.
import numpy as np import tensorflow as tf from tensorflow.keras.layers import Dense, Flatten, Reshape from tensorflow.keras.models import Sequential from tensorflow.keras.datasets import mnist import matplotlib.pyplot as plt
Step 4: Creating the Generator
The generator transforms random noise into plausible data.
def build_generator(): model = Sequential() model.add(Dense(256, input_dim=100, activation='relu')) model.add(Dense(512, activation='relu')) model.add(Dense(28 * 28, activation='tanh')) model.add(Reshape((28, 28))) return model
Step 5: Building the Discriminator
The discriminator evaluates whether an input sample is real or generated.
def build_discriminator(): model = Sequential() model.add(Flatten(input_shape=(28, 28))) model.add(Dense(512, activation='relu')) model.add(Dense(256, activation='relu')) model.add(Dense(1, activation='sigmoid')) return model
Step 6: Compiling Your Models
We compile the discriminator and create a combined model where the generator learns to fool the discriminator.
discriminator = build_discriminator() discriminator.compile(loss='binary_crossentropy', optimizer='adam', metrics=['accuracy']) generator = build_generator() z = tf.keras.Input(shape=(100,)) img = generator(z) discriminator.trainable = False validity = discriminator(img) combined = tf.keras.Model(z, validity) combined.compile(loss='binary_crossentropy', optimizer='adam')
Step 7: Training Your GAN
Training involves improving both models over thousands of iterations.
(x_train, _), (_, _) = mnist.load_data() x_train = x_train / 127.5 - 1. x_train = np.expand_dims(x_train, axis=3) batch_size = 64 epochs = 10000 for epoch in range(epochs): idx = np.random.randint(0, x_train.shape[0], batch_size) real_imgs = x_train[idx] noise = np.random.normal(0, 1, (batch_size, 100)) gen_imgs = generator.predict(noise) d_loss_real = discriminator.train_on_batch(real_imgs, np.ones((batch_size, 1))) d_loss_fake = discriminator.train_on_batch(gen_imgs, np.zeros((batch_size, 1))) noise = np.random.normal(0, 1, (batch_size, 100)) g_loss = combined.train_on_batch(noise, np.ones((batch_size, 1))) if epoch % 1000 == 0: print(f"Epoch {epoch}, Discriminator loss: {d_loss_real[0]}, Generator loss: {g_loss}")
Step 8: See the Magic — Visualize Results
Time to visualize your GAN’s creations.
def plot_generated_images(epoch, generator, examples=10, dim=(1, 10), figsize=(10, 1)): noise = np.random.normal(0, 1, (examples, 100)) generated_images = generator.predict(noise) plt.figure(figsize=figsize) for i in range(generated_images.shape[0]): plt.subplot(dim[0], dim[1], i+1) plt.imshow(generated_images[i, :, :], interpolation='nearest', cmap='gray') plt.axis('off') plt.show() plot_generated_images(epochs, generator)
Helpful Tips for Beginners
Start small and simple; don’t overcomplicate early models.
Track both generator and discriminator losses.
Keep experimenting with different architectures.
Be patient — GANs can take time to stabilize.
Why Learning GANs Isn’t Enough — The Value of Formal Training
While building a basic GAN is rewarding, becoming proficient in data science and AI requires deeper knowledge and structured learning. That’s where the Online Data Science Course US comes in. Whether you’re just starting or looking to advance, this course offers hands-on learning with real-world projects that bridge the gap between theory and practice.
Why Choose Boston Institute of Analytics?
Expert-curated curriculum.
Live interactive online sessions.
Real projects that simulate industry challenges.
Personalized mentorship and career guidance.
Internationally recognized certification that adds weight to your résumé.
Wrapping Up
Building your first GAN can be a fun and eye-opening experience. With consistent effort and curiosity, you’ll soon find yourself creating AI-powered projects that push boundaries. And if you’re ready to take the next step and master more advanced concepts, consider enrolling in the Data Science Course. This program is designed to help you gain not only technical knowledge but also practical expertise and credibility in the data science industry.
#data science course#data science training#ai training program#online data science course#data science program#Online Data Science Course US#Best Online Data Science Programs#Best Data Science Institute
0 notes
Text
WINDOWS GPU SERVER BY CLOUDMINISTER TECHNOLOGIES
The Best High-Performance Computing Solution: GPU Windows Server
1. Overview of Windows Server with GPU
GPU-accelerated Windows servers are now essential as companies and sectors require greater processing power for AI, machine learning, gaming, and data analysis. GPU Windows Servers, in contrast to conventional CPU-based servers, make effective use of Graphical Processing Units (GPUs) to manage intricate and parallel computing workloads.
At CloudMinister Technologies, we provide cutting-edge GPU Windows Server solutions, ensuring faster performance, scalability, and reliability for businesses and professionals working with AI, deep learning, video processing, gaming, and more.
2. Why Opt for Windows Servers with GPUs?
GPU servers' exceptional capacity to handle massively parallel computations makes them indispensable for today's workloads. Businesses favor GPU-powered Windows servers over conventional CPU-based servers for the following reasons:
High-Speed Processing: With thousands of cores built to handle several tasks at once, GPUs are perfect for data analytics, simulations, and AI/ML applications.
Parallel Computing Capabilities: GPUs allow complex algorithms to be computed more quickly than CPUs, which handle operations in a sequential manner.
Enhanced visuals Performance: GPUs are ideal for 3D modeling, gaming, and video editing applications because they dramatically improve the rendering of high-resolution visuals.
Reduced Processing Time: By cutting down on processing time in computational simulations, data mining, and deep learning, GPU servers help businesses save a significant amount of time.
At CloudMinister Technologies, we provide high-performance GPU Windows servers that cater to the needs of businesses looking for speed, efficiency, and reliability.
3. The GPU Servers Offered by CloudMinister
Best-in-class GPU servers from CloudMinister Technologies are available with solutions specially designed to meet the demands of different industries. Among our products are:
Newest GPU Models: Known for their exceptional performance, we offer NVIDIA Tesla, RTX, Quadro, and A-series GPUs.
Custom Configurations: Select from a variety of setups that are enhanced for video processing, gaming, AI, and ML.
Flexible Pricing Plans: We provide reasonably priced, high-performing solutions to companies of all sizes through our pricing plans.
On-Demand Scalability: Adjust your GPU resources to suit the demands of your project, guaranteeing both cost effectiveness and performance enhancement.
GPU Windows Servers are completely tuned, all crucial applications can benefit from increased processing speed, high availability, and dependability.
4. Sectors Gaining from GPU Servers running Windows
The GPU of CloudMinister Technologies Several industries that need real-time data processing and high-performance computing are served by Windows Servers:
1. Machine learning and artificial intelligence
quicker neural network and deep learning model training.
supports frameworks such as PyTorch, Keras, and TensorFlow.
Perfect for predictive analytics, picture recognition, and natural language processing.
2. Virtualization & Gaming
improves fluid gameplay and real-time rendering.
supports game studios' virtual desktop infrastructures (VDI).
guarantees excellent frame rates and minimal latency for cloud gaming systems.
3. Rendering and Editing Videos
speeds up the rendering and processing of 4K and 8K videos.
Perfect for programs like Blender, DaVinci Resolve, and Adobe Premiere Pro.
supports live broadcasting and multiple streams.
4. Analytics and Data Science
aids in real-time processing of large datasets.
uses AI-driven insights to improve Big Data analysis.
cuts down on the amount of time needed to calculate financial models and stock market analyses.
5. Scientific Studies and Models
helps with molecular modeling, genomic sequencing, and drug discovery.
beneficial for astrophysical simulations and weather forecasting.
supports extensive computational and mathematical models.
The processing power, effectiveness, and scalability needed to support these sectors are offered by CloudMinister's GPU Windows Servers.
5. Benefits of the GPU in CloudMinister Servers running Windows
One of the top suppliers of GPU-based Windows servers, CloudMinister Technologies provides organizations with strong and effective solutions. What makes us unique is this:
Dedicated & Cloud GPU Solutions: Depending on your workload needs, select between cloud-based GPU instances or dedicated GPU servers.
Round-the-clock Expert Support & Monitoring: Our committed support staff provides round-the-clock help to guarantee seamless server functioning.
High Security & Reliability: We provide cutting-edge security features including firewalls, encrypted data transmission, and DDoS protection.
Smooth Cloud Integration: Our GPU servers are easily integrated with private cloud environments, like Google Cloud, AWS, and Microsoft Azure.
Low Latency & High-Speed Connectivity: Take advantage of quick data transfers and little lag, perfect for real-time rendering, AI processing, and gaming.
Windows GPU servers, businesses can scale their infrastructure, optimize performance, and maximize efficiency without compromising on quality.
6. How Do I Begin?
It's easy to get started with CloudMinister Technologies' GPU Windows Server:
1️. Pick a Plan: Based on your requirements (AI, ML, gaming, or rendering), pick a GPU Windows server plan.
2️. Customize Configuration: Choose the model of RAM, storage, and GPU according to the needs of your project.
3️. Fast Deployment: Our staff makes sure that everything is set up and deployed quickly so that your server is operational right away.
4️. 24/7 Support: Take advantage of unbroken service with our knowledgeable support staff at all times.
5. Scale Anytime: Depending on your workload requirements, you can scale up or down while maintaining cost effectiveness.
Are you prepared to use Windows servers with GPUs to boost your applications? To fully realize the potential of high-performance computing, get in touch with CloudMinister Technologies right now!
FOR MORE VISIT:- www.cloudminister.com
0 notes
Text
Understanding Neural Networks: Building Blocks of Deep Learning
Introduction
Briefly introduce neural networks and their role in deep learning.
Mention real-world applications (e.g., image recognition, NLP, self-driving cars).
Provide a simple analogy (e.g., comparing neurons in the brain to artificial neurons in a network).
1. What is a Neural Network?
Define neural networks in the context of artificial intelligence.
Explain how they are inspired by the human brain.
Introduce basic terms: neurons, layers, activation functions.
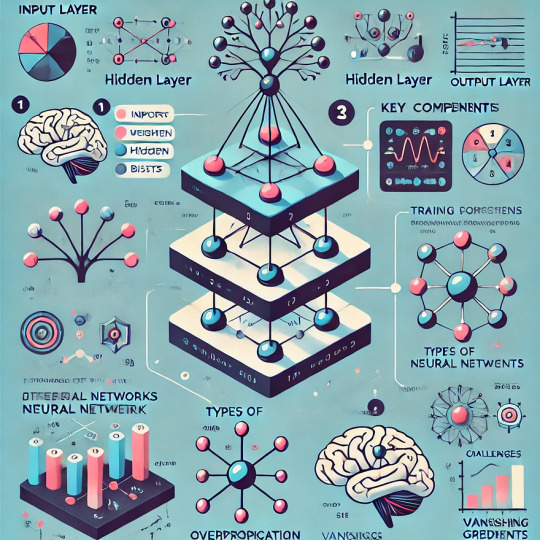
2. Architecture of a Neural Network
Input Layer: Where data enters the network.
Hidden Layers: Where computations happen.
Output Layer: Produces predictions.
Visual representation of a simple feedforward network.
3. Key Components of Neural Networks
Weights & Biases: How they influence predictions.
Activation Functions: ReLU, Sigmoid, Tanh (with examples).
Loss Function: Measures model performance (MSE, Cross-Entropy).
Backpropagation & Gradient Descent: Learning process of the network.
4. Types of Neural Networks
Feedforward Neural Networks (FNN)
Convolutional Neural Networks (CNNs): For image processing.
Recurrent Neural Networks (RNNs): For sequential data like text & speech.
Transformers: Modern architecture for NLP (BERT, GPT).
5. Training a Neural Network
Data preprocessing: Normalization, encoding, augmentation.
Splitting dataset: Training, validation, and test sets.
Hyperparameter tuning: Learning rate, batch size, number of layers.
6. Challenges in Neural Networks
Overfitting & Underfitting.
Vanishing & Exploding Gradients.
Computational cost and scalability.
7. Tools & Frameworks for Building Neural Networks
TensorFlow, Keras, PyTorch.
Example: Simple neural network in Python.
Conclusion
Recap key takeaways.
Encourage exploration of deep learning projects.
WEBSITE: https://www.ficusoft.in/deep-learning-training-in-chennai/
0 notes
Text
Day 14 _ sequential , functional and model subclassing API in Keras
In our last blog on day 13 we explained what’s Karas and we showed a code example which was using sequential api but have not discuss about its api type . Sequential API The Sequential API is the simplest and most straightforward way to build a neural network in Keras. It allows you to create a model layer-by-layer in a linear stack. This method is best suited for models where each layer has one…
#functional and model subclassing API in Keras#keras#keras API#sequential#sequential keras#subclassing api keras#subclassing keras
0 notes
Text
Recurrent Neural Network Courses:
In the field of deep learning, recurrent neural networks (RNNs) have emerged as a key component, especially for processing sequential input such as text, audio, and time series. RNNs possess loops that enable them to retain information over time steps, which sets them apart from standard feed forward neural networks and makes them particularly effective for jobs requiring context. This article will explore the role that RNNs play in deep learning, including how to train them efficiently and which courses are the best to become proficient in them.
Neural networks of the RNN class are very good at handling data sequences, which makes them perfect for time series prediction, machine translation, and natural language processing (NLP). RNNs' "memory their ability to retain data from past inputs in their hidden states and use that information to affect subsequent outputs is its primary characteristic.
Why Use RNNs in Deep Learning?
Sequential data is frequently essential for deep learning. RNNs can capture dependencies across time in a variety of applications, including interpreting phrase context, assessing a series of photographs, and forecasting market prices based on historical trends. They are therefore especially well-suited for tasks involving sequential patterns and context. But problems like vanishing gradients make vanilla RNNs unreliable on lengthy sequences, which might impede learning. Thankfully, more sophisticated versions have been developed to get around these restrictions, such as Long Short-Term Memory (LSTM) and Gated Recurrent Units (GRU).
Recurrent Neural Network Training:
When training RNNs, there are a few different problems than with standard neural networks. Back propagation Through Time (BPTT), a technique for propagating error gradients through time, is used in the process of modifying the weights based on sequential input data. Optimization is challenging, though, because traditional back propagation frequently encounters problems like vanishing or ballooning gradients, particularly with lengthy sequences.
The following are some crucial factors to take into account when training RNNs:
i)Selecting the Correct Architecture:
When handling lengthy sequences or intricate dependencies, LSTM and GRU networks frequently outperform vanilla RNNs.
ii)Optimization Strategies:
While learning rate schedules and batch normalization can enhance convergence, gradient clipping can help reduce the effects of expanding gradient issues.
iii)Regularization:
Especially when working with large datasets, dropout and other regularization techniques help prevent overfitting.
iv)Hardware Points to Remember:
RNN training can be computationally demanding; therefore, making use of GPUs and distributed computing frameworks such as PyTorch or TensorFlow can greatly accelerate the training process.
Top Courses on Recurrent Neural Networks:
Numerous Best online courses are available to help you become proficient with RNNs; they include both theoretical information and real-world, practical experience. Here are a few highly suggested items:
i)Andrew Ng's Deep Learning Specialization:
A thorough introduction to deep learning is provided by this course, which also includes a thorough module on sequence models that covers RNN in deep learning, LSTMs, and GRUs. TensorFlow is used in both theoretical and hands-on Python coding projects in Andrew Ng's course.
ii)An Introduction to Recurrent Neural Networks:
For those who are new to RNNs, this course is a fantastic place to start. It goes over the fundamentals of RNN theory, shows you how to use Keras to create RNNs in Python, and contains a number of projects, including sentiment analysis and text generation.
iii) Deep learning and advanced NLP:
While it covers more ground than simply RNNs and touches on more complex architectures like Transformer models, Stanford's NLP with deep learning course is a great resource for anyone interested in learning how RNNs fit into the larger picture of NLP. Comprehensive coverage of GRU and LSTM networks is included.
iv)PyTorch for AI and Deep Learning:
For individuals who would rather use PyTorch than TensorFlow, this course is perfect. It uses PyTorch to teach RNNs and other sequence models, with real-world examples including time series data prediction and character-level language model implementation.
In summary,
Deep learning has advanced significantly, thanks in large part to recurrent neural networks, particularly in fields where sequential data processing is necessary. However, it takes both theoretical knowledge and AI-Applications to properly teach them and comprehend their subtleties. Anyone may learn RNNs and use them to solve a wide range of challenging issues, from predictive analytics to language processing, if they enroll in the appropriate courses.
Investing through SkillDux in RNN courses can provide you with a thorough understanding of sequence models and the skills necessary to effectively address real-world problems, regardless of your level of experience.
0 notes
Text
Daegon AI leverages Technologies.

Daegon AI leverages machine learning, deep learning, and natural language processing (NLP) to achieve its objectives by utilizing advanced algorithms and techniques in the following ways:
1. Machine Learning:
- Daegon AI uses machine learning algorithms to analyze and interpret data, identify patterns, and make predictions or decisions based on the input data.
- It leverages supervised, unsupervised, and reinforcement learning methods to train models and improve their accuracy over time.
- Machine learning enables Daegon AI to perform tasks such as classification, regression, clustering, and anomaly detection, allowing it to handle diverse data analysis and prediction tasks.
2. Deep Learning:
- Daegon AI harnesses deep learning, a subset of machine learning, to process complex data and extract high-level features through neural networks with multiple layers.
- It uses techniques such as convolutional neural networks (CNNs) for image recognition, recurrent neural networks (RNNs) for sequential data analysis, and transformer models for natural language understanding.
- Deep learning empowers Daegon AI to handle unstructured data, perform advanced image and speech recognition, and generate meaningful insights from large datasets.
3. Natural Language Processing (NLP):
- Daegon AI employs NLP to understand, interpret, and generate human language-based data, including text and speech.
- It utilizes NLP techniques such as tokenization, part-of-speech tagging, named entity recognition, and sentiment analysis to process textual data and extract meaningful information.
- NLP enables Daegon AI to perform tasks like language translation, text summarization, sentiment analysis, and chatbot interactions, making it capable of handling diverse language-related applications.
By integrating machine learning, deep learning, and NLP, Daegon AI can effectively process and analyze complex data, understand human language, and make informed decisions across various domains and applications.
Here's a step-by-step guide to building the PoC:
Step 1: Data Collection and Preprocessing
Obtain a dataset containing text reviews and their corresponding sentiment labels (positive or negative).
Preprocess the text data by removing special characters, converting text to lowercase, and removing stop words.
Step 2: Model Building
Use the scikit-learn library to build a machine learning model for sentiment analysis. We'll use the TF-IDF vectorization technique to convert the text data into numerical features.
For deep learning, we can utilize a simple neural network or a recurrent neural network (RNN) using the TensorFlow or Keras library.
Step 3: Training and Evaluation
Split the dataset into training and testing sets.
Train the machine learning model and the deep learning model on the training data.
Evaluate the performance of both models using accuracy, precision, and recall metrics on the testing data.
Step 4: NLP Integration
Utilize NLP techniques such as tokenization, part-of-speech tagging, and sentiment analysis to process the text data and extract features for the models.
# Import necessary libraries
import pandas as pd
from sklearn.model_selection import train_test_split
from sklearn.feature_extraction.text import TfidfVectorizer
from sklearn.svm import LinearSVC
from sklearn.metrics import accuracy_score
import tensorflow as tf
from tensorflow.keras.preprocessing.text import Tokenizer
from tensorflow.keras.preprocessing.sequence import pad_sequences
from tensorflow.keras.models import Sequential
from tensorflow.keras.layers import Embedding, LSTM, Dense
# Load the dataset
data = pd.read_csv('sentiment_data.csv')
# Preprocess the data
# ...
# Split the data into training and testing datasets
X_train, X_test, y_train, y_test = train_test_split(data['review_text'], data['sentiment'], test_size=0.2, random_state=42)
# Machine Learning Model
vectorizer = TfidfVectorizer()
X_train_vec = vectorizer.fit_transform(X_train)
X_test_vec = vectorizer.transform(X_test)
model = LinearSVC()
model.fit(X_train_vec, y_train)
y_pred = model.predict(X_test_vec)
accuracy = accuracy_score(y_test, y_pred)
print('Machine Learning Model Accuracy:', accuracy)
# Deep Learning Model
tokenizer = Tokenizer(num_words=10000, oov_token='<OOV>')
tokenizer.fit_on_texts(X_train)
X_train_seq = tokenizer.texts_to_sequences(X_train)
X_test_seq = tokenizer.texts_to_sequences(X_test)
X_train_pad = pad_sequences(X_train_seq, maxlen=100, truncating='post')
X_test_pad = pad_sequences(X_test_seq, maxlen=100)
model = Sequential([
Embedding(10000, 16, input_length=100),
LSTM(64),
Dense(1, activation='sigmoid')
])
model.compile(loss='binary_crossentropy', optimizer='adam', metrics=['accuracy'])
model.fit(X_train_pad, y_train, epochs=5, validation_data=(X_test_pad, y_test))
This PoC demonstrates the integration of machine learning, deep learning, and NLP techniques to perform sentiment analysis on text data, showcasing the power of Daegon AI in processing and analyzing textual information.
RDIDINI PROMPT ENGINEER
0 notes
Text
The World of Pixel Recurrent Neural Networks (PixelRNNs)

Pixel Recurrent Neural Networks (PixelRNNs) have emerged as a groundbreaking approach in the field of image generation and processing. These sophisticated neural network architectures are reshaping how machines understand and generate visual content. This article delves into the core aspects of PixelRNNs, exploring their purpose, architecture, variants, and the challenges they face.
Purpose and Application
PixelRNNs are primarily engineered for image generation and completion tasks. Their prowess lies in understanding and generating pixel-level patterns. This makes them exceptionally suitable for tasks like image inpainting, where they fill in missing parts of an image, and super-resolution, which involves enhancing the quality of images. Moreover, PixelRNNs are capable of generating entirely new images based on learned patterns, showcasing their versatility in the realm of image synthesis.
Architecture
The architecture of PixelRNNs is built upon the principles of recurrent neural networks (RNNs), renowned for their ability to handle sequential data. In PixelRNNs, the sequence is the pixels of an image, processed in an orderly fashion, typically row-wise or diagonally. This sequential processing allows PixelRNNs to capture the intricate dependencies between pixels, which is crucial for generating coherent and visually appealing images.
Pixel-by-Pixel Generation
At the heart of PixelRNNs lies the concept of generating pixels one at a time, following a specified order. Each prediction of a new pixel is informed by the pixels generated previously, allowing the network to construct an image in a step-by-step manner. This pixel-by-pixel approach is fundamental to the network's ability to produce detailed and accurate images.
Two Variants
PixelRNNs come in two main variants: Row LSTM and Diagonal BiLSTM. The Row LSTM variant processes the image row by row, making it efficient for certain types of image patterns. In contrast, the Diagonal BiLSTM processes the image diagonally, offering a different perspective in understanding and generating image data. The choice between these two depends largely on the specific requirements of the task at hand.
Conditional Generation
A remarkable feature of PixelRNNs is their ability to be conditioned on additional information, such as class labels or parts of images. This conditioning enables the network to direct the image generation process more precisely, which is particularly beneficial for tasks like targeted image editing or generating images that need to meet specific criteria.
Training and Data Requirements
As with other neural networks, PixelRNNs require a significant volume of training data to learn effectively. They are trained on large datasets of images, where they learn to model the distribution of pixel values. This extensive training is necessary for the networks to capture the diverse range of patterns and nuances present in visual data.
Challenges and Limitations
Despite their capabilities, PixelRNNs face certain challenges and limitations. They are computationally intensive due to their sequential processing nature, which can be a bottleneck in applications requiring high-speed image generation. Additionally, they tend to struggle with generating high-resolution images, as the complexity increases exponentially with the number of pixels. Creating a PixelRNN for image generation involves several steps, including setting up the neural network architecture and training it on a dataset of images. Here's an example in Python using TensorFlow and Keras, two popular libraries for building and training neural networks. This example will focus on a simple PixelRNN structure using LSTM (Long Short-Term Memory) units, a common choice for RNNs. The code will outline the basic structure, but please note that for a complete and functional PixelRNN, additional components and fine-tuning are necessary.
PixRNN using TensorFlow
First, ensure you have TensorFlow installed: pip install tensorflow Now, let's proceed with the Python code: import tensorflow as tf from tensorflow.keras import layers def build_pixel_rnn(image_height, image_width, image_channels): # Define the input shape input_shape = (image_height, image_width, image_channels) # Create a Sequential model model = tf.keras.Sequential() # Adding LSTM layers - assuming image_height is the sequence length # and image_width * image_channels is the feature size per step model.add(layers.LSTM(256, return_sequences=True, input_shape=input_shape)) model.add(layers.LSTM(256, return_sequences=True)) # PixelRNNs usually have more complex structures, but this is a basic example # Output layer - predicting the pixel values model.add(layers.TimeDistributed(layers.Dense(image_channels, activation='softmax'))) return model # Example parameters for a grayscale image (height, width, channels) image_height = 64 image_width = 64 image_channels = 1 # For grayscale, this would be 1; for RGB images, it would be 3 # Build the model pixel_rnn = build_pixel_rnn(image_height, image_width, image_channels) # Compile the model pixel_rnn.compile(optimizer='adam', loss='categorical_crossentropy') # Summary of the model pixel_rnn.summary() This code sets up a basic PixelRNN model with two LSTM layers. The model's output is a sequence of pixel values for each step in the sequence. Remember, this example is quite simplified. In practice, PixelRNNs are more complex and may involve techniques such as masking to handle different parts of the image generation process. Training this model requires a dataset of images, which should be preprocessed to match the input shape expected by the network. The training process involves feeding the images to the network and optimizing the weights using a loss function (in this case, categorical crossentropy) and an optimizer (Adam). For real-world applications, you would need to expand this structure significantly, adjust hyperparameters, and possibly integrate additional features like convolutional layers or different RNN structures, depending on the specific requirements of your task.
Recent Developments
Over time, the field of PixelRNNs has seen significant advancements. Newer architectures, such as PixelCNNs, have been developed, offering improvements in computational efficiency and the quality of generated images. These developments are indicative of the ongoing evolution in the field, as researchers and practitioners continue to push the boundaries of what is possible with PixelRNNs. Pixel Recurrent Neural Networks represent a fascinating intersection of artificial intelligence and image processing. Their ability to generate and complete images with remarkable accuracy opens up a plethora of possibilities in areas ranging from digital art to practical applications like medical imaging. As this technology continues to evolve, we can expect to see even more innovative uses and enhancements in the future.
🗒️ Sources
- dl.acm.org - Pixel recurrent neural networks - ACM Digital Library - arxiv.org - Pixel Recurrent Neural Networks - researchgate.net - Pixel Recurrent Neural Networks - opg.optica.org - Single-pixel imaging using a recurrent neural network - codingninjas.com - Pixel RNN - journals.plos.org - Recurrent neural networks can explain flexible trading of… Read the full article
#artificialintelligence#GenerativeModels#ImageGeneration#ImageInpainting#machinelearning#Neuralnetworks#PixelCNNs#PixelRNNs#SequentialDataProcessing#Super-Resolution
0 notes
Text
AI Image Recognition Application Programming

AI image recognition is one of the most exciting and widely-used technologies in artificial intelligence. From facial recognition to object detection, image recognition allows computers to "see" and understand visual content. This blog post will introduce you to the world of AI image recognition, tools you can use, and how to start building your own applications.
What is Image Recognition?
Image recognition is a subset of computer vision and AI that enables machines to process, analyze, and identify images. The goal is to teach computers to recognize patterns, objects, people, text, and even emotions within images.
Common Use Cases
Facial recognition in security and social apps
Object detection in self-driving cars
Medical imaging for diagnosis
Product recognition in e-commerce
Document and handwriting recognition (OCR)
Tools & Libraries for Image Recognition
Python: The most popular language for AI applications
TensorFlow: Google’s powerful open-source machine learning library
Keras: A high-level API for building neural networks (works with TensorFlow)
OpenCV: A computer vision library for image processing and recognition
PyTorch: Facebook’s deep learning library, easy to use for research and prototyping
Basic Steps to Build an Image Recognition App
Collect & Prepare Data: Use image datasets or your own labeled images.
Train a Model: Use deep learning (CNNs) to train a model that can classify images.
Test & Evaluate: Check how accurate your model is on new, unseen images.
Build an Interface: Create a simple web or desktop interface to upload and test images.
Deploy: Host your model using Flask, FastAPI, or on cloud platforms.
Example Python Code (Using TensorFlow + Keras)
from tensorflow.keras.models import Sequential from tensorflow.keras.layers import Dense, Conv2D, MaxPooling2D, Flatten from tensorflow.keras.datasets import mnist (x_train, y_train), (x_test, y_test) = mnist.load_data() x_train = x_train.reshape(-1, 28, 28, 1) / 255.0 model = Sequential([ Conv2D(32, (3,3), activation='relu', input_shape=(28,28,1)), MaxPooling2D(2,2), Flatten(), Dense(64, activation='relu'), Dense(10, activation='softmax') ]) model.compile(optimizer='adam', loss='sparse_categorical_crossentropy', metrics=['accuracy']) model.fit(x_train, y_train, epochs=5)
This example creates a simple neural network to recognize handwritten digits using the MNIST dataset.
Popular Datasets to Practice
Kaggle Datasets
MNIST (Digit Recognition)
ImageNet
TensorFlow Datasets
Best Practices
Normalize and augment your data for better results
Use pre-trained models (like ResNet, VGG, MobileNet) for transfer learning
Evaluate performance using confusion matrix and accuracy metrics
Optimize model size and speed for real-time usage
Conclusion
AI-powered image recognition is transforming industries and opening up creative possibilities. With accessible tools and libraries, you can start experimenting and building powerful applications right now. Whether it’s classifying images or building a real-time object detector, the future of visual AI is in your hands!
0 notes
Text
Hands-On Tutorial: Using Keras to Build a Recurrent Neural Network for Time Series Prediction
Introduction Hands-On Tutorial: Using Keras to Build a Recurrent Neural Network (RNN) for Time Series Prediction In this tutorial, we will explore the world of Recurrent Neural Networks (RNNs) and how to use Keras to build a time series prediction model. RNNs are a type of neural network designed to handle sequential data, making them ideal for time series forecasting. This tutorial is designed…
0 notes