#share screenshot on Linux
Explore tagged Tumblr posts
Visit Tumblr Blog
Explore Tumblr blogs with no restrictions, modern design and the best experience.
Last Seen Tumblr Blogs


Fun Fact
Mobile US users spent an average of 115.8 minutes on Tumblr app monthly.
Text
On Keeping Time
To run a simple program, a computer needs some kind of storage, and some kind of input/output device. To run a simple operating system, a computer will also need some random-access memory for holding onto information temporarily. To run a sophisticated operating system that supports many users and programs reliably, a computer will also need some way to make sure one user doesn't hog resources and prevent other users' programs from running.
My Wrap030 homebrew computer currently has a flash ROM which holds a bootloader program from starting other programs from disk. It has 16MB of RAM. It has 9 total serial ports for I/O. It just needs that last thing to be able to run a sophisticated operating system.
I've written before about how computers can share a single processor between multiple users or programs. The simplest option is to have each program periodically yield control back to the system so that the next program can run for a little while. The problem with this approach is if a program malfunctions and never yields control back to the system, then no other program can run.
The solution is to have an external interrupt that can tell the CPU it's time to switch programs. Each program can be guaranteed to have its chance to run because if a program tries to run too long, that interrupt will come to force a switch to the next program.
The way this is typically accomplished is with a periodic timer — ticking clock that interrupts the CPU regardless of what it's doing.
And that's what my Wrap030 project is missing. I need a timer interrupt.
The catch is, my system has always been a little fragile. I have it running well right now with three expansion boards, but there's always a risk of it being very unhappy if I try to add another expansion board. If I could somehow pull a timer interrupt out of what I already have, that would be ideal.
Nearly all of the glue logic pulling this system together is programmable logic in the form of CPLDs. This gives me the flexibility to add new features without having to rework physical circuitry. As it happens, the logic running my DRAM card currently consumes under half of the resources available in the card's CPLD. It also has several spare I/O pins, and is wired to more of the CPU bus than any other chip in the system.
So I added a timer interrupt to my DRAM controller.
It is very minimal — just a 16-bit register that starts counting down every clock cycle as soon as it's loaded. When the timer gets to 1, it asserts one of those spare I/O pins to interrupt the CPU.
And all it took was a couple bodge wires and a little extra logic.

I put together a quick test program to check if the timer was running. The program would spin in a loop waiting to see if a specific address in memory changed. When it changed, it would print out that it had, and then go right back into the loop. Meanwhile, the interrupt service routine would change the same address in memory every time the timer expired.

This is great! It was the last significant piece of hardware I was missing to be able to run a proper operating system like Unix or Linux — which has always been a goal of the project. While I still have much to learn before I can attempt to get a proper OS running, I can still put this new timer to use.
I had previously built my Multibasic kernel to run cooperatively. Each user instance of BASIC would yield control whenever it needed to read or write to its terminal (which it does at every line while running a BASIC program, checking for the Ctrl-C stop sequence). This worked well enough, but a particularly complex BASIC program could still slow down other users' programs.
Converting my Multibasic kernel from Cooperative multitasking to Preemptive multitasking was actually fairly easy. I just needed to initialize the timer at startup, and add an interrupt service routine to switch to the next user.

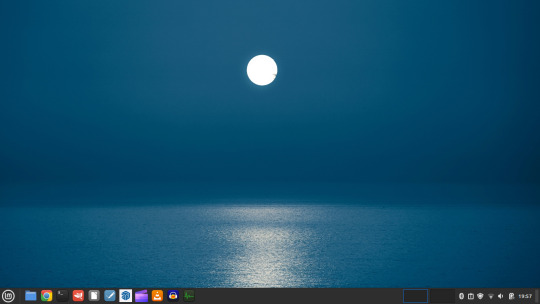
(It's not really something that can be seen in a screenshot, but it's doing the thing, I promise.)
Now that I have all of the requisite hardware, I guess I need to dive into learning how to customize and build an operating system for a new machine. It's something I have always wanted to do.
35 notes
·
View notes
Note
i was wondering which reshade preset you're using? i love the look of your screenshots!
thank you so much! 🥰 i actually haven't posted many pictures using reshade - most of my gameplay pictures are still from my pre-linux archive. but if you're interested in the PSD i use, i can upload it!
i call it my Peppy PSD because it just puts a little extra pep into the existing game!

Download (Dropbox)
examples of before/after shots are below the cut. the beauty of this PSD is that it works on 99% of screenshots!
I find it a little too strong on photos of sims against blank backdrops, but otherwise it tends to work very nicely, day or night.
this is not the most economical psd out there - i have tons of layers at lowered opacities making very slight adjustments. since it's mostly for personal use, it doesn't bother me, but just a heads up.
(if I can figure out how to recreate this 1:1 as a reshade preset, i'd be happy to share that too!)


#*psd#*mine#every time i share a psd i hope to make up for the searingly bright one i shared 10 years ago#forgive me for i have sinned#ts2
46 notes
·
View notes
Text
putting together a list of free file sharing/hosting/storage services here for personal use bc i keep meaning to and forgetting 📁 [WIP]
(for personal use but suggestions very welcome as I’m looking to expand the list, my only real requirements are that it’s 100% free (OR has a usable 100% free version that’s not just a free trial and doesn’t require credit card info or anything else that would force you to pay under certain circumstances) and that it’s trustworthy/not sketchy)
Hosting-oriented
file.garden: requires account, made for hosting/linking-back-to but can still be used for rudimentary file storage, ability to use folders and make individual files private and unlisted, unlimited storage afaik, does not work well on mobile
Storage-oriented
Google drive: self explanatory, requires Google account, 15GB of free storage but payment needed for any more
Proton Drive: requires account, haven’t used this one personally, 5GB of free storage but any more is paid, encryption options are apparently really good, have heard complaints about lack of Linux support and file syncing issues
One-time file sharing-oriented
file.pizza: no account required, p2p in-browser file sharing by link, password protection available, highly convenient
Other (or, fulfills multiple of the above criteria)
4shared: the world’s largest file locker, very old and has weird limits to keep in mind, account required, notably the entirety of it is searchable but password protection is available, can upload files of up to 500MB each (5GB if subscribed), daily bandwidth limit of 3GB
MEGA.nz: file locker, 20GB free plan, account needed, end-to-end encryption available, pretty dang good
Tixte: file hosting/sharing service, requires an account, 15gb free plan, ability to make files public or private
Alternatives that were not made for the purpose of file storage/hosting/management/sharing but can still be used for said purposes
Pinterest: it is worth noting that if you need a place to throw some random files, Pinterest can work for that, it can majorly compress images and no longer supports GIF uploads but if you have a bunch of screenshots you need to throw somewhere you can easily make a private Pinterest board and upload them to it and no one else will be able to access it, requires an email address
Please help me expand this list! Keep in mind that I haven’t used all of these personally so lmk me if any of these descriptions are misleading or inaccurate.
Again, this was made with my own file storage needs in mind so please forgive me if they don’t exactly fit your own, I just wanted to catalogue these in one place for if I ever needed or if they’d help anyone else
12 notes
·
View notes
Text
List of programs and stuff I use
[pt: List of programs and stuff I use ./end pt]
Disclaimer: This is in no way trying to say I have the best setup of all time or anything. The point of this post is mostly to introduce people to cool things they may not know about, or a place to point to when someone asks what I use!
(Last updated: 6/28/24)
Browser
[pt: browser ./end pt]
Firefox (Windows/Linux/MacOS/Android/IOS) - Obviously I recommend Firefox above all else, especially with chromium-based browsers moving onto manifest V3.
Bitwarden (Windows/Linux/MacOS/Android/IOS) - Good password manager! Used it for years with no complaints!
AdNauseam (Firefox/Chrome) - My adblocker. It's built upon uBlock Origin and has all the same features, but it actively clicks on the ads to waste advertiser money. If that's not up your alley, uBlock Origin is fantastic too!
Wayback Machine extension (Firefox/Chrome/Safari) - Allows you to make snapshots of pages, or view old snapshots if a page isn't loading correctly!
XKit ReWritten (Firefox/Chrome) - Pretty much a must-have for Tumblr. Has a ton of features to make navigating this site much better. Full feature list here!
Discord
[pt: Discord ./end pt]
Vencord (Windows/Linux/MacOS) - A modified Discord client that adds support for plugins and themes. Basically allows you to install plugins from a massive list that improves Discord. (Technically against ToS. Basically, don't post that you're using it in big servers, and turn off your themes before sharing screenshots.)
Bunny (Android/IOS) - If you miss Vendetta for Discord, Bunny is an actively maintained fork of Vendetta! Basically the same as above, but for Android/IOS instead of desktop. Same warnings about ToS apply.
Aliucord (Android) - Miss the old Android app feel, and still want to have plugins/themes? Pretty cool but has a less impressive theme/plugin selection. Same warnings about ToS apply.
Bluecord (Android) - Another Discord modification without the new Discord UI!
Youtube
[pt: Youtube ./end pt]
Freetube (Windows/Linux/MacOS) - A desktop Youtube client with adblock and sponsorblock built in. Still in beta, but very good.
Sponsorblock (Firefox/Chrome) - Pretty much a must-have for watching Youtube these days. Automatically skips over sponsors, self-promos, interaction bait, outros, intros, etc. Highly configurable!
Dearrow (Firefox/Chrome) - Haven't used this very long but I love it. Gets rid of vague or clickbait titles/thumbnails and replaces it with descriptive and more accurate thumbnails. Also built into Freetube now!
Newpipe (Android) - Lightweight Youtube client. I haven't used it myself much but people swear by it!
ReVanced (Android) - Modded Youtube client with Sponsorblock, Return Youtube Dislike, and Youtube Premium features. Doesn't support Dearrow as of 6/25/24 :( (PLEASE BE CAREFUL INSTALLING THIS. If you don't know what you're doing, you can cause some damage!)
Spotify
[pt: spotify ./end pt]
Spicetify (Windows/Linux/MacOS) - Spotify modded client. Has adblock, themes, etc! Think Vencord, but for Spotify.
Misc.
[pt: Misc ./End pt]
Obsidian (Windows/Linux/MacOS/Android/IOS) - Basically a personal wiki for notetaking! A bit of a learning curve. Fanfic writers and worldbuilders... go feral.
Notepad++ (Windows) - A must-have text editor. Might be on more platforms but can't confirm?
Mullvad VPN (Windows/Android) - The only VPN I can 100% recommend. Cheap, fast, and really cares about your privacy. It's a little under $6 USD a month!
NVDA (Windows) - A free screenreader I use for reading large blocks of text. (Notice: I am not visually impaired to the point I rely on a screenreader to navigate my PC. I use it on occasion to read text to me because I have a hard time reading. If you're looking for advice on screenreaders for the visually impaired unfortunately I'm not a good source! Maybe check out the #visually impaired, #blind, or #accessibility?)
Syncthing (Windows/Linux/MacOS/Android) - Lets you sync folders across devices. It's especially good with Obsidian.
"Tequito, I didn't find what I wanted!"
[pt: "Tequito, I didn't find what I wanted!" ./end pt]
I'm sorry. :( If you're looking for a program I have personally mentioned using in the past, feel free to shoot me an ask or DM! Or hey... maybe try searching the letters "FMHY" and having a look around? *wink*
30 notes
·
View notes
Text
pro tip for programmers - how to alias
hey, so you know that annoying thing that happens when you're coding, and you need to run/test the same program 100 times in a row, so you end up typing "python3 testScriptWithASuperLongName.py" into the terminal about 80,000 times?
well, there's a better way! it's called aliasing :D
in your bash shell (or zsh, or whatever shell you use, but bash is the default on VSCode and most people on tumblr use VSCode, so I'm using bash as the default to explain this concept) you can set an alias, essentially a shortcut command, that runs longer commands.
(yes you can just use the up arrow key to re-run the same command, but sometimes you're typing other things into the terminal too and you don't feel like hitting the up arrow key four times in a row, and also this is just a cool and useful tip to get comfortable with aliasing so shhhh)
so, in your terminal shell, just type this:
alias run="python3 testScriptWithASuperLongName.py"
now, you can run that entire super long command, just by typing the word "run" into your terminal. Here's a screenshot of an example on my computer to make it make more sense:

in this example, i just created a simple python file that contains one line of code: print("it works!")
then, as you can see, by setting the alias to run, i can now run that file, runningatestscript.py, simply with the command 'run'.
the best part is, this alias is temporary - it only lasts as long as your shell session is open. so once you close the terminal, the run alias is cleared and you can set it again next time to any file or task you're currently working on, to save yourself a lot of typing, typos, and time.
so if you want to, you can get in the habit of always setting a run alias in the VSCode terminal for whichever file you're working with as soon as you get everything open. that way, when you need to run the same file 50 million times, you have a super easy way of doing it! you can even set it to a single letter if you want to go for maximum speed, but i prefer to use whole short words, because they're easy for me to remember.
note: if you do want to set an alias to work for all sessions, you can simply add it to your ./bashrc file. this is a common way to automate repeatable tasks, and simply to set easier-to-remember commands for terminal commands that are really complicated/confusing/hard to remember.
for example, i saved the alias checkboot="[ -d /sys/firmware/efi ] && echo 'UEFI mode' || 'BIOS mode'" into my zshrc file (zsh equivalent of bashrc file). this way, no matter how many times i rebooted my machine, i would always be able to quickly check which boot mode was running by simply typing 'checkboot'.
yesterday i was updating my boot mode from BIOS to UEFI on my very old machine that is technically compatible with UEFI, but not configured for it by default. So it was extremely helpful and saved me the time and headache of having to remember and type that long-ass command a thousand times in between many different reboots and new shells.
if you have any tasks like that, or terminal commands that you know would be useful to you, but you can never remember them when you need them, i highly recommend getting comfortable with aliasing! it can be super useful to simply set custom aliases for all the commands you don't want to remember, so that you can automate things away and not have to worry about so much linux syntax all the time when you're tring to focus on programming.
i know this may seem like a simple tip to some, but i only learned about it recently and it's been extremely helpful to integrate into my workflow and customize my OS with! so i thought it might be worthwhile to some people if i share :) hope it helps!
#codeblr#linux#hacker#compsci#hack the planet#hacking#studyblr#coding#progblr#programmer#programming#women in tech#women in stem#women in computing#women in cs#comp sci#coding tips#programming tips#software development#software developers#vscode
112 notes
·
View notes
Text
ok since i've been sharing some piracy stuff i'll talk a bit about how my personal music streaming server is set up. the basic idea is: i either buy my music on bandcamp or download it on soulseek. all of my music is stored on an external hard drive connected to a donated laptop that's next to my house's internet router. this laptop is always on, and runs software that lets me access and stream my any song in my collection to my phone or to other computers. here's the detailed setup:
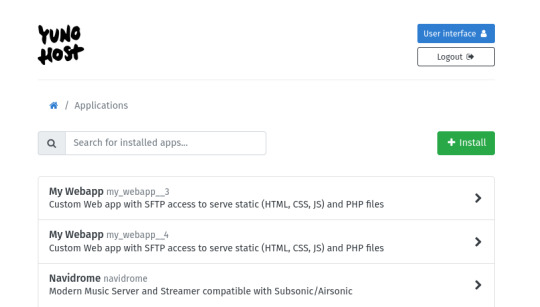
my home server is an old thinkpad laptop with a broken keyboard that was donated to me by a friend. it runs yunohost, a linux distribution that makes it simpler to reuse old computers as servers in this way: it gives you a nice control panel to install and manage all kinds of apps you might want to run on your home server, + it handles the security part by having a user login page & helping you install an https certificate with letsencrypt.
***
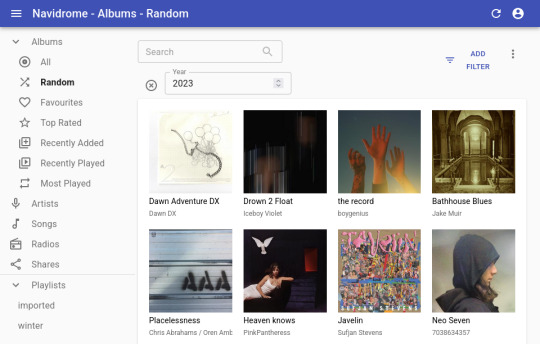
to stream my music collection, i use navidrome. this software is available to install from the yunohost control panel, so it's straightforward to install. what it does is take a folder with all your music and lets you browse and stream it, either via its web interface or through a bunch of apps for android, ios, etc.. it uses the subsonic protocol, so any app that says it works with subsonic should work with navidrome too.
***
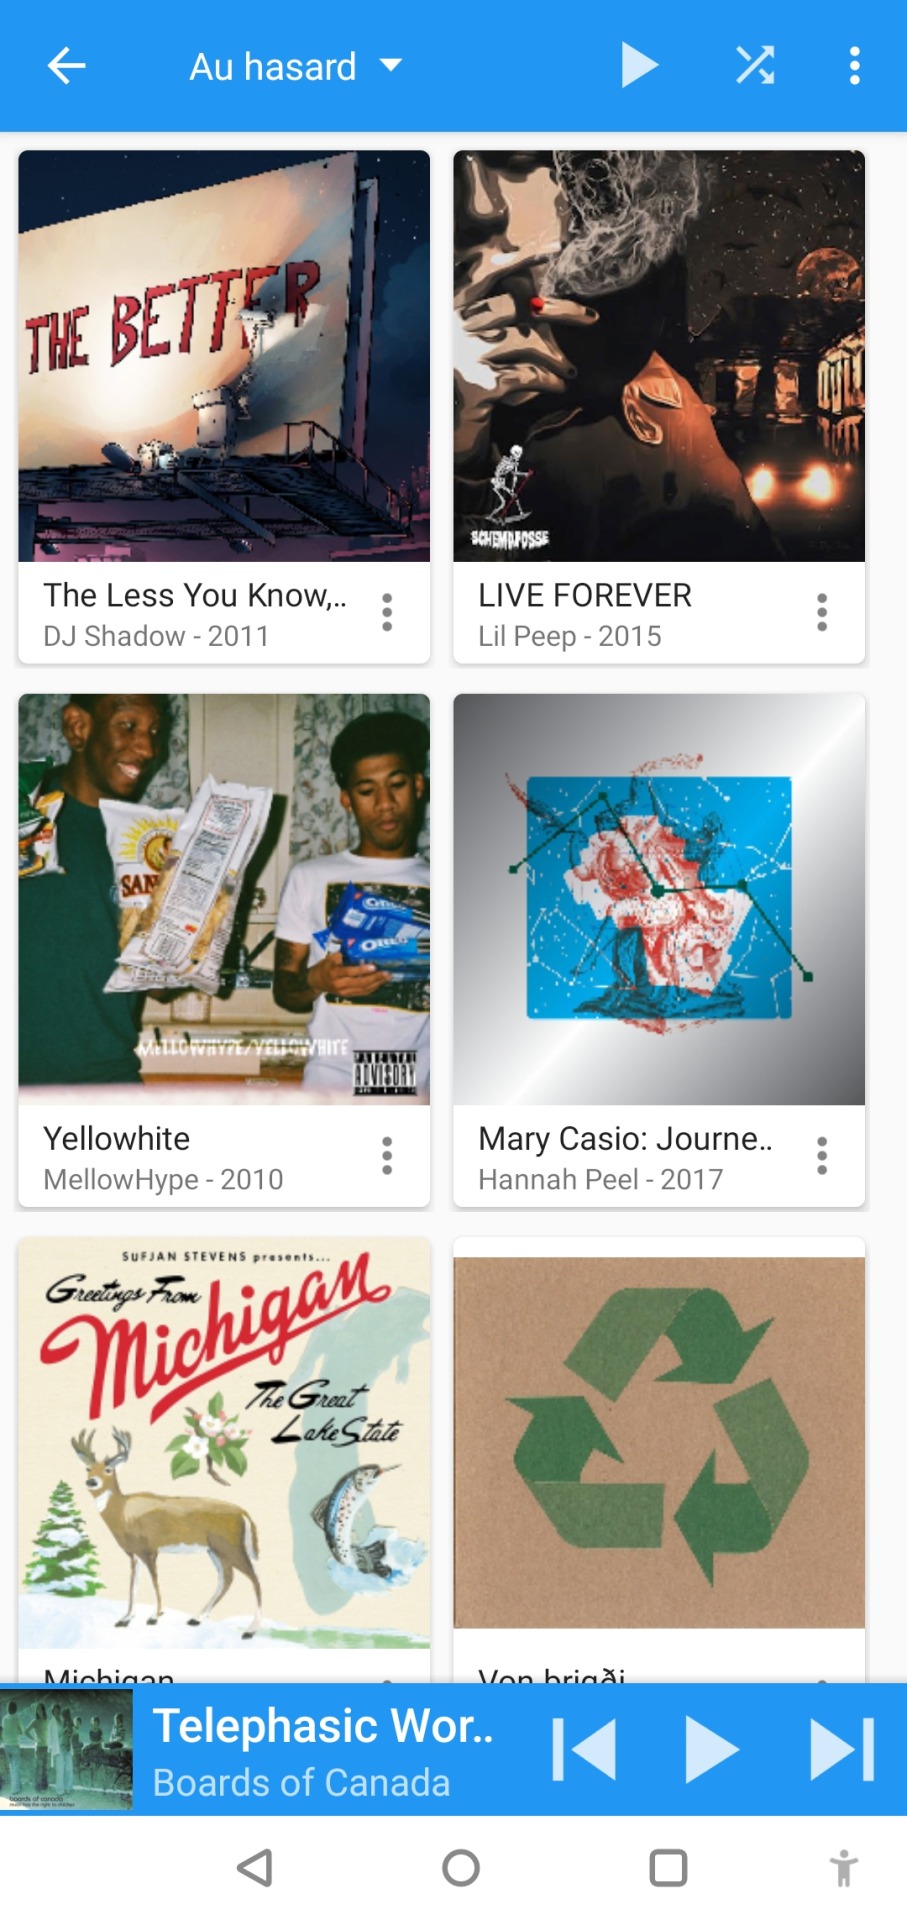
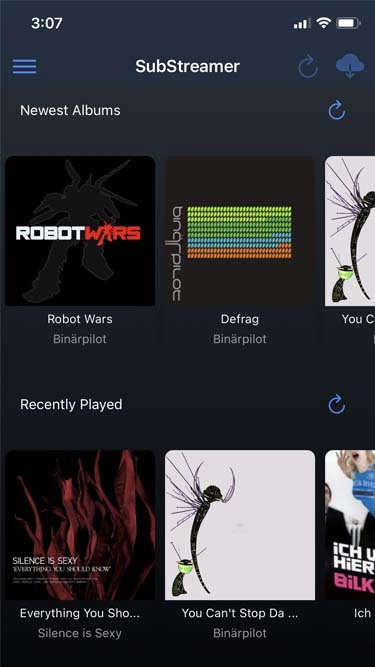
to listen to my music on my phone, i use DSub. It's an app that connects to any server that follows the subsonic API, including navidrome. you just have to give it the address of your home server, and your username and password, and it fetches your music and allows you to stream it. as mentionned previously, there's a bunch of alternative apps for android, ios, etc. so go take a look and make your pick. i've personally also used and enjoyed substreamer in the past. here are screenshots of both:
***
to listen to my music on my computer, i use tauon music box. i was a big fan of clementine music player years ago, but it got abandoned, and the replacement (strawberry music player) looks super dated now. tauon is very new to me, so i'm still figuring it out, but it connects to subsonic servers and it looks pretty so it's fitting the bill for me.

***
to download new music onto my server, i use slskd which is a soulseek client made to run on a web server. soulseek is a peer-to-peer software that's found a niche with music lovers, so for anything you'd want to listen there's a good chance that someone on soulseek has the file and will share it with you. the official soulseek client is available from the website, but i'm using a different software that can run on my server and that i can access anywhere via a webpage, slskd. this way, anytime i want to add music to my collection, i can just go to my server's slskd page, download the files, and they directly go into the folder that's served by navidrome.
slskd does not have a yunohost package, so the trick to make it work on the server is to use yunohost's reverse proxy app, and point it to the http port of slskd 127.0.0.1:5030, with the path /slskd and with forced user authentification. then, run slskd on your server with the --url-base slskd, --no-auth (it breaks otherwise, so it's best to just use yunohost's user auth on the reverse proxy) and --no-https (which has no downsides since the https is given by the reverse proxy anyway)

***
to keep my music collection organized, i use beets. this is a command line software that checks that all of the tags on your music are correct and puts the file in the correct folder (e.g. artist/album/01 trackname.mp3). it's a pretty complex program with a ton of features and settings, i like it to make sure i don't have two copies of the same album in different folders, and to automatically download the album art and the lyrics to most tracks, etc. i'm currently re-working my config file for beets, but i'd be happy to share if someone is interested.
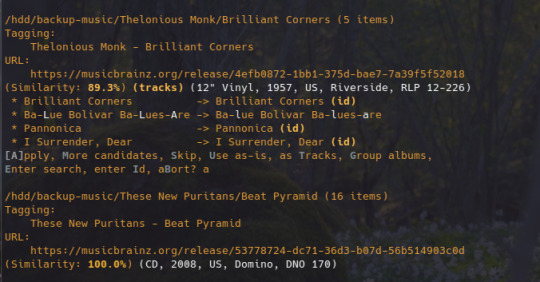
that's my little system :) i hope it gives the inspiration to someone to ditch spotify for the new year and start having a personal mp3 collection of their own.
34 notes
·
View notes
Text

05.09.24
Linux laptop project 2024.
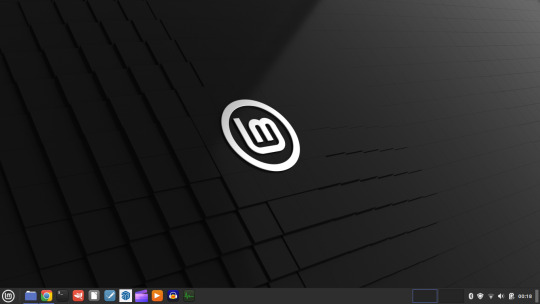
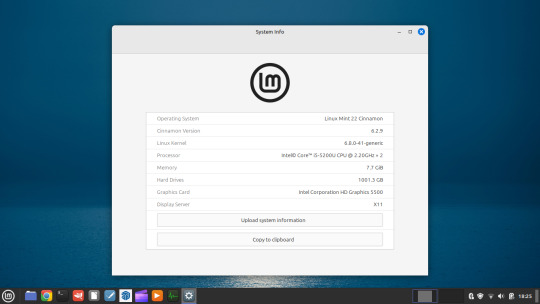
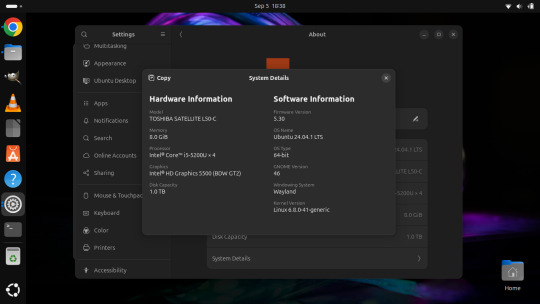
I decided to upgrade my old laptop by making it a Linux dual boot system. I had never done this before. I downloaded the ISO files for Linux Mint 22 'Wilma' and Ubuntu 24.04.1 'Noble Numbat' LTS.
The selected files include the standard desktop environments for each, Cinnamon, for Linux Mint and GNOME for Ubuntu.
Then using the built in USB disk creator on Linux Mint, I created bootable USBs, one for Linux Mint and one for Ubuntu. I decided to install Linux Mint first. The installation includes creating partitions and I used the installation partition creator to create a 25 Giga-byte partition in which I installed Linux Mint. The installation went ahead smoothly, and when it completed, I booted up Linux Mint. It looked perfect.
See screenshots below.


I then installed GParted, which is a more powerful partition manager to create the additional partitions I needed. I created a 25 Giga-byte partition for Ubuntu, two other 25 Giga-byte partitions and I hundred Giga-byte data partition formatting them all using ext4.
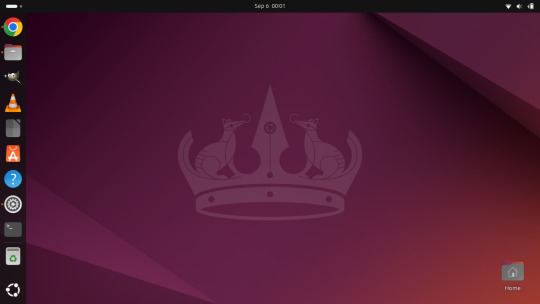
I then installed Ubuntu. During the installation, I selected the extended install, rather than the minimal install, so I had a full Ubuntu desktop installation on the second partition on my laptop hard drive. This all went well and at the end of it all I had a system which could boot either Linux Mint or Ubuntu.


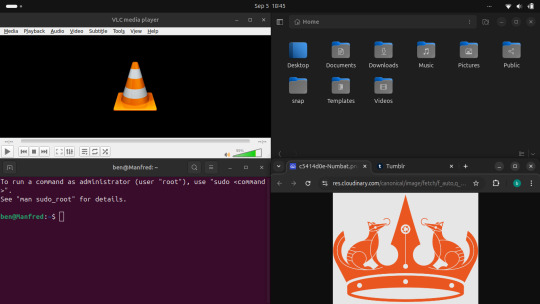
After installation, I booted each system up individually and updated them with the latest updates available, and then I installed necessary software that I wanted such as the Google Chrome Browser, Audacity, VLC Media Player, GIMP, Asunder CD ripper.
I also reinstalled the Chrome web apps for Microsoft Clipchamp and Trimble SketchUp web.
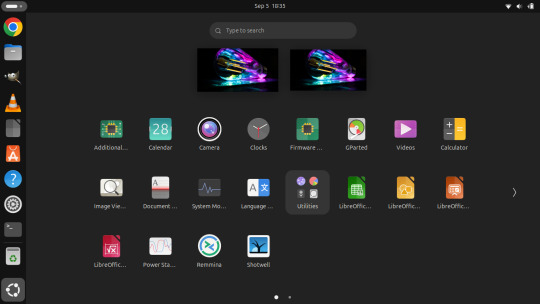
The majority of software bundled on these Linux distros is already preinstalled. I then had fun tweaking each install and making them look how I wanted.
Here is a list of some of the tasks I did in both installs:
- configuring the desktop environment to my liking, e.g. background, theme colour, dark theme (Ubuntu) mixed colour scheme (Mint). - added Bluetooth devices (headphones, Mini-Rig speaker) - added the printer device - dual booted into each one to check them out!
-
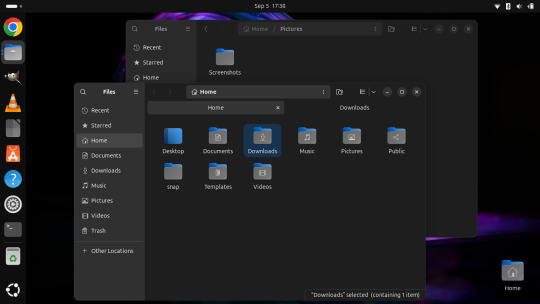
After this, Dad wanted to finish the set-up in such a way that I could link my local laptop Documents, Downloads, Pictures, Music and Video folders directly to the data partition, which would mean that I could access those folders automatically from any installed Linux distributions, however this didn't quite go to plan and messed some things up, so we decided to re-install both operating systems again and I repeated all the previous steps and left out the folder sharing part for now.
-
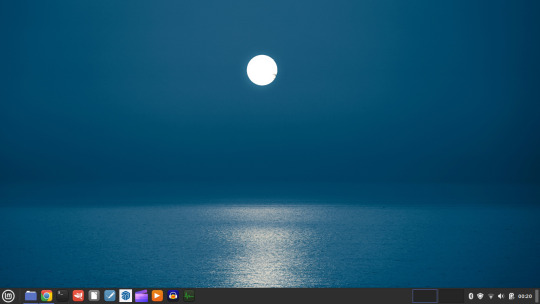
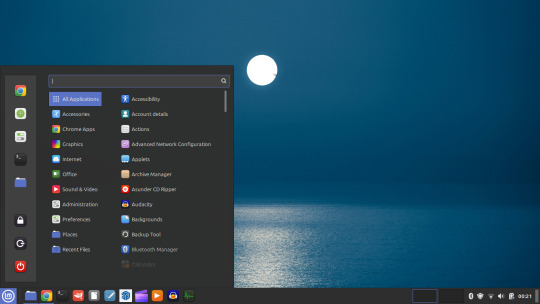
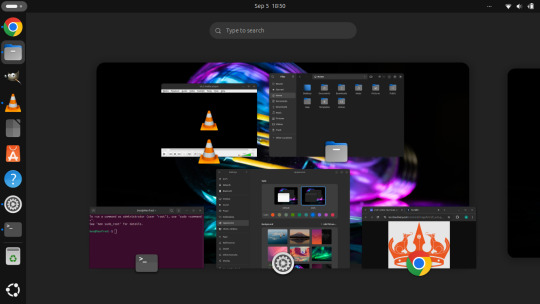
The images underneath show the final desktop installs with my various theme and desktop personalisation's applied and all the installed apps.
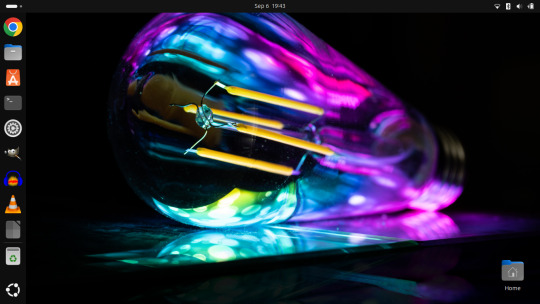
Here is a screenshot of the 'GNOME image viewer' in Mint and Ubuntu.

Ubuntu Linux is celebrating its 20th anniversary with a web post.
See link below:
https://ubuntu.com/20years
For more information about the Linux laptop project, search 'Linux' on my Tumblr blog!
6 notes
·
View notes
Note
i have asked u so many questions but i must know
show me ur neofetch (if u have one)
what distro do u use
and what DE/WM/compositor (if any)
I don't actually have any neofetch screenshots at the moment but I can tell you that that my home system runs mint + cinnamon, and it was the first machine I ever put linux on and I've never run anything other than mint on it. It's all really shit hardware like mid range 10 year old stuff and it runs great. Before that I was using a 2012 Mac mini running windows at my desktop and ditching it for a PC and putting linux on it was an amazing decision and I couldn't be happier. I got it about a year ago. I Also have a 2014ish thinkpad that's currently running debian + xfce and it runs great but I'm not super happy with the debian defaults so I'm thinking I should switch to arch on that machine. My friends and I also share a series of olf servers we use for a number of things, including a vm server where I test out distros and configurations, so I also have some experience with Kali and Endeavor and Open SUSE. :)
8 notes
·
View notes
Text
For my American Friends
I feel now is a good time to spread this news. Much like how the internet came together to help share information with the Ukrainians for resisting Russia, I’m here delivering help of a similar nature to those that could be impacted by this latest election in the US. There are ways to communicate relatively securely, outside of Big Brother's social media. I bring this up so that we can minimize the amount of gatherable information that could be used to hurt you, or others you know, in the coming years as changes are made. I'm not going to tell you how or why to use them, I'm just going to provide you with the information.
WhatsApp – While not my personal favorite, since Facebook/Meta is the parent company, WhatsApp is free, globally popular, and widely-used, featuring the ability to lock chats with passwords, disappearing messages, photos and videos that are deleted after being opened, profile photo privacy, the ability to lock the app itself so that only your biometrics can unlock it, encrypted backups, the ability to set custom permissions for who can see you online or when you last used the app, and of course End-to-End Encryption for all conversations EXCEPT those with business accounts. WhatsApp is a good option for those who are not really technically savvy, but still value privacy – if one trusts Facebook/Meta to adequately protect their privacy. It does require a phone number to sign up, however.
Signal - Signal is an end-to-end encrypted messaging software. meaning that the contents of your conversation is secure. The protocol they use (which they created) is seen as the best known protocol for asynchronous messaging by cybersecurity researchers. It's so good that it has been implemented in WhatsApp and in Messenger's secret chats. This app has even been mentioned in the Right-wing author Jack Carr's Political Thriller about a Navy SEAL named James Reece, as being a preferred method of secure communication on the civilian side for operators. (Jack Carr is a former US Navy SEAL.) It's run by a Non-Profit organization called Signal Foundation, and it's mission is to "protect free expression and enable secure global communication through open source privacy technology." It allows secure messaging, voice calls, and video calls. The only downside is that app links to your phone number, so while your conversations and content are secure, who you are talking to is not. Signal is available on Windows, Mac, Andriod, Linus, and iOS.
Session - Session is an end-to-end encrypted messenger that minimises sensitive metadata, designed and built for people who want absolute privacy and freedom from any form of surveillance. Session is an open-source, public-key-based secure messaging application which uses a set of decentralized storage servers and an onion routing protocol to send end-to-end encrypted messages with minimal exposure of user metadata. This means no phone numbers, no metadata for digital footprints, and censorship resistance. It features group chats, the ability to send documents, files, and images securely, and has added voice messages, though these can be spotty. It’s slow, but effective, and be downloaded on Android, F-Droid, iPhone, Mac, Windows, and Linux.
Briar - If you have an Android phone, Briar is another option you have. It features a decentralized network (it’s peer-to-peer encrypted, rather than relying on a central server), meaning messages are synced directly between user devices. It also means that even if the internet is down, it can sync via Bluetooth, Wi-Fi, or even memory cards, meaning information can continue to flow even during a crisis. In the event the internet is functioning, it can sync via the Tor network, protecting users and their relationships from surveillance. Other features: - Screenshots and screen recording are disabled by default - Each user’s contact list is encrypted and stored on her own device. - Briar’s end-to-end encryption prevents keyword filtering, and because of its decentralized design there are no servers to block. - Every user who subscribes to a forum keeps a copy of its content, so there’s no single point where a post can be deleted. - Briar’s forums have no central server to attack, and every subscriber has access to the content even if they’re offline. - Doesn’t require any user data like name and phone number. The downside is that it is text-only and limited to Android Devices, but they do offer Briar Mailbox to deliver messages securely to those who are online at different times. Briar’s goal is “to enable people in any country to create safe spaces where they can debate any topic, plan events, and organize social movements”
Protonmail - A free end-to-end encrypted AND zero-access encryption email service based out of Switzerland, you can safely email with peace of mind that your content is secure. Unlike Google, Outlook, Yahoo, and others, Proton's zero-access encryption means they can't even view the contents of your emails or attachments. As a Swiss-owned company they are not allowed to share information with foreign law enforcement under criminal penalty and they are politically neutral, meaning they won't be pressured by foreign governments. Furthermore, Switzerland has a constitutional right to privacy and strict data protection laws. Unlike companies in other countries, Proton cannot be compelled by foreign or Swiss authorities to engage in bulk surveillance.
Additional Information, from Proton’s Website: Switzerland has strong legal protections for individual rights, and in fact the Swiss Federal Constitution(new window) explicitly establishes a constitutional right to privacy. (In the US, this right is merely implied.) Specifically, Article 13 safeguards privacy in personal or family life and within one’s home, and the Swiss Civil Code(new window) translates this right into statutory law in Article 28.
In the US and EU, authorities can issue gag orders to prevent an individual from knowing they are being investigated or under surveillance. While this type of order also exists in Switzerland, the prosecutors have an obligation to notify the target of surveillance, and the target has an opportunity to appeal in court. In Switzerland, there are no such things as national security letters(new window), and all surveillance requests must go through the courts. Warrantless surveillance, like that practiced in the US where the FBI conducts 3.4 million searches per year(new window) with little oversight, is illegal and not permitted in Switzerland.
Switzerland also benefits from a unique legal provision with Article 271 of the Swiss Criminal Code(new window), which forbids any Swiss company from assisting foreign law enforcement, under threat of criminal penalty. While Switzerland is party to certain international legal assistance agreements, all requests under such agreements must hold up under Swiss law, which has much stricter privacy provisions. All foreign requests are assessed by the Swiss government, which generally does not assist requests from countries with poor rule of law or lack an independent judiciary.
Swiss law has several more unique points. First, it preserves end-to-end encryption, and unlike in the US, UK, or EU, there is no legislation that has been introduced or considered to limit the right to encryption. Second, Swiss law protects no-logs VPN(new window) meaning that Proton VPN does not have logging obligations. While numerous VPNs claim no-logs, these claims generally do not stand up legally because in most jurisdictions, governments can request that the VPN in question starts logging. So the VPN is only no-logs until the government asks. However, in Switzerland, the law does not allow the government to compel Proton VPN to start logging.
We’ve also fought to ensure that Switzerland remains a legal jurisdiction that respects and protects privacy.
Nearly every country in the world has laws governing lawful interception of electronic communications for law enforcement purposes. In Switzerland, these regulations are set out in the Swiss Federal Act on the Surveillance of Post and Telecommunications (SPTA), which was last revised on March 18, 2018. In May 2020, we challenged a decision of the Swiss government over what we believed was an improper attempt to use telecommunications laws to undermine privacy.
In October 2021, The Swiss Federal Administrative Court ultimately agreed with us and ruled that email companies cannot be considered telecommunication providers. This means Proton isn’t required to follow any of the SPTA’s mandatory data retention rules, nor are we bound by a full obligation to identify Proton Mail users. Moreover, as a Swiss company, Proton Mail cannot be compelled to engage in bulk surveillance on behalf of US or Swiss intelligence agencies. (Links can be found at: proton.me/blog/switzerland)
#american politics#kamala harris#transgender#lgbtqia#lgbtq community#antifascist#anti trump#freedom#information#resistance
6 notes
·
View notes
Text
Get Creative with Mystopia: The Ultimate Sandbox Experience

Mystopia relaxing sandbox game about building that is coming to both Linux and Windows PC. Thanks to the creative talents of developer Last Minute Studios. Working to make its way onto Steam. Big news from Last Minute Studios – they’re releasing a demo for their new game, Mystopia, on July 18th. Mystopia is all about kicking back and getting creative. It’s a relaxing sandbox game where you can build your own worlds and brew magical potions. The twist? Everything is inspired by witchcraft from all over the world. Due to create using blocks that bring a bit of magic from Europe, Japan, China, and more right to your screen. You’ll never run out of things to discover or build in this native port.
We would love to add Linux support...
According to the Last Minute Studios email reply, half of the development team uses Linux. They also tested earlier versions of the title on two systems a few weeks ago. It worked really well. So they were planning more testing soon, which seems to be finished. And, as a result, the developer has updated the Steam page.
Mystopia - Steam Announcement Trailer
youtube
Now, here’s how Mystopia gameplay works: as you play, letters pop up in your world. Open them, and you’ll find all sorts of blocks. These can be anything – a piece of ground, a plant, a magic hat, even something as wild as an octopus leg. There’s a whole variety waiting for you. Building in Mystopia is very flexible. You can design your world any way you want – there’s no wrong way to do it. Whenever you’re happy with your creation, just take a screenshot and share it with a click. Every world you make feels unique.
Let’s talk about some of the features:
Discover Blocks from Different Cultures: The blocks you find are inspired by witchcraft from around the world. You could come across a Gong from China, a Torii gate from Japan, and so much more. Each block adds a little cultural magic to your creations.
Design Your Dream Worlds: Get creative and build your world however you like. There are no rules, just endless possibilities. Snap a screenshot anytime and share it with your friends. Each world you make is its own cozy corner of Mystopia.
Use Potions for Mystifying Effects: Potions add another layer of magic. Each potion does something unique, and you’ll want to try them all. Mix items you find in your world in the cauldron to whip up all sorts of potions.
Track Your Progress: Keep an eye on your achievements in the Collection Notebook. Then check out all the potions you’ve discovered in the Potion Book. It’s a great way to see how far you’ve come.
Remember, the Mystopia native demo is due to release on July 18th. Don’t forget to Wishlist on Steam so you don’t miss any updates. Get ready to dive into a world of endless magic and creativity. The relaxing sandbox is coming to both Linux and Windows PC.
4 notes
·
View notes
Text
Change of OS
I am changing my OS to Linux. The reason is because of the most recent addition to the (I think) annoying, busy body Microsoft programs to Windows: Recall. Basically an AI that takes constant screenshots of your computer so that when you ask where certain information was, it can tell you. I know you can turn it off or limit it's ability but the fact that they made a program for screenshotting now proves that either the had been screenshotting and taking our information, or they are now going to do so. Microsoft says that screenshots won't be shared between users but they say nothing about whether or not screenshots will be shared with them.
Of course, converting from Windows to Linux isn't as easy as saying you will, so it will take some time, not to mention deciding which distribution to go to. But my data is already saved and ready to move. The change should have minimal effect on my games, besides that I will now be testing .x86_64 files instead of .exe.
So of you may be surprised or not surprised. But regardless, I suggest looking up "Windows PC photographic memory" or "Windows Recall" Yourselves to get your own information and come to your own conclusions.
Well, that's that. Hope y'all have a blessed day.
3 notes
·
View notes
Text
Inform Basics (#17: your project)
I've said it before: we've covered enough material for you to start your own Inform 7 project, even if you are a beginner like me. Let's take a break from coding to talk a bit about development environments.
Have you downloaded an Inform 7 Integrated Developemnt Environment (IDE for short) yet? If you've been clicking on my code snippets, you've already encountered Borogove, an online IDE for not only Inform 7 but several other IF development platforms. Its ability to share live snippets of code that are fully functional in many forum softwares is rather amazing and makes it easer to assist other developers in need.
Nevertheless, I don't recommend it for creating a full-fledged game. Why is that?
No external file support for features like images, sound, and other shared documents.
The Index is not fully functional, as it does not contain links to either default or custom actions.
Borogove does not support Inform 7's table of contents feature (more on this in a minute).
My understanding is that it does support external files for Inkle and others, but not Inform 7. While I encourage using the snippets as a great way to share and demonstrate code, Borogove falls short of the standard Inform 7 IDEs. Windows, MacOS, and Linux are supported. You can find and download the latest versions here:
Note that Windows Defender and other antivirus softwares tend to mistakenly flag the interpreter executables--git, frotz, and glulxe--as malicious. This has been reported to Microsoft repeatedly, but the files have yet to be whitelisted. If you get an error about these files, you can consider it a false positive.
After installing the IDE, you'll find a two-panel layout. By default, the left pane is for entering and reading source code, while the right pane contains a playable instance of your compiled code. You can compile and recompile by clicking "go" at the top-left of the application window.
My practice is to create a backup of a project every couple of days, while compiling frequently as I work. In informal polling, Inform 7 authors of varying levels of skill tend to do the same.
On to the main purpose of this post: using Inform 7's built-in features to organize your program. Let's look at an automatically generated table of contents for Repeat the Ending, which is among the larger (code-wise) Inform 7 games. The left-hand pane of the IDE shows tabs at the right and top edges. The top tabs are "source" and "contents." This is a screenshot of the contents tab.
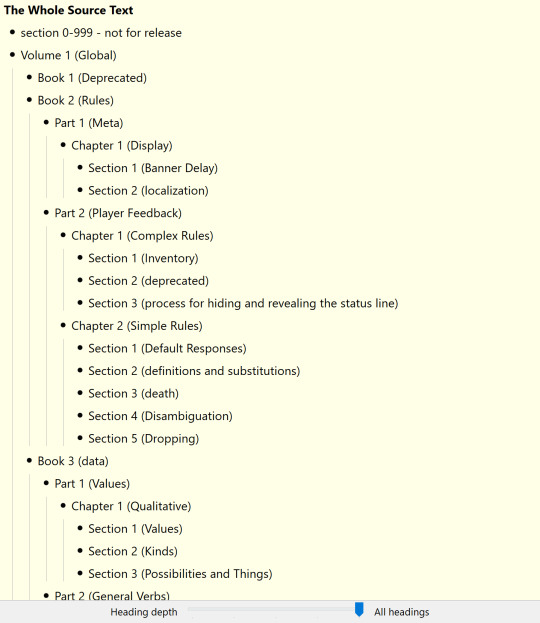
See the slider at the bottom? Inform 7's automatically generated TOC features five tiers by default, and the slider can be used to dictate the level of detail displayed. Those tiers are as follows:
Volume (top level)
Book
Part
Chapter
Section (bottom level)
We can use these tiers in our code, and the IDE will detect them automatically. The practice looks like this:
Volume 1 - Global
It's as simple as that. We have a lot of freedom in what we say there. That isn't to say there aren't restrictions:
The heading must have a blank line above and below it.
The heading cannot contain characters that have specific functions in Inform 7 code. No periods, colons, semicolons, and the like.
The heading must begin with one of the five designations (volume, book, part, chapter, and section)
You have a lot of freedom in terms of how to order your code. I've gotten the impression that I do things differently, but I like the way my approach works.
For top-level headings, I used the following:
global: used to define verbs, data, kinds, variables, the player characters, and so forth. All things that apply to the game and its world generally.
the game: the actual geography, things, and specific action responses.
the companion text: the entirety of the Reader's Guide to Repeat the Ending.
the artwork: I chose to maintain the rules governing the display of artwork and alt descriptions separately.
mix and match: a true mixture of various late stage requirements.
Regarding mix and match: some rules in Inform 7 must follow related rules. For instance, a region (a group of individual rooms that can be dealt with as a collective) must follow the room definitions. For this reason I decided to define certain rules related to regions at the end, even if they seem to be global rules. This is the way that those late definitions were used:
The game world is a region. The eighties and the 90s are in the game world. Energy is a backdrop. Energy is in the game world. Instead of doing anything to the energy: say "It doesn't work that way. Entropic magic requires specificity.".
Sometimes, things just make sense at the end. I also kept all of my test scripts there.
How should you build your TOC? While you can see my example above, give equal or greater consideration to what will be easiest for you to read and update. The TOC is a tool to for you to manage your project. If it doesn't make intuitive sense to you, it's worthless. Think about the way you process information and build from there.
I hope this is helpful! Consider maintaining a test/scratch project where you can keep copies of useful code and test the cases we discuss here. Feel free to AMA!
Next: scenery and backdrops.
5 notes
·
View notes
Text
ChatGPT
Log in
You said:
Is they a way to back up a discord conversion?
ChatGPT said:
Yep, there are a few ways to back up a Discord conversation, depending on what exactly you need and what permissions you have:
1. Manual Copy-Paste
Just select the messages you want, copy, and paste them into a document (like a text file or Word doc).
You can include timestamps and usernames manually or with a bot’s help.
2. Use Discord Chat Exporter (Unofficial Tool)
This is a third-party app that can export chats into formats like JSON, TXT, or HTML.
It works for DMs, server channels, and group chats.
GitHub: DiscordChatExporter
You'll need to log in with your Discord token (be careful with this and never share your token).
Supports message filtering by date, user, or content.
3. Use a Bot (if you own the server or have permission)
You can set up or use an existing bot to log and save messages in specific channels.
Some logging bots: Logger Bot, Dyno Bot, or custom bots using Discord.js or Discord.py.
4. Screenshots
Old school but useful for small conversations or if you just need a visual copy.
Would you prefer a method that works on desktop or mobile? And are you trying to back up DMs or a specific server channel?
You said:
Desktop
ChatGPT said:
Perfect — if you’re on desktop and want a clean way to back up full conversations (DMs or server channels), your best bet is DiscordChatExporter. Here’s how to use it step-by-step:
How to Use DiscordChatExporter (Windows/macOS/Linux)
1. Download it:
Go to the official GitHub page:
https://github.com/Tyrrrz/DiscordChatExporter
Download the latest release (you can grab the .exe for Windows or the .zip for other systems).
2. Get your Discord Token (needed for DMs and private servers):
Open Discord (in a browser like Chrome or Firefox).
Press Ctrl+Shift+I to open Developer Tools.
Go to the Application tab → Storage → Local Storage → Click on https://discord.com.
Look for the key named token.
Copy its value. (Keep this private — never share it!)
3. Run the exporter:
Open DiscordChatExporter.
Paste your token and choose the server/channel/DM you want to export.
Choose your format: HTML, plain text, or JSON.
You can set date ranges, filter by user, or include attachments.
4. Save & View:
Exports will be saved locally, and HTML format gives you a clean, scrollable version of the chat like how it looks in Discord.
matt just fired half the remaining tumblr support staff lmao
48K notes
·
View notes
Text
Community Challenge: Help me refresh my RSS feeds

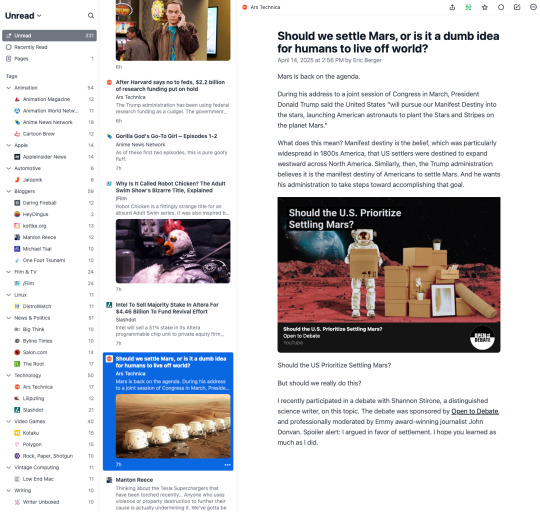
Ok. Here’s the deal. I’ve decided it’s high time I completely rebuild my RSS feeds to improve my sources for information, and I’d love some help. I used to follow a number of older, formerly reliable sites for tech and other news, but I’ve noted the steep increase in promoted goods, advertorials, listicles, and other junk gumming up my NetNewsWire feed. As such, l’ve become less interested in scanning for interesting tidbits of late.
The goal is not only to update my feeds and improve the quality of my incoming information, but to share it with whomever has like interests or would like a pre-curated base to start from. The first version is linked at the bottom of this post, and I’ll be posting updates periodically as I make suggested changes.
To facilitate this I’ve setup a new file to build out this new collection of sources, imported my current OPML, and have trimmed out what I think are the biggest contributors to fluff in my current file. Sadly, this culling has left certain categories a tad light. I’m attaching my XML export to this post (see the last line) and asking for ideas. The following is a list of my existing categories:
Animation (with a particular focus on anime, but I’m into all animation)
Apple (current and retro, which is pretty much all of it, I guess…)
Automotive (mostly petrol vehicles, rally, touring car, but all is good)
Bloggers (preferably in the categories listed here)
Film & TV (I love scifi, but I’m good with most everything except drama and mobster)
Linux it seems harder to find good sources that are regularly updated)
News & Politics (I’m a progressive humanist, but need unbiased sources. I know, big ask)
Technology (mostly computers, but I’m wide open. I adore small gadgets, though)
Video Games (I’m a handheld emulator gamer, Steam user of nigh 20 years, and Nintendo head)
Vintage Computing (mostly Apple and ThinkPads, but I’m interested in all retro gear)
Writing (I am, after all, a writer…)
Below is a recent screenshot of my Feedbin Unread page:
I have a framework that I am applying to myself and ask those pitching in to consider:
No Al or crypto centric content. I recognize that technology news covers Al and that crypto is “popular” which is fine, but I don’t want any sources that focus on them.
The source needs to either have direct support for RSS or, if not, l’d like it if you provided a scraper source. If I can’t import it into my reader, I’ll be a lot less inclined to read it.
I’m not a programmer so nothing programming specific, but I love technical stuff about chips, architectures, and other like frameworks.
I’m open to taking suggestions for new categories, so feel free to drop your ideas on me.
I’m also open to debating everything and I have an open mind so will consider the removal or inclusion of just about anything. So, don’t be shy or presume I’ll not like something. I may be judgmental about things, but not people.
Avoid duplication of stories. I know that this is nigh impossible with certain categories, but I’m going to at least try.
This a going to be a public OPML, so I won’t be including anything that would be on your typical list of “things not allowed”. I don’t think I need to list them out for you to get what I mean.
I think that’s pretty much it. I’ll likely edit this post over time as internet reality shifts like the sands of a desert, but this is a good place to start. Then someone recently told me something that struck me…
Ignore what you hate and direct your energy toward celebrating the things you love.
While they were speaking about my media-related posting, I think it applies to life in general. I am not willing to give up on the news that is important and I need to be a part of redirecting America towards a better future for all human life, but maybe I also need to start being positive and talk about the things I like, love, and appreciate.
As for participating, you can comment here, on the Mastodon post, or on the Bluesky post, to which I will add links for after I’ve published this first post. I’ll do my best to keep track of it all and be responsive.
Download the XML file for import into a feed reader here. This is version 0.1 from April 14th, 2025.
0 notes
Text
Elevating the Blog Experience with Laravel 11: A Technical Deep Dive!Scideassolutions
In today's fast-paced digital landscape, a robust and engaging blog is critical for thought leadership and community engagement. My recent project involved building a sophisticated blog and web application utilizing Laravel 11, seamlessly integrated with Moodle and featuring a custom chatbot – and I'm excited to share some insights.
Laravel 11 offers a streamlined and powerful foundation for creating modern web applications, and I've been particularly impressed with:
Simplified Structure: Laravel 11's leaner application skeleton makes it even easier to get started and maintain a clean codebase. This is particularly important for large projects with ongoing development.
Performance Enhancements: The latest version brings further performance optimizations, resulting in a snappier user experience. This translates to better engagement and lower bounce rates.
Beyond the Basics: Integrating Moodle API
One of the key challenges was integrating the blog with a Moodle platform. This involved leveraging Laravel's API capabilities to:
Synchronize User Data: Automatically create and update user accounts between the blog and Moodle.
Embed Course Content: Display relevant Moodle course content directly within blog posts, creating a unified learning experience.
Enable Single Sign-On (SSO): Allow users to seamlessly access both the blog and Moodle with a single set of credentials.
I achieved this using Laravel's robust HTTP client and carefully crafted API endpoints, ensuring secure and efficient data transfer.
Custom Laravel Commands for Streamlined Management
To further enhance the workflow, I developed custom Laravel commands for managing various blog aspects. Examples:
php artisan blog:publish {post_id}: Publishes a blog post with a specific ID.
php artisan moodle:sync: Synchronizes user data with Moodle.
php artisan chatbot:train: Retrains the chatbot with the latest data.
These commands, optimized for both Windows and Linux environments, significantly simplified administrative tasks.
AI-Powered Engagement: Laravel Chatbot Integration
To enhance user interaction and provide instant support, I integrated a Laravel-based chatbot. This chatbot can:
Answer frequently asked questions about the blog and Moodle courses.
Guide users to relevant content.
Provide personalized recommendations.
This proactive approach improves user satisfaction and reduces the burden on support staff.
Key Takeaways
Building a blog with Laravel 11 and integrating it with Moodle and a chatbot required a deep understanding of both technologies. The key takeaways from this project include:
Planning is Paramount: A well-defined architecture is crucial for seamless integration.
Security First: Prioritize security best practices when working with sensitive data.
User Experience Matters: Focus on creating a user-friendly and engaging experience.
Important Considerations and Customization Steps:
Personalize Extensively: This is a template! Replace my generic statements with your specific experiences, challenges, and solutions.
High-Quality Visuals: I cannot stress this enough. Your images are crucial. Invest time in creating visually appealing and informative screenshots and graphics.
Target Audience: Think about who you want to reach on LinkedIn. Tailor the language and content to resonate with them. Are you targeting recruiters? Other developers? Potential clients?
Call to Action: Encourage interaction. Ask a question at the end, invite comments, or suggest readers connect with you.
Keywords: Use relevant keywords in your post to improve its visibility in search results. I included a few, but research others relevant to your skill set and the project.
Proofread Carefully: Ensure your post is free of grammatical errors and typos.
Engagement: Respond to comments and engage in discussions to build your network.
Track Results: Pay attention to how your post performs to learn what resonates with your audience.
Conclusion: In conclusion, leveraging Laravel 11 for your blog's development can significantly elevate user engagement and streamline management tasks.From integrating Moodle for unified learning experiences to deploying an AI-powered chatbot for enhanced user interaction, the possibilities are vast. Remember to personalize your content, prioritize high-quality visuals, and engage your audience actively to maximize impact.
I'm excited to connect with fellow developers! How are you using Laravel 11 in your projects? Let’s discuss.
#Laravel #PHP #Moodle #WebDevelopment #AI #Chatbot #SoftwareEngineering #ScadeaSolutions
Let’s Take Your Business Online!
🌐 Website: www.scideassolutions.com
📧 Email: [email protected]
1 note
·
View note
Text
PlayWright Automation Training | PlayWright Course Online
How Playwright Automation is Revolutionizing End-to-End Testing
PlayWright Automation Training evolving landscape of web development, ensuring the reliability and performance of applications across various browsers and platforms is paramount. Traditional testing frameworks often grapple with challenges like flakiness, slow execution, and limited cross-browser support. Enter Playwright, an open-source automation framework developed by Microsoft, which is transforming end-to-end (E2E) testing by addressing these challenges head-on.
Understanding Playwright
Launched in January 2020, Playwright is designed to provide fast and reliable testing for modern web applications. It supports all major rendering engines—Chromium, WebKit, and Firefox—enabling comprehensive cross-browser testing. Developers can write tests in multiple programming languages, PlayWright Course Online, including JavaScript, TypeScript, Python, .NET, and Java, making it accessible to a broad audience.

Key Features Driving the Revolution
Cross-Browser and Cross-Platform Support
Playwright's ability to automate browsers like Google Chrome, Microsoft Edge, Safari, and Firefox ensures that applications perform consistently across different environments. This cross-browser capability is crucial for reaching a diverse user base. Additionally, Playwright operates seamlessly on Windows, Linux, and macOS, both locally and in continuous integration (CI) pipelines, supporting headless and headed modes.
Resilient and Flake-Free Testing
One of the standout features of Playwright is its auto-wait mechanism. The framework intelligently waits for elements to become actionable before performing interactions, reducing the reliance on arbitrary timeouts—a common source of flaky tests. This approach enhances test reliability and minimizes false negatives.
Comprehensive Mobile Emulation
Recognizing the importance of mobile users, PlayWright Training offers native emulation of mobile devices, including Google Chrome for Android and Mobile Safari. This feature allows testers to validate the responsiveness and functionality of web applications on various screen sizes and orientations without the need for physical devices.
Advanced Tooling and Debugging Capabilities
Playwright comes equipped with powerful tools to enhance the testing experience:
Codegen: This utility records user actions and generates corresponding test scripts in the desired programming language, accelerating test creation and reducing manual effort.
Playwright Inspector: Aids in debugging by allowing testers to inspect the page, generate selectors, step through test execution, and explore logs interactively.
Trace Viewer: Captures detailed information during test runs, including execution traces, screenshots, and DOM snapshots, facilitating efficient troubleshooting of test failures.
Isolation and Parallelism
PlayWright With TypeScript Training introduces the concept of browser contexts, which are akin to separate browser profiles. Each test runs in its own isolated context, ensuring no shared state between tests. This isolation enables safe parallel execution, significantly speeding up test suites and improving efficiency.
Network Interception and Monitoring
For applications that rely heavily on network interactions, Playwright provides capabilities to intercept and modify network requests and responses. This feature is invaluable for testing scenarios like handling network failures, simulating different server responses, and validating client-side behavior under various conditions.
Real-World Impact and Adoption
Since its inception, Playwright has seen rapid adoption within the developer community. Its robust feature set and reliability have made it a preferred choice for many organizations aiming to enhance their testing strategies. Companies have reported improved test stability, faster execution times, and increased confidence in their application's cross-browser compatibility after integrating Playwright into their workflows.
Conclusion
Playwright is revolutionizing end-to-end testing by offering a comprehensive, reliable, and developer-friendly framework. Its cross-browser support, resilience against flaky tests, advanced tooling, and robust feature set empower teams to deliver high-quality web applications with confidence. As web development continues to evolve, Playwright stands out as a pivotal tool in ensuring that applications meet the demands of diverse environments and user expectations
Visualpath is the Leading and Best Software Online Training Institute in Hyderabad. Avail complete PlayWright Automation Training Worldwide. You will get the best course at an affordable cost.
Attend Free Demo
Call on - +91-9989971070.
WhatsApp: https://www.whatsapp.com/catalog/919989971070/
Visit: https://www.visualpath.in/online-playwright-automation-training.html
Visit Blog: https://playwrightautomationtraining.blogspot.com/
#PlayWright Automation Training#PlayWright Course Online#PlayWright Training#PlayWright Automation Online Training#PlayWright Online Training#PlayWright Training In Hyderabad#PlayWright With TypeScript Training#PlayWright Automation Testing Hyderabad
0 notes