#soil amendment testing
Explore tagged Tumblr posts
Visit Tumblr Blog
Explore Tumblr blogs with no restrictions, modern design and the best experience.
Last Seen Tumblr Blogs


Fun Fact
There are dozens of funny blogs to kill time on Tumblr.
Text
Soil Testing Liquid Vermicompost with microBIOMETER®
Worm Power’s Vermicompost Liquid Extract is shelf-stable soil amendment from liquid worm castings that have hundreds of diverse bacteria species. For more details, visit https://microbiometer.com/blog/soil-testing-liquid-vermicompost-with-microbiometer/

0 notes
Text


#prepping#survival#emergency#war garden#food preservation#self sufficiency#victory garden#planting#soil#soil testing#soil amendment#gardening
4 notes
·
View notes
Text
Growing Paw Paws from seed: 2024


Some of y'all may recall last year I made a Plant Profile post after finding my first Paw Paw (they don't really grow this far north in NJ so this was exciting). Well after eating the fruit I decided to see if I could propagate the seeds and I was very successful!
Below I'll describe my process and some tips, this was unconventional towards how I usually grow saplings but I was in my final year of a masters program, needed to be as cheap as possible, and this is probably easier for those of you in apartments


So you want to propagate paw paws? It's not hard it just requires a bit of understanding.
When I found my first Paw Paw I was on the University of Pennsylvania campus, I saw a tree in front of a multi-faith church and immediately recognized the fruit. My friends and I climbed up the branches to get some bigger fruits and then we basically ate them on a nearby bench.
Once I had the seeds (I started with 14, only 4 viable) I walked home and washed off any debris then I wrapped the seeds in a damp paper towel (wring out excess water) and placed them in a plastic bag in the fridge for 3ish months
Around February I decided to grow them, I had some extra cardboard pots I was starting oaks in (image 3: ps I hate these pots) and knew I could use this to to start the seeds, at the same time I asked a friend to grow paw paws so we had a diverse gene pool to produce fruit. Paw paws need deep pots because they develop a taproot that can easily reach 12" the first year, instead of buying multiple deep pots you can place disposable pots in a bigger container with soil. If you find like long/narrow containers those are your best option.
I used left over peatmoss (but loamy potting soil will be better) and placed them 1" deep each. I then cut off the bottoms of my small cardboard containers and placed those together in a deeper pot I had (image 4). You want to retain moisture, so also cover the pots in plastic wrap. Of course water enough to keep the soil moist that goes without saying.
Paw paws take about a month to germinate above the soil but still need the increased light levels. Keep an LED light on above it (these are very cheap to operate) They will start growing a taproot soon after you plant them and occasionally will break the surface, just try to keep it covered in dirt.
Once they appear above the surface (this was march-april for me), let them grow till they develop like 4-5 leaves before planting out. I kept them in my Frankenstein pots until about June when I had time to exchange with my friend (he grew like 18 with seeds from an online seller but stunted their taproots a bit).

Paw paws have a natural insecticide in their leaves, I didn't encounter any herbivory from both deer and insects but I left my best specimens in a sapling cage. I planted about 8 in my yard, all around 4 inches tall (image 5), in partial shade conditions. When you plant the sapling dig a little deeper than the taproot and leave soil around the taproot itself, it helps to have a deep trowel. For amendments, I mixed in richer compost soil with the native soil, but for a few I gave no amendment (I wanted to test if it made a big difference). Ultimately those which grew the most were in brighter conditions but they all did okay, my largest ended up being 15" (image 6) which is the same development as some nursery stock I've encountered for $165...

On a side note you're not supposed to move them once planted but I ended up having to do this with one. I did break the taproot in half, however this sapling still survived so these trees are a bit hardier than others have implied.
So, is this the best way to grow paw paws? No absolutely not. Is it cheap and basically using just garbage...yes! Try to grow your own :)
122 notes
·
View notes
Text
Radical Reinterpretation
In the novel 1984, they had Newspeak. It was like English, but not English. It was a language which allowed the Party to define what things meant.
While people talk about things like “Doubleplusungood”, the real power is in redefining existing words. If you can change what a word means, not only do you control what you say you also control what everyone else says and has said in the past.
The USA has jus soli “right of soil” citizenship, meaning that anyone born on US soil is a US citizen. This is a powerful thing for America. Historically, it was used to assure that black slaves were legally full US citizens, a right which had been denied to them prior to the American Civil War. It has another important benefit: the USA does not, and cannot, have generations of stateless residents. Although some may find that objectionable, it has been beneficial to the country.
This right is found in the 14th amendment:
All persons born or naturalized in the United States, and subject to the jurisdiction thereof, are citizens of the United States and of the State wherein they reside
Now a reasonable interpretation to this would hold that anyone born in the USA save for the children of foreign diplomats (who have Diplomatic Immunity) are automatically US citizens.
In recent years, opponents of this right have advanced the claim that persons who are not here legally are not “subject to the jurisdiction” of the United States, and therefore their children should not be allowed US citizenship. Of course, illegal immigrants who are held in US prisons are somehow not afforded diplomatic privileges.
One would say that in order to end jus soli citizenship, the 14th amendment would have to be repealed. This is not the case. If the current Chief Executive decides on a reinterpretation of the words ”subject to the jurisdiction thereof” and the courts allow it, then effectively the Executive and Judiciary branches will have changed the Constitution without involving the Legislative branch.
It is worth noting that the current SCOTUS has not shrunk from overturning precedent and radically reinterpreting words when it suits their goals.
Such a rewrite of a crucial right in the Constitution would have dire effects on the country.
Realistically, the current administration has no more ability to reduce illegal immigration than prior administrations; it is engaging in showy and brutal measures, but is not targeting the root causes. So there will still be a substantial population of undocumented people in America - but such a policy will create a further population of stateless individuals, assuring legal problems and severe unrest in future generations. This has not worked out well for any other country, and will not work out well for the USA.
It will deter legal immigration: this places the children of H-1b visaholders in limbo, and even if the current laws do not directly affect them, a sensible person will realize that US law is becoming increasingly xenophobic and the country is not safe for anyone presenting as foreign regardless of their legal status.
It could be used to disenfranchise large numbers of American citizens: a citizen could be challenged to not only prove their own US citizenship but also that of their parents. While likely not resulting in deportation or putting people in concentration camps, it could be used as an excuse to deny voting registration. Notably, this would particularly affect college-educated liberals who often move away from their families after graduation, and would find it onerous to prove the citizenship of family members who live many states away. (It might hurt some conservatives too, but if it disproportionately hurts liberals, republicans are okay with it).
In a larger issue, this sets precedent to essentially suspend entire rights by radical reinterpretation. For example, Article VI of the US Constitution states “…no religious Test shall ever be required as a Qualification to any Office or public Trust under the United States.” Current interpretation being that you cannot bar someone from public office based on their religion, or lack thereof. However, the Constitution does not explain what constitutes a religious test. A new interpretation would hold that this simply means you cannot require a person to perform a particular religious act or answer any questions about religion as a condition of public office; but requiring someone to be a member of a church (likely under the guise of “demonstrating membership in good standing within the community”) does not constitute a religious test, as it does not specify a particular church nor any particular religious practice. And, of course, local authorities would be allowed to determine which churches are actually members of the community. Such a reinterpretation could be used to deny public service to anyone who is not a member of an organized religion, and even to specify which organized religions can participate in government, while maintaining the façade of religious freedom.
Rewriting laws by redefining words is a powerful tool in the authoritarian playbook, and makes a mockery of the entire concept of the rule of law.
14 notes
·
View notes
Text
Investigate
Sometimes a little investigation will show you a place or activity that is consuming extra resources, and you can then find a way to fix that. The best example is water leaks. If your water bill suddenly goes up, you likely have a water leak. In addition to wasting water, some water leaks can also lead to rot inside walls or under floors, requiring expensive repairs. Some additional thoughts:
I noticed that my t-shirts tended to get small holes in the front near my waist. I finally figured out the cause. My t-shirt is between my seat belt and my jeans when I am in the car and it rubs little holes. Now I can keep my shirt outside the seatbelt and my shirts last longer.
A sudden increase in your electric bill could mean a short circuit or appliance that needs repair. Call an electrician to investigate.
A quick soil test might tell you what minerals and amendments will help your garden be more productive. If you are planting a native habitat area, do your research on what the plants need to grow well.
12 notes
·
View notes
Photo

Plumeria, also known as frangipani, is a deciduous, semi-succulent tropical plant renowned for its fragrant and colorful flowers. Its distinctive scent can be sweet, spicy, floral, or fruity. Plumeria features large, five-petaled, aromatic flowers in various colors, including white, cream, red, pink, yellow, and lilac. Tropical trees like plumeria do not thrive in most parts of the United States becausethey require hot and humid conditions. However, anyone who wants to enjoy their fragrant blossoms can successfully grow plumerias in containers and bring them indoors during the colder winter months. Ahead, plumeria growers share their expert tips for growing and caring for this striking plant. When to Plant Plumeria The ideal time to plant plumeria is generally from spring to early summer when temperatures are consistently warm and the risk of frost has passed, says Brian Dawes, owner and operator of The Potted Plumeria Nursery. “It is best to avoid planting in late fall or winter as plumeria plants go dormant in cooler temperatures and may struggle to establish if planted too late in the season.” However, in USDA zones 10 to 12, plumeria is a perennial and can be planted year-round since frost is not a concern. How to Plant Plumeria Outside Plumeria thrives in warm climates with well-draining soil and plenty of sunlight, says Dawes. Follow his steps to ensure successful planting: 1. Choose the Right Location Select a sunny spot that receives at least six to eight hours of direct sunlight daily. To prevent root rot, ensure the area has well-draining soil. 2. Prepare the Soil If your soil retains moisture, amend it with sand, perlite, or pumice. “Test drainage by digging a hole and filling it with water; if water remains after an hour, improve drainage by mixing in coarse sand or gravel.” The ideal soil pH for plumeria is 6.5 to 7.5 (slightly acidic to neutral). 3. Dig a Hole Dig a hole twice as wide as the root ball but only as deep as the existing root system. If planting a cutting, create a hole 6 to 8 inches deep to support the cutting upright. 4. Plant the Plumeria For rooted plants, place the root ball in the hole at the same depth it grew in the container. The base of the trunk should sit just above ground level. For cuttings, insert the cutting 6 to 8 inches deep, ensuring at least two nodes are below the soil for better rooting. Backfill with soil, gently firming around the base to remove air pockets. If planting multiple plumerias, space them 8 to 10 feet apart to allow for full growth and proper air circulation. 5. Watering After Planting Water lightly to settle the soil, but avoid overwatering. Fill in any gaps in the soil that were created when initially watering. Allow the soil to dry out completely before the next watering to prevent rot. 6. Provide Support If planting a large cutting, use a stake to keep it upright until roots are established. Use tree ties or straps designed to stretch as the tree grows. 7. Mulch and Fertilize Apply a thin layer of mulch (1 to 2 inches) around the base to retain moisture and suppress weeds, but keep it away from the trunk to prevent rot. After two to three weeks, Dawes recommends fertilizing with a high-phosphorus fertilizer (10-30-10) to encourage root and flower development. How to Care for Plumeria aradaphotography / Getty Images Mike Atkinson, co-owner of Atkinson Plumeria, has grown plumerias for 30 years. He finds them to be low-maintenance and easy to care for. Here, he shares his tips for success whether you're growing plumerias outside or indoors. Sun Plumeria roots thrive in heat. They prefer full sun, whether rooted in pots or the ground. However, some shade is necessary for rooting or for newly-rooted cuttings. Soil Plumerias do not thrive in wet or muddy conditions, so it is essential to use well-draining soil. Atkinson advises against placing plant saucers or water catchers under the pots. If the plant is potted, use chunky potting soil such as cactus mix, and consider adding extra perlite or pumice to enhance drainage. Fertilizer Plumerias need regular feeding but are flexible in their nutrient intake. Atkinson recommends using NPK-balanced fertilizers like Excalibur Plumeria Fertilizer (which offers a slow release), rose food, or orchid food. Additionally, you can supplement with organic options such as manure, seaweed, fish fertilizers, and used coffee grounds. Water Plumerias like the soil to dry out a bit before being watered again. When growing plumeria flowers in different-sized containers, Atkinson recommends using a moisture meter, as different sizes dry out at different rates. Reduce watering during cooler months and place potted plumerias undercover (under eaves, patio, garage, etc.) during heavy rains. How to Prune Plumeria Though plumerias require minimal pruning, doing so can enhance airflow and allow sunlight to reach the canopy, helping to protect the plant from diseases and pests. Light pruning can also assist in achieving a desired shape. In spring or early summer, prune away the lower branches near the base of the trunk. Cut at a 45-degree angle to prevent water from pooling on the cut surface and reduce the risk of rot. If rain or heavy dew is expected, seal the cut with a pruning sealant. If the weather is dry, sealing is not necessary, says Atkinson. How to Propagate Plumeria Selecting a healthy, well-sized cutting will increase your chances of successful propagation. Dawes shares his propagation tips to help you through the process. 1. Choose and Cut Select a healthy branch from a mature plumeria plant or use an existing cutting, ideally one that's 12 to 18 inches long. The cutting should be mature (containing some gray bark), firm, free of damage, and generally healthy looking. Using clean and sterilized pruning shears, cut the branch at a 90-degree angle. 2. Let It Dry Allow the end of the cutting to dry for 7 to 10 days in a shaded area. This step is essential for forming a callus over the cut end and reducing the risk of rot once the cutting is planted, says Dawes. 3. Apply Rooting Hormone Before planting, dip the callused end of the cutting into a rooting hormone. While not mandatory, Dawes says this can help speed up root development. 4. Plant the Cutting Fill a small, gallon-sized pot with well-draining potting mix. Insert the cutting about 2 to 3 inches deep and tamp the soil down lightly, ensuring the cutting stands upright. A stake can be added for support if needed. Give it a light watering, but do not overwater—plumeria cuttings prefer slightly dry conditions as they root. Avoid wetting the leaves. 5. Provide the Right Environment Place the pot in a warm, bright location with indirect sunlight. Avoid direct sun and excessive water until roots develop. Water only when the soil is dry to avoid rot. 6. Wait for Roots Dawes says roots typically develop in four to six weeks. You’ll know it’s ready when you see a few large leaves forming. At this stage, you can gently tug on the cutting; resistance indicates roots have formed. You can continue to let the plant grow in this container until it’s ready to be repotted or planted in the ground. Tips for Growing Plumeria in Containers Cynthia Shirk / Getty Images Growing plumeria in containers is an excellent way to control their size and environment and ensure optimal growth. To prevent root rot, use a pot with several drainage holes. A 1- to 3-gallon pot is ideal for young plants, while mature plants may need 10- to 15-gallon pots. Avoid oversized pots, which can retain too much moisture and cause root issues. Fill the container with a well-draining soil. You can use a cactus or succulent mix or make your own by combining potting soil, sand, and perlite. Avoid heavy garden or topsoil, which will retain too much water. Water deeply but infrequently, allowing the soil to dry out between waterings. Don't get the leaves wet, as this can cause fungus to form. Keep potted plumerias in a location with at least six to eight hours of sunlight daily. If growing indoors or in a greenhouse, supplement with grow lights to maintain healthy growth. How to Overwinter Plumeria Plumeria can remain outside in mild winter regions, says Clark Little of Little Plumeria Farm. However, most cultivars will enter a dormant phase, during which they may experience leaf drop and reduced blooming. In frost-prone areas, bring plumeria indoors before freezing temperatures. Once indoors, keep the plant in a heated room near a sunny window, and water sparingly during winter. Do not take your plumeria outside until all frost threats have passed. Common Pests and Diseases While plumeria is mostly pest-free, the longhorn beetle (plumeria borer) poses a threat. The beetle lays eggs in tree branches. Larvae can damage the center, potentially killing the tree, says Clark. Eggs are typically laid in areas where there is a break in the tree's outer protective layer, particularly when cuts are made, or branches break off. He suggests using a pruning seal after trimming and applying systemic treatments like Merit on potted plumeria to prevent infestations. In terms of disease, rust is a fungus that can sometimes affect plumeria in humid conditions. It appears as small orange spots on the leaves. Clark recommends using a fungicide spray or neem oil to combat this issue. Source link
6 notes
·
View notes
Text
Editor's note:This is the first blog in our series that examines how social determinants influence gender biases in public health research, menstrual hygiene product development, and women’s health outcomes.
Worldwide, over 100 million women use tampons every day as they are the most popular form of menstrual products. U.S. women spent approximately $1 billion from 2016 to 2021 on tampons, and 22% to 86% of those who menstruate use them during their cycles, with adolescent girls and young adults preferring them. Tampons and pads are the most practical and common option for those who are working and have limited funds. Yet, a recent pilot study exposed concerning amounts of lead, arsenic, and toxic chemicals in tampons: 30 different tampons from 14 brands were evaluated for 16 different metal(loid)s, and tests indicated that all 16 metal(loid)s were detected in all different samples. This news comes as quite a shock to women who use these products. It raises many concerns and questions for those who do not have other viable options when they menstruate. We explore some of the major questions and concerns regarding the products on the market and their potential to increase the risk of exposure to harmful contaminants. It is clear that beyond this pilot study, further research is required to understand the potential health challenges.
Unpacking the potential risks for those who use menstrual products
Measurable concentrations of lead and arsenic in tampons are deeply concerning given how toxic they are. The World Health Organization (WHO) classifies lead as a major public health concern with no known safe exposure level. Arsenic can lead to several health issues such as cancer, cardiovascular disease, and diabetes. There are three ways in which these metal(loid)s can be introduced into the product: 1) from the raw materials that absorbed the soil and air, like the cotton used in the absorbent core; 2) contamination from water during the manufacturing process; and 3) intentionally being added during the manufacturing process for certain purposes. No matter how these metal(loid)s are introduced into the product, the pilot study stresses that further research must be done to explore the consequences of vaginally absorbed chemicals given the direct line to the circulatory system.
On an institutional level, the public health system has historically been biased toward the male perspective, essentially excluding research related to women’s health. In 1977, the U.S. Food and Drug Administration (FDA) recommended that women of childbearing age should be excluded from clinical research. Because of this gendered bias, many women now experience delayed diagnoses, misdiagnoses, and suffer more adverse drug effects; eight out of 10 of the drugs removed from U.S. markets from 1997 to 2000 were almost exclusively due to the risk to women. In 1989, the National Institutes of Health (NIH) amended its policy to include women and minorities in research studies, but it wasn’t until 1993 that this policy became federal law in the NIH Revitalization Act of 1993. Then, in 2016, the NIH implemented a policy requiring the consideration of sex as a biological variable in research.
Historically, women haven’t been in control of the various industries that support their unique health needs and develop products that allow them to manage their health in safe ways. In spite of this, women-owned businesses have increased over time, with many of them supporting a range of products, services, and health and child care needs. Changes in these industries can lead to a better understanding of how certain products aid or impede women’s health trajectories.
Racialized and gendered bias in health research
The life expectancy of women continues to be higher than men’s. That does not suggest there has been universal nor equitable support for women’s health issues and women’s health care. Black women are three times more likely to die from pregnancy-related issues. They also experience racism and differential treatment in health care and social service settings. This reality becomes starker when stigma and bias influence negative behaviors toward Black women and other women of color, and socioeconomic status limits access to preventative care, follow-up care, and other services and resources.
Toxic menstrual products are just the tip of the iceberg for gender bias in health research. Gendered bias extends into how health care professionals evaluate men and women differently based on the stereotypical ideas of the gender binary. This results in those who are perceived as women receiving fewer diagnoses and treatments than men with similar conditions, as well as doctors interpreting women’s pain as stemming from emotional challenges rather than anything physical. In a study comparing a patient’s pain rating with an observer’s rating, women’s pain was consistently underestimated while men’s pain was overestimated. Women’s pain is often disregarded or minimized by health care professionals, as they often view it as nothing more than an emotional exaggeration or are quick to blame any physical pain on stress. This has led to a pain gap in which women with true medical emergencies are pushed aside. For instance, the Journal of the American Heart Association reported that women with chest pain waited 29% longer to see a doctor in emergency rooms than men.
For people of color, especially Black women, the pain gap, as well as the gap in diagnoses and treatment, is exacerbated due to the intersectionality of gender, race, and the historical contexts of Black women’s health in America. Any analysis must consider the unique systemic levels of sexism and racism they face as being both Black and women. They face a multifaceted front of discrimination, sexism, and racism, in which doctors don’t believe their pain due to implicit biases against Black people—a dynamic that stems from slavery, during which it was common belief that Black people had a higher pain tolerance—and women. A study found that white medical students and residents believed at least one false biological difference between white and Black people and were thus more likely to underestimate a Black patient’s pain level.
Intersectionality, as well as sexism, further explains why medical students that believe in racial differences in pain tolerance are less likely to accurately provide treatment recommendations or pain medications. A Pew study found that 55% of Black people say they’ve had at least one negative experience with doctors, where they felt like they were treated with less respect than others and had to advocate for themselves to get proper care. Comparatively, 52% of younger Black women and 40% of older Black women felt the need to speak up to receive care, while only 29% of younger Black men and 36% of older Black men felt similarly. Particularly among Black women, 34% said their women’s health concerns or symptoms weren’t taken seriously by their health care providers. This even happened to Serena Williams!
Restructuring the health system
On Tuesday, September 11, 2024, the FDA announced they would investigate the toxic chemicals and metals in tampons as a result of the pilot study. This comes after public outcry and Senator Patty Murray’s (D-Wash.) letter to FDA Commissioner Robert M. Califf asking the agency to evaluate next steps to ensure the safety of tampons and menstrual products. In her letter, she specifically asks what the FDA has done so far in their evaluations and what requirements they have for testing these products, ensuring a modicum of accountability within this market. As of July 2024, the FDA classifies tampons as medical devices and does regulate their safety but only to an extent, with no requirements to test menstrual products for chemical contaminants (aside from making sure they do not contain pesticides or dioxin). The pilot study on tampons containing harmful metals was the first of its kind, which sheds light on how long women’s health has been neglected. Regulations requiring manufacturers to test metals in tampons need to be implemented, and future studies on the adverse health impacts of metals entering the bloodstream must be prioritized. The FDA investigation will hopefully be a step in the right direction toward implementing stricter regulations.
For too long, the health field has been saturated with studies by and for men. Women’s health, on the other hand, faces inadequate funding, a lack of consideration for women’s lived experiences, and the need for more women leading research teams investigating women’s health. Women, especially those who face economic and social disparities, have the capacity to break barriers and address real issues that impact millions of women each day but only if they are brought to the table. With structural change, we can address how women’s concerns are undermined and put forth efforts to determine new and effective measures for women’s health.
11 notes
·
View notes
Text
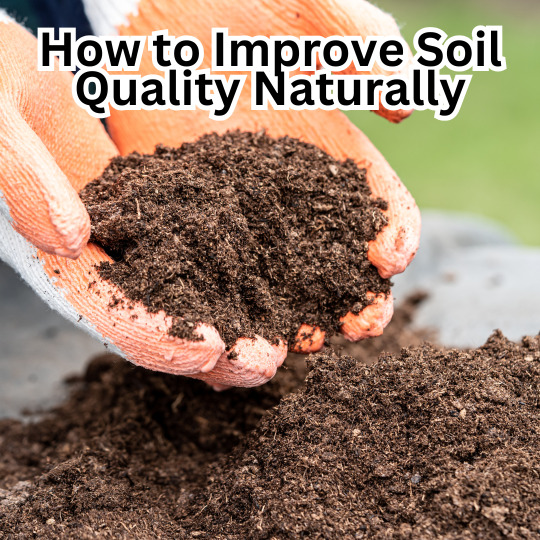
How to Improve Soil Quality Naturally
Improving soil quality is crucial for healthy plant growth and sustainable gardening. Here are some natural methods to enhance your soil:
Add Organic Matter: Incorporate compost, well-rotted manure, or leaf mold to increase nutrient content and improve soil structure.
Practice Crop Rotation: Rotate crops annually to prevent nutrient depletion and reduce pest and disease build-up.
Use Cover Crops: Plant cover crops, like clover or rye, during the off-season to protect and enrich the soil.
Mulch: Apply a layer of organic mulch (like straw or wood chips) to retain moisture, suppress weeds, and gradually enrich the soil as it decomposes.
Encourage Earthworms: Earthworms naturally aerate the soil and improve nutrient cycling. You can attract them by adding organic matter and reducing chemical use.
Test Soil pH: Use a soil test kit to determine pH levels and amend accordingly with lime to raise pH or sulfur to lower it, ensuring optimal nutrient availability.
By implementing these practices, you can foster a thriving ecosystem in your garden, leading to healthier plants and better yields.
#soilquality#organicgardening#sustainablegardening#soilImprovement#gardeningtips#nature#compost#healthyplants#gardening#plants
12 notes
·
View notes
Photo

Organic Nutrients for Soil If you're interested in gaining a better understanding of the nnutrients you can add to your soil for improved plant growth, yo're in the right place. First let's take a look at the primary nutrients required by plants to grow and thrive: Macronutrients Micronutrients Organic Nutrient Sources Now let's take a look at some commonly-used amendments and nutrient sources in organic gardening, as well as rough estimates of their nutrient percentages. This chart can help inform you as to which amendments you might consider adding to your soil, dependng on the nutrien needs of your plants and the results of your soil testing: This table will become available for download & print FREE. Check back soon! Have an amendment to add that's not on the list? Drop a comment down below.
#regenerativegardening#soilhealth#learngardening#soilbuilding#organicgardening#gardeningforbeginners#desertgardening#growyourownfood#organicgarden#vegetablegardening#zone9a#tucsongardening#permaculture#gardener#arizonagardening#gardening
3 notes
·
View notes
Text


Happy Soil Testing Day to all who observe it! Looks like one more year until we need amendments. (Not my handwriting.)
4 notes
·
View notes
Text
youtube
Unveiling HumxPower (Humic Acid Sodium Salt) Big Shiny Flakes: Factory Machine Production Process 🌱
Description Step into Humico state-of-the-art China factory as we showcase the precision production of HumxPower—Super Sodium Humate Shiny Flakes! Crafted through advanced manufacturing processes, these lustrous black flakes redefine organic fertilization. With 65%+ humic acid (dry basis), 100% water solubility, and a 2–4mm size, each flake is engineered for maximum efficacy in soil amendment and crop enhancement. Watch as our machinery transforms premium raw materials into a sustainable solution that elevates global farming practices. Discover how HumxPower bridges innovation with environmental responsibility in every granule!
Specification Appearance: Black Shiny Flake Humic Acid (dry basis): 65% min Water Solubility: 100% Moisture: 15% max Size: 2–4mm pH: 9–10 More details: https://www.ihumico.com/super-sodium-humate-flakes/
Application Soil Amendment: Apply 5–8 kg/ha as basal or top dressing, or via fertigation to revitalize soil structure and nutrient retention. Foliar Application: Dissolve 0.5–1.0 kg/ha in 500–1000L water for uniform leaf spraying, enhancing nutrient absorption. Seed Treatment: Soak seeds in a 0.3–0.5 kg/ha solution for 6–12 hours to promote robust germination and seedling vigor.
Benefits & Advantages 🌿 Soil Revitalization: Improves water-holding capacity, microbial activity, and nutrient chelation for healthier, more fertile soil. 📈 Crop Enhancement: Stimulates root development, accelerates plant maturity, and boosts yield by up to 30% across crops. ♻️ Organic Purity: 100% water-soluble, OMRI-certified, and free from synthetic additives—ideal for organic farming standards. 🌍 Versatility: Effective for cash crops, horticulture, and sustainable agriculture systems worldwide. 🔍 High Concentration: 65%+ humic acid content ensures potent performance with minimal application rates.
Services ✅ Certified Quality: OMRI & ISO 9001 certified for global market compliance. ✅ Custom Solutions: OEM/ODM support for tailored formulations and branding. ✅ Sample Testing: Free product samples available to validate performance. ✅ Flexible Packaging: 25kg kraft bags, bulk containers, or custom sizes with blank labeling options.
Contacts WhatsApp: https://wa.me/8618175193115 Direct Line: +86 181 751 93115 (WeChat/Zalo/Line compatible) Email: [email protected] Website: https://www.ihumico.com
Follow Our Journey Linktree: https://linktr.ee/Humico
Humico Group—Pioneering Organic Solutions for Global Agriculture 🌿 Transform your fields with HumxPower—where science meets sustainability! 🌟
#agriculture#humico#organic#plants#fertilizers#wholesale#organicfertilizers#HumxPower#SodiumSalt#Humic Acid#Humic#Sodium Humate#Youtube
2 notes
·
View notes
Text
How Soil Amendment Testing Can Reduce Fertilizer Costs
Soil amendment test provides the insights necessary to make informed decisions about fertilization, crop selection, and long-term land management strategies. For more details, visit https://mbiometer.medium.com/how-soil-amendment-testing-can-reduce-fertilizer-costs-3316c0c6f328

0 notes
Note
are you perhaps willing to give a tiny snippet of the desert husbands whip 🥺
a snippet! a snappet! a small snitch of s'maul??
as you wish!
-dilf season 2 ch 37-
Obi-Wan runs a hand back through his hair to neaten the strands a bit, some sixth sense telling him the humidity is playing havoc with it. "If you must know, I was there as a slave. The order had decided I was… best placed as part of the agricorps. Except I was kidnapped from my post, and put in chains. It took time, but I eventually staged a revolt."
Maul chokes on air. "You mean to tell me- the jedi order nearly sent-" he stops to cough a laugh, "-the greatest soresu master they had seen in an age, to be a farmer? A ploughman?"
"It's a… noble career. Feeding people is important," he tries, but it sounds unconvincing even to his own ears. He had been devastated to be relegated to agriculture instead of knighthood. Not that it wasn't a powerful calling… but it wasn't his.
Maul loses it, wheezing quietly with mirth, his force presence flaring obnoxiously.
Obi-Wan sighs, expansively. "It's not that funny."
"Farmer! They would have made you a farmer!" the man crows.
He glowers. "If you're quite done, we could maybe focus on the test…"
"Oh, cursed line of Aith'zin, that is truly the most hilarious thing I have ever heard. Obi-Wan Kenobi, expert in- in radishes and soil amendments." He hears a slap, like the sith had struck a palm to his metal thigh. "I am even more grateful the jedi did not come for me! Can you imagine what mundanity they would have subjected me to? School teacher, hmmm? Secretary? Potter?"
At this rate, Obi-Wan is sure he will run out of sighs before they reach the end of this place. A lifetime supply used up in an afternoon.
"Oh, no, I know!" The sith smacks him on the shoulder, "A mechanic! I could have spent my sad little life as a jedi puppet repairing watering drones right alongside you in the agricorps."
Obi-Wan thinks about that for only a minute, and immediately resolves never to think about it again.
Him, Maul, quiet days, and the steady growth of crops? If the worst he had ever done in life was to be mediocre at growing things and argue all the time with his mechanic…?
...it would have been so much better than the fruition of reality.
"You never know," he says without tone, "It could have been a fulfilling life."
The sith makes a noise like a dying space whale.
Obi-Wan glares. "You sound like a demented purgill, I hope you know… I- wait, how did you know where my shoulder was? It's pitch black in here. I'm surprised you didn't smack me in the head."
"Oh see, there is this thing called the living force," Maul begins, snide, "and through it all living things are connected."
"I hate you," he replies mildly.
"Good," the man purrs.
29 notes
·
View notes
Text
I feel like Master Gardeners training is probably going to make me better at troubleshooting problems, but only actual effort and time management can make my garden better. For example, I know how to identify fusarium wilt now, but that kinda doesn't matter after the fact, because there's no treatment. Only actual effort would mean that I'd remembered to test and amend the soil in the fall for better plant nutrition, or made sure to mulch the ground to reduce the splashing of soil-borne fungi onto plants, or put in a drip irrigation system to ensure consistent, effective watering at soil level, or effectively supported and pruned our hypothetical tomato plant. And like...I actually did already know a lot of that. I just didn't DO it.
5 notes
·
View notes
Text
10 Essential Landscape Maintenance Tips for Homeowners

A well-maintained landscape does more than boost your home’s curb appeal—it enhances your outdoor living experience and increases your property value. Whether you're a new homeowner or a seasoned green thumb, keeping your garden and lawn in top shape requires consistency, the right tools, and a bit of knowledge. In this blog, we’ll explore ten essential landscape maintenance tips that will help you preserve the beauty and functionality of your outdoor space all year long.
1. Develop a Year-Round Maintenance Schedule
Each season presents different needs for your landscape. Develop a maintenance calendar that includes tasks such as pruning in winter, fertilizing in spring, mowing in summer, and leaf clearing in autumn. Staying ahead of seasonal changes prevents problems and helps your plants thrive.
2. Water Smartly
Efficient irrigation is key to a healthy landscape. Water early in the morning or late in the evening to minimize evaporation. Use drip irrigation systems or soaker hoses to target plant roots directly and reduce water waste. Overwatering can be just as harmful as underwatering, so adjust your irrigation depending on rainfall and plant needs.
3. Keep Your Lawn in Shape
A lush, green lawn is the centerpiece of many landscapes. Mow regularly, but never cut more than one-third of the grass blade at a time. Leave grass clippings on the lawn to decompose and return nutrients to the soil. Aerate the soil annually to improve water and nutrient penetration.
4. Mulch for Moisture and Weed Control
Mulching is a simple yet powerful tool for landscape maintenance. A 2-3 inch layer of mulch around trees, shrubs, and garden beds helps retain moisture, regulate soil temperature, and prevent weeds. Organic mulches like bark, wood chips, or compost also enrich the soil as they decompose.
5. Prune Regularly and Properly
Pruning enhances the health and shape of your plants. Remove dead, diseased, or damaged branches to encourage new growth and prevent pests. Use clean, sharp tools and learn the correct pruning techniques for each plant type. Avoid over-pruning, especially during the growing season.
6. Control Weeds Early and Often
Weeds compete with your plants for nutrients and water. Tackle them early before they set seed. Hand-pulling, hoeing, and applying organic or chemical weed control solutions can help. Keeping a thick lawn and using mulch are also effective ways to suppress weed growth naturally.
7. Feed Your Plants Right
Just like humans, plants need proper nutrition to thrive. Use organic compost or slow-release fertilizers that are appropriate for your soil type and plant species. Test your soil periodically to determine nutrient deficiencies and amend it accordingly.
8. Monitor for Pests and Diseases
A healthy garden is a vigilant one. Inspect your plants regularly for signs of pests like aphids, mites, or grubs, and look for fungal infections or mildew. Integrated Pest Management (IPM) practices use a combination of biological, cultural, and chemical tools to manage pest problems with minimal environmental impact.
9. Edge Your Garden Beds
Crisp, clean edges give your landscape a polished look. Use a spade or half-moon edger to create defined boundaries between lawn and garden beds. This not only improves aesthetics but also prevents grass from creeping into flower beds.
10. Invest in Professional Help When Needed
While DIY landscaping has its perks, some tasks require a professional touch. Whether it’s a complete landscape redesign, irrigation system installation, or routine maintenance, experts like Al Bazi Landscape & Services provide customized solutions tailored to your specific needs. With a deep understanding of local climate and plant varieties, Al Bazi ensures your outdoor space remains vibrant, functional, and eco-friendly throughout the year.
Final Thoughts
Maintaining a beautiful landscape is a rewarding effort that pays dividends in comfort, beauty, and property value. Following these ten essential tips, homeowners can ensure their outdoor spaces remain inviting and healthy. And regarding expert support, don’t hesitate to contact Al Bazi—a trusted partner in landscape design, maintenance, and innovation across the UAE.
2 notes
·
View notes
Photo

Plumeria, also known as frangipani, is a deciduous, semi-succulent tropical plant renowned for its fragrant and colorful flowers. Its distinctive scent can be sweet, spicy, floral, or fruity. Plumeria features large, five-petaled, aromatic flowers in various colors, including white, cream, red, pink, yellow, and lilac. Tropical trees like plumeria do not thrive in most parts of the United States becausethey require hot and humid conditions. However, anyone who wants to enjoy their fragrant blossoms can successfully grow plumerias in containers and bring them indoors during the colder winter months. Ahead, plumeria growers share their expert tips for growing and caring for this striking plant. When to Plant Plumeria The ideal time to plant plumeria is generally from spring to early summer when temperatures are consistently warm and the risk of frost has passed, says Brian Dawes, owner and operator of The Potted Plumeria Nursery. “It is best to avoid planting in late fall or winter as plumeria plants go dormant in cooler temperatures and may struggle to establish if planted too late in the season.” However, in USDA zones 10 to 12, plumeria is a perennial and can be planted year-round since frost is not a concern. How to Plant Plumeria Outside Plumeria thrives in warm climates with well-draining soil and plenty of sunlight, says Dawes. Follow his steps to ensure successful planting: 1. Choose the Right Location Select a sunny spot that receives at least six to eight hours of direct sunlight daily. To prevent root rot, ensure the area has well-draining soil. 2. Prepare the Soil If your soil retains moisture, amend it with sand, perlite, or pumice. “Test drainage by digging a hole and filling it with water; if water remains after an hour, improve drainage by mixing in coarse sand or gravel.” The ideal soil pH for plumeria is 6.5 to 7.5 (slightly acidic to neutral). 3. Dig a Hole Dig a hole twice as wide as the root ball but only as deep as the existing root system. If planting a cutting, create a hole 6 to 8 inches deep to support the cutting upright. 4. Plant the Plumeria For rooted plants, place the root ball in the hole at the same depth it grew in the container. The base of the trunk should sit just above ground level. For cuttings, insert the cutting 6 to 8 inches deep, ensuring at least two nodes are below the soil for better rooting. Backfill with soil, gently firming around the base to remove air pockets. If planting multiple plumerias, space them 8 to 10 feet apart to allow for full growth and proper air circulation. 5. Watering After Planting Water lightly to settle the soil, but avoid overwatering. Fill in any gaps in the soil that were created when initially watering. Allow the soil to dry out completely before the next watering to prevent rot. 6. Provide Support If planting a large cutting, use a stake to keep it upright until roots are established. Use tree ties or straps designed to stretch as the tree grows. 7. Mulch and Fertilize Apply a thin layer of mulch (1 to 2 inches) around the base to retain moisture and suppress weeds, but keep it away from the trunk to prevent rot. After two to three weeks, Dawes recommends fertilizing with a high-phosphorus fertilizer (10-30-10) to encourage root and flower development. How to Care for Plumeria aradaphotography / Getty Images Mike Atkinson, co-owner of Atkinson Plumeria, has grown plumerias for 30 years. He finds them to be low-maintenance and easy to care for. Here, he shares his tips for success whether you're growing plumerias outside or indoors. Sun Plumeria roots thrive in heat. They prefer full sun, whether rooted in pots or the ground. However, some shade is necessary for rooting or for newly-rooted cuttings. Soil Plumerias do not thrive in wet or muddy conditions, so it is essential to use well-draining soil. Atkinson advises against placing plant saucers or water catchers under the pots. If the plant is potted, use chunky potting soil such as cactus mix, and consider adding extra perlite or pumice to enhance drainage. Fertilizer Plumerias need regular feeding but are flexible in their nutrient intake. Atkinson recommends using NPK-balanced fertilizers like Excalibur Plumeria Fertilizer (which offers a slow release), rose food, or orchid food. Additionally, you can supplement with organic options such as manure, seaweed, fish fertilizers, and used coffee grounds. Water Plumerias like the soil to dry out a bit before being watered again. When growing plumeria flowers in different-sized containers, Atkinson recommends using a moisture meter, as different sizes dry out at different rates. Reduce watering during cooler months and place potted plumerias undercover (under eaves, patio, garage, etc.) during heavy rains. How to Prune Plumeria Though plumerias require minimal pruning, doing so can enhance airflow and allow sunlight to reach the canopy, helping to protect the plant from diseases and pests. Light pruning can also assist in achieving a desired shape. In spring or early summer, prune away the lower branches near the base of the trunk. Cut at a 45-degree angle to prevent water from pooling on the cut surface and reduce the risk of rot. If rain or heavy dew is expected, seal the cut with a pruning sealant. If the weather is dry, sealing is not necessary, says Atkinson. How to Propagate Plumeria Selecting a healthy, well-sized cutting will increase your chances of successful propagation. Dawes shares his propagation tips to help you through the process. 1. Choose and Cut Select a healthy branch from a mature plumeria plant or use an existing cutting, ideally one that's 12 to 18 inches long. The cutting should be mature (containing some gray bark), firm, free of damage, and generally healthy looking. Using clean and sterilized pruning shears, cut the branch at a 90-degree angle. 2. Let It Dry Allow the end of the cutting to dry for 7 to 10 days in a shaded area. This step is essential for forming a callus over the cut end and reducing the risk of rot once the cutting is planted, says Dawes. 3. Apply Rooting Hormone Before planting, dip the callused end of the cutting into a rooting hormone. While not mandatory, Dawes says this can help speed up root development. 4. Plant the Cutting Fill a small, gallon-sized pot with well-draining potting mix. Insert the cutting about 2 to 3 inches deep and tamp the soil down lightly, ensuring the cutting stands upright. A stake can be added for support if needed. Give it a light watering, but do not overwater—plumeria cuttings prefer slightly dry conditions as they root. Avoid wetting the leaves. 5. Provide the Right Environment Place the pot in a warm, bright location with indirect sunlight. Avoid direct sun and excessive water until roots develop. Water only when the soil is dry to avoid rot. 6. Wait for Roots Dawes says roots typically develop in four to six weeks. You’ll know it’s ready when you see a few large leaves forming. At this stage, you can gently tug on the cutting; resistance indicates roots have formed. You can continue to let the plant grow in this container until it’s ready to be repotted or planted in the ground. Tips for Growing Plumeria in Containers Cynthia Shirk / Getty Images Growing plumeria in containers is an excellent way to control their size and environment and ensure optimal growth. To prevent root rot, use a pot with several drainage holes. A 1- to 3-gallon pot is ideal for young plants, while mature plants may need 10- to 15-gallon pots. Avoid oversized pots, which can retain too much moisture and cause root issues. Fill the container with a well-draining soil. You can use a cactus or succulent mix or make your own by combining potting soil, sand, and perlite. Avoid heavy garden or topsoil, which will retain too much water. Water deeply but infrequently, allowing the soil to dry out between waterings. Don't get the leaves wet, as this can cause fungus to form. Keep potted plumerias in a location with at least six to eight hours of sunlight daily. If growing indoors or in a greenhouse, supplement with grow lights to maintain healthy growth. How to Overwinter Plumeria Plumeria can remain outside in mild winter regions, says Clark Little of Little Plumeria Farm. However, most cultivars will enter a dormant phase, during which they may experience leaf drop and reduced blooming. In frost-prone areas, bring plumeria indoors before freezing temperatures. Once indoors, keep the plant in a heated room near a sunny window, and water sparingly during winter. Do not take your plumeria outside until all frost threats have passed. Common Pests and Diseases While plumeria is mostly pest-free, the longhorn beetle (plumeria borer) poses a threat. The beetle lays eggs in tree branches. Larvae can damage the center, potentially killing the tree, says Clark. Eggs are typically laid in areas where there is a break in the tree's outer protective layer, particularly when cuts are made, or branches break off. He suggests using a pruning seal after trimming and applying systemic treatments like Merit on potted plumeria to prevent infestations. In terms of disease, rust is a fungus that can sometimes affect plumeria in humid conditions. It appears as small orange spots on the leaves. Clark recommends using a fungicide spray or neem oil to combat this issue. Source link
3 notes
·
View notes