#step3
Explore tagged Tumblr posts
Visit Tumblr Blog
Explore Tumblr blogs with no restrictions, modern design and the best experience.
Last Seen Tumblr Blogs


Fun Fact
69% of Tumblr users are millennials.
Text
How to Get a Medical Residency in the USA as an International Medical Graduate

Choosing to the medical residency for IMG medical students in USA is the best opt. With world-class training opportunities and state-of-the-art facilities, landing a coveted US residency spot allows you to advance your skills and expertise to the highest level.
However, getting a US medical residency as an IMG involves a step-by-step process with many requirements along the way. By understanding and following the key steps, you’ll place yourself in the best position to match into your desired residency program.
1) Register with the USMLE
Your first step when applying for US residency positions is registering with the United States Medical Licensing Examination (USMLE). The USMLE is a three-step exam assessing an IMG’s medical knowledge and clinical skills. It is a core requirement when applying to US residency programs.
Registering is an easy process online via the USMLE website. You’ll need to create an account and provide background information on your medical education and credentials. This allows you access to schedule test dates and testing center locations.
Registering with the USMLE is the vital first step for IMGs seeking US medical residencies.
2) Pass the USMLE Exams
The next step is successfully passing all required USMLE exams. These are challenging, marathon tests covering a wide range of topics. Thorough preparation through dedicated study time and practice questions is a must.
The USMLE step structure is:
Step 1 - Assesses core concepts in basic medical sciences. Often taken after 2nd year of med school.
Step 2 CK - Focuses on medical knowledge application in clinical settings. Taken during 3rd year typically.
Step 2 CS - Evaluates clinical and communication skills through interactions with standardized patients.
Scoring well on your USMLEs signals to residency programs your strong medical knowledge foundation. It also indicates readiness for the fast-paced rigors of a US residency.
Many IMG applicants space out their exam schedule over a 1-2 year timeframe. Create your own prep timeline backward from desired residency start dates.
Allow plenty of dedicated study time to pass the USMLE exams.
3) Get Valuable Clinical Experience in the USA
In addition to tests, US residencies want applicants exposed to the American healthcare system and culture.
Gaining clinical experience in the US through observerships and clinical electives are a big advantage. These allow you hands-on learning of workflows, systems, treatments, technologies, patient populations, documentation, communication norms and more in American hospitals and clinics.
Observership organizations like Prasad Medical Center (+1 718-774-6060) assist IMGs in securing observership positions across the country. Be sure to research and understand program eligibility terms before applying.
Even a few weeks of US clinical experience can give that important edge among competitive applicants.
US clinical experience highlights adaptability to American medical norms.
4) Register with the AAMC
The Association of American Medical Colleges (AAMC) has two key systems you must access during your application process:
MSPE (Medical Student Performance Evaluation) – Official record of medical education including grades, rankings and assessment.
ERAS (Electronic Residency Application Service) – Centralized online application portal distributing all materials to selected residency programs.
Register with AAMC early to get your credentials verified, understand each platform and have ERAS documentation ready when application season starts.
Connecting with the AAMC is essential throughout the residency hunt.

5) Pick your Residency Programs
When deciding which residency programs to apply for, start broad. Identify specialties matching your interests, strengths and USMLE scores. Use online directories to make a list of reach, reasonable match and safety options across several states or regions.
Factors like location competitiveness, program size, IMG match history and curriculum emphasis can help you categorize options. Have a few safety choices with higher IMG acceptance rates.
Research programs thoroughly to have residency options at each level.
6) Get your ECFMG Token and Register with ERAS
Once programs are selected, activate your ECFMG (Educational Commission for Foreign Medical Graduates) token. This allows ERAS to verify your test scores, credentials and identity when applying.
Next, access your MyERAS applicant profile. Add your exam history, experiences, publications and other credentials that programs will review.
Double and triple check all entries for accuracy before submitting to avoid costly mistakes or delays.
MyERAS is your central application hub throughout the residency process.
7) Finalize Documentation and Submit ERAS Application
With your MyERAS profile complete, finalize all required documentation:
Personal statement
Medical school transcripts
MSPE Dean’s letter
Letters of recommendation (3+)
School catalogues
Proofread all materials thoroughly before uploading to ERAS by the deadlines. Activate program selections and assign supporting documents for each.
Carefully prepare all pieces of your ERAS application package.
8) Medical Residency Interview
With a strong application submitted early, interview offers should follow!
Interview formats vary widely across residencies. Common options include one-on-one, panel interviews, multiple mini interviews (MMIs) and virtual interviews.
Careful preparation is key. Research programs, polish answers to common questions, hone your communication style, dress professionally and send prompt thank you notes.
Treat travel associated interviews as 24/7 assessments of fit. Be gracious, avoid complaining and share your passion for medicine and interest in the program.
Interviews are critical to sealing a residency position – make the most of them!
9) Register with the NRMP
After interviewing, register with the National Resident Matching Program (NRMP) by late January. Creating your NRMP account starts the matching process based on how you rank programs and how they rank applicants.
The yearly Match Day in mid-March reveals results simultaneously to applicants across the country. This coordinated effort fills nearly 40,000 residency roles each spring.
Understand match statistics for given specialties and programs to set realistic expectations before this nerve-wracking day!
Learning match nuances helps ease the anticipation leading up to Match Day!
10) Residency Post-Match Focus
If matched, congratulations on achieving that coveted US residency program spot! Notify all relevant parties, celebrate thoroughly and handle any needed visa application processes.
Review program details to address required paperwork, licensing, preparations or moving requirements before start dates. Share excitements and ask graduated residents for advice as you transition to this intense but rewarding new chapter!
For those not matched, don’t be discouraged! Strategize about strengthening certain areas of your application and discuss options with mentors. Often success comes with perseverance and giving yourself the best opportunities the following year.
We hope this overview gives international medical graduates more clarity on the pathway to getting a US medical residency. While challenging, thousands achieve this goal annually through careful planning, dedication to preparation, and showing your passion for serving US patient populations.
If you still need assistance securing clinical experience or have any other questions along your journey, don’t hesitate to contact the knowledgeable team at Prasad Medical Center at (+1 718-774-6060) or visit https://www.prasadmedicalcenter.com/ We wish you the best of luck in achieving your American medical career dreams!
#usmle#step1#step2#step3#prasadmedicalcenter#medicalresidency#imgstudents#medicalstudents#clinicalresearch#meded
4 notes
·
View notes
Text


A digital workbook in PDF format, It includes reading content, reflection questions, worksheets, and guided exercises. The focus is on exploring spirituality and working through Steps 2 and 3 of the 12 Steps. Designed for people in addiction recovery
#addictionrecovery #addictioncounselor #addictionawareness #addictiontreatment #SubstanceUseRecovery #substanceabuse #therapyworksheets #therapistworksheets #Step2 #STEP3 #12steprecovery #cbtworkbook
#addictionrecovery#addictioncounselor#addictionawareness#addictiontreatment#SubstanceUseRecovery#substanceabuse#therapyworksheets#therapistworksheets#Step2#STEP3#12steprecovery#cbtworkbook
0 notes
Text
No thoughts, head empty, just Baxter

#olba#kurio doodles#olba mc#baxter ward#olba baxter#our life#tbh this was for practicing step3 baxters hair#you can clearly see me struggling here
217 notes
·
View notes
Text
keyframes stuff

deja one chance just one pleasepleasepleaseplease 🙏

+another redesign of ruri's clothes bc the summer one felt out of character agdfdfg
#rui draw smth#keyframes#keyframes vn#i have THOUGHTS that i dont have time to draw without fucking up my sleep schedule but I HAVE THOUGHTS#deja lamarre#cameron molinares#kf#kf fanart#keyframes mc#?#kf mc#still wondering if i should use the olba mc tag bc of ruri#i am nOT changing her spring palette idc if she looks like discount percy in my mind it makes a perfect middle step between her step3 and s#step4 outfits#all of the drawings were made late nights so they all look kinda wonky ajkghdfk#ruri posting
196 notes
·
View notes
Text

i am saving the space between the breaths
i am making your place between the breaths
#cove holden#jamie last#covejamie#our life beginnings & always#olba#egg doodles#old wip from when i finished the step3 dlc for the first time in 2021#aka the peak of my unhinged brainrots for this game LOL i miss drawing covejamie daily#i still cry thinking abt them while listening to mitski's between the breaths and her cover of let's get married
201 notes
·
View notes
Text

zero found dead in miami
#more work on The Project. today was fixing everything i messed up yesterday#this detail is gonna be refined out of existence whenever i get to phase2 step3 but it made me laugh so i wanted to preserve it#mmz zero#wip
3 notes
·
View notes
Text
USMLE Step 3
To be deemed eligible for the third USMLE examination, you must satisfy the following conditions:
Successful completion of Steps 1 and 2 CK is mandatory.
Non-American and non-Canadian medical schools meeting the ECFMG eligibility standards are listed in the World Directory of Medical Schools (WDOMS). Alternatively, you must possess the equivalent of a medical degree from a non-American or non-Canadian medical institution.
To qualify for a state board license, you must have met the criteria of a recognized US graduate medical education (GME) program and have completed or be in the final stages of at least one postgraduate training year.
Upon graduation from an international medical program (IMG), you must obtain certification from the Educational Commission for Foreign Medical Graduates (ECFMG) prior to completing Step 3. To initiate the Step 3 application process, you must register an account on the USMLE website and complete the online application. An application fee is required, along with submission of documentation verifying your eligibility, such as your medical school diploma and transcripts. Upon approval of your application, you can schedule your examination appointment. Step 3 exams are administered at Prometric USMLE Step 3 test centers across the United States. For further details, please refer to the USMLE Step 3 eligibility criteria and application procedure page on the FSMB website: usmle.fsmb.org.
0 notes
Text
Happy Birthday to B·A·W!

2025.05.19 00:00 US time
Happy birthday to Baxter Alexander Ward! I hope he can achieve his goals and spend every day in happiness and joy. He is such a charming and attractive good man who deserves all good things. His existence has brought unforgettable memories to many OL fans! Love him so much! I am not good at writing blessings, but I really hope that he can realize all his wishes. He means a lot to us...
Since there are exactly five images of him in total and there are exactly five Moments of OL:BA, I used the Moment interface of Step3 to make the first picture! This is like witnessing his growth, haha. No matter which period he is, he is so incredible and likable. Love him in any period!


I modified some deviations in the painting (mainly color) myself, but since I am not good at painting, there may be some problems with details... I am very sorry... These commissions are all closely related to the artist’s painting habits. I'm sorry if there are serious issues that we didn't fix, but our intentions in creating it are definitely good.
I use a translator, so I may not express myself well, I'm sorry. If I made any mistakes that I don't know about, please tell me, I definitely didn't do it with malicious intent. I hope the way I used the tags this time was not offensive, I'm sorry! I also used timed posting because I was in class at this time. (I hope I set the time right TwT)
228 notes
·
View notes
Text
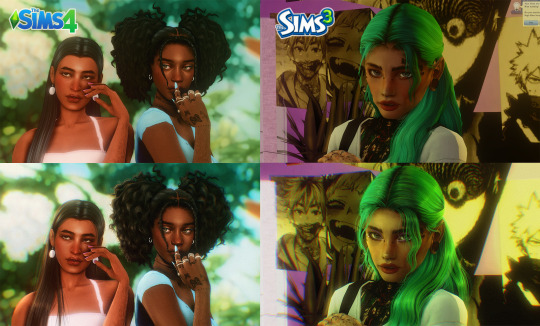
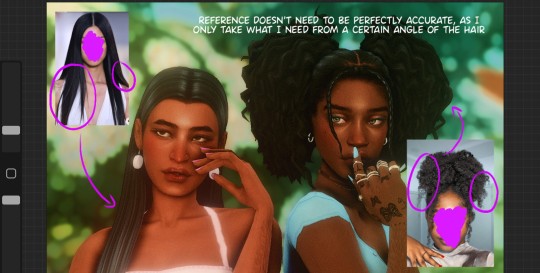
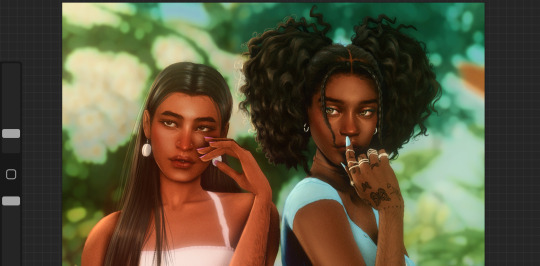
how i draw hair :) applies for TS3 & TS4
a few people have asked for this so i thought i'd just show my process, i'm still learning myself but sharing is caring. This is all done in the Procreate app on the ipad.
i used to use these brushes when i had my old ts3 acc: photoshop brushes these are super good if you might be be able to draw the individual strands, now i just use 3 brushes from samdoesart patreon:
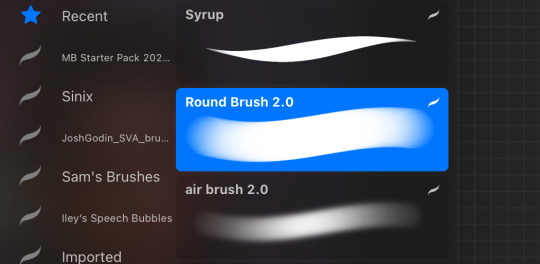
round brush: has some hard edges air brush: better for curly hair as it's soft syrup brush : i use this more for straight/wavy hair
procreate does have FREE brushes so alternatives for the brushes i use are found in: calligraphy - 'script', airbrushing - 'hard blend' & 'soft brush'.
step1: i'll gather reference on pinterest for curly/wavy hair as straight hair is more simple to draw, this help me to understand how the hair falls and where to put highlight/shadows
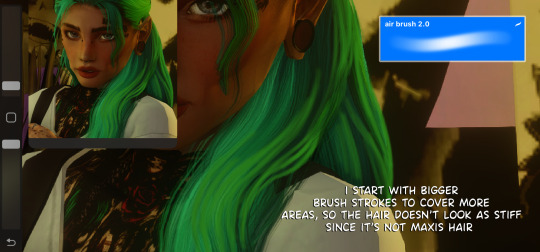
step2: *create new layer* pick the brush and colour pick the hair, i like a lot of loose strands and messy looking hair, start drawing your strands lightly and build up. The only thing that differs with sims 3 is that when drawing the strands i use a bigger brush size to start with then go in with smaller strands later.

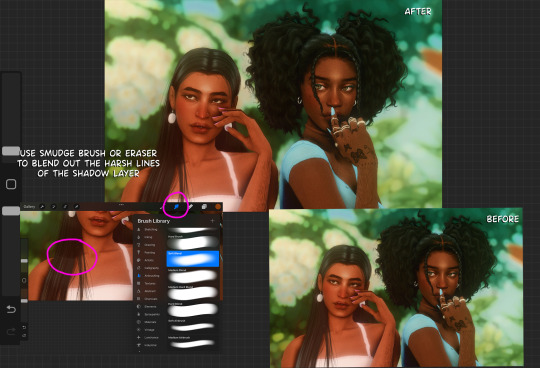
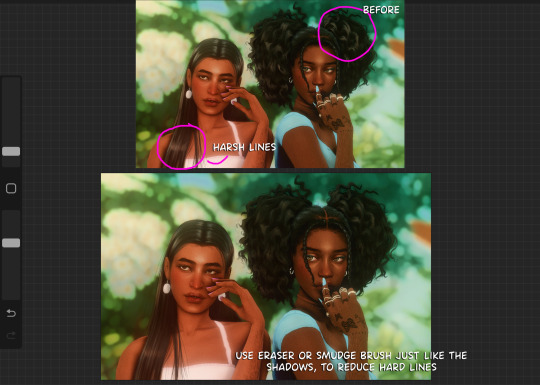
step3: *create new layer* blending mode: multiply opacity: 50-60% i'll add shadows to the parts of the hair that 'bend' to add more depth. (remember shadows are never usually completely black, so if the sim has blue hair make the shadow a dark blue)
step4: *create new layer* blending mode: add. opacity 20-30%. i'll add highlight by using the selection tool and similar to how anime hair looks with the hair higlight ill add zig zag lines going around the hair, then go in with my brush lightly making the centre more intense. Once done ill get the eraser and make sure the edges aren't too harsh
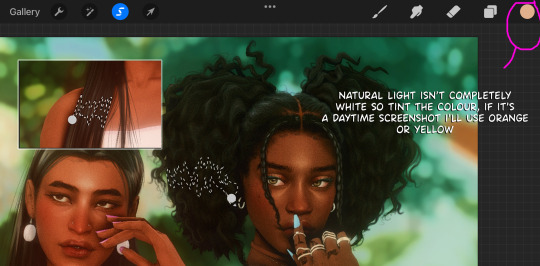
step5: *create new layer* blending mode: normal (place under shadows layer. i'll add colour highlights, (for black hair i'll use a littie bit of brown as no ones hair is really completely black)
step 6: *create new layer* blending mode: add. this one is for lighting purposes. for the rest of the screenshot then i'll add extra shine to hair & add shadows to the body
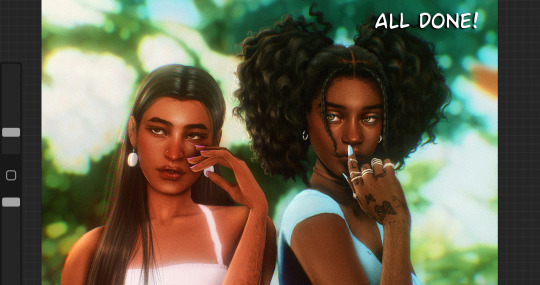
step 7: once i'm done. *create new layer* blending mode: overlay and i'll go over the parts that are in the light. merge all layers together and add some grain so the hair drawing blends in with the rest of the screenshot.
if you have any questions feel free to direct them to my inbox & u can check out other tutorials here
212 notes
·
View notes
Text

Step3 Qiu&Franky! From a few months ago :3.

And here’s the process :D I think the sketch was made on january/february, but I begin to work on it between may-june if I remember well. If only my wrist could be strong enough so I can make more art of them faster!!!!! But for now patience is the key so my hand won’t hurt that much B)
85 notes
·
View notes
Text
Step 1: kiss
Step2: kiss
Step3: fall in love
33 notes
·
View notes
Text
Tiktok Protest
Okay heres the deal. We all know that Trump, whom we must all remember IS the person who started the ball rolling on the Tiktok ban because he hates free speech, is going to hand over TikTok to Mark Goddamn Zuckerberg so he can fold it into his monopoly. He and Musk are both in Trump's pocket and we've just set a precedent that thy can take down any platform that criticizes the government and just claim its "for national security reasons"
We need a bargaining chip.
We Need to make it clear that you will keep using TikTok even if they dont sell and will STOP using tiktok if it is successfully sold to Meta.
We need to make it worthless in Meta's hands.
SO
step one:
Get a VPN. Theres a ton of free ones on Google play. download it and keep connecting until it says you are somewhere other than the US.
step two:
Post a video on tiktok. Threaten to delete your account as well as ALL of your videos off tiktok if it gets sold to Meta making it empty and worthless. You guys made the content that made tiktok worth while and you can take it away.
Step3:
We need a consistent hashtag. Something like #NoMetaSale
whatever tag ends up catching on, you like and comment and share as many of them as you can.
Step4: Be creative! Make graphics, make songs, make skits. Whatever you usually do on your account.
And if this doesnt work and it gets sold to Meta, we all burn it down together.
If theres one thing i learned from Rednote its that y'all are the perfect kind of petty. Keep that energy going.
28 notes
·
View notes
Text
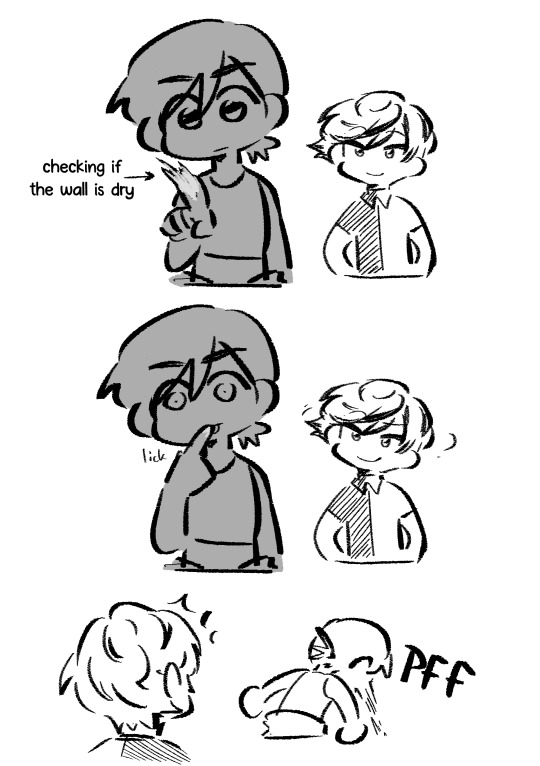
Step 3 posting!
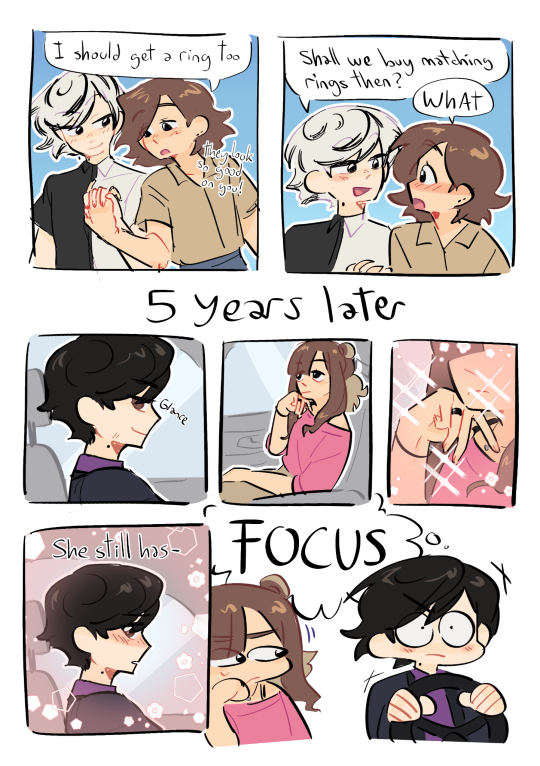
Ik step3 bax wouldn't say *matching* rings but i had to get the joke in two panels (him getting all soft for a second when he notices the mc still wearing smth they bought together or smth)
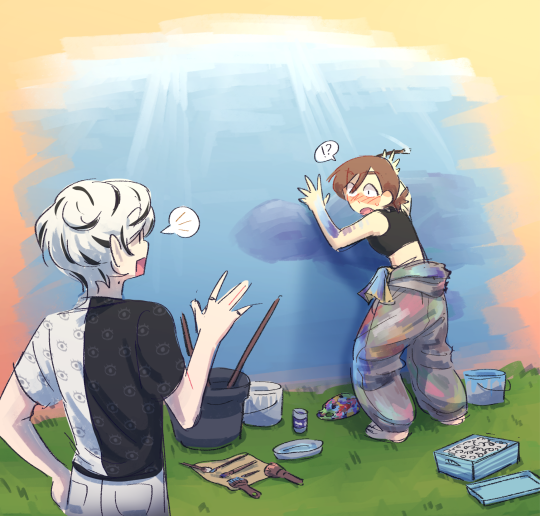
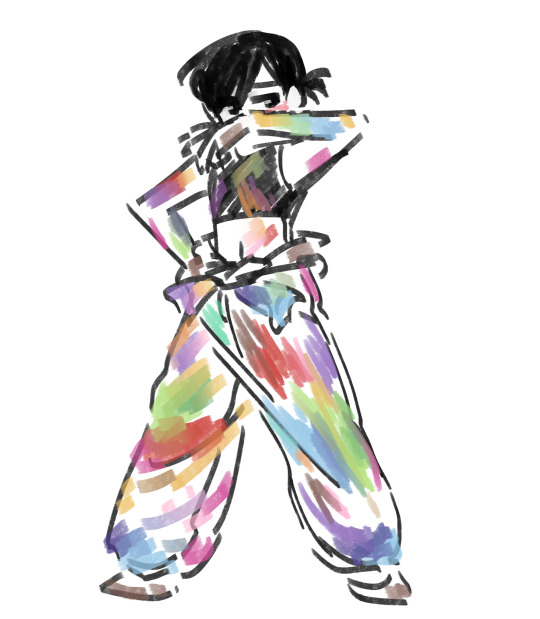
Ruri is based off me (duh) but i wanted to give her a little more of her own stuff so she paints murals and stuff in walls
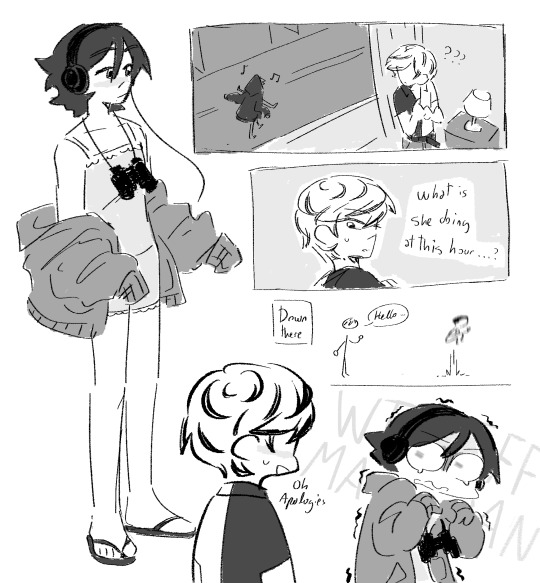
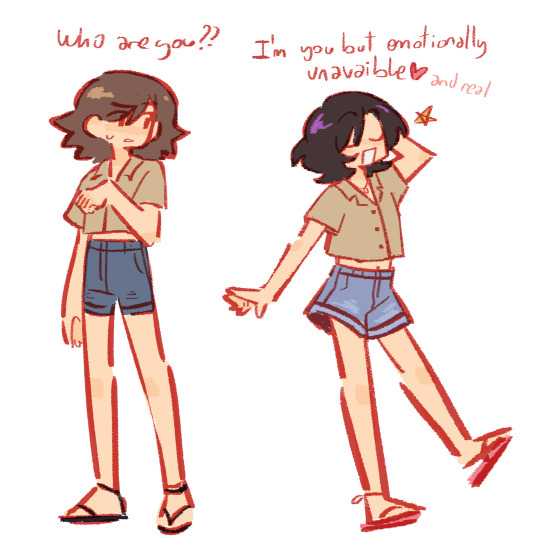
We can have a full telescope in our room and I WANT TO USE IT so late night date watching the stars in the poppy hill (+i put the same outfit as ruri the other day and I wanted to make sure i was different than her)
#i have SO many ideas and the only thing keeping me from drawing 6 page comics each is me not know how tf write Baxter#i need a fancyficator that fancyfies anything i write#i don't even know enough english to write a full sentece that makes sense without thinking and rethinking#rui draw smth#our life mc#our life: beginnings & always#our life#baxter ward#olba#olba mc#our life baxter#i learned what asisine meant thru him. TELL ME WHAT THE FUCK DO I NEED TO KNOW WHAT ASISINE MEANS#dont even know if i wrote it ok#ruri posting
291 notes
·
View notes
Text
Chiaki, Full Introduction!! ヽ(・∀・)ノ
I finallly finished Chiaki, so here's step 1, 2 and 3 Chiaki. Tho I might change his design in step3.

Since little Chiaki was very shy with basically everyone. He always found it hard to talk with other kids his age and it didn't help that hm, Fuuto and their mama moved a lot making it harder for him to create a bond with other. When he moves to Golden Groove, he's just nervous to meet new people.

(Step 1) Chiaki is a shy boy that often hide behind his twin or his scarf and hair. He often stays silent and never speaks up for himself. But he does talks a lot if he's comfortable enough, he'll start talking nonstop about his favorite musics and stories. If he's not at home with his sibling, you could find him reading or writing in his backyard. He's also a very proper boy, unlike his twins, since he can't focuse with a mess around him. He always clean his room and bags when he can, sometimes doing it for his brother.
When he and his brother met Qiu and Tamarack he felt shy at first not wanting to talk to them too much. But as the day and weeks went by he grew fond of the both of them, even growing strong feeling for a special someone

(Step 2) Four years went by and Chiaki is not so shy anymore. As the timid boy grew he became more confident with people around him, especially around his friends. He's not scared to tell when someone's wrong, sometimes being a bit to blunt about it. And as time went by, he showed his perfectionism more, having a need of anything being neat and organized, leading him to sometimes get a little upset at people around him. He's still very passionate about his hobbies, but all of those hobbies comes after school because his grades are the most important things to him, because if he can't keep up his excellent grades he's not that good. And of course he still as his friends to count on and he's always ready to make time for them. And even after four years, his feelings for his dear best friend and neighbour got even stronger as they both grew. As Chiaki realized his feellings grew more and more, he kept it to himself.

I don't have anything certain planned for step 3 expect that he's went back to being shy in front of people he didn't know well (but stil very honest with his friends and family) and that he focusses more on his passion for the violon. (Here's some doodles of step 3 <( ̄︶ ̄)>)

#olnf#our life now and forever#olnf mc#olnf oc#I'm not good at explaining characters...#I love what I did for his step 3 design..#( ´ ▽ ` )#I hope I won't change it anymore...
30 notes
·
View notes
Note
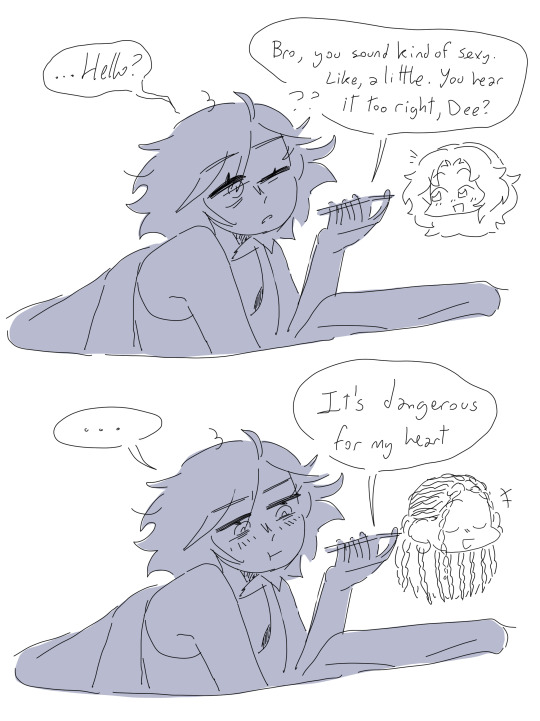
how can i see ur cock?
How to unlock mods cock?
Hello and welcome today I'll be showing you how to unlock my cock
First of all make sure not to talk to the samurai armor it will lock you into the bad ending.
Step1 close your eyes
Step2 imagine me
Step3 now do it but I have penis now(hairy)
Done
Like and subscrbibe :D
24 notes
·
View notes
Text
quick guide (with images) on using the “inspired by” function for translations on ao3
this is a quick guide and only touches upon how to use the “inspired by” function specifically for translations, skipping over everything else that comes with posting a work to ao3
Step 1: start a new work. do this by using the “Post” button at the top right


Step 2: you will see a form with things to fill out in order to post your work. scroll down until you reach a section called “Associations”


once in “Associations”, click the little box right above the “This work is a remix, a translation, a podfic, or was inspired by another” box
Step 3: once you click that little box, a new field will be displayed for you to fill out. fill out the things it asks of you, and click on “This is a translation” at the bottom of this new mini-menu

NOTE: all of these fields (marked in pink) pertain to the work you are translating! so the language is the language of the original fic, etc.
And done! You now have the right association for your translation! all that’s left is filling out all other required fields (title, etc), input the translated fic in the text box, and you’re good to post!
Some translation ettiquette (as i have encountered it, i’m not the law): use the same title, tags (character, relatinship, additional), rating, fandom, etc as the fic you are translating! you can add tags to indicate it is a translation, add your own author’s notes, end notes, etc. for the title, you can translate it as well (e.g. “Summer with you” —> “Verano contigo”, etc)
Under the cut: how you can do this if your translation is already posted, and you want to create the association after posting
If your work is already posted and you didn’t assiciate it before, and want to do so now, it’s pretty much the same!
Step1: hit the “Edit” button at the top of your fic


Step2: You will get the same fields to fill as if you were posting a new work (though anything you already inputed when posting will already be filled, instead of empty)
Again, scroll down until you reach the “Associations” field and click on the appropiate box

Step3: fill things out, same as if it were a new work
Hit post! You’re done :D
that is all. quick and dirty mini-guide. hope it helps!
15 notes
·
View notes