#tutorialz
Explore tagged Tumblr posts
Visit Tumblr Blog
Explore Tumblr blogs with no restrictions, modern design and the best experience.
Last Seen Tumblr Blogs


Fun Fact
Tumblr.com rank in the US is 25.
Text
well hi :3 welcome to deja’s skinblending guide. this is my first full written tutorial so excuse me if its not very good LAWL before we get started, here's the tools i'll be using
sims4studio
tray importer
photoshop 2022 (theres cracked version everywhere on tumblr)
blender 4.1
sims 4 ripper
blender + the ripper aren't required to make skins, plenty of people don't go that extra step, but i love using it for placement help
okay lets fuckin go gamers heres my very in depth process for making my ocs skins
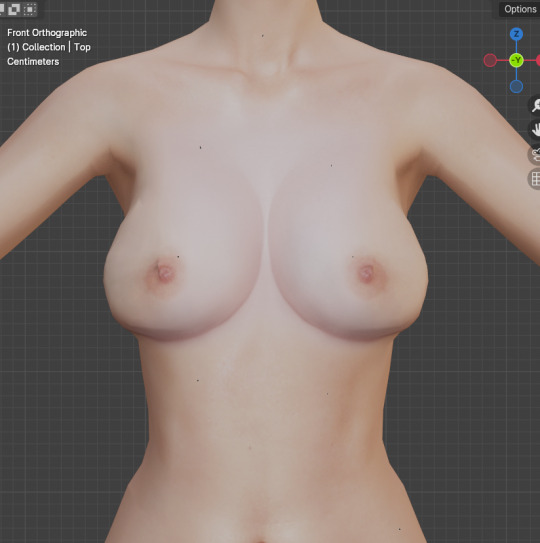
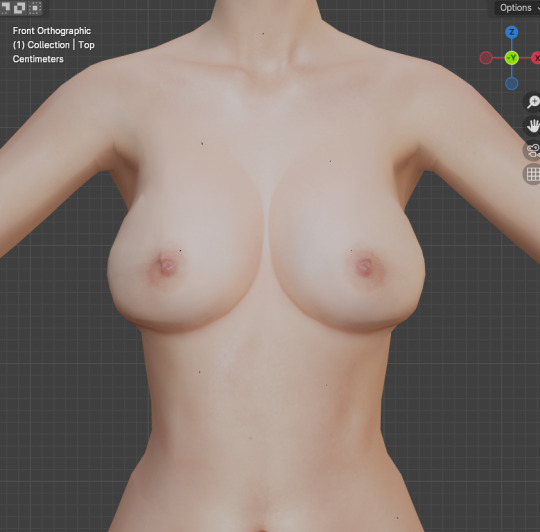
miss dolly is gonna be our model today. she already has a skin but im gonna add some little details for the sake of example + some tats cause ive been meaning to anyway.
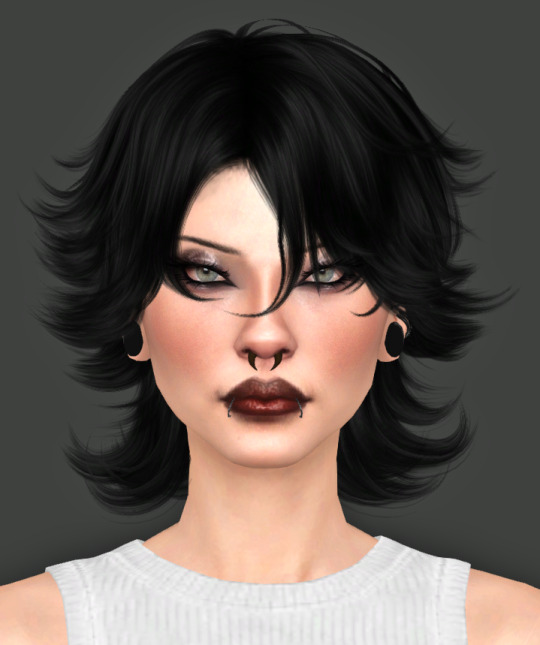
so when i first get started on making someone a skin, ill find a good base to use and then add details from other categories like nosemasks, eyebags, contours, etc.
my fav skin creators are @sims3melancholic and @thisisthem. my bases are usually thisisthem, and then i'll pick through a couple s3m skins and make notes on my phone about what parts i wanna take off of them (like, say, i like how a certain s3m skin's nose looks. i'll use that instead of a nosemask)
my goal when im gathering things i wanna add is to free up as many slots as i can. id rather add cheshire's freckles onto her skin than use up the freckle slot in skin details that i could use for something else, yknow?
ill repeat this process for makeup next. obviously im not giving my ocs permanent full glam, but some lipsticks can add better texture, you can get highlights/blush from........the blush section LOL and i love using this obscurus eyeliner at a low-ish opacity
just adds an extra level of detail i love. i think what keeps my sims looking consistent next to each other is that i tend to use some of the same details all across the board
make sure for all makeup/skin detail/tattoo category swatches you use, you make note of what swatch it exactly is. when you go into s4s to export the file, you're gonna have to manually select it and if u cant remember what skintone u chose out it can be annoying :/
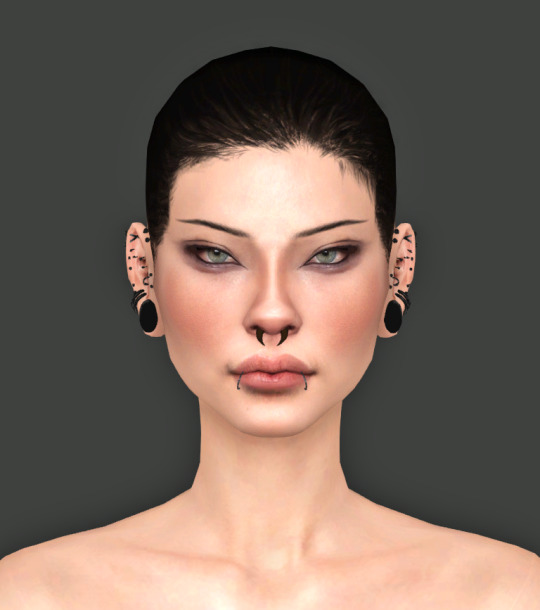
note that she is completely nakey aside from her piercings while i pick what im gonna use for her skin! no clothing but u can keep on their hair. this is so we have a clear view of everything (and i mean EVERYTHING) for blender.
after you make sure u save the sim/household to ur gallery, you can close out of cas and save ur game! i forgot to do this bc im a fucking idiot but its okay bc you will not. its not REALLY necessary to do this as long as you know exactly what packages you need to locate for texture exporting
step one is done!!!! close out ur game
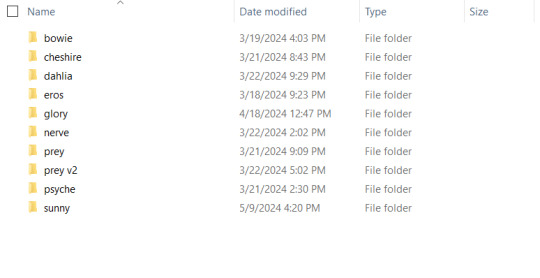
i have a million fucking characters so i made a deja senti skinblending folder to keep it all organized :-)
this is what it looks like inside. gives u a pretty good overview of what ur gonna be doing tbh. the 't' folder is all the textures we're about to export
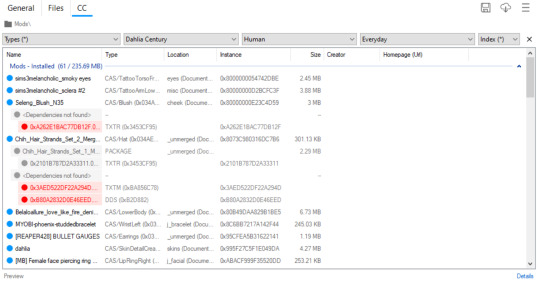
thankfully i do have a version of dahlia saved in my gallery so even tho i didnt go it before i closed my game i can still show u what to do in tray importer lol. i have multiple sims in one household, so i narrowed it down by going up top and selecting dahlia / human / and her everyday outfit.
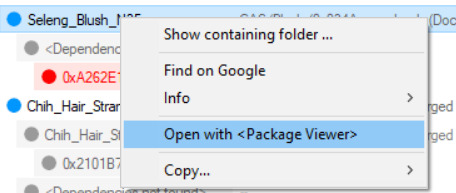
since im gonna give her this blush, i right click and hit open w package viewer so itll find it and open s4s for me
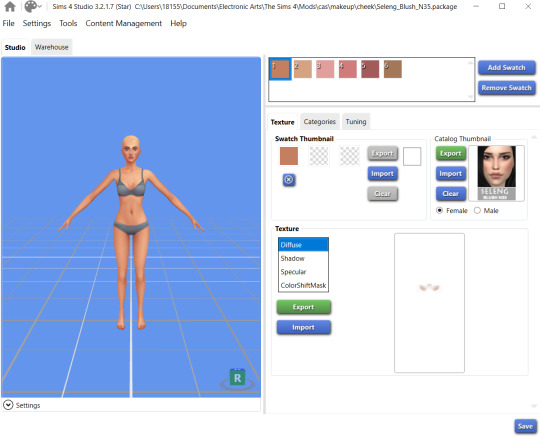
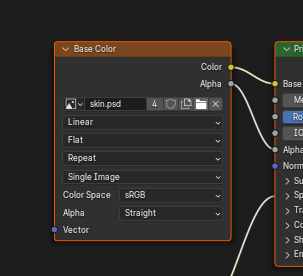
anime wow sound. im gonna change the color manually in photoshop so it doesnt matter to me what swatch i export. hit that green export button under the list of diffuse/shadow/etc (u dont need to worry about all those options, just diffuse) and save it to ur folder!
once ur done gathering ur textures ur good to close out of tray importer and s4s(we'll come back to s4s later tho)
thats step two! the quickest step lawl
this is where i start being a little extra. u dont have to rip ur sim and use blender if u dont want to, but i think it can rly help bc the default sim in s4s doesn't have ur sims facial features and can make ur skins look wonky/wont give an accurate representation of how itll look in game. this cuts out having to go in game/out of game over and over to check
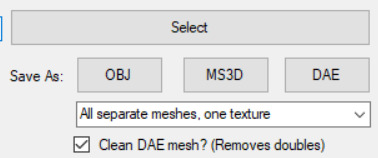
so in simripper once u load up ur sim, the important part is to make sure u have it set to export the dae with separate meshes. once thats done u can import it into blender and there's plenty of other tutorials out there how to use simripper n all that.
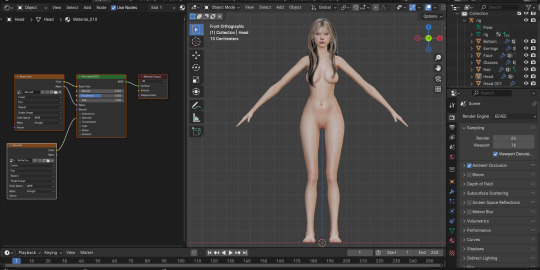
so once u get the dae loaded into blender im gonna send u on a little side quest over to this ask i answered where i explain how i separate eyes from the head mesh. next thing ur gonna open is photoshop! or whatever u have thats similar

say hi to flat dahlia. u should have ur own guy but flat open now too :-) along with everything else ur gonna combine. in my case its blush and a titty mask. im gonna start w the blush so i zoomed into her face in blender. i went into the blush file and copied, then back into my base skin file and pasted into place with crtl+shift+v
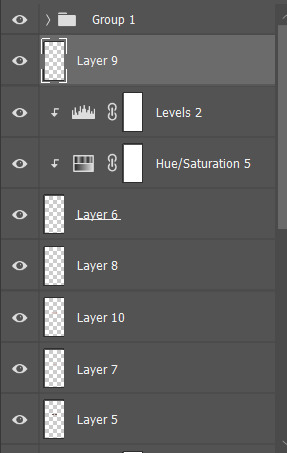
please do not be like me. make sure u rename ur layers as you copy and paste them into the main skin file. do this because it DOES matter what order ur layers are in. u dont want to put ur highlight under ur nose mask cause the nose mask will just cover the highlight etc etc. i already lost what layer the new blush i added is. what is wrong w me
so when u have ur first detail pasted on and in place, ur gonna save the base skin file as a psd. then go into blender, and in the little textures window ur gonna replace the diffuse file ur dae came loaded with with ur new psd file
u should see the change u made but mine was super subtle so im gonna show it to u when i put on the cleavage overlay
when it comes to stuff like this, ur obviously gonna want to pick the closest to ur skintone swatch as u can. i did not do this, because again, im an idiot
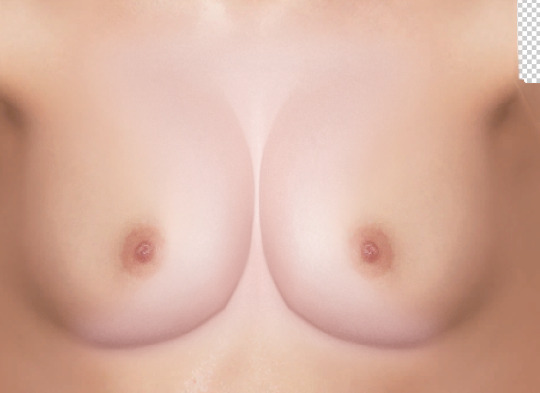
mine is way too pale LAWL whoops. we can fix this tho
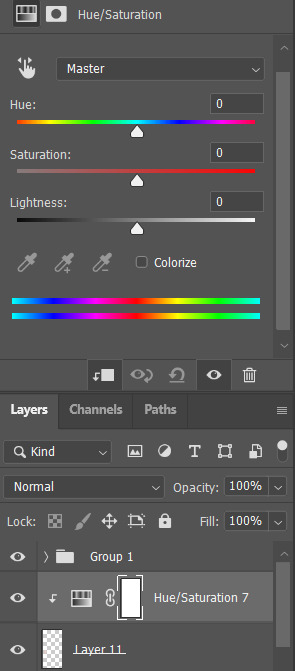
i add a hue/saturation adjustment and make it a clipping mask using that square w the arrow so the adjustment will ONLY affect the mask
from there i just make little adjustments until the color match up is as perfect as i can make it. for example for this, ik that it needs to be a little warmer and a little more saturated, so im gonna bump the hue and saturation sliders to the right and it was pretty much perfect
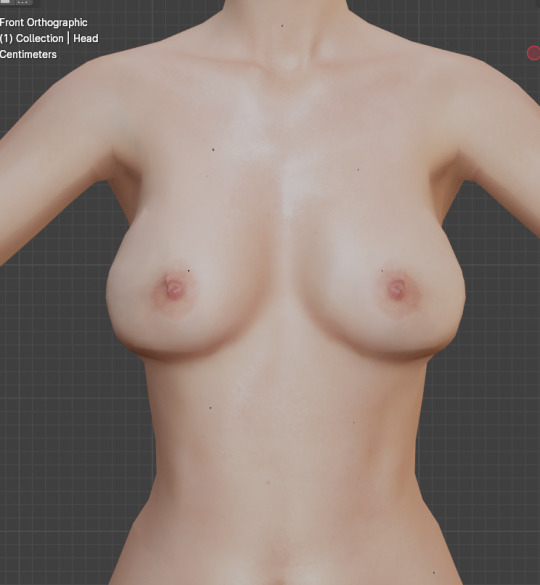
tiddies with no mask > with mask no adjustments > with mask and adjustments
and ur gonna go ahead and repeat that process with every single thing u wanna add to ur skin.
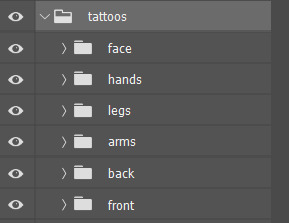
so as for tattoos! this is another thing ur gonna wanna rename the layers for because depending on how heavily ur sims can be tatted it can get A LOT
here's psyche's neat little tattoo folder. its separated into where the tattoo is and then
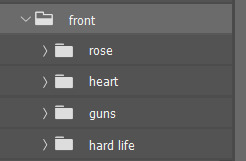
what it is
i find all my tattoo inspo on pinterest using flash sheets/keywords in the search. my ocs usually have sub-boards that i hoard inspo in for them specifically. dahlia doesnt have one bc ive never seen her as the most tattooed person, but i think she'd have some at least
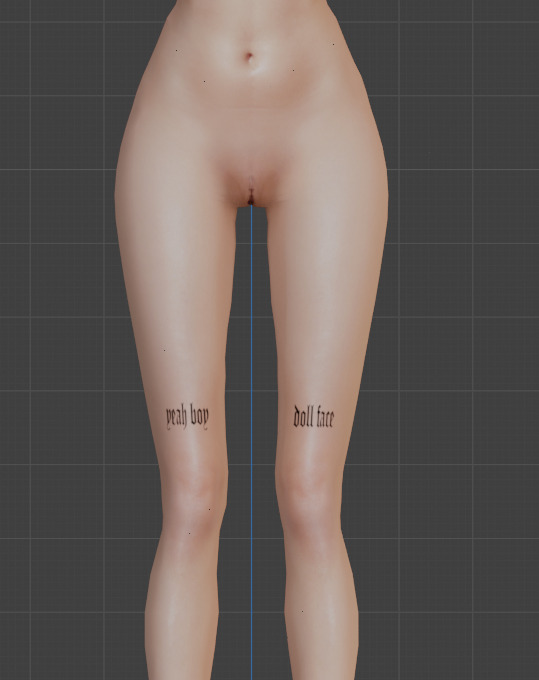
this process is pretty much the same as putting on skin details! its all about adjusting to what u like. for example, i like when my sims tattoos are a little faded and a bit blurred at the edges cause it looks a little more real
when it comes to images i find on pinterest, ill save the image and first try to make it as clean as i can
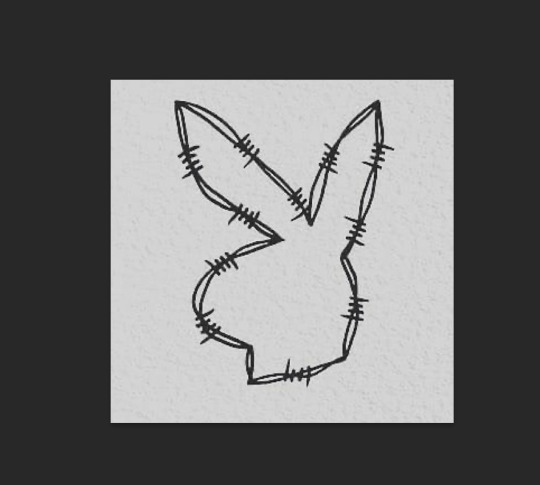
for example, this lil guy
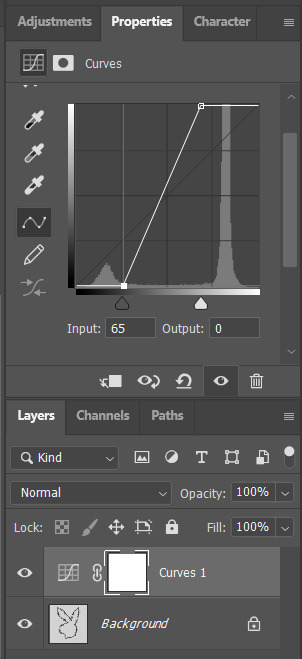
a curve mask made the whites brighter and the blacks darker as u can see. then ill go into filter > reduce noise to soften the harsh edges
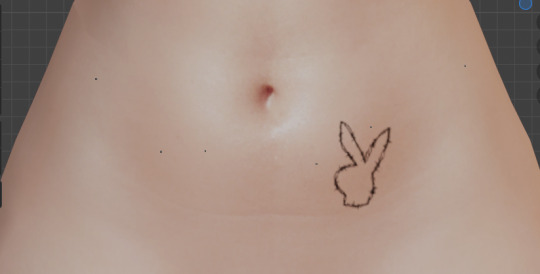
then i flatten it, copy and paste to the skin file, n place it wherever i want it to go :-)

louder anime wow!!!
okay so now ur gonna want to make sure u .psd file is saved (it should be bc we've been checking our progress w blender) and then merge the visible layers (NOT flatten, merge visible. we need the transparency around the skin to be in tact)
ur done in photoshop and blender!!! good job :-)
step whatever number we're on. back into s4s!
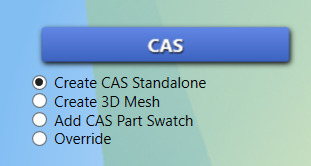
ur focus is over here. make sure the option filled is the top one, and then hit the cas button
this menu will open, ur gonna go up to part type and find the option skin details, forehead. pick the first forehead wrinkle option that appears and hit 'next.' itll prompt you to save ur new file n give it a name, i usually just make it my sim's name cause i have a folder in my mods folder for specifically my cc
remember wayyyy back when we were exporting the skin details? ur gonna go back to that same section and hit 'import' instead of export. select ur skin's .png file, and poof !

ur skin :DD it looks great man good job
this part is EXTREMELY important. go up to the warehouse tab
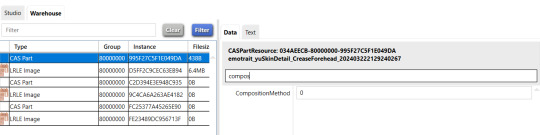
in the 'data' section ur gonna see a box at the top labeled 'filter.' thats where i typed in 'compos' just so it would show me JUST the compositionmethod section since theres a lot of shit in there lawl. yours is initially gonna say '3,' but we're gonna change it to '0' mind you, this is because MY skins are all alpha. maxis match overlays do not show up on my skins because my comp method is set to 0, meaning it has top priority essentially.
after you do that, you can hit save and place that .package file you created into your mods folder!!! and GUESS WHAT BESTIE UR DONE!!!!! U DID IT :DDDD
of course, as always, you can always dm me if youre stuck on anything or need any more clarification. i am always open to help as much as i can. i rly hope this helped :-)
63 notes
·
View notes
Text
doez anyone have any tipz on choosing color palettez slash where to put colorz on a character and not make it look like trashhhh pretty pleaseee
#im trying to figure out colorz for my tf ocz and ummmmm itz not going well </3#sniffling . sobbing pathetically over a bucket of markerz.#i KNOW i wanna make one a cool red + gray palette#and i want the other to be majorly purple#but i cannot for the LIFE of me figure out a good way to do thiz#and therez NO TUTORIALZ on how to figure out color palettez that are GOOD so if anyone haz any tipz.................inbox open#kitkat chitchat#if u guyz help me figure out good colorz i might even show off my ocz . wink wink nudge nudge.#[thiz iz an excuse for me to beg for oc interaction]#[slash joke]
2 notes
·
View notes
Text
welcome 2 beetlelandia!!!
i liek 2 draw w a few different mediums n also digitally n i liek 2 play guitar n listen 2 all kindsa rock n uhhhh play video games n erm uh other thingz :3
check out my carrd 4 moar abt me!!
(it is not required 4 u 2 look @ my carrd!!! i block ppl n it’s not usually personal lolol so i dont got no dni or byf or n e thing liek that. othr than.. i don’t like meaniez. but that’s kinda obvious ain’t it?? who does??? ..itz possible that i j liek 2 make websitez..)
if u want 2 use my art (including photoz, photo edits, drawrings, n pictures of sculptures or other physical art piecez i’ve done; EXCLUDING vidz n audioz) 4 personal porpoises liek pfps n banners, plez credit me!! tyyy!! neva eva repost tho!!!! ‘preciate it!!
plz plz plz send askz 🙏🙏 ask thingz abt me. tell me thingz abt u!!!!! i luv talking 2 ppl
hav fun stormin da castle!!! 🪲

tagz n pfp/banner ids r undr da cut‼️
#skbeetle art - mostly old stuff other than reblogz from my art blog
#skbeetle fics - also mostly old stuff. if u kno me irl don’t look @ this evr 😋
#beetle says - text postz by yrs truly
#beetle’s stack of hacks - stuff i’m saving 4 use L8r.. this can b art tutorialz, ad blockerz, etc
#monkey boy & doctor monster - my ocs
[profile pic id: image of joey jordison with his mask. he rests his cheek on his hand.]
[banner id: image of jonathan davis looking down at camera and pouring water on it. it’s captioned “waters you so you can grow into a beautiful marijuana plant.”]
2 notes
·
View notes
Note
I live in fear
Cuz it only took me an hour to figure out blender
Like. My mum followed the tutorialz and she cant even figure it out
Damn
1 note
·
View note
Text
Tutorialz pls
Controversial take if I've ever heard one
21K notes
·
View notes
Text
literally dont hav the art energy 2 do this rn but i rly need 2 redo the kandi scourge && giv him som 3D cuffz & such hez just got a bunch of singlez rn
#textz#ive been watching a lot of random kandi tutorialz idk man#typed a bunch of planz of stuff i wanna make but thn decided thtz 4 me 2 kno 4 now#rly wanna do like. plur package tradez stuff but alaz. kandi doesnt actually fit my aesthetic & im not into the music i just. think itz neat#im a phony but u kno. tht doeznt mean i cant do fun bead craftz#post prompted by him popping up in my notificationz again which is chill bcuz the art is still p alreight n i dont Hate his design itz just#very obviously by som1 who doesnt kno like a ton about kandi
13 notes
·
View notes
Note
I'm a pretty recent follower but I assume you have a plush version of one of your fav characters from something you like
yah!! ive gotta moomintroll plushie that i got when visiting family in ireland (theres no moomin merch in the usa *cries*) n ive got like 2 ducktales plushies + a finn from adventure time that i found at good will in a stroke of good luck
#.life#i croceted my moomin a scarf but it did not survive cuz it was my first time croceting ever and i learned from utube tutorialz#chrochet??? is that how itz spelled#who invented the english language. fuck
6 notes
·
View notes
Text
i kinda like how the way my carrd lookz but im still trying to get the hang of it
#🌈fun dip fizzles🎂#why does it hafta be so complicated#i looked at tutorialz and everything and im still sorta lost
1 note
·
View note
Text
hiii here's deja's lighting guide for blender 4.1 :-)

we're going to be lighting this mf

so i always turn AO on at the very beginning, but we're also gonna check the bloom box as well! note that i personally render using eevee
so with bloom and ao on, im gonna go over to this website in the hdri section polyhaven. ur gonna scroll thru all those options until u find one that u think will fit ur Vibe. now, you dont have to use an hdri, but i think it adds a nice realistic detail to my lighting and can take care of a lot of the work for me including adding a background. u can skip over this step and just change the background world color if u want

so ur gonna go into the shaders panel like u would to apply texture to ur sims and instead of shader type > object, ur gonna go to world. delete that background node and copy this set up

ur gonna get these nodes by hitting shift + a and then searching up texture coordinate, mapping, and environment texture. click that open button and load in the .exr file u downloaded off of polyhaven

so when u load it in it may or may not look the way u want to at first. mine......does not! so im gonna fuck w all the sliders in the mapping node until i can change it into something more suited for my style

slay. but oh no! its dark as shit now. time 2 light it better

so more often than not ur gonna wanna turn contact shadows on when u make a new light. it just helps create more realistic depth

i use point lights for a lot of things! depending on the size and power u can pretty much get away with using solely point lights. i like cheating cigarettes w a tiny little yellow light w bloom turned on.

sun is this big bitch. i dont use it so idk her rly. she can b REALLY overpowering i literally put it behind him so it wouldn't just wash him out completely. (granted jay is pale as a mf)

spotlight is sun's sexier cousin. it gives..... a spotlight effect! wow .

area is like spotlight but.......square :-)
so with these tools in hand.........we can combine our knowledge and make mr old as fuck look pretty like he did in his youth

and here's my final result! this is literally just with an hdri and a point light and a spotlight. once u play around w lighting options for long enough, you realize how much u can do with so so little
34 notes
·
View notes
Text
i think my switch having such severe drift that i needed to order replacement stickz and then one of the replacement stickz being faulty leading me to have to order Another replacement stick iz the universez way of saying i need to take a break from splatoon for a bit
#sniffle. i miss squidding.#kitkat chitchat#just for clarification no i didnt just spend 160$ on replacement *joyconz* i spent like 30 buckz total [including shipping] for the FOUR-#now (4!!!) replacement STICKZ and have been doing repairz myeslf#no i did not do anything incorrectly i waz az gentle and careful az possible and watched multiple tutorialz b4 doing anything#no i didnt break them or anything yes i tested the replacementz on both controllerz it worked [badly] on one and then didnt work at all on-#the other before stopping alltogether#yes the other one worked at FIRST but now itz?? doing a weird thing where i cant push forwardz all the way??#like i push it az far az i can normally and it movez very slowly and not far#so i have to get my thumb UNDER it to push it [very uncomfortable]#so i just caved and spent an extra like 9 buckz on 2 new replacementz off fuckin#amazon#cuz i cannot be assed to fiddle w it more ill just switch em out entirely#THIZ IZNT A VENT OR ANYTHING BTW IM JUST RANTNG IM FRUSTRATED GRAGAH#though tbf i got my switch AT LAUNCH so thiz baby iz so old. so so very old.#at least itz old enough to fuck with in other wayz tho iykwim#[NOT like that the other way. scared to do it but i did it to my 3ds so ykyk]
3 notes
·
View notes
Note
Tutorialz for monkey head anatomies?
*puppy dog eyez*
i've no idea man i just stared at this pic for a long time

and then got all the info from it scrambled in my brain feat. attempts to slap my style on top of it did Things To It

(ngl just realized that i've been snatchin away their forehead rights, alas)


das for rhesus macaques at least ✊😐
at some point bitch develops a shorthand for these things n its kinda hard to reverse engineer it again so i hope this was at least a tad understandable!

160 notes
·
View notes
Text
i hate tutorialz n information. dont tell me thingz

#image iz unrelated it juz addz 2 the vibe i am trying 2 create#th text iz like 2/3rds not a joke#i see art tutorialz n they make me mad idk why im like. dont tell me what to do fuck you#like itz totally irrational#zkbr.txt
0 notes
Note
i saved a playlist of tutorialz Jsut so that i could try them :] msjd bc. funn

:O !!!! those all look v cool
4 notes
·
View notes
Note
any1 have tipz 4 shading or backgroundz? i have trouble with them so i usually do flat art with no background. i want to learn though so any tipz or linkz to tutorialz would help!! :3
5 notes
·
View notes
Note
Sorry about bothering you, I know you tag your Brightheart design but could you please tag it with body horror as well? If you don't mind ^^ (I love your pride icons but her design makes me very uncomfortable, I know there's been talking about you toning it down a bit and I personally think that would be very kind of you)
OH! yeah i can- i guess tht tag makez sense i rly should hav thought to add it eariler..... n yeah as much as i like stickin 2 my gunz with her design & the ovr th top one will alwayz be my go 2 i am probly gonna make a Toned Down Version pbbth :P
#askz#honestly ive spent so much time real deep into body horror n gore n stuff tht ive got kinda a skewed scale 4 wht is Too Much#if tht makez sense????#like her design feelz pretty cartoony to me but thtz literally just bc i do thingz like watch taxidermy tutorialz just cus lol#but yeah i understand the want 4 a chiller ver
9 notes
·
View notes
Note
'Ello mantis do u think itd be worth it to get a carrd subscription
yes it would!!!! an acct is completely free odsihvc therez just some featurez that r locked behind a paywall to access
if u get a free acct ull get 3 whole sitez w/ a 100 element limit (u need to pay to go over 100 elementz but 100 is more than enough for someone just trying to make an “about me” page). each site is one page but u can use section breakz to simulate it having more than one page (itz hard to explain but it workz and itz simple trust me isfhdcoi)
itz extremely customizable and easy to use once u know the basicz of how it workz (which u can come to me for if u want) and therez alsoplenty of carrd tutorialz on yt if ur lookin for a specific aesthetic
1 note
·
View note