#what can I do with a cricut maker 3
Text
What Can I Do With a Cricut Maker 3: Explore 6 Projects
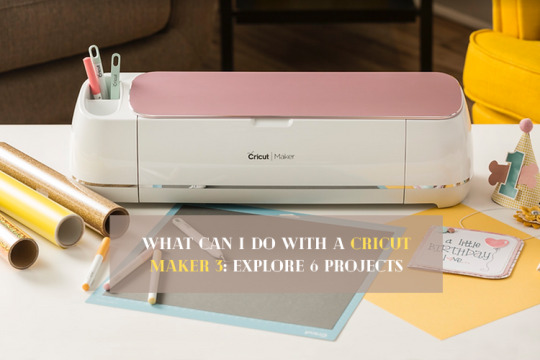
Recently, I received a command on one of my previous blogs. In this, someone asked, “What can I do with a Cricut Maker 3?” After reading the comment, I wondered whether I had written something on it before. After extensive research, I found out that it still needed to be written, so I finally came up with this blog.
But before writing this post, I discussed it with my friend Jack, who is also a Cricut Maker 3 user. I asked him the same question I got in my comment. He advised me on a few Cricut Maker 3 project ideas that we can create using the Maker 3.
So, are you excited to explore these Cricut Maker 3 projects? Get into this blog and start searching for the idea that you like. I have mentioned the top 6 projects in this blog. Let’s delve into it to learn more.
1. Large Vinyl Decals
Cricut Maker can easily help you get large-size decals. Let me tell you when I made this. I made this up on my friend Andy’s request. He recently bought his new home and wanted to do something for his wall.
He asked me, “What can I do with a Cricut Maker 3? Is there anything that you can advise me on? “As a beginner crafter, he needed something extraordinary, so he helped me make these wall decals. They look stunning! No?
2. Personalized Vinyl Decals
Yes, you can also make personalized decals on Maker 3, as it is capable of making decals easily by cutting the material precisely. So, here is what you have to do: just install Cricut Design Space on your PC and start creating or editing the design on your Design Space app.
Then, just wait for a while; you have to perform the on-screen steps to choose the material. Finally, just cut the material as per your requirements on Cricut. Then, you are ready to go!
3. Thank You Cards
Who doesn’t love the thank you message? So do I. Cricut Maker can cut a wide range of materials with different thicknesses. However, before making these cards, I was lost in my thoughts and thinking - what can I do with a Cricut Maker 3?
Thanks to my friends, who recently gifted me a platinum necklace. Since she doesn’t live here, I had to send her a thank you message to her. Hence, I created this beautiful card using my Maker 3. Can you see those green color cards inside those cutouts? That is nothing but an insert card. It also adds a creative touch to my crafts.
4. Full-Color Stickers
A colorful sticker always looks amazing on a diary or journal. Doesn’t it? Look at those colorful stickers in the picture above. I made those using a Print Then Cut feature, which is easily possible with your Cricut Maker 3. Yes, if you still want to know what I can do with a Cricut Maker 3. Then look no further than such projects. Just use the simple paper and print your images using a compatible printer. Then, set up the materials on Cricut and start cutting it.
5. Personalized Mug
Vinyl-based projects are my favorite, as they look fantastic when made. I made this mug as my first project on my Cricut Maker 3 last January, and today, I finally got a chance to mention it in this blog. I hope it will help you find the answer to your question: What can I do with a Cricut Maker 3?
But do you think only Cricut Maker 3 is enough for this project? The answer is No! You will also need a Mug Press to transfer the vinyl on your mug. However, Maker 3 is for cutting your design, not to transfer it to the mug.
6. Custom Shirts
What about this vinyl shirt? Look at those intricate designs I made on Design Space. Isn’t that enticing? To me, it is wonderful! Try this and make it for your loved ones or yourself. You can create custom shirts in a few simple steps. You will need to create a design on Design Space and then send the command to your Cricut Maker to cut the vinyl. Lastly, I hope you find a satisfactory answer to the question: what can I do with a Cricut Maker 3?
Final Words
In this blog, you will find 6 Cricut Maker 3 projects that you need to make using a Maker 3 cutting machine. This robust machine has a versatile feature that lets you cut 300+ materials quickly without interruption. The precision and quality it offers for your project are just amazing. From large-size wall decals to personalized shirts, I have included many projects in this blog.
FAQs
Should I really buy a Cricut Maker 3?
Yes, you can buy a Cricut Maker cutting machine if you want to make projects that give you amazing results. If your crafting needs are high, then you must get this machine. This die-cutting machine can cut a variety of materials easily in a few minutes. Also, if you are a series crafter, you must try this machine. In my experience, it has been a worthwhile investment until now.
Can I print images using my Cricut Maker 3?
Cricut cutting machines are not made to print any images. They look quite similar, but instead of using ink cartridges to print, they have a built-in blade housing that cuts the materials. The capabilities of cutting the materials for Cricut Maker 3 are high, and you get very precise cuts.
Can I use regular paper in Cricut Maker 3?
Be it delicate paper or cardstock, you can easily cut them on your Cricut Maker 3 machine. However, you can make several exciting projects using this paper or cardstock, such as cards, home decor, gift tags, 3D boxes, banners, party decorations, flowers, and so much more.
For more information visit: cricut.com/setup
Set Up Cricut Maker
Cricut Design Space software
cricut new product setup
Source: What Can I Do With a Cricut Maker 3
#what can I do with a cricut maker 3#cricut maker 3 projects#cricut maker 3 project ideas#cricut maker 3 setup#cricut maker setup#cricut maker 3#cricut design space#cricut design space software#cricut machine set up
1 note
·
View note
Text


GUESS WHOSE BOOK ARRIVED TODAYYYYYY SO NOW I GET TO POST PICS!!!!
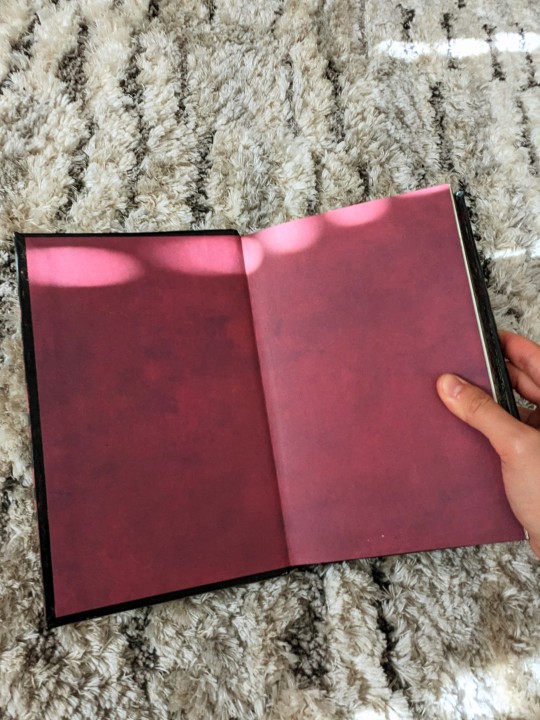
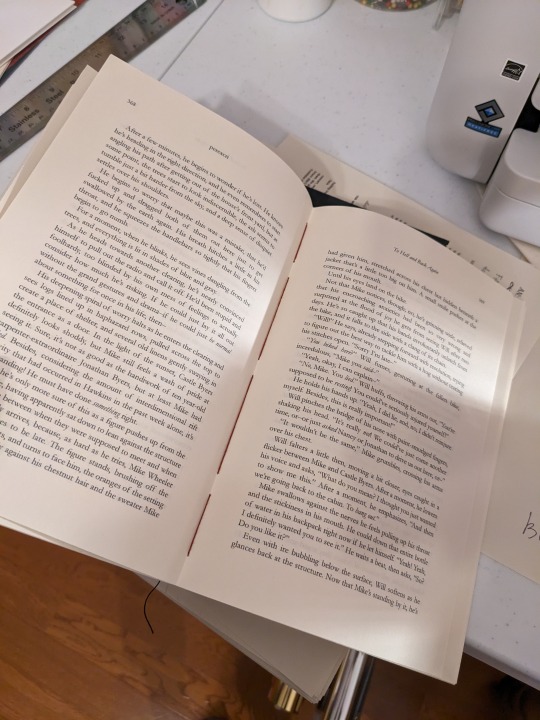
This is To Hell and Back Again, by dear dear @perexcri. Cover design by @byierficrecs (thank you SO much for letting me use your design!). Binding by me!
I'm not in ST fandom, but I had the pleasure of skimming this fic while I was typesetting, and can I just say? I'm rooting for these kids SO hard. I'd go to hell and back again for them--[GUNSHOT]
But in all seriousness, Leah's writing is whip-smart, sincere, and funny as hell. I cannot recommend it enough to anyone who is a fan of these crazy kids. Her ao3 is a veritable treasure trove of excellent byler stories, which you should absolutely check out right now go do it!!!
As usual, process chatter and more pics, under the cut! <3
WORD COUNT: 144k
FONTS:
Title: Hellprint
Heading/Chapter Headings/Spine Titling: Norwester
C4 Summary: Roboto Condensed
Main Body Text: Garamond
COVER MATERIAL: Epson Premium Presentation Paper Matte, printed on my Epson Ecotank (more on that later baha)
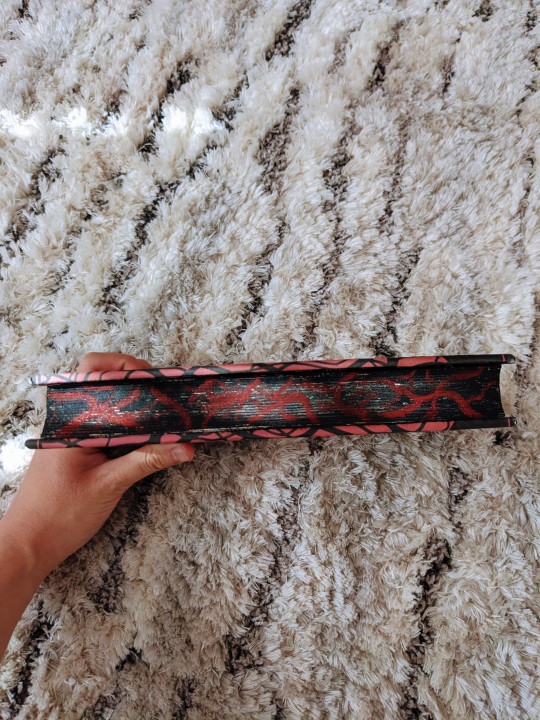
HEADBANDS: Trebizond silk thread in the colors Garnet and Black
EDGE PAINTING: Acrylic paint in Crimson and Black
TITLING: Red iron-on foil for the text and white HTV for my maker's mark. Cut by Charlotte, my Cricut!
BINDING:
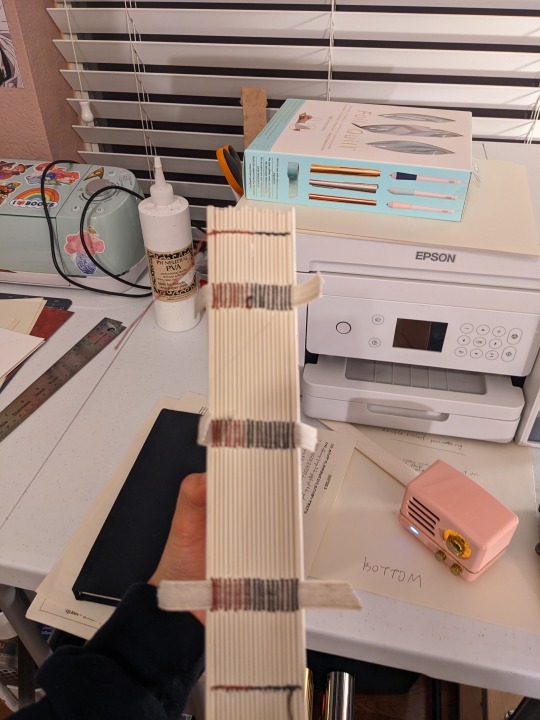
This was my first go at a German Bradel binding! I've seen lots of Renegade folks use this method and am so psyched I got around to trying it myself. I modified DAS's approach a bit and tipped on endpapers instead of sewing them in (there were a lot of new things to learn so I decided to shelve sewn endpapers for the next binding XD). I also only had 2.0 mm bookboard instead of 1.0 mm, so instead of layering two of the same boards like DAS did, I instead used one 2.0 mm board and one very thin piece of cardboard to create the groove for the hinge. The original article that DAS bases his video on actually uses boards of two different sizes too--a "thick" board and a "thin" board--but I still want to experiment with DAS's way of doing it, especially since I think it'll be easier to do cutouts on thinner board.
As far as matching the groove with the hinge, I think I did pretty okay for my first try! One board is definitely better fitting than the other though baha. There's always room for improvement, but hey that's where half the fun is anyway (and also you can't tell after the case-in whew), so I'm not stressed about it :D

COLOR SCHEME:
Nearly all of my design decisions for the color scheme were based off of @byierficrecs's gorgeous cover design! They were so generous in letting me use their cover and answering my questions about fonts, for which I can't thank them enough. And with so many wonderful elements to work with, it was so much fun to tease out the elements I loved from their work!
I decided to keep with the theme of red/black, which I also thought was fitting for a ST fic set largely in the Upside Down. Thus, black painted edges with red vines, as a kind of inverted, "upside down" continuation of the cover:

Even the thread I used to sew the signatures is red/black! :3 (please also ignore how the picture of the textblock is not focused on the actual textblock ajsldkfjs it was very late when I took that photo)
COVER PRINTING:
This was my first time printing a cover on my new printer (!!!), and BOY oh boy was it an adventure. Figuring out the dimensions took a second, but not as long as it took me to figure out what settings produced something I was happy with. Behold, all my test prints:

Very long story short, let's just say now I understand why being a prepress color specialist is literally a career you can have in publishing LOL.
Also, for some reason I could only sometimes get the bleed to work? Basically what I ended up doing was painting over the parts where the design didn't quite extend over the turn-ins, using with the same black acrylic paint I used for the edges. You can see this more clearly in the photos I took of the groove, and the endpapers covered the messy bits when I cased in:

THE MAIN INGREDIENT: LOVE
Finally!! The most important part of the process!!! HI LEAH ILY!!!! This fic is special for a lot of personal reasons, but chief among them is LOVE!!!! Your A/N's made me tear up when I first read it, because AH! You read my words of love!!! And went and wrote hundreds of thousands of your own words of love!!! And now I hope I've given that love back once again :3 And on and on we go, ad infinitum, until we are relieved of the curse of literacy and greet whatever comes after all this, thanks be to Todd. But until then, I'm so glad I get to shoot holes out of bagels and scream about radioactive tumblr posts and cry over fake people with you, friend :] Truly, peace and love on FUCKING Planet Earth. We are making it and we will all go together when we--[ANOTHER GUNSHOT]
I'm so excited to see where we're going, and what other stories we have to tell. But for now: EEEEEEEE YOU WROTE A BOOK!!!!!!!

<33333!!!
#Stranger Things#Byler#bookbinding#fanbinding#ficbinding#To Hell and Back Again#perexcri#friend fic!#<333
316 notes
·
View notes
Note
I saw you mentioned cricut machines in your last post. I've been considering getting one, but there seem to be a whole lot of models and I don’t know anything about them — do you have any tips?
I have the Explore Air 2, and it's just fine.
I did what I usually do when it comes to buying nonessential tech--figure out what I need it to do (in this case, cut vinyl and paper in formats up to 12 in wide) and then read a few articles about the best [whatever tech item] of the year is for several years running, avoiding sponsored articles. If I'm looking at a specific brand, like Cricut, I look up "versus" style articles, which compare the pros and cons of different models by that brand. For Cricut, the "Maker" line is their highest-end machine, intended for people who do serious production. If you're not doing a small business level of cricut work, it's probably overkill. The "Explore" is the midrange machine, for casual crafters.
I look for anything along the lines of "The new model fixes a major problem that the previous model had, which was..." If the current model is just a faster, shinier version of the old one, I'm getting the prior model--it'll be less expensive and for a tool I'm only using intermittently, speed isn't a high priority. The current Explore 3 model is running $300-$400; the Explore 2 can be found for about $200.
I think it does the job well. I actually already have a larger-format vinyl cutter--my brother and I went halfsies on a commercial scale machine we've affectionately named Arty Boi--but the cricut is faster to set up, more portable, and I like the grippy-mat material system. It does a good job for my needs, which are really pretty simple.
#I don't think it's worth it to buy the Cricut accessories for what it's worth#their vinyl isn't special and it's singnifcantly more expensive than other brands#you can get weeding tools literally at the dollar tree#i think it does fine but I am also not that deeply into The Cricut Life#which seems to involve labelling everything you own#i mostly use it as an element of other projects
110 notes
·
View notes
Text

so I got a cricut maker 3 and ive spent the afternoon creating and designing some keyrings and some bookmarks! I’m pretty chuffed so far, going to get some more vinyls and keep learning about what I can do etc!
might start up at Etsy shop at some point
Let me know what you think? Xx
18 notes
·
View notes
Text
How Do I Set Up My Cricut Maker? [Ultimate Guide]
Buying a new Cricut Maker can be overwhelming for all of us. Initially, setup can be daunting, but once you do it, you will love the overall process. However, you can easily set up any Cricut machine without needing much assistance.
The post is all about how do I set up my Cricut Maker. Through this write-up, we will see the items while unboxing the new Cricut Maker. Further, you will explore the Cricut Maker and its types. Afterward, we will explain the complete process of setting up your Cricut Maker machine.
What Do You Get in the Cricut Maker Box?
Unboxing a new product is always an exciting task. While unboxing the Cricut Maker machine, we got several items that we will be discussing here. However, you always have the option to select the bundles when you buy the machine from Cricut's official website.
Following are the items that you get in the box of the new Cricut Maker:
Apart from these, you will get the following:
The best thing is that we get the blades and tools along with the new Cricut machine. These blades allow us to try various products before buying more blades.
How Do I Set Up My Cricut Maker on a Computer?
When we talk about setting up Cricut Maker machine, it means we want to connect it to our devices like computers or mobile phones. However, there are certain ways to connect these machines to our devices. For example, we can connect our Cricut Maker to our computer or phone via Bluetooth or USB cable. So, it is the users’ choice to choose which way is the most suitable for them.
Below, we explain how to set up Cricut Maker. This method is only applicable for Windows or Mac users only:
How Do I Set Up My Cricut Maker on a Mobile?
Here's how to set up your Cricut Maker on Mobile devices with iOS or Android operating systems:
Cricut Maker is the most advanced and versatile in Cricut's lineup. However, the box contains various items that you can use to make several projects uninterruptedly. In this write-up, we explained the Maker and its features in detail. It helps the users to get an overview of machines so that they can use them without any hassle. After exploring the Maker cutting machine, the blog found out how do I set up my Cricut Maker.
FAQs
Question 1: Can I set up the Cricut Maker easily?
Answer: People think the setup is daunting, but this is not the case. Cricut machines are just like printers. The only difference is that Cricut has blades to cut. However, when you go through the notice period, you will find the setup is too easy and complete in less time. While setting up, you will need to download and install the Design Space app. This app will guide you through the further setup process, making it easy for beginners to set up the machine in one go.
Question 2: How do I connect my mobile phone to my Cricut?
Answer: Here, we are going to show you the method to connect your mobile device to the Cricut machine. Here, we are using iPhone or iOS devices. So, ensure you have an iOS device.
Question 3: Can I use the Cricut without its software?
Answer: No, you must use the Cricut Design Space app to send your design to your Cricut device. The machine is the companion for your Cricut cutting machine. Without this machine, you can't cut anything. However, the Design Space is essential for creating intricate designs and then sending them to the machine. Also, the app is the only way to maintain communication between your computer and Cricut.
Visit: cricut.com/setup
cricut.com/setup
Source: https://cricutmakersetup.wordpress.com/2023/10/21/how-do-i-set-up-my-cricut-maker-ultimate-guide/
#cricut explore air 2#design space setup#cricut maker#cricut.com/setup#cricut.com design space#cricut.com/create#cricut.com sign in#design cricut.com download#digital design
2 notes
·
View notes
Text
How to Setup Cricut Maker: Getting Started for First Project!
If you wonder how to setup Cricut Maker, you need to follow this tutorial! In this guide, I will teach you the complete Cricut machine setup in 4 simplified steps. Although you can use this post to set up any model, I will use the Cricut Maker machine in this blog.
The Cricut setup can be daunting in the beginning, but you don’t have to worry. I have been crafting using Cricut for many years, and I am capable of teaching you how to do it. However, in this blog, I will only discuss the procedure of setting up Cricut Maker.
Let’s start with the basic steps to download Cricut, connect it to a Windows computer, and finally set up the machine. Let’s delve into it.
Step 1: Check System Requirements
Are you using a Windows PC? Well, you can’t use it without knowing the system requirements. This is a must before you learn how to set up Cricut Maker. Since the setup will be done on the Windows system, let’s see what we need to run the software on it.
Please take note of the following system requirements:
Operating System: Windows 10 or later (64-bit)
RAM: Minimum 4 GB
Disk Space: At least 2 GB free
CPU: Intel Dual Core or equivalent AMD processor
Display: Minimum screen resolution of 1024px x 768px
Connection: A USB port or Bluetooth connection is required.
Step 2: Download & Install Cricut Software
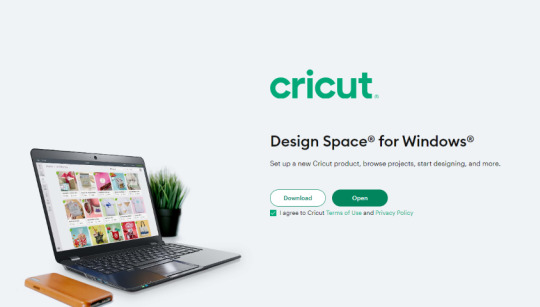
In order to learn how to set up Cricut Maker, you have to download Cricut Design Space software on your PC. Since all the setup steps are to be done on the app, you must download it beforehand.
On your PC, open your browser and enter this URL: cricut.com/setup.
After that, you will need to choose the product type: Cutting Machine.
Then, accept Cricut’s Terms of Use and click on the Download button. Now, your Cricut software will start downloading.
Once downloaded, you have to go to the Downloads folder and open it.
Just double-click on the downloaded file and begin the installation.
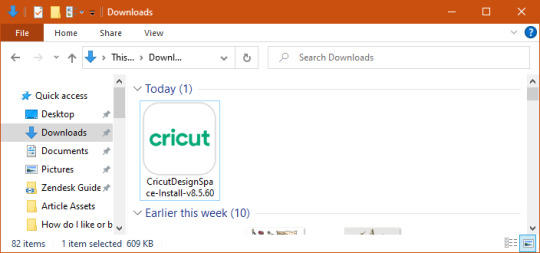
Finally, you will have your Cricut software downloaded to your PC.
Step 3: How to Set up Cricut Maker
Finally, I will walk you through the steps to set up a Cricut machine stepwise. Make sure you have downloaded the Cricut software on your PC and checked its compatibility.
Launch the Design Space app on a Windows PC and click on Product Setup.
Now, you should create your Cricut account.
Once done, you have to select a Smart Cutting Machine.
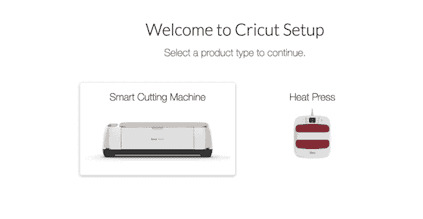
Next, click on the Cricut Maker machine.
After that, you need to follow the screen’s prompts for further setup.
Once you complete the above steps, you will need to connect your Cricut to your PC. I have explained this separately in the next step for your convenience. Please follow the steps carefully.
Step 4: Connect Cricut to PC Using Bluetooth
To complete the Cricut setup, you must connect it to your PC. Then, you will be able to use your machine.
Here’s how to connect Cricut cutting machine to a PC wirelessly:
Take your power cable out and plug it into your PC and machine.
After that, press the power button located on the top of the machine.
Once you have powered on your machine, go to your PC.
On your Windows desktop, press the Windows logo icon + I keys to enter Settings.
On the following screen, choose Devices.

Now, enable Bluetooth and select Add Bluetooth or other device.

Next, you will see a pop-up asking you to add a device. Choose the Bluetooth option.
Wait for a while and pair your machine with your PC.
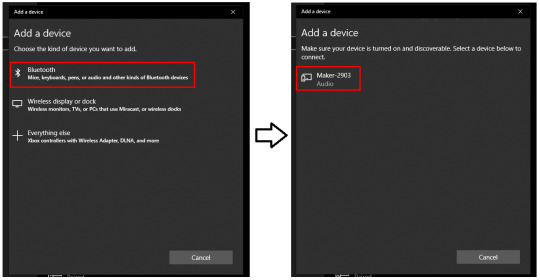
Once it is found, select it and pair the machine with the PC.
Kudos to you😍! You have learned how to set up Cricut Maker on your Windows computer. From checking system requirements to connecting Cricut to a PC, it might not be as daunting as it seemed to be. Good luck with your first project; now you are all set to create your first project on Cricut.
FAQs
Question 1: Is it necessary to set up Cricut on PC?
Answer: No, it depends on whether you have any compatible device or not. According to Cricut, there are four compatible devices on which you can use Cricut software, and hence, you can use your Cricut hassle-free. These are Windows, MacBook, Android, and iOS devices. So, make sure you have one of the devices available.
Question 2: How is setting up Cricut Maker possible on Android?
Answer: To set up your Cricut on your Android phone, follow the steps below:
Plug the power cable into your Cricut and wall outlet.
Pair your machine with your Android phone using Bluetooth.
After that, you have to download the Cricut software.
Now, launch the app on your phone and create or sign in using Cricut ID.
Next, click on the menu and choose Machine Setup.
Then, choose the Cricut model.
Lastly, follow the rest of the steps displayed on the screen.
Question 3: How to connect Cricut Maker to a PC using a USB cord?
Answer: Follow the steps mentioned below and connect your machine to your Windows PC using the USB cable:
Make sure you have turned on your Cricut and PC.
After that, use one end of the cord and insert it into the back of the machine.
Then, take another end and insert it right into the PC.
Finally, your Cricut is connected to your PC with a USB cord.
Visit: www.cicut.co setup login
install cricut design space app
Source: https://cricutmakermachines.com/how-to-setup-cricut-maker-getting-started-for-first-project/
#cricut.com/setup#www.cricut.com setup login#www.cricut.com/setup login#www.cricut.com/setup#cricut design space app login#install cricut#install cricut explore air 2#install cricut design space#install cricut design space app#cricut install setup#cricut setup#cricut setup on computer#cricut setup maker#cricut setup explore air 2 setup#cricut setup for pc#cricut create connect to computre#cricut create connect to computer
0 notes
Text
7 Wood Cricut Projects: Unique Ideas and How-To Guide
I love creating wood Cricut projects. Do you? Since my father was a professional carpenter, he had a plethora of tools in his garbage, which I used to use to make small toys and things. Having been brought up in such an environment, I never thought that I would become a passionate crafter one day and create tons of projects using wood.
However, I do not create wood projects like my father used to. I use a special tool, a Cricut cutting machine. This tool is invaluable for every crafter; it was possible to create these wooden projects hassle-free.
So, the purpose of writing this post is to walk you through the different ideas that will help you easily create your own crafts without anyone’s help. Whether you are a beginner or a professional crafter, you must look at these projects I created myself. Let’s dive in!
Earrings

If you are interested in makingwood Cricut projects, you should try making intricate earrings. I used veneer wood and cut it using a deep-point blade. This simple project can also be made using a Cricut Explore machine. Anyone who wears earrings will love this mini jewelry made out of wood. Start over your crafting with this beautiful wooden craft.
Coasters

Want useful wood Cricut projects? Here it is — a wooden coaster! I always need a coaster on my desk, as I always mess up my table when I have tea or coffee. So, if you want your table neat and clean, then you must give this a shot once. It is easy to create and takes less time. Try to make this wooden project on a machine that is compatible with wood.
Bookmarks

If you are an avid reader or know someone who is so, you need this bookmark. This wooden bookmark will not bend as easily as the paper bookmark. Therefore, I created this bookmark for my cousins and me. With crafting machines, creating wood Cricut projects is never daunting, and it assists every crafter in turning their imagination into reality.
Hanging Closet Divider

Want to organize your clothes in your closet? No worries — here is the solution — a hanging closet divider made of wood using a Cricut machine. I created it a few months ago because I was fed up organizing my clothes and finding them when I needed them the most. So, if you are also a crafter like me, you need to try this once.
Desk Organizers

If you are wondering about wood Cricut projects, don’t worry. There are a plethora of options available that you can try. For example, this desk organizer can be really helpful for crafters like us. I always need tools on time, and the inability to find them is frustrating. Therefore, I created a separate box using the wood. Painting them with the color of your choice can give them a fantastic look.
Puzzles

Do you love solving puzzles? Whether you love them or your children, you can now use your cutting machine to create these wooden puzzles in no time. For these types of wood Cricut projects, you will need wood material up to 2.4 mm in thickness. However, on the wooden piece, you have to paste a photograph that you want to make a puzzle of. Moreover, the best balsa wood Cricut projects you can ever try.
Keychains

Have you tried making wooden keychains? No? It’s okay. You should try it once, and it looks really amazing. The magical touch of the cutting machine will help you create an outstanding keychain that will always stand out. To create this, you need wood and some tools, including a cutting machine. After that, you can start creating designs by engraving and cutting.
FAQs
Question 1: Can I use a Cricut machine for wood projects?
Answer: Absolutely, yes. Cricut machines are capable of cutting wood without any hassle. This smart machine is designed to create a wide range of projects because it can cut wood up to a thickness of 2.4 mm. Cricut can cut different types of wood, including veneer, balsa wood, or basswood.
Question 2: What Cricut model is capable of cutting wood?
Answer: Cricut Maker 3 is the best machine for cutting wood hassle-free. This machine can cut wood quickly and accurately. Also, it is compatible with 300+ materials, from the softest paper to tougher materials such as matboard, leather, and balsa wood. In short, this machine is the best cutting machine for cutting wood easily.
Question 3: Can I engrave on wood using a Cricut machine?
Answer: Yes, it is possible to engrave wood using a Cricut Maker machine. You need to add an engraving tip designed for engraving purposes. With Cricut, however, you can engrave soft and tough wood, as well as materials such as acrylic and soft methods. Mostly, balsa wood is taken into practice for engraving the soft material.
Source: wood cricut projects
Visit here to Know More: Cricut.com/setup
Pinterest
#wood cricut projects#balsa wood cricut projects#Cricut Explore Software#Cricut Venture#Cricut.com/setup
0 notes
Text
How to Setup Cricut Maker 3: A Full Guide for Beginners
Are you wondering how to setup Cricut Maker 3? If the answer is yes, then you have reached the right place to learn the process. I have been using the Cricut Maker 3 machine from the beginning and have learned everything about it. Here, I am going to write down everything related to setting up a Cricut machine. After reading the blog, you will know what you get inside the box, the installation procedure, how to connect Cricut to your computer, and download the Cricut Design Space app. When you download the software to your device, your Cricut machine will be installed. Without any further delay, let’s jump right into the full process.
Introduction to Cricut Maker 3
Before we learn how to setup Cricut Maker 3, it is important to know about the machine. It is a third-generation and one of the latest Cricut machines. It has impressive features and is a powerful cutting machine. Due to its power, it can cut wood, leather, and heavy metals like metals. It includes many innovative features that make it better than previous models. It can cut over 300 materials, such as paper, fabric, chipboard, balsa wood, leather, etc.
To set up the Cricut machine, you will first need to unbox it and check all the items inside the box. When you open the box, here’s what you will find:
Cricut Maker 3
USB cable
Fine-point blade
Power adapter
A few samples for a practice cut
1-month free Cricut Access plan
How to Setup Cricut Maker 3 to Get Started Easily?
Once you have unboxed and checked the materials inside the box, you proceed to setup the Cricut machine. Setup involves connecting Cricut to any phone or computer and downloading the Cricut software. You need to follow these steps carefully to know about the installation process:
After you have unboxed the machine, you must install it on a clean, flat surface.
Now, you should add it to a power source. For that, you can use the power adapter that you received in the box. Connect it to the machine and a wall socket.
Once connected to an electric outlet, press the power button and turn on the machine.
Then, connect your Cricut to your computer with the help of Bluetooth. A USB cable is also good for connection. You got the cable in the box as well.
Afterward, visit the official Cricut site and search for the Cricut Design Space app.
When you see the app, click on Download and then install it on your computer.
Next, you have to go to the Product Setup window.
On the following screen, select Smart Cutting Machine.
Follow the directions and enable the Cricut app on your computer.
Finally, your Cricut setup will be complete, and you will be able to start working on your DIY projects.
How to Connect Cricut Maker 3?
To proceed with how to setup Cricut Maker 3, you should connect it to your computer. Connecting any device to your machine is not too difficult if you know the right procedure. You can use Bluetooth or a USB cable. Here is how you can connect Cricut to your computer via Bluetooth.
To connect, the first thing you have to do is turn on the machine and your computer.
On your device, you have to go to the Start menu and open Bluetooth and other devices.
Next, turn on Bluetooth and click on Add Bluetooth or other device. Then, choose the Bluetooth device option.
Now, you will see that the device has started to search for nearby models.
When you see your machine, you must click on it, and the machine will be connected to your device.
To ensure connectivity to the device, you can go to the software and check the Machine Setup section. You will see that your Cricut product will show as connected.
Important Note: To connect your Cricut Maker machine to your computer, you can also use a USB cable. Just take the cable and connect it to both the machine and your device from both ends, and they will be connected.
How to Download Cricut Design Space?
Now, you have reached the final stage of how to setup Cricut Maker 3. Here, you have to download the Cricut Design app on your computer and log in with your account. The process for that is as follows.
To start, you have to open the computer and go to an internet browser.
Then, navigate to cricut.com/setup and click on Download to download the Cricut Design Space app.
Now, you have to select the Downloads folder and double-click the file.
After that, you will see that the installation has begun.
When the app is downloaded, you have to open it and log in with your username and password.
Your Cricut Maker machine installation is complete now.
FAQs
What Materials Can I Cut With Cricut Maker 3?
Cricut Maker 3 is one of the best cutting machines, and you can cut any material. It is an amazing machine that can cut light materials like foil paper or tissue paper. Also, it is a powerful machine that allows you to cut heavy materials, including leather, wood, and metal. Apart from these, you can cut materials, such as cardstock, fabric, and vinyl as well.
What Are the System Requirements for Cricut Maker 3?
To work on a Cricut cutting machine, you will need the Cricut Design Space app. In order to download and use the app, your computer must have certain features. It should have 4GB RAM and 2GB free disk space. The machine must be connected to a USB port or Bluetooth connection. Its screen resolution should be at least 1024×768 pixels. It should have 2-3 Mbps downloading and 1-2 Mbps uploading speed.
Can I Install Cricut Maker 3 on My Android Phone?
Yes, you can! You are required to have the Cricut Design Space app on your device, and an Android phone is fully compatible with the software. You can connect your phone to your Cricut machine with Bluetooth or a USB cable. Once the mobile device is connected to your machine, you should download the app from the Play Store and log in with your Cricut account. The Cricut machine will be installed.
Source :- https://sites.google.com/view/cricuthelp-center/blog/how-to-setup-cricut-maker-3-a-full-guide-for-beginners
0 notes
Text
How to Use a Pen on Cricut: A Beginner’s Guide
If you are a Cricut user, then you know that Cricut is a brand that offers crafting machines capable of making a variety of projects using different materials. But did you know that you can now create DIY projects using Cricut pens without cutting any design? Yes, it is possible! Cricut provides many pens and markers in different colors for beautiful crafts. To make projects involving pens, you must know how to use a pen on Cricut.
If you do not know what a Cricut pen is or how to use it, don’t worry. This blog will explain everything related to a pen. To learn all about these pens and how to use them, just read the blog!
What Is a Cricut Pen?
Before we find out how to use a pen on Cricut, we should know what a Cricut pen is. Cricut pens are specially designed to work with Cricut machines to write on various materials. Using this pen, you can make banners, greeting cards, bookmarks, labels, notes, and more.
With Cricut models like Maker, Venture, and Explore, you can use special-sized pens that you can fit into the machine’s pen holder. However, if you want to use a pen with Cricut Joy, you will need to buy a separate pen, which will not work with other Cricut machines. The Cricut Joy is a small machine, so any regular pen will not work with it. You will have to get a pen that is specially made for Cricut Joy.
Types of Cricut Pens
Cricut has a variety of pens, and you can use one of them depending on the project you are making. I am writing about all of them. Here, you will learn about these pens and which one is suitable for your project. It is important to know about pens before learning how to use a pen on Cricut.
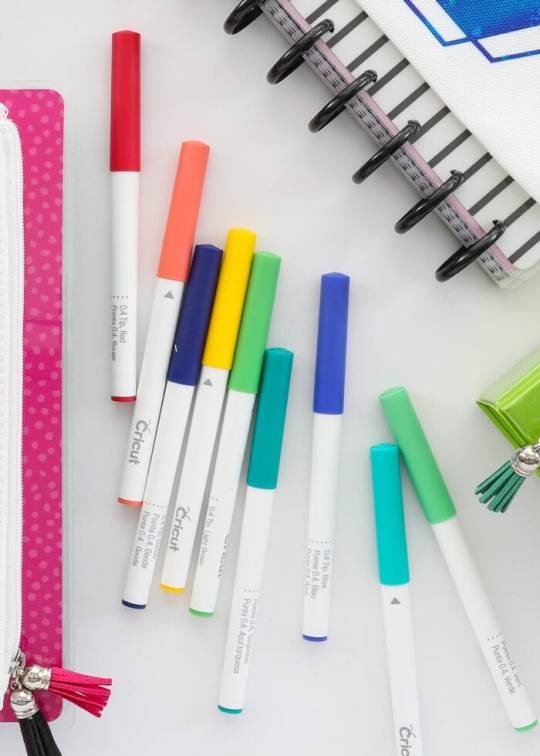
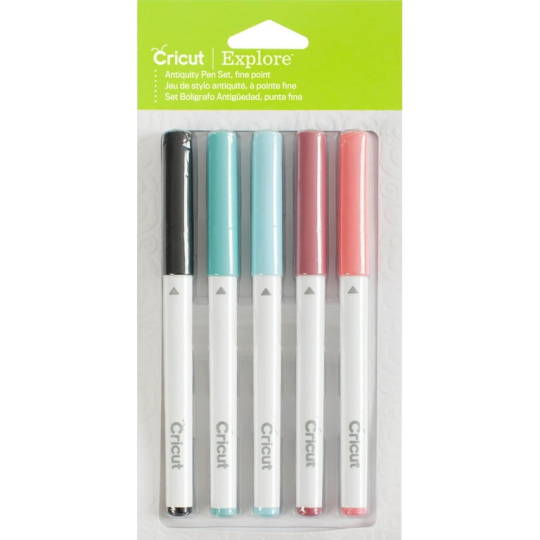
Pens
Most Cricut writing projects are made with Cricut pens. You can insert the pen into the machine clamp, which is good for writing. These pens come in a wide variety of thicknesses, colors, sheens, and weights. They have fun color combinations. These pens include fine-point pens, extra fine-point pens, and normal pens. Their thickness ranges from 0.3 to 0.8 mm.
Markers
When you need to write on projects that require thick writing, you can use markers instead of pens. Its thickness ranges from 0.6 mm to 1.0 mm.
Fabric Pens
This pen is specially created to draw on clothes. You can fit the pen into clamp A just like any other pen and start drawing. You can use the Cricut Maker/Explore machines to draw.
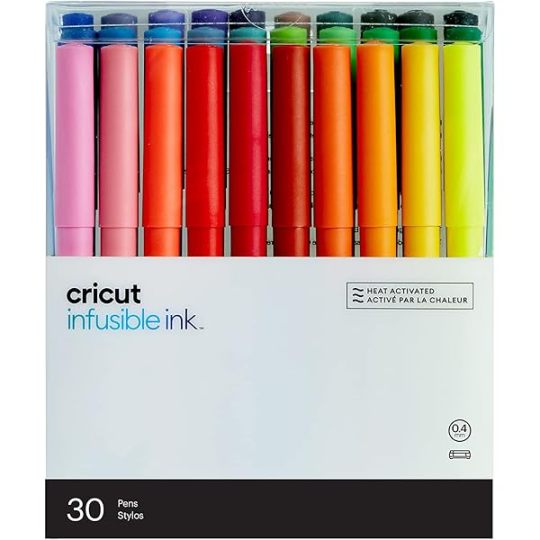
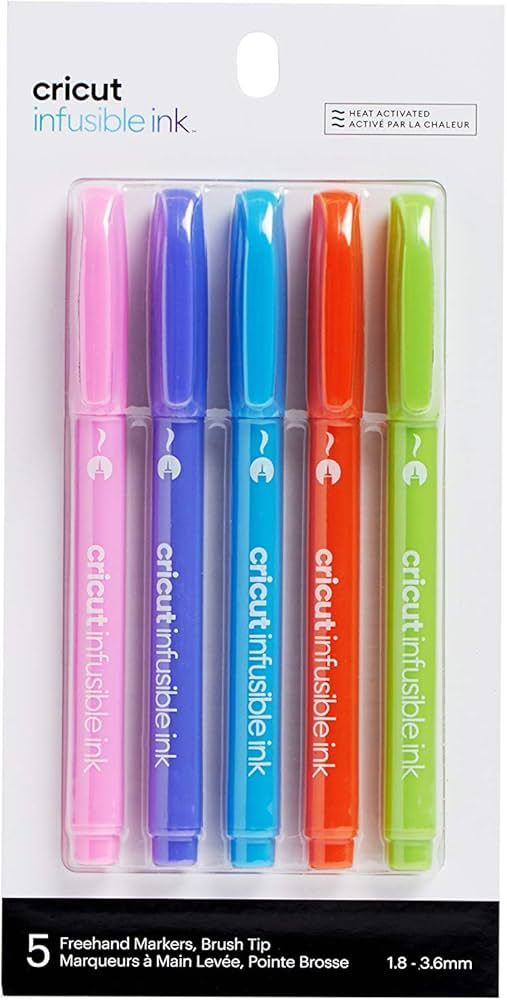
Infusible Ink Pens
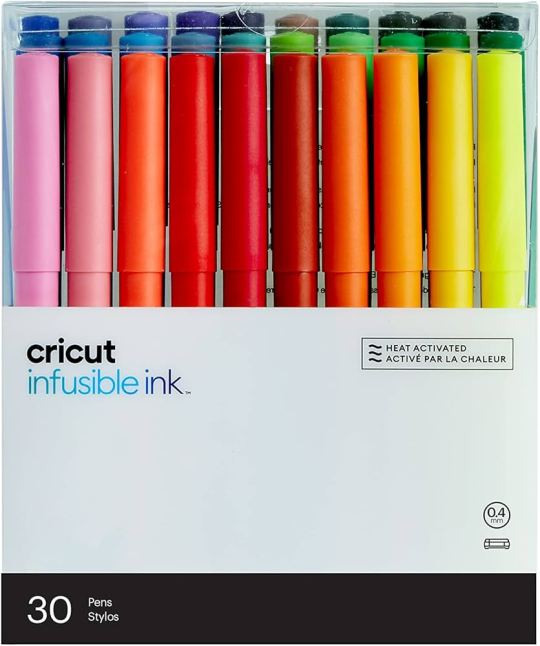
If you want to draw on your sublimation projects, you can use infusible ink pens. It will draw on the infusible ink sheet, and you can transfer it to a mug or coaster project using a heat press machine. Remember, do not use this ink with non-sublimation projects.
Free Hand Markers
These are markers that do not fit in a Cricut machine. If you want to use it, color the design by hand.
How to Use a Pen on Cricut: 3 Easy Instructions
Now you know all you need to know before you go on to learn how to use a Criuct pen. Let’s learn how you can actually use a pen on your project.
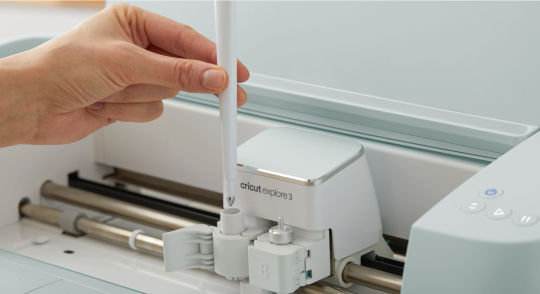
Step 1: Insert a Pen into Your Cricut Machine
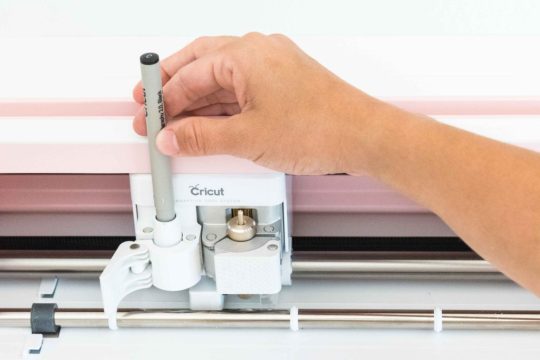
To install the pen, you have to turn the machine on and then open clamp A of your Cricut cutting machine, which is located on the left side. Once the clamp opens, you have to remove the pen cap and press it into the camp. When it reaches its limit, you will hear or feel a click. It means that the pen is well installed. Now, you close the camp.
Step 2: Choose a Design or Font
Before using a pen on your Cricut machine, you should first choose or create a design using the Design Space software. Cricut has thousands of ready-made designs, fonts, and images. You can select any one of them and draw on your machine. If you want, you can also create a design on your own. You also have an option to upload an image from the internet.
Step 3: Draw Your Design
After that, you can draw the design using your material. You must put the material inside the Cricut Maker, Explore, or Venture machine. Once the material is loaded, you can start drawing the design on it, and when it is done, you can unload the material. Your project is now ready.
Conclusion
In conclusion, you have to know that you have learned here how to use a pen on Cricut, and now you can easily create projects with the help of pens. Cricut has various pens, and you can use any that fit the needs of your project. To use a pen on your Cricut machine, you should choose a design that you will draw using your material. Once the design is ready, you can install the pen into the machine and draw the design on it.
Frequently Asked Questions
How Can I Install Cricut Pen?
To draw any image or font on a Cricut machine, you will need to install a pen. You can install it in a few steps. Here is how you can do it.
First, pick a pen suitable for your project.
Then, open the clamp A of your machine.
Next, insert the pen inside the clamp and close the camp
Now, the pen is installed. You can start crafting.
What Can I Make from a Cricut Pen?
A Cricut pen is a tool that can be used for multiple projects. You can create beautiful bookmarks, cards, invitations, coasters, t-shirts, and so much more. If it is someone’s birthday and you want to make banners, you can use a Cricut machine for it. Apart from these, you can make cute doodles, stickers, and labels using these pens. You can use these projects for your home decor, or you can also give them to someone you love.
Can I Write on Fabric with a Cricut Pen?
Yes definitely! Cricut has a fabric pen specifically designed for fabrics. You can use the pen with the Cricut machine and draw any design on the fabric. To use the fabric pen, you must first select a design on the Cricut Design Space app and then install the pen on your cutting machine. After that, load the fabric onto the machine and draw your design on it.
0 notes
Text
8 Unique Cricut Gift Ideas: Perfect Projects for Any Occasion
Are you looking for some unique Cricut gift ideas? If so, you are in the right place! Here are the best projects you must try to gift someone on their special occasion. These gifts are handmade creations that I created using my smart Cricut machines. Since I have won all the Cricut cutting machines, I have used different types of tools at my convenience. However, you can use a machine you already have.
Being a professional Cricut crafter, I have to make many projects with my Cricut machine to show the theme to my online buddies like you. In this blog, I have covered all the gift ideas you must try once if you are a beginner and just getting started. Without any further ado, let’s get started now!
1. Spice Jars
Does anyone in your family love cooking? This is going to be one of the best Cricut gift ideas. These glass-made jars with labels and text can make it easier for them to find suitable ingredients. They can significantly help them by saving them time finding a particular spice as soon as possible. Now, personalize all the jars using your Cricut machine and Cricut Design Space, where you can choose a different font style to make them look more attractive.
2. Makeup Bag
There are different ways to create a personalized cosmetic bag, and they are the perfect Cricut gift ideas for anyone who is into beauty and wellness. However, I made this customized bag at my sister’s request. She wanted it for her use as she is a makeup artist and has to carry many makeup-related items. Also, you can use iron-on material with any blank you sewed for or bought from the market. Don’t forget to add the texts that remind them of you.
3. Doormat
Want to make something for your sweet home? Here is the doormat that I believe is one of the fantastic Cricut gift ideas you must try this year. Since I have made one for myself and one of my best friends, Julie, I made this using my Cricut Maker machine. I was looking for something like this, which I couldn’t find on the market, so I decided to make one myself using my Cricut machine.
4. Flower Mug
Do you want to add flower magic to your simple mug? You can use your Cricut machine to do it. It is easier than you think and looks beautiful. Not only this, but you can also add the name or initial to make the ultimate Cricut gift ideas. I used permanent vinyl to add these flowers to my mug. Doesn’t it look so beautiful? I found it excellent; give it a shot now!
5. Fox Pillow
Here is one of the standard pillows I gifted to my cousin’s sister. She loved it when she received it. I used my trusty Cricut Maker machine to make this effective way to bring personality and some adorable decorations you have never seen before. So, what are you waiting for? Give it a shot now!
6. Sleep Mask and Slippers
Thanks, Cricut—it helped me decide on the best Cricut gift ideas, which were not easy to find in a shop. With Cricut, we can create our design and add it to our daily used stuff like sleep masks and slippers. The text-based design is the easiest beginner can easily create on Cricut software. All they need to do is use the Cricut Design Space app and add the texts using the font style of their own choice.
7. Coffee Mug
I gifted this mug to my dad last week. It was neither his birthday nor any special occasion; I just wanted to make him feel special by expressing my gratitude. All credit goes to Cricut, and I used beautiful fonts from Cricut Design Space. Making it was really fun, as most of the Cricut software resources are free.
FAQs
Question 1: What birthday Cricut gift ideas can I try?
Answer: If you are looking for Cricut birthday gift ideas, then you should try the following ideas that I have made myself:
Question 2: What items do I need to make my Cricut projects?
Answer: The requirements of items may vary according to the type of project you are working on. However, I am mentioning some of the everyday items or supplies that you must have when you are creating a project using a Cricut:
Question 3: How to make a gift tag using Cricut?
Answer: To make your gift tags, you should follow the steps below:
Wrap Up
In this blog, I have added some Cricut gift ideas, which are easy to make if you put all your effort and ideas into them. However, the best part about the Cricut app is that it has an intuitive interface that lets you create unique designs in no time, and you find no difficulty using it. Explore the different types of projects that you want to make and make your loved one feel so special with these inexpensive gift ideas with Cricut.
Visit: cricut.com/setup
install cricut design space app
cricut.com setup mac
www.cricut.com setup login
Source: https://cricutsetuplogin.wordpress.com/2024/07/22/8-unique-cricut-gift-ideas-perfect-projects-for-any-occasion/
#install cricut design space app#cricut setup#cricut.com setup#cricut.com sign in#cricut.com/create#cricut.com/setup#cricut.com design space#cricut.com/register#www.cricut.com setup login#cricut design space login#cricut design space app#cricut design space download#cricut design space setup#cricut design space software#install cricut design space#install cricut explore air 2#cricut new product setup#cricut new product device#cricut setup login#cricut setup log in
0 notes
Text
Cricut Maker 3 + Essentials Bundle Review: Unleash Your Creative Potential
I am the son and brother of successful artists and enjoy doing creative things; making gifts and items by hand is highly satisfying. I was recently sent the Cricut 3 + Essentials Bundle to try, which has opened up so many creative possibilities. My family and I had a lot of fun testing it while doing several projects, and we have all been impressed by what this device can do.
Continue reading…
0 notes
Text
7 Cricut Maker 3 Leather Projects to Enhance Your Style

Hey, are you looking for some unique Cricut Maker 3 leather projects? Look no further than this guide! In this post, I am going to tell you the best DIY projects that you can create with leather. About 3 weeks ago, I finished my Cricut leather projects. I have aimed to make a few projects so that I could write this blog diligently. But do you know what was the most difficult part of this project? Cutting intricate designs on leather. Yes, it might not be easy to cut, but they require patience during both cutting and weeding such designs.
Without any further delay, let’s get straight into this blog to find out the most amazing ideas for creating leather Cricut projects.
1. Bracelets
Do you love bracelets? If so, you must give it a shot! When I was looking for ideas for Cricut Maker 3 leather projects, it had been on my mind for a long time. Finally, I gave it a try and saw how beautiful it looked. If you have any friends you want to give this bracelet to, it would be great!
2. Hair Accessories
Do you want something for your hair? You might wonder what I can make for my hair or other beauty stuff. Well, this leather accessory is also made with leather. As you can see, it might look a little tedious, but it is a piece of cake. Start diving into your Crafting journey and create what you need the most.
I gave it a flower shape, and if you are a little bit familiar with Cricut Maker 3 Setup, then it is a breeze for Maker 3 to cut such designs.
3. Earrings
I love leather earrings, as they enhance my beauty and are easy to create. Beginners who are looking for the best Cricut Maker 3 leather projects should try them out! Why? Because they are really easy to make. I also wanted to make them a little unique, so I added some glittery effects. This is what I needed, and hence, I made them.
4. Keychains
If you want personalized keychains, then here I have something for you! Whether you are a novice crafter or a pro, this keychain is easy to make. All I did was add some texts with different font styles to my Design Space.
Finally, after finishing my design, I started my Cricut Maker 3 and cut all the words Daddy and Daniel to make keychains. I handed it to my dad, my brother, and my dinner.
5. Crossbody Bag
Today, everyone wants to use a body bag, and what if you have a personalized one? Sounds like a great idea, no? I created this simple bag for myself as I am not much into personalized stuff. But you can have one if you want. The process of making this bag is easier, and you will need iron-on vinyl to make such a beautiful crossbody bag.
6. Monogram Keyring
Looking for super easy-to-make Cricut Maker 3 leather projects? Here is the monogram keyring that is most widely useful, and it would be great if you could give it a shot! This is a great beginner project, and any beginner should try to make something unique. I also used paint to color it to make it look stunning! Lastly, you can see the result in the picture, like how elegant it looks.
7. Cord Organizers
Every one of us uses earphones or a charger, but sometimes managing those clumsy wires is boring and tedious. So, I decided to create something that could organize my cords or wires. Here, you go with leather cord organizers, which I created using my Cricut. There are many cuts that I had to make, and I preferred my Cricut Maker to cut them as they are faster and provide precise cuts, making them look professional rather than handmade.
FAQs
Can I cut leather with Cricut Maker 3?
Yes, leather can be easily cut with Cricut Maker 3. It can also cut other materials such as fabric, paper, and balsa wood without any problem. In order to cut the leather, you have to use a knife blade, and the thickness of the leather should be up to 2.4 mm or 3/32 mm thick. However, you have to use a clean cutting mat with a sharp blue edge for better results.
What are the essential Cricut tools for cutting leather?
There are some common tools that you can use to cut leather. They are as follows:
Utility knife: This sharp knife is considered a versatile tool for cutting your leather.
Rotary cutter: This is a tool that comes with a wheel-shaped blade. Ideal for long and straight cuts.
Leather shears: A kind of specialized scissors idea for cutting thick and tough leather.
Round knife: It is a popular tool that is most widely used for cutting leather.
How thick can I cut leather with Cricut Maker 3?
If you want to cut the leather on Cricut Maker 3, you can cut up to 7 oz thick. The best thing about the Maker 3 machine is that it cuts anything precisely. In addition, cutting the leather is a breeze. You will also have to use a knife blade for all these leather Cricut projects.
Wrapping Up
As you went through the 7 Cricut Maker 3 leather projects, you might have found them easy to make. The best thing about these leather projects is that they are beginner-friendly. So, you will not need to worry about the complexity of the projects; just turn on the Cricut Maker 3 and prepare the leather that you want to cut. After cutting, the result will be fantastic and will stand out!
For more information and visit: www.cricut.com/setup login
cricut.com/create
Cricut Design Space App
Source: Cricut Maker 3 Leather Projects
#Cricut Maker 3 leather projects#leather Cricut projects#cricut design space download#Cricut maker setup#cricut maker 3 setup#Cricut Design Space Login#Cricut Design Space App#Cricut New Machine Setup
2 notes
·
View notes
Text
Cricut Explore 3 Download: Software Installation Guide
Unsure about the Cricut Explore 3 download? Fear not. I’ve got your back! If you are a beginner who is up for learning to make crafts with Cricut, you are at the right place. Before you start creating projects on Cricut, you will need to set it up. I even had to setup my Cricut machine when I got it last year. Although I have been using it for many years, I purchased the latest version of Cricut Joy this year. Hence, I had to set it up using the same software – Cricut Design Space.
Likewise, you can setup your Cricut Explore 3 model. All you need to do is download the Cricut app. But you don’t have to worry about it, as I have already made it easier for you. First, I am talking about the Explore 3 software. Next, I will explain the steps to download it. Let’s get started now.
What Is Cricut Explore 3 Software?
It is also known as Cricut Design Space, a companion app for using Cricut machines. Sometimes, people use terms like Cricut Maker software because they use the Cricut app with their Cricut Maker machine. Likewise, when using a Cricut Explore 3, we use the term for the Explore 3 machine—nothing else.
You must know that all Cricut machine models use the same type of software, Cricut Design Space. It works the same with all machines. The Cricut Explore 3 software aims to set up the new machine and use it to create, edit, or modify the designs.
I have given you a brief introduction to the app. Now, let’s see how to download Cricut software on PC and Mac.
Cricut Explore 3 Download on Your Computer
When it is evident what Explore 3 software is, you should now move further to download it on your PC and Mac. The steps to download the Cricut software vary for different devices; hence, I will explain them separately. Let’s start now!
For Windows
In the beginning, ensure your computer is turned on.
Once you are on your desktop screen, you have to move to the taskbar and click on a Windows logo icon (also called the Start menu).
As you hit that button, a pop-up screen will appear. Here, you have to type Chrome or the name of any browser that you are using.
Then, click on the search bar, enter the URL – design.cricut.com, and press the Enter key.
Now, you will move to a Cricut Explore 3 download page. Here, you have to mark a checkbox to enable the Download button.

Next, just hit the enabled Download button and let it download to your folder.
When it is downloaded, you can go to your Downloads folder (in File Explorer).
When you find the file, double-click on it to install.

After that, you need to follow the simple steps to install the software on your PC.
Once installed, you can find the app on your app list.
For MacBook
On your Mac, you need to launch the internet browser.
After that, you have to search for the link design.cricut.com.
Once you are on the Cricut’s website, you need to click the checkbox. It will enable the Download button. As you hit the checkbox, the Download tab will be clickable.

Next, select the Download tab, and it will begin the Cricut Explore 3 download.
Once it is downloaded, navigate to your Downloads folder and look for the .dmg file.
Then, double-click on the .dmg file and start the installation.
To install the software on the Mac, you must drag the Cricut icon to the Applications folder.
FAQs
Question 1: How to setup a Cricut Explore 3 machine on a computer?
Answer: Setting up a Cricut machine is a breeze. However, the following steps can help you with the setup:
You need to plug the machine into the wall outlet.
Then, connect the Explore 3 machine via Bluetooth or USB cable.
After that, you have to download the Cricut software.
Next, create a Cricut ID using your Cricut Design Space.
Finally, your Cricut machine setup is done.
Question 2: What is Cricut Explore 3 download?
Answer: This is the process of downloading the Cricut Design Space so that you can use the app with your Cricut Explore 3 cutting machine. In order to download the app, you have to visit Cricut’s official website and then download the app on your computer. However, you can also get the app on your mobile device.
Question 3: Is Cricut software compatible with Chromebooks?
Answer: Cricut Design Space is only compatible with PC, Mac, Android, and iOS. Besides these operating systems, Chromebooks and Linux/Unix are incompatible with the Cricut app. So, make sure if you are buying a Cricut machine, you have to make sure you have at least one compatible device to use the software.
Wrap Up
That’s all in this guide. I have tried my best to explain how to download Cricut software on a Windows computer and a MacBook. Once you have learned about the Cricut Explore 3 download, you can start using it to create what’s in your mind. The above easy instructions will help you get the software on your Windows and Mac.
Read more: Cricut Design Space
Cricut Design Space Download
install cricut design space app
Source: Cricut Explore 3 download
#Cricut Explore 3 download#install cricut design space app#cricut design space#cricut new machine setup#cricut design space login#cricut design space app
0 notes
Text
How to Do Cricut Maker 3 Setup: Full Connection Guide
If you are looking for an ultimate crafting machine to make your DIY projects, then Cricut Maker 3 is definitely the one. Cricut machines are one of the best tools for crafting your DIY projects at home. If you are here, reading this blog, that means you are searching for the Cricut Maker 3 setup. You are new to the world of crafting and have bought your first cutting machine, or you have already been using Cricut machines and have updated to the latest machine. In either case, you are going to learn everything you need to know in this blog post.
All about Cricut Maker 3
Cricut Maker 3 is the latest cutting tool in the Cricut Maker series. It has the capability of cutting more than 300+ different materials, including paper, vinyl, cardstock, fabrics, leather, cardboard, balsa wood, and many more. Cricut Maker 3, like other cutting machines, is a good tool if you want to cut and create your designs and projects. With the help of this Cricut machine, you can design almost everything from greeting cards to wooden signs and tote bags. You can design your own T-shirts or other clothes as well.
Before looking for a Cricut Maker 3 setup, you will need stable internet and an operating system like a computer or mobile device to use the Design Space app. This machine is great for making your own projects, but if you want, you can use it for business purposes as well.
What Do I Get in the Cricut Maker 3 Box?
In the box, almost all the needed equipment is given. You can use them to craft your project. But if you want extra tools for your project, you can buy them online from Cricut’s official website or any third-party site. When you open the box, these are the items you get in it:
Cricut Maker 3
A USB cable
Power adapter
Fine point blade
Some sample materials
Free trial of the Cricut Access plan
Cricut Maker 3 Setup on Your Device
Setting up a Cricut cutting machine is simple and easy. All you have to do is follow the basic steps in the section below. Once you unpack your machine and have checked that all the necessary items are there, you are ready to go for setup. You should download the Cricut Design app from the device you are using. Carefully follow the instructions written below, and your machine will be setup:
Once you finish unboxing the machine, you must put it in a safe place; make sure the place’s surface is flat.
Next, plug the machine into the wall socket using the power adapter that comes in the box.
Now, you have to connect the machine to your computer or mobile using a USB cable or Bluetooth.
After that, download the Design Space app.
Then, you will see New Machine Setup in the app.
Moreover, select the Cricut model from the list.
Follow the instructions displayed on the screen.
Finally, you can use your Cricut cutting machine for crafting.
Download Cricut Design Space on Your Device
Downloading the Design Space is crucial for the Cricut Maker 3 setup. But you do not have to worry as it is easy. You can simply do it if you follow the instructions well. By this time, I am sure you have setup your machine and connected your phone/computer to the internet. Now, you should open any browser and go to the official website of Cricut. You can download the app from there.
If you are already a user of Cricut and have made an account, you just need to sign into the app. In case you are new, you will need to create a new account. This is also an easy task, and you can do it by following these easy steps:
First, go to the browser on your device and open design.cricut.com.
Next, click Download so that the app can be downloaded.
In the case of a computer, go to the Downloads folder.
Now, click twice on the file to initiate installation.
In the end, open the installed file and sign in.
In case you are a new user, go for the option of Sign Up for creating an account.
Conclusion
In short, the Cricut Maker 3 setup is not a difficult task. You just have to do a few things, and you are ready for your crafting. In the beginning, you open the box and check for all the equipment. Then, you begin to setup the Cricut machine, which you can do by following the steps written up there. In the end, you download the Design Space application and sign in to your Cricut ID. Once done, you are ready to start your crafting journey.
0 notes
Text
How to Connect Cricut Bluetooth to Computer: Full Guide
Hey, Cricut folks, I’m going to show you the easiest way to connect Cricut Bluetooth. I know how hard it can be when we get a new Cricut machine. From setup up to performing a test cut, it seems like climbing a mountain. But wait, this is not as difficult as you think!
I recently finished setting up a friend’s machine, in which I briefly taught him how to connect Cricut to computer. Honestly speaking, I didn’t even touch a thing; I was just instructing him to do this and that. Following my instructions, he completed his setup in a matter of minutes. Do you also want me to instruct you on how to set up your Cricut machine? If so, join me on a board to connect your Cricut to your computer using Bluetooth. Let’s start!
Step 1: Unpacking the Cricut Product
In the first step, you must open your new Cricut machine. Be careful while unboxing the box because many accessories are included. You have to ensure that nothing breaks while taking things out. As you can see below, I have unboxed my Cricut Maker 3 machine, and the items inside the box are as follows:
Similarly, when you unbox other Cricut models, such as Cricut Explore or Joy, you will get a few similar items. Now that we have done the unboxing let's proceed with the second step, which is to connect Cricut Bluetooth.
Step 2: Place Your Cricut Machine
Now, you have to find a place where you can locate your machine properly. Ensure the surface is completely flat so that it will be easier to work for you in the future. If you have a table, you can keep it. Otherwise, the floor is also a good idea if you have none.
Now you have chosen the right place, let’s move on to plug the machine. To do this, you have to find a nearby power socket and connect your machine to it.
Once connected, you have to turn on the machine by pressing its power button.
Step 3: Connect Cricut Bluetooth to Your Device
Finally, we are heading to learn how to connect Cricut to a computer via Bluetooth. But here, one question that might arise in your mind is what computer will we connect to? Is this a Mac or Windows or others?
Don’t worry! I have got your back for both the computers. I will show you how to individually connect your Cricut machine via Bluetooth on a Mac or Windows computer. Let’s start with Windows first:
For Windows
For Mac
FAQs
Question 1: Can I connect my Cricut to my laptop?
Answer: As mentioned on its official site, Cricut works with iOS, Windows, Mac, and Android. However, it is not compatible with Chromebook or Unix/Linux. Hence, if you use the operating system mentioned above, you can use any brand’s laptop, such as HP, Acer, Dell, Asus, Lenovo, MSI, and Apple.
Question 2: Is the Internet compulsory for using Cricut Design Space?
Answer: No, it is not necessary to connect the Cricut software to the internet all the time. The internet is only needed when you want to access a certain feature in the app. Otherwise, there is no need to connect it to the internet. The offline option is available for the Cricut app on all devices except Android devices.
Question 3: Can I connect my Cricut machine without Bluetooth?
Answer: Absolutely, yes! You can also connect your Cricut machine and computer via a USB cable. To do this, insert one cable end into the machine’s USB port and the other end into the computer’s USB port. Once connected, you are ready to use the machine for cutting, scoring, and other operations.
Final Words
In conclusion, I discussed how you can connect Cricut Bluetooth to Mac and Windows computers. I explained everything stepwise so that every beginner Cricut user can connect their Cricut wirelessly and hassle-free. The connection is important if you want to set up your Cricut. Hence, connect it and set it up to get started with your Cricut cutting machine. Start setting up your Cricut machine in one go with this simple guide.
Source: https://desincricut.wordpress.com/2024/04/23/how-to-connect-cricut-bluetooth-to-computer-full-guide/
#cricut setup#install cricut design space app#install cricut printer#install cricut explore air 2#www.cricut.com setup login#cricut.com/setup#cricut.com setup download#cricut.com setup#cricut.com setup windows#cricut.com setup mac#cricut.com/create#cricut.com sign in#cricut.com/register#cricut.com design space#cricut#cricut com setup#cricut new#cricut new product device#cricut new machine setup#cricut new product setup#cricut create#cricut create connect to computer
0 notes
Text
How to Setup Cricut Maker 3: Full Guide for Beginners
Are you a beginner looking to start with a Cricut machine? Are you wondering how to setup Cricut Maker 3? If yes, then you have reached the right place. As a longtime Cricut user, I have been using the Cricut Maker 3 machine really well. Here, I am going to provide all the necessary details and tutorials to guide you in setting up your own Cricut cutting machine.
The Cricut Maker 3 is a third-generation crafting machine and one of the latest models. It is known for its power and is capable of cutting over 300 different materials, such as paper, cardstock, leather, plastic, fabric, vinyl, iron-on vinyl, metal, and more. To begin setting up, you have first to unbox the machine and then follow the steps below.
Unboxing the Cricut Maker 3 Product
As a beginner, after buying the machine to learn how to setup Cricut Maker 3, the first thing you have to do is unbox it, check for the items, and make sure nothing is missing. Once checked, you can prepare it for the setup. When you buy the Cricut machine, these are the tools and supplies you will get in the box. You should keep them all in a good place so nothing gets lost and you can find them easily when you need them to use.
Note: When you buy the machine, you should know one thing: a few items will not be in the box. Cricut used to provide these materials in the previous ones. These tools are a mat, pen, rotary blade, and others. While using the Cricut Maker 3 machine, you will have to know what extra tools you will need, and you will have to buy those things separately.
How to Setup Cricut Maker 3 to Get Started Easily?
Once you have unboxed, you can proceed to see the setup you have to do. The process for the Cricut product is as follows. You will need to do it properly and in the right order. The machine setup will be done, and you will be able to work on it.
How to Connect Cricut Maker 3 to Your Computer?
In order to learn how to setup Cricut Maker 3, the next step is that you have to connect the Cricut machine to your computer, you can use wireless Bluetooth or a wired USB cable connection for pairing. The process for connecting your Cricut to your desktop via Bluetooth is here.
How to Download Cricut Design Space?
Moving forward in learning how to setup Cricut Maker 3, now you have to download the Cricut Design Space app on your computer. You may find it a little difficult if you are doing it, but trust me, it is very easy, and here is how you can do it.
Conclusion
In short, learning how to setup Cricut Maker 3 is an easy task, but you should have the proper guidelines for it. In this blog, I have given you all the details you need for your Cricut Maker 3 setup. The first thing you have to do is unbox the machine and prepare for the setup. Once the machine is prepared, you should connect it to your computer. The final step in the setup is to download the Cricut Design Space app. Once you have downloaded and logged in with an account, you can start working on projects.
FAQs
Can I Make Stickers With Cricut Maker 3?
Yes, you can! Cricut Maker 3 is a versatile tool that can cut all the materials you can on a Cricut machine. It is a powerful machine; you can even cut materials like metal and leather. To make stickers, you need to cut papers or cardstock on the Cricut machine. The Cricut Maker 3 can easily cut these materials, allowing you to make stickers.
Can I Use Ink With My Cricut Maker 3?
Yes, for sure! Infusible ink is a material that you can cut on the Cricut machine, and then you can use that design on a mug to make a unique design with the help of the Cricut Mug Press. Infusible ink can be cut on any Cricut machine. Even the older models cut the design to the infusible. If you want to use the ink with the Cricut Maker 3, you can do it without any problem.
What Software Is Good for Cricut Maker 3?
Cricut has two software applications, both compatible with all Cricut machines. The first is the Cricut Design Space app, which is free. You can download this app on your device, connect it to the Cricut Maker 3, and use it just like any other Cricut machine. The other app, Cricut Access, is also available for the Maker 3 machine. However, it is a premium app and requires a subscription.
Visit: cricut.com/setup
Source: https://cricricutdesigncut.wordpress.com/2024/07/20/how-to-setup-cricut-maker-3-full-guide-for-beginners/
#design space setup#cricut.com/setup explore air 2 setup#cricut.com/setup#cricut venture#cricut easy press#cricut design space#cricut new machine setup#cricut setup#www.cricut.com/seup#digital design#www.cricut.com/setup login#setup cricut design space setup#cricut design space setupp#cricut design space login#design space cricut#design.cricut.com#design.cricut.com/setup
0 notes
Last Seen Blogs

speraclinicturkey
Spera Clinic - Hair Transplant Turkey - Istanbul


andreimx
Principe Latino

canwaym
Minus

dimancrazy
Crazy