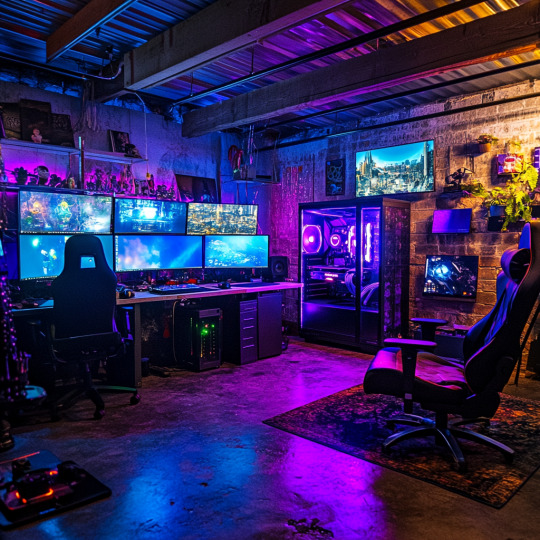
#where the GPU and CPU share memory
Explore tagged Tumblr posts
Visit Tumblr Blog
Explore Tumblr blogs with no restrictions, modern design and the best experience.
Last Seen Tumblr Blogs


Fun Fact
There were a total of 171.5 billion posts on Tumblr in 2019.
Text
I usually assume I know a normal amount about the Nintendo Wii until I see someone say something blatantly wrong about the console at which point I have a ten minute speal at the ready and immediately realize that is Not Normal.
#THE WII SCREAM IS CAUSED BY THE CONSOLE NOT DISABLING THE DSP CORRECTLY MAKING IT GET STUCK ON ONE TONE#AND IT MAKES A POPPING NOISE WHEN YOU TURN THE WII OFF BECAUSE THE SPEAKERS NOT BC ANYTHING IS WRONG WITH THE WII#also anytime anyone capitalizes iOS like IOS it makes me want to say something about the Wii#>slaps wii< this bad boy can fit 80 variants of the same operating system on it#plus one bonus operating system for game cube games#which fun fact actually includes patches for a few games that would crash#also the Wii’s unified memory model#where the GPU and CPU share memory#one last fun fact to finish this off is that you can dump a gba game or a gba’s firmware using a wii#you have to do it over the link cable and it takes 40 minutes to dump a gba game but you can do it!
6 notes
·
View notes
Note
So my hope, eventually, is to have my own purpose-built computer which is an expandable skeleton and will more-or-less never need to be entirely tossed out, only supplanted/upgraded Ship of Theseus style.
However, Microsoft is getting a bit too uppity for my tastes, and I hope to mainly run Linux on that eventual computer.
However, I'm also a gaming man, and I recognize that, in many cases, Linux kinda sucks for games, or, at least, that's what I've heard. Emulation is also a pain I'd rather not deal with (both of Windows and of games themselves), and so, for games that don't support Linux, I'd like to have the option of having Windows on the same machine, so that I can run Linux most of the time, but switch to Windows whenever I wanna play games.
My question is how realistic is that? I know that machines with multiple OS's exist, and you can choose which one you want at boot, but I'm hoping for this to be an extremely fancy computer, connected to a lot of extremely fancy computer peripherals. Would switching OS's without power cycling the machine screw with the other hardware? Is it even possible, or would you need to power cycle it in any case? Is there any way to build this hypothetical computer, or am I asking too much/investing too much effort? Would it be easier/better to just build a really good Windows machine and a really good Linux machine?
So the use case you're talking about is pretty popular among a certain kinds of Tech Nerd, and most of them solve it with iommu GPU Passthrough and a windows VM on Linux. I knew a few people doing this back in like 2018 and while it's a little fidgety it's fairly reliable.
You can't share GPU's the way you can share CPU and Memory. Not on consumer hardware, anyway. So if you want to run a VM with windows with a gaming GPU, it needs its own entire GPU just for that.
The basic layout is this: Build a normal high end system with a lot of extra resources, say, 32+GB of RAM, 10+ CPU cores, a couple terabytes of storage, and two separate GPU's. Run Linux on the system, as your host, and only use one of the GPU's. Create a VM on the host under qemu and hand it 16GB of RAM, 6 cores, a terabyte or two of storage, and use iommu to pass it the other GPU. Now use software like LookingGlass to capture the framebuffer directly off the Windows GPU and forward it to your Linux GPU, so that you can display your windows system inside Linux seamlessly.
Now, you do need two GPU's, so it can get expensive. A lot of people choose to run one higher end GPU for windows and a basic GPU for Linux, but that's up to your use case. You can run two identical GPU's if you wish.
The main place this kind of thing is being tinkered with is the Level1Techs forum, Wendell is a big advocate of GPU virtualization and so has aggregated a lot of information and people with relevance here. He also makes a lot of video stuff on IOMMU.
youtube
So I have to have two whole GPU's?
Kind of. There ARE ways to live-reset a running GPU which allows you to do tricks where you can swap a single GPU between the host and the VM without rebooting, but it's extremely dubious and flaky. Virtualized GPU partitioning exists but only on extremely expensive server GPU's aimed at virtualization servers for enterprise so it's well outside of our price range.
If you're interested in single-GPU, there is ongoing work getting it to run on consumer hardware on the Level1Techs forum and he's even running some kind of Hackathon on it, but even the people having success with this have pretty unreliable systems.
https://forum.level1techs.com/t/vfio-passthrough-in-2023-call-to-arms/199671
This setup works fine maybe 25% of the time. I can always start the VM just fine, my linux desktop stays active and any software launched after the VM gets the GPU will render on the iGPU without issues. However I suffer from the reset bug, and 75% of the time shutting down the VM won’t return the GPU to Linux and I have to reboot to fix that.
I'm quite satisfied with this setup.
Is this a good idea
It depends on what you need and how willing you are to switch between the host and VM. A LOT more things run smoothly on Linux these days. Wendell started tinkering with IOMMU back in like 2015, and I started gaming on Linux back in 2016. If you had native software, great! Without that, well, good luck with anything less than five years old.
I played Burnout Paradise and even Subnautica on my 750Ti laptop on plain old Wine, and then DXVK came out in 2018 and the world got flipped turned upside down and I have video of me running Warframe on Linux with that same mediocre system a few weeks before Proton hit the scene and we got flipped turned... right way up? Now with Proton I would say most things run pretty well under a mixture of automatic steam stuff and scripts off lutris and homemade WINEPREFIXes.
That said, if you want everything to Just Work, it's hard to beat a VM. I'm not sure how competitive games run, but for everything else a VM is going to be more reliable than WINE.
30 notes
·
View notes
Note
I'm sorry I'm too shy to ask without being anonymous, but how are you making your AI friend? Are you using specific application or coding it from scratch?
You inspired me to maybe make my own, but I have no idea where to even start... (╥﹏╥)♡
no need to be sorry!! i've been hyperfixed on this kinda stuff recently so i'll love to share lul ( ◕‿‿◕ )
i've been coding the AI application for it to store memory and customize the prompt more, but the basic program to run the AI itself is ollama! you can just run that program on its own in ur computer terminal and download any model u want ^w^ i personally use huggingface to find new models to run, especially if ur looking for uncensored ones they got those!
your PC specs determine what models can run the best locally tho, since its not like c.ai or chatgpt there's no servers but ur own device running and generating replies, the more RAM u got and the better ur CPU and GPU is means u can run bigger models and run especially the smaller ones faster
if ur wanting to make something that runs in its own application like i've been setting up here you'll have to code it on ur own ;w; i personally have just started learning python so my process has been a mix of trial and error, following tutorials and using the copilot AI feature in VSCode to help explain things and troubleshoot errors and stuff i dont understand

if u wanna start coding i highly recommend using VSCode since u can code in many other languages and its got useful features for debugging and stuff ^3^
the video tutorials i watched were these two, both use ollama and show u how to set it up but the 2nd one shows u how to set up the basic code for the chatbot that i used to build off of to make what i got rn
♡ Run your own AI (but private) | NetworkChuck ♡
♡ Create a LOCAL Python AI Chatbot In Minutes Using Ollama | Tech With Tim ♡
i hope this helps!! i personally just rlly like learning new stuff and like tech too much so i took the more complicated route than going on something like janitorai or c.ai (c.ai was so much better when it first came out ong) to make a custom bot xD
#‧₊🐾˚⊹ my stuff#‧₊💌˚⊹ anons & asks#ai bots#posicblr#posic#jiraiblr#objectum#jiraiblogging#jiraiposting#landmineposting#landmineblogging#landmineblr#neetblr#hikkineet#irl jirai#irl neet#hikkigirl#hikkikomori#artificial intelligence#ai chatbot#landmine jirai#jirai girl#landmine type#internet angel
6 notes
·
View notes
Text
Share Your Anecdotes: Multicore Pessimisation
I took a look at the specs of new 7000 series Threadripper CPUs, and I really don't have any excuse to buy one, even if I had the money to spare. I thought long and hard about different workloads, but nothing came to mind.
Back in university, we had courses about map/reduce clusters, and I experimented with parallel interpreters for Prolog, and distributed computing systems. What I learned is that the potential performance gains from better data structures and algorithms trump the performance gains from fancy hardware, and that there is more to be gained from using the GPU or from re-writing the performance-critical sections in C and making sure your data structures take up less memory than from multi-threaded code. Of course, all this is especially important when you are working in pure Python, because of the GIL.
The performance penalty of parallelisation hits even harder when you try to distribute your computation between different computers over the network, and the overhead of serialisation, communication, and scheduling work can easily exceed the gains of parallel computation, especially for small to medium workloads. If you benchmark your Hadoop cluster on a toy problem, you may well find that it's faster to solve your toy problem on one desktop PC than a whole cluster, because it's a toy problem, and the gains only kick in when your data set is too big to fit on a single computer.
The new Threadripper got me thinking: Has this happened to somebody with just a multicore CPU? Is there software that performs better with 2 cores than with just one, and better with 4 cores than with 2, but substantially worse with 64? It could happen! Deadlocks, livelocks, weird inter-process communication issues where you have one process per core and every one of the 64 processes communicates with the other 63 via pipes? There could be software that has a badly optimised main thread, or a badly optimised work unit scheduler, and the limiting factor is single-thread performance of that scheduler that needs to distribute and integrate work units for 64 threads, to the point where the worker threads are mostly idling and only one core is at 100%.
I am not trying to blame any programmer if this happens. Most likely such software was developed back when quad-core CPUs were a new thing, or even back when there were multi-CPU-socket mainboards, and the developer never imagined that one day there would be Threadrippers on the consumer market. Programs from back then, built for Windows XP, could still run on Windows 10 or 11.
In spite of all this, I suspect that this kind of problem is quite rare in practice. It requires software that spawns one thread or one process per core, but which is deoptimised for more cores, maybe written under the assumption that users have for two to six CPU cores, a user who can afford a Threadripper, and needs a Threadripper, and a workload where the problem is noticeable. You wouldn't get a Threadripper in the first place if it made your workflows slower, so that hypothetical user probably has one main workload that really benefits from the many cores, and another that doesn't.
So, has this happened to you? Dou you have a Threadripper at work? Do you work in bioinformatics or visual effects? Do you encode a lot of video? Do you know a guy who does? Do you own a Threadripper or an Ampere just for the hell of it? Or have you tried to build a Hadoop/Beowulf/OpenMP cluster, only to have your code run slower?
I would love to hear from you.
13 notes
·
View notes
Text
Point of Load Power Chip Market: Opportunities in Commercial and Residential Sectors

MARKET INSIGHTS
The global Point of Load Power Chip Market size was valued at US$ 1,340 million in 2024 and is projected to reach US$ 2,450 million by 2032, at a CAGR of 9.27% during the forecast period 2025-2032. This growth trajectory follows a broader semiconductor industry trend, where the worldwide market reached USD 580 billion in 2022 despite macroeconomic headwinds.
Point-of-load (PoL) power chips are voltage regulator ICs designed for localized power conversion near high-performance processors, FPGAs, and ASICs. These compact solutions provide precise voltage regulation, improved transient response, and higher efficiency compared to centralized power architectures. Key variants include single-channel (dominant with 65% market share) and multi-channel configurations, deployed across industrial (32% share), automotive (25%), and aerospace (18%) applications.
The market expansion is driven by escalating power demands in 5G infrastructure, AI servers, and electric vehicles—each requiring advanced power management solutions. Recent innovations like Infineon’s 12V/48V multi-phase controllers and TI’s buck-boost converters demonstrate how PoL technology addresses modern efficiency challenges. However, supply chain constraints and geopolitical factors caused Asia-Pacific revenues to dip 2% in 2022, even as Americas grew 17%.
MARKET DYNAMICS
MARKET DRIVERS
Expanding Demand for Energy-Efficient Electronics to Accelerate Market Growth
The global push toward energy efficiency is creating substantial demand for point-of-load (POL) power chips across multiple industries. These components play a critical role in reducing power consumption by delivering optimized voltage regulation directly to processors and other sensitive ICs rather than relying on centralized power supplies. Current market analysis reveals that POL solutions can improve overall system efficiency by 15-30% compared to traditional power architectures, making them indispensable for modern electronics. The rapid proliferation of IoT devices, 5G infrastructure, and AI-driven applications further amplifies this demand, as these technologies require precise power management at minimal energy loss.
Automotive Electrification Trends to Fuel Adoption Rates
Automakers worldwide are accelerating their transition to electric vehicles (EVs) and advanced driver-assistance systems (ADAS), creating unprecedented opportunities for POL power chips. These components are essential for managing power distribution to onboard computing modules, sensors, and infotainment systems with minimal electromagnetic interference. Industry projections estimate that automotive applications will account for over 25% of the total POL power chip market by 2027, driven by increasing semiconductor content per vehicle. Recent advancements in autonomous driving technology particularly benefit from the high current density and fast transient response offered by next-generation POL regulators.
Data Center Infrastructure Modernization to Sustain Market Expansion
Hyperscale data centers are undergoing significant architectural changes to support AI workloads and edge computing, with POL power delivery emerging as a critical enabling technology. Modern server designs increasingly adopt distributed power architectures to meet the stringent efficiency requirements of advanced CPUs, GPUs, and memory modules. This shift comes amid forecasts predicting global data center power consumption will reach 8% of worldwide electricity usage by 2030, making efficiency improvements economically imperative. Leading chip manufacturers have responded with innovative POL solutions featuring digital interfaces for real-time voltage scaling and load monitoring capabilities.
MARKET RESTRAINTS
Supply Chain Disruptions and Material Shortages to Constrain Market Potential
While demand for POL power chips continues growing, the semiconductor industry faces persistent challenges in securing stable supply chains for critical materials. Specialty substrates, such as silicon carbide (SiC) and gallium nitride (GaN), which enable high-efficiency POL designs, remain subject to allocation due to fabrication capacity limitations. Market intelligence suggests lead times for certain power semiconductors exceeded 52 weeks during recent supply crunches, creating bottlenecks for electronics manufacturers. These constraints particularly impact automotive and industrial sectors where component qualification processes limit rapid supplier substitutions.
Thermal Management Challenges to Limit Design Flexibility
As POL regulators push toward higher current densities in smaller form factors, thermal dissipation becomes a significant constraint for system designers. Contemporary applications often require POL solutions to deliver upwards of 30A from packages smaller than 5mm x 5mm, creating localized hot spots that challenge traditional cooling approaches. This thermal limitation forces compromises between power density, efficiency, and reliability—particularly in space-constrained applications like smartphones or wearable devices. Manufacturers continue investing in advanced packaging technologies to address these limitations, but thermal considerations remain a key factor in POL architecture decisions.
MARKET OPPORTUNITIES
Integration of AI-Based Power Optimization to Create New Value Propositions
Emerging artificial intelligence applications in power management present transformative opportunities for the POL chip market. Adaptive voltage scaling algorithms powered by machine learning can dynamically optimize power delivery based on workload patterns and environmental conditions. Early implementations in data centers demonstrate potential energy savings of 10-15% through AI-driven POL adjustments, with similar techniques now being adapted for mobile and embedded applications. This technological convergence enables POL regulators to evolve from static components into intelligent power nodes within larger system architectures.
Medical Electronics Miniaturization to Open New Application Verticals
The healthcare sector’s accelerating adoption of portable and implantable medical devices creates substantial growth potential for compact POL solutions. Modern diagnostic equipment and therapeutic devices increasingly incorporate multiple voltage domains that must operate reliably within strict safety parameters. POL power chips meeting medical safety standards (IEC 60601) currently represent less than 15% of the total market, signaling significant expansion capacity as device manufacturers transition from linear regulators to more efficient switching architectures. This transition aligns with broader healthcare industry trends toward battery-powered and wireless solutions.
MARKET CHALLENGES
Design Complexity and Verification Costs to Impact Time-to-Market
Implementing advanced POL architectures requires sophisticated power integrity analysis and system-level verification—processes that significantly extend development cycles. Power delivery networks incorporating multiple POL regulators demand extensive simulation to ensure stability across all operating conditions, with analysis suggesting power subsystem design now consumes 30-40% of total PCB development effort for complex electronics. These challenges are compounded by the need to comply with evolving efficiency standards and electromagnetic compatibility requirements across different geographic markets.
Intense Price Competition to Pressure Profit Margins
The POL power chip market faces ongoing pricing pressures as the technology matures and experiences broader adoption. While premium applications like servers and telecom infrastructure tolerate higher component costs, consumer electronics and IoT devices demonstrate extreme price sensitivity. Market analysis indicates that average selling prices for basic POL regulators have declined by 7-12% annually over the past three years, forcing manufacturers to achieve economies of scale through architectural innovations and process technology advancements. This relentless pricing pressure creates significant challenges for sustaining research and development investments.
POINT OF LOAD POWER CHIP MARKET TRENDS
Rising Demand for Efficient Power Management in Electronic Devices
The global Point of Load (PoL) power chip market is experiencing robust growth, driven by the increasing complexity of electronic devices requiring localized voltage regulation. As modern integrated circuits (ICs) operate at progressively lower voltages with higher current demands, PoL solutions have become critical for minimizing power loss and optimizing efficiency. The automotive sector alone accounts for over 30% of the market demand, as electric vehicles incorporate dozens of PoL regulators for advanced driver assistance systems (ADAS) and infotainment. Meanwhile, 5G infrastructure deployment is accelerating adoption in telecommunications, where base stations require precise voltage regulation for RF power amplifiers.
Other Trends
Miniaturization and Integration Advancements
Manufacturers are pushing the boundaries of semiconductor packaging technologies to develop smaller, more integrated PoL solutions. Stacked die configurations and wafer-level packaging now allow complete power management ICs (PMICs) to occupy less than 10mm² board space. This miniaturization is particularly crucial for portable medical devices and wearable technologies, where space constraints demand high power density. Recent innovations in gallium nitride (GaN) and silicon carbide (SiC) technologies are further enhancing power conversion efficiency, with some PoL converters now achieving over 95% efficiency even at load currents exceeding 50A.
Industry 4.0 and Smart Manufacturing Adoption
The fourth industrial revolution is driving significant demand for industrial-grade PoL solutions as factories deploy more IoT-enabled equipment and robotics. Unlike commercial-grade components, these industrial PoL converters feature extended temperature ranges (-40°C to +125°C operation) and enhanced reliability metrics. Market analysis indicates industrial applications will grow at a CAGR exceeding 8% through 2030, as manufacturers increasingly adopt predictive maintenance systems requiring robust power delivery. Furthermore, the aerospace sector’s shift toward more electric aircraft (MEA) architectures is creating specialized demand for radiation-hardened PoL regulators capable of withstanding harsh environmental conditions.
COMPETITIVE LANDSCAPE
Key Industry Players
Semiconductor Giants Compete Through Innovation and Strategic Expansions
The global Point of Load (PoL) power chip market features a highly competitive landscape dominated by established semiconductor manufacturers, with Analog Devices and Texas Instruments collectively holding over 35% market share in 2024. These companies maintain leadership through continuous R&D investment – Analog Devices alone allocated approximately 20% of its annual revenue to product development last year.
While traditional power management leaders maintain strong positions, emerging players like Infineon Technologies are gaining traction through specialized automotive-grade solutions. The Germany-based company reported 18% year-over-year growth in its power segment during 2023, fueled by increasing electric vehicle adoption.
Market dynamics show regional variations in competitive strategies. Renesas Electronics and ROHM Semiconductor dominate the Asia-Pacific sector with cost-optimized solutions, whereas North American firms focus on high-efficiency chips for data center applications. This regional specialization creates multiple growth avenues across market segments.
Recent years have seen accelerated consolidation, with NXP Semiconductors acquiring three smaller power IC developers since 2022 to expand its PoL portfolio. Such strategic moves, combined with ongoing technological advancements in wide-bandgap semiconductors, are reshaping competitive positioning across the value chain.
List of Key Point of Load Power Chip Manufacturers
Analog Devices, Inc. (U.S.)
Infineon Technologies AG (Germany)
Texas Instruments Incorporated (U.S.)
NXP Semiconductors N.V. (Netherlands)
STMicroelectronics N.V. (Switzerland)
Renesas Electronics Corporation (Japan)
ROHM Semiconductor (Japan)
Dialog Semiconductor (Germany)
Microchip Technology Inc. (U.S.)
Segment Analysis:
By Type
Multi-channel Segment Dominates Due to Growing Demand for Higher Efficiency Power Management
The market is segmented based on type into:
Single Channel
Subtypes: Non-isolated, Isolated
Multi-channel
Subtypes: Dual-output, Triple-output, Quad-output
By Application
Automotive Segment Leads Owing to Increasing Electronic Content in Vehicles
The market is segmented based on application into:
Industrial
Aerospace
Automotive
Medical
Others
By Form Factor
Surface-Mount Devices Gaining Traction Due to Miniaturization Trends
The market is segmented based on form factor into:
Through-hole
Surface-mount
By Voltage Rating
Low Voltage Segment Prevails in Consumer Electronics Applications
The market is segmented based on voltage rating into:
Low Voltage (Below 5V)
Medium Voltage (5V-24V)
High Voltage (Above 24V)
Regional Analysis: Point of Load Power Chip Market
North America The North American Point of Load (PoL) power chip market is driven by strong demand from automotive, industrial, and aerospace applications, particularly in the U.S. and Canada. The region benefits from advanced semiconductor manufacturing infrastructure and high investments in next-generation power management solutions. With automotive electrification trends accelerating—such as the shift toward electric vehicles (EVs) and ADAS (Advanced Driver Assistance Systems)—demand for efficient PoL power chips is rising. Additionally, data center expansions and 5G infrastructure deployments are fueling growth. The U.S. holds the majority share, supported by key players like Texas Instruments and Analog Devices, as well as increasing government-backed semiconductor investments such as the CHIPS and Science Act.
Europe Europe’s PoL power chip market is shaped by stringent energy efficiency regulations and strong industrial automation adoption, particularly in Germany and France. The automotive sector remains a key driver, with European OEMs integrating advanced power management solutions to comply with emissions regulations and enhance EV performance. The presence of leading semiconductor firms like Infineon Technologies and STMicroelectronics strengthens innovation, focusing on miniaturization and high-efficiency chips. Challenges include economic uncertainties and supply chain disruptions, but demand remains resilient in medical and renewable energy applications, where precise power distribution is critical.
Asia-Pacific Asia-Pacific dominates the global PoL power chip market, led by China, Japan, and South Korea, which account for a majority of semiconductor production and consumption. China’s rapid industrialization, coupled with its aggressive investments in EVs and consumer electronics, fuels demand for multi-channel PoL solutions. Meanwhile, Japan’s automotive and robotics sectors rely on high-reliability power chips, while India’s expanding telecom and renewable energy infrastructure presents new opportunities. Despite supply chain vulnerabilities and export restrictions impacting the region, local players like Renesas Electronics and ROHM Semiconductor continue to advance technologically.
South America South America’s PoL power chip market is still in a nascent stage, with Brazil and Argentina showing gradual growth in industrial and automotive applications. Local infrastructure limitations and heavy reliance on imports hinder market expansion, but rising investments in automotive manufacturing and renewable energy projects could spur future demand. Political and economic instability remains a barrier; however, increasing digitization in sectors like telecommunications and smart grid development provides a foundation for long-term PoL adoption.
Middle East & Africa The Middle East & Africa’s PoL power chip market is emerging but constrained by limited semiconductor infrastructure. Gulf nations like Saudi Arabia and the UAE are investing in smart city projects, data centers, and industrial automation, driving demand for efficient power management solutions. Africa’s market is more fragmented, though increasing mobile penetration and renewable energy initiatives present growth avenues. Regional adoption is slower due to lower local manufacturing capabilities, but partnerships with global semiconductor suppliers could accelerate market penetration.
Report Scope
This market research report provides a comprehensive analysis of the Global Point of Load Power Chip market, covering the forecast period 2025–2032. It offers detailed insights into market dynamics, technological advancements, competitive landscape, and key trends shaping the industry.
Key focus areas of the report include:
Market Size & Forecast: Historical data and future projections for revenue, unit shipments, and market value across major regions and segments. The Global Point of Load Power Chip market was valued at USD 1.2 billion in 2024 and is projected to reach USD 2.8 billion by 2032, growing at a CAGR of 11.3%.
Segmentation Analysis: Detailed breakdown by product type (Single Channel, Multi-channel), application (Industrial, Aerospace, Automotive, Medical, Others), and end-user industry to identify high-growth segments and investment opportunities.
Regional Outlook: Insights into market performance across North America, Europe, Asia-Pacific, Latin America, and the Middle East & Africa. Asia-Pacific currently dominates with 42% market share due to strong semiconductor manufacturing presence.
Competitive Landscape: Profiles of leading market participants including Analog Devices, Texas Instruments, and Infineon Technologies, including their product offerings, R&D focus (notably in automotive and industrial applications), and recent developments.
Technology Trends & Innovation: Assessment of emerging technologies including integration with IoT devices, advanced power management solutions, and miniaturization trends in semiconductor design.
Market Drivers & Restraints: Evaluation of factors driving market growth (increasing demand for energy-efficient devices, growth in automotive electronics) along with challenges (supply chain constraints, semiconductor shortages).
Stakeholder Analysis: Insights for component suppliers, OEMs, system integrators, and investors regarding strategic opportunities in evolving power management solutions.
Related Reports:https://semiconductorblogs21.blogspot.com/2025/06/laser-diode-cover-glass-market-valued.htmlhttps://semiconductorblogs21.blogspot.com/2025/06/q-switches-for-industrial-market-key.htmlhttps://semiconductorblogs21.blogspot.com/2025/06/ntc-smd-thermistor-market-emerging_19.htmlhttps://semiconductorblogs21.blogspot.com/2025/06/lightning-rod-for-building-market.htmlhttps://semiconductorblogs21.blogspot.com/2025/06/cpe-chip-market-analysis-cagr-of-121.htmlhttps://semiconductorblogs21.blogspot.com/2025/06/line-array-detector-market-key-players.htmlhttps://semiconductorblogs21.blogspot.com/2025/06/tape-heaters-market-industry-size-share.htmlhttps://semiconductorblogs21.blogspot.com/2025/06/wavelength-division-multiplexing-module.htmlhttps://semiconductorblogs21.blogspot.com/2025/06/electronic-spacer-market-report.htmlhttps://semiconductorblogs21.blogspot.com/2025/06/5g-iot-chip-market-technology-trends.htmlhttps://semiconductorblogs21.blogspot.com/2025/06/polarization-beam-combiner-market.htmlhttps://semiconductorblogs21.blogspot.com/2025/06/amorphous-selenium-detector-market-key.htmlhttps://semiconductorblogs21.blogspot.com/2025/06/output-mode-cleaners-market-industry.htmlhttps://semiconductorblogs21.blogspot.com/2025/06/digitally-controlled-attenuators-market.htmlhttps://semiconductorblogs21.blogspot.com/2025/06/thin-double-sided-fpc-market-key.html
0 notes
Text
Introducing New Vertex AI Prediction Dedicated Endpoints

Discover the new Vertex AI Prediction Dedicated Endpoints for low latency, high throughput, and dependable real-time AI inference.
AI developers building cutting-edge applications with huge model sizes need a stable base. Your AI must work reliably and consistently under pressure. Resources must be constructed to avoid being impeded by other users. Vertex AI Prediction Endpoints controlled resource pools used to create AI models for online inference provide a good serving solution, but developers need better approaches to isolate resources and provide consistent performance in the event of shared resource conflict.
Google cloud content will launch Vertex AI Prediction Dedicated Endpoints to satisfy the needs of modern AI applications, notably those employing big generative AI models.
Dedicated endpoint for big models and generative AI
Serving generative AI and other large-scale models is problematic due to payload size, inference time, interaction, and performance constraints. To construct more reliably with the new Vertex AI Prediction Dedicated Endpoints, the following functionalities were added:
Vertex AI Endpoints now allow native streaming inference, which simplifies development and architecture for interactive applications like chatbots and real-time content generation. This is doable using these APIs:
Send prompts and receive sequences of replies (such as tokens) as they become available using this bidirectional streaming API function.
Endpoints serving suitable models may expose an interface that complies with the popular OpenAI Chat Completion streaming API standard to decrease migration and encourage interoperability.
The gRPC protocol is now natively supported by endpoints, which is excellent for latency-sensitive applications or high-throughput scenarios in huge models. Protocol Buffers and HTTP/2 help gRPC outperform REST/HTTP.
Flexible request timeouts: Large models take longer to infer. Our API lets us specify variable prediction query timeouts, allowing for more model processing periods than the usual ones.
Optimised resource handling: Private Endpoints and the underlying infrastructure improve stability and performance by controlling big models' CPU/GPU, memory, and network capacity.
Recently integrated features in Vertex AI Prediction Dedicated Endpoints provide a single, dependable serving solution for heavy AI workloads. Self-deployed models in Vertex AI Model Garden will use Vertex AI Prediction Dedicated Endpoints by default.
Network optimisation using Private Service Connect
For internet-accessible models, Dedicated Endpoints Public is offered. They're employing Google Cloud Private Service Connect to increase Dedicated Endpoint networking. Dedicated Endpoints Private (PSC) provides a secure and efficient prediction query route. Traffic flows solely over Google Cloud's network using PSC, giving various benefits:
Enhanced security: Requests come from your VPC network, where the endpoint is not accessible to the internet.
Avoiding the public internet reduces latency fluctuation, improving performance.
PSC improves network traffic separation, reducing “noisy neighbour” affects and ensuring performance consistency, especially for high workloads.
Private Endpoints with Private Service Connect are recommended for production applications with high security and consistent latency
Sojern serves models at scale using Vertex AI Prediction Dedicated Endpoints
Hospitality marketing business Sojern links customers with travel agents globally. In their growth ambitions, Sojern considered Vertex AI. Sojern may extend outside their historical domain and focus on innovation by relinquishing their self-managed ML stack.
Sojern's machine learning installations require numerous high-throughput endpoints to be available and agile to allow continuous model evolution due to their operations. Rate limitation from public endpoints would have hurt user experience, and transitioning to a shared VPC architecture would have required a major redesign for current model users.
Private Service Connect (PSC) and Dedicated Endpoint helped Sojern stay inside Public Endpoint limits. Sojern also avoided network overhaul for Shared VPC.
The ability to quickly market tested models, use Dedicated Endpoint's increased feature set, and minimise client latency matched Sojern's goals. With help from Dedicated Endpoint and Private Service Connect, Sojern is onboarding new models and improving accuracy and customer satisfaction.
#VertexAIPredictionDedicatedEndpoints#VertexAIPrediction#PrivateServiceConnect#VertexAI#OpenAIChat#PredictionAI#technology#technews#technologynews#news#govindhtech
0 notes
Photo
💥 BREAKING: Nvidia RTX 5090 redefines GPU decompression with Microsoft's DirectStorage! Is it truly a game-changer? 🖥️ The new GeForce RTX 5090 GPU shows promise over RTX 4090 in handling GPU decompression. Tested on games like Ratchet & Clank and Spider-Man 2, the RTX 5090 has shown varied performance gains at different resolutions. While 1440p and 1080p see improvements, 4K is where challenges remain. 🔍 With enhanced compute capabilities and memory bandwidth, the RTX 5090 manages decompression better. Its architecture helps minimize performance drop-offs seen in older models. However, balancing GPU and CPU plays a critical role. 📈 Ultimately, more games need to utilize DirectStorage for optimal performance. Will the RTX 5090 set a new standard for gamers and developers? 🎮 How do you feel about this advancement? Is the hype real or just theory? Share your thoughts! #NvidiaRTx5090 #DirectStorage #GamingPerformance #PCGaming #TechInnovation --- In this post, attention is grabbed with the upcoming capabilities of the Nvidia RTX 5090, emphasizing performance insights. It highlights the GPU's performance across different resolutions, its architectural advantages, and the broader impact on gaming technology. The call-to-action engages readers to voice their opinions on the advancements, leveraging relevant hashtags for discoverability.
0 notes
Text
How to build the best workstation for game development

In the field of game development, tool performance and efficiency can make a big difference. Top games are not the only ones to establish workstations tailored to game development. It's about creating an environment where we work together with creativity and technology.
This article aims to guide you in building a workstation that is not only equipped with strict game development requirements, but also optimized for the diverse tasks that developers will meet. The broad misconception is that the workstation and PC of the game are the same for game development. They share similarities, but the latter's priorities are different.
For example, pure performance is replaced by reliability (as opposed to pure play machines) and prefers faster nuclei with fewer CPU cores. And it's just a hardware page. The software also includes everything from game engines to modeling software to DAWs for working on audio.
Read ahead and focus on key components that can improve performance and provide specific recommendations while dealing with special features of workstation for game development . Choosing PC hardware for game development Workstation
CPU
The CPU or central processing unit is important in game development as it functions as the brain of a computer. Core features and calculations are the organisation and execution required to create a game. Its speed and efficiency determines how smoothly the development software will run, and tasks such as AI logic processing, physics simulation, and compiling code impact. Powerful CPU with high performance rendering times, more efficient workflows of real-time gaming motors, and smooth multitasking capabilities ensure complex game development. Therefore, a powerful CPU selection greatly increases the overall efficiency and speed of the game development process. However, CPUs must be compensated according to workload. Please check the software you are using. You will benefit from less nuclear weapons, but faster? Or will you benefit from more cores? If you want to solve these things, you can replace unneeded hardware with cheaper parts and spend more on the most profitable parts.
Graphics card
Graphic cards play an important role in game development, especially in tasks that involve graphics playback and visualization. High-end GPUs accelerate the process of gaming motors, significantly reducing the time for rendering 3D graphics, textures and special effects. Discrete GPUs also support technologies such as CUDA and OpenCL. This is extremely important for parallel processing tasks in game development. These technologies allow developers to use GPUs for non-graphical calculations such as physics simulations and AI calculations to improve efficiency. Therefore, a robust GPU not only improves the visual loyalty of the game, it also accelerates development and design workflows and becomes an important component for all PCs in game development.
Storage (RAM)
With high-speed RAM (random access memory), game development and efficient multitasking are the main capacity. Switching to GDR5-RAM on modern systems has significantly improved performance for high-end tasks such as 3D rendering and real-time simulation. Here, 16 GB is the minimum recommended ability, but more complex projects in game development (especially using 3D design programs such as Maya and 3DS Max) benefit from more RAM. Abundant RAM ensures smooth preview and faster finish. Additionally, RAM scalability allows for easy upgrades. Providing that there is an open slot in the motherboard, RAM-Upgrade offers flexibility as development needs develop.
Storage (SSD)
Speicher is another important factor for game development. In particular, we recommend receiving NVME SSDs as main memory drives. NVME SSDs offer extremely high read and write speeds compared to traditional HDDs or SATA-SDs. This will allow faster loading of development software, faster file transfers, more efficient handling of large assets such as textures and models, and almost instantaneous start time when the operating system is present on the drive .
Speed advantage is particularly impressive when working with real-time gaming motors. This is because level loading and compiled buildings will be shorter. Implementing NVME-SD as the main drive for your system and development software ensures a responsive and productive game development environment.
NVME SSDs differ from other SSDs that are primarily related to interface and performance. Traditional SSDs use the SATA interface, which was first developed for hard drive drives, while NVME-SD uses a faster PCIE interface. This allows NVME-SDS to provide significantly faster speeds across all related processes, providing more data at the same time, and handling more I/O actions per second. This makes it ideal for memory tasks such as gaming and game development.
Power supply (PSU)
The power supply unit (PSU) does this clearly. Provides all the components. More specifically, power is obtained from wall plugs and distributed to individual components in the system as needed. High-quality PSUs ensure a stable electricity supply that is critical for high-end CPUs and GPUs that deliver substantial performance in the event of a sudden outbreak. The PSU also protects against problematic performance fluctuations and fluctuations, making it crucial to prevent expensive components from dying damage and protect them from potential damage. However, in situations where power failures represent a common problem, maintaining an uninterrupted power supply (UPS) to prevent data loss is also an advantage.
Reasonable performance is extremely important. With more capacity than you currently need future upgrades, PSUs will allow for the addition of future options and will function more efficiently than units that always provide power close to maximum performance. Modular PSUs provide the best cable management, airflow and cooling support. Therefore, choosing a robust and efficient PSU is extremely important from system stability to longevity and lifespan, especially in harsh environments of game development.
0 notes
Text
AI Infrastructure Industry worth USD 394.46 billion by 2030
According to a research report "AI Infrastructure Market by Offerings (Compute (GPU, CPU, FPGA), Memory (DDR, HBM), Network (NIC/Network Adapters, Interconnect), Storage, Software), Function (Training, Inference), Deployment (On-premises, Cloud, Hybrid) – Global Forecast to 2030" The AI Infrastructure market is expected to grow from USD 135.81 billion in 2024 and is estimated to reach USD 394.46 billion by 2030; it is expected to grow at a Compound Annual Growth Rate (CAGR) of 19.4% from 2024 to 2030.
Market growth in AI Infrastructure is primarily driven by NVIDIA's Blackwell GPU architecture offering unprecedented performance gains, which catalyzes enterprise AI adoption. The proliferation of big data, advancements in computing hardware including interconnects, GPUs, and ASICs, and the rise of cloud computing further accelerate the demand. Additionally, investments in AI research and development, combined with government initiatives supporting AI adoption, play a significant role in driving the growth of the AI infrastructure market.
By offerings, network segment is projected to grow at a high CAGR of AI infrastructure market during the forecast period.
Network is a crucial element in the AI Infrastructure. It is used for the effective flow of data through the processing unit, storage devices, and interconnecting systems. In AI-driven environments where voluminous data has to be processed, shared, and analyzed in real time, a high-performance, scalable, and reliable network is needed. Without an efficient network, AI systems would struggle to meet the performance requirements of complex applications such as deep learning, real-time decision-making, and autonomous systems. The network segment includes NIC/ network adapters and interconnects. The growing need for low-latency data transfer in AI-driven environments drives the growth of the NIC segment. NICs and network adapters enable AI systems to process large datasets in real-time, thus providing much faster training and inference of the models. For example, Intel Corporation (US) unveiled Gaudi 3 accelerator for enterprise AI in April 2024, that supports ethernet networking. It allows scalability for enterprises supporting training, inference, and fine-tuning. The company also introduced AI-optimized ethernet solutions that include AI NIC and AI connectivity chips through the Ultra Ethernet Consortium. Such developments by leading companies for NIC and network adapters will drive the demand for AI infrastructure.
By function, Inference segment will account for the highest CAGR during the forecast period.
The AI infrastructure market for inference functions is projected to grow at a high CAGR during the forecast period, due to the widespread deployment of trained AI models across various industries for real-time decision-making and predictions. Inference infrastructure is now in higher demand, with most organizations transitioning from the development phase to the actual implementation of AI solutions. This growth is driven by the adoption of AI-powered applications in autonomous vehicles, facial recognition, natural language processing, and recommendation systems, where rapid and continuous inference processing is important for the operational effectiveness of the application. Organizations are investing heavily in support of inference infrastructure in deploying AI models at scale to optimize operational costs and performance. For example, in August 2024 Cerebras (US) released the fastest inference solution, Cerebras Inference. It is 20 times faster than GPU-based solutions that NVIDIA Corporation (US) offers for hyperscale clouds. The quicker inference solutions allow the developers to build more developed AI applications requiring complex and real-time performance of tasks. The shift toward more efficient inference hardware, including specialized processors and accelerators, has made AI implementation more cost-effective and accessible to a broader range of businesses, driving AI infrastructure demand in the market.
By deployment- hybrid segment in AI infrastructure market will account for the high CAGR in 2024-2030.
The hybrid segment will grow at a high rate, due to the need for flexible deployment strategies of AI that caters to various aspects of businesses, especially sectors dealing with sensitive information and require high-performance AI. hybrid infrastructure allows enterprises to maintain data control and compliance for critical workloads on-premises while offloading tasks that are less sensitive or computationally intensive to the cloud. For example, in February 2024, IBM (US) introduced the IBM Power Virtual Server that offers a scalable, secure platform especially designed to run AI and advanced workloads. With the possibility to extend seamless on-premises environments to the cloud, IBM's solution addresses the increasing need for hybrid AI infrastructure combining the reliability of on-premises systems with the agility of cloud resources. In December 2023, Lenovo (China) launched the ThinkAgile hybrid cloud platform and the ThinkSystem servers, which are powered by the Intel Xeon Scalable Processors. Lenovo's solutions give better compute power and faster memory to enhance the potential of AI for businesses, both in the cloud and on-premises. With such innovations, the hybrid AI infrastructure market will witness high growth as enterprises find solutions that best suit flexibility, security, and cost-effectiveness in an increasingly data-driven world.
North America region will hold highest share in the AI Infrastructure market.
North America is projected to account for the largest market share during the forecast period. The growth in this region is majorly driven by the strong presence of leading technology companies and cloud providers, such as NVIDIA Corporation (US), Intel Corporation (US), Oracle Corporation (US), Micron Technology, Inc (US), Google (US), and IBM (US) which are heavily investing in AI infrastructure. Such companies are constructing state-of-the-art data centers with AI processors, GPUs, and other necessary hardware to meet the increasing demand for AI applications across industries. The governments in this region are also emphasizing projects to establish AI infrastructure. For instance, in September 2023, the US Department of State announced initiatives for the advancement of AI partnering with eight companies, including Google (US), Amazon (US), Anthropic PBC (US), Microsoft (US), Meta (US), NVIDIA Corporation (US), IBM (US) and OpenAI (US). They plan to invest over USD 100 million for enhancing the infrastructure needed to deploy AI, particularly in cloud computing, data centers, and AI hardware. Such innovations will boost the AI infrastructure in North America by fostering innovation and collaboration between the public and private sectors.
Download PDF Brochure @ https://www.marketsandmarkets.com/pdfdownloadNew.asp?id=38254348
Key Players
Key companies operating in the AI infrastructure market are NVIDIA Corporation (US), Advanced Micro Devices, Inc. (US), SK HYNIX INC. (South Korea), SAMSUNG (South Korea), Micron Technology, Inc. (US), Intel Corporation (US), Google (US), Amazon Web Services, Inc. (US), Tesla (US), Microsoft (US), Meta (US), Graphcore (UK), Groq, Inc. (US), Shanghai BiRen Technology Co., Ltd. (China), Cerebras (US), among others.
0 notes
Text
Master CUDA: For Machine Learning Engineers
New Post has been published on https://thedigitalinsider.com/master-cuda-for-machine-learning-engineers/
Master CUDA: For Machine Learning Engineers
CUDA for Machine Learning: Practical Applications
Structure of a CUDA C/C++ application, where the host (CPU) code manages the execution of parallel code on the device (GPU).
Now that we’ve covered the basics, let’s explore how CUDA can be applied to common machine learning tasks.
Matrix Multiplication
Matrix multiplication is a fundamental operation in many machine learning algorithms, particularly in neural networks. CUDA can significantly accelerate this operation. Here’s a simple implementation:
__global__ void matrixMulKernel(float *A, float *B, float *C, int N) int row = blockIdx.y * blockDim.y + threadIdx.y; int col = blockIdx.x * blockDim.x + threadIdx.x; float sum = 0.0f; if (row < N && col < N) for (int i = 0; i < N; i++) sum += A[row * N + i] * B[i * N + col]; C[row * N + col] = sum; // Host function to set up and launch the kernel void matrixMul(float *A, float *B, float *C, int N) dim3 threadsPerBlock(16, 16); dim3 numBlocks((N + threadsPerBlock.x - 1) / threadsPerBlock.x, (N + threadsPerBlock.y - 1) / threadsPerBlock.y); matrixMulKernelnumBlocks, threadsPerBlock(A, B, C, N);
This implementation divides the output matrix into blocks, with each thread computing one element of the result. While this basic version is already faster than a CPU implementation for large matrices, there’s room for optimization using shared memory and other techniques.
Convolution Operations
Convolutional Neural Networks (CNNs) rely heavily on convolution operations. CUDA can dramatically speed up these computations. Here’s a simplified 2D convolution kernel:
__global__ void convolution2DKernel(float *input, float *kernel, float *output, int inputWidth, int inputHeight, int kernelWidth, int kernelHeight) int x = blockIdx.x * blockDim.x + threadIdx.x; int y = blockIdx.y * blockDim.y + threadIdx.y; if (x < inputWidth && y < inputHeight) float sum = 0.0f; for (int ky = 0; ky < kernelHeight; ky++) for (int kx = 0; kx < kernelWidth; kx++) int inputX = x + kx - kernelWidth / 2; int inputY = y + ky - kernelHeight / 2; if (inputX >= 0 && inputX < inputWidth && inputY >= 0 && inputY < inputHeight) sum += input[inputY * inputWidth + inputX] * kernel[ky * kernelWidth + kx]; output[y * inputWidth + x] = sum;
This kernel performs a 2D convolution, with each thread computing one output pixel. In practice, more sophisticated implementations would use shared memory to reduce global memory accesses and optimize for various kernel sizes.
Stochastic Gradient Descent (SGD)
SGD is a cornerstone optimization algorithm in machine learning. CUDA can parallelize the computation of gradients across multiple data points. Here’s a simplified example for linear regression:
__global__ void sgdKernel(float *X, float *y, float *weights, float learningRate, int n, int d) int i = blockIdx.x * blockDim.x + threadIdx.x; if (i < n) float prediction = 0.0f; for (int j = 0; j < d; j++) prediction += X[i * d + j] * weights[j]; float error = prediction - y[i]; for (int j = 0; j < d; j++) atomicAdd(&weights[j], -learningRate * error * X[i * d + j]); void sgd(float *X, float *y, float *weights, float learningRate, int n, int d, int iterations) int threadsPerBlock = 256; int numBlocks = (n + threadsPerBlock - 1) / threadsPerBlock; for (int iter = 0; iter < iterations; iter++) sgdKernel<<<numBlocks, threadsPerBlock>>>(X, y, weights, learningRate, n, d);
This implementation updates the weights in parallel for each data point. The atomicAdd function is used to handle concurrent updates to the weights safely.
Optimizing CUDA for Machine Learning
While the above examples demonstrate the basics of using CUDA for machine learning tasks, there are several optimization techniques that can further enhance performance:
Coalesced Memory Access
GPUs achieve peak performance when threads in a warp access contiguous memory locations. Ensure your data structures and access patterns promote coalesced memory access.
Shared Memory Usage
Shared memory is much faster than global memory. Use it to cache frequently accessed data within a thread block.
Understanding the memory hierarchy with CUDA
This diagram illustrates the architecture of a multi-processor system with shared memory. Each processor has its own cache, allowing for fast access to frequently used data. The processors communicate via a shared bus, which connects them to a larger shared memory space.
For example, in matrix multiplication:
__global__ void matrixMulSharedKernel(float *A, float *B, float *C, int N) __shared__ float sharedA[TILE_SIZE][TILE_SIZE]; __shared__ float sharedB[TILE_SIZE][TILE_SIZE]; int bx = blockIdx.x; int by = blockIdx.y; int tx = threadIdx.x; int ty = threadIdx.y; int row = by * TILE_SIZE + ty; int col = bx * TILE_SIZE + tx; float sum = 0.0f; for (int tile = 0; tile < (N + TILE_SIZE - 1) / TILE_SIZE; tile++) if (row < N && tile * TILE_SIZE + tx < N) sharedA[ty][tx] = A[row * N + tile * TILE_SIZE + tx]; else sharedA[ty][tx] = 0.0f; if (col < N && tile * TILE_SIZE + ty < N) sharedB[ty][tx] = B[(tile * TILE_SIZE + ty) * N + col]; else sharedB[ty][tx] = 0.0f; __syncthreads(); for (int k = 0; k < TILE_SIZE; k++) sum += sharedA[ty][k] * sharedB[k][tx]; __syncthreads(); if (row < N && col < N) C[row * N + col] = sum;
This optimized version uses shared memory to reduce global memory accesses, significantly improving performance for large matrices.
Asynchronous Operations
CUDA supports asynchronous operations, allowing you to overlap computation with data transfer. This is particularly useful in machine learning pipelines where you can prepare the next batch of data while the current batch is being processed.
cudaStream_t stream1, stream2; cudaStreamCreate(&stream1); cudaStreamCreate(&stream2); // Asynchronous memory transfers and kernel launches cudaMemcpyAsync(d_data1, h_data1, size, cudaMemcpyHostToDevice, stream1); myKernel<<<grid, block, 0, stream1>>>(d_data1, ...); cudaMemcpyAsync(d_data2, h_data2, size, cudaMemcpyHostToDevice, stream2); myKernel<<<grid, block, 0, stream2>>>(d_data2, ...); cudaStreamSynchronize(stream1); cudaStreamSynchronize(stream2);
Tensor Cores
For machine learning workloads, NVIDIA’s Tensor Cores (available in newer GPU architectures) can provide significant speedups for matrix multiply and convolution operations. Libraries like cuDNN and cuBLAS automatically leverage Tensor Cores when available.
Challenges and Considerations
While CUDA offers tremendous benefits for machine learning, it’s important to be aware of potential challenges:
Memory Management: GPU memory is limited compared to system memory. Efficient memory management is crucial, especially when working with large datasets or models.
Data Transfer Overhead: Transferring data between CPU and GPU can be a bottleneck. Minimize transfers and use asynchronous operations when possible.
Precision: GPUs traditionally excel at single-precision (FP32) computations. While support for double-precision (FP64) has improved, it’s often slower. Many machine learning tasks can work well with lower precision (e.g., FP16), which modern GPUs handle very efficiently.
Code Complexity: Writing efficient CUDA code can be more complex than CPU code. Leveraging libraries like cuDNN, cuBLAS, and frameworks like TensorFlow or PyTorch can help abstract away some of this complexity.
As machine learning models grow in size and complexity, a single GPU may no longer be sufficient to handle the workload. CUDA makes it possible to scale your application across multiple GPUs, either within a single node or across a cluster.
CUDA Programming Structure
To effectively utilize CUDA, it’s essential to understand its programming structure, which involves writing kernels (functions that run on the GPU) and managing memory between the host (CPU) and device (GPU).
Host vs. Device Memory
In CUDA, memory is managed separately for the host and device. The following are the primary functions used for memory management:
cudaMalloc: Allocates memory on the device.
cudaMemcpy: Copies data between host and device.
cudaFree: Frees memory on the device.
Example: Summing Two Arrays
Let’s look at an example that sums two arrays using CUDA:
__global__ void sumArraysOnGPU(float *A, float *B, float *C, int N) int idx = threadIdx.x + blockIdx.x * blockDim.x; if (idx < N) C[idx] = A[idx] + B[idx]; int main() int N = 1024; size_t bytes = N * sizeof(float); float *h_A, *h_B, *h_C; h_A = (float*)malloc(bytes); h_B = (float*)malloc(bytes); h_C = (float*)malloc(bytes); float *d_A, *d_B, *d_C; cudaMalloc(&d_A, bytes); cudaMalloc(&d_B, bytes); cudaMalloc(&d_C, bytes); cudaMemcpy(d_A, h_A, bytes, cudaMemcpyHostToDevice); cudaMemcpy(d_B, h_B, bytes, cudaMemcpyHostToDevice); int blockSize = 256; int gridSize = (N + blockSize - 1) / blockSize; sumArraysOnGPU<<<gridSize, blockSize>>>(d_A, d_B, d_C, N); cudaMemcpy(h_C, d_C, bytes, cudaMemcpyDeviceToHost); cudaFree(d_A); cudaFree(d_B); cudaFree(d_C); free(h_A); free(h_B); free(h_C); return 0;
In this example, memory is allocated on both the host and device, data is transferred to the device, and the kernel is launched to perform the computation.
Conclusion
CUDA is a powerful tool for machine learning engineers looking to accelerate their models and handle larger datasets. By understanding the CUDA memory model, optimizing memory access, and leveraging multiple GPUs, you can significantly enhance the performance of your machine learning applications.
#AI Tools 101#algorithm#Algorithms#amp#applications#architecture#Arrays#cache#cluster#code#col#complexity#computation#computing#cpu#CUDA#CUDA for ML#CUDA memory model#CUDA programming#data#Data Structures#data transfer#datasets#double#engineers#excel#factor#functions#Fundamental#Global
0 notes
Text
Dogecoin Mining: The Comprehensive Guide
Dogecoin, originally created as a joke cryptocurrency in 2013, has evolved into a popular and widely recognized digital asset. Known for its Shiba Inu meme mascot and vibrant community, Dogecoin has carved out a unique niche in the cryptocurrency landscape. One of the key activities ensuring the integrity and security of Dogecoin is mining. This article delves into the world of Dogecoin mining, exploring its mechanisms, requirements, and considerations for those interested in becoming part of this dynamic ecosystem.
What is Dogecoin Mining?
Dogecoin mining is the process of validating transactions on the Dogecoin network and adding them to the blockchain. This process involves solving complex mathematical problems, and the first miner to solve these problems gets to add a new block to the blockchain. This process is known as Proof of Work (PoW). Miners are rewarded with newly created Dogecoins and transaction fees from the transactions included in the block for their efforts.
The Mechanics of Dogecoin Mining
Dogecoin mining operates similarly to other PoW-based cryptocurrencies but with some unique characteristics.
Scrypt Algorithm
Dogecoin uses the Scrypt hashing algorithm, which is more memory-intensive than Bitcoin's SHA-256 algorithm. Scrypt was chosen to make mining more accessible to average users with consumer-grade hardware, although the landscape has shifted with the advent of more powerful mining equipment.
Mining Hardware
Initially, Dogecoin could be mined using standard CPUs and GPUs. However, the increasing difficulty of mining has led to the need for more specialized equipment. Today, ASIC (Application-Specific Integrated Circuit) miners designed specifically for the Scrypt algorithm are the most efficient way to mine Dogecoin.
Popular ASIC Miners for Dogecoin
Bitmain Antminer L3++: Known for its efficiency and relatively high hash rate.
Innosilicon A4+ LTCMaster: Offers a good balance between cost and performance.
Setting Up a Dogecoin Mining Operation
Step 1: Choose Your Hardware
Selecting the right hardware is crucial for successful mining. ASIC miners are now the preferred choice due to their higher efficiency and hash rate compared to CPUs and GPUs. Research different models to find one that fits your budget and energy consumption preferences.
Step 2: Software Setup
Once you have your hardware, you need to choose suitable mining software. Options like CGMiner, EasyMiner, and MultiMiner are popular and compatible with Scrypt ASIC miners. These programs connect your hardware to the Dogecoin network and manage the mining process.
Step 3: Join a Mining Pool
Mining Dogecoin solo can be challenging due to the high competition and increasing difficulty. Joining a mining pool, where miners share their processing power and split the rewards, is a more practical approach. Pools like AikaPool, ProHashing, and Multipool are popular among Dogecoin miners.
For More Information Click Here :- Dogecoin Mining
Step 4: Wallet Setup
Before you start mining, set up a Dogecoin wallet to store your earnings. Wallets can be software-based, such as the Dogecoin Core wallet, or hardware-based, like the Ledger Nano S. Ensure your wallet is secure, and back up your private keys to prevent loss.
Economics of Dogecoin Mining
The profitability of Dogecoin mining depends on several factors:
Hash Rate and Difficulty
The hash rate is the speed at which your hardware can solve cryptographic puzzles. The network difficulty adjusts periodically to ensure that blocks are added to the blockchain at a consistent rate. Higher difficulty means more computational power is required, impacting profitability.
Electricity Costs
Mining is energy-intensive, and electricity costs can significantly affect your bottom line. Calculate your potential earnings against your electricity expenses. Miners often seek locations with low electricity costs to maximize profits.
Dogecoin Price
The market price of Dogecoin directly impacts mining profitability. If the price drops significantly, the rewards might not cover the operational costs. Conversely, a price surge can make mining highly lucrative.
Environmental Impact and Future of Dogecoin Mining
Like other PoW cryptocurrencies, Dogecoin mining has been criticized for its environmental impact due to high energy consumption. Efforts are ongoing within the industry to develop more energy-efficient mining technologies and explore renewable energy sources.
The future of Dogecoin mining will likely see further advancements in ASIC technology, continued community support, and potential adaptations to maintain its relevance and sustainability in the rapidly evolving crypto landscape.
Dogecoin mining is a complex yet rewarding endeavor, combining elements of technology, economics, and strategic planning. Whether you're a hobbyist looking to dabble in the world of cryptocurrencies or a professional seeking to maximize returns, understanding the fundamentals of Dogecoin mining is crucial. By staying informed about the latest developments and optimizing your mining setup, you can participate effectively in this dynamic and exciting space.
0 notes
Text
Mastering Excellence: The Power of Custom Native App Development
Introduction
In the constantly changing realm of mobile apps, where there are no limits to innovation, a question frequently becomes the focal point: "How can we develop Android applications that stand out from the rest? Exploring the solution to this question frequently directs us towards the journey characterized by the inventiveness, accuracy, and effectiveness of custom native Android development.

Welcome to a journey into the realm of crafting excellence—a journey where we uncover the unparalleled capabilities of custom native Android development. This blog is your ticket to understanding why, when it comes to delivering top-tier performance and user experiences, nothing quite matches the prowess of going native.
In this exploration into native Android development, we will extensively examine the factors that justify why specifically designed native applications remain the industry's benchmark. We'll dissect the core elements that enable native apps to harness the full potential of Android devices, resulting in unmatched performance, user satisfaction, and a memorable brand presence.
Native Performance Advantage for Custom Native Android Development:
When it comes to creating top-notch Android applications that perform at their best, custom native development is the way to go. Native development offers a range of benefits that directly contribute to performance, making it the preferred option for ambitious app projects.
Hardware Optimization
One remarkable benefit of customizing native Android development is the capability to fully utilize the hardware capabilities of a device. Native applications are carefully optimized to seamlessly cooperate and function alongside the central processing unit (CPU), graphics processing unit (GPU), random-access memory (RAM), and other hardware elements of the device. This leads to extremely fast performance, effective use of resources, and the capability to provide visually immersive and quick responses. Hardware optimization guarantees that native Android applications perform exceptionally by leveraging the distinct capabilities of every device, leading to unique levels of performance and user satisfaction. This includes having seamless animations and efficient data processing.
Fluid User Experience
Native applications are well-known for their seamless and prompt performance. A fluid user experience in custom native Android apps is crucial for several reasons:
Prompt Responsiveness: Native apps are highly responsive to user input. When a user taps a button or swipes through a list, the app responds instantly. This prompt responsiveness is achieved by leveraging platform-specific APIs and system-level optimizations. Users don't have to wait for the app to catch up with their actions, making it feel natural.
Platform Integration: Native Android apps can fully integrate with the Android platform. They can access device hardware features like the camera, GPS, accelerometer, and more, offering a wide range of capabilities to enhance user experiences. Additionally, native apps can seamlessly interact with other Android apps, making it easier to share content and data across applications.
Performance Optimization: Native app developers can apply performance optimization techniques specific to the Android platform. They can optimize memory usage, implement efficient data caching, and manage background processes effectively. These optimizations lead to quicker loading times, reduced battery consumption, and overall improved performance.
Offline Functionality: Native Android apps can work seamlessly in offline mode. Developers can implement data caching and storage solutions to enable users to access content and features even when there is no internet connection. This offline functionality enhances user convenience and ensures that the app remains useful in various scenarios.
Efficient Memory Management
Developers have precise control over memory management when using native Android development. This allows for efficient allocation and deallocation of memory resources, reducing the risk of memory leaks and app crashes.
Optimized for Multithreading
Apps that require simultaneous task execution, such as managing background processes or real-time updates, rely on multithreading as a crucial component. Native development provides strong support for multithreading, enabling Android developers to design applications that can fully utilize multicore processors, guaranteeing swift execution of tasks.
Access to Platform-Specific APIs:
Platform-specific APIs and features can be accessed without any limitations by native Android applications. This enables developers to integrate deeply with Android's ecosystem, accessing functionalities like cameras, sensors, GPS, and more. Using these APIs can lead to the development of highly specialized and feature-packed applications that are optimized specifically for the Android platform. This depth of integration is challenging to achieve with cross-platform solutions, where access to platform-specific APIs can be limited or delayed due to compatibility issues, making custom native development the preferred choice for apps that demand deep integration and a high degree of specialization.
Superior Performance Tools:
Android Studio, which is widely recognized as the preferred integrated development environment (IDE) for native development, offers an extensive array of tools for optimizing performance and various options for profiling. These tools aid developers in efficiently identifying and resolving performance obstacles.
Swift Adoption of New Features
Native Android applications possess a clear advantage in terms of swiftly embracing the newest Android functionalities and updates. This ensures that your app remains competitive and can take advantage of the latest capabilities offered by the platform. Our Android App Developers can quickly incorporate the newest Android updates and features into their applications through native Android development. Native app developers can promptly modify their apps to take advantage of the improvements and features introduced in the update when Google launches a new version of the Android operating system.
Conclusion
In conclusion, the advantages of custom native Android development are clear and compelling. From unparalleled performance to seamless integration with Android's ecosystem, native apps excel in delivering a superior user experience. Developers benefit from powerful performance optimization tools and the ability to harness hardware-specific features. However, it's essential to weigh these advantages against development timelines and costs when making the choice between native and cross-platform development. Ultimately, for apps that demand top-tier performance and deep integration with the Android platform, the native route remains the gold standard, ensuring your app stands out in today's competitive marketplace.
0 notes
Text
Everything You Need to Know About the MacBook Pro with M1 Chip
The MacBook Pro has always been a popular choice for professionals and enthusiasts alike. Apple's latest introduction of the M1 chip has significantly enhanced its performance. In this blog post, we will explore the features and benefits of the MacBook Pro M1, providing you with all the information you need to know about this innovative device.
1) Unleashing the Power of the M1 Chip: The M1 chip marks a significant departure from Intel processors, as Apple has embraced its own ARM-based architecture. This transition brings several key benefits, including enhanced performance, improved power efficiency, and tighter integration between hardware and software. The M1 chip packs a powerful 8-core CPU, an 8-core GPU, and a 16-core Neural Engine, providing unmatched processing capabilities for demanding tasks.
2) Exceptional Performance: With the M1 chip, the MacBook Pro achieves new heights in terms of performance. The CPU offers up to 2.8x faster processing, allowing seamless multitasking and speedy execution of resource-intensive applications. The GPU delivers up to 5x faster graphics performance, enabling smooth rendering and enhanced visual experiences. Whether you're editing videos, designing graphics, or running complex simulations, the MacBook Pro with the M1 chip can easily handle it all.
3) Extended Battery Life: The M1 chip's efficiency is a game-changer when it comes to battery life. The MacBook Pro can now provide up to 20 hours of web browsing or up to 17 hours of video playback on a single charge, making it an excellent choice for professionals on the go. This extended battery life means you can work or enjoy entertainment without constantly worrying about finding a power outlet.
4) Enhanced App Compatibility: One of the concerns when transitioning to a new chip architecture is app compatibility. However, Apple has made the transition seamless by introducing Rosetta 2, a translation layer that allows apps designed for Intel processors to run smoothly on the M1 chip. Additionally, many developers have optimized their applications for the M1 architecture, improving performance and efficiency. Whether you rely on productivity tools, creative software, or entertainment apps, the MacBook Pro with the M1 chip ensures a smooth user experience.
5) Unified Memory Architecture: Unlike traditional systems where the CPU and GPU have separate memory, the M1 chip employs a unified memory architecture. This shared memory design enables faster data transfer between the CPU, GPU, and Neural Engine, eliminating bottlenecks and optimizing performance. With up to 16GB of unified memory, the MacBook Pro can handle memory-intensive tasks effortlessly, allowing for smooth multitasking and quick data processing.
6) Advanced Security: Security is a top priority for Apple, and the M1 chip reinforces this commitment. The Secure Enclave technology protects your data, offering hardware-level encryption and secure boot capabilities. Additionally, the M1 chip includes a dedicated image signal processor that enhances privacy during video conferencing, providing peace of mind in an increasingly connected world.
7) Built-in Secure Enclave for Enhanced Authentication: The M1 Pro chip features a built-in Secure Enclave, a secure co-processor that plays a crucial role in managing authentication mechanisms like Touch ID. This dedicated hardware ensures that fingerprint data is securely stored, isolated, and processed, providing a robust layer of protection against unauthorized access.
The MacBook Pro with the M1 chip is a game-changer! This laptop boasts exceptional performance, long battery life, compatibility with many apps, a unified memory architecture, and cutting-edge security features. It's no wonder why this laptop is a top pick among professionals and power users alike. Apple's successful transition to its own chip architecture has resulted in a powerful and efficient device. Whether you're a creative professional, a software developer, or a high-level executive, the MacBook Pro. with the M1 chip is guaranteed to revolutionize your computing experience and elevate your productivity to unprecedented heights.
1 note
·
View note
Text
Zane’s Original Body: Computing Systems
[Rundown Masterlist]
Motherboard:
The motherboard is more or less what connects all of the other systems together. Everything travels through it and meets there to interact and share information across it. If this part is damaged, it will likely immobilize him, blind him, render him mute, prevent him from hearing, prevent him from accessing his memories, and all in all pretty much render him unable to do anything but think- and even thinking may become difficult and strained.
CPU/Central Processing Unit:
The CPU is what processes things. It is, more or less, his brain- or at the very least, where all the decision making happens. His consciousness is likely stored somewhere within it; if he gets majorly injured, so long as his CPU is intact, he can be rebuilt- though without some other parts, he will lack his memories, which is unfortunate.
Now, in a traditional computer, a CPU has complete and total control of all the systems at all times. However, for Zane, having to manually control every single system would be overwhelming to the point where he would be unable to focus on anything but on controlling his own body and using it to even see and stay alive, so, a lot of it is fairly automated, but can be taken control of directly if he so wishes- a lot like humans and breathing. (My apologies for making you think about your breathing.) Unlike humans and breathing, however, Zane can think of these things and not be forced to take control of them.
There are a few things, however, that are entirely automated and that he can’t access at all, even when he actively tries. These things are: sensors, his EPU (though in his second body, Pixal is able to manually control this for him despite the way that he seems to lack the ability to do it himself), his input units, and his perspiration cooling system.
GPU/Graphics Processing Unit:
The GPU is what does graphics. Normally, on a computer, this would impact what shows up on the screen. In this case, it is most likely to affect and control his HUD, or ‘heads-up display’, which is the information panels, scans, images, and anything that may show up in his vision that comes from being a nindroid.
However, it does also impact his vision in general. If this part is damaged, he may go blind despite his eyes and optics working perfectly fine, because the information his eyes gather simply has nowhere to go to be processed.
RAM/Random Access Memory:
RAM is, more or less, his short term memory. Memories are kept there temporarily for quickest access, though he should be able to pull up old memories into it if he needs to access them quickly. However, if this part is damaged or loses power, it loses all memories and information inside of it. This means that if he goes unconscious suddenly without warning or his power sources are somehow interrupted, he will lose his short term memory of what was in that period and likely won’t recall much about the event.
EPU/Energy Processing Unit:
This is what decides what power goes where and how much. It also controls how much power the power source generates, and in doing so, can also impact how well the rest of his mind and body functions, because of controlling how much power he has, how much is stored as back up reserves, and where it all goes. When he has adrenaline (the artificial kind, anyway), this is what allows him to function at a higher level than normal, giving him more power to do more intense things and think faster in the same way the organic kind does to humans.
Memory Unit:
What the title says. This is basically where all his memories are. Yeah. That’s it. They’re stored here until the RAM yoinks them for Zane to be able to access. That’s all.
9 notes
·
View notes
Text
Porting Falcon Age to the Oculus Quest

There have already been several blog posts and articles on how to port an existing VR game to the Quest. So we figured what better way to celebrate Falcon Age coming to the Oculus Quest than to write another one!
So what we did was reduced the draw calls, reduced the poly counts, and removed some visual effects to lower the CPU and GPU usage allowing us to keep a constant 72 hz. Just like everyone else!
Thank you for coming to our Tech talk. See you next year!
...
Okay, you probably want more than that.
Falcon Age
So let's talk a bit about the original PlayStation VR and PC versions of the game and a couple of the things we thought were important about that experience we wanted to keep beyond the basics of the game play.
Loading Screens Once you’re past the main menu and into the game, Falcon Age has no loading screens. We felt this was important to make the world feel like a real place the player could explore. But this comes at some cost in needing to be mindful of the number of objects active at one time. And in some ways even more importantly the number of objects that are enabled or disabled at one time. In Unity there can be a not insignificant cost to enabling an object. So much so that this was a consideration we had to be mindful of on the PlayStation 4 as loading a new area could cause a massive spike in frame time causing the frame rate to drop. Going to the Quest this would be only more of an issue.
Lighting & Environmental Changes While the game doesn’t have a dynamic time of day, different areas have different environmental setups. We dynamically fade between different types of lighting, skies, fog, and post processing to give areas a unique feel. There are also events and actions the player does in the game that can cause these to happen. This meant all of our lighting and shadows were real time, along with having custom systems for handling transitioning between skies and our custom gradient fog.
Our skies are all hand painted clouds and horizons cube maps on top of Procedural Sky from the asset store that handles the sky color and sun circle with some minor tweaks to allow fading between different cube maps. Having the sun in the sky box be dynamic allowed the direction to change without requiring totally new sky boxes to be painted.
Our gradient fog works by having a color gradient ramp stored in a 1 by 64 pixel texture that is sampled using spherical distance exp2 fog opacity as the UVs. We can fade between different fog types just by blending between different textures and sampling the blended result. This is functionally similar to the fog technique popularized by Campo Santo’s Firewatch, though it is not applied as a post process as it was for that game. Instead all shaders used in the game were hand modified to use this custom fog instead of Unity’s built in fog.
Post processing was mostly handled by Unity’s own Post Processing Stack V2, which includes the ability to fade between volumes which the custom systems extended. While we knew not all of this would be able to translate to the Quest, we needed to retain as much of this as possible.
The Bird At its core, Falcon Age is about your interactions with your bird. Petting, feeding, playing, hunting, exploring, and cooperating with her. One of the subtle but important aspects of how she “felt” to the player was her feathers, and the ability for the player to pet her and have her and her feathers react. She also has special animations for perching on the player’s hand or even individual fingers, and head stabilization. If at all possible we wanted to retain as much of this aspect of the game, even if it came at the cost of other parts.

You can read more about the work we did on the bird interactions and AI in a previous dev blog posts here: https://outerloop.tumblr.com/post/177984549261/anatomy-of-a-falcon
Taking on the Quest
Now, there had to be some compromises, but how bad was it really? The first thing we did was we took the PC version of the game (which natively supports the Oculus Rift) and got that running on the Quest. We left things mostly unchanged, just with the graphics settings set to very low, similar to the base PlayStation 4 PSVR version of the game.

It ran at less than 5 fps. Then it crashed.
Ooph.
But there’s some obvious things we could do to fix a lot of that. Post processing had to go, just about any post processing is just too expensive on the Quest, so it was disabled entirely. We forced all the textures in the game to be at 1/8th resolution, that mostly stopped the game from crashing as we were running out of memory. Next up were real time shadows, they got disabled entirely. Then we turned off grass, and pulled in some of the LOD distances. These weren’t necessarily changes we would keep, just ones to see what it would take to get the performance better. And after that we were doing much better.

A real, solid … 50 fps.
Yeah, nope.
That is still a big divide between where we were and the 72 fps we needed to be at. It became clear that the game would not run on the Quest without more significant changes and removal of assets. Not to mention the game did not look especially nice at this point. So we made the choice of instead of trying to take the game as it was on the PlayStation VR and PC and try to make it look like a version of that with the quality sliders set to potato, we would need to go for a slightly different look. Something that would feel a little more deliberate while retaining the overall feel.
Something like this.
Optimize, Optimize, Optimize (and when that fails delete)
Vertex & Batch Count
One of the first and really obvious things we needed to do was to bring down the mesh complexity. On the PlayStation 4 we were pushing somewhere between 250,000 ~ 500,000 vertices each frame. The long time rule of thumb for mobile VR has been to be somewhere closer to 100,000 vertices, maybe 200,000 max for the Quest.
This was in some ways actually easier than it sounds for us. We turned off shadows. That cut the vertex count down significantly in many areas, as many of the total scene’s vertex count comes from rendering the shadow maps. But the worse case areas were still a problem.
We also needed to reduce the total number of objects and number of materials being used at one time to help with batching. If you’ve read any other “porting to Quest” posts by other developers this is all going to be familiar.

This means combining textures from multiple object into atlases and modifying the UVs of the meshes to match the new position in the atlas. In our case it meant completely re-texturing all of the rocks with a generic atlas rather than having every rock use a custom texture set.
Now you might think we would want also reduce the mesh complexity by a ton. And that’s true to an extent. Counter intuitively some of the environment meshes on the Quest are more complex than the original version. Why? Because as I said we were looking to change the look. To that end some meshes ended up being optimized to far low vertex counts, and others ended up needing a little more mesh detail to make up for the loss in shading detail and unique texturing. But we went from almost every mesh in the game having a unique texture to the majority of environment objects sharing a small handful of atlases. This improved batching significantly, which was a much bigger win than reducing the vertex count for most areas of the game.
That’s not to say vertex count wasn’t an issue still. A few select areas were completely pulled out and rebuilt as new custom merged meshes in cases where other optimizations weren’t enough. Most of the game’s areas are built using kit bashing, reusing sets of common parts to build out areas. Parts like those rocks above, or many bits of technical & mechanical detritus used to build out the refineries in the game. Making bespoke meshes let us remove more hidden geometry, further reduce object counts, and lower vertex counts in those problem areas.

We also saw a significant portion of the vertex count coming from the terrain. We are using Unity’s built in terrain system. And thankfully we didn’t have to start from total scratch here as simply increasing the terrain component's Pixel Error automatically reduces the complexity of the rendered terrain. That dropped the vertex count even more getting us closer to the target budget without significantly changing the appearance of the geometry.

After that many smaller details were removed entirely. I mentioned before we turned off grass entirely. We also removed several smaller meshes from the environment in various places where we didn’t think their absence would be noticed. As well as removed or more aggressively disabled out of view NPCs in some problem areas.
Shader Complexity
Another big cost was most of the game was using either a lightly modified version of Unity’s Standard shader, or the excellent Toony Colors Pro 2 PBR shader. The terrain also used the excellent and highly optimized MicroSplat. But these were just too expensive to use as they were. So I wrote custom simplified shaders for nearly everything.
The environment objects use a simplified diffuse shading only shader. It had support for an albedo, normal, and (rarely used) occlusion texture. Compared to how we were using the built in Standard shader this cut down the number of textures a single material could use by more than half in some cases. This still had support for the customized gradient fog we used throughout the game, as well as a few other unique options. Support for height fog was built into the shader to cover a few spots in the game where we’d previously used post processing style methods to achieve. I also added support for layering with the terrain’s texture to hide a few places where there were transitions from terrain to mesh.

Toony Colors Pro 2 is a great tool, and is deservedly popular. But the PBR shader we were using for characters is more expensive than even the Standard shader! This is because the way it’s implemented is it’s mostly the original Standard Shader with some code on top to modify the output. Toony Colors Pro 2 has a large number of options for modifying and optimizing what settings to use. But in the end I wrote a new shader from scratch that mimicked some of the aspects we liked about it. Like the environment shader it was limited to diffuse shading, but added a Fresnel shine.

The PSVR and PC terrain used MicroSplat with 12 different terrain layers. MicroSplat makes these very fast and much cheaper to render than the built in terrain rendering. But after some testing we found we couldn’t support more than 4 terrain layers at a time without really significant drops in performance. So we had to go through and completely repaint the entire terrain, limiting ourselves to only 4 texture layers.
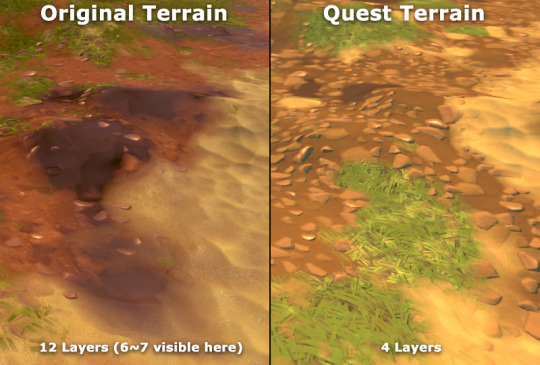
Also, like the other shaders mentioned above, the terrain was limited to diffuse only shading. MicroSplat’s built in shader options made this easy, and apart from the same custom fog support added for the original version, it didn’t require any modifications.
Post Processing, Lighting, and Fog
The PSVR and PC versions of Falcon Age makes use of color grading, ambient occlusion, bloom, and depth of field. The Quest is extremely fill rate limited, meaning full screen passes of anything are extremely expensive, regardless of how simple the shader is. So instead of trying to get this working we opted to disable all post processing. However this resulted in the game being significantly less saturated. And in extreme cases completely different. To make up for this the color of the lighting and the gradient fog was tweaked to make up for this. This is probably the single biggest factor in the overall appearance of the original versions of the game and the Quest version not looking quite the same.
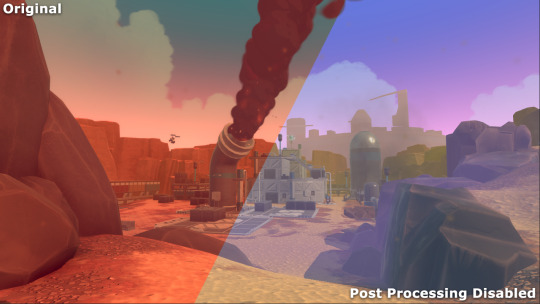
Also as mentioned before we disabled real time shadows. We discussed doing what many other games have done which is move to baked lighting, or at least pre-baked shadows. We decided against this for a number of reasons. Not the least of which was our game is mostly outdoors so shadows weren’t as important as it might have been for many other games. We’ve also found that simple real time lighting can often be faster than baked lighting, and that certainly proved to be true for this game.
However the lack of shadows and screen space ambient occlusion meant that there was a bit of a disconnect between characters in the world and the ground. So we added simple old school blob shadows. These are simple sprites that float just above the terrain or collision geometry, using a raycast from a character’s center of mass, and sometimes from individual feet. There’s a small selection of basic blob shapes and a few unique shapes for certain feet shapes to add a little extra bit of ground connection. These are faded out quickly in the distance to reduce the number of raycasts needed.

Falcon
Apart from the aforementioned changes to the shading, which was also applied to the falcon’s custom shaders, we did almost nothing to the bird. All the original animations, reaction systems, and feather interactions remained. The only thing we did to the bird was simplify a few of the bird equipment and toy models. The bird models themselves remained intact.

I did say we thought this was important at the start. And we early on basically put a line in the sand and said we were going to keep everything enabled on the bird unless absolutely forced to disable it.
There was one single sacrifice to the optimization gods we couldn’t avoid though. That’s the trails on the bird’s wings. We were making use of Ara Trails, which produce very high quality and configurable trails with a lot more control than Unity’s built in systems. These weren’t really a problem for rendering on the GPU, but CPU usage was enough that it made sense to pull them.
Selection Highlights
This is perhaps an odd thing to call out, but the original game used a multi pass post process based effect to draw the highlight outlines on objects for both interaction feedback and damage indication. These proved to be far too expensive to use on the Quest. So I had to come up with a different approach. Something like your basic inverted shell outline, like so many toon stylized games use, would seem like the perfect approach. However we never built the meshes to work with that kind of technique, and even though we were rebuilding large numbers of the meshes in the game anyway, some objects we wanted to highlight proved difficult for this style of outline.
With some more work it would have been possible to make this an option. But instead I found an easier to implement approach that, on the face, should have been super slow. But it turns out the Quest is very efficient at handling stencil masking. This is a technique that lets you mark certain pixels of the screen so that subsequent meshes being rendered can ask to not be rendered in. So I render the highlighted object 6 times! With 4 of those times slightly offset in screen space in the 4 diagonal directions. The result is a fairly decent looking outline that works on arbitrary objects, and was cheap enough to be left enabled on everything that it had been on before, including objects that might cover the entire screen when being highlighted.

Particles and General VFX
For the PSVR version of the game, we already had two levels of VFX in the game to support the base Playstation 4 and Playstation 4 Pro with different kinds of particle systems. The Quest version started out with these lower end particle systems to begin with, but it wasn’t enough. Across the board the number and size of particles had to be reduced. With some effects removed or replaced entirely. This was both for CPU performance as the sheer number of particles was a problem and GPU performance as the screen area the particles covered became a problem for the Quest’s reduced fill rate limitations.
For example the baton had an effect that included a few very simple circular glows on top of electrical arcs and trailing embers. The glows covered enough of the screen to cause a noticeable drop in framerate even just holding it by your side. Holding it up in front of your face proved too expensive to keep framerate in even the simplest of scenes.

Similar the number of embers had to be reduced to improve the CPU impact. The above comparison image only shows the removal of the glow and already has the reduced particle count applied.
Another more substantive change was the large smoke plumes. You may have already noticed the difference in some of the previous comparisons above. In the original game these used regular sprites. But even reducing the particle count in half the rendering cost was too much. So these were replaced with mesh cylinders using a shader that makes them ripple and fade out. Before changing how they were done the areas where the smoke plumes are were unable to keep the frame rate above 72 fps any time they were in view. Sometimes dipping as low as 48 hz. Afterwards they ceased to be a performance concern.
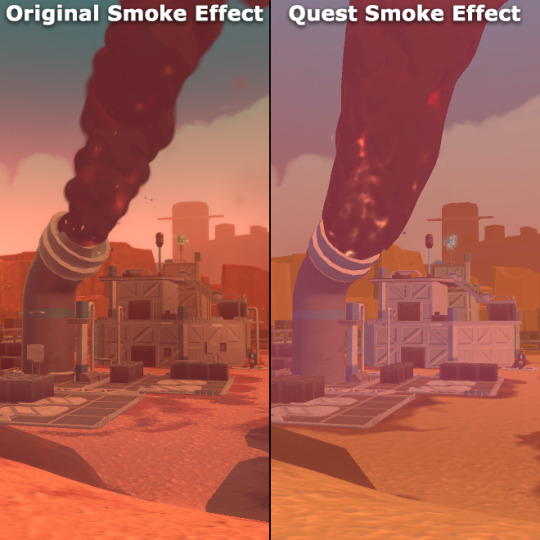
Those smoke plumes originally made use of a stylized smoke / explosion effect. That same style of effect is reused frequently in the game for any kind of smoke puff or explosion. So while they were removed for the smoke stacks, they still appeared frequently. Every time you take out a sentry or drone your entire screen was filled with these smoke effects, and the frame rate would dip below the target. With some experimentation we found that counter to a lot of information out there, using alpha tested (or more specifically alpha to coverage) particles proved to be far more efficient to render than the original alpha blended particles with a very similar overall appearance. So that plus some other optimizations to those shaders and the particle counts of those effects mean multiple full screen explosions did not cause a loss in frame rate.
The two effects are virtually identical in appearance, ignoring the difference in lighting and post processing. The main difference here is the Quest explosion smoke is using dithered alpha to coverage transparency. You can see if you look close enough, even with the gif color dithering.
Success!
So after all that we finally got to the goal of a 72hz frame rate! Coming soon to an Oculus Quest near you!
https://www.oculus.com/experiences/quest/2327302830679091/

10 notes
·
View notes