#windows 10 beginners guide tutorial
Explore tagged Tumblr posts
Visit Tumblr Blog
Explore Tumblr blogs with no restrictions, modern design and the best experience.
Last Seen Tumblr Blogs


Fun Fact
Tumblr has been banned in Indonesia for providing people with access to pornographic content.
Note
computer/firefox anon, no questions this time. just my undying thanks! as tumblr users say, i am kissing you on the mouth etc etc. huge thank you to you and everyone else who added stuff in the replies or reblogs — i feel much more confident about this now<33. tldr: y’all are awesome, thanks a bunch!
happy to help! and i think i said this deep down under the read-more in the first response to your Linux ask, but it's worth highlighting--@compusever's advice to get a Windows 10 or 11 Home laptop and do what you can with the privacy settings is not AT ALL incompatible with trying Linux or eventually replacing Windows with it. once you've booted up the computer from an installation USB drive, most distros will offer a temporary "preview" version of the OS that runs from the USB drive without changing anything on the computer. you can try Ubuntu, mess around, see if you like it, wipe the USB drive, put Mint on it, and try that; if you go for the full install you can dual-boot and keep Windows around in hard-drive quarantine in case you need it.
in other words, you don't have to take the entire plunge all at once! but i suspect that if you don't have pre-existing desktop UI preferences, and you strongly prefer a device that won't pester/spy on/micromanage you, a beginner-friendly Linux will be easier to use than any of the current versions of Windows.
btw, here's the install guide for Mint: https://linuxmint-installation-guide.readthedocs.io/en/latest/ compared to the Ubuntu one, which goes out of its way to be friendly and dead simple, the Mint guide is... a lot closer to what you can expect from most Linux tutorials, lmao. i especially love that the very second step explains a bit about why it wants you to check that the file didn't get corrupted in the download process, immediately starts providing commands you can copy into a Linux terminal to generate cryptographic checksums, and only then adds a "how to do this on Windows" link... to a forum post with commands you can paste into a Windows terminal. (meanwhile, Ubuntu gives you a download link and then displays an unobtrusive "here's how to verify the file if you want" with a one-off command and a link to more info.) even the friendliest Linux tends to be built on the labor of absolute nerds who are into this stuff as a hobby, and they are very helpful, but be warned that they often have a wildly skewed frame of reference about what "normal computer use" consists of.
51 notes
·
View notes
Text
Street Fighter V Modding Guide and Tutorial Archived Links
People are actually still interested in modding SFV. Since Modderbase is down, here's some SFV modding links from archive.org. If you don't see images or spoiler boxes in the thread, click on the Way Back Machine search bar where you see the link url address and hit 'Enter' again. FYI this may load quite slowly. Also, If you need to download a tool from these archived links, copy the url of the tool and paste it on the browser's address bar, erase the archive.org parts and then hit enter on the actual link address. Example, copy the address from the hyperlink (https://web.archive.org/web/20240316160336/https://fluffyquack.com/tools/REtool.zip), delete the web.archive stuff, and then it should be ( https://fluffyquack.com/tools/REtool.zip ) and then hit Enter on the address bar.
Anyway, here are the tutorial links:
Unreal Engine Version : Unreal Engine 4.7.6
AES Key : _aS4mfZK8M5s5KWC2Lz2VsFnGKI7azgl
---SFV Modding Tutorial for Beginners---
https://web.archive.org/web/20230227205009/http://modderbase.com/showthread.php?tid=445
https://web.archive.org/web/20170920143910/http://modderbase.com/showthread.php?tid=97
---Tools List---
https://web.archive.org/web/20230619234458/http://modderbase.com/showthread.php?tid=18
---SFV Character Codes---
https://web.archive.org/web/20201028055311/http://modderbase.com/showthread.php?tid=60
https://web.archive.org/web/20240324163507/http://modderbase.com/showthread.php?pid=20364&tid=1000#pid20364
---Character Resource Pack---
https://web.archive.org/web/20201029015331/http://modderbase.com/showthread.php?tid=20
---Texture Guide---
https://web.archive.org/web/20230306152351/http://modderbase.com/showthread.php?tid=274
https://web.archive.org/web/20230117144443/http://modderbase.com/showthread.php?tid=1878
---Injecting Texture into UASSET file---
https://web.archive.org/web/20231013070905/http://modderbase.com/showthread.php?tid=57
https://web.archive.org/web/20220906234610/http://modderbase.com/showthread.php?tid=1448
---Color Editing---
https://web.archive.org/web/20170920143734/http://modderbase.com/showthread.php?tid=39
---Sound Modding---
https://web.archive.org/web/20210321104439/http://www.modderbase.com/showthread.php?tid=77
---Camera and Posing via Cheat Engine---
https://web.archive.org/web/20240316171311/http://modderbase.com/showthread.php?pid=23177&tid=89#pid23177
https://web.archive.org/web/20240316172307/http://modderbase.com/showthread.php?tid=89
---Hiding Some Costume Parts & Easter Eggs ---
https://web.archive.org/web/20200130095243/http://modderbase.com/showthread.php?tid=269
https://web.archive.org/web/20240324163506/http://modderbase.com/showthread.php?pid=25521&tid=1732#pid25521
---Swap A character to another Character Slot---
https://web.archive.org/web/20240303200429/http://modderbase.com/showthread.php?tid=53
https://web.archive.org/web/20220623143544/http://modderbase.com/showthread.php?tid=1000
https://web.archive.org/web/20240316164750/http://modderbase.com/showthread.php?tid=811
https://web.archive.org/web/20200926055244/http://modderbase.com/showthread.php?tid=576
---Swapping Movesets---
https://web.archive.org/web/20201030162142/http://modderbase.com/showthread.php?tid=1099&pid=22087#pid22087
---How to Pack a Mod into a Pak file---
https://web.archive.org/web/20230619231455/http://modderbase.com/showthread.php?tid=122
---Creating Physics Assets in UE4---
https://web.archive.org/web/20200130095618/http://modderbase.com/showthread.php?tid=37
---Custom Animations---
https://web.archive.org/web/20201224123539/http://modderbase.com/showthread.php?tid=873
---VFX Modding and Tips---
https://web.archive.org/web/20210825014646/http://modderbase.com/showthread.php?tid=1470
---Packing mod Powershell way if you have Windows 10---
https://web.archive.org/web/20230619231456/http://modderbase.com/showthread.php?tid=122&pid=3943#pid3943
---Hex Editing Files to be Larger---
https://web.archive.org/web/20240324163507/http://modderbase.com/showthread.php?tid=1900
Good luck!
8 notes
·
View notes
Text
How to Begin Your Web Design Journey: A Step-by-Step Guide in Simple Terms

Understanding the Basics:
Learn about HTML, which is like a web page’s skeleton.
Understand CSS, which is like makeup for web pages.
Know how to make websites look good on different screens.
2. Choose your tools:
Start with simple text editors like Notepad (for Windows) or TextEdit (for Mac).
Later, try fancier editors like Visual Studio Code.
For making pictures, try Adobe Photoshop or Illustrator.
3. Learn HTML and CSS:
Use websites like W3Schools or Codecademy.
If you want to learn more about web design with certification and placement, ACTE Institute offers comprehensive machine learning training courses that can give you the knowledge and skills necessary to excel in this field. Consider the infinite possibilities for data analysis, automation, and decision-making that machine learning may create.
YouTube: There are many video tutorials covering HTML and CSS for beginners.
They teach you how to make web pages and make them look nice.
You can also learn from courses on Coursera or edX.
4. Practice your skills.
Besides learning, make simple web pages to get better.
Try harder projects as you get more confident.
Make your own website to practice lots.
5. Responsive Web Design:
Make sure your websites work well on phones and computers.
Learn about media queries (they help your design fit different screens).
6. Master CSS Layouts:
Get really good at arranging web stuff using CSS (like making boxes and arranging them nicely).
7. Web Design Frameworks:
Think about using ready-made kits like Bootstrap.
They have pre-made pieces to help you design faster.
8. UI/UX Design:
Learn to make websites easy to use and nice to look at.
Think about how people will use your site.
9. Web Hosting and Domain:
To show your website to people, you need a place to put it (hosting) and a name for it (domain).
Lots of companies can help with this, like Bluehost or HostGator.
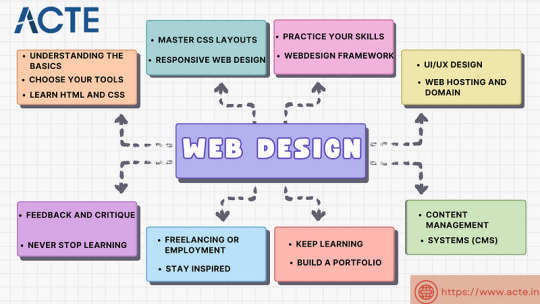
10. Content Management Systems (CMS):
Consider using tools like WordPress to manage your website easily.
11. Keep Learning:
Web design keeps changing, so keep learning new stuff.
Read blogs, watch webinars, and take more advanced classes.
12. Build a portfolio.
Make a collection of your best work to show others.
People who might hire you want to see what you can do.
13. Freelancing or employment:
Decide if you want to work alone or with a company.
Both ways have good things and not-so-good things, so pick what you like.
14. Networking:
Join groups of web designers to meet others like you.
Learning from others can help you become better.
15. Feedback and criticism:
Don’t be shy to ask for advice on your work.
When people give you tips, it helps you improve.
16. Launch your projects:
When you’re good enough, work on real websites.
Offer to make websites for friends or local businesses.
17. Stay Inspired:
Be creative and get ideas from different places.
Nature, art, and other designers can help you think of cool stuff.
18. Never Stop Learning:
Web design always changes, so keep learning new things.
Stay curious and open to learning more tricks and tools.
The secret to success in web design is to start with the fundamentals and gradually advance your abilities. Keep in mind that on this trip, patience and practice are the keys to success. As your skills advance, you’ll have the imagination needed to realise your ideas for websites. So put your hands in your pockets, launch your preferred coding editor, and start your web design experience!
4 notes
·
View notes
Text
Price: [price_with_discount] (as of [price_update_date] - Details) [ad_1] Have you been looking for a way to boost your skills and become a master in DevOps for your business or career in software development but lack an excellent, high-quality guide to assist you get there?And are you looking for a guide that is simple, assuring and easy to follow? If you've answered YES, keep reading... You Are About To Discover The Ins And Outs Of Dev-Ops, Including How To Leverage Its Power To Your Advantage In Your Business Or Career! It goes without saying that DevOps is one of the greatest inventions in software development. It came to satisfy a need to get away from the traditional software design for efficiency, collaboration and productivity in development processes, and by extension to boost business growth. Did you know that businesses that adopt DevOps enjoy up to 60% more revenue rates and profit than their reticent counterparts?Unfortunately, great as it is, DevOps remains one of the most misunderstood concepts- even by tutors across the world! Similarly, for someone who's just getting into the software development scene or someone wh0 has drowned in the "Waterfall" methodology a couple of times before, it may seem like something a little complex or one that requires some skill, or lots of effort and time to master. If you can relate, you must have wondered: What's DevOps all about, and is there a way to learn it quickly?What does DevOps entail?How exactly would I benefit from learning DevOps?How and where do I get started?Is DevOps agile? How does it work? So if such questions have been keeping you from making the next important step in your career or business with DevOps, then this simple, clear and straightforward guide is here for you. With it, you'll learn: What DevOps is and why you need itThe features of DevOps architecture The potential benefits and risks of using DevOpsWhat you need to know about the DevOps lifecycleThe ins and outs of the DevOps architectureThe workflow and principles of DevOpsThe DevOps tools you need to know and useHow DevOps automation worksWho DevOps engineers are, and the roles they playThe methodologies and pipelines of DevOps you need to familiarize yourself withThe DevOps Amazon Web ServicesThe tools and tutorials for DevOps, including their features and benefitsHow to install GIT on Mac, Linux and Windows ...And much more! Do you prefer practical guides that you can implement as you go (not ones that are heavy on theory- that require taking loads of caffeine to complete)?Do you want a beginners' book that is exciting to follow and well-structured for quick comprehension?Then don't let this one slip away.Even if this is your first time actually wanting to learn DevOps, this book will hold you by the hand until you feel confident about it! Publisher : 17 Books Publishing (20 July 2017) Language : English Paperback : 76 pages ISBN-10 : 1801490481 ISBN-13 : 978-1801490481 Item Weight : 113 g Dimensions : 15.24 x 0.41 x 22.86 cm
Country of Origin : United Kingdom [ad_2]
0 notes
Text
House drawing | House drawing with Scenery | Easy tutorial | Art magix
House drawing | House drawing with Scenery | Easy tutorial | Art magix https://www.youtube.com/watch?v=Pc94w6t0VEw 🏡✨ How to Draw a Beautiful House – Step-by-Step Tutorial! 🎨🖌️ Ever wanted to draw the perfect house but didn’t know where to start? 🏠✏️ In this fun and easy tutorial, we’ll guide you through every step – from sketching the basic structure to adding details like windows, doors, and even a cute little garden! 🌿🌷 ✅ What You’ll Learn in This Video: 🏠 Simple techniques to sketch a house quickly & accurately ✏️ 🎨 How to add depth, perspective, and realistic details 🏗️ 🖌️ Pro tips for shading, textures, and coloring 🌈 ✨ Tricks to make your house look cozy & full of life! 💡 📌 Perfect for: ✔️ Beginners & aspiring artists 🎨 ✔️ Kids & adults who love sketching 🖍️ ✔️ Anyone who wants to improve their drawing skills! 🏡 So grab your pencils & colors and let’s create a masterpiece together! 🤩🎨 Don't forget to LIKE 👍, COMMENT 💬, and SUBSCRIBE 🔔 for more amazing art tutorials every week! 🚀 #HouseDrawing #HowToDrawAHouse #DrawingTutorial #ArtForBeginners #EasyDrawing #SketchingTips #PerspectiveDrawing #StepByStepArt #CreativeDrawing #HomeSketch #ArtLovers #DrawingForKids #RealisticDrawing #PencilSketch #ColoringFun Follow us on our Website: https://ift.tt/aTs2FAH follow our blog! https://ift.tt/zqn0Ukr Love you guys! ❤ via ArtMagix | How to draw & color for Kids https://www.youtube.com/channel/UCkaKcAcsY5gAhgiQ2ARNc1A February 27, 2025 at 10:30AM
#numberart#drawingforkids#kidsartutorial#stepbystepdrawing#artandlearning#creativeeducation#drawingtutorial#artinspiration
0 notes
Text
Ace Your Next Job Interview with These Essential Python Questions
When it comes to landing a job in software development, especially as a Python developer, interviews can be daunting. Being well-prepared can make the difference between impressing the interviewer and leaving empty-handed. If you’re gearing up for an interview and want to stand out, mastering key Python questions is essential.
In this blog, we’ll break down some must-know Python interview questions, why they're important, and how you can practice them. Additionally, for a visual guide to understanding Python interview essentials, don’t miss out on this insightful YouTube tutorial.
1. What are Python’s Key Features?
Understanding the foundational features of Python is crucial for demonstrating your knowledge. Be prepared to discuss:
Simple and Easy-to-Learn Syntax: Python’s syntax is straightforward, which makes it ideal for beginners and efficient for experienced developers.
Interpreted Language: Python executes code line by line, simplifying debugging.
Extensive Libraries and Community Support: Modules like NumPy, Pandas, and TensorFlow showcase Python’s versatility.
Platform Independence: Python runs on various platforms like Windows, Mac, and Linux without changes to the code.
2. What is PEP 8 and Why is It Important?
PEP 8 is the style guide for Python code. Demonstrating awareness of PEP 8 during your interview shows you write clean and readable code that aligns with industry standards. Mention:
The role of PEP 8 in maintaining code consistency.
How using it can improve collaboration among teams.
3. Explain Python Data Types
Interviewers often test your understanding of Python’s core data types:
Lists: Mutable and ordered collections.
Tuples: Immutable sequences, useful for fixed collections.
Dictionaries: Key-value pairs, ideal for mapping data.
Sets: Collections of unique elements.
4. What are Python Decorators?
Decorators are a powerful feature that allow you to modify the behavior of a function or class method. Be ready to explain:
Definition and Syntax: How @decorator_function is used.
Use Cases: Enhancing functions without altering their code.
Example:
python
Copy code
def my_decorator(func):
def wrapper():
print("Something is happening before the function is called.")
func()
print("Something is happening after the function is called.")
return wrapper
@my_decorator
def say_hello():
print("Hello!")
5. **Differentiate Between *args and kwargs
This question tests your understanding of Python’s flexible argument passing:
*args allows you to pass a variable number of non-keyword arguments.
**kwargs allows you to pass a variable number of keyword arguments.
Example:
python
Copy code
def func(*args, **kwargs):
for arg in args:
print(arg)
for key, value in kwargs.items():
print(f"{key} = {value}")
6. What is List Comprehension?
List comprehension is a concise way to create lists. It showcases Python's expressive nature and your ability to write efficient code:
python
Copy code
squares = [x**2 for x in range(10)]
Discuss its advantages over traditional for loops and potential use cases.
7. Discuss Python’s Global Interpreter Lock (GIL)
The GIL is crucial for Python’s thread management but can be a limitation for multi-threaded programs. Key points:
What It Is: A mutex that protects access to Python objects, preventing multiple native threads from executing Python bytecode simultaneously.
Implication: Can limit the performance of multi-threaded Python programs, especially in CPU-bound processes.
8. How Do You Handle Exceptions in Python?
Handling errors gracefully is a must for any developer. Explain:
The try and except block structure.
The use of else and finally clauses for improved control.
Example:
python
Copy code
try:
result = 10 / 0
except ZeroDivisionError:
print("Cannot divide by zero.")
finally:
print("This will always execute.")
9. What is the Difference Between deepcopy and shallow copy?
A question that explores your understanding of object references and memory management:
Shallow Copy: Creates a new object but inserts references into the original object.
Deep Copy: Recursively copies all objects found in the original, creating an independent clone.
10. Why Should You Use Generators?
Generators are a memory-efficient way to iterate over sequences, especially large ones. They use yield instead of return to produce items lazily:
python
Copy code
def generate_numbers(n):
for i in range(n):
yield i
Bonus Resource: Practice with a Comprehensive Video Guide
Visual learners can deepen their understanding by watching tutorials. This YouTube video provides practical explanations and examples of interview questions that can help you solidify your preparation.
Final Tips for Success
Practice Coding: Regularly use platforms like LeetCode or HackerRank.
Understand the Basics: While advanced topics are important, ensure you master Python’s core concepts.
Mock Interviews: Simulate real interview experiences to boost confidence.
Ace your Python interview by being well-versed in these questions and supplementing your preparation with comprehensive resources. Good luck!
0 notes
Text
Wireshark is a powerful network protocol analyzer tool that is available open source. This is a popular choice of security analysts and ethical hackers to monitor the network. There are ways to hack into a WiFi network using known vulnerability exploits. You can easily use Wireshark to do such hacking without knowing much about network protocol. Wireshark is available on all popular operating systems including Linux, windows, and mac OSx. Wireshark is an important tool to learn for a security tester. This can help save hours finding problems and security issues at any place. We have manually created this list of useful tutorials and courses that can help any beginner learn this tool in no time. Wireshark Beginners Tutorials: Simple and Focused These are some tutorials for beginners at Wireshark. These are simplified tutorials that cover basics. You can move on to the advanced topics once you have learned the basics. How to Use Wireshark to Capture, Filter and Inspect Packets How to Use Wireshark: A Complete Tutorial Wireshark Tutorial and Tactical Cheat Sheet | HackerTarget.com Quick and dirty Wireshark tutorial Wireshark Tutorial: Network & Passwords Sniffer Wireshark Tutorial – Linux Hint Wireshark tutorial: Using Wireshark to sniff network traffic Understanding Wireshark Capture FiltersEmailFacebookLinkedInRSSTwitterYouTubeFacebookLinkedInRSSTwitterYouTube How To Go From 0 to Sniffing Packets in 10 Minutes - Motherboard Wireshark - The best open source network packet analyzer(Part I) (Real world open source) Wireshark Video Tutorials and Courses To Learn Online This is a list of Wireshark video tutorials available on youtube. Some of these are a big playlist of tutorials that you can learn at your own pace. Wireshark Tutorials for Beginners Playlist - YouTube HakTip: Wireshark - Packet Capturing and Analysis - YouTube Decoding Packets with Wireshark - YouTube Tutorial: Packets don't lie: how can you use tcpdump/tshark (wireshark) to prove your point. - YouTube The Ultimate Wireshark Tutorial - YouTube Wireshark - YouTube Wireshark eBooks and PDF Tutorials You can download these ebooks and learn Wireshark offline. Robot Check - This is a book about Wireshark usage and various tips about effectively utilizing it. 1893939758 - Good book for beginners, it contains a snapshot of screens for windows users and is very simple to follow. User Guide Chapter 1. Introduction Wireshark Lecture Wiresharksection Wireshark Tutorial Wireshark Tutorial Wireshark Cheatsheet and Quick Reference Resources These are some cheat sheets and printable PDF files that you can use for quick reference while using Wireshark. Wireshark Display Filters Wireshark 802.11 Filters Reference Sheet Wireshark Tutorial and Tactical Cheat Sheet | HackerTarget.com Wireshark Websites, Blogs, and Forums for More Help These are other useful websites and resources where you can look for some help. Sniff free or die | The official Wireshark blog - Official Wireshark blog that has frequent updates about Wireshark releases and related stuff. Packet Foo | Analyzing network packets since 2003 - You can often find interesting Wireshark topics on this blog. Frequent 'Wireshark' Questions - Network Engineering Stack Exchange Summary Wireshark is a powerful packet analyzer. There are plenty of free resources available on the internet for you to learn. Hope you find this list useful.
0 notes
Text
youtube
Simple beginners guide how to build create WebHID API Electron JS Desktop App for windows 10 & windows 11. Electron webhid api Desktop App html js Script: https://bit.ly/4egIyAw or https://drive.google.com/file/d/1euT1JxtpOgdZwVpA5C1nXOZRZ7bnbsoa/ Electron JS Desktop App Project Tutorial for Beginners: WebHID API Example w/ Source Code
#tutorials#how to#programming#arduino#esp32-s2#esp32#WebHID API#Desktop App#Electron#Electron JS#Source Code#Project Tutorial for Beginners#windows 10#windows 11#Youtube
0 notes
Text
Video editing can be a fun and creative process! Here’s a step-by-step guide to get you started
1. Choose Your Software
Beginners: iMovie (Mac), Windows Movie Maker (PC), or online options like Canva or Kapwing.
Intermediate/Advanced: Adobe Premiere Pro, Final Cut Pro, DaVinci Resolve, or HitFilm Express.
2. Gather Your Footage
Record video clips using a camera or smartphone.
Collect any additional media like images, music, or graphics.
3. Import Your Media
Open your editing software and create a new project.
Import your video clips and other media files.
4. Organize Your Clips
Sort your clips in the media library.
Create bins or folders to keep your files organized.
5. Start Editing
Timeline: Drag your clips onto the timeline in the order you want them to appear.
Trimming: Cut out any unnecessary parts of your clips to tighten the video.
Transitions: Add transitions between clips (e.g., fades, cuts) to enhance flow.
6. Add Effects and Titles
Use effects to enhance your video (color correction, filters).
Insert titles or text overlays for context or branding.
7. Include Music and Sound Effects
Add background music and adjust the volume levels.
Use sound effects to enhance the viewing experience.
8. Fine-Tune Your Edits
Watch your video multiple times and make adjustments as needed.
Pay attention to pacing, audio levels, and visual continuity.
9. Export Your Video
Choose the right format and resolution for your audience (e.g., MP4 for online sharing).
Export the final version of your video.
10. Share Your Video
Upload to platforms like YouTube, Vimeo, or social media.
Consider creating a thumbnail for better engagement.
Tips:
Practice: The more you edit, the better you’ll get!
Watch Tutorials: Many tutorials are available on YouTube for specific software.
Experiment: Don’t be afraid to try new effects or styles.
Have fun with your video editing! If you have specific questions about any software or techniques, feel free to ask!
0 notes
Text
How to Install Cricut Design Space on Windows [Beginners Tutorial]
We all know that you should have a device if you want to use a Cricut machine. It can be a phone or a computer. One such device is a computer with Windows 11 on it. It is an excellent choice for a Cricut machine. To use your crafting machine, you must learn how to install Cricut Design Space on Windows 11. For that, I would suggest you read this blog till the end. This guide will help you not only download the app on a computer but also connect the machine to your device wirelessly. You will also be able to check the computer’s system requirements.
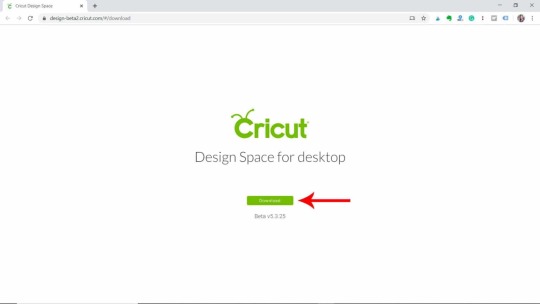
You can download the Design Space software from the Internet for free. To download it on Windows 11, you have to visit the official site. This blog explains the process for downloading the app. So, let’s dive into it to start the crafting journey today.
Minimum System Requirements for Cricut App on Windows 11
If you want to use a Windows computer on your machine, you have to first make sure that it is capable of downloading and running Design Space. The computer will require certain features that are essential to run the app. The features that the computer requires for Design Space are mentioned below:
How to Connect Cricut Machine to Windows 11?
Once you make sure that your computer has the required system features in the process of learning how to install Cricut Design Space on Windows 11, you should connect it to the machine. Here, we will see the connection process of the Windows PC to a machine via Bluetooth:
How to Install Cricut Design Space on Windows 11?
By now, you have checked the features of your computer and have learned the Bluetooth connection process on the machine. Now, you have to download the app on a Windows 11 computer. But before downloading the software on your computer, you have to connect it to a stable Wi-Fi network. To download the app, you have to follow the steps written below:
Conclusion
To conclude, I would say this blog helped you learn how to install Cricut Design Space on Windows 11. Windows 11 is one of the newest operating systems and has the ability to run the app on it. But before you download the software on a computer, you must know about the minimum features any computer needs to run the app on it. Once you are sure of your computer’s compatibility, you can connect it to the machine. You read about the Bluetooth connection on the computer. Finally, you saw the Design Space installation process. Now, you can easily set up a machine on a Windows PC.
FAQs
Is Cricut Design Space Available for Windows?
Yes, it is! Design Space is an official app, and it is essential for Cricut machines. It works with multiple devices, including a Windows computer. If you want to use the machine on a Windows PC, you will have to download the software from the Internet. It is available on the official site. After installing the app, you can start crafting on your desktop.
Why Is Cricut Design Space Not Installing on My Computer?
If you are trying to install the app on your computer but are unable to do so, you should do a few things. First, you must ensure that your computer is connected to good internet broadband. After that, you will have to check the compatibility of your computer. If the computer lacks the required features, you might have trouble downloading the app. Also, you have to check the browser you are using to download the app. If it is an outdated browser, you must update it.
Is Windows 11 Compatible With Cricut Design Space?
Windows 11’s operating system is good enough to download the Design Space software on it. A Cricut machine requires Windows 10 or newer. But to make sure that it is actually compatible with the machine, you also have to check its features. The computer should have at least 2 GB free disk space and 4GB RAM. It needs to have a resolution of 1024 x 768 pixels and 2-3 Mbps of internet speed.
Visit: cricut com setup www.cicut.com setup login setting up my cricut maker install cicut design space app
Source: https://cricutspaces.blogspot.com/2024/09/how-to-install-cricut-design-space-on.html
#cricut.com/setup#cricut.com/setup login#cricut setup#install cricut explore air 2#cricut.com setup mac#www.cricut.com/setup login#www.cricut.com/setup#cricut install setup#install cricut design space app#cricut design space setup#cricut design#setting up new cricut maker#setting up your cricut maker#cricut design space app#cricut explore air 2
1 note
·
View note
Text
Cricut Explore Air 2 Setup: Easy Tutorial for Beginners
I can feel your excitement if it is your first time using the Cricut machine for crafting. The process of the Cricut Explore Air 2 setup is straightforward, but it is wise to have the proper knowledge first. Plus, as a new crafter, you can face some problems during the procedure, and that is given. But don’t worry, as I am going to cover all the vital steps to complete the machine setup. With the help of this guide, you will be able to setup your Cricut machine on a Mac and iOS device. Without causing any further delay, let’s jump right into the process!
Cricut Explore Air 2 Setup on Your Mac Computer
Here are the comprehensive steps that will allow you to setup your Explore machine on a Mac operating system.
Step 1: Establishing the Bluetooth Connection
First and foremost, keep your machine within the 15 feet range of your Mac device.
After that, turn on the printer if it is not on.
Now, move to your Mac desktop and click on the Apple icon to select the System Preferences option.
In the System Preferences window, choose the Bluetooth icon.
After that, click on the Bluetooth toggle to turn it on; it will start searching for all the available Bluetooth devices under its range.
Look for your machine model number in the list and click on the Pair option in front of it.
When you see a prompt to enter the password, click on the 0000, then click on Pair.
Then, the Bluetooth connection process will be complete.
Moreover, you can use the provided USB cable for the connection if you want to establish a wired connection.
Step 2: Downloading Cricut Design Space on Mac
Initially, browse the official Cricut web page on your macOS device.
Move to the Apps page and click on the Download option under Design Space for Mac option. (If the Download option is not enabled, then click on the checkbox for the Cricut Terms of Use and Privacy Policy first.)
After that, a new screen will appear on the screen, where you can specify how to save the Cricut file after the download.
Once you have selected a folder path, click on the Save option; afterward, the download process will begin.
Wait for the download to complete, and then open the software file from the browser.
In addition, you can also access the selected folder to open the Cricut .dmg file.
Then, drag your Cricut icon to the Applications folder in order to initiate the installation folder
Now, you can launch the app by double-clicking on the “cricut design space” option in the Applications folder.
While opening the app, a Mac notice may show up on the screen asking if you want to open this app; click on the Open button to move forward.
On the app home page, complete the account login process or create a new account if you are a new user.
Next, select the right option to complete the Explore machine setup.
From the list of options, choose your machine model number.
Here you go! Your machine setup process is complete.
Cricut Explore Air 2 Setup on Your iOS Device
The following procedures will guide you through the complete process of Explore machine setup on iPhones and iPads.
Step 1: Connecting a Cricut Machine via Bluetooth
Before you move to the connection process, ensure the printer is switched on.
If you want to connect the machine to an iPhone/iPad using Bluetooth connectivity, bring both devices within the 10–15 feet range.
Next, tap on the Settings tab from the home screen of your iPhone/iPad.
On the next page, tap on the Bluetooth option and then tap on the toggle to turn on the Bluetooth connection.
Now, the device will start scanning for the Bluetooth devices within its connection range.
Henceforth, look for your machine name from the devices list and then tap on it.
If you see a prompt to enter the password to establish the Bluetooth connection, enter 0000 and then tap on Pair.
The device Bluetooth pairing will now be complete.
Once the Bluetooth connection process is done, you can move to the next setup of the Cricut Explore Air 2 setup.
Step 2: Installing Cricut Design Space App
Then, go to your iOS device and open the App Store from your home screen.
After that, tap on the search section and type “cricut design space.”
From the results, tap on the correct app and then tap on Get to download it. (you might need to enter your iTunes password to verify the download.)
Next, the download process will begin.
After downloading, the app will automatically be added to your home screen.
You can open the app from the App Store or from the home screen.
On the app, access your Cricut account by entering your registered ID and password. (You need to create a new ID if you are a new user.)
To setup your machine, tap on the Machine Setup option.
Follow the instructions, and the Cricut Explore Air 2 setup process will be complete.
Final Words
I have covered all the information you should know to setup your Cricut Explore Air 2 machine. With the help of this complete guide, you can easily setup the device on a Mac or iOS device without anyone’s help. However, to avoid any problems during the setup, make sure to check the device compatibility first. Besides that, feel free to ask for additional help if you want more help, or if any problem appears in the setup.
Frequently Asked Questions
Can I Connect My Cricut Explore Air 2 to My Phone?
Yes, you can connect your Explore Air 2 machine to a phone. The machine works with both Android and iOS smartphones and tablets. You can download the Cricut app on your device and then start using it after connecting both devices through the app. However, before downloading the app to your device, make sure to check if the phone model you have is compatible with the machine.
Why Is My Cricut Explore Air 2 Not Connecting?
If your Cricut machine is not connecting to a device then it could be the result of some technical glitches. You need to check the system compatibility criteria and check the network connection. Also, ensure that your device OS is updated and both devices are within the connection range. If the problem seems complex, then connect to the brand customer support team to get the solution of this problem.
Do I Need to Download Software to Setup Cricut Explore Air 2?
Design Space is essential software to setup and use, no matter which cutting machine you are using. Also, without the Cricut app, it is impossible to setup the machine, let alone use it. Therefore, as a Cricut crafter, you need to download the app on a computer or smartphone device.
Source: cricut explore air 2 setup
Visit here to know more: Cricut.com/setup
Pinterest
0 notes
Text
How to Use Cricut Design Space (Beginner’s Step Guide!)
It looks like you want to learn how to use Cricut Design Space but haven’t found anything yet. No worries; I’ve got your back! Cricut Design Space is a software application with an intuitive interface, so even beginners can make the most of it.
However, the software still has many features that you will need to explore with patience. This blog is the perfect fit for newbies who haven’t even downloaded the app and want to learn how to use it. So, I will start by telling you the basic system requirements for downloading the Cricut software on Windows and Mac computers. Then, I will teach you how to download the Cricut app and use it to create a project. Let’s get started now without any further delay!
System Requirements for Using Cricut Design Space
Checking system compatibility is a must when you are ready to download a Cricut Design app on your PC or other device. Once you are sure your system meets the basic Cricut system needs, you can learn how to use Cricut Design Space. Let’s check our system’s compatibility for both computers. You can see the requirements for the desktop of your choice.
For Windows/MacBook
Operating System: On Windows PC, confirm the latest Windows 10 or later. For Mac users, macOS 11 or later is required.
CPU: Intel Dual-Core or equivalent AMD on PC or 1.83 GHz on Mac
RAM: 4 GB
Disk: 2 GB Free
Connection Type: Both wireless Bluetooth & wired USB connections are compatible
Screen Resolution: Minimum 1024px x 768px
How to Download Cricut Design Space on Computer?
Below are the steps to help you download and install the Cricut Design app on your desktop. Both desktops��� downloading steps are identical, but the installation steps differ slightly. Let’s first learn how to download this forward on your device:
First, you have to start your computer and then open a browser.
After that, you will need to visit design.cricut.com.
Click the square check box on the site to agree to Cricut’s Terms of Use and Privacy Policy.
Next, simply hit the Download button to start downloading.
Once you have downloaded the software, you will need to install it.
Here’s how to install the Cricut Design app on your Windows PC:
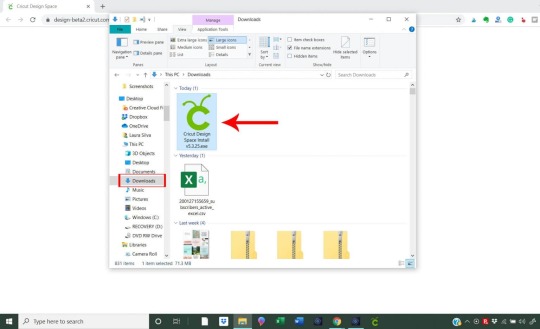
After downloading the software, you need to navigate to the folder where you have saved your downloaded file.
Now, you must double-click the downloaded file to install it.
Once you have installed the app, you can create your Cricut ID to learn how to use Cricut Design Space.
Here’s how to install the Cricut app on your Mac operating system:
Then, wait until it has finished downloading your software.
After that, you have to head to the folder (Downloads folder) where the .dmg file is.
Also, you need to double-click on the .dmg file.
Move to a new window screen, where you are supposed to drag your Cricut icon to the Applications folder.

In the last step, you will see the Cricut software on your Mac computer.
How to Use Cricut Design Space: 5 Easy-To-Follow Steps
Here, I will share the tutorial on working on a sublimation design using Design Space. No worries, this is going to be very easy. Before you start, make sure you have logged in to the Cricut software. Once done, you need to start following the steps below:
Step 1: Upload a Sublimation Image

Open your Cricut Design app and go to the Upload button on the left panel. Click on it and start uploading the picture that you want. I am going to work on a sublimation picture, and I have uploaded it here. So, upload the image and then move to the next step to learn how to use Cricut Design Space for sublimation.
Step 2: Choose Upload Type
Once you have uploaded the image, click the Continue button in the lower right-hand corner. On the next screen, select the Upload Type screen. Here, I selected Print Then Cut Image, and then chose the Upload button in the lower right-hand corner.
Step 3: Modify Your Image
Next, I selected my image here and took it to my Canvas. After that, I resized the image to fit my ornament. Since my ornament size is 3.5”, I resized my image up to 3.6” wide.
Step 4: Add Text to the Image
Next, I added the text by selecting the Text tool from the left-hand side. Now, I selected both the name and the image and another tool, such as Flatten, to make them one single Print Then Cut image.
Step 5: Reveal Your Project
Once I was done and satisfied with my image, I clicked on the Make It button in the upper right corner. Afterward, you need to click on Continue. Finally, you learn how to use Cricut Design Space, and you can easily make your next sublimation project as possible.
FAQs
Question 1: How to work on a sublimation project using Cricut?
Answer: If you are going to make a sublimation project, you need to ensure that you have a sublimation paper on which to print your design. You then have to place the image printed on the side above on your cutting mat. Then, insert the machine, and your Cricut will read the registration marks and cut the image accordingly.
Question 2: What do I need to make a sublimation shirt on Cricut?
Answer: In order to make a sublimation shirt on your Cricut machine, you will need the following items:
Sublimation shirt (with 65% polyester).
Sublimation paper
Sublimation printer and ink (e.g., Epson EcoTank ET-4760 with Hippo sublimation ink)
Cricut Heat Press
Protective paper
Heat resistant tape
Lint roller and scissors
Laptop or desktop
Question 3: How can I use my image in Cricut Design Space?
Answer: The following are the ways to use your image in the Cricut Design app:
First, open the Cricut software.
After that, start a new project.
Next, you will need to Select Upload.
Select the Browse button to find the image of your choice from your computer.
Or, if you have other image files ready, you need to drag and drop the image into your Canvas.
Source :- https://connectcricutmaker.com/how-to-use-cricut-design-space-start-your-first-project-now/
0 notes
Text
Master Automation Testing with Python: Selenium WebDriver Guide

Automation Testing with Python: A Comprehensive Guide to Selenium WebDriver
Automation testing is like having a personal assistant who tirelessly performs repetitive tasks, ensuring everything works as it should. For anyone diving into the world of software testing, Selenium WebDriver paired with Python is a match made in heaven. This article will walk you through everything you need to know about automation testing with Python , offering a detailed Python Selenium tutorial that’s easy to follow, even if you’re new to the scene. Discover the ultimate guide to automation testing with Python. Learn the ins and outs of Selenium WebDriver in this comprehensive Python Selenium tutorial.
Table of Contents
Sr#
Headings
1
Introduction to Automation Testing
2
Why Choose Selenium WebDriver with Python?
3
Setting Up Your Environment
4
Installing Python and Selenium
5
Understanding the Basics of Selenium WebDriver
6
Writing Your First Test Script
7
Interacting with Web Elements
8
Handling Waits in Selenium
9
Managing Multiple Windows and Frames
10
Taking Screenshots with Selenium
11
Advanced Selenium Features
12
Debugging and Error Handling
13
Best Practices for Selenium Testing
14
Integrating Selenium with Other Tools
15
Conclusion
16
FAQs
Introduction to Automation Testing
Imagine having to manually check every single function on a website every time there’s a small update. Sounds tedious, right? That’s where automation testing comes in. It’s like setting up a robot to perform these repetitive tasks for you, ensuring that everything runs smoothly and efficiently. Automation testing helps save time, reduces human error, and allows for more thorough testing.
Why Choose Selenium WebDriver with Python?
Ease of Use and Flexibility
Selenium WebDriver is a powerful tool that allows you to control a web browser through programs and perform browser automation. It supports multiple programming languages, but pairing it with Python offers a unique advantage. Python's simple and readable syntax makes it an excellent choice for both beginners and experienced developers.
Open Source and Community Support
Selenium is open-source, which means it’s free to use and constantly being improved by a large community of developers. This extensive community support ensures that you can find solutions to most problems online, making your automation testing journey smoother.
Cross-Browser and Cross-Platform Testing
Selenium WebDriver supports all major browsers (like Chrome, Firefox, Safari, and Edge) and can run on various platforms (Windows, macOS, Linux). This versatility makes it a one-stop solution for browser automation.
Setting Up Your Environment
Before diving into writing test scripts, you need to set up your environment. This includes installing Python, a code editor, and Selenium WebDriver.
Choosing a Code Editor
There are many code editors available, but for Python, some popular choices include PyCharm, VS Code, and Sublime Text. These editors offer features like syntax highlighting, debugging tools, and extensions that can make your coding experience more pleasant.
Installing Python and Selenium
Step-by-Step Installation
Download and Install Python: Head to the official Python website and download the latest version. Follow the installation instructions for your operating system.
Install Selenium: Open your command prompt or terminal and type the following command: bash Copy code pip install selenium
Install WebDriver: Depending on the browser you want to automate, you need to download the corresponding WebDriver. For instance, for Chrome, download ChromeDriver from the official site.
Understanding the Basics of Selenium WebDriver
What is Selenium WebDriver?
python for automation testing Selenium WebDriver is a web automation framework that allows you to execute your tests against different browsers. It provides a way to interact with web elements, such as clicking buttons, entering text, and navigating through pages.
Core Components
WebDriver: The main interface for testing web applications.
WebElement: Represents an HTML element on a web page.
Browser Drivers: Bridge between your test scripts and browsers.
Writing Your First Test Script
Setting Up Your Script
Let’s start with a simple script to open a web page and check its title.
Import the Necessary Modules: python Copy code from selenium import webdriver
Set Up WebDriver: python Copy code driver = webdriver.Chrome(executable_path='path/to/chromedriver')
driver.get("https://www.example.com")
Verify the Page Title: python Copy code assert "Example Domain" in driver.title
driver.quit()
Running Your Script
Save your script and run it using Python. If everything is set up correctly, your browser should open, navigate to the specified URL, check the title, and then close.
Interacting with Web Elements
Locating Elements
Selenium provides several ways to locate elements on a web page:
By ID: python Copy code element = driver.find_element_by_id("element_id")
By Name: python Copy code element = driver.find_element_by_name("element_name")
By XPath: python Copy code element = driver.find_element_by_xpath("//tag[@attribute='value']")
Performing Actions
Once you have located an element, you can perform various actions:
Clicking a Button: python Copy code element.click()
Entering Text: python Copy code element.send_keys("sample text")
Clearing Text: python Copy code element.clear()
Handling Waits in Selenium
Implicit Waits
Implicit waits tell WebDriver to wait for a certain amount of time before throwing an exception if it cannot find an element immediately.
python
Copy code
driver.implicitly_wait(10) # waits for 10 seconds
Explicit Waits
Explicit waits are used to wait for a specific condition to be met before continuing.
python
Copy code
from selenium.webdriver.common.by import By
from selenium.webdriver.support.ui import WebDriverWait
from selenium.webdriver.support import expected_conditions as EC
element = WebDriverWait(driver, 10).until(
EC.presence_of_element_located((By.ID, "element_id"))
)
Managing Multiple Windows and Frames
Switching Between Windows
Sometimes, your test needs to interact with multiple windows. Here’s how to switch between them:
python
Copy code
# Store the ID of the original window
original_window = driver.current_window_handle
# Open a new window and switch to it
driver.switch_to.new_window('window')
driver.get("https://www.new-window.com")
# Switch back to the original window
driver.switch_to.window(original_window)
Handling Frames
Frames are used to embed HTML documents within another HTML document.
python
Copy code
# Switch to frame by name or ID
driver
python
Copy code
.switch_to.frame("frame_name_or_id")
# Switch back to the default content
driver.switch_to.default_content()
Taking Screenshots with Selenium
Capturing Screenshots
Screenshots are incredibly useful for debugging and record-keeping. Here’s how to capture and save a screenshot with Selenium:
python
Copy code
driver.save_screenshot('screenshot.png')
Saving Screenshots of Specific Elements
If you only want to capture a specific element, you can use the screenshot method on a WebElement:
python
Copy code
element = driver.find_element_by_id("element_id")
element.screenshot('element_screenshot.png')
Advanced Selenium Features
Handling Alerts and Pop-ups
Selenium can handle JavaScript alerts and pop-ups. Here’s how:
Accepting an Alert: python Copy code alert = driver.switch_to.alert
alert.accept()
Dismissing an Alert: python Copy code alert = driver.switch_to.alert
alert.dismiss()
Executing JavaScript
You can execute custom JavaScript using Selenium’s execute_script method:
python
Copy code
driver.execute_script("window.scrollTo(0, document.body.scrollHeight);")
Debugging and Error Handling
Common Errors and Solutions
NoSuchElementException: This occurs when Selenium can’t find an element. Double-check your locator and ensure the element is present.
TimeoutException: This happens when an explicit wait times out. Make sure the conditions you are waiting for are met within the specified time.
Using Try-Except Blocks
To handle exceptions gracefully, use try-except blocks:
python
Copy code
try:
element = driver.find_element_by_id("non_existent_id")
except NoSuchElementException:
print("Element not found!")
Best Practices for Selenium Testing
Keep Your Tests Independent
Ensure each test can run independently without relying on the state left by previous tests. This improves reliability and makes debugging easier.
Use Page Object Model (POM)
The Page Object Model is a design pattern that encourages storing locators and interactions with web pages in separate classes. This makes your code more maintainable.
Regularly Update WebDrivers
Keep your browser drivers updated to match the latest browser versions to avoid compatibility issues.
Integrating Selenium with Other Tools
Continuous Integration (CI)
Integrate your Selenium tests with CI tools like Jenkins to automate running your tests whenever code changes are made.
Test Reporting
Use reporting tools like Allure or TestNG to generate detailed test reports, making it easier to track the results and performance of your tests.
Conclusion
automation testing in python using Selenium WebDriver is a powerful combination for any tester's toolkit. By automating repetitive tasks, you can focus on more critical aspects of your project and ensure a higher quality product. This guide has walked you through setting up your environment, writing test scripts, and employing best practices. Now, you’re well on your way to becoming proficient in automation testing.
FAQs
1. What is Selenium WebDriver?
Selenium WebDriver is a web automation framework that allows you to execute your tests against different browsers, providing a way to interact with web elements like buttons and text fields.
2. Why should I use Python for Selenium testing?
python in automation testing simple and readable syntax makes it an excellent choice for both beginners and experienced developers, facilitating quicker and more efficient scripting.
3. How do I handle dynamic elements in Selenium?
You can handle dynamic elements by using explicit waits, which wait for specific conditions to be met before proceeding with the test.
4. Can Selenium interact with mobile applications?
Selenium itself is designed for web applications. For mobile application testing, you can use Appium, which extends Selenium’s functionality to mobile apps.
5. How do I capture screenshots in Selenium?
You can capture screenshots using the save_screenshot method for the entire page or the screenshot method for specific elements, which is useful for debugging and reporting purposes.
By following this comprehensive guide, you can harness the full potential of Selenium WebDriver with Python, streamlining your testing processes and enhancing the quality of your software products. Happy testing!
0 notes
Text
How to Install Cricut Design Space on Windows 11: Full Guide
If you are an old user of Cricut machines, you already know how important the Cricut Design Space app is. But if you are a beginner and wondering how to install Cricut Design Space on Windows 11, I am going to guide you through this blog. You just have to keep reading it till the end, and you will be able to download and install the Cricut app on your computer.
Cricut Design Space is a free app that is designed to be used for all Cricut machines. It is great for all users, but it is even better for beginners. The reason behind that is it is available for free. As a beginner, if you make a few mistakes, you are not worried about losing the money. You can learn how to use the app for free. When you have learned how to use it, you can choose Cricut Access, which is a premium Cricut software that gives you a better experience.
Now, let’s dive into the installation procedure.
Minimum System Requirements for Cricut Design Space
If you want to know how to install Cricut Design Space on Windows 11, you must know what specifications your computer should have to set up the app. Although your computer is likely to have all the required features as you are using the Windows 11 computer, I am writing it down anyway.
Your Windows computer should have these features:
It should be a Windows 10 or newer version.
The processor of the computer should be Intel Dual-Core or equivalent.
It should have 2 GB of free disk space.
The RAM of the computer should be at least 4GB.
In order to connect a Cricut machine to the computer, there should be a USB port or Bluetooth connectivity option.
The computer should have a minimum resolution capacity of 1024x768 pixels.
In order to use the Design Space app and download and upload a design, the computer should have a stable internet or Wi-Fi connection. The minimum downloading speed should be 2–3 Mbps, and the uploading speed should be 1–2 Mbps.
How to Download Cricut Design Space?
To learn how to install Cricut Design Space on Windows 11, you have to download the Design Space app. You can do it on your Windows 11, following some easy steps. I am writing them down here.
To begin the downloading, open the web browser on your computer.
Next, type cricut.com/setup in the search bar and click Enter.
You will see the Cricut Design app. Click on the Download option. You will have to agree to the terms and conditions of the app, so click on Agree.

Afterward, click on Install to start the installation.
Then, the app has been downloaded to your Windows 11 computer.
Log in with a Cricut ID, and if you do not have an account, you can create one.
How to Create a Cricut Account?
Once you have downloaded the Cricut software, you can log in with a Cricut ID. In case you are a first-time Cricut user, you need to create a new account. To create it, you should follow these steps.
Firstly, go to the browser and open Cricut’s official site.
Next, you will see an option to Create a Cricut ID. You must choose that option.
Then, you will have to fill in some details, such as your name, email, and country of origin. You will also need to enter a unique Cricut ID and password.
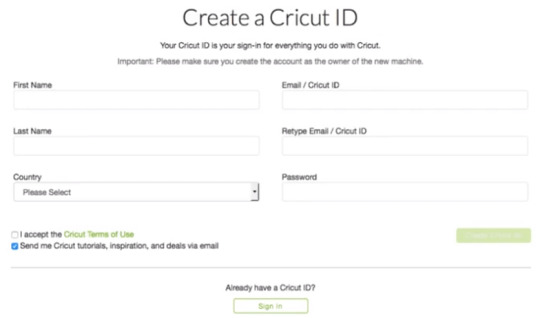
Afterward, you need to agree to the Terms & Conditions.
Next, you can choose the option Send Me Cricut Tutorials via email if you want the latest information and tutorials via email. If you don’t want it, you can ignore it.
Now, proceed with Create Cricut ID.
Your new Cricut ID has been created. You must remember your username and password for future logins.
How do you login to a Cricut Account ID?
In the process of learning how to install Cricut Design Space on Windows 11, the last stage is to learn about logging in with a Cricut account. To know how to do it, read further in the blog:
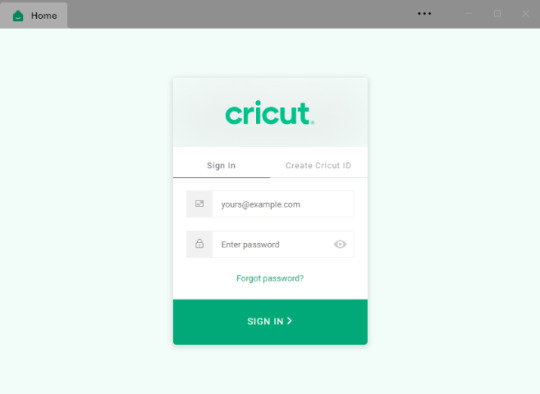
Open the Cricut app that you have just downloaded.
Then, choose the option Sign In.
Next, enter the Cricut ID and password and press the sign in link.
Now, you are ready with your account, which is logged in with the Cricut Design app.
log in with a Cricut account on your Design Space app, your Cricut machine will be ready to use. You can choose a design on the app, cut it on your Cricut, and make beautiful projects.
Conclusion
Cricut Design Space is a wonderful app that works on your Cricut machine. It is especially good for beginners as it is free. With this free Cricut software, you can learn how to cut materials and design your fabrics, tables, walls, and many more things. After reading the blog, you know how to install Cricut Design Space on Windows 11. Although it is a free app, if you want to use full Cricut features, you should subscribe to the premium Cricut Access plan.
FAQs
Can I Download Cricut Design Space on My Android Phone?
Yes, you can! The Cricut Design Space app is available for Android phone users, as it is for iOS, Windows, and Mac users as well. Your phone just has to have certain features like all the other devices to run the app smoothly. Otherwise, it will be difficult to run the Design Space app on your mobile device.
Does Cricut Design Space Support Multiple Projects at Once?
Yes, it does! When you are using a desktop or laptop for the Design Space app, you can open multiple windows and work on various projects at the same time. In the different windows you can pick different designs. However, while cutting, the Cricut machine can connect to just one window. So, if you want to work on multiple projects at once, you can pick a design and save it for cutting later.
Can I Use Cricut Design Space Offline?
Yes, you can! If you have purchased any project and have saved it on your device, you will be able to edit and cut it offline as well. You can even work on new projects, including fonts, patterns, and images, but you have saved them already on your computer. If you are working on a project and suddenly lose your internet connection, you can continue working on it. When the internet connection resumes, it will automatically sync with the internet.
Source: Install Cricut Design Space
Visit here For More Information: Cricut Venture
Pinterest
0 notes
Text
Cricut Setup for PC: Quick and Easy Tutorial
Hey, are you looking for a guide on Cricut setup for PC? In this guide, you will get everything that a beginner needs for a Cricut machine setup. I still can’t forget the day when one of my best friends, Alex (a pro crafter), bought his new Cricut machine. He was very unsure about the setup, and he was going to use his Cricut directly. I was there to guide him; otherwise, he could mess everything up.
Somehow, I saved my friend from making a big mistake. But what about you? I know why you came here. So, let’s get to the point of what I will teach you throughout this blog. In this post, I will first discuss the system requirements for a PC. Then, I will provide you with the steps to connect Cricut to Bluetooth. Let’s get started now!
Minimum System Requirements for Cricut Setup on PC
So why are system requirements needed? The short answer is ‘Cricut setup for PC.’ This is also important because we have to download and install the Cricut Design app.
Since this software has a minimum requirement for every device, it can work smoothly only on compatible devices. However, if you want to know your PC’s requirements, look at the following list.
Operating System – Windows 10 or later (64-bit)
Disk – 2 GB free
A USB port or Bluetooth connectivity is required
RAM – Minimum 4 GB
CPU – Intel Dual Core or equivalent to AMD processor
Display – Minimum 1024px x 768px screen resolution
When you have met the above needs, you need to move to the next step, where you will learn to connect your Cricut to your PC via Bluetooth. Let’s first connect Cricut to a PC, and then we will move on to learning about Cricut setup for PC.
Connect a Cricut Machine to Your Windows PC Using Bluetooth
Now, let us start connecting our Cricut using Bluetooth. Make sure your computer has Bluetooth so that you can easily connect your Cricut machine. Let’s see how to do this:
Firstly, you will have to turn on the machine and place it at an adequate distance (approx 10 to 15 feet).
Then, go ahead to the Start button and choose the Settings option.

After that, you will need to click on Devices.

Make sure Bluetooth is turned on; if not, turn it on.
Next, you should hit the Add Bluetooth or other device.

Now, click on the Bluetooth option and wait until your PC detects your machine.
Once it detects your Cricut cutting machine, click on it to pair.
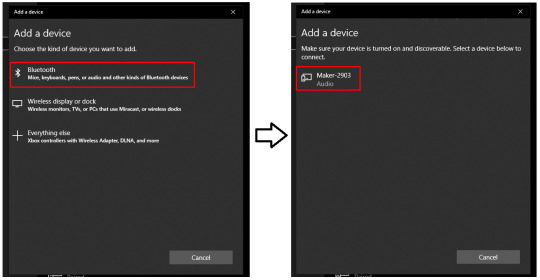
Finally, we are done with the connection setup via Bluetooth. Let’s proceed to the next step.
The Process of Cricut Setup for PC (Windows)
I think you are now prepared for the Cricut machine setup. If so, you might also have connected your Cricut to a computer via Bluetooth. If yes, then SUPERB! This is because I find the Bluetooth connection a little bit lengthy. It takes time, in my case. Anyway, let’s setup our Cricut machine.
Here is the easiest way to setup the Cricut cutting machine on a PC:
I would like you to open your internet browser and then navigate to cricut.com/setup.
Then, you have to download and install the Cricut Design Space app for your desktop.
After that, you need to follow the steps on your display to create a new Cricut account (If you do not have any).
Otherwise, sign in to your account using your Cricut ID & password.
Next, you will need to choose your Cricut machine model.
Also, turn on the Cricut by inserting the power cord and pressing the power button.
Here, you will want to connect your Cricut to your PC using a USB cable or Bluetooth (that we have already done above).
Afterward, you will be prompted to register your machine.
Now, your setup is done, and you can make your first cut easily.
Now, the Cricut setup for PC is complete. You are now ready to use your Cricut to make amazing crafts. Good Luck!
FAQs
Question 1: How to download Cricut Design Space on a PC?
Answer: To setup the Cricut machine, you will need to download and install the Design Space on your PC. Here’s how to download it:
Open the browser and navigate to design.circuit.com.
After that, you will see a checkbox. Click on it to enable the Download button.
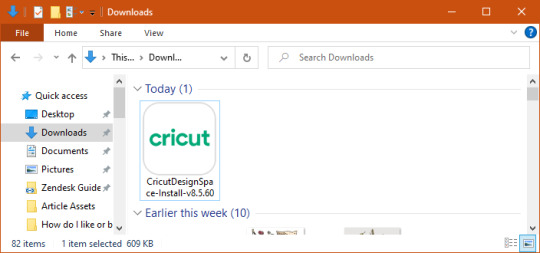
When the download is done, you have to go to your Downloads folder.
If asked, click on the Yes button to trust the application source.
In the last step, installation will begin.
Question 2: What devices do I need to connect my Cricut machine?
Answer: You might require many requisite items while setting up your machine. Have a look at the following list:
A compatible computer, laptop, tablet, or smartphone
Cricut Design Space app
Cricut ID & password
Cricut machine
Power cable
USB cable
An internet connection with good internet speed
Question 3: Why do I need to setup my Cricut?
Answer: The Cricut setup is the foremost thing we do when getting a new machine so that we can use it. The setup process includes many things, such as connecting Cricut to Bluetooth, downloading and installing the Cricut Design Space app, and finally, creating a Cricut account. All these steps are part of the Cricut setup.
Source: Cricut setup for PC
#cricut setup for pc#Cricut setup#cricut setup create account#cricut setup explore air 2 setup#cricut setup maker#cricut setup on computer#install cricut design space app#cricut explore 3#cricut.com/setup#cricut new machine setup#install cricut explore air 2#cricut design space
0 notes
Text
How to Create a Cricut Account: Beginner’s Guide
Before you can create custom-made crafts, you must create a Cricut account, which allows you to log in to Cricut Design Space at any time. Simply put, it will give you a unique identity and register you as a regular user. Your Cricut machine won’t start working on any project unless you have a Cricut Design Space account. Once registered, you will get full access to the available features. This software will save your projects and designs and keep updating by launching new features.
The Design Space app works with a Cricut machine and helps crafters make new designs with their tools. Plus, it is compatible with computers and smartphones. If you are a new user and don’t know how to create an account, then stick to this blog till the end.
What Are the Minimum System Requirements for Cricut Design Space?
To make the app run smoothly on the computer system, all users must ensure that their devices meet the basic system requirements. In this blog, you will learn about the system requirements for Windows & Mac as well:
Windows
Operating System: Windows 10 or it’s latest version
Internet Connectivity: At least 2–3 Mbps for downloading & 1–2 Mbps for uploading
Offline: Can work without internet
Mac
Operating System: macOS11 or updated version
Internet Connectivity: Min 1–2 Mbps for uploading & 2–3 Mbps for downloading
Offline: Can work without internet connectivity
How to Download Cricut Design Space on a Computer?
Before you create a Cricut account, getting the app on your respective devices is essential. Get the app free of cost on your device by considering the below steps:
First, open your web browser, go to Cricut’s official website, and press the Download box in the middle of the page.

After the download ends, go to your device’s Downloads folder and double-click it.

Now, a pop-up window with installation progress will appear on your screen.
Following this, you will notice the Design Space icon on your device’s home screen.
You need to double-click it and sign in by entering your Cricut ID & password inside the specific area.

How to Create a Cricut Account on Your Computer?
After installing the designing software on your device, it is time for you to learn about how to create a Cricut Design Space account. If you are new and don’t have a clue about the process, then refer to the following pointers:
Start the process by going to the Cricut Design Space official website and tick the Let’s Get Started option.
After that, enter your email address, first name, last name, and country.
Next, go through Terms & Conditions and tap the box given next to it.
Now, press Send Me Cricut Tutorials, inspiration, and deals via email.
Following this, tap the Create Cricut ID option to get a confirmation message.
Afterward, click the Continue option and answer the questions asked.
Lastly, you will get the login credentials and start creating designs on the app.
How to Login to Cricut Design Space Account?
Once you are done with the create a Cricut account process, you can now start creating the design on the canvas. For easy login, you need to go through the steps given below:
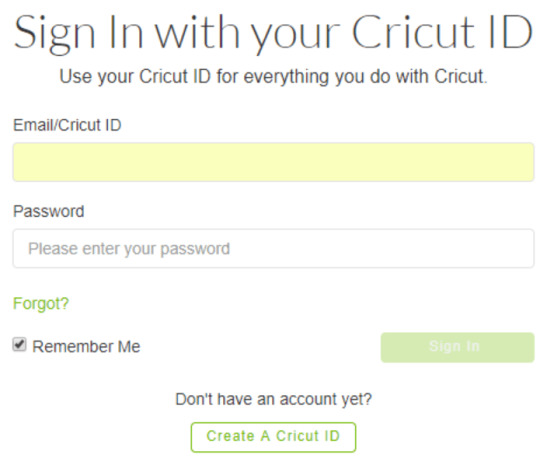
Initiate the process by opening the Cricut app installed on your device.
After the app opens, you will land on the Cricut Sign-in page.
Now, fill in your Cricut ID & password inside the blanks and press the Sign In option.
Here you go, all set to create new projects on the app by using its respective tools.
Once you are done finishing all the above activities, you will be eligible to do many customized projects with cutting machines within a few minutes. Besides, this design app is compatible with smartphones.
Frequently Asked Questions
Question: How Do I Install Cricut Design Space on My Android Device?
Answer: The Cricut app is compatible with smartphones also, so to get the app, have a look at the steps given below:
First, you need to switch on your device and open the Google Play Store.
Afterward, type Cricut Design Space inside the search box.
Now, to get the app on your device, hit the Install button visible on your screen.
Next, go back to your home screen and open the installed app.
After the app opens, sign in or create a Cricut account by submitting your Cricut ID & password.
Question: How to Update Cricut App for Desktop?
Answer: Whenever the new version of the Cricut app is available, the app will instantly begin to update itself once it is connected to the internet. If you are already connected to the internet, then you will get a small pop-up notification asking for permission to update the app before using a new canvas to make new designs.
Question: How Can I Change My Cricut Design Space Login ID?
Answer: Any reasons if you want to change your Cricut login ID, then follow the below steps:
Start the process by going to your Cricut profile and pressing the Here option.
After doing that, tap the Edit Profile, enter your email address, and tick the Save button.
Now, you can log in to Design Space by entering this email ID on the sign-in page.
Read more: cricut.com/setup mac
Cricut design space
install cricut design space app
how to setup cricut explore
Source: create a cricut account
#create a cricut account#how to setup cricut explore#Cricut design space#design space signin#cricut design space download#cricut design space login#cricut.com/setup#cricut design space setup#cricut design space app#cricut design space for mac#cricut.com
0 notes