#keyboard shortcut for bullet point
Explore tagged Tumblr posts
Visit Tumblr Blog
Explore Tumblr blogs with no restrictions, modern design and the best experience.
Last Seen Tumblr Blogs


Fun Fact
Tumblr’s website traffic is steadily declining.
Text
When I write a post on tumblr dot com, I rarely (if ever) use proper punctuation, capitalization, or sentence structure. However, when I write as an author, or in any other structured manner (recipes for strangers, explanations/trying to Properly Share Knowledge, school) my writing would almost certainly be flagged as AI.
Because I'm autistic. And when I am writing seriously, I Follow The Rules.
Different circumstances require different writing styles. These can be replicated by AI easily because they each have neat little rulesets. You can make your little bot write in a certain voice; you can make it write casually or you can have it make bulleted lists full of professional jargon relating to the topic you're generating content for. Just take five minutes to scroll the chatGPT subreddit, and you'll see dozens of examples of douchebags telling the stupid AI "hey write that again but in a more professional voice/more casual/with better grammar" and the damn fucking bots can do it. There is literally no telling what is 100% AI anymore because they've unfortunately trained the models to be able to write in any fucking voice they want.
I had to LEARN how to write less professionally because, growing up, school was one of the only places in which it wasn't incredibly difficult for me to thrive, so I applied The Writing Rules everywhere. If I could count the number of times I've been told I "talk like a robot" -- even 20 years ago -- I'd like, have a loose bag of change, but enough to make a point here. Point here being that "your writing is too structured so you must be using AI to generate a post" = really kinda messed up ableist rhetoric.
Not because "wahhhhhh I can't write my post I NEED AI" but because you haven't taken into account that numerous autistic people just. Write like that. AND SO DO THOUSANDS OF PEOPLE WHO AREN'T ON THE SPECTRUM! Because it was their job! Because it's how they learned to write in school! Because they didn't grow up terminally online!
And that right up there (the double dash --) automatically converts to an em dash in almost any functioning word processor. Because it's literally normal-ass punctuation. There's like, settings to turn it on or off, sure, but default? It gets converted. Because it's not something used frequently enough to have a dedicated key on a keyboard -- but it IS something frequently enough used to have a generally recognized shortcut that doesn't require using ALT codes.
Anyway, this got longer than I wanted it to. But immediately labeling a numbered/bulleted list or writing that uses em dashes as AI is really messed up, considering a dude can just say "hey rewrite that without the dashes" and -- surprise -- now your tactics are useless. And now you're attacking a real person who uses a real punctuation mark to emphasize or explain their points. Like,
"this is DEFINITELY written by AI, I can tell because it uses the writing quirks that AI uses (because it was trained on real people who write with those quirks)"
c'mon dudes we have got to do better than this
27K notes
·
View notes
Text
Top 10 Shortcuts in MS Word Everyone Should Know

Microsoft Word is software full of functionalities, but did you know just a few keyboard shortcuts can double your productivity? Whether you're a student writing essays or a professional writing reports, these top 10 MS Word shortcuts will give you extra time to do other things.
1. Ctrl + C / Ctrl + V — Copy and Paste
We'll get it out of the way now. Ctrl + C copies the selected text or object while Ctrl + V pastes it. It's universally applicable, but in Word, it's quite useful for quickly moving contents.
2. Ctrl + Z / Ctrl + Y — Undo and Redo
Made a mistake? Tap Ctrl + Z to have your last action undone. Feel like bringing it back now? Ctrl + Y will do it for you. It's like a time machine at your fingertips!
3. Ctrl + B / Ctrl + I / Ctrl + U — Text Formatting
Need to give some emphasis? Hit:
Ctrl + B for Bold
Ctrl + I for Italic
Ctrl + U for Underline
Great way to make important points stand out.
4. Ctrl + A — Select All
Apply formatting to the whole document? Just hit Ctrl + A, and everything in your Word file will be selected instantly.
5. Ctrl + F — Find Text Fast
Searching for a particular word or phrase in a lengthy document? Hitting Ctrl + F will pop up a Find tool through which you can jump to any section in no time.
6. Ctrl + S — Save Your Work
Avoid nightmares of losing data. Press Ctrl + S to save your document, often and fast. It's a habit that can save you from imminent disasters.
7. Ctrl + P — Print Your Work
Going all the way old-school and printing your work? Ctrl + P opens up the print dialog. Quick and easy!
8. Ctrl + Home / Ctrl + End — Jump to Top or Bottom
You're having to move through really large files fast in a hurry. Ctrl + Home will do this at the top for you, and Ctrl + End will speed you off to the bottom of your file.
9. Ctrl + Shift + L — Apply Bullet Points
Are you preparing lists? Ctrl + Shift + L will apply bullet points to your chosen text instantly. It comes in very handy for meeting notes and outlines.
10. Ctrl + K — Insert Hyperlink
Inserting a hyperlink pointing to a website or another document? When you use Ctrl + K, the hyperlink dialog will open for you to link your content.
Conclusion
Those MS Word shortcuts are not just party tricks—they are tools that make you work smart. Just use them time after another, and they will just come naturally to you. Flaunt your typing skills for faster completes and earn some brownie points from your boss or teacher-all sweat-free!
At TCCI, we don't just teach computers — we build careers. Join us and take the first step toward a brighter future.
Location: Bopal & Iskcon-Ambli in Ahmedabad, Gujarat
Call now on +91 9825618292
Visit Our Website: http://tccicomputercoaching.com/
#computer courses in bopal Ahmedabad#computer training institute near me#Ms Office Course in Bopal Ahmedabad#TCCI - Tririd Computer Coaching Institute#Top 10 Shortcuts in Ms Word
0 notes
Text
Effective Management Techniques for Google Slides
Branded Google Slides design of high quality: Common Queries Answered
1.How do I select multiple shapes in Google Slides?
To select multiple shapes in Google Slides, hold down the "Shift" key while clicking on each shape you want to select. Alternatively, you can click and drag your cursor around the shapes to create a selection box encompassing them. Once selected, you can move, resize, or format all shapes simultaneously.
2. How to check Google slide ratio?
To check the slide ratio in Google Slides, open your presentation and click on "File" in the top menu. Then select "Page setup." A pop-up window will display the current slide dimensions, showing the aspect ratio (e.g., 16:9, 4:3). You can also change the slide ratio from this menu by selecting a different option or entering custom dimensions. After adjusting, click "Apply" to update your slides.
3. How do I add pages in Google Slides?
To add pages in Google Slides, open your presentation and navigate to the left sidebar where your slides are listed. Click on the "+" button located at the top left of the sidebar to insert a new slide. Alternatively, right-click on an existing slide and select "New Slide" from the context menu. You can also use the keyboard shortcut Ctrl + M (Cmd + M on Mac). Choose a layout for the new slide if prompted. Your new slide will appear in the sidebar, ready for you to edit.
4. How to organize Google Slides?
To organize Google Slides effectively, start by creating a clear outline for your presentation. Use the slide sorter view to rearrange slides easily by dragging them into your desired order. Group related slides into sections using the "Change Layout" option to maintain consistency. Utilize the "Master Slide" feature for uniform design elements. Label slides and use descriptive titles for easy navigation. Incorporate bullet points and visuals to enhance clarity. Finally, regularly review and edit your slides for coherence and flow, ensuring each slide supports your main message.
5. How do I group slides in Google Slides?
To group slides in Google Slides, first select the slides you want to group by holding down the Shift key and clicking on each slide. Once selected, right-click on one of the highlighted slides and choose "Group." Alternatively, you can use the menu by clicking on "Arrange" and then selecting "Group." This groups the selected slides together for easier navigation and organization. To ungroup, simply right-click on the grouped slides and choose "Ungroup."

Visit: VS Website See: VS Portfolio
0 notes
Text
Understanding the Three Pillars of SEO: Authority, Experience, and Relevance
In the ever-evolving landscape of digital marketing, mastering SEO is crucial for businesses aiming to enhance their online presence. To achieve high rankings on search engines like Google, it's essential to focus on the three fundamental pillars of SEO: Authority, Experience, and Relevance. These pillars form the foundation of effective SEO strategies and are key to driving organic traffic, boosting visibility, and establishing trust with your audience.
In this blog, we’ll dive deep into these three pillars of SEO, explaining how each contributes to your website’s success. For businesses looking to elevate their SEO game, partnering with a leading SEO agency in Pune like Osumare can ensure that your strategy aligns perfectly with these core principles. For expert guidance and services, visit osumare.com.
1. Authority: Building Trust and Credibility
Authority refers to the perceived trustworthiness and credibility of your website in the eyes of search engines and users. It’s about demonstrating that your site is a reliable source of information within your industry or niche. Google and other search engines assess a website’s authority through various signals, including backlinks, domain age, and content quality.
How to Build Authority:
High-Quality Backlinks: One of the strongest indicators of authority is the number and quality of backlinks pointing to your site. These are links from other reputable websites that vouch for your content. Building a robust backlink profile involves outreach, guest blogging, and creating link-worthy content that others want to reference.
Consistent Content Creation: Regularly publishing high-quality, informative, and engaging content not only helps your audience but also signals to search engines that your site is active and valuable. Focus on creating in-depth articles, guides, and resources that address the needs of your audience.
Earning Trust Signals: Trust signals like HTTPS encryption, privacy policies, and secure payment options are crucial for building authority. Ensuring that your website is secure and user-friendly enhances your credibility.
Social Proof: Positive reviews, testimonials, and social media mentions contribute to your site’s authority. Encourage satisfied customers to leave reviews and engage actively on social media platforms.
2. Experience: Prioritizing User Experience (UX)
Experience refers to how users interact with your website, including site speed, mobile-friendliness, and overall usability. A positive user experience keeps visitors on your site longer, reduces bounce rates, and increases the likelihood of conversions, all of which are favorable in the eyes of search engines.
How to Enhance User Experience:
Fast Loading Times: Slow websites frustrate users and lead to high bounce rates. Optimize images, use efficient coding, and leverage caching techniques to ensure your site loads quickly.
Mobile Optimization: With the majority of web traffic coming from mobile devices, it’s essential to have a mobile-friendly site. Implement responsive design to ensure your site looks great and functions well on all screen sizes.
Easy Navigation: A well-structured website with intuitive navigation helps users find what they’re looking for quickly. Use clear menu labels, breadcrumbs, and internal linking to enhance the user journey.
Engaging Design and Content: A visually appealing design with high-quality images, videos, and interactive elements keeps users engaged. Break content into digestible sections with headers, bullet points, and visuals to improve readability.
Accessibility: Ensure your website is accessible to everyone, including users with disabilities. Use alt text for images, maintain high contrast ratios, and design your site to be navigable using keyboard shortcuts.
3. Relevance: Aligning Content with Search Intent
Relevance is about how closely your content matches the search intent of users. Search engines prioritize delivering results that are most relevant to a user’s query. Your content needs to address what the user is looking for, whether it’s answering a question, solving a problem, or providing information.
How to Increase Relevance:
Keyword Research and Optimization: Understanding what your audience is searching for is the first step in creating relevant content. Use tools like Google Keyword Planner, Ahrefs, or SEMrush to identify keywords that align with your business and audience. Integrate these keywords naturally throughout your content, including in titles, headings, and meta descriptions.
Content Alignment with Search Intent: Different searches have different intents—informational, navigational, or transactional. Tailor your content to match the specific intent behind the keywords. For example, if the keyword suggests informational intent, focus on providing comprehensive guides or how-to articles.
Regularly Update Content: Relevance is not static. Regularly updating your content ensures it remains current and valuable. Refresh old blog posts, update statistics, and add new insights to keep your content in line with the latest trends and user expectations.
Structured Data and Schema Markup: Use structured data to help search engines understand your content better and display it in rich snippets. This enhances your content’s relevance and can improve click-through rates from search results.
Why Partner with an SEO Agency in Pune?
Navigating the complexities of SEO requires a strategic approach that focuses on authority, experience, and relevance. An expert SEO agency in Pune like Osumare offers the skills, tools, and insights needed to optimize your website according to these three pillars. By analyzing your current SEO performance and implementing tailored strategies, Osumare ensures that your website not only ranks higher but also delivers an exceptional user experience.
Conclusion
Understanding and implementing the three pillars of SEO—Authority, Experience, and Relevance—is essential for achieving long-term success in digital marketing. These pillars work together to improve your search rankings, drive quality traffic, and establish your brand as a trusted authority in your industry. To stay ahead of the competition and maximize your online potential, consider partnering with an expert SEO agency in Pune like Osumare.
For comprehensive SEO services and expert guidance, visit osumare.com and take the first step toward enhancing your website’s authority, experience, and relevance today.
#seo services in pune#seo agencies in pune#seo company in pune#seo agency in pune#seo companies in pune
0 notes
Text
Nobody told you these Secret Adobe illustrator Shortcuts
Ready to discover some secret shortcuts that'll make your design life easier? Learn how to add trademark, copyright, and registered symbols with ease. Plus, I'll show you how to drop in bullet points like a pro and share some keyboard tricks that'll make your workflow smoother than butter. Don't miss out on these time-saving hacks – your future self will thank you! these tips will have you mastering Illustrator like a pro. Let's unlock these hidden gems and boost your productivity!
#IllustratorTips #DesignHacks #adobeshortcuts #illustratorshortcuts #adobeillustratorshortcuts #adobesecret #illustratorsecret #adobeillustratorsecret #logodesigner #logoartist #brandingidentitydesigner #logodesign #softwareshortcuts #DesignHacks #CreativeShortcuts
0 notes
Text
InDesign:
Keyboard Shortcuts:
SPACE - pan
z - zoom
v - select
a - direct select
COMMAND + left click (outside of textbox) - exit text edit mode
t - text tool
w - toggle preview mode
Text Mode:
COMMAND + left/right arrows - select text by character
COMMAND + SHIFT + left/right arrows - select text by word
COMMAND + up/down arrows - select text by line
COMMAND + SHIFT + up/down arrows - select text by paragraph
SHIFT + RETURN - soft return
Image/Design mode:
hold COMMAND + SHIFT (before resizing) - constrains when scaling objects
hold OPTION + drag image - duplicate image (when text wrapped)
SHIFT + OPTION + COMMAND + v - paste in place
Paragraph Styles:

Paragraph styles allow us to add preset styles to whole paragraphs. Set these styles through the PARAGRAPH STYLES palette. Create a new paragraph style with the plus icon at the bottom of the palette, the double click its title to enter the Options menu

An example of this is the Bullet points PARAGRAPH STYLE below.

By defining the parameters of the Paragraph style and selecting OK, a new preset is created. It is then a simple matter of selecting the relevant text and double clicking that PARAGRAPH STYLE heading within the PARAGRAPH STYLES palette.
It is important to note, that as the name suggests, a paragraph style will be applied to the whole paragraph even if only a portion of the paragraph's text is selected.
Character Styles:

CHARACTER STYLES are created in the same way as PARAGRAPH STYLES, the difference is they can be applied to parts of paragraphs, sentences, parts of sentences, individual words, or even letters. Here, the text selection has been given a bold, italic CHARACTER STYLE.
Images:

To add an image in InDesign choose the File drop-down menu, then select Place. The image is added in the original size of the image file and InDesign places a box around it. Resizing this box works like cropping it rather than re-scaling the image itself. Holding COMMAND + SHIFT allows for the image itself to be re-scaled, rather than just the frame that InDesign automatically places around it.
Embedded vs Linked Images:
Linking an Image, rather than Embedding it is desirable. When an image is Linked, InDesign references the original image file and will thus automatically update the image whenever changes are made to the original file. The other advantage of this is that Embedded images are saved into the InDesign file, thus increasing the file size with every save iteration.

Text Wrap:
Text can be wrapped around an image with the TEXT WRAP feature. The margins around the image can be changed by increasing/decreasing the offset numbers. These can be done individually or uniformly by with the chain symbol located in the centre of the 4 number values. TEXT WRAP not only looks cleaner when using a combination of text and imagery on a page, it will also reposition the image automatically if text is added or deleted from the document.

Paste Into:
This feature allows an image to be nested within another shape,which acts like a border. The circle was created with the Ellipse tool. Then select the image (the frog), copy it, then re-select the the circle before selecting PASTE INTO.

The circle now sets the boundaries for the edge of the image and the original image can be deleted (if no longer needed for the InDesign document).

Pages:
Pages can be managed through the PAGES palette menu. Use the + icon at the bottom of the menu to add pages. For printing and compiling purposes it is important to remember that the total page numbers should ideally be divisible by 4.
Pages can be added using the + icon at the bottom of the PAGES palette.
Page Numbers:
Page numbers can be applied to pages automatically using he PARENT template at the top of the PAGES palette.

Double click the PARENT heading to edit it. To add the page numbers create a text box and position it in the appropriate place on the page.

Now Insert Special Character as above. Repeat this process for the opposite page. While in the PARENT template, InDesign will use the generic place-holder value 'A'. When you exit the PARENT template though, each page will have the relevant page number inserted.

Margins and Columns:
Margins and columns can be preset for the document through the PARENT. Select Layout drop-down, then Margins and Columns. The margins can be set uniformly, or individually by toggling the chain-link icon in the middle of the 3 values. The number of columns can also be selected here as well as the space (gutter between them).
Parents:
Creating a new PARENT allows another preset template to be created. In this example the text colour of the PAGE NUMBER has been altered to accommodate pages which contain images where the black text will not show through well.
Endpapers:

By creating a simple, vector image in Illustrator, it can be transformed into a SWATCH and used as FILL for other shapes.

Here, the bird has been made with the PEN tool and over top of a simple, geometric shape. By GROUPING this image it can then be dragged and dropped onto the colour palette next to the SWATCHES section, creating a brand new SWATCH.

By double-clicking the thumbnail of the SWATCH, we can access the PATTERN OPTIONS, here we change the appearance of the swatch. The pattern has been tiled by ROW in a Hex pattern.

Now we can make a rectangle using the RECTANGLE tool and from there it can be exported into InDesign through the copy and paste method. It helps to save time by ensuring that the rectangle is the same size as the page setup in InDesign.

Here it has been pasted onto a double-page spread in InDesign. PARENT-B has been used for the Page format, so the page number has been set to white text on white background.
0 notes
Text
I had a funny dream. I dreamt that us CIS people were all in one class. On the day of the dream, we were having PE but I had forgotten to bring my PE clothes. But it turned out it didn’t matter much because me and another friend had to go do something during PE so we didn’t get to participate much anyway. I remember throwing the frisbee a few times. I also remember traveling around the MRT to get around school (I wish SMU was like that…)
In the next class we had a substitute teacher. The substitute teacher had an aura and was glowing almost - like a super Saiyan. The aura was yellow and she had horns…? Raine was in my dream. Here she was a professional Valorant player so when I entered class she wasn’t paying attention and she had her keyboard ninety degrees to her screen and was playing intensely. But I couldn’t see her screen because she was facing the other way. I think Jia Xin was in the class too and we were watching her play. There were a bunch of us from CIS, sitting in a typical classroom arrangement.
After a short while, Raine stopped moving her mouse. She appeared to be analysing the replay. After a short while that stopped too. The familiar glow of Nier Automata was reflected in her eyes (or was it her face). I think she turned her screen so we could see her play. Anyway, she was stuck in this boss battle. The intro sequence was that you’d have to fly in a spaceship as you were pelted by a bunch of bullets. She’d try to fly into this secret shortcut hole (which you were supposed to do) but upon entering the shortcut she’d fall into another hole (this one being deadly). Her character would keep dying in rather humorous ways so she starts laughing in class. This laugh is AUDIBLE. I think we were supposed to be doing work. But at this point, the whole class is watching her play and they’re so invested. The substitute turns to the sound of the laugh and gives a sort of angry look.
That’s all I remember. There was a lot more but it’s faded from my memory because my sister woke me up with her drum playing…
0 notes
Text
Mastering Microsoft Office: Essential Skills for Success
Microsoft Office is a suite of productivity tools that has become ubiquitous in the modern workplace. Whether you're a student, a professional, or simply someone looking to boost your digital skills, mastering Microsoft Office skill tests is essential for success in today's digital age. In this blog post, we will delve into the world of Microsoft Office, explore its key applications, and provide you with in-depth facts and tips to help you become a proficient user.

The Power of Microsoft Office Microsoft Office is a collection of applications that are designed to streamline and enhance your work, no matter what your field or industry. The core applications in the Microsoft Office suite include:
Microsoft Word Facts:
Microsoft Word is the go-to word processing software used by millions of people worldwide. It was first released in 1983 and has since undergone numerous updates and enhancements. Word offers a wide range of formatting options, making it perfect for creating documents, reports, and even professional publications. Tips:
Learn keyboard shortcuts like Ctrl+C (copy), Ctrl+V (paste), and Ctrl+B (bold) to increase your efficiency. Utilize templates to create eye-catching documents without starting from scratch.
Microsoft Excel Facts:
Excel is a powerful spreadsheet application that is essential for data analysis, financial modeling, and more. It was first introduced in 1985 and has evolved into a sophisticated tool for managing and analyzing data. Excel supports complex formulas, charts, and pivot tables for in-depth data analysis. Tips:
Learn functions like SUM, AVERAGE, and VLOOKUP to perform advanced calculations. Use conditional formatting to highlight important data trends.
Microsoft PowerPoint Facts:
PowerPoint is the leading presentation software used for creating slideshows and visual presentations. It was initially released in 1990 and has since become a staple in business and education. PowerPoint offers a wide range of design templates and transition effects to create engaging presentations. Tips:
Keep slides concise and use visuals to support your message. Practice your presentation to ensure a smooth delivery.
Microsoft Outlook Facts:
Outlook is an email and personal information management application. It was first included in the Microsoft Office suite in 1997 and has since become a key tool for managing communication and appointments. Outlook includes features like email organization, calendar scheduling, and task management. Tips:
Use rules and filters to manage your email efficiently. Sync Outlook with your mobile devices for on-the-go productivity. Essential Skills for Success Now that we've explored the core applications, let's discuss the essential skills you need to master Microsoft Office and achieve success:
Proficient Typing Fast and accurate typing is fundamental to efficiently using Microsoft Word and other Office applications. Consider taking a typing course or using online typing tools to improve your speed and accuracy.
Document Formatting Understanding how to format documents in Word, including styles, headings, and page layouts, is crucial for creating professional-looking documents.
Spreadsheet Basics Learn the basics of Excel, including entering data, creating formulas, and using functions. These skills are invaluable for tasks like budgeting and data analysis.
Visual Communication In PowerPoint, focus on creating visually appealing slides and effectively conveying your message through graphics, charts, and bullet points.
Email Management For Outlook, master email organization techniques, schedule management, and task tracking to stay organized and productive.
Collaboration Skills Microsoft Office offers collaborative features, such as real-time editing in Word and Excel and sharing documents via OneDrive. Familiarize yourself with these features to work seamlessly with colleagues and peers.
Continuous Learning Microsoft Office is a dynamic suite of tools, and staying up-to-date with its latest features and improvements is essential. Microsoft offers numerous resources, including online tutorials, user guides, and certification programs, to help you continue learning and enhancing your skills.
youtube
Conclusion Mastering Microsoft Office is a key step toward achieving success in today's digital world. Whether you're a student, a professional, or someone looking to boost your digital proficiency, the skills you gain from using Word, Excel, PowerPoint, and Outlook will prove invaluable in a variety of contexts. Remember to practice, explore new features, and keep learning to stay at the forefront of productivity in the modern workplace.
SITES WE SUPPORT
Online Office Skills – Weebly
1 note
·
View note
Text
InDesign Basics
Ideal for typography based design, things like magazines and other print media. Organising blocks of text and images.
Paragraph Styles
A paragraph in ID is described as a passage of text between two presses of the return key. So this includes actual paragraphs, and any lone pieces of text like titles. Paragraph styles can be saved and applied to other paragraphs, which can be good for large designs.
Paragraph styles are one of the main functions of InDesign, so it will be important to get familiar with them.
Under the parapgraph styles windows we can basically edit all of the aspects of the text, like the kerning, leading, text size and font. This is ideal for editing large bodies of text because the style of the paragraph can be saved and placed onto other bodies of text.

Pink lines at the top and bottom of the page represent the margin. These can be adjusted, but should be used as a sort of guide for where the page design should end.
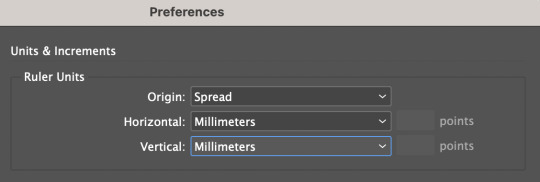
Under the top InDesign tab, we can access preferences and change them to millimeters.
The main ui of ID is familiar to photoshop, with windows being accessed from the windows tab. The most important one for todays lesson is the styles tab, under which we find paragraph styles which is what we will be experimenting with today.
Once a text box is created, the software will expect any keyboard clicks to be typing, so typical shortcuts and commands won't work. In order to exit the text box, we can command click anywhere outside of it and then will be able use shortcuts again. In order to edit the text we can just double click back inside the text box.

This screenshot was taken while the text box was edited, so in order to exit it I would have to command click outside of the box.

This tool at the top control screen is the gutter tool, which is ordinarily set to one. If we edit this number and make it two, it creates a "gutter" in the middle of the screen with two columns.

The aforementioned gutter, showing a split between what will become two distinct columns of text. In order to create this we had to select the outside of the text box with the select tool.
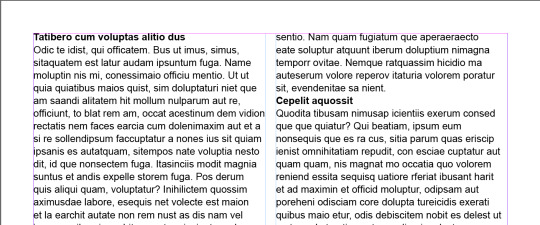
When in the type tool, we can select the type window at the top of the screen, and near the bottom of the options is a "fill with placeholder text" option which will fill the text box with lorem ipsum.
By creating a new paragraph style and calling it heading, we're able to select the headings and just clicking on the new paragraph style and it will automatically apply the style to them.
Now if we edit the heading style after the fact, it will apply any changes to any of the pieces of text that have the heading style applied to them. Using this we can put some space before and after the heading to make it somewhat more visually appealing.
After applying more before and after space to the heading style:
These changes are consistent across all of the pieces of text with the heading style applied.
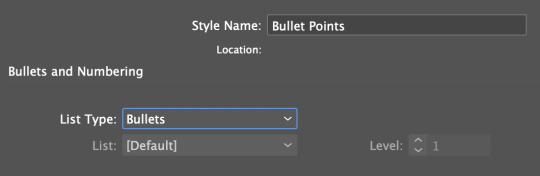
Adding bullet points is possible through the paragraph styles as well, using the bullets and indents tab. Selecting the area we want bullet pointed, and then creating a new paragraph style for bullet points and selecting the list type as bullets adds bullet points.

In order to format the bullet points properly, we need to make the left indent and the first line indent the same number, but with the first line indent as a minus. This will format the bullet points properly and make them look like actual bullet points.
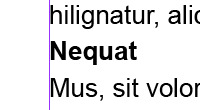
Character styles function similarly to paragraph styles, except instead of editing a whole body of text it will only edit the selected area. This is good for bolding certain pieces of text, or making edits to just certain pieces of text or a sentence instead of an entire paragraph or body of text.

Edited using the character style option with bold italic selected under Basic Character Format.


Using the text wrap tool we can create borders around linked images. This image has been edited and then linked from photoshop, so any updates made to the image in photoshop will appear in InDesign. Using the text wrap tool accessed from window, we can create boundaries around the outside of the image in which text will not clip. This can be done with round images as well, in order to create a wrapping around effect.
0 notes
Text
Alt keyboard shortcut bullet point

Alt keyboard shortcut bullet point how to#
Alt keyboard shortcut bullet point manual#
Alt keyboard shortcut bullet point code#
Hitting the Alt key (a second time) closes them.
Hitting Esc on your keyboard walks you back a level.
Hitting the Alt key activates them (PC versions of PowerPoint only).
You do not need to hold them down to make them work.
Microsoft introduced the Ribbon Guide shortcuts to the Microsoft Office suite in November 2006, and their common characteristics are: That’s why I want to make sure you learn them in this mini-series.
Alt keyboard shortcut bullet point how to#
And yet, very few people know how to effectively use them! While these are Microsoft’s newest keyboard shortcuts, they are still over 10 years old. The great thing about these shortcuts are you do not need to memorize them to immediately start taking advantage of them. Ribbon Guide shortcuts are visible keyboard shortcuts that allow you to visually access any command or feature that exists in your PowerPoint Ribbon. Ribbon Guide Shortcuts BasicsĪs a quick recap, here is where you now are on the PowerPoint Shortcut Mountain. Here we discussed how to add Bullet Points in Excel cells using various methods with examples.Submitting. This has been a guide to Bullet Points in Excel Cell. It is used when the order of the list is not important.Bullet points are used to display key features of some issues.Step 5: Then click OK it will add a bullet point in the cell.Step 4: Under the type text box, write “Bullet point” or Alt+7 and write as a text place holder.Step 3: Select the Number tab and click on custom from category.Step 2: Choose Format cells from the Context menu by clicking the right button of mouse or press Ctrl + 1.Step 1: Select the cell where you want to insert the bullet point.Let’s see how this custom bullet format works: read more will help you spare the difficulty of inserting bullet points again and again and help you to automatically insert the bullet points. #5 Creating Custom Bullet Points in ExcelĬustom number format Custom Number Format Excel custom number formatting is nothing but making the data look better or make the data visually more appealing. Step 3: Write the number 149, then close the round bracket and press the enter key.Step 1: Select the cells where you want to fill the bullet.
Alt keyboard shortcut bullet point code#
Suppose, at the same time, we want to insert multiple bullet points, we can use CHAR Function in Excel.ĬHAR function will return the specific character based on a set of charters used by the computer.Īs we have seen above that code 0149 is used for the round filled bullet. #4 Inserting Bullet Points in Excel Cell using Excel Formula This will paste all the lists along with the bullet points. Step 4: To paste the list, press Ctrl + V.Step 3: Select the cell in which you want to insert the bullet point in excel.Step 1: Simply select the bullet list in Word.Suppose we have already created a bullet list in Word, we can copy all the lists and can paste it in the Excel. Now that the Symbol will be inserted in the selected cell. Click on the symbol you would like to use for a bullet point.Select the cell in which you want to insert the bullet point.A symbol dialog box will appear on the screen.Click on the Insert tab, then select the Symbols group at last and click on.#2 Adding Bullet Point in Excel Cell using Symbol Menu The cells which are not adjacent, we can copy-paste the bullet point to it by copying the bullet using Ctrl + C and press Ctrl + V in order to paste the copied bullet. read more to copy it to the alongside cells. This tiny cross is a versatile tool in the Excel suite that can be used for data entry, data transformation, and many other applications. To copy the bullet into other cells, we can drag the fill handle Fill Handle The fill handle in Excel allows you to avoid copying and pasting each value into cells and instead use patterns to fill out the information. There are many different types of the fancy bullet we can insert in excel. Select the cell in which you want to insert the point, then press the Alt + 7 or Alt + 0149 for a solid bullet.
Alt keyboard shortcut bullet point manual#
The fastest way to insert a bullet point is by using a keyboard shortcut Keyboard Shortcut An Excel shortcut is a technique of performing a manual task in a quicker way. #1 Inserting Bullet Points using Keyboard Shortcuts
0 notes
Text
Essential Tips for Clearing Formatting and Enhancing Your Word Document
Clean Formatted Word documents : Top Questions Answered
1.How do I clear all formatting in a Word document?
To clear all formatting in a Word document, select the text you want to modify. Then, go to the "Home" tab and click on the "Clear All Formatting" button, which looks like an eraser on an A. Alternatively, you can use the keyboard shortcut Ctrl + Spacebar to remove character formatting or Ctrl + Q to reset paragraph formatting. For a complete reset, you can also paste the text into Notepad and then copy it back into Word, which removes all formatting.
2. How do I fix the formatting in a Word document?
To fix formatting in a Word document, start by selecting the text you want to adjust. Use the "Home" tab to access font, paragraph, and style options. You can clear formatting by selecting the text and clicking “Clear All Formatting” (the eraser icon). Adjust line spacing and indentation in the Paragraph section. For consistent formatting, use styles from the Styles gallery. If necessary, check the "Page Layout" tab for margins and orientation settings. Lastly, consider using the "Format Painter" to apply formatting from one section to another quickly.
3. How do I clean up a corrupt Word document?
To clean a corrupt Word document, try the following methods:
1. **Open and Repair**: In Word, go to "File" > "Open," select the file, click the arrow next to "Open," and choose "Open and Repair."
2. **Recover Text**: Select "File" > "Open," choose the file, and in the "Open" dialog, select "Recover Text from Any File" in the file type dropdown.
3. **Copy Content**: Open the document in another text editor, copy the content, and paste it into a new Word document.
4. **Backup Versions**: Check for auto-saved or previous versions via the "File" > "Info" section.
4. How can I improve my Word formatting?
To improve your Word formatting, start by using styles for consistent headings and text. Utilize the "Format Painter" to quickly apply styles. Adjust margins and spacing through the "Layout" tab for better alignment. Use bullet points or numbered lists for clarity. Incorporate tables for organized data presentation, and leverage text boxes for emphasis. Regularly check for consistency in font types and sizes, and review the document in "Print Preview" mode to ensure it looks professional. Lastly, consider using templates to save time and maintain structure.
5. How to repair a Microsoft Word document?
To repair a Microsoft Word document, open Word and go to "File" > "Open." Select the damaged file but don't open it immediately; instead, click the arrow next to the "Open" button and choose "Open and Repair." Word will attempt to fix the document automatically. If this method fails, try creating a new document and copying content from the damaged file (if accessible). Additionally, you can use recovery software or restore a previous version if available. Always keep backups to prevent data loss in the future.
Visit: VS Website See: VS Portfolio
0 notes
Text
Okay multiple internet sites make a copyright symbol when I put parentheses around a c
And I don’t want them to. Argh.
I have a keyboard shortcut for the copyright symbol. I can get a copyright symbol any time I want. You know what? I don’t usually want it. What I want is an informal bullet point list about some characters I happen to be fannish about.
The amount of time I spend talking about copyright is seriously small compared with the amount of time I spend expressing my various bullshit in bullet point form.
10 notes
·
View notes
Text
40 KEYBOARD SHORTCUT BUTTON TRICKS TO WORK FASTER ON LAPTOP
Hello there welcome to mytutorialguide.com in this post you will learn 40 Keyboard Shortcut Button Tricks to Work Faster on Your Laptop you may be working for hours on your windows computerand laptop and you are feeling you need to know more shortcut keyboard button to make your life easier, well here we are After reading this post you will be able to use your pc, laptop, a computer at much…
View On WordPress
#keyboard shortcut#keyboard shortcut for bullet point#keyboard shortcut for paste#keyboard shortcut for print#keyboard shortcut for strikethrough#keyboard shortcuts#keyboard shortcuts chromebook#keyboard shortcuts iphone#keyboard shortcuts mac#keyboard shortcuts windows#keyboard shortcuts windows 10
0 notes
Text
Week 9 - Intro to InDesign - Part 1
InDesign Keyboard Shortcuts
W = Preview Mode
Cmmd + Click outside of text box = Escapes text editing
Cmmd + A = Select Everything
Shift + Return = Soft Return (On Bullet Points)
Hold Shift and Cmmd = Scales Frame and Image at same time
?/ = Remove Stroke
Cmmd + E = File Export
Today we moved away from Illustrator and Photoshop and started learning the ropes of adobe InDesign which I am going to find very useful because I have never used this application before and am going to need to use it in an upcoming project in one of my other classes. The first image on the top left below shows what the menu looks like which is still relatively similar to AI and PS as it is still adobe. The screenshot on the top right shows what happens when you create a textbox from the toolbar on the left hand side of the screen and fill it with placeholder text by right clicking in the text box and selecting 'fill with placeholder text'. The image on the bottom of this group shows where you can find the styles menu for certain text adjustments such as adding paragraph styles or character styles to text which is very useful as it means you have have certain text setting that you can apply to different parts of your layouts.


Paragraph Styles
Firstly we opened the paragraph styles menu finding it in the toolbar as shown above. Once doing this we created a new style by clicking the plus on the bottom of the page and then double clicking this new style to bring up the bigger paragraph styles box. We then changed the name of the style to body text as this is what it is going to be applied too. Now all we needed to do what click ok, highlight some text and click the basic text style to apply it to the text.


After doing this we created another paragraph style and named it headings. We then clicked on the basic character formats tab of the menu which brings up some of the basic changes you can make to the text seen on the left below. We set the text size to 14 as it was going to be a heading as well as making it font 'Arial' and setting it to bold. After making these changes we clicked on the indents and spacing tab of the menu and set there to be a 1 mm gap below the text. We then clicked ok, highlighted the headings we had created earlier ready to be edited and applied it and the result is the bottom image below. Notice how the gap after the headings has changed as these headings are still the biggest elements on the page they already create a bigger gap before and after them because of their size.


This is the hyphenation menu showing how you can use this by simply checking the hyphenate button off as quite often words are cut in half in text boxes so this is a useful function to have.

This is my finished paragraph styles document in preview mode. I made one more final adjustment by adding a 3mm gap above the headings in the paragraph styles menu and it automatically changed them all.

Character Styles
We then brought up the character styles menu. From this we created a new style and named it italic and set it to make text go italic in the character style menu. After doing this we highlighted some text and selected italic and watched as it turned the text italic as seen in the image on the left. We then created another style by dragging the existing italic style onto the plus at the bottom of the menu. Once opening the duplicate style we set it to be bold as well as italic and clicked ok. We then applied this to some of the headings we had already made. The bottom image shows the document in preview mode.


Bullet Points
I changed the document so that it has two columns and added some given text to my document. After doing this we created a new paragraph style and went to the bullets and numbering tab of the menu. From here we selected list type and set it to bullets. We then previewed it but realised that the bullet points were very close to the text so we went back into the menu for the style and added an indent so that it looked nicer as seen in the second image. We then used the helpful keyboard shortcut to soft return some of the words on these to make the text flow better and to format it correctly. This soft return function allows us to send text to a new line without creating a new bullet point.


0 notes
Text
Week 9 — InDesign Part 1
This week we started learning about InDesign. InDesign is best used for large documents where you need to combine text and images, for example, a cookbook, magazine spread, or annual report.
It's important to consider visual hierarchy and alignment.
To bring up the control toolbar, select Window -> Workspace -> Advanced. There is a useful function on this toolbar to change the number of columns.

First, we created a text box using the type tool (T) and filled with placeholder text (Window -> Type -> Placeholder).
Click outside the text box before trying to use keyboard shortcuts like V and A.
Next, we learned about paragraph and character styles. I was familiar with the concept of these, as I use Word styles a lot for work.
InDesign recognises a paragraph as the text between two carriage (hard) returns. A paragraph style will effect the entire paragraph.
To create a paragraph style, select text and apply the settings you need. Then, open the styles window (Window -> Styles -> Paragraph Styles) and hit the + button to create a style. Character styles are created the same way, but these apply to individual characters or words.

In the Styles window, you can edit any number of settings. These are summarised under General.

Today we explored Indents and Spacing, Bullets and Numbering, and Basic Character Formats.


InDesign hyphenates text automatically, so this function needs to be turned off under Paragraph in the Properties tab, or under Style -> Options -> Hyphenation.
To create a bulleted list, we created another Paragraph Style. A key function here was under 'Indents and Spacing'. By selecting 'Space between paragraphs using the same style' we could change the spacing between bullet point lines.

We also learned about soft returns. By holding shift + return, this actions a soft return, allowing you to move words to a new line without creating a new paragraph.
Here are some examples of my document after adding a paragraph style, a character style, and a bulleted list. I didn't find any of this too difficult, as I am very familiar with document structure guidelines for work (sometimes it feels as though I live and breathe our style guide), although it was my first time using InDesign to do it.


0 notes
Text
Copy and paste not working windows 10 spinning wheel

#Copy and paste not working windows 10 spinning wheel software#
#Copy and paste not working windows 10 spinning wheel mac#
#Copy and paste not working windows 10 spinning wheel software#
Method 4: Using Third-Party Software on Windows They are also configurable, letting users set keyboard shortcuts to copy/paste plain text into their browser. They give you the option to either retain the original formatting by using the default ‘Copy’ option in your browser’s right-click context menu or copy just the plain text by using the ‘Copy Plain Text’ option. Using browser extensions for Chrome and Firefox is probably the easiest and cleanest method to copy/paste plain text online. On editors like WordPress, the extensions also add a ‘Paste PlainText’ option. They both work pretty much the same way, by adding a ‘Copy PlainText’ or ‘Copy as Plain Text’ option, to the browser’s right-click context menu. The one I use on Firefox is Copy PlainText ( Free), while the best one on Chrome is Copy as Plain Text ( Free). There are multiple extensions for Firefox and Chrome that remove all formatting from the selected text before copy/pasting. The third option pastes the plain text into Word, stripped of all the formatting. While the first one keeps the original formatting, the second one only keeps the basic formatting, like bold letters and bullet points, but changes the font to match your document. You get three options: ‘Keep Source Formatting,’ ‘Merge Formatting,’ and ‘Keep Text Only,’ as shown below. Once you’ve copied the target text with formatting, hit the Paste button on the MS Word ribbon. You can paste text without formatting into MS Word using a special ‘Paste’ option on the ribbon. However, this shortcut doesn’t work in MS Word, which uses a native method to paste plain text into the editor. On a Mac, press Command+Option+Shift+V to ‘paste and match formatting’ in a document. This method works in all major browsers while writing in WordPress, say for instance, and in most applications. To do that, press Ctrl+Shift+V to remove formatting instead of Ctrl+V on Windows. Using a keyboard shortcut is, by far, the easiest way to paste plain text without formatting on your computer.
#Copy and paste not working windows 10 spinning wheel mac#
Using Notepad on Windows and TextEdit on Mac
0 notes