A blog to register the creative process of an independent graphic novel about a brave young girl facing wild changes in her world.
Don't wanna be here? Send us removal request.
Statistics
We looked inside some of the posts by animus-wild-magic and here's what we found interesting.
Average Info
Notes Per Post
51
Likes Per Post
44
Reblog Per Post
7
Reply Per Post
0
Time Between Posts
11 days
Number of Posts By Type
Photo
17
Last Seen Tumblr Blogs


Fun Fact
Tumblr is available in 18 languages.
Photo
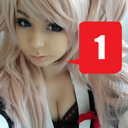
Story writting tips: Antagonistic characters
We have already discussed the relevance of building an interesting and multifaceted protagonist, and now it’s time to talk about the other side of this coin: the antagonist. It’s imperative that you craft an antagonistic force with the same care and dedication as you did to your hero. In a similar way to our main character, the antagonist also typically goes through a drastic change at the climax of the story, though frequently this irreversible transformation it’s simply their death or destruction.
“A protagonist and their story cannot be more or less intellectually fascinating and emotionally convincing than the antagonistic forces that create them.” (Robert McKee, Story)
The antagonism of a story might reside in a typical villain character, but keep in mind that the antagonistic forces are essentially each and every power or influence that opposes the protagonist’s will and quest. The more complex and interesting are those forces, the more dimensional and creative the protagonist becomes. The conflict exists in order to change the herom challenging them at extraordinary levels so that we, as an emotionally engaged audience, can experience catharsis for their change, their success or failure in overcoming such adversities.
The antagonist is a key piece and should be treated with the proper attention. A flat and dull antagonist can be felt as an insult to the emotional and intellectual capability of your public. The antagonist character or the opposing forces should be woven seamlessly as part of your plot, integrated with your hero’s conflict and motivations, as well as with the theme of the story. What this means is that the struggle between the protagonist and antagonist is a reflection of the theme of the story, and of the moral or lesson you want to convey to your audience.
In a typical heroic tale, this is generally seem as justice, represented by our classic knight in shiny armor, against injustice or tyranny from and evil overlord. When both forces clash, the audience gets to experience this conflict and take their own lessons and reflections to their lives. The impact of this experience is proportional to how real and connected your story was to them, and the antagonistic forces are part of what makes a story feel real and compelling.
So, how do we match protagonist and antagonist into a single coherent theme? First of all, we must have a well structured theme and know what is your hero’s journey, so that we can properly oppose them with challenging forces. We’ve already talked about the four major points, or building blocks of a character: taking action, going through change, being a mirror or avatar to the audience and expressing a personal perspective of the world. Let’s review this concept focusing on the antagonist character.
The antagonist character must take action, generally the first act that goes against the protagonist’s will and desire. Frequently, the antagonist’s action leads to consequences that cause the hero to start their journey, often reluctantly, and thus revolting against the antagonist is the first movement towards the unfolding of the story.
This character also goes through transformations, sometimes emotional and sometimes quite literal, with many fiction stories leading to a physical transfiguration of the villain, whether into a terrifying dragon or the technological upgrade of their body in order to combat the hero. This is a typical climax of an epic story, but the antagonist can also go through many changes as the story progresses, such as the metamorphosis from a hero’s childhood best friend into their adversary in love and ultimately their foe in battle. Showing this change can also be very humanazing, and this is especially important for the next topic were going to discuss.
As much as the audience generally likes to see themselves in the hero, it’s very crucial that they can also have some fraction of this empathy for the villain of your story, even if it tastes bitter when they realise this. As we’ve already considered, the main conflict between the protagonist and antagonist should be something that can be translated to human experience, a conflict that might occur inside their lives. That moment in which your reader scratches their head and considers “Well, this guy actually has a point.” is when the conflict presented in your story reaches the real world and leads to an involving emotional and intellectual experience.
Which takes us to our last crucial point of a character, their world view. All of the previous actions and changes your villain goes through, all of their effort to oppose the protagonist must be true to their personal perspective. This is the main reason we generally get bored by villain that are simply “evil for the sake of evil”. Those kinds of characters lack a motivation that feels compelling and relatable, a sense of intelligence and emotion that builds up to the conclusion that such actions must be taken in order to express their point. It’s the thing that makes us reflect upon a good antagonist and realise we might not agree with them, but we understand their actions. Pure madness or a purely evil nature are tools available to build an antagonist, but they tend to leave the audience with a feeling of incompletion and distance.
This essential structure can be helpful to craft and refine an antagonist character along with your hero and always considering your theme. Like we said, the antagonism can come not only from a person, but also from the environment and situations around the characters.
Next week, we’ll be talking about these and other inciting events that move your story! Hope to see you there!
You might also like to read about How to build a character: Part I and Part II
If you don’t want to miss this, go ahead and subscribe to our newsletter!If you
enjoy this content and comic, please considerer supporting us at Patreon!
#howtowritecomics#creative writting#Writting Tips#writting blog#writters on tumblr#writting comics#writting stories#how to write stories#how to write
2 notes
·
View notes
Photo
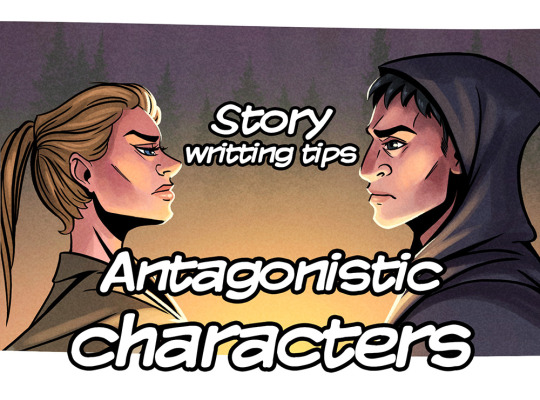
How to print your comic, Part III: What could go wrong?!
Today is the last day of the “Printing your comic” series, and after learning the proper vocabulary and better understanding how the printing process works, were gonna tackle the most common problems that will happen anyway. Yes, even if you communicate properly, even if you export the file correctly and if you’ve chosen the appropriate paper grammage. I’ve said before and I’ll say it again: printing is not exactly predictable and you’re probably going to have to deal with some unexpected adjustments to make. Let’s talk about the most common things we want to avoid or fix.
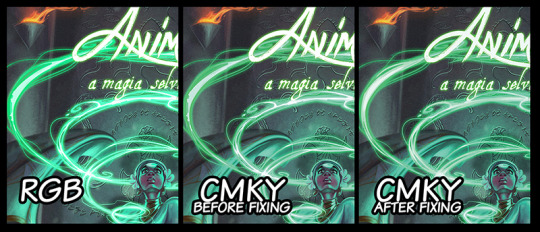
“My colors look dull and dreary on paper”
This is for anything related to color in printing: if you’re like most digital artists, you probably create your comic in RGB mode on your chosen drawing software. This is the standard setting and the most appropriate to work with on your computer screen, since it uses the light-color language.
This apparent desaturation of your painting happens because in fact light is brighter than pigment, very simply, and when we convert the art to CMYK, some of the vibrance might be lost. This happens especially when portraying conditions such as high contrast, bright lights and some particularly tricky colors such as blues and greens. In this case, color might simply break in generate ugly color bands instead of the smooth gradient transitions you’ve envisioned and executed on digital media.
A simple way you can fix this is to work normally on your RGB file, and after finishing it, save it in CMYK color mode to check it out. Things you’ll get to fix at this point are:
Color balance overall, using tools such as color curves (they will now appear as CMKY),
Avoid color bands, which happen because some colors don’t exist in CMKY the same way they exist in RGB
Anything to glowy or scenes that have lots of contrast might need to be toned down in order not to break your colors. Again, white in light is really, really bright, so it naturally looks very different on your computer screen, which is a light source.
“My colors looks too glaring and oversaturated”
This is not a very common problem, but it’s the other side of the coin from the topic above. Some colors might pop out more than you’ve expected and overtake the painting. For me, I’ve had the experience of getting a really loaded yellow, so everything close to this color would look lighter and brighter - as a consequence, some other colors would look dull and gray, since the proportion of colors was a little off balance now. Most cases, however, you’ve probably picked a very shiny paper, like a glossy photographic one. Changing to a matte finishing generally fixes this issue. So, for this cases:
Check the color balance as indicated above,
Choose a paper finishing that favours your colors.
“My blacks look gray.”
For this one we need again to remember the difference of color perception from screen to paper. If you are now looking at your CMKY final file on screen and have the impression that the blacks are gray, that’s totally normal. For your screen, “black” means no light at all in those pixels, but the “K” that is printing black ink has a different data to inform that. That’s why most softwares will give you two options: PDF-digital and PDF-printing for exporting your art.
Now, if your printed file comes out with blacks looking too gray, let’s talk about what probably happened. This typically will show in your speech lines, if you’re making comics, and the confusion happens when we switch color modes from one software to the other. Say you’re on your painting software (Photoshop, SAI, Corel Painter, etc), painting in RGB color mode. You export the file and don’t pay a lot of attention, and the page art is still in RGB, but you open in on a vector based (InDesign, Illustrator, CorelDRAW, etc) the add speech bubbles and character speeches, but these softwares generally work in CMKY. So the problem generally comes from picking two images that were generated in different color modes and merging them. When you export this mix in whichever final format, something is bound to break down.
If you’re working with more than one software, be sure they’re on the same color mode when you merge those images.
“My pages came in the wrong position/upside down in some of the units.”
That’s always a funny thing, and way more recurring than you’d expect. Unless you noticed this happens to all of your units (which would mean the file has the pages switched), that’s absolutely not your fault, but a very common mistake from the printing shop. Take a moment to think about just how many units you are printing, and how many pages you have in each one of them. Most the process of saddle stitching is automated, so the staff won’t actually check every page of every unit. This is your job, actually. Once you notice one or more of your units have this problem, just make a video of it indicating the issue, send it to your printer and explain the situation. Like I said, this is more recurring than you’d think, so they’ll probably very quickly print you new copies with very little questioning.
Always check your comics at the time of arrival. You can ask for corrected copies later on if one you your buyers notices it after the purchase, of course, but whenever you can, check before to have a chance of substituting them in advance.
Be communicative and register everything in video.
“My text font came out wrong.”
This can happen if you’ve sent the native file to the printer, like a .AI, .ID or .CDR. (Illustrator, Indesign and CorelDraw, respectively) and did not link or pack your font with it.You’re using a font that you’ve downloaded, it didn’t come embedded in your computer or software. When the printer staff opens your file to send it to the printing machine, their computer will not be able to read this font, and will therefore substitute it for a font they have available. Since this is an automated process, it won’t even be a similar one, and you might end up with Arial Black all over your comic.
Send your files in PDF, really, it is just the best format for this purpose (JPEG and PNG will also prevent this from happening, though).
If you need to send a native file, always remember “packing” your fonts. (That’s a very specific situation, so I won’t explain how to do it here, but if you need this, please feel free to contact me, ok?)
For all of those problems above, you can actually ask for a print test when you’re running a certain amount of units. For most print shops, they’ll either have a free or very low fee option of sending you a test copy to anything over 100 units. You get this copy before your actual print is run, so you get to check all of these things and talk to your staff ahead of time. It’s a great idea, always ask if this option is available and use it!
Here is a quick list of things to check before you send your file:
Be sure the number of pages in your file is a multiple of 4
Remember your cover counts as 4 pages (front, back, and the verse of each one)
300 to 450 DPI resolution
If needed, “pack” your fonts
Make the proper math to choose between offset and digital printing in advance
Always leave a bleed
Be aware of your safezone
Send your files in CMKY
Check paper size
Have sample prints whenever is possible
Always have a time buffer so that you can fix problems before a convention or event
Always, always, always be patient and communicate a lot!
That’s the end of our series on how to print your comic, guys! Thank you so much for questions and suggestions and for keeping track of this blog.
You might also like to read: How to print your comic Part I and How to print your comic part II
If you don’t want to miss this, go ahead and subscribe to our newsletter!If you
enjoy this content and comic, please considerer supporting us at Patreon!
#howto#howtowritecomics#how to write#writting tips#making comics#how to make comics#how to print comics#printing comics
1 note
·
View note
Photo

Printing your comic, Part II: The printing process
Hello there, and welcome guys to part II of this article. On last week’s post we’ve talked about some printing vocabulary and some basic terms, and now we’re going to discuss some settings and common problems you want to check before you send your comic to the printing shop!
Page count:
Most comic creators plan for some time on their pages, set specific compositions to be shown in spread pages and even take the extra step of leaving a shocking plot twist to be revealed right after the flipping of a page. And because of that, here’s another relevant thing to consider if you plan on printing: page count. Take a look at a comic book close to you, and changes are it is a saddle stitch, as we’ve previously discussed. Because of that, each page actually corresponds to half the paper sheet in which it was printed, and the paper sheet is folded in the middle and attached to the spine by the staples. Considerer also that there’s a front and a back side of this sheet, which means each one sheet corresponds to four pages. Because of that, you want to make sure your final page count inside your book is a multiple of four. For example, if your comic has 35 pages, you’ll just need to add an empty (or not) page at the end of it and make it 36 pages long. If your comic is 37 pages, you’ll have to stretch it to 40, so might as well use those compulsory extra pages for some extra material, sketches and character bios!
Resolution settings:
Another very relevant thing to keep in mind is image resolution. Many artists create comic strips for the internet, both desktop and mobile, and sometimes the resolution for tis medias is lower than what you need for printing. Remember that the standard US comic size is way bigger than your cell phone screen, and this final file format should be measured in inches or centimeters, not in pixels. I’d in fact recommend creating pages with about 150% of the final format size just to be sure. Another important measurement of image quality is the DPI rage, which stands for “dots per inch”. This is the amount of dots that will be effectively printed per inch of paper in your final comic. You’ll need at least 300 DPI to ensure a good printing quality, though some print shops will recommend 450 DPI.
File format:
Now that you know your digital file size and proper resolution, let’s see what kind of digital format you should send to your printer. Remember we’ve talked about how any sort of printing process is actually a translation from light color to pigment color, so there will be a change in what you see on your screen to what you get on your printed comic, but we want to make the best of both. So here are some of the ost commonly known output format for images:
JPEG (or JPG): saving your files in this format keeps the file size quite small due to its efficient compression, but also because of that, you lose image quality. What this format does is it groups similar pixels together to save space, which may generate color bands in areas of your paintings. This conversion is also permanent, so the previous data from these compressed area is lost once you save the file.
PNG: The most commonly known advantage is the possibility of saving transparent backgrounds, which can be very handy. PNG files also go through compression, but without any quality loss, which means you can open and edit it as many times as you want without effectively losing data.
PDF: Most printers will suggest you to send your files in this format, and for a good reason. A PDF image is identical to its source in any way, and it’s the ideal file format for printing graphic design material, photographs and also your comic. Also, PDF allows you to save your entire comic within one single file, with all of the pages already in their proper place, and you can even add the printing marks we’ve previously talked about if necessary. Most painting and art softwares can export files in this format, but you can even use online conversion tools for this.
It’s also a good idea to add a note about vector images. Unlike the file formats above, which are all what we call raster graphics, a vector graphic image can have different file formats - and very different properties. To put it simply, a vector image is composed by a series of mathematical equations, it is a collection of points, lines and curves that can be put into numbers like geographical coordinates. But don’t worry: you don’t have to deal with any of the math to get acquainted with vector images!
Through the use of graphic tools, producing vector images can feel very familiar and intuitive. The most notorious quality of vectorized images is that they’re very reliable and can be expanded (or reduced) without any data loss. That’s a great solution for logos, so if you can get your own comic brand in vector image, this can come in hand when producing banners and other bigger products. Also, many people will use vector softwares and tools to create speech bubbles and lettering for their comics. That can make it easier to edit those elements later on, and it also makes it easier to control and create a standard visual identity for your comic. Since most of us will not effectively draw our comics in vector based software, this means speech bubbles and lettering will come as a later stage of the comic production.
So let’s just take a final look at these formats: JPEG, PNG the native PSD (Adobe) are raster graphic images. They are composed of pixels and cannot be enlarged beyond their original format without losing data. These are probably the output format of most of you artwork, so be sure to always produce your comic pages at large sizes and 300 DPI. Vector graphic images include the formats: SGV and EPS, along with the native AI (Adobe). Vector images are composed by curves and occupy less space. PDF is a bit of a wild card here: it can be both raster and vector, and it’s your exporting setup that will define this. PDF is great to maintain all of the data and image quality, and in my opinion is your best friend for printing purposes.
Printing process:
Now we know the proper terms and how to communicate with the print shop staff, and we also know what kind of file we need to export and send in order to get things properly printed. But what kind of printing process are we going to use? Let’s talk about the differences, advantages and disadvantages of the two main printing methods offered by print shops: offset and digital printing.
First of all, those two types of printing process are created in different machines, which different technologies, and as a consequence the color representation that comes out of them differs. Remember, any printing process is already a translation from the data on your computer screen, the language of light, to the language of pigment, so you’ll have to deal with slight changes during this transformation process.
The offset machine is generally a bigger, bulky engine with typically four sections, one for each printing color: cyan, magent, yellow and black. In order to print something, there’s a metal plate to apply each corresponding ink color to its place in the paper sheet, counting four metal plates per image. That means your image will be split into four colors and them those four images will be applied one on top of the other until the final figure is built. It’s a pretty fascinating process, and if your print shop allows you to take a look at the machines, it will be easier for you to understand what’s going on there.
Digital printing will also use four colors, but they’ll be applied using electrostatic rollers, which is another very fascinating thing to watch. This printing process uses toner instead of ink, and the peculiar thing about it that it’s not a liquid, but a very thin powder, which will adhere to the paper sheet according to the data on the programming of those electrostatic rollers. In this process, each color will take its turn as it is laid on paper, but there’s no need for creating the metal plates previously.
So now that you understand how both those machines work, there are some considerations regarding what process to use to print your comic. The most relevant for us comic creators one is the cost and benefit concerning the total amount of copies. As you can see, setting up an offset machine takes way more time, and it also consumes more time and needs more manutention. However, once the setup is made and the process starts, it’s way more efficient, and therefore the unit is cheaper in the long run. Digital printing takes way less time of preparation, and it is cheaper because of that at a smaller number of units. Digital printers will also have a faster turnaround time.
So, in a nutshell:
Offset printing: Good for 2.000+ units, takes more time to produce. The total investment will be big, but the unit cost will be lower, so it’s good for big press. (Tip: some printing shops will actually keep or allow you to keep the metal plates from your current run, so that if you choose to print again in the future, this stage is already executed. Ask your print shop about that!)
Digital printing: Good for anything from 1 to 2.000 copies, a short run print. As you get closer to the 2.000 copies mark, be sure to check out that limbo and see which process is better suited for your specific needs. Digital printing offers fast turnaround time and the initial cost is cheaper, though the unit will be more expensive.
That’s it for today’s article, guys! This time we’ve covered everything process-related that I saw as convenient to comic makers. If you still have any questions about the printing process itself, please let me know!
Next week, we’ll talk about the most common problems along the way, how to avoid some of them, and how to fix others after they've been identified!
You might also like to read: How to print your comic Part I and How to print your comic part III
If you don’t want to miss this, go ahead and subscribe to our newsletter!
If you enjoy this content and comic, please considerer supporting us at Patreon!
#howtowritecomics#how to write stories#how to make comics#how to print comics#making comics#creating comics#printing comics
2 notes
·
View notes
Photo

Printing your comic
Part I: Presswork vocabulary
“If it walks like a printing press staff, and talks like a printing press staff, then it must be...an aspiring comic artist!”
So, you went through all of the organization phase, worked really hard, followed every tip on project management and now you have your beautiful comic (or maybe another kind of art book) ready to print. But, how to do so? When we’re at the edge of this crucial moment, most of us realize we need a little help and basic knowledge to guide us, so today we’re going to talk about the key terms and process you need to be familiar with.
First of all, most print shops will be able to help and solve some of your problems, you can trust at least someone in the staff has the knowledge to solve the most common complications around printing a comic. The reason I start by saying this is that printing anything can be a very stressful process, full of re-works and need for quick trouble-shooting, and you might feel tempted to be angry at the print shop crew. What I want to make clear from the start is that the printing machine itself can be tricky, sometimes you’ll export in the wrong format and get mad at the print shop, and sometimes people will in fact stitch your pages wrong. Take a deep breath, and chill.
If you’re printing, chances are you’re going to take this material to a convention and you have a deadline, and I also acknowledge how stressful this can be, so please be aware that your emotions might get the best of you, which is why I want to help you to be able to communicate as best as you can with your printer. In order to do so, let’s get familiar with some crucial terms:
Printing vocabulary
Trim line: This is a line that indicates the final size and format of your page. Everything outside this line will be cut off the paper sheet, and everything inside of it will be on your final book. The digital file you’ll be sending to the print shop will be a little bigger than the final book, because you also have your bleed.
Bleed area: It’s an area which is still within the paper sheet during the printing process, but is outside your trim mark. That means, this area will be trimmed, cut off your final book. So, why is it relevant? The bleed is a precaution for the possible dislocation of the paper sheet as it is going through the cutting machine. You basically extend your art just a few millimeters outside the actual page to be sure you won’t end up with ugly undesired white lines at the edge of your comic pages. The recommended bleed size is between 3 and 6 mm, but you can always ask your print shop for the suggested setting for their machine.
Slug area: So, your art is inside the trim lines, it extends a little bit outside of them to create your bleed area, and even outside that area, we finally have the slug area. Slug area is a good thing to have and to be able to communicate clearly to your printer, though not everyone does so. You can inform the size of your bleed area via e-mail or other method, so this is not necessary, but let’s just go through it: the slug area is the area outside the page containing all of the marks and information necessary to properly cut your page to it’s final format. Trim marks and bleed marks are indicated here with specific iconographies, which we will talk about in next week’s article.
For many print shops, this is not necessary and you can inform such formats in their own website as you upload your artwork. Always, always ask questions and communicate when in doubt.
Gutter: It’s the inside space closest to the books spine, the middle of the book once you open it. This is more relevant for books with over 200 pages, but it’s worth the acknowledge in any way. Simply take in consideration that once your pages are bind together, this space where the two pages meet is slightly compressed, squeezed together and subject to a little deformation due to perspective. Most importantly, do not put any relevant art and especially texts in this area closer to where the pages meet: you don’t want people to have to force your book open in order to read a character’s speech bubble. If you have a really big book, and/or heavy paper pages, you might need to make a slight adjustment in the gutter along the pages of your book. Talk to your printer staff and follow their recommendations. (This is a very specific topic, so if you need help here, just feel free to contact me!)
Safe area/danger zone: Remember that the bleed area is there for when the paper is possibly cut a little further outside the edge of your page? Well, sometimes the opposite might occur: your art might get trimmed just a little more on the inside of these predicted lines. In order to prevent mutilation of your beautiful comic pages, you can create a margin for your danger zone: don’t put anything crucial or texts between the trim line and a safe margin, about 6mm inside the trim lines.

Fore edge: Another non-crucial term, but useful to keep in mind in order to provide a good reading experience for your reader. This might sound logical, but remember the person reading your comic will have to hold it in their hands. While doing so, their thumbs are probably gonna grab this outside area of your comic page, leaving it a little more damaged over time, and also their hand will partially cover this area while they’re reading, so just plan this little thing ahead: avoid putting crucial information too close to the fore edges!
Saddle stitch: This is the most common format for comics, and you’re probably already familiar with it: all pages are attached together by two (or sometimes three) staples in the middle of the book. This is a more affordable format, and it’s generally recommended for shorter stories, with not many pages. Big, bulky books sometimes cannot be stitched together just with that, and so they need a different binding method. Advantages: it’s quick and efficient, and also more affordable.
Perfect binding: In this format, the entire volume of pages will be distributed into smaller sections, called booklets. These booklets will then be attached together at the book’s spine with a strong, but flexible glue, along with the cover. This method generally creates a beautiful rectangular shaped spine, in which you can add your book’s title or other art. The size of this spine will vary according to the number of pages and chosen paper. You can guess-timate it, but always contact your printer for more trustworthy estimatives. Advantages: it looks just so beautiful! But also, it can accomodate a big volume with more pages than the saddle stitch would be able to. Also allows hardcovers, which are really pretty and offers a lot of mechanical resistance.
Cover: This might seem a little obvious, but let's cover all the bases (see what I did here?) just to be sure. Your cover for a saddle stitch will be composed of front cover and backcover. That’s two “pages”, right? But also keep in mind that in saddle stitching, the inner part of the same paper sheet used for the cover also counts as cover, making it have four pages in your file. This will be relevant later when we talk about page count, so hold on to that. If you’re printing hardcover, you’ll also have two end pages to attach this cover material to the inside pages of the book. You might also want to have a flap, which is an extension of the cover that folds inside and can serve as a page marker to your reader. Always ask your printing staff about those possibilities and what they imply on.
Now it’s time to close your file for printing! Let’s talk about some terms that generally puzzles us while preparing the file to the printing shop, and we will start with a very important concept: color!
CMYK and RGB: most of us are familiar with those acronyms, but if you’re more into just creating digital art, you’re probably not very sure about what they imply. Let’s take a look at what distinguishes those two different color languages. CMYK stands for cyan, magenta, yellow and black (which is “key”), the four primary pigment colors used for printing. RGB stands for red, green and blue, the three primary light colors that can produce any other visible color on your screen.
Why are those colors sets different, if they both should be primary? Let’s break this down because it might be a little confusing at the beginning: CMYK is pigment, and RGB is light. That means CMYK is subtractive color, and RGB is additive. That means, the more you mix pigments, the darker it gets, until it reaches black. Black means no light is reflected, so you’re subtracting light by adding pigment. Are you following me? Now, RGB is pretty much the opposite: the more light colors you add, the brighter it gets, until it reaches complete white, where all the light is reflected, making in an additive process: the more colors, the more light. Take a look at it:

So, why should this matter to us, comic creators? Because you’re probably making your comics digitally, or coloring them digitally or at the very least editing them and giving it final touch ups on your computer screen. At the moment you create a digital file, in order for it to appear on your screen, it must be converted to RGB, the language of additive color which your computer uses to convey image to your eyes. That means you’re probably gonna work with an RGB file but print a CMYK file. Proper and careful conversion of one to another is the key, and will take about it on the next section of this article.
Now you understand how color works on printed paper, but what kind of paper are we talking about? These are some of the common varieties of paper and questions you will be asked when printing your material:
Paper grammage: This is the measurement of the paper weight, not it’s thickness. The distinction is important because due to the ratio of cellulose and cotton of some types of paper, they might look thicker, but actually be lighter, or the other way around. To put it simply: grammage measures the weight, in grams, of a sheet of one square meter of said paper. (For US folks, sometimes this measurement is made based on pounds) Overall, 90 gsm is very light and does not make much of an impression, but anything from 115 gsm on should do the trick. Heavier paper makes a good impression and makes the entire book more resistant and aesthetically pleasant, but there are a few things to consider before you go 300 gsm on the entire book! First off, remember what grammage means: you’re making your comic book heavier when you choose a higher grammature, so if you intend on mailing it, considerer this details and plan ahead for a more expensive shipping cost. Thicker pages also mean more wear and tear on the folding of the paper, so if you intend to have your inner pages as thick as 150 gsm on, you might need some coating and lamination to make sure your pages won’t get prematurely outworn.
Coating: Most printer shops will also give you options for the paper finishing, sometimes varying depending on what grammature you’ve chosen (very light grammature such as 75 gsm might not be suitable for coating). The paper finishing gives it a final texture quality, and the options available are generally gloss, silk and uncoated. The gloss finish, as the name suggests, gives your art a very shiny glossy aspect, similar to magazines and printed photographs. It can get really reflexive, so beware. A paper with silk finishing, also sometimes referred to as a matt finish, gets a more velvety texture, soft to the touch and not as reflexive. Personally, my favorite to print comics, since the printing is vibrant enough to convey the desired colors, but it’s not reflexive enough to get in the way of reading and appreciating the panels. The third option is simply not to have it coated at all, leaving the natural paper and paint texture. This is generally the more accessible choice, but it comes with its drawbacks: quick detratition of the pages due to lack of protection from the regular manipulation of the book. The colors will also look a little more dull without any coating.
Paper size: A very crucial part of printing your comic is deciding what size will it have in the final format. In fact, that is something you should be planning from the start. Adapting and A4 size comic page to a US standard comic format can be incredibly tiring and time consuming, so why not make the pages already conceiving their final print format? Here are the most common printing formats for comics: International paper size (A Series paper size), US standard comic size and manga size (B series paper size).
A series: Comic are generally printed in A4 size, or 21 x 29,7 cm (8.27" x 11.69")
US standard comic size: 6.63" x 10.24" (16.84 x 26.01 cm)
B series: Manga are generally printed in B6 size, or 12.8 × 18.2 cm (5.04" × 7.17")
Remember to have the final format in mind when thumbnailing and executing your pages. It will save you a lot of time when you decide to print your comic!
That’s it for today! This topic was getting a little to long so I've decided to split it into two weeks articles. In this first one, we cover the basic vocabulary and terms we need in order to communicate with our print staff and understand what’s going on. Next week, we’ll be talking about really fixing troubles, exporting files and how to bring this comic fully to life.
If you don’t want to miss this, go ahead and subscribe to our newsletter!
You might also like to read: How to print your comic Part II and How to print your comic part III
If you enjoy this content and comic, please considerer supporting us at Patreon!
#makingcomics#comics#indiecomic#printing comics#printingcomics#tutorial#howto#printing#how to make comics#how to print comics
2 notes
·
View notes
Photo

Facing challenges And respecting limits
This time I wanted to talk to you about setting plausible and healthy goals that will make you grow, not hurt you. As usual, you’ll see me making a case for deciding things up front, so let me explain my reasons for this right now at the beginning: once you’re tired and stressed out, you won’t be able to measure when you really need rest, or how much rest you truly need. Same goes for setting ambitious goals, because when you’re at the peak of your excitement and adrenaline, you’ll have a hard time evaluating how much you can produce during a certain amount of time.
Ever heard someone advise you no to go grocery shopping when you’re hungry? Same principle. Your judgement will be clouded by your more immediate urges if you leave all of those decisions to be taken on the spot. This might lead you to a place many artists and creators find themselves from time to time: guilt and confusion.
The cycle generally looks like this: we start off by getting super excited about a specific topic or project and jump right in, sometimes because we feel immediately inspired by it, sometimes because we are lured by the prospect of a promising financial return, or maybe something else. In any case, we end up working passionately in the beginning of it, and making huge plans of working even harder for the next days, weeks, months, probably forgetting previously scheduled projects or even missing the fact that we need time to take care of our food and do house chores. When the time comes to do those forgotten tasks in addition to the time we’ve already set for said project, we are probably already struggling. We’ve made too early the decision of how to allocate time and now physical and mental exhaustion start compounding. As the rope stretches, you might feel tempted to deal with this stress in many ways, but probably none of them are quite healthy for you. Anxiety, sleep deprivation and stress eating are very common at this phase.
Eventually, the stress and tiredness become impossible to manage, and many of us feel like we simply pass out instead of actually deciding to rest. The problem is that when we reach this point, we probably also loose hand of how much rest we need, and also what kind of rest is most needed at that time. We might opt for spending the day surfing on the internet, when the kind of rest your eyes need is actually some sunshine, but we’re simply too tired to calm down and look at the options available, too mentaly exhausted to take decisions.
And after all of that, what generally follows is a sense of disorientation, guilt and apathy. This might be the reason you gave up a promising, inspiring project, thinking you simply couldn’t tackle it, it was too big of a goal. We might stop challenging ourselves after these traumatic experiences. But we can take on these challenges and break many barriers. The key is also knowing and respecting your limits, and that takes honesty, self knowledge and peace of mind, which you won’t have at a moment of pressure and pain.
So now that we’re familiar with what happens under these stressful situations, let’s talk about how to avoid them by challenging ourselves while respecting our limits. First of all, as Plato said, “know thyself”. Take some time to look back at previous projects and make an honest estimative of how much time and energy you need to execute them. Use your past experiences as a way to roughly predict the future!
With that in mind and with a clear head, not too excited nor too overwhelmed (both things good at certain doses), decide in advance what to do and when. How specific this planning is, depends on the size of your project, be it a single illustration of an entire comic series, and also should reflect your personality and expectations. If you’re not a very tidy person, don’t go around scheduling your tasks by the minute, it will probably backfire at some point. The important thing here is to be partially in control before your emotions take the wheel.
After that, a very crucial part of this is also honoring those previous decision of yours. If you have decided you’d take a break on Sunday, don’t skip this because you’re super hyped even after a full week of work, because this may lead you to feel exhausted beyond any measure on Monday, and make you feel guilty for that. Have your own back with your decisions, and be kind to yourself, no matter how you feel along the way.
We grow by breaking barriers and challenging ourselves, but growing up hurts and we need to respect our limits and take some time to heal from all this energy consuming process.
#motivation#art blog#artblog#writting tips#writting#mindsetting#creative writting#how to make comics#making comics#how to work from home#mental health
27 notes
·
View notes
Photo

Building a character Part II: Structure
This article is the second part of Building a character Part I: 4 major points
So, as we’ve discussed previously, your protagonist is probably crafted as the pivoting center of the plot in order to make your story develops into a conclusion, and as we discussed, they are very important for the spectator as well. But overall, their structure, the character’s building blocks, are generally similar to the structure of any character, so let’s talk a little about that. The meaning and direction of your character’s journey is what expresses the point of your story, your theme, and this journey is generally intense and irreversible, both externally and internally. It’s a recurring debate (all the way to Plato!) whether the most important part of the story is the character or the plot. But by approaching your character journey as an echo of the theme of your story, the hero and the plot become connected and develop together.
It is in fact the sum of all the changes and decisions your hero takes along the narrative that truly expresses them as a character. Other aspects such as how smart of tall they are compose a set of characteristics, but it is the actions that shape the character. This is important because the same way the plot thickens as the chapters unfold, a character will reveal their true self as those choices must be made.
The harder, more intense the decisions, the more their true core will be disclosed to the audience, and again this is where the plot and character interwine: as you craft your story, you will be crafting those scenes of tension, of tough choices, dilemmas that might not have a right answer, just the lesser of two evils. It is the storyteller’s power and duty to reveal the character’s true nature through these provations, these critical resolution moments.
Those decisions will generally become progressively more critical and demanding, following what is generally called the character arc, a sum of all the decisions they must undergo during their journey and that will reveal to the spectator - and themselves - their true nature. This revelation of a character’s most true and naked soul is generally connected to the story climax, which we’ll discuss in the future.
What this climax and revelation of the true character does is to put two very important traits of the character side by side, so we get to see and compare them. We can call them the character’s desires, and the character’s needs, and they are an expression of the hero's conscious and subconscious motivations. A character whose desire might be becoming rich and famous might actually need to learn modesty and valuing their friends. The clashing of those different motivations helps developing the character and the story.
There’s a point you might be asking by now: isn’t it possible to tell a story that does not involve putting your character through such decisions? I’d say yes, but think about it: how dimensional can they get if we never get to see them doing so? It is also possible that the decisions this character takes are very aligned to what we’ve previously seem they show as their characterization. The heroic character might, indeed, be altruistic and have an honest and deep desire to save the day whenever he can, and that’s all. But again, how interesting is that for your narrative?
We crave for stories that move us, and to which we can connect, and characters, specially the protagonist, are the key to that connection, an avatar of ourselves experiencing that fiction world. Because of that, we crave for characters that, even though are not necessarily like us, we can still understand and empathize with, that are human somehow, even if you’re telling tales of robots, elves and aliens. You might also like to read about How to build a character: Part I
I want to inspire and connect with more people, so if you enjoy this blog post, please share, reblog and tell your friends!
As always, you can sign up for our newsletter here, and you can also help support this project by clicking here!
#art blog#art blogging#character#Character Design#character development#character structure#writing blog
1 note
·
View note
Photo

Building a character Part I: 4 major points
What defines a main character, a protagonist, the hero of our story? Often, a group of many characteristics, but we’ll start by trying to craft a simple definition.
pro·tag·o·nist
/prōˈtaɡənəst,prəˈtaɡənəst/
noun
the leading character or one of the major characters in a drama, movie, novel, or other fictional text.
When we look at the etymology of the world protagonist, we can also have another important clue about what makes a main character, which is the world “protos”, greek for first, or forward, and the other world “agonistes”, actor or competitor (source). From there we can take that the protagonist of our story is both the most relevant in the plot and also the first to take a significant action related to it. But does the action makes them important, or is their relevance that leads them to that first prompt action? Here are some of my personal considerations of four major points that help define and carve out your hero.
The protagonist is the first to take action, so it’s important to remember that no matter their conditions or personality, the character must take actions that change their situation from state A to state B. We can get easily bored by stories that revolve around a character that just coincidentally have all the action happening around them or because of them, but takes none.The character happens to the world, not the other way around.
The hero is also defined by their change of state, how deep and irreversible are the transformations they’re going through as this story develops. We get moved by seeing an innocent character get corrupted by the harsh, brutal world in which he lives, and we also want to see the mean selfish character being transfigured by love and altruism.
The protagonist of your story is also the mirror through which your readers will be able to see your world. They’re the avatar or channel used to project your expectator into your fictional universe and experience it, so they must have something we can empathize with.
This main character will also have their own perspective of the world, their actions will reflect their personality, which you, as an author, have crafted. If you have compelling secondary characters, they will also have their own personalities, but it is the point of view of your lead character that will express your argumentation about your fictional world, and by extension, your argumentation about life in the real world.
I hope those 4 major points help to clarify some of your ideas around how to craft your lead character. This article was a little too long to a single update, so we’re gonna see each other next week and dive deeper into character structure and see what stuff is your hero (and other characters) made of!
You might also like to read about How to build a character: Part II
As always, you can sign up for our newsletter here, and you can also help support this project by clicking here!
6 notes
·
View notes
Photo

I love my work, and that does not make it less of a job
I work with art, and today it feels good to say so. But I’ll have to confess: it was uncomfortable at some times in the past, even embarrassing and disorienting. For many reasons, declaring this simple fact was a premise for erupting comments and excuses from my part, and I cannot say whether third party comments on my own profession would come naturally or due to my own insecurity and confusion in explaining what I was doing with most of my time. There were many misconceptions I would balance in my mind as I tried to find I way to express what my job (yes, a job) is and how I manage it. Some of those misconceptions were mine, ingrained in my mind, and others were ideas and misconceptions I’d assume from my interlocutors, and then try to bypass them.
First and foremost, it’s important to note the way our current economy and culture deals with paid work is very different from what our parents had at their time, so the conflict of ideas and definitions of what a nice work is emerges naturally. For example, my current situation (which I appreciate very much) is that of a full time freelancer artist, meaning I work from job to job, switching from client to client in a range of projects that can take anything from a week to two months to finish, and sometimes very long term projects that can be with me for over a year. This entire definition can be pretty weird and confusing if you’re used to a regular biweekly paycheck that is directly related to getting at your office at 8 am and leaving it at 5pm. It can look both terrifying or very tempting, depending on what side you look at it, so I want to invite you to take a quick look at both.
Good stuff about being a full time freelance artist:
You get to work from wherever you want and at your own chosen time. In my case, I work from home, and I do enjoy having a regular time routine, which, by the way, includes more than 8 hours of work a day.
You don’t have to work every day or in a set time. But You’ll have to deal with the consequences of it.
You can choose what you work on...partially. Most of us need to pay rent and electricity bill, so you will have to work for some clients you don’t particularly like just to get that worked out. Still, you’ll be able to get more picky as you evolve your client portfolio.
You can work on your pajamas. But I would not recommend you do so, and that’s not a joke: putting on some decent clothes does help me to get ready for work. Still, this means you are pretty much free from office dress code and don’t have to worry that much about covering your face with makeup every morning, which is a blessing.
The downside of being a full time freelance artist:
No support from the company you work on: you are completely responsible for your health care, retirement plan, fixing your equipment and updating your materials and softwares.
You’ll have to juggle clients in your schedule, and this will sometimes mean there are too many, and sometimes there is none.
You’ll also have to juggle your finances, since there will be no regular paycheck coming every two weeks, and this takes extra responsibility with your finances.
You’ll have to take care of your taxes and any legal responsibility that might recur from your contracts or business, and this can be pretty intimidating, so get informed in order not to be overwhelmed by it.
You are the entire company, and that means you’ll have to take upon many different tasks. You’ll spend a considerable amount of time doing side tasks that might not have a lot to do with art, but that are necessary for maintaining your business running.
You can see then, in this quick example, how working this way has a balance of a good and a bad side, which you must weight before you decide whether is something appropriate for your life. But I think it’s relevant to say that your more traditional office job would have the same balance of good stuff, such as more stability and predictability of income, and a bad side, such as having to wake up earlier to drive there. For me, that means this is about a choice, and maybe some sense of timing, since you probably do not want to jump into a freelancer life without having a backup plan and some financial safety net. I truly believe, even though many people might seem delighted and even envy of the idea of being a freelance artist, both can be a happy job to have and sustain you. So now I want to discuss something that comes from this idea.
I realized when I was at the beginning of my career and still couldn’t quite explain what was this that I was doing, I had at least one firm idea in mind: I had to express to my interlocutor that I was struggling, that it was hard and I was suffering. Because that’s what people do about their jobs, right? They complain about their boss or something like that. I worked inappropriate amounts of time, and made sure to mention this, as if it was a sign of how much my work with art was truly a job. It took me sometime to realize the association I was following: work equals suffering.
As time went by, and both me and my portfolio changed, this mental situation shifted as well. I got to balance my life in a more healthy way, my clients changed and my schedule became more regular, my income was slowly getting to something I could trust. And I realized I could handle the bad, boring, cary parts of my work, and that means it was not that bad at all. So a new, bizarre side effect arose: I loved my job. And that felt weird.
With so many people around me complaining about their jobs, their bosses, their work colleagues, I felt disconnected and abnormal. I felt guilty to admit that I didn’t feel like I had a lot to complain about in my day, and even though I was tired, and yes that client was rude or that alteration was a pain to fix, but I was actually thrilled about what I was doing. Another ghost emerged, and those old concepts came back to my mind. Maybe I wasn’t working hard enough, or enough hours. Maybe I was cutting myself some slack without even realizing. Unfortunately for my health, a new -shorter- cycle of self-mistreating began, and again it took me some time to balance my thoughts and even my schedule again around what came to be the title of this article: I love my work, and that doesn’t make it less of a job.
Suffering and struggling is not a requirement for working hard, and in fact, it’s a side effect that should be avoided, always. Validation should not come attached to the idea of martyrdom, especially considering all of the already discussed toxic stereotypes artists carry with them, such as anxiety, mental and emotional struggles and such. I came to the conclusion that you can work hard and even more efficiently when you’re contented with what you’re doing, and you can tolerate the downsides and boring parts with grace and easy. That may even mean, in fact, that you work less hours, but that still wouldn’t make your work less worthy of recognition, from others and especially from yourself.
You might also want to read about Burnout among artists and Artists stereotypes that hurt us
#work#art inspiration#work inspiration#mindset#art blog#how to write stories#making comics#making art#how to work from home
4 notes
·
View notes
Photo

Burnout among artists
Let’s talk about burnout,what it is and how to prevent this from happening, and I’d like to start by the opposite definition: what is not a burnout. It’s also important to remember from the start that we’re not going to address the clinical condition (burnout syndrome) and if you feel like you’ve been dealing with mental breakdowns in critical condition, you should look for professional support, always.
First and foremost, I feel like we should clarify that burnout is not a byproduct of working hard, nor is it needed to accomplish the desired results. You do not need to sacrifice your well being in order to achieve big goals, and as much as we see this idea of being workaholic being glorified, I do not believe should stand burnouts in order to succeed. In fact, going through a burnout might mean you’re not working hard, but working “wrong” somehow.
We can think about it as swimming in the ocean, and how hard it can be to do that if you do not know what you’re doing. You don’t know how to swim and you’re trying to struggle against the current. Paddling and moving your arms will surely be very tiring, but not efficient. What you have to do is stop, take a deep breath and let yourself float for a while until you can get to swim in the proper way, and fighting this need will lead you to a collapse. Being in that situation demands that you stop and rethink your strategy, and it might also include some time to rest and heal from the stress.
A burnout, therefore, is not necessarily the result of too many hours of production, but the sum of the feelings of overwhelming exhaustion, stress and finally apathy, due to inappropriate directioning of your efforts towards a task you desired to accomplish. From my experience then, burnout is not a means to an end, nor is it even a final product: it is an emotional state, which you can both avoid and overcome.
It is very important to avoid reaching that point and especially stopping if you reach it, because this crackup can be damaging in many ways. Anxiety and lack of motivation are the most common results of a burn out, and the emotional exhaustion that comes with it can be pretty hard to overcome. Burnout can even bring physical symptoms, and the other way around might happen as well:if you’re dealing with physical pain, you might get more easily overwhelmed and prostrated, since dealing with pain and discomfort is also very mentally tiring.
But if we do have a burnout, as many might already have experience, what can we do? My personal most simplified answer is: compassion. Artists are notorious for being hard on themselves, and perfectionism is a recurring thought in our minds, but this is not helpful.
Here are some good ideas to prevent burnouts before they can happen:
Be organized
I do realize I say this a lot, but bare with me: a messy room is more stressful, and the time it takes you to find your pencil in the middle of all the trash on your desk it mentally tiring, because it stacks up with many other little interruptions. The same goes to your schedule and other intellectual tasks.
Have a list of alternative, simple tasks at hand
Sometimes we are honestly tired, and art making can be particularly exhausting for the head. If you have to stop and think of something else to do right at this moment when you’re already drained, chances are you’re gonna break, or simply do nothing. So just decide upfront that whenever you’re tired of painting, you’re gonna get up and stretch, or clean your desk or do the dishes.
Have a hobby that has nothing to do with your work
Switching tasks is very important for your brain health, and we do not want to end up like Charles Chaplin at Morden Times, so find out something you enjoy doing as a hobby and commit to actually doing it, exercise another piece of your mind while you rest the one you use to work daily. Many artists end up by having hobbies that also involve drawing, but it is really good to get yourself something entirely different to entertain the mind.
Have a study routine
I cannot emphasize how much going back to studying the basics can help relieve the feeling of apathy and confusion. If we go back to our previous analogy of paddling without knowing how to swim, this is your training pool, it is where you’ll get challenged and learn how to deal with your current and future problems. Plus, it can be very relaxing to study simply for the sake of learning, whereas when we are painting for a client, we have many other factors to be aware of, such as deadlines and specific requests.
You might also want to read about How to beat fear and Artists stereotypes that hurt us
#mental health#inspiration#creative work#how to work from home#making comics#artists life#how to organize your day#daily routine
1 note
·
View note
Photo

Being inspired and being inspiring
Today I want to talk about how we, as part of the art community, can keep it an inspiring place, and maybe in this process, be able to embolden ourselves and those we get in touch with. First off, let’s start trying to define what inspiration is, and what we are doing when we search for it.
in·spi·ra·tion
/ˌinspəˈrāSH(ə)n/
noun
the process of being mentally stimulated to do or feel something, especially to do something creative. "Helen had one of her flashes of inspiration"
a sudden brilliant, creative, or timely idea. "then I had an inspiration"
Inspiration is frequently seem as something either external, coming from outside of us and affecting our minds, or something more internal, but generally out of our control, ike a muse. Still, we strive for inspiration, we are constantly looking to be inspired in some way.
We typically look outside ourselves for inspiration, generally from other artists, be them within or outside our own field of work. You might listen to some music to inspire your next painting, or maybe look for art that is similar to what you want to create in order to gather inspiration. Most of all, I believe we look for references, references on what our own artwork should look and feel like once we execute it. We look for references of what should be our envisioned result in the world, in the realm of art and within the specific medium we’ve chosen to work with.
We look for reference on what is expected from us, of how an artist behaves on doing so and even how much we should earn from our art. Depending on the answers we find, we might feel motivated -or inspired- or we might feel apathetic and dull. In short: searching or inspiration is actually looking for references of what is possible based on what we see in our community. And to be frank, we all want to be inspired, which means we all search for role models, inspiring artists, we want to know about beautiful projects that were backed in their crowdfunding and we want to be shown that it is possible to live a healthy life as an artist.
What I want to propose today is: what if each one of us could commit to endorse those examples, and be not only inspired by the art community, but also be inspiring for others as well? We often fall into the stereotype of the muse-driven artist, waiting for this inspiration to get to us as if through a one-way channel, but we can give this same insight and enthusiasm back to our art community, and if we do it regularly and intentionally, I dare to say we might inspire ourselves to be better artists - and better people.
You might also want to read about How to organize your time as a creative freelancer
I want to inspire and connect with more people, so if you enjoy this blog post, please share, reblog and tell your friends! (: As always, you can also support this project on Patreon!
#motivation#art blog#art blogging#comic#making comics#mindset#mind set#productivity#inspiration#how to tutorials#productive routine#Productivity Tips
1 note
·
View note
Photo

Let’s get naked: failure and shame in art
We’ve talked previously about the power and pain of feeling vulnerable, but today I want to invite you to not only allow yourself to see and think about your vulnerability as an artist, but to share it. I invite you to undress whatever embarrassment or shame you might have over a failed project, an ignored campaign, a story nobody liked.
First and foremost, I think it’s worth to address the fact that we might not see a lot of those stories in the art community, and in general we humans don’t really enjoy sharing our stumbles and falls, mostly because we feel embarrassed by those episodes, demotivated by those failures, and it can be truly hard for us to expose ourselves like this. So why should we? My personal answer is: the more you share about your struggles with honesty and compassion, the less alone other artists and creatives will feel, by knowing you’ve been through something similar. More than that: you are here, which means you were not defeated by those failures, and that is inspiring to know too.
Another thing about sharing is that it doesn’t only strengthen the community and enhances our self aware of technical problems, it also relieves a great pressure from self judgement and perfectionism, which is something many artists agree is one of the causes of art block.
“If we can share our story with someone who responds with empathy and understanding, shame can’t survive.”
(Brené Brown)
It’s encouraging to see other people’s success, but we can also get a deep sense of belonging, as a community, by sharing what did not go right, and we can learn so much from observing how our fellow artists managed those bumps on the road. You can learn and teach so much by simply acknowledging this.
So today I wanna prompt you to think of some of the times things went wrong for you and your art, and remind yourself of how you overcame those obstacles. Sometimes it’s good to remember your failures so that you can realize you are still here, in spite of them. I’d love for you to be able to share them, and I’ll start by sharing some of my failures with you.
Quick reminder, though: this is not a complaint section. I invite you to list your hardships in the most factual way you can, and so will I, with the least detail about personal information and emotions attached to those occasions. The goal is to reflect upon our stumbles and falls so we can learn with them, even though some of them embarrass us. Here are some of my naked failures and shames:
At the beginning of my career, I’ve worked for very low rates, and in order to compensate for this, I’d work for way too long hours trying to make a decent daily income. I got very sick, and realize now that if you have to choose between an unfair paid rate and not get any gig at all, you’d be better off working on your portfolio and studying instead of supplying a demand for underpaid work. I am very embarrassed of how low were those rates, really.
I’ve accepted unpaid work with the promise of return on sales percentage. Never heard of it and feel really silly today about going for this. Again, if you have to choose, just work on your own portfolio and personal projects. Since you’re not gonna get paid anyway, might as well work for your own benefit.
I’ve got confident about how I was able to build what seemed like a fan base in a specific platform, and decided to ask these people for a type of support (not financial, btw). I got crickets, and learnt that only a small percentage of people who consume your work is actually engaged on it, and that is completely understandable looking in retrospect. Know each platform and the expectations of your public, as well as the expected level of commitment from them.
I’ve once spend a fair amount of money building a prototype of a comic I was creating at that time. At a local event, I met an editor from that city, and was so excited about the possibility of reaching out for them that I handed my one and only prototype. It got tossed in a box with a bunch of other stuff, and I never heard of this person again. Ouch.
TW: Harassment. I was once heavily harassed by a client, and pretend not to notice it because I wanted to keep the gig. I feel really embarrassed of this episode, even though I also feel proud of later on confronting the situation and ending both professional and social relationships. Ethics at work is priceless, and if you ever get into this situation, confront it immediately.
Some other recurring failures you might get as an artist:
Campaigns will fail and be ignored, even with paid ads.
Your e-mails won’t get replies.
Your portfolio might be tossed aside at a con.
Your crowdfunding might not reach its mark.
Your business cards might get dumped on the floor or nearest trash bin.
None of this is a reason to stop, I promise you. At the time I experience those failures, I felt like my heart would break and that I couldn't breath, that I was utterly defeated and would never succeed in art after that. But I’ve made a turn around every time, and I’m sure so many people did, and I truly believe the more we share those experiences, the easier it is to recognize this truth: rejection is part of the deal.
Recently a dear friend of mine made a video that expresses some parallels between rejection in art and in social life, and there’s a very important point to this. Dismissal is part of our lives, both in art and in our daily relationships, and the more we talk about it, the more we naturalize it and undress that mantle of shame and silence around it.
I want to inspire and connect with more people, so if you enjoy this blog post, please share, reblog and tell your friends! (: As always, you can also support this project on Patreon!
#art blog#artist life#mindset#motivational#shame#dealing with shame#mental health#artists life#artists on tumblr
0 notes
Photo

Artist stereotypes that hurt us
Whenever we think of a stereotype, it generally feels like is a bad thing, a prejudice of some sort or a feeling without much thought. A stereotype, however, has much thought on it, and a very special kind of thinking behind it: subconscious thoughts. A stereotype comes to the surface of your mind as a very subtle feeling or insight that might be very helpful or incredibly harmful to you and others. Those impressions are buried deep into our minds throughout a life of experiences and previous considerations, and they might alert us when to cross the street to avoid a suspicious place, but can also whisper stereotypes and words of stagnation as if they were a consumated truth.
As artists, we are subject to many stereotypes of what a professional in this field looks like, how they act and live their lives. People around us might have told us with precise words what they expect an artist to be, or we might simply have absorbed those ideas from movies, books, from references in life. The portraying of a character in a story, whether is being display on silver screen or told my your grumpy grandfather, is always a caricature of some sort. When your mother tells you about how life as an artist might be, she’s probably not using much of personal experience, but holding to the stereotypes she knows and exaggerating them to clarify her message.
“We have, as human beings, a storytelling problem. We're a bit too quick to come up with explanations for things we don't really have an explanation for.”
Malcom Gladweel
We then build the image of what things we do not know yet are, we create an opinion about things before we know them. This is not a bad thing, I must say, it’s a powerful way of wrapping our minds around the world and it’s possibilities even before we get familiar with them. But today, I want to discuss some of the stereotypes you might have buried deep inside your mind and heart - and that might be hurting you.
The thing is: once we’ve decided what something is before we know it, this vision might be hard to change. This though will permeate our minds and guide our actions, whether we notice it or not. So the key here, as I see, is to think those thoughts on purpose, to recognize and adjust our decisions to what we want as results.
Take a look at some of the main images of what an artist is like to you. Some of them might get you excited: freedom, expression, spontaneity, passion. We want to keep inspired, so let’s analyse and keep those thoughts that elevate us. But here I want to take a look at some of my personal most dreadful artist stereotypes, the ones that hurt me for a while, and might be hurting you and your performance as well.
The penniless, starving artist.
A very recurring one, both from the art community perspective, and also how artists are frequently seen from outside. This stereotype can end up ruling your finances and taking you away from your earning goals. Believing you’re supposed to be underpaid because of your profession it’s not something we wish to do, but we might be doing so subconsciously, when we accept this stereotype to be true.
The bohemian, overdrinking, hedonist artist.
This one has a lot to do with the passionate, life-loving artist we see in romantic movies, watching the rain falling down as they smoke a cigarette. It’s OK to enjoy things you love and be passionate about life, but i wonder why did vices became so tied to the artist as a character. I’ve once met a young fellow who recognized in secret that the reason for his smoking was to look and feel like a certain writer he admired, and I cannot see this stereotype as being of any help to our community.
The unrecognized, misunderstood genius artist.
This is, in fact, a tempting one, I’ll confess. For some time, I have believed in it, and came to the conclusion that it was the reason I wasn’t getting the clients and jobs that I wanted, and especially the recognition and validation of the public. It can be really tempting to feel like a misunderstood soul, but the facts this stereotype was hiding were way more simple:I wasn’t ready, my work wasn’t good enough at that time, I wasn’t reaching for the right people, I needed to hone my skills. I’ve learned that working hard and having compassion for my own growth allowed me to let go of this stereotype which was in fact hurting me.
The marginalized and socially disabled artist.
We’ve all been there, at a party or art event, trying to make way to the important folks we want to impress, to work with, to learn from, and our social skills, if we had any, completely leave our bodies. We’re left voiceless, maybe shaking in anxiety. This can happen to anyone, and it sure did happen a lot to me, but the thing is: this does not define how you ae as an artist or a person. There’s so much power in the introspection of the creative process, but we assume being this introverted artist condemns us to a life of social anxiety or worse. It doesn’t. You can have a social life that nourishes and inspires you, and it’s OK to ask for help to do so if you need. Always.
Those were the stereotypes that floated in my mind without me thinking or questioning them, but they were there, guiding my actions and feelings. The reason I invite you to take a look at this and at your own preconceptions about what an artist looks like is to think on purpose things that can benefit you, rather than inadvertently harming you.
It’s not because you or people around you have been thinking and believing something for a long time that this is truth. You can embrace life as an artist and let go of those stereotypes, if you wish to. So, what are the stereotypes you wanna let go now? You might also want to read about How to beat fear I want to inspire and connect with more people, so if you enjoy this blog post, please share, reblog and tell your friends! (: As always, you can also support this project on Patreon!
0 notes
Photo

The hard work of making it effortless
This might seem like a contradictory premise, but I wanted to start with this. We’ve discussed previously the question of talent and how it can be defined by how easily one can seem to handle certain tasks. This time, I want to propose that, in fact, when you see someone executing a hard task so well they make it seem easy, it is actually easy for them. Or, at least, easier than it would be for someone who has just started learning this specific skill.
“Part of the reason why a certain skill often seems so effortless for great masters is not just because they've mastered the process - they really are doing less than the rest of us who don't know any better. They choose to exert only calculated force where it will be effective, rather than straining and struggling with pointless attrition tactics.”
(Ryan Holiday)
A skilled, seasoned master won’t struggle as much as a beginner, not because they’re better at art, or a better person in any sense, but simply because they are already familiar with the path and no longer struggle with the most recurring missteps we have. But what is struggle, anyway?
We struggle when we have to deal with setbacks, when we have to change our plans a start things over again, rethink the process and redo the work. There’s also emotional struggle that comes with what we might call cognitive dissonance, being indecisive and mistrusting our own judgement. We don’t wanna take step further or back, because we feel confused and lost. Those setbacks steal time in an abrupt way, so it kills the flow, a feeling many artists, athletes and other professionals describe when they’re in the zone. When we are in this state, the work flows easily and painlessly, with confident results. This very productive state of mind comes naturally, but that does not mean we can’t prepare the ideal setting for it or prevent environments that destroy it, such as the struggles we’ve listed above.
What we can do to prevent those struggles is to recognize that most of them come from indecision and confusion, which can be contained by having the proper answers to such confusing questions in advance. To me, this is basically the definition of being prepared, and this awareness comes from your previous experiences and the questions you’ve already had to answer. Being prepared is already having the answers for the most recurring question you might face during your day, and the more experience you have, the most easily those answers will come. You do make less effort, because you already have the solutions stored in your brain, you don’t need to reinvent the wheel every time.
This might sound contradictory, but the spontaneous painting comes from a lifetime of answering very specific questions and having rules set in your head that answer to most of the queries you might encounter. Having a pocket full of previously answered questions will free your brain to react more spontaneously and without confusion, without killing the flow. This does not mean you are acting without thinking, actually as far as I understand it, you’re thinking in a better, more efficient way, so quickly you don’t even realize you just had a full argumentation in your mind and solved it, subconsciously and efficiently.
Like any professional, the more you train and rehearse your reactions to the stage, to the microphone or to the blank page, the more used you’ll get to react quickly and spontaneously to what for the beginners seem so overwhelming. And it is at this moment, when we see a dancer execute an impossible movement with a serene look on their face, that we get impressed and see a master at their craft. They don’t do it without thinking: they already thought this, many, many times, and they have already solved those questions.
I want to inspire and connect with more people, so if you enjoy this blog post, please share, reblog and tell your friends! (: As always, you can also support this project on Patreon!
#indie comics#independet comis#art blog#graphic novel#graphic novel art#art life#artist life#mindset#how to make comics#how to write stories#mind set#mindsetting#motivaiton
0 notes
Photo

Brick by boring brick: the long term project
Building a project from beginning to end is an amazing journey, and there’s nothing compared to the experience of looking at a long term goal and see it finished, within all of its potential. We all feel like having a beautiful finished project to call our own, and that is why we brainstorm ideas and get creative and set new goals. We generally also love to talk about them: our ideas, dreams, and how good they’ll look once finished. But we generally neglect telling the whole story, the long tale of months, years maybe, working hard and seeing little to no results, no validation, just the dreadful notion that we have a hugetowerl to build, and there we are, lifting brick by boring brick.
It can feel really overwhelming and even fatalist to think about it, and because of that, I want to share some tactics and tips about how to tackle this concept of a long term goal, postponing reward and keeping you focus to finish your projects. We’ll discuss practical tips of how to trick yourself into keep rolling even though the horizon seems so far away, and hopefully I’ll be able to share some new perspectives on how to face the whole idea enduring and even enjoying the process.
First of all, I want to share an alternative view to the intimidating notion that there are just so many steps ahead. As a person who has executed many long term projects, both for clients and for personal work, I have to tell you this: I’d never be able to face and finish an entire project. But what I can do is to write down one single page. And I can do it again, and again, and again, until it is done. Facing a long term project can seem like fighting a Colossus, and even after splitting this big goal into smaller steps, it can still be very intimidating to tackle all of them. So don’t. You don’t have to deal with all of the steps at a time, and in fact you can even ignore the next ones, and just focus on that current small step.
Big athletes don’t usually go to their games or performances thinking about the entire season or championship. In fact, a soccer player might not even be thinking a lot about the entire 45 minutes of the game. They might be focused solely on the most relevant aspects of the moment: scoring the next goal. We have already discussed the importance of seeing the big picture, but to address the overwhelm of the huge goal, we can do precisely the opposite, take a step closer and focus only on that single brush stroke. This might leave with a sense of anxiety and urgence at first, because you might feel like giving your entire attention to each step can be simply to time consuming, but once you get in the flow, you’ll see this time pay off, I truly believe that. Remember the saying:
“Slow is smooth, and smooth is fast.”
OK, so we’ve talked about using the techniques previously discussed to split a big goal into smaller steps, and today we’ve seen the advantages of taking each one of these steps at a time. Let’s take a look at some ways we can do it daily with some simple tips and tricks.
Pick up your big goal. Split it, thinking of it like a sheet of paper. The bigger the sheet, the more times you can fold it into smaller ones, but it is still a finite number. That last part is important to keep in mind in order to avoid micromanaging every single thing, being overwhelmed by it, and than doing nothing. Like a paper sheet being folded, you have smaller tasks inside medium siex tasks, and all of them unfold under the one big goal, your big, open sheet of paper.
After that you can categorize and set priorities on your smaller goals. What step must be finished before the next one? Which ones are independent from each other? Take notes on those aspects. You can honestly think of which ones you like the most and use some of the ideas we’ve already discussed, such as pairing activities once you have a better idea of how long and how much effort your smaller goals will take.
Many people like lists, and I’m no exception, but here’s a new idea for yo to try: take your list of small steps, now that you know them very well, and put them on your calendar, or agenda. Set specific days and deadlines, being honest with yourself, not unrealistic demanding, but also not too soft on yourself. What this does is it takes the other steps even further away from your perception on a daily basis. Just focus on each day, each hour set for each task, one at a time.
Course correcting: as best as we know yourselves and our process, we’ll eventually fail to guess how much time and effort a step can take. It’s OK, be kind to yourself. Just make a note and put that step for the next day, readjust your calendar and keep rolling.
Set a time period to take a step back and once again take a look at the whole picture in order to keep track of your progress. Take this time to give a nice pat on your own back for your nice big project and its evolution. As much as taking one step at a time is useful, it’s very important to take a look at the whole thing from time to time.
Keep doing it. The world needs your story. Whenever it gets overwhelming, my suggestion is for you to think: just one more step. In my experience, things tend to look more simple and way less intimidating from this perspective.
You might also want to read about Organization tips to keep your focus
I want to inspire and connect with more people, so if you enjoy this blog post, please share, reblog and tell your friends! (: As always, you can also support this project on Patreon!
#mindset#motivation#art blog#artblog#art life#artlife#settingoals#dailymotivation#art motivation#step by step
0 notes
Photo

Beating fear: one step at a time
Most of artists’ biggest struggles come from fear. In fact, many of our daily struggles come from it too, at work, school, with family, fear is an ever present emotion that moves us, but not necessarily in e health way. We’ve talked about fear before. Fear is great to trigger fast actions that will get out of danger in a jungle, or make you get out of the way of a racing car. Fear is not bad, it is an invaluable tool for our survival. But it’s precious life saving potential is reserved for that: life threatening moments. So today we’re gonna talk about how to get back in control and beat the fear of art making.
The main thing about fear is that we feel out of control, and this might happen for some different reasons. Firstly, we might in fact be losing control of things we are supposed to be leading, and this can be very tiring . A second kind of control loss we might feel, however, is when we feel frustrated about actions that are, in fact, out of our control. This includes people’s reactions to our art, their opinions and comments, or lack of their attention.
I want to address the second question first, because I think it just has a more simple and immediate answer, which is: that was never under your control anyway. Fear is something that exists in our brains to warn us of how to avoid danger by taking whatever action that is in our control, but when we fear third parties’ judgements, we betray this principle. This fear does not serve you or your art, let go of it.
The first kind of fear referred previously is more related to self confidence, the lack of control over our own skills. In those situations, I particularly feel like I do not know myself of the extension of my own capabilities. In fact, I start to wonder if I ever had any! That’s very scary. The solution I invite you to take is borrowed by the ancient Greeks, and it’s inscripted in Delfos Templo until today: “Know thyself.” Seriously, fear can be relieved by something as simple as getting to know yourself, your own skills, merits and flaws, and addressing those with the same respect and care we so many times give freely to our friends and colleagues, but not to ourselves.
Another very important action to take against this fear is also a simple one: study. With passion and honest desire to learn, study and practice your own skills as best as you can. Confidence in your skills will come with study and persistence.
“Uncertainty and fear are relieved by authority. Training is authority. It's a release valve” (Ryan Holiday)
If you feel like this is just too overwhelming, and that you would even know where to start, just take a step back and make yourself a diagnosis. Look at your own work and latest accomplishments with honesty and curiosity, and analyse it. If you feel like you need help, ask for it, no shame in doing that. Ask for friends and colleagues to rate your strengths and the things you might improve and go for it.
Pick your weak points and study them, again and again, with focus and interest. You will gt better not only at drawing feet, or hands, or horses or whatever you used to dread: you’ll also become used to it, and fear will dissipate. We fear the unknown, so just get familiar with the things that scare you. You don’t need to become an expert in horses, as much as I don’t need to go bungee jumping in order to face my fear of heights. But I do like making myself look down from high places from time to time, even if I have to hold tight to my husband’s hand while doing so. And little by little, fear goes away.
I want to inspire and connect with more people, so if you enjoy this blog post, please share, reblog and tell your friends! (: As always, you can also support this project on Patreon!
#mindset#comicart#artlife#art life#motivational#motivate#motivated#fear of failure#makingcomics#comicbookartist#mental health
1 note
·
View note
Photo

What is talent, anyway?
This time I’d like to talk about the concept of talent, not only in art career, but also in other aspects of life, and how that affects both artist and client or expectator. Many people enjoy or struggle with the fleeting definition of talent, whether they have or lack it, and whether it is a compliment or a misjudgement to call someone talented. Sometimes praised, sometimes hated, let’s take a closer look at what we perceive as talent, starting by some definitions.
“Tal·ent /ˈtalənt/
noun
A marked natural ability or skill. [from 15thc.]
He has a real talent for drawing.”
Wikidictionary
“Talent, in common parlance, is “what comes easily”. So, sooner or later, you reach a point where the work doesn’t come easily, and - Aha!, it’s just as you feared”
(Art & Fear)
We can link both the definitions above by the idea of a natural or easy capability into a specific subject. Common sense says that if you do something naturally, it is because it comes easily to you, and having ability and skill is in fact a way to make it easier to take action. However, the belief that something can be innate and inherent to a person’s behavior or skill touches some very important points: are we born with certain abilities? Is our capability in the hands of fate, or is it just ever so slightly touched by it?
The belief in talent is also connected to expectations regarding the results, but also the process in itself. Mostly, we expect our process to come naturally, and easily. As it most frequently occurs, creative processes can be stressful, frustrating, and demand a lot of research and reworking. It can be very rewarding, but nevertheless, it’s hard.
If talent is supposed to be something that comes out easily, and we are having struggles in our creative process, the logical conclusion is a scary one: “I do not possess talent”. This line of tough makes us uneasy and even scared of facing hard times. We might feel very demotivated and gloomy when we take too long to develop an idea, or even freeze and actively avoid any challenges and new things in order to feel in control.
Here are two recurring problems of perceiving talent this way:
The artist feel immense pressure and the sense that if he doesn’t nail the project or art piece from the start, he’s not talented, and therefore, not a true artist. This connects to another very common situation: the impostor syndrome, in which one feels like a fake, untalented, and on the edge at every moment, expecting someone to “find out” about it.
The client, reader or spectator might be lead to underrate the artist’s efforts, study and techniques, considering all as part of a magical event that takes place when he creates, effortlessly, one masterpiece after the other.
Let’s address the first situation now, and recognize that being afraid of talent is a part of being afraid of yourself and your own perfectionism, a common thing among artists and creators. We also mostly see other artists’ finished pieces, and might have the impression they nail each artwork everytime, unaware that many failed attempts, ugly sketches and crappy design choices might have come along the way. Self awareness and a curiosity for your fellow artists’ process can help you deal better with these struggles.
Now, let’s talk about the second situation, which involves other people and their perception of you, your skills, and your talent. First and foremost, I’d suggest that you don’t take it personally, even if you feel momentarily offended by the situation. An overall ignorance of how the creative process works does not mean this person does not validate or enjoy your work. Sometimes, as it is frequent with art in general, they just don’t understand it very well. It’s not a personal aggression, and you shouldn’t take it this way. Art is a very fugacious word to define, mysterious and filled with a magical aspect. In ancient Greece, Plato would perceive talent as literally a gift from the gods, that would possess the mind of the artist in order to execute a masterpiece.
But in the end, is talent even a real thing? My answer would be: talent is as real as you believe it to be, for good or bad. We’ve talked so far about the struggles that surround the concept of talent, the negative aspects of it, but like anything else, it depends heavily on what you believe and how you act upon it. And if you can be conscious about this, here are some suggestions of how the perceived talent in the following phrases:
“You are very talented!”
See that this person took the time to let you know they enjoy your art, and are being supportive of you.
“I am talented at___”
Recognize your strengths and the paths your life and personality has lead you to.
“He/she’s such a talented person!”
This person is very skilled, they make it look easy even though I know this is a challenging task.
You might also want to read about Artists stereotypes that hurt us
How do you feel about talent now? Let me know your opinions in the comments!
I want to inspire and connect with more people, so if you enjoy this blog post, please share, reblog and tell your friends! (: As always, you can also support this project on Patreon!
#mindset#motivational#motivation#art process#art journal#talent#what is talent#talented#art talent#art life#art coaching#art making#making art
3 notes
·
View notes
Photo

Does my story need a deeper meaning?
Recently, I’ve come across the question of whether a story must have a deeper meaning in order to have readers, and I feel like many creatives have similar questions while crafting their stories. Every story, as far as I understand, will have some sort of subtext, or as many people refer to it, a “deeper meaning”. The reason I believe every single narrative has its own subtext is simply because stories are written by human beings, and we are all biased towards our own experiences and how we perceive life. But what we want to talk about today is the arbitrary and conscious choice of imprinting a subtext in your story, with a specific argumentation and intention.
Before we start, let’s try to understand some terms so we’re on the same page.I’ll borrow some knowledge from different authors and artists here, but I also want to add some of my personal understanding of each topic. Even if you disagree with those definitions, I think it will be helpful for the sake of sharing the knowledge itself.
Narrative
Borrowing some ideas from Greima’s semiotics, a narrative is a change of state, in which someone was in disjunction with something, and later is in conjunction, or sometimes the other way around. Basically, we listen to stories to hear how did Frodo get rid of the One Ring. We’re drawn to this process of change, we deal with it everyday. Even the shortest phrase can be a narrative:
“Mary got rich.”
The character Mary was not reach, she was in disjunction with wealth. Later, she is rich, in conjunction with wealth. The end.
Story
Now, that’s a more subtle term. Stories are narratives we create to entertain, teach, touch, protest. Stories have intentions and they are a basis of our society ever since we see ourselves as self conscious creatures.
“Story is not only our most prolific form of art, but also rivals with all activities - work, play, eat, exercise - for our waking ours.We tell and listen to stories as much as we sleep - even when we dream. Why? Why is so much of our life time spent with stories? Because, as the critic Kenneth Burke told us, storie are equipment for life.”
Robert McKee, Story
In a similar sense, the story is also a change of state,but a specifically chosen clipping. The story’s core is a purposefully chosen change of state that is (or feels like) definitive and irreversible, such as the One Ring being destroyed in the fires of Mount Doom.
Subtext
Now, this one I’ve got with the help of Wikipedia, and I do like this definition:
“The subtext is the unspoken or less obvious meaning or message in a literary composition, drama, speech, or conversation.”
The subtext is a second layer, often referred as a undertext or a second meaning, and it can be so subtle most people will not even notice it (but might absorb it) or as clear as the main text, creating almost a parallel narrative. There are many tools for the creation of subtext, such as: metaphor, allegory, allusion, hyperbole, etc.
Subtext, as much as the entire narrative, is subject to interpretation of the reader or viewer. The destruction of the Fangorn Forest by Saruman and his orcs, can be interpreted as an ugly depiction of industry advancing and destroying country life.
Theme
The theme has being frequently mistaken by a synopses of the narrative, which is not quite right. The theme is the core of the story, sometimes referred as the “moral of the story”. As artist Chris Oatley puts in his course Storyteller’s Summit, “The theme is a conclusion to the argumentation made by the story.” In the same line of thought, he states that this argumentation should be something that you can agree or disagree with, a phrase that can be proved or disproved. In The Lord of the Rings, one might see this theme as “Good prevails when good people unite”, which is a statement you can easily debate around and agree or disagree with. Again, the theme can and will be interpreted by your audience, but as a storyteller, phrasing your theme in a clear way can be very helpful.
Now, let’s go back to our main question: does my story need a deeper meaning? In my opinion, the quick answer is: no. The thing is: your story does not need a deeper meaning because it has a meaning already, inherent to it. You are a human being expressing yourself by telling a story. You cannot be impartial, so your story is bound to have a subtext based on your own life experiences.
But a very important point if you’re creating stories is that someone will read your book, watch your short film, listen to your audio drama, and these people want to connect with this life experience of yours, with your theme and with how you perceive life. Crafting a clear theme, and consciously deciding do create a layer of a “deeper meaning” can help your public connect with it, because you’ll be more aware of how to stick with it along the way. The more aware you are of the process of crafting a story, the more conscious choices you can make to connect in a clear way with others and hare your art.
You might also want to read about the 4 major points of building a character I want to inspire and connect with more people, so if you enjoy this blog post, please share, reblog and tell your friends! (: As always, you can also support this project on Patreon!
#art blog#motivation#art motivation#Commitment#mindset#theme#story#writting blog#deeper meaning#subtext#how to write#how to write stories#how to make comics#creative writting
0 notes