
Statistics
We looked inside some of the posts by learntomakeup and here's what we found interesting.
Average Info
Notes Per Post
49K
Likes Per Post
32K
Reblog Per Post
17K
Reply Per Post
1
Time Between Posts
5 days
Number of Posts By Type
Photo
17
Last Seen Tumblr Blogs


Fun Fact
Tumblr has been banned in Indonesia for providing people with access to pornographic content.
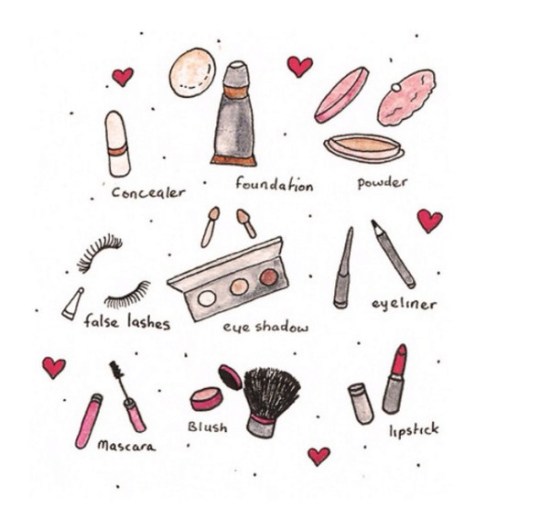
Photo
Hello my beauty lovers! ♥
This is my blog LEARNTOMAKEUP and I’m Valeria.
Today’s topic is about HIGHLIGHTERS. We all love highlighters because they give such a dewy, glowy and flawless finish to any kind of makeup.
In this post you will learn to choose the perfect highlighter for your skin.

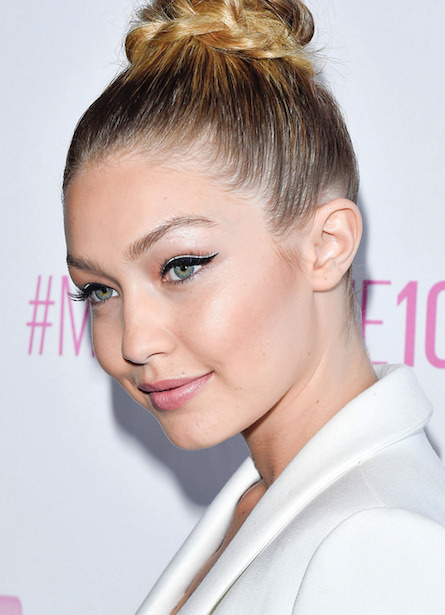
Ever wonder how celebrities get such glowing, ethereal skin? It’s not all fancy facials and expensive aesthetician visits. With the right highlighter and proper know-how, you can fake it!
Highlighter comes in many forms, from cream to liquid to powder. While you use darker colors for contouring, highlighting brings your features forward and makes skin look younger and more dewy.
Because you can find it in so many different shades and finishes, deciding which highlighter is right for you can be daunting.
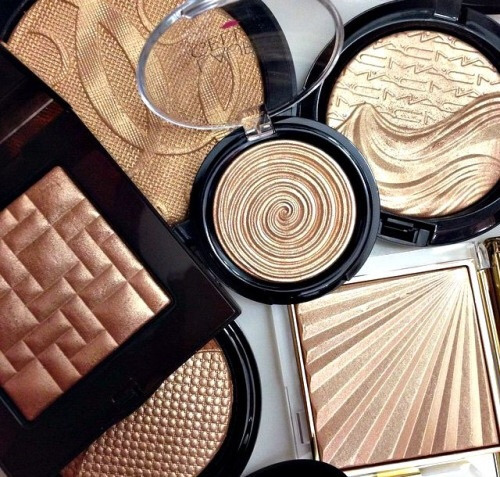
However, not all highlighters are created equal. Just like foundation, not every highlighter is made for every skin tone. Depending on what the product is, where you place it, and what your coloring is, you can end up with a shiny and frosty effect.
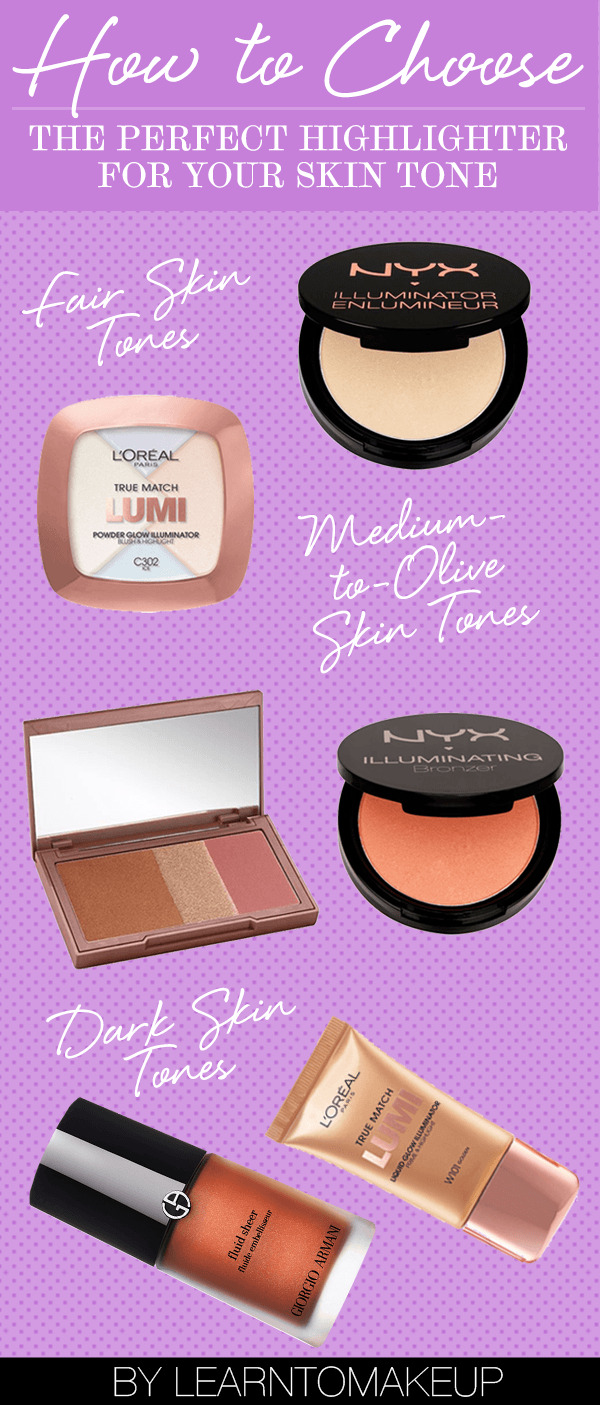
PICK THE RIGHT HIGHLIGHTER FOR YOUR SKIN TONE BELOW
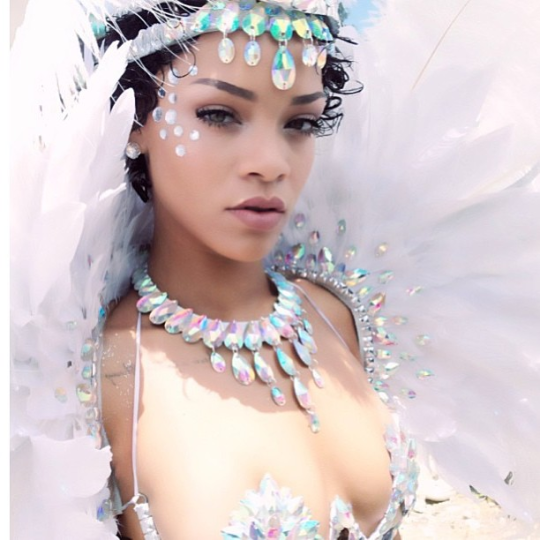
PALE TO FAIR SKIN
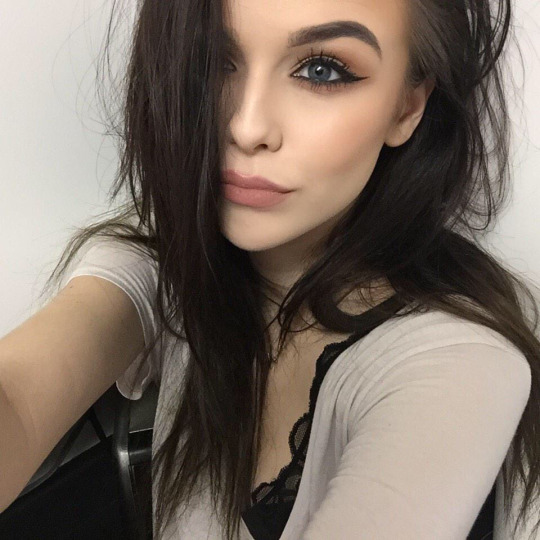
Those with pale to light skin tones should opt for highlighters with a pearlescent, icy-silver or champagne sheen. The light pigment adds just enough radiance to your complexion .

The pearl pigment will add just enough opalescence to wake up your face giving your look a perfect finish.
Those with fair skin should also take advantage of the fact that they can rock a pink-toned highlighter without it looking unnatural or ashy.
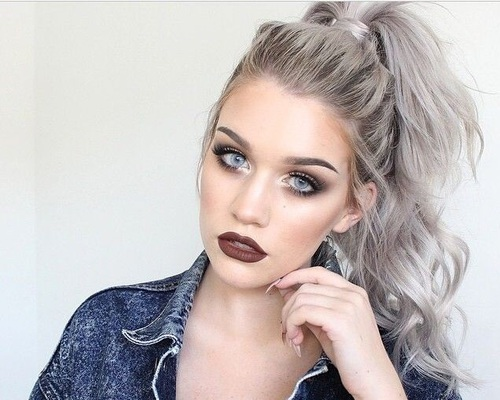
FAIR TO MEDIUM SKIN


For fair to medium tones there is probably the widest product range to choose from so those that fall into this category can afford to be less selective with their highlighters.
You really can’t go wrong with a vanilla highlight, this will accent the high points of your face without adding too much unnatural color like a bronze highlighter might.
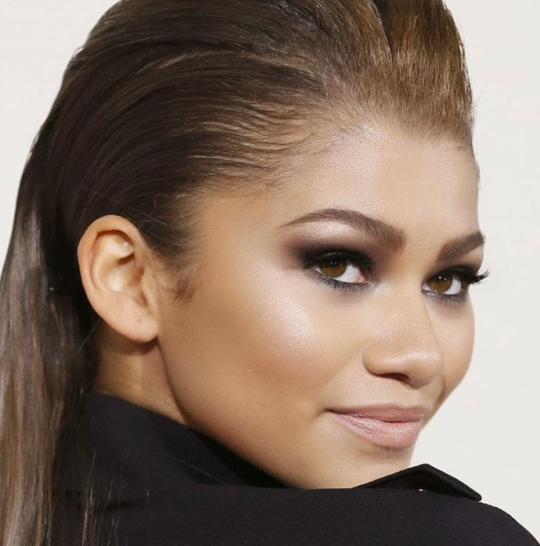
MEDIUM TO DARK SKIN


For those with warmer skin tones or that have a lot of yellow in their skin try not to use anything too pink. To keep your complexion from looking too frosty, warmer skin tones pair well with highlighters that have peach or gold undertones.

Gold luminizers should be your go-to. They will play well off without being too much or too little but instead just right. The hint of color is just enough to give you that sun-kissed glow!
DARK TO DEEP SKIN

The richer the tone of the skin is, the richer of a gold you can use. Avoid using anything lighter than the skin color since this will create a gray cast.

Rich variations of rose gold or bronze work wonders on darker complexions and keep your focus on warm hues.
A great trick is using loose pearl eyeshadow pigments in anything from pale gold to almost bronze depending on your skin color.
*As always I’m open to suggestions and opinions so if you need information about an specific topic don’t forget to tell us! *
If you found helpful/useful this post please like and reblog it so I know that you want me to publish more tips & tricks about makeup.
Last but not least, if you are a makeup lover or if you want to join our family follow LEARNTOMAKEUP to read our posts and stay updated ♥
Remember that I post new content on Saturdays and Sundays☺
Love you, Valeria.
114 notes
·
View notes
Photo
Welcome to my beauty blog LEARNTOMAKEUP ♥
Hello my angels, I’m Valeria and now is time for Sunday’s post.
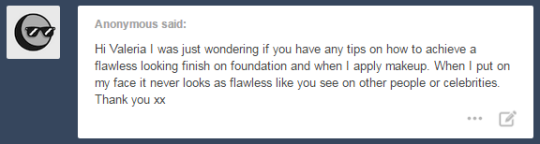
Yesterday I was checking out my messages and I saw I got this ask:
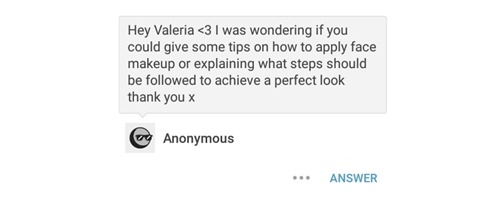
But if we read this question carefully, is it important to follow an order or steps to achieve a flawless look?
Do you guys remember that math propertie we learnt at school that is really accurate itself because it involves so many things we do on a daily basis? Changing the order of the factors does not change the product.
However, in this case we say goodbye to this statement because applying makeup should be done in order.
To be honest we all have been here, I used to apply foundation directly to my face without knowing and realizing all the damage this action made to my skin.
If you think you don’t follow a makeup application order routine and you would like to start one keep on reading!
I promise it’s not complicated at all, if you repeat it on a daily basis or even on weekends it will get easier.
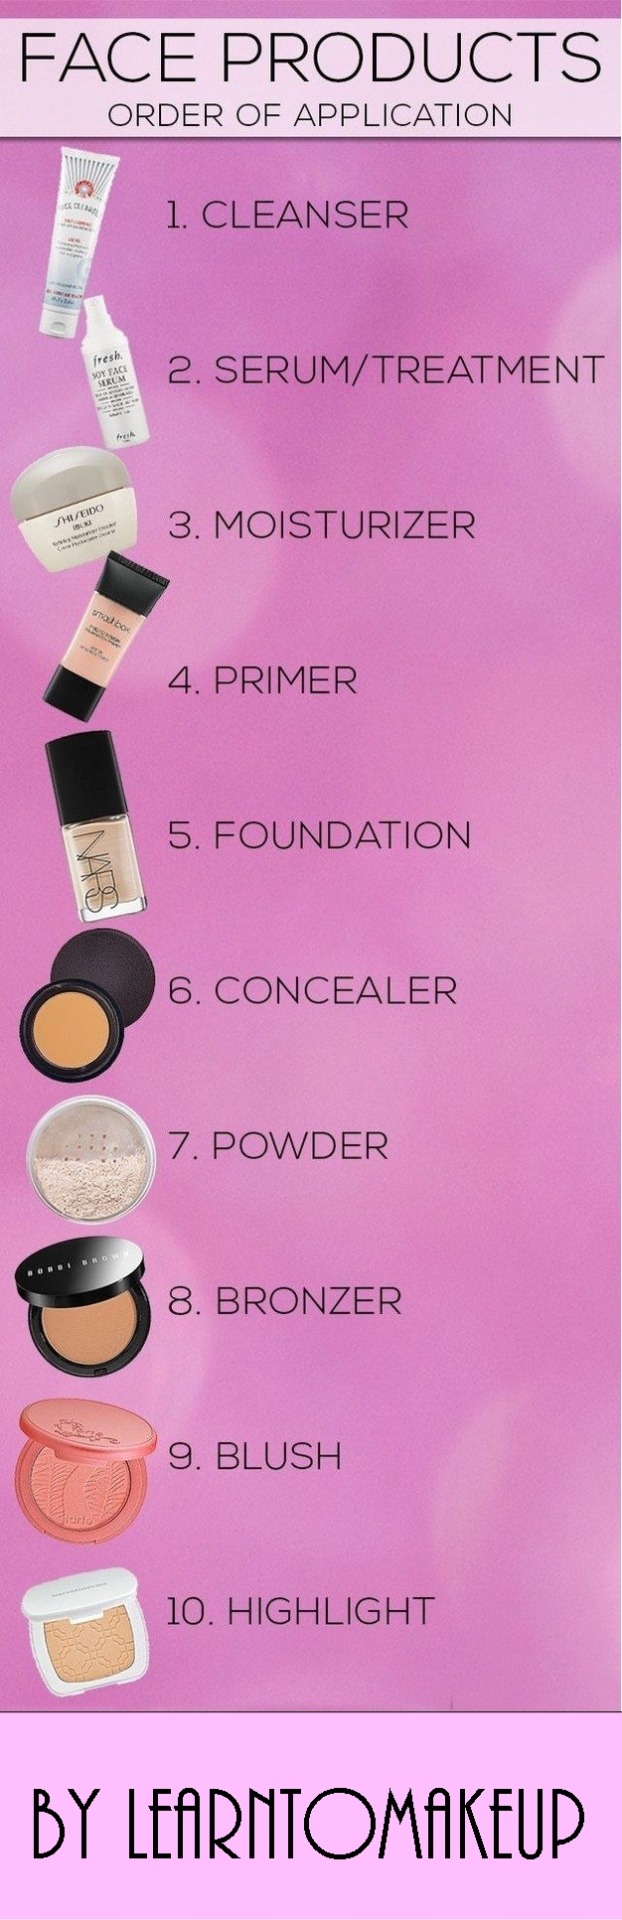
In this post you will learn WHAT MAKEUP ORDER APPLICATION YOU SHOULD FOLLOW ✿

Are there any pro’s when you apply your face makeup in order?
The answer is YES.
What are the pro’s?
✔ The application becomes easier, smoother and dewy.
✔ Your foundation will never look cakey again.
✔ Your skin and pores will not be damaged anymore.
✔ You will need less product and get a better result.
There are so many advantages you will notice if you start following a makeup order application.
Keep on mind that I’m not telling you that you need to follow all this steps or you need to use all this products every single day.
If you think you only need some foundation and powder that is completely fine, you can follow the steps until you think it’s enough coverage or enough products for you.
You can apply this routine on a daily basis or if you don’t feel like doing your makeup every single day then you can do it like I do, I only follow this routine on weekends or if I have party, meeting or a important event.
Let’s get started!
1. CLEANSER
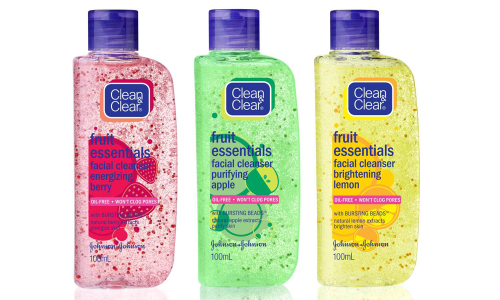
A cleanser is a facial care product that is used to remove make-up, dead skin cells, oil, dirt, and other types of pollutants from the skin of the face.
This helps to unclog pores and prevent skin conditions such as acne. A cleanser can be used as part of a skin care regimen together with a toner and moisturizer.
2. SERUM/TREATMENT
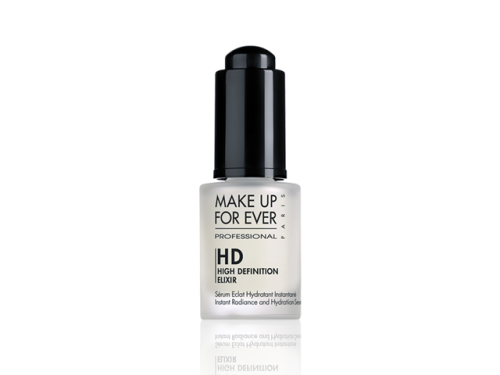
Serums offer beneficial ingredients or even more antioxidants than any other product in your routine.
A serum won’t replace your daytime or night-time moisturizer, but they will boost your anti-aging results and overall skin health when used morning and evening.
Start using products loaded with these types of impressive ingredients will help you to be on track for a more even complexion and firmer, healthier skin as you age.
3. MOISTURIZER
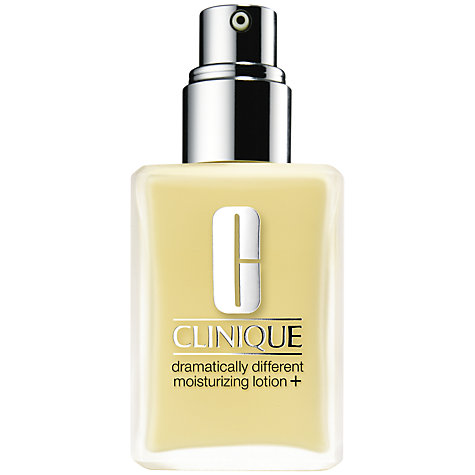
Moisturizer is a complex mixture of chemical agents specially designed to make the external layers of the skin softer and more pliable also it increases skin’s hydration.
Putting on moisturizer not only makes the surface look pretty, it seals and protects what is beneath it.
4. PRIMER
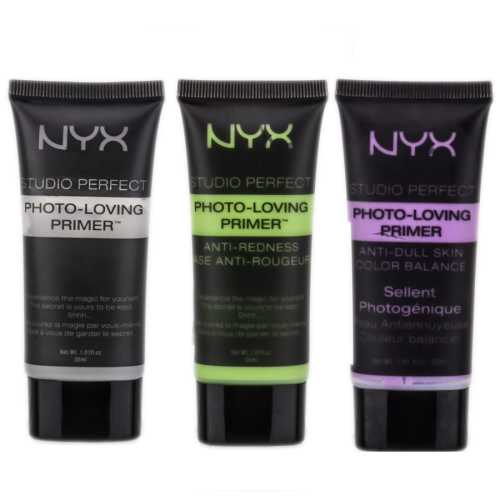
Yet, many people often skip this step because they believe they don’t really need it, are unsure of how to use it or don’t think it’s worth the investment.
However, using primer underneath your makeup will make everything last longer, whether that’s on your skin or in your cosmetics bag.
Makeup primer is a base for foundation or face makeup that allows it to go on smoother and last longer.
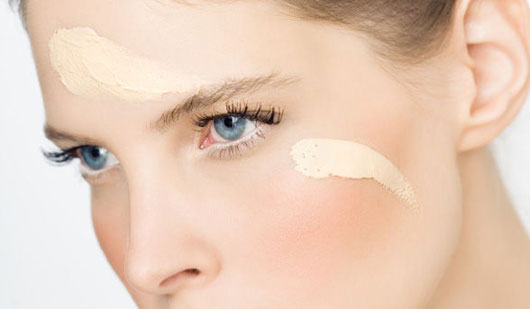
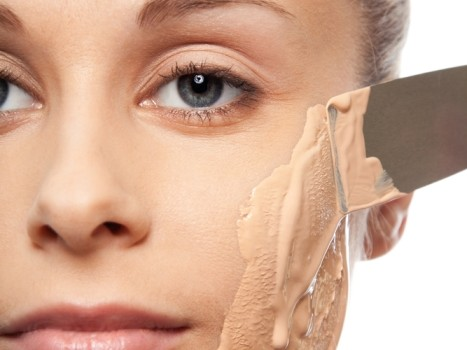
5. FOUNDATION
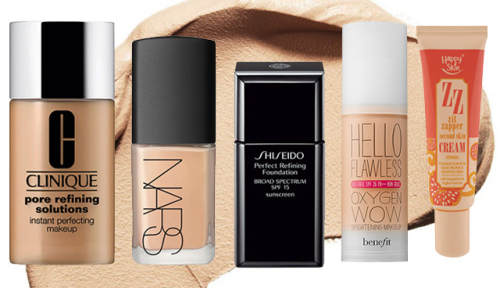
Foundation is an important facet of makeup it’s like the blank canvas on which the rest of your makeup is applied. It is the base for any makeup application.
Foundation will hide facial imperfections such as scars, depressions and pigmented areas of skin. Foundation is not merely about adding color to your skin but also as a protective covering from the drying sun, wind and air conditioning.
6. CONCEALER
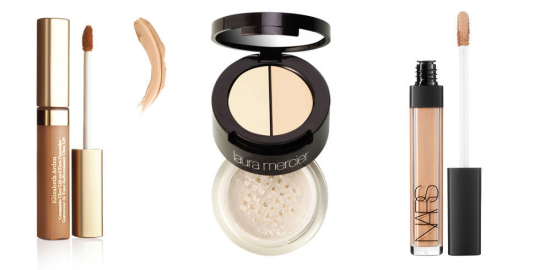
Concealer does much more than foundation. As the name suggests, it works at concealing or camouflaging facial imperfections. But what is of essence when using concealer is to apply it and blend it well. You may end up highlighting the trouble spots instead of concealing them. Remember that concealers are meant to conceal and not to draw attention. Concealers are of a denser composition than regular foundations and are generally available in sticks, tubes, pots, and creams.
7. POWDER
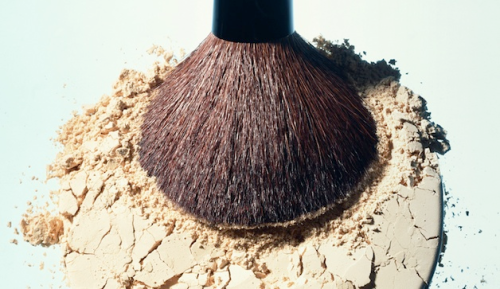
Powder is used to set the foundation and concealer for a lasting fresh look. Foundation and concealer are both moist and therefore have no holding power without a bit of powder to set them in place.
Not only does the powder set the make-up, it also reduces excess shine on the skin. When light is attracted to shining skin and when light shines on an area it illuminates any flaws like large pores, uneven skin, wrinkles and creases.
One of things I did learn on my makeup school was that once you apply powder never go back to foundation or it will look cakey. Make sure you applied correctly your foundation and then set it with powder.
8. BRONZER
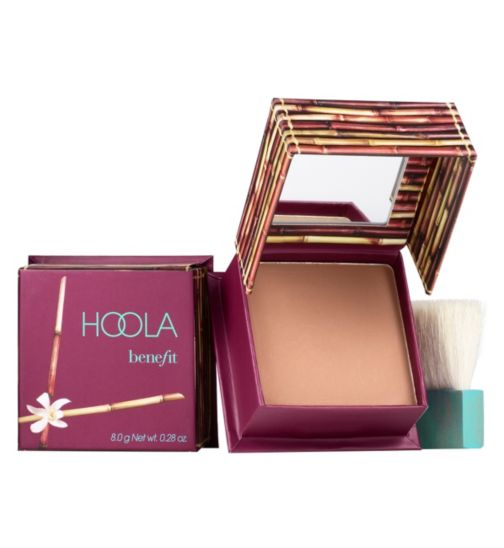
Bronzer is used to imitate a natural suntan. It is considered a natural look and is often used for everyday wear. It highlights the cheekbones and contours the face.
Bronzer is an easy way to enhance color and provide shimmer to one’s skin tone. As the name implies, bronzer is available on a metallic palette ranging from light gold to dark brass.
Use bronzer to highlight the cheekbones. Apply it to the forehead, nose, and chin as well.
9. BLUSH
Blush is used to imitate the natural blushing of the skin. It changes the face’s depth and draws attention to the cheekbones. It can be used for a more made-up look. Blush is available in a variety of colors, including red, pink, peach, and tan. There are shimmer and matte varieties.
When applied together, blush and bronzer create a stunning and dynamic look. Blush and bronzer are common types of makeup that can be used skillfully to highlight natural beauty.
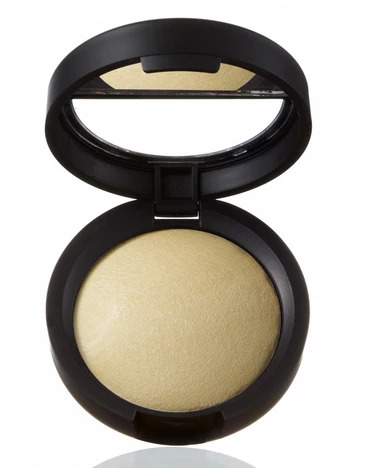
10. HIGHLIGHTER

Highlighter is a product that can completely change your beauty look. When you’re choosing a highlighter you have to think about your skin tone; if you have very sallow skin, pink toned highlighters are going to stick out, but if you have very pale skin pink tones are perfect.
The goal when applying highlighter is to get a reflective dewy look that makes you look like you just moisturized your skin.
*As always I’m open to suggestions and opinions so if you need information about an specific topic don’t forget to tell us! *
If you found helpful/useful this post please like and reblog it so I know that you want me to publish more tips & tricks about makeup.
Last but not least, if you are a makeup lover or if you want to join our family follow LEARNTOMAKEUP to read our posts and stay updated ♥
Remember that I post new content on Saturdays and Sundays☺
Love you, Valeria.
702 notes
·
View notes
Photo

Good saturday my angels! I’m Valeria and welcome to my blog LEARNTOMAKEUP ♥
DIY TIME☺I will post another DIY since you guys liked the last one.
This time is HOW TO WHITEN YOUR TEETH NATURALLY IN 2 MINUTES A DAY.
Whiten teeth treatments can be really expensive and hurtful as well. I can tell because I have been in one before and it gets annoying and tiring, usually people never finish the treatment because money or the pain that causes you.
In this post I will be sharing with you some DIY TIPS that you will help you to whiten your teeth naturally. Of course it will take longer but you will see the results within weeks.

Wondering how to naturally whiten your teeth? Yellowing teeth can be one of the first signs of aging.
Also if you had braces at some point of your life probably you want to know how to whiten your teeth too.
Let’s face it, it can be pretty unattractive, especially when paired with a beautiful red lipstick.
The good news is that teeth whitening at home is easy and can be achieved in very little time.
Just use these teeth whitening tips to put your best smile forward!
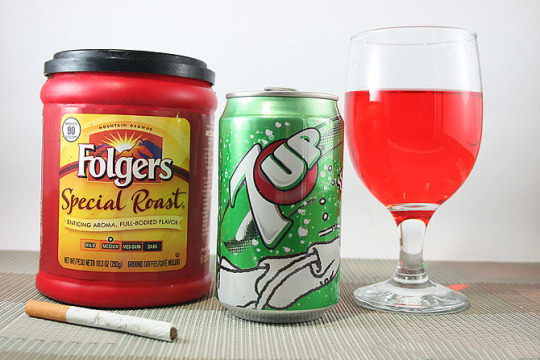
1. BRUSH AFTER DRINKING OR EATING
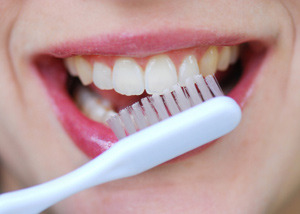
Brushing right after eating or drinking is the best way to whiten teeth and prevent staining. Most foods do not cause staining but if you’re a coffee lover or a smoker, you can pretty much expect having discolored teeth. If this is the case, then visit your dentist every three months to have your teeth cleaned.
2. BAKING SODA & HDROGEN PEROXIDE SOLUTION
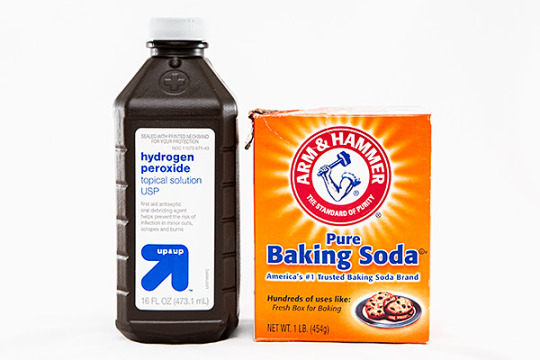
Brush your teeth with a hydrogen peroxide and baking soda paste twice a week.
What do I need to do?
• Pour 2 teaspoons of hydrogen peroxide into 3 teaspoons of baking soda. Mix these together until a paste forms. The paste should be similar in thickness to toothpaste.
• Add a tiny bit of mint toothpaste to your homemade paste to give it a fresh flavor.
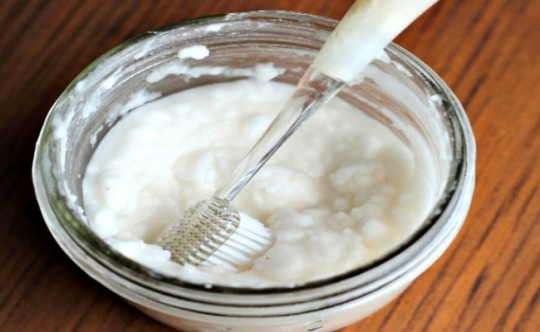
• Dollop the paste mixture onto your toothbrush. Brush the paste onto your teeth in small, circular motions.
• Once all teeth are covered, let the mixture sit on your teeth for 2 minutes.
• Rinse the solution off of your teeth by swishing with water from the bathroom sink.
• Brush your teeth with toothpaste to rid your mouth of any remnants of the hydrogen peroxide mixture.
3. COCONUT OIL PULLING
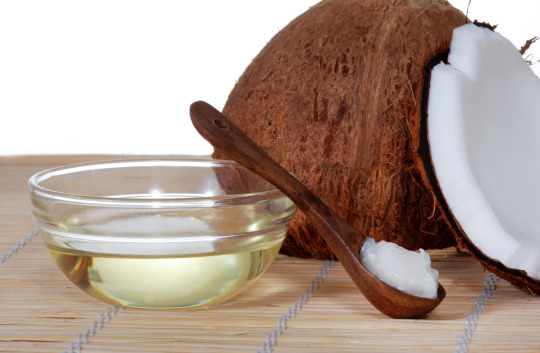
Some people have attested that their teeth have become whiter by applying coconut oil to their teeth after brushing.
Simply swish a spoonful of coconut oil in your mouth for 5 to 20 minutes. If you don’t feel like doing that then you can add a few drops to your tooth brush and brush your teeth.
Lastly, you can put some coconut oil to a corner of a clean wash cloth and rub it on your teeth.
4. APPLE CIDER VINEGAR

Apple cider vinegar is a natural whitening agent for dark spots on your body, and that includes your teeth. The vinegar helps remove stains, whiten teeth, and kill bacteria in your mouth and gums. Gargle with apple cider vinegar in the morning, then brush as usual after you gargle.
5. STRAWBERRIES
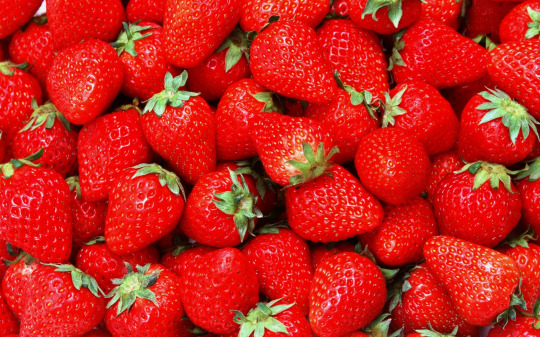
Ever wondered how Catherine Zeta Jones kept her teeth sparkling white? She used strawberries! She simply mashed up about four or five strawberries and rubbed this yummy mixture all over her teeth. Tyra Banks is also trying out this delicious technique.
Some people swear by this technique as truly effective. If two super iconic beauties are to be believed on this one, it must be worth a try. Remember to rinse well afterwards.
DON’T FORGET THAT
While you are doing try to smoke less. Try to avoid tannin-containing beverages but if you do drink them, use a straw to maintain your treatment and not ruint it.
*As always I’m open to suggestions and opinions so if you need information about an specific topic don’t forget to tell us! *
If you guys enjoyed this DIY and you want me to post more DIY’s please like and reblog it so I know that you want me to publish more tips & tricks about makeup.
Last but not least, if you are a makeup lover or if you want to join our family follow LEARNTOMAKEUP to read our posts and stay updated.
Thanks for reading my posts and love you all, Valeria.
186 notes
·
View notes
Photo
Hello my beauty lovers! ♥
This is my blog LEARNTOMAKEUP and I’m Valeria.
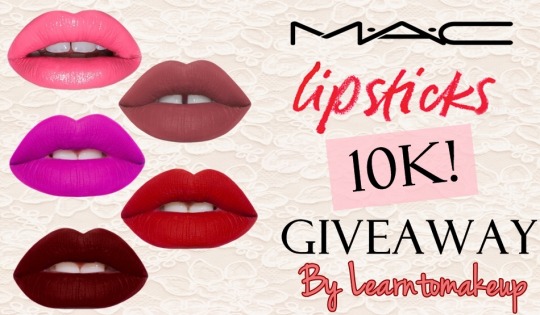
I’m really excited to announce that this is our first giveaway ever! I’m so happy we are 10k beauty lovers now yay!
I think it’s a good time for me to show you all my appreciation so I will be giving away 5 MAC lipsticks.
All this products are new and completely legit.
I bought this products with my own money and I would never risk myself or anyone else to put fake beauty products.
I know it might sound obvious but we always need to remember we need to be careful what products we put in our faces.
PRIZES:
In this part I will tell you the prizes and a brief description of each lipstick so you can choose which one you want!
The lipsticks in this giveaway will be totally different (in formulas and shades as well)
— SPIRIT MAC LIPSTICK
MAC’s Spirit lipstick has a satin formula.
A satin formula means that it provides high color payoff and a semi-matte finish.
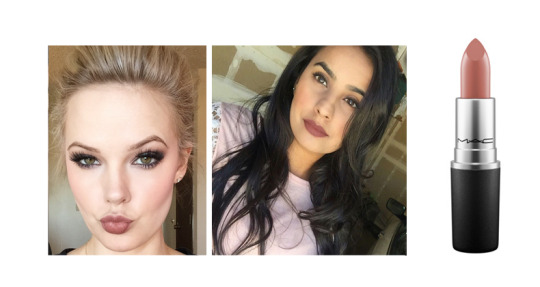
It’s a nice color with pinkish-brown undertone.
This lipstick is a great nude color for everyday wear and it’s also very handy if you want dramatic eyes and a soft lips color.
Gives a subtle healthy pink color rather than a pale nude look.
— RUSSIAN RED MAC LIPSTICK
MAC’S Russian Red lipstick is a matte true red color.
Russian Red is absolutely beautiful on nearly every skin out there and it photographs brilliantly!
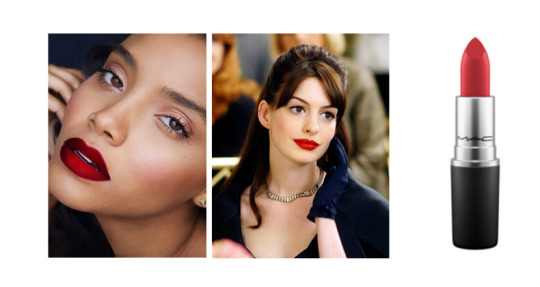
Russian red has deep blue undertones which means that is great for those people that love a perfect smile.
Red lipsticks with a blue undertones make your teeth instantly look whiter.
It has a matte finish but the texture of this lipstick is very creamy and moisturizing and the pigmentation.
— MEDIA MAC LIPSTICK
MAC’s Media is satin deep dark red wine lipstick.
It’s really intese color but if you like darker shades this is the perfect lipstick for this winter season!
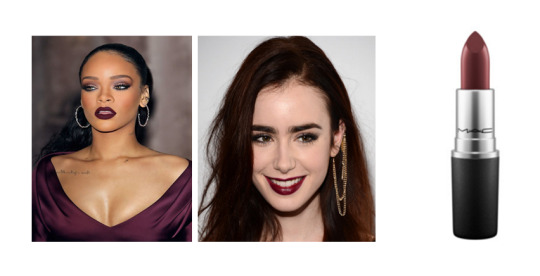
Media is highly pigmented! One glide is enough for the color to show. It’s not drying at all and the texture it’s amazing.
The best thing about this lipstick is that it has so much depth and works for all skin tones.
Media is an awesome color for any occasion you can use it at morning or night and it will look flawless.
— HEROINE MAC LIPSTICK
MAC’s Heroine is matte purple lipstick.
The Heroine lipstick has a bright purple shade with slight blue undertones and has great pigmentation.
Even though it is a matte lipstick, it is really creamy and goes opaque on the lips with just two swipes and it will usually stay on for 4 to 5 hours.
Overall, the MAC Heroine Lipstick is one those colors that is best for fall.
It can give you that edgy or classic look based on how you pair it up with the rest of your makeup and outfit.
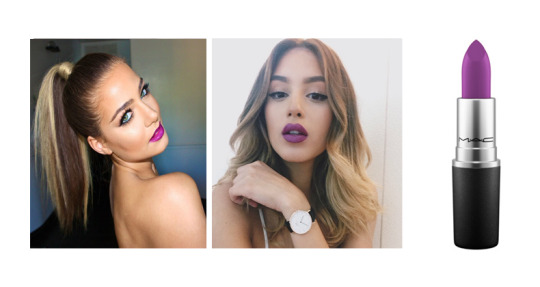
— CANDY YUM-YUM MAC LIPSTICK
MAC’s Candy Yum-Yum is matte neon bright pink lipstick.
I totally recommend it for anyone looking for a fun and girly pink lipstick. It’s quite loud so you definitely need to put up a brave face.

It applies opaquely and it is creamy enough not to tug on lips or feel like a really dry matte.
Glides smoothly and actually feels emollient. It’s very comfortable matte to wear as well.
This shade tends to stain on lips and it usually wears for six to eight hours.
HOW TO ENTER TO THE GIVEAWAY
• Must be following me
• Add me on snapchat (my user is learntomakeup)
• Reblog this post
• After you did steps above send me a message here incluing:
— YOUR SNAPCHAT USERNAME
— UP TO 3 LIPSTICK SHADES YOU WANT TO WIN
— YOUR COUNTRY
That’s all you have to do to win one of the 5 MAC LIPSTICKS I will be giving away!
RULES
• Only reblogs count as entries (likes are bookmarks)
• You can reblog this as many times as you’d like
• Please don’t unfollow once the giveaway is over!
FAQ:
Is the giveaway international?
Yes. It doesn’t matter where you live. I will ship worldwide.
Do multiple reblogs actually increase my chances? Yes. It would help me tremendously if you could keep track of the number of times you reblog it and either tag it with that number or message me. Don’t make up a random number because I will check!
How will you choose winners?
Winners will be randomly selected (please don’t unfollow once the giveaway is over!)
How will you contact winners?
I will message them via tumblr letting them know they won and ask them for the information needed.
How will you contact winners?
When does it ends?
The giveaway ends December 14, 2015. Good luck!
Loads of love, Valeria.
608 notes
·
View notes
Photo

Good Sunday my beauty lovers ☺
Welcome my beauty blog LEARNTOMAKEUP ♥
As you might know my name is Valeria and I’m a makeup artist.
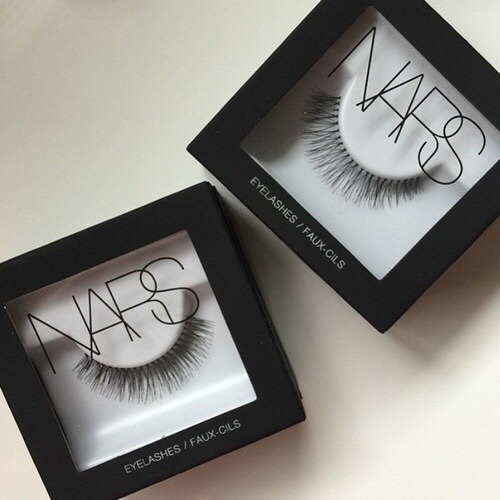
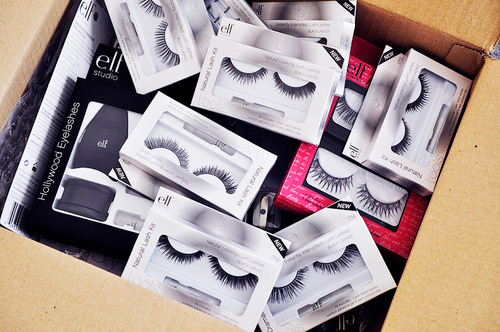
Today we will be talking ABOUT FAKE LASHES!

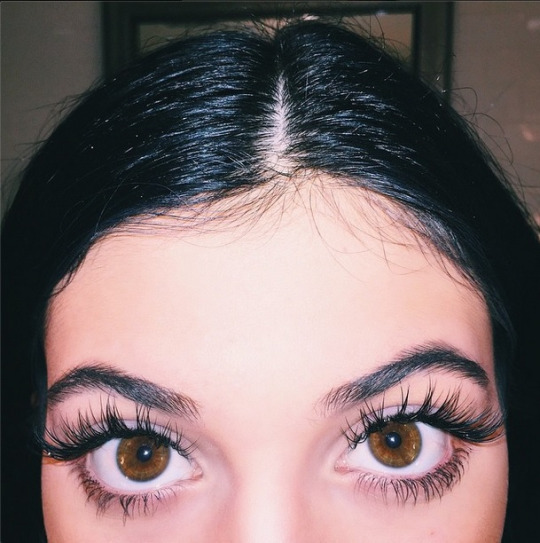
There are dozens of fabulous mascaras that can maximize your natural lashes, but no mascara can compete with the results you can get from a good pair of false eyelashes.
If you've been coveting the extraordinary fullness and length of celebrities lashes, then fake lashes are for you. Celebrities aren't relying on mascara alone, and you don't have to either!


Many people feel intimidated by false eyelashes, but worry no more.
In this post you will learn:
— TYPES OF FAKE LASHES
— RECOMMENEDED LASHES AND GLUES
— HOW TO APPLY THEM AND TAKE OFF
— HOW LONG DO THEY LAST
— HOW TO RE-USE THEM
Basically everything about fake lashes that will make the application and whole process much easier.
So let’s begin right now!
• TYPES OF FAKE LASHES
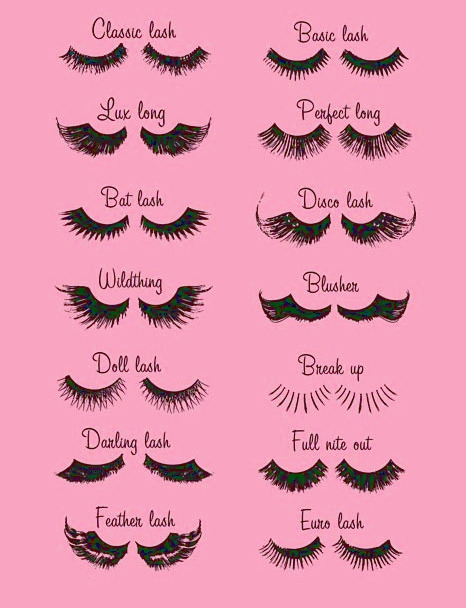
When it comes to cosmetics, expensive isn't necessarily better, and false lashes are no exception! There are excellent options available at the drugstore and online for a fraction of the price of department store lashes. But no matter where you buy your lashes, there are a few things to keep in mind.
First, we recommend human hair lashes over lashes made of synthetic hair.
Human hair lashes blend easily with the natural lashline and they take mascara much better than synthetic lashes.
Next, if you're buying a full set of lashes, pay attention to the width of the lash strip which is the band that the individual lashes are attached to.
A thin or "invisible" lash strip is preferred over a thick or opaque lash strip, as the latter tends to be more obvious. Also, the thinner the lash strip, the more lightweight and comfortable the falsies will be.
Shape matters! Falsies come in all different shapes and lengths. Choose those with a shape and length similar to your natural eye shape and with the look you desire.

If in doubt, choose a medium length set of lashes with a rounded shape. Lashes that have the most length in the middle of the eyelash strip create a universally flattering shape.
• WHAT LASHES SHOULD I BUY?
Here is a top 2 of the best rated lashes in the makeup industry
— Ardell (sold in most major drugstores) — Red Cherry
• WHAT GLUE SHOULD I USE?
A good glue makes a huge difference. I mean, you aren't going to be very happy with your false lash experience if they keep falling off, right?
The best glue for makeup artists is duo eyelash adhesive.
It comes in two colors, the classic dark one and the light one.
You'll definitely want to follow the instructions and let the glue set on the false lashes for about 30 seconds before attaching the lash to your lid.
• HOW TO APPLY FALSE LASHES

You will need a lash curler, lash glue, mascara, tweezers and of course your fake lashes.

Step 1: Remove the lashes from the container by pushing down on the center of the lash strip with your thumb.
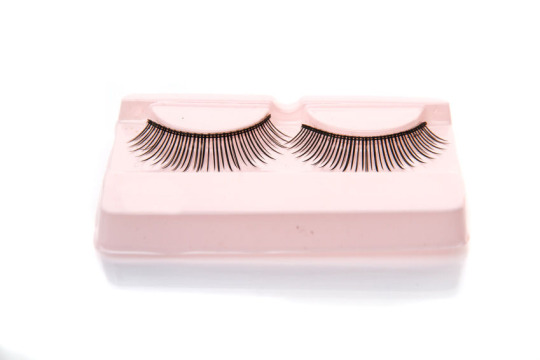
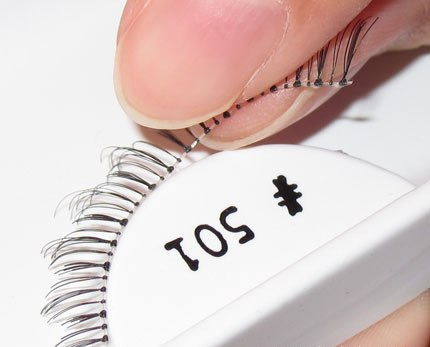
Do not pull from either end of the strip because you don't want to stretch, rip, or tear the delicate lash strip. If the lashes are difficult to remove by pushing down in the center with your thumb, use tweezers. (Keep the container, just in case you want to save your falsies and wear them again.)
Step 2: Try on your lashes before you apply eye makeup.
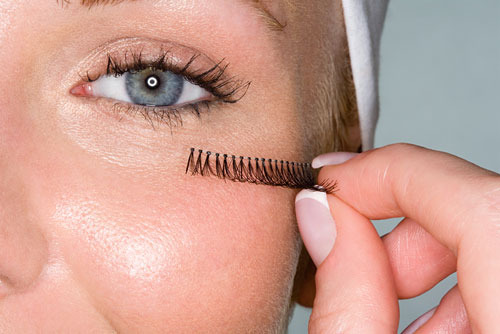
You won't have to hold them there with your fingers because new lashes generally have a small amount of adhesive left on the lash band.
Step 3: Trim the lashes. Almost everyone needs to trim strip lashes to get them to fit properly.

Trim the lash strip so that it ends before your natural lashline thins out at the inner corner of your eye. If the lash strip doesn't fit your eye shape, you may need to cut the lashes into two parts for a comfortable fit.
It's best to trim the lash strip from the OUTSIDE. Lash strips typically have smaller lashes at the inner corners to mimic natural lash growth.
Step 4: Curl your lashes before you put the fake ones.
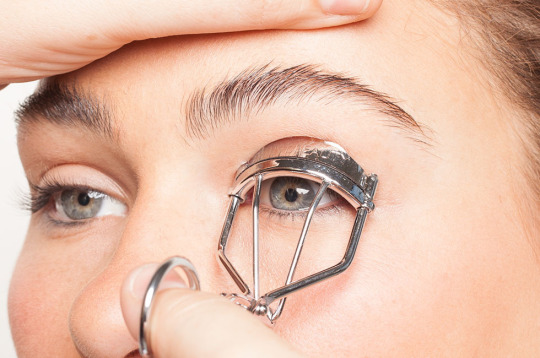
Just a small amount of gentle pressure and warmth will also curl your lashes. Hold for ten seconds, then repeat as needed. Curling your lashes will make the real and fake ones join and look better than ever.
Step 5: Put the glue in your lashes.
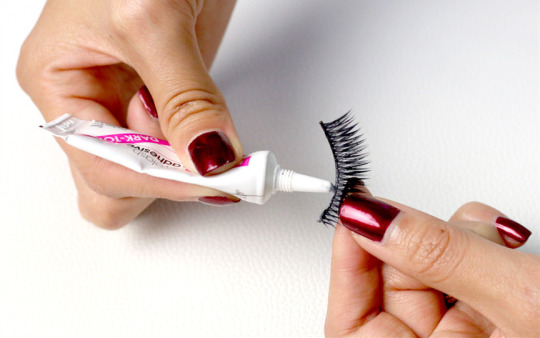
First, squeeze a drop of duo eyelash adhesive on the back of your hand and lightly dab glue to the lash. Wait about 15 seconds for the glue to get tacky, then lay the strip on the outer edge of your eye.
Step 6: Apply the lash strip as closely to the lashline as possible.
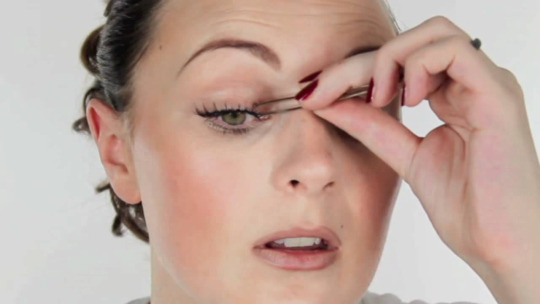
Using your tweezers stick your fake lashes on. Don't apply the lash strip to your eyelashes because you don't want to risk getting glue in your eye. Also, it's messy to remove the glue from your real lashes, and you risk pulling out your real lashes if the get stuck in the glue.
Step 7: Using mascara is a must!
You must apply a light coat of mascara to blend your natural lashes with the falsies.
• HOW TO REMOVE FALSE LASHES
You will need cotton pads and an oil-free makeup remover.

Step 1: Remove your false lashes by gently pulling out from the center of the lash and wiggling until the lash comes off.
Step 2: Use an oil-free eye makeup remover and a cotton pad to remove the eyeliner and glue.
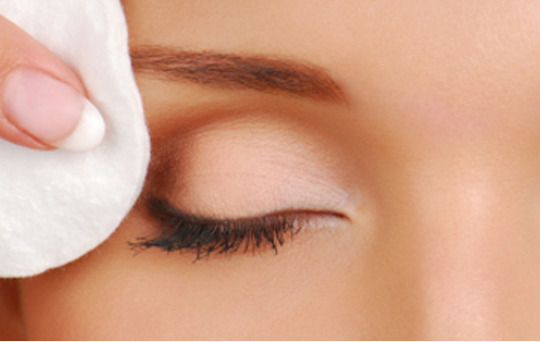
You may need more than one cotton pad to remove the remaining residue of glue.
Step 3: Don't wet the false lash strip.
To remove the glue from the lash strip, gently pull the glue away from the band.
• STORING YOUR LASHES
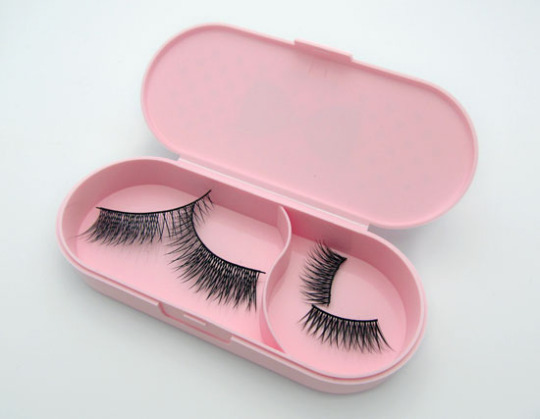
You might not know this but yes! False eyelashes can be reusable. Peel any remaining pieces of glue off the lash and use eye makeup remover and a Q-tip to clean it more thoroughly. Store your lashes in a clean plastic container and they’ll be ready for your next big night out!
Some of this lashes can last 15-20 uses.
• WHAT IF I HAVE SENSITIVE EYES?
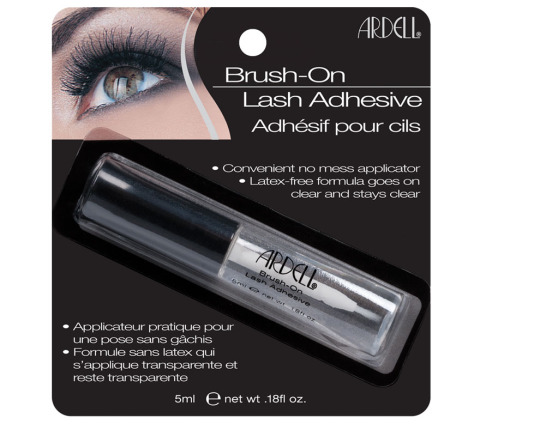
If you have issues with lash adhesive, try a latex-free adhesive. You can buy this Ardell latex-free glue. Depending on your sensitivity, you may have to try a few glues to find one that doesn't aggravate your particular sensitivity issue.
• HOW LONG DO LASHES LAST?
They will usually only last you through the day. Depending on how much glue you used they should last through the end of the night.
*As always I’m open to suggestions and opinions so if you need information about an specific topic don’t forget to tell us! *
If you found helpful/useful this post please like and reblog it so I know that you want me to publish more tips & tricks about makeup.
Last but not least, if you are a makeup lover or if you want to join our family follow LEARNTOMAKEUP to read our posts and stay updated ♥
Remember that I post new content on Saturdays and Sundays☺
See you soon my angels love you all , Valeria.
372 notes
·
View notes
Photo
Hello there my angels, this is another Saturday post!
This is my blog LEARNTOMAKEUP and I’m Valeria ♥
As you might know for some of us makeup is our work for others makeup is a hobbie but at the end of the day makeup is an art that let us all to express our feelings, emotions and moods.
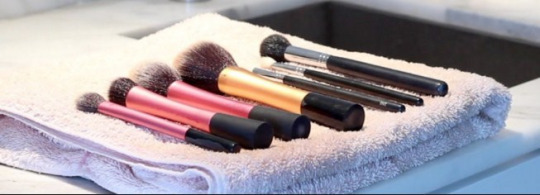
Brushes are a must in any makeup routine.
Weeks ago I explained to you the types of brushes and the use of every essential brush. If you didn’t read the post you can find it here and use it as your guide.
However, it’s so important being aware of the cons that makeup can bring to our lives if we are not self-conscious or careful about the tools we use.
In this post I will tell you why is important to stay clean and keep our makeup tools sanitization routine because if we don’t this will lead to many consequences.
Today you will learn and get to know:
HOW TO CLEAN YOUR BRUSHES
WHAT PRODUCTS YOU NEED TO CLEAN THEM
HOW TO KEEP THE SHAPE OF YOUR BRUSHES
CHEAP BUT WORTHY PRODUCTS FOR YOUR BRUSHES
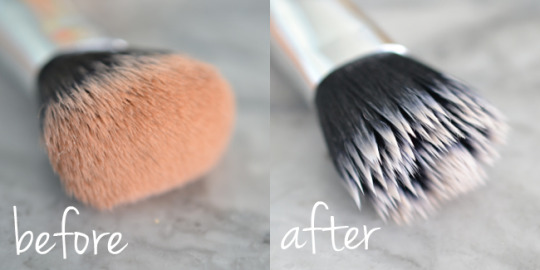
Before explaining the steps you might be wondering but why should I clean my brushes? Well …
Whenever you use your brushes bacteria stays into the hairs. All that bacteria can cause break outs and when you have build up on your foundation it can cause your brushes to be rough and scratchy which will irritate the skin.
Not only bacteria lives in the brush itself but also dirt, oils, old make-up, debris, dead skin cells and such.
I understand that is a big commitment, but once you get into a routine it will be easy as pie.
If you’re one who never cleans your brushes think about all the old make-up and bacteria that builds up in your brush and then you go rubbing it on your face. It’s not healthy for your skin at all.
1. RECOGNIZE YOUR BRUSHES
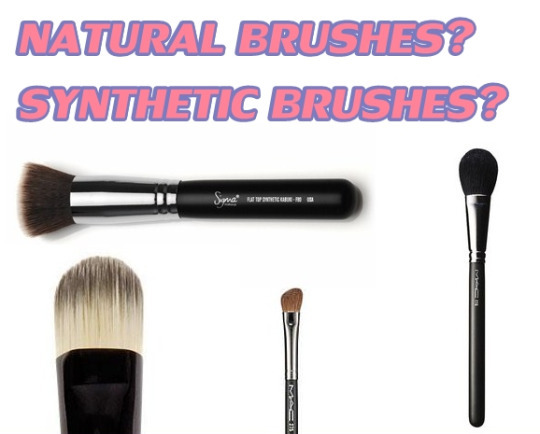
But before you start, take your tools into consideration.
Just like different hair textures have different needs, so do brushes. Fine-haired ones need to be treated with the utmost care as they’re cleaned to avoid breakage, while coarse-bristled tools need to be conditioned so they don’t get rough.
Take some extra time washing your synthetic styles, especially if you use them for applying cream products like foundation. Your synthetic brushes aren’t porous and don’t absorb any oils, you have to be careful not to let them get coated and weighed down.
When you’re actually washing your tool, let its shape guide you. Domed or round brushes can be swirled, while flatter shapes should be dragged from side to side.
If you work against the shape of the brush, you can end up distorting the hair pattern or damaging the hairs.
While you might think that isn’t such a big deal, mussed or broken bristles means a messy application. Even when you’re creating highly precise looks like a cat eye, you don’t want your tool working against you.
2. BRUSH CLEANING OPTIONS
You have two options when cleaning your brushes:
• A quick-dry method
• A wet wash method
— What a quick-dry brush cleaning method means?
It means a faster clean, this method can be used by makeup artists who have to work all day long and they don’t have time to let brushes dry. If you are not a makeup artist but if you have a party or meeting and your friends come to your house and use your tools or if you give them a makeover you need to do this.
Not having time it’s not an excuse.
— What product do I need to clean my brushes?
You will need an alcohol-based product or cleanser.
As a makeup artist, the cheapest and best product in the market that we use to clean our brushes for our clients is RUBBING ALCOHOL.
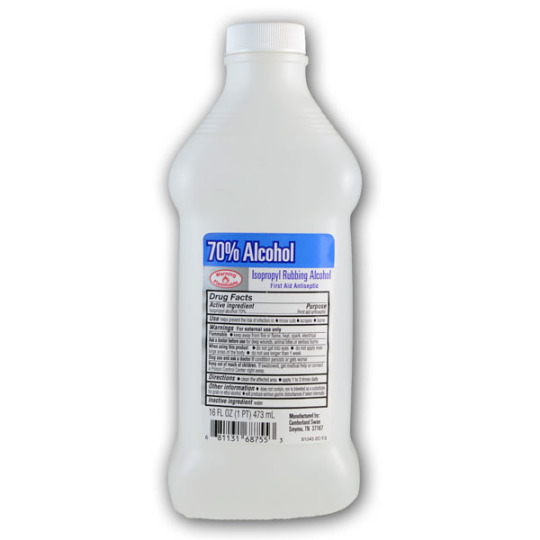
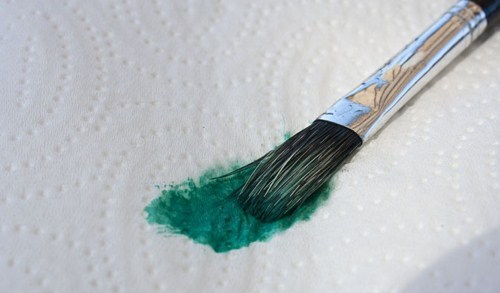
It will sanitize and cleanse your brush but dry quickly. Spritz it down so that it is damp, then wipe the bristles against a clean, soft towel that you don’t mind staining.
Repeat your spraying and wiping process until you see no residue on the towel. You can use a paper towel if you don’t have a towel.
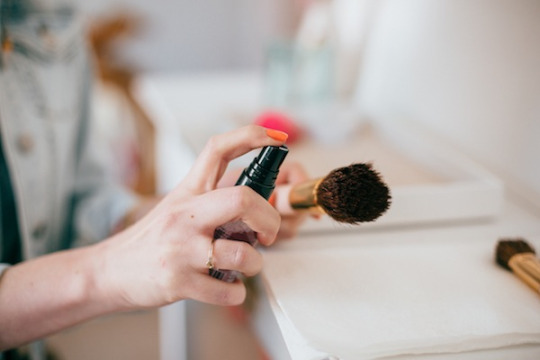
If you are scared of trying out rubbing alcohol don’t be! Makeup artist use it and we do it because we know it will not harm or damage our clients faces or even our own brushes. I’m just trying to save your pocket some money and sharing my beauty tips.
Fun fact: Rubbing alchohol kills 99% bacteria.
If still you are not sure about it, no worries because it’s up to you, if you want to buy a cleanser that’s okay it’s your choice!
— What a wet wash cleaning method means?
It means giving your brushes a deeper cleaning routine.
Professional makeup artists, you don’t get to be lazy here.
If you are starting a makeup artist career or if you are a makeup artist you this method must be applied twice a week.
Wet washing once a week isn’t realistic for most people, so if you can use a spray cleanser every one to two weeks and do a full wet wash twice a month, that should be fine.
But if you are oily and prone to breakouts, wash more consistently.
— What products do I need to clean my brushes?
This is the deepest brush cleanse ever so we have several but quick and easy steps!
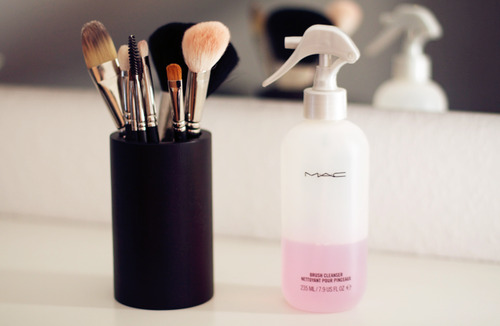
For a deeper clean, first you need a good brush cleanser.
Personally, I love MAC’s brush cleanser.
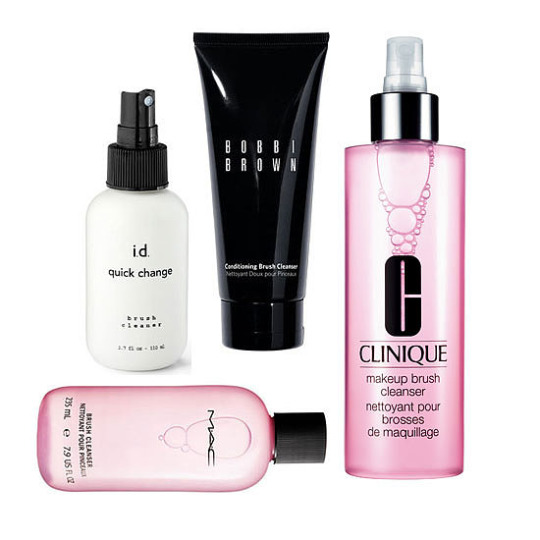
It’s not the cheapest but I promise it will last you forever. This cleanser is very gentle on bristles.
Overall, brush cleansers clean, disinfect and condition brush fibres so that brushes will last longer.
Apply the cleanser directly to the brush bristles or on a towel. Then, run the brush along a towel until it no longer distributes any makeup remnants.
After that step now it comes the second step.
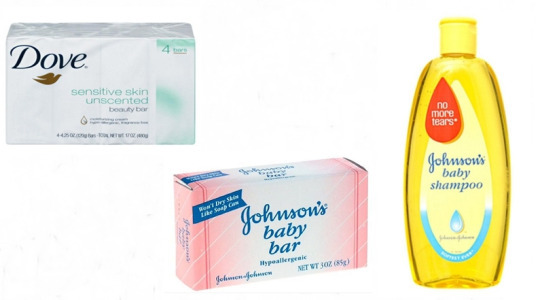
Now you can use unscented bar, baby soap or baby shampoo to keep removing bacteria from your brushes. A tiny amount of any of those products mentioned above in warm water will break up any oil that’s accumulated.
As I told you before you need a towel or you can try out this little not expensive at all brush eggs.
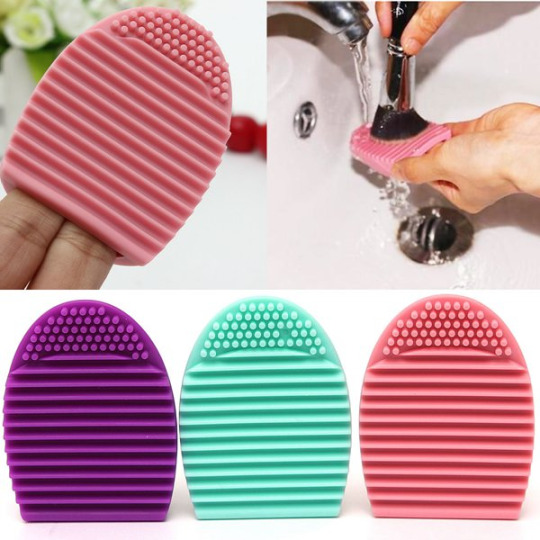
I bought 5 of this cute brush eggs for $1 each.
No matter what, use something that has texture because a textured surface grips into the brush hairs which helps to pull out the oils and pigments.
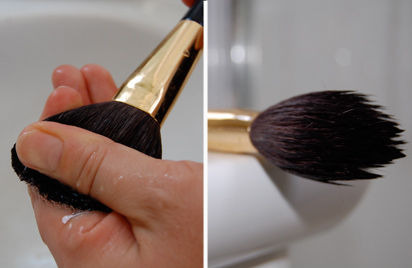
For superdelicate or stained brushes, just softly swirl them in the palm of your hand until they’re clean.
Do not submerge your brush and do not run water into the ferrule ( the metal between the handle and the bristles)
Doing this will also loosen the glue in the brushes. Be sure to work a small amount of the cleanser into the hairs. Wash thoroughly but gently.
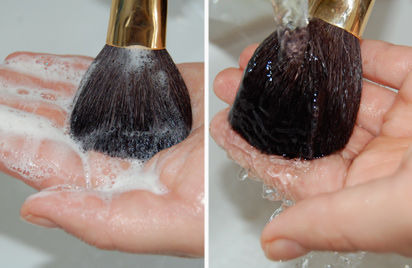
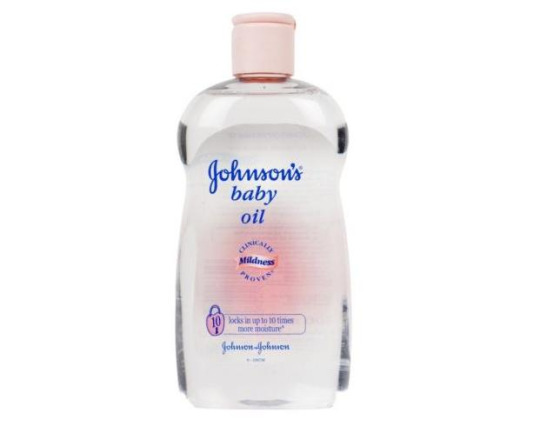
Finally, take some baby oil and keep cleaning the brush until it’s totally clean.
Trust me, you will be amazed from all the product that comes off the bristles, it’s insane.
Mostly just notice about how the outside of our brush looks but what many people don’t know is that inside the bristles is where the dirt and old products stick.
3. ALL ABOUT DRYING
A big part of cleaning your brushes is how you dry them.
Gently squeezing wet brushes in a paper towel to soak up extra moisture then reshaping the head with your hand.
You shouldn’t stand them up because this allows water to run into the ferrule which loosens the glue as well and you will damage your brushes irreparably.
So, if you want you can buy one of this brush holders, they cost less than $5 and it will save your life.
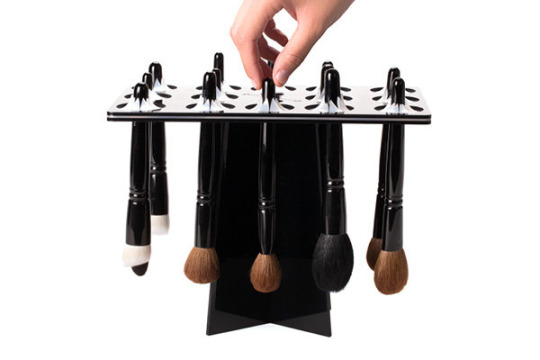
I love SIGMA but they sell brush drying shaping holders for almost $40 and let’s be honest … would you pay that much for a brush holder? If you want to find out an affordable option, figure it out below.
When it comes to preserving the shape of your brushes, it’s all about how you let it dry postwash. Even if it gets bent or splayed during washing, you can wet it down again to reset the hair pattern.
If you want to make sure to keep the shape of your brushes you can buy a plastic net, you can find it in a store or if you don’t have idea where to get it you can order it from internet as I did, they sell 20 pieces for less than $1.
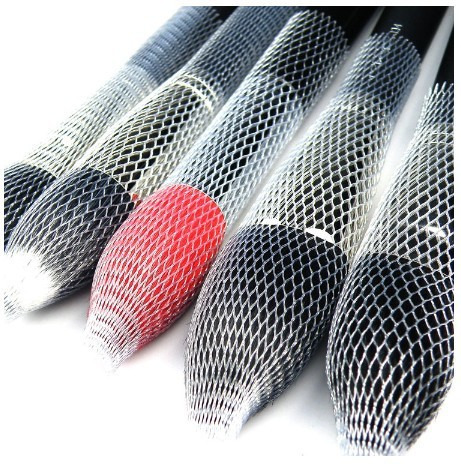
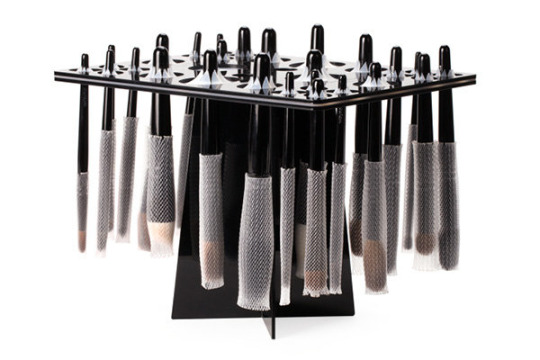
The best thing? You can use them over and over again, you don’t need to re-purchase!
If you don’t want to purchase any of those items the best way to can let your brushes dry is putting them in a towel this way.
Right now I feel like I’m sharing all my compulsive buyer tricks with you guys but it’s all good haha I love telling you about my such a bargain goodies.
To end up with this post, I know there are a lot of details but it’s for your health.
Cleaning your brushes can feel like a headache to you we get it, this can take a good chunk of time out of your day and you want to avoid it as much as possible.
The good news? You don’t have to clean your brushes every day. As long as your skin is clear and you aren’t dealing with any allergies or infections. You can lightly wiping the bristles on a towel in between uses, which will extend the amount of time you can go between washes.
I know this information will help you and I hope you guys can apply it in your routine.
*As always I’m open to suggestions and opinions so if you need information about an specific topic don’t forget to tell us! *
If you found helpful/useful this post please like and reblog it so I know that you want me to publish more tips & tricks about makeup.
Last but not least, if you are a makeup lover or if you want to join our family follow LEARNTOMAKEUP to read our posts and stay updated ♥
Remember that I post new content on Saturdays and Sundays☺
Once again, thank you my angels for all your support it makes me so happy, Valeria.
1K notes
·
View notes
Photo
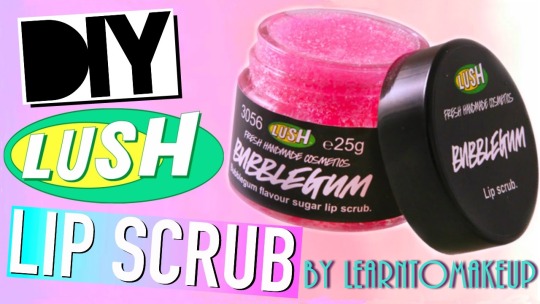
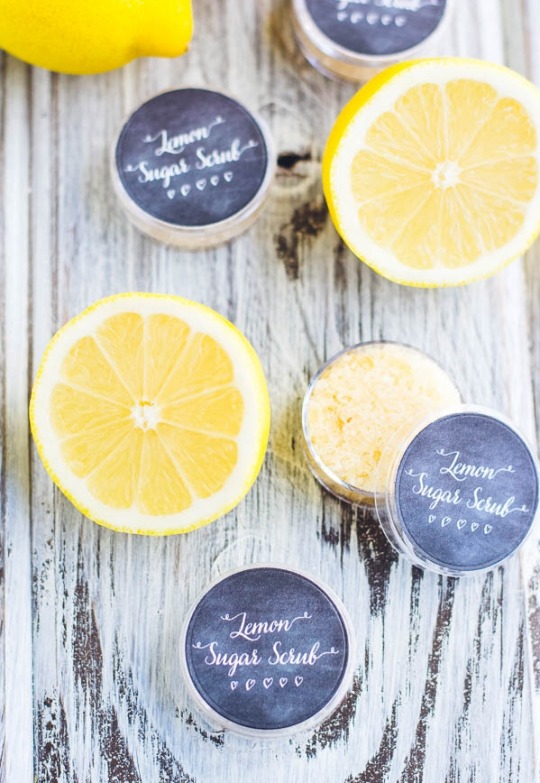
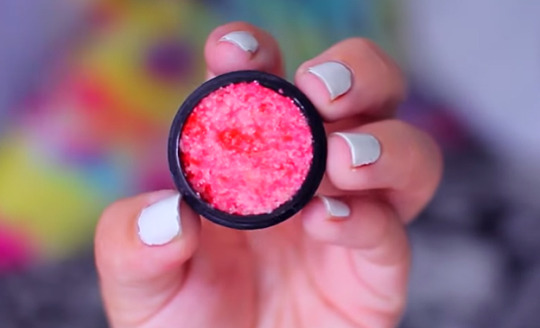
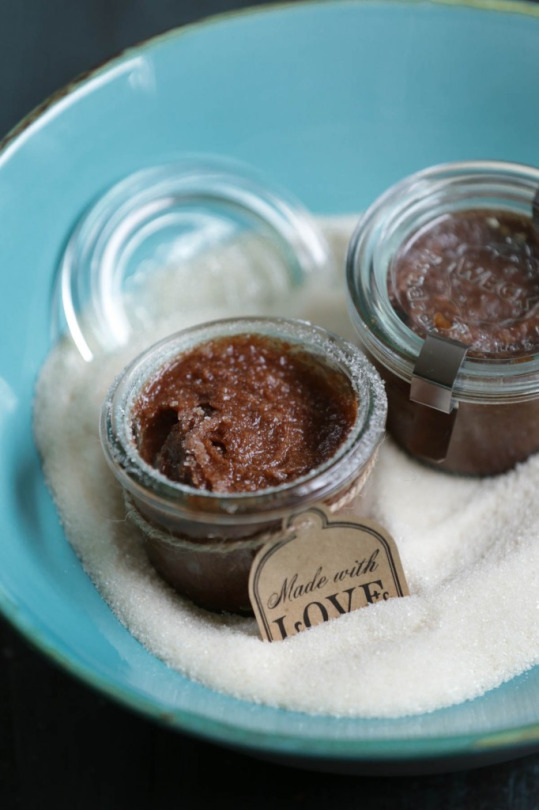
DIY DUPE FOR LUSH LIP SCRUBS ♡
Welcome to my blog LEARNTOMAKEUP!
I’m Valeria and I’m happy that it’s finally Sunday☺
This time I’m posting a new DIY and it’s HOW TO MAKE YOUR OWN LIP SCRUB!
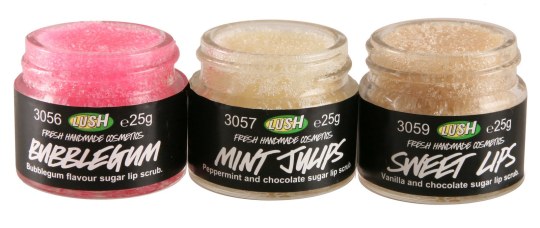
Have you ever heard about this popular brand LUSH? Well they sell handmade cosmetics like scrubs, soaps, creams and such. They have nice things but let’s be honest we all not have tons of money to spend on that we wish we had!
Maybe it’s not the money but not all the stores have international shipping and we can’t have those amazing scrubs.
Well here is a DIY on how to make your lip scrub and it’s easier than ever. You need a few ingredients that you can find in your own place.
I will show you 5 types of lips scrubs you can start doing! You can add them your own color, flavor and smell too.
You can keep the scrub up to 5 minutes in your lips and to see the results you must do it 2-3 days a week minimum.
1. LEMON LIP SCRUB
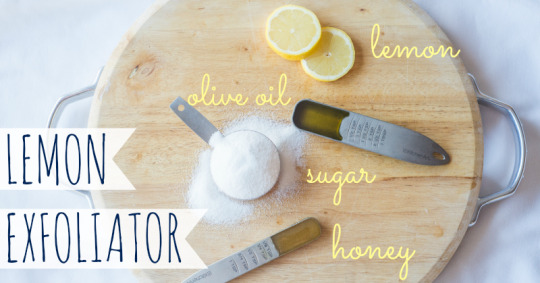
This DIY lip scrub helps to exfoliate dry lips and bring moisture back in. This easy homemade lemon lip scrub smells amazing and helps lips feel silky smooth.
This lip scrub is made with honey, jojoba oil, sugar and lemon essential oil. I recently started using jojoba oil in my skin and hair beauty routine and it’s made an amazing difference. Jojoba oil is one of the best oils out there. The fatty acids in the oil help lock in moisture and revitalize dry skin and hair.
The rough texture of the sugar will exfoliate your lips while the jojoba oil and honey help bring back moisture. The lemon essential oil provides a refreshing scent, one that I use in the majority of my scrubs and hair masks.
DIY LEMON LIP SCRUB PRO’S:
Exfoliates and moisturizes dry lips with this refreshing lemon lip scrub.
INGREDIENTS:
• 1 teaspoon Jojoba oil
• 1 teaspoon raw honey
• 2 tablespoons sugar
• lemon essential oil
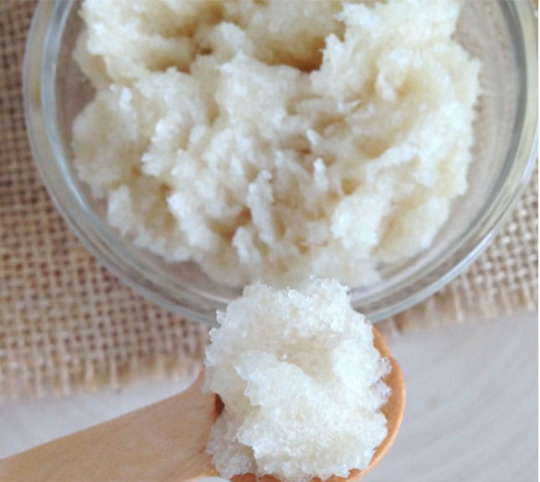
INSTRUCTIONS:
• In a small bowl combine jojoba oil, honey, and a few drops of lemon essential oil.
• Stir in sugar; mix until fully combined with honey.
• Apply to lips and gently rub to exfoliate. Leave on lips for four or five minutes to help the jojoba oil moisturize.
• Use a wet washcloth to remove scrub.
You are done!

2. VANILLA LIP SCRUB

The sugar acts as an exfoliant to smooth chapped, dry lips, while also tasting great. The olive oil, is a super moisturizer that helps the sugar work. Your homemade lip scrub can be flavored. This recipe is for vanilla flavor but you can also buy other flavors of extract in the baking section of the grocery to make flavors like bubblegum, peppermint and chocolate.
DIY VANILLA LIP SCRUB PRO’S:
Makes your lips soft and silky feeling, make sure to put on a good moisturizing balm on your lips afterwards, too.
INGREDIENTS:
• 1 teaspoon vanilla extract
• 1 teaspoon of any food coloring shade you want
• 1 tablespoon granulated sugar
• 2 teaspoon Olive oil
INSTRUCTIONS:
• Mix ½ teaspoon of olive oil and ½ teaspoon of granulated sugar in a bowl.
• Add in a drop of vanilla extract and mix it with the sugar and the oil.
• If you want you can add 1-2 drops of food coloring into the mixture. It is recommended to stay light on the food coloring since it might temporarily stain your lips and pick a practical color.
Put the mixture into the container.
And here is your vanilla lip scrub!
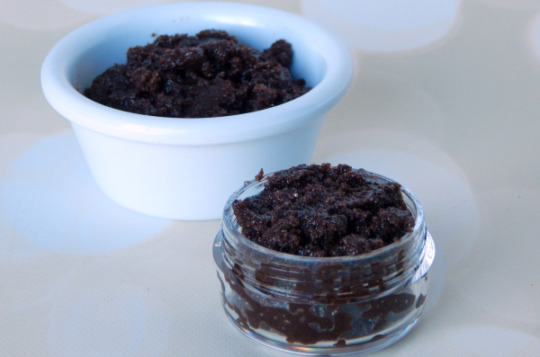
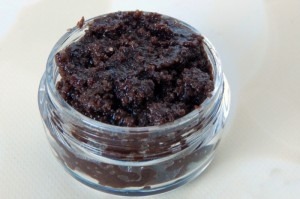
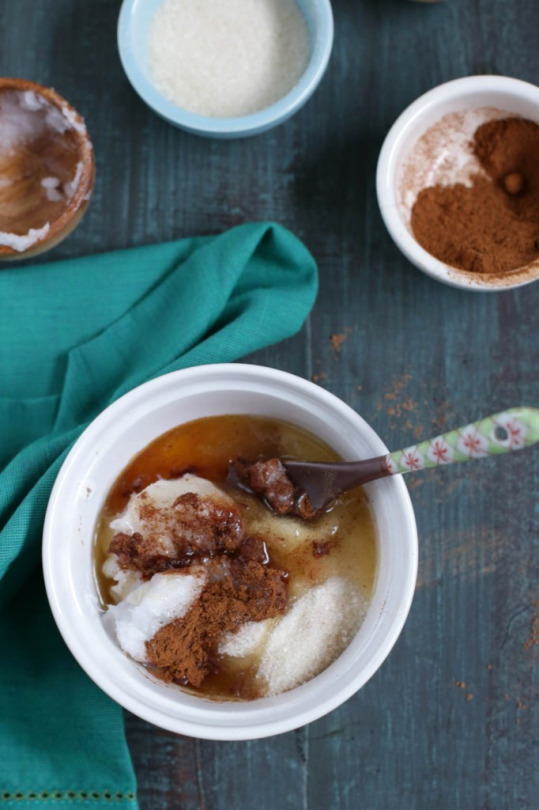
3. CHOCOLATE LIP SCRUB
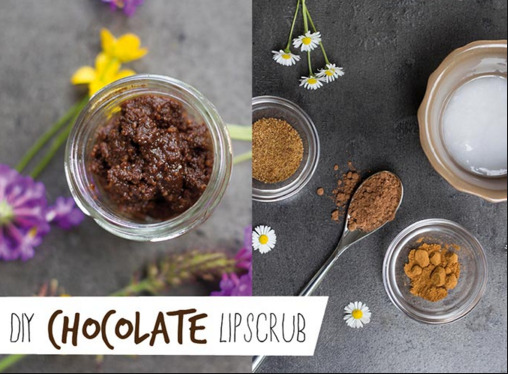
The only things you’ll need to make your own DIY Chocolate Lip Scrub are sugar, cocoa powder, vanilla extract, honey and olive oil. What I really love about this scrub is how customizable it is.
Want it to have a more caramel flavor? Use brown sugar instead of white sugar. Want a different flavor than vanilla? Substitute in almond extract. Not a big fan of olive oil? Use coconut oil instead. It’s easy to make this completely your own.
DIY CHOCOLATE LIP SCRUB PRO’S:
Your lips will love you for using this flavorful DIY Chocolate Lip Scrub that's easy to make with ingredients you already have on hand and your lips will be softer than ever.
INGREDIENTS:
• 3 tablespoons Sugar
• 1 tablespoon Cocoa Powder
• 2 teaspoons olive oil
• 1 teaspoon vanilla extract
• 1 teaspoon honey
INSTRUCTIONS:
• Mix ingredients in a bowl.
• Apply a small amount of lip scrub to lips, rubbing in small gentle circles.
• Allow to sit for about a minute.
• Wipe off with a soft wet cloth.
• Store the rest of the scrub in the fridge.
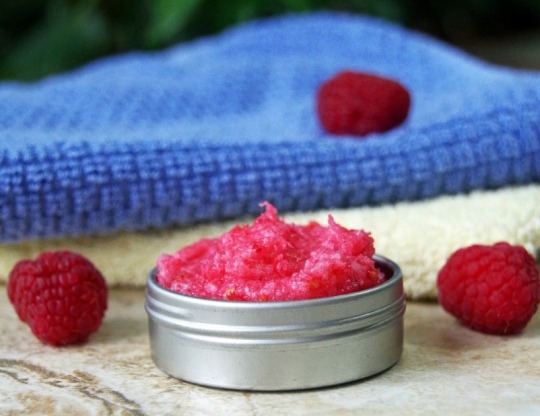
4. RASPBERRIES LIP SCRUB
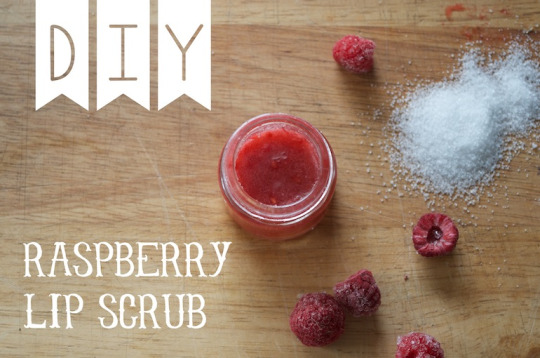
Since you need such a small amount of this sugar scrub for lips, you are measuring out your ingredients in tablespoons rather than cups. I found that the raspberries were ripe enough that I could smash them with a spoon and the sugar, coconut oil and raspberries were very easy to mix together in a small bowl.
Don’t be too rough, lips are tender! Afterwards, just wash off with a washcloth soaked in some warm water, pat dry, and apply your favorite lip balm.
RASPBERRY LIP SCRUB PRO’S:
A gentle and sweet sugar scrub for soft, kissable lips! Goodbye dry and flaky lips!
INGREDIENTS:
• 6 tablespoon white sugar
• 2 tablespoon coconut oil
• 3 ripe raspberries
INSTRUCTIONS:
• Place ingredients in a small bowl and smash together with the back of a metal spoon
• If the mixture is too wet, add more sugar, too dry, add another berry!
• Place into a small container with a lid and store in a cool, dry place for up to 2 to 3 weeks.
• Gently massage a small amount onto your lips. Rinse with warm water, pat dry and use your favorite lip balm.
5. FRENCH TOAST LIP SCRUB
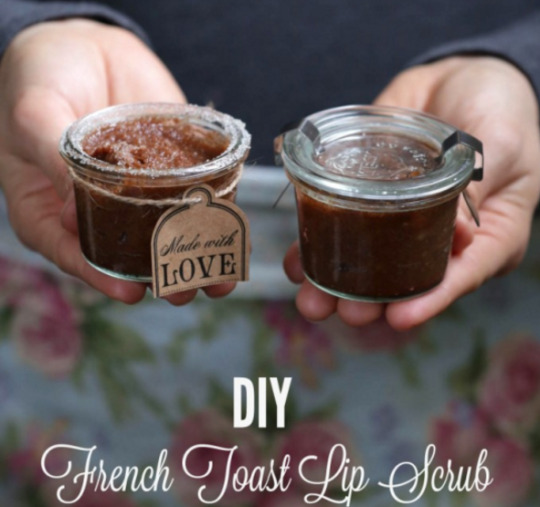
Like most good natural scrubs this one uses sugar as the exfoliant and carrier oil to moisturize and repair. A dash of cinnamon to stimulate blood flow. This mixture has a delicious smell while moisturising your lips.
FRENCH TOAST LIP SCRUB DIY PRO’S:
Trust me, you do not want to miss out on french toast flavored lip scrub. Do those winter lips a favor and scrub your way to smoother smile with this easy DIY french toast lip scrub.
Enjoy new freshly polished lips!
INGREDIENTS:
• 1 teaspoon organic white granulated sugar
• ⅛ teaspoon ground cinnamon
• pinch ground nutmeg
• ¼ teaspoon pure maple syrup or honey*
• ¼ teaspoon coconut oil
• 2 drops pure vanilla extract
INSTRUCTIONS:
• Stir the sugar, cinnamon, and nutmeg together in a small dish.
• Add the maple syrup/honey, coconut oil, and vanilla extract, and mash everything together. At first it'll seem like there's not enough moisture to get everything to combine, but keep mashing until you'll end up with a thick, fragrant, sugary paste.
• Take a small amount of the scrub onto your finger.
•Massage the sugary mixture into your lips, buffing off any dry skin.
• Once your lips feel sufficiently scrubbed, simply rinse away the remnants of the scrub with some warm water.
*As always I’m open to suggestions and opinions so if you need information about an specific topic don’t forget to tell us! *
If you guys enjoyed this DIY and you want me to post more DIY’s please like and reblog it so I know that you want me to publish more tips & tricks about makeup.
Last but not least, if you are a makeup lover or if you want to join our family follow LEARNTOMAKEUP to read our posts and stay updated.
Thanks for reading my posts and love you all, Valeria.
5K notes
·
View notes
Photo
Hello my angels! How are you? I hope you are fine 😊
This is my blog LEANRTOMAKEUP and I’m Valeria ♥
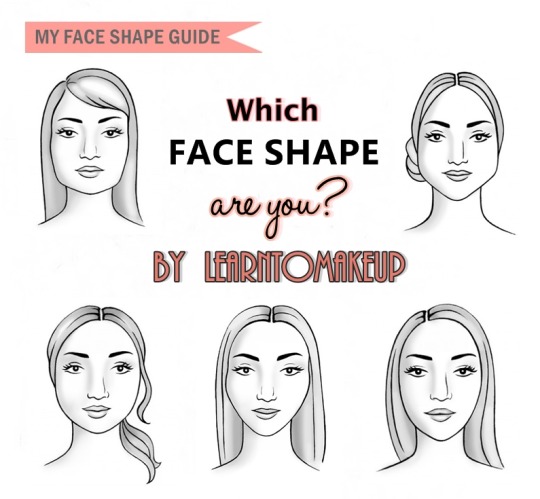
Today’s post will probably be one of the most important one by far. Do you want to know why? Because we will teach you to recognize your face shape.
But how knowing what your face shape is helps at all?
One of the first things I learnt in my makeup school was recognizing my clients face shape to enhance their natural features this way I could give my work a flawless finish.
When I started my makeup course I found so complicated to understand this drawings so I understand if you don’t understand the drawings that much because you can’t really tell what is your face shape.
However, once you start reading and looking all the face shapes it gets better than ever.
After you know what your face shape is, applying blush, contouring your face and using highlighter in your cheekbones will be easier than ever. Not only that but you will notice what kind of colors, formulas and techniques suit you the best.
With that being said, which is my face shape? Starts now!

ASK AND ANSWER YOURSELF THIS QUESTIONS
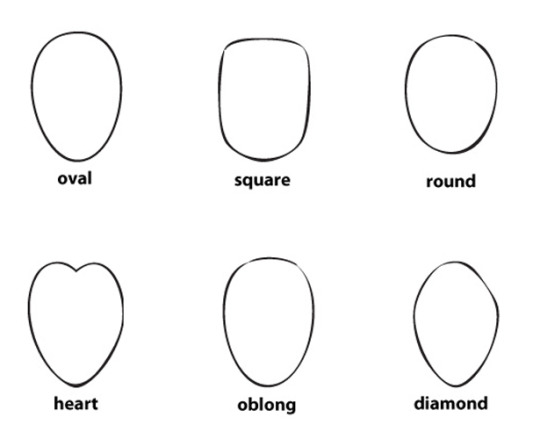
1. Is my face as wide as it is long with the widest part occurring at the ears? (If yes, you have a ROUND face.)
2. Is my face longer than it is wide? Is it long and slender with a narrow chin or high forehead? (If yes, you have an OBLONG/RECTANGULAR face.)
3. Are my forehead and cheekbones wide but my jaw narrow? (If yes, you have a HEART-shaped face.)
4. Is my forehead the same width as my jaw line and is my jaw prominent? Is my hairline squared? (If yes, you have a SQUARE face.)
5. Is my jaw line wider than my forehead? (If yes, you have a DIAMOND face.)
6. Is my face approximately twice as long as it is wide? Is it only slightly narrower at the jaw than at the temples? Is my hairline rounded? (If yes, then you have an OVAL face.) Now that you have an idea as to what shape your face is, let’s look at some celebs who share your shape and discuss some of the most flattering hair and makeup things you can do for it. However if you are not sure about your face shape keep reading because I put a more detailed explanation and description about face shapes.
ROUND FACE
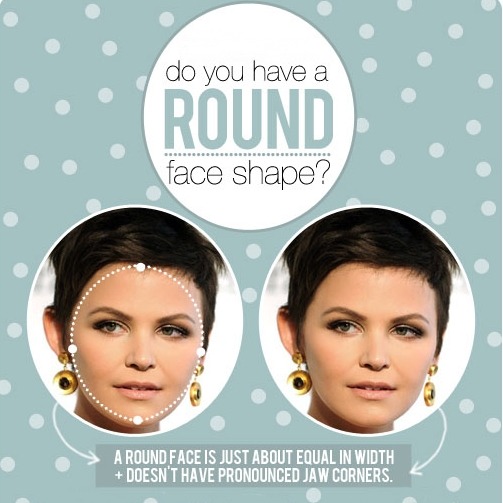
Round face shapes are exactly as they sound- the widest point is across the cheekbones, narrowing some at the forehead and jawline. This face shape is not angular at all, and is wider than the typical oval or oblong face.
People sometimes associate round faces with “chubby cheeks”, but that isn’t always the case. If you have a round face, your cheekbones are just the widest part of your face and your jaw will be curved. Think of a square face, but with softer angles.

Round face attributes: Full face, round chin, very few clearly defined angles, and prominent cheeks.
HEART
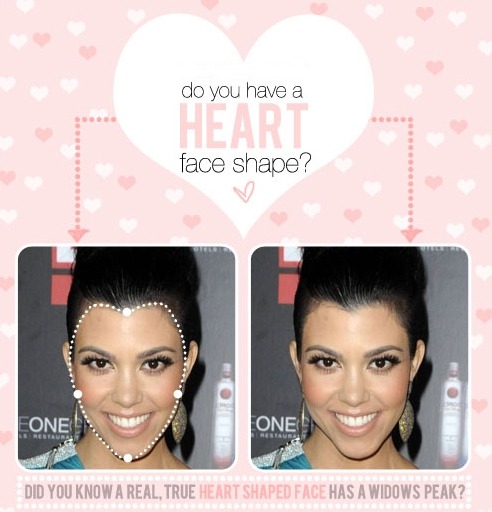
The heart shaped face is sometimes called the inverted triangle, particularly if the hairline doesn’t come to a point on the forehead. This face shape is the opposite of the triangle or pear; it is widest at the forehead and it narrows toward the jawline. The jaw is the most narrow area of the face. Again, it may be angular or more rounded.
A person with a heart-shaped face will have a long and pointed jawline, with the chin being the smallest point of their face. Imagine a triangle flipped upside down on one point.

Heart shape attributes: Narrow, prominent chin, visible cheekbones and wide forehead.
DIAMOND
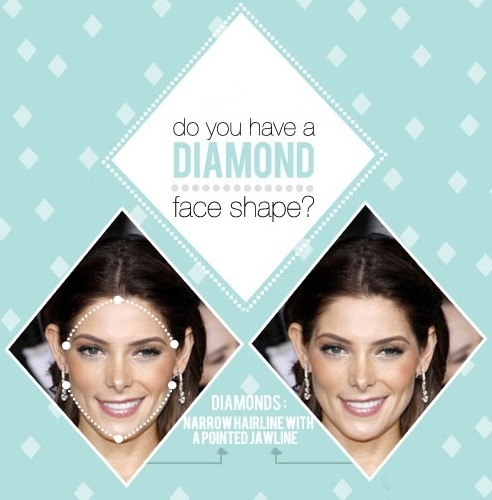
Diamond face shapes are not so common. They are characterized by a narrow forehead and jawline, with the cheekbones being the widest point of the face. The cheekbones are often high and defined on this face shape.
With diamond faces, the goal is to add fullness or texture at the forehead and jawline, and to avoid fullness only at the cheekbone area.
The difference between diamond-shaped faces and heart-shaped faces is the hairline – those with diamond-shaped faces will have a narrower hairline.
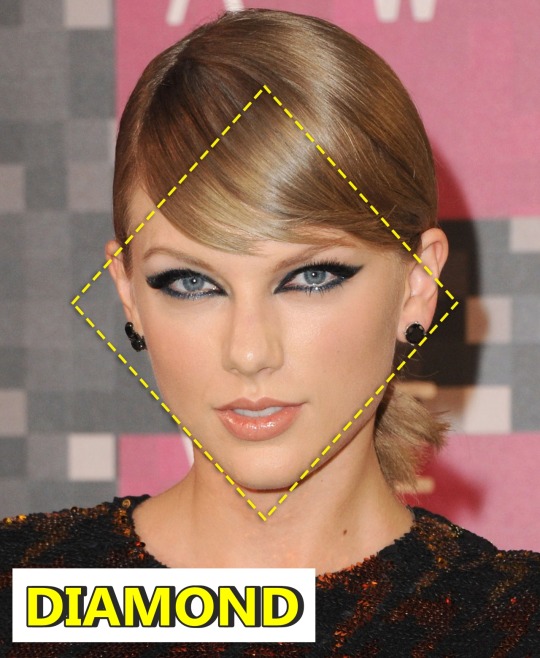
Diamond shape attributes: Small chin and forehead, prominent cheekbones and narrow appearance.
SQUARE
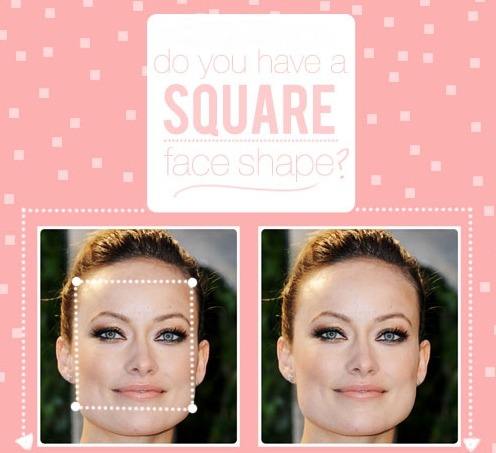
The square face and round face are the two most common face shapes. The square face does not narrow much from the cheekbone to the forehead, nor from the cheekbone to the jawline. The square face may also look angular- the jawline may appear sharply-angled at the corners, and even the forehead may be squared off.
If you have a square face, the sides of your face will be straight and your face will be nearly as wide as it is long. Your jawline is defined, with only a minimal curve.

Square shape attributes: Proportional width and length, broad jaw line and forehead.
RECTANGLE
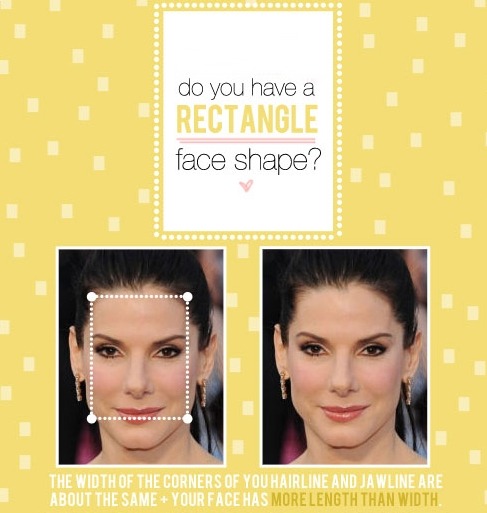
This shape tends to be angular, but not always. Rectangles faces are pretty straight, with the cheekbones not any or much wider than the forehead and jawline.
Rectangular faces or “oblong” as it is sometimes called, are similar to oval and square-shaped faces. The only difference is, the face is longer and less wide. Your forehead, cheeks and jawline should all be pretty much the same width.

Rectangle attributes: Long and thin, pointy chin, angular features and high forehead.
OVAL

The oval face shape is considered to be “ideal.” The reason is that oval face shapes are well-balanced, not overly sharp or angular, and not overly rounded or full.
The oval face shape is widest at the cheekbones, but not by much. It narrows a tiny bit at the jawline and at the forehead. The width of the forehead and the width of the jawline (corner to corner) is nearly equal.
Oval shape attributes: Evenly proportioned, chin narrower than forehead, prominent cheekbones.
Before ending this post, in my opinion, I disagree with the principle that there is one “ideal” face shape. I genuinely believe that other face shapes- and a whole variety of different features- are truly beautiful.
» If you still can’t recognize your face shape I will do it for you! Submit your selfie/picture here and I’m going to reply saying your face shape «
Remember that if you have a request about an specific topic let me know so I can help you. As always I’m open to suggestions and question so if you need any information I’m here for you!
If you found helpful this post please like or reblog it so I know that you want me to publish more tips & tricks about makeup.
Last but not least, if you are a makeup lover or if you want to join our family follow LEARNTOMAKEUP to read our posts and stay updated ♥
Love you, Valeria.
425 notes
·
View notes
Photo


Hi my angels! This is my blog LEARNTOMAKEUP and I’m Valeria.♥
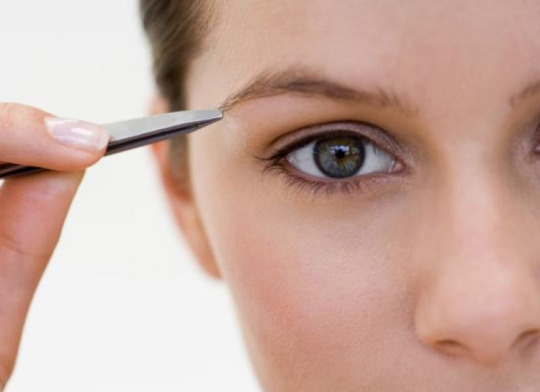
I got some messages asking me for a brow tutorial and to be honest talking about brows makes me really happy.
Today what I have for you all is a post about BROWS.
You will learn how to take care of your brows, how to shape them without destroying their natural or damaging them.

SHOULD I TRIM?
SHOULD I TWEEZE?
IS SHAVING MY BROWS GOOD?
DO TWEEZED HAIRS GROW BACK?
If you want to know the answer of any of this questions keep on reading!
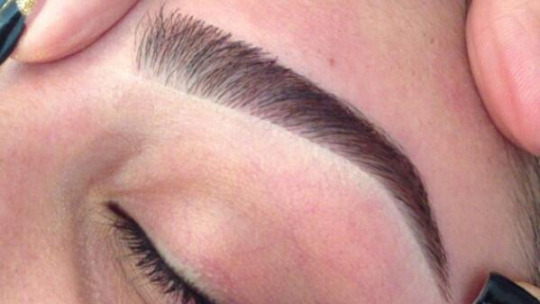
Discovering the best shape for your eyebrows without sacrificing their natural appearance is what you want to accomplish when shaping your brows. Pencil thin or overly bushy eyebrows are dated looks that can be distracting rather than enhancing.
The shape of the eyebrows affects the appearance of the eyes. In many ways, the overall appearance of the eye area is defined by the arch, length, and thickness of the eyebrow.
The eyebrow should follow the length of the eye but it shouldn’t extend into the temple area. The basic rule is that the front part of the brow should never drop below the back part of the brow.
Allowing this to happen, either with the way you tweeze your eyebrows or the way you draw them on, makes you look like you’re frowning and overemphasizes the downward movement of the back part of the eye.
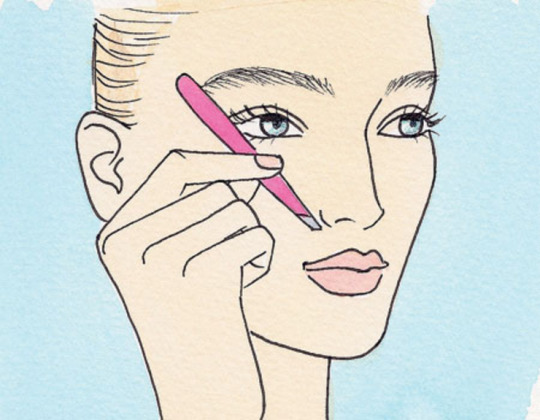
1. LOCATE YOUR STARTING POINTS
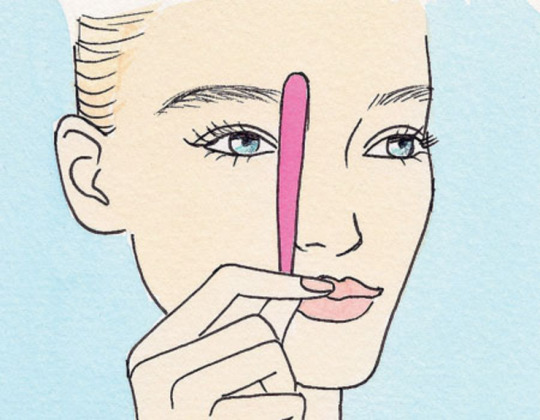
Flip your tweezer upside down so the open end is pointing downward, and place it vertically alongside the outer edge of the bottom of your nose.
The point where the vertex lands marks the beginning of your brow (which should also be about one inch above the inner corner of your eye).
Using an eye pencil, draw a vertical line to demarcate the start of each brow, then check that the space above the bridge of your nose is centered between them.
Remove the strays that fall in between. Grab strands right at the root and slowly pull them out. 2. MARK YOUR END POINTS
Lay the tweezer on an angle against your cheek so that the open end is at the bottom of your nose and the other end reaches the outer corner of your eye.
The spot where the tweezer intersects your brow is where the hairs should end. Mark it with the eye pencil, then pluck the hairs beyond the line.
3. DETERMINE YOUR BROW THICKNESSS

Starting just below the fullest part of your brow, use an eye pencil to draw a line along the bottom edge of your brow; it should be above any stray hairs and it should follow the natural shape of your brow’s top line, which may be angled, slightly curved, or even straight. Pluck the strays below the line.
Ultimately, your brows should be between a quarter inch and a half inch at their thickest.
4. SHAPE YOUR ARCH

Look straight into a mirror. Use a magnifying mirror, at least a 5X magnification, so you can see each hair. The arch should peak above the outer rim of your iris and lie right on your brow bone. Mark the point with your eye pencil, then remove a row of hairs along the bottom, from your inner brow point to the peak point.
After the peak, shape the tail. Make it a bit thinner than the main part of your brow, tapering at the end. Go slowly (one hair at a time) so you don’t over-tweeze.
Which hairs you tweeze and which ones you don’t is the difference between attractively shaped brows and misshapen ones.
→ IMPORTANT ADVICE ←
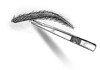
•TWEEZING AND TRIMMING
1. Like I already told you before you start tweezing, use a brow pencil to heavily draw on the shape you want.
You can adjust it with makeup remover as you decide on the shape you want to create.
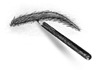
2. Once the shape is drawn on, tweeze any hairs that fall outside the line of the brow.
3. Next, brush the brows straight up with an old toothbrush
4. Any hairs that are too long and floppy should be trimmed with small scissors.

Tweezing long brow hairs rather than trimming them can result in gaps in the eyebrow or create a patchy appearance.
•WHAT SHOULD I AVOID?
Avoid over-tweezing above the brow. A few stray hairs are fine to remove, but too much and it can create an unnatural look.
Do not overstate the shape of the brow; minimal brow alteration is best.
Do not pluck brows into a thin line thinking it will make your eyes look larger. It can look dated or give the face a surprised look and this shape is not easy to correct once the damage is done.
•IS IT SAFE TO SHAVE MY EYEBROWS?
Never shave. This presents too big a risk of removing too many hairs at once, leading to a patchy, overly thin or wildly uneven brow. None of that is safe!
•DO TWEEZED HAIRS GROW BACK?
The answer is yes and no. Tweezed eyebrow hairs can grow back but this doesn’t happen overnight. Hairs on different parts of the body have variable rates of growth. It takes about 64 days for eyebrow hair to grow in after it is plucked. The length of time can be far greater, so you need to be patient.
If you have been tweezing the same area for a long time it may be too late. Eyebrow hair is very sensitive to injury. Repeated plucking can permanently damage the hair root, which will prevent the hair from ever growing back.
As always I’m open to suggestions and opinions so if you need information about an specific topic don’t forget to ask! Don’t be afraid to ask for help, if you want me to answer privately, I will do it. You can leave all your questions here
If you found helpful this post please like and reblog it so I know that you want me to publish more tips & tricks about makeup.
Last but not least, if you are a makeup lover or if you want to join our family follow LEARNTOMAKEUP to read our posts and stay updated ♥
Love you all, Valeria.
2K notes
·
View notes
Photo

Hello beauty lovers ♥
My name is Valeria and this is LEARNTOMAKEUP!
Dark dark dark circles …
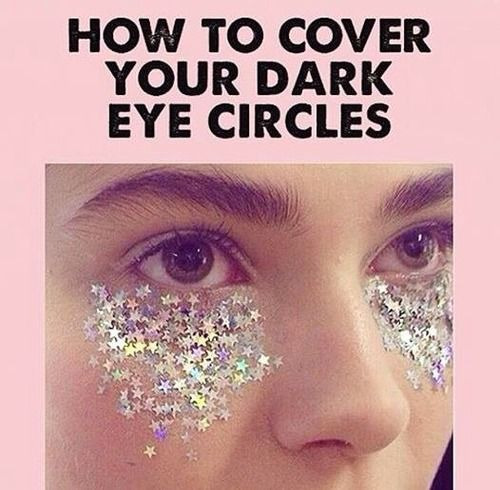

Do you hate dark circles? Don’t worry we hate them too! We wish they fade away from our lives right now.
Today I will be talking about the right shades and makeup products you need to purchase to hider and get rid of your dark circles.
As always I will help you to know what kind of under circle you have and what you can do.
Here we go!
What is a dark circle?
Dark undereye circles can be caused by a host of different things from heredity to allergies to poor sleep. This is a common problem and are frequently described as “tired eyes.”
Why is it caused?
Several situations can cause dark circles but here are the most common ones.
— Smoking — Hyperpigmentation caused by sun damage — Caffeine consumption — Alcohol consumption — Sleep deprivation — Dehydration — Dietary deficiencies
How to cover them with makeup?
A colored concealer is the best item to use to cover dark circles!
It will help to cancel out the discoloration.

You’ve probably noticed that concealers no longer come in only skin tone shades. Instead, there are many different colors: green, purple, pink, yellow, white, etc.
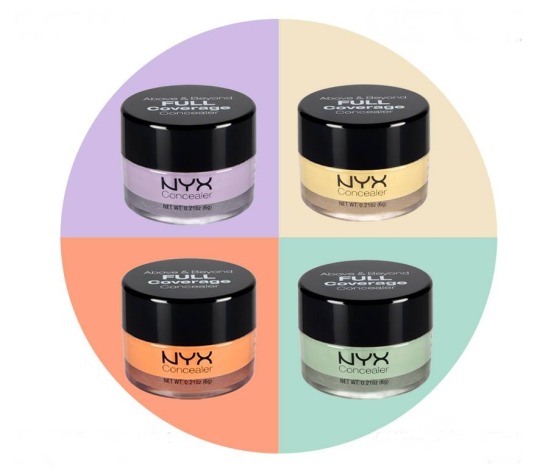
Each shade has a specific issue they are best suited to conceal. And if you have several spots on your face that you struggle with, then understanding color correcting concealers can be a total game changer.
With that in my mind, let’s figure out what type of dark circles we have. They come in different shapes, sizes and even colors.
So keep reading to see how you’re supposed to use these color correcting concealers to make troublesome spots disappear.
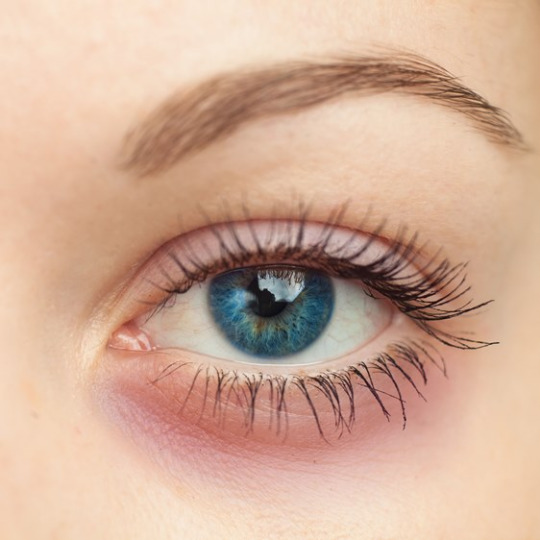
• PURPLE-BLUEISH CIRCLES
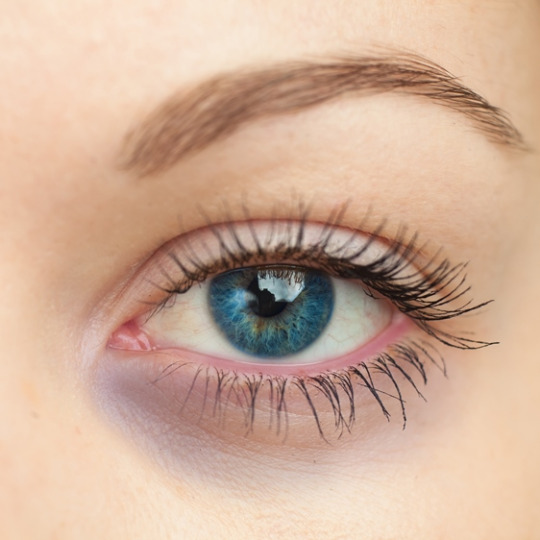
Blue circles result from oxygenated blood stagnating beneath the skin.
Skin here is very thin and almost transparent, so the blood shows through. You’ll find this more noticeable in the morning when you wake after been horizontal for a while, the fluids accumulate and the veins expand to hold more blood.
Blue circles may get worse with age because as get older, we lose natural fat in the area, which can mask blueness below the surface of the skin.
What concealer should we use?
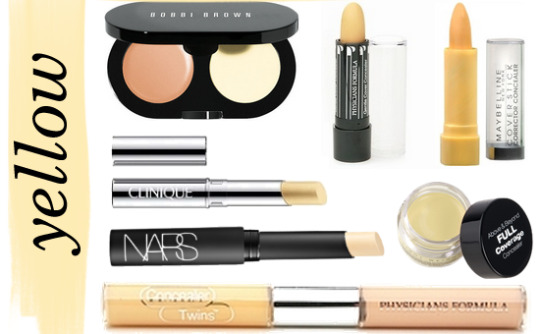
The concealer color for purple or blueish circles is YELLOW.
Yellow concealers are perfect for hiding purple or blue bruises, veins, and under eye circles.
Yellow concealers are typically the most general, and are great for evening out skin tone to give a bright base for your foundation.
Depending on your skin tone, they can also be a perfect as an eye shadow base if you don’t have a eye primer handy.
REDDISH CIRCLES
The eye area becomes red when the blood vessels enlarge and engorge and become more visible through the skin.
This can happen when you suffer allergies or nasal congestion or simply when you’ve burnt the candle at both ends and haven’t had enough sleep. Dehydration and irritation are other major causes.
What concealer should we use?
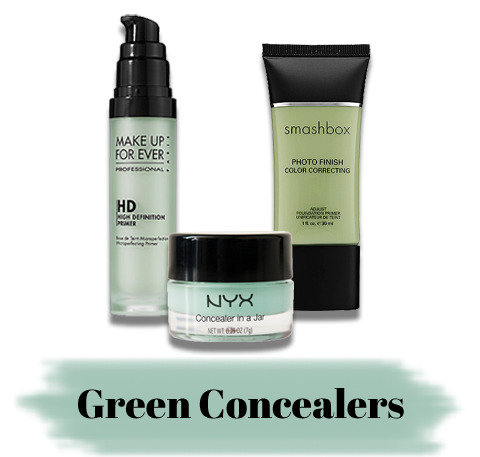
The concealer color for reddish is GREEN.
As I just mentioned, the color green neutralizes the color red, which is why green concealers are wonderful for getting rid of any redness on your face.
Use a green based spot concealer to remove redness then a color correcting green primer will be best to significantly reduce redness and give an even toned base for flawless makeup application.
DEEP SHADOWS
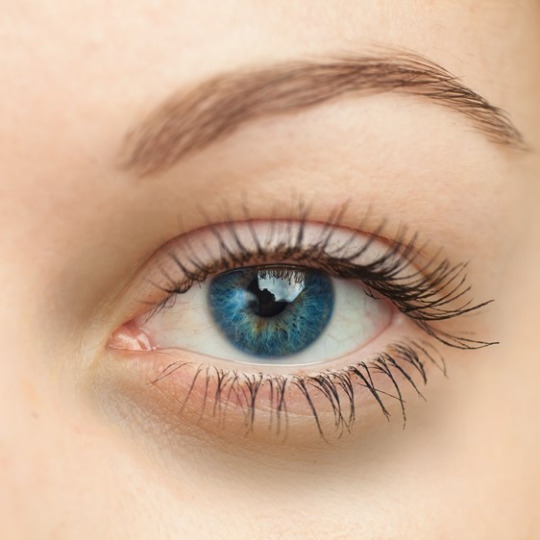
This happens when the skin produces less proteins and therefore the texture of the delicate skin become lax.
This deep circle creates shadows and hollows.
What concealer should we use?
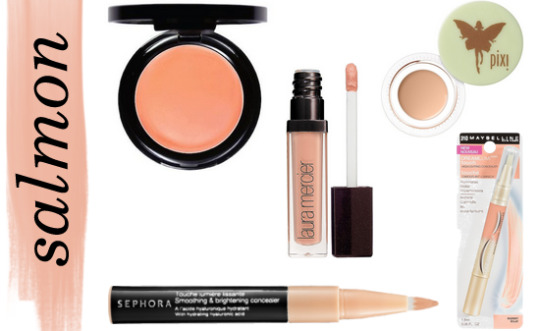
The concealer color for deep and dark circles is SALMON.
It’s more like salmon or peach. These are ideal for brightening around the eye area and masking signs of fatigue.
This particular concealer color is a mixture of red, orange, and yellow hues, which are across from the blue, purple, and green hues on the color wheel.
That’s why this color is best to combat dark under eye circles for people with light skin. Since it’s a great brightening agent, these concealers also work well to cover raccoon eyes and to give sallow olive tones skin a much needed radiance.
DEEP CIRCLES FOR PEOPLE WITH DARKER SKIN
Darker skin has more melanin pigment (the substance responsible for skin color) in the skin cells so your dark circles may be more obvious. Your treatment choices to remove these dark circles will depend on the specific cause. Consider using a concealer to cover darkened areas.
What concealer should we use?
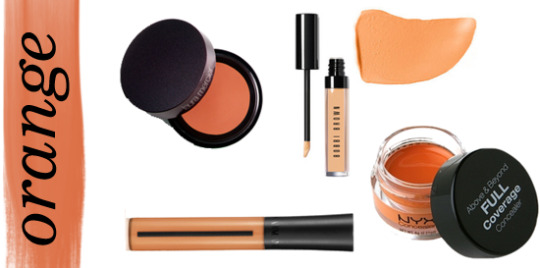
The concealer color for tiny circles is ORANGE.
For all of you with lighter skin tones, you will want to stay away from orange concealers for the most part. The exception? If you’re doing facial contouring and need something that can work as a liquid bronzer.
Other than that, this color is perfect for people with darker skin tones looking to hide dark circles or other spots with deep discoloration.
TINY UNDER CIRCLES OR EYEBAGS

This is a normal one for all of us and might be caused by lack of sleep or when you have a busy day. Your circles are not that noticeable and you can cover them realy easily and fast.
What concealer should we use?
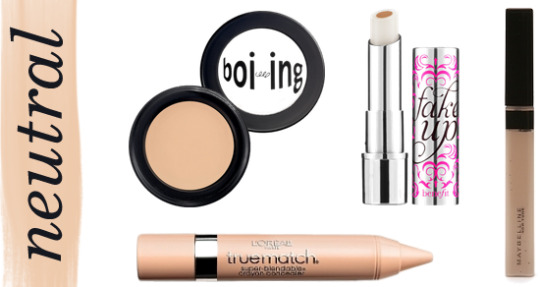
The concealer color for tiny circles is NEUTRAL.
If you’re one of the lucky ones that doesn’t have too many problem areas to hide, this will work fine for you.
Any regular concealer should work to veil little imperfections or the occasional pimple.
Just choose a shade similar to your skin tone, or one shade lighter, and you’re all set.
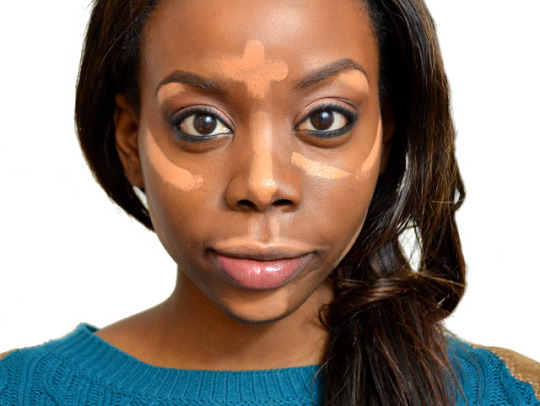
HOW TO APPLY IT?
Application is very important when using them.
If you have too many layers you can experience major creasing. The colored concealer is meant to cancel the the discoloration not cover it. It’s best to use your finger and pat in the product. Your finger will warm the product for a better application and pick up excess product. Push the product inwards and outwards for minimal creasing.
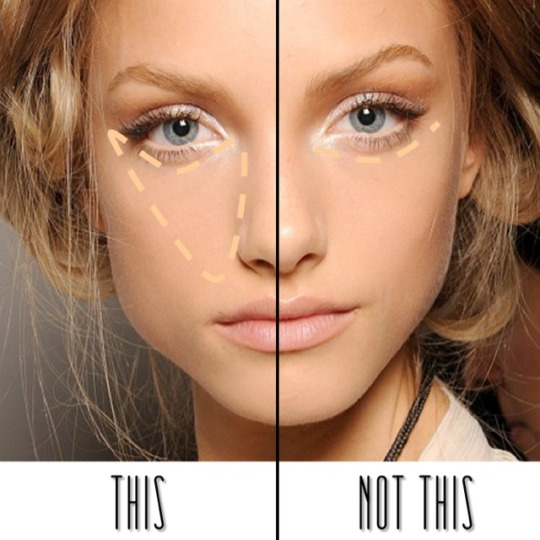
Apply concealer in the shape of a inverted triangle. Doing that the concealer will match your foundation and your makeup look will look flawless.
Remember that it’s better to apply concealer after foundation. That way you will be able to get a little bit more coverage because you already applied a layer of foundation.
After that set your foundation and concealer with your powder and you are done!
I hope this helps to all of you my angels so you can buy the right concealer and to add this products to your makeup routine.
*As always I’m open to suggestions and opinions so if you need information about an specific topic don’t forget to tell us! *
If you found helpful/useful this post please like or reblog it so I know that you want me to publish more tips & tricks about makeup.
» Last but not least, if you are a makeup lover or if you want to join our family follow LEARNTOMAKEUP to read our posts and stay updated ♥ «
Love you all, Valeria.
1K notes
·
View notes
Photo
Hey beauty lovers! Welcome to LEARNTOMAKEUP ♥
As you might know my name is Valeria and I’m a makeup artist. This is my beauty blog that shares tips, advices, tricks and ways to improve your makeup.
I need to tell you an amazing new announcement and is that I will be posting every saturday and sunday since today. If you enjoy our content stay tuned for that.
I would love to post more than twice a week but it would be a lie. Some days I have events or classes and it’s kinda difficult but I will be able to post new and nice tips and tricks every weekend for you guys.
WHAT ARE WE GOING TO TALK ABOUT TODAY?
Let’s see if you can guess it ...

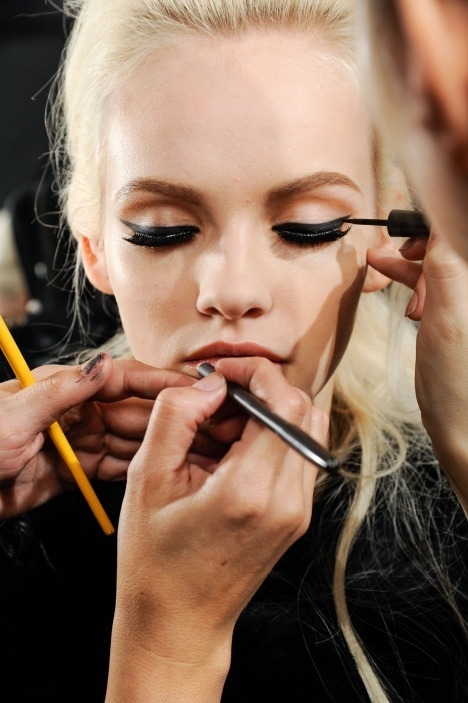
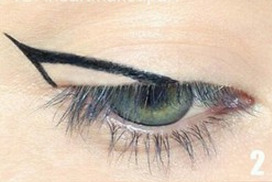
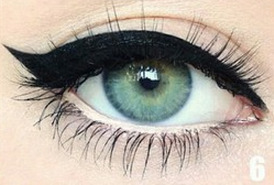
Yes, you are right. We are talking about winged eyeliner.
We love it and we know how beautiful it looks. But the question is why? The reason is that black is classy but still black will make your eyes pop, it will add more dimension by creating depth.
I have been getting messages asking for a winged eyeliner tutorial and I’m so happy I can actually help you all.

Now we are going to start with our tutorial!
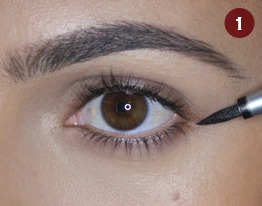
1. PICK THE PRODUCT
You need to know what you want to reach out, here are some products you should consider. If you don’t know why we aren’t mentioning pencil eyeliners here is because they smudge and they don’t last that much so if your goal is to keep that winged eyeliner all night then keep reading.
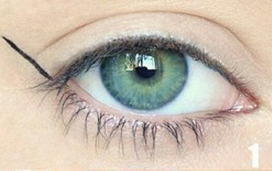
• USE LIQUID EYELINER FOR:
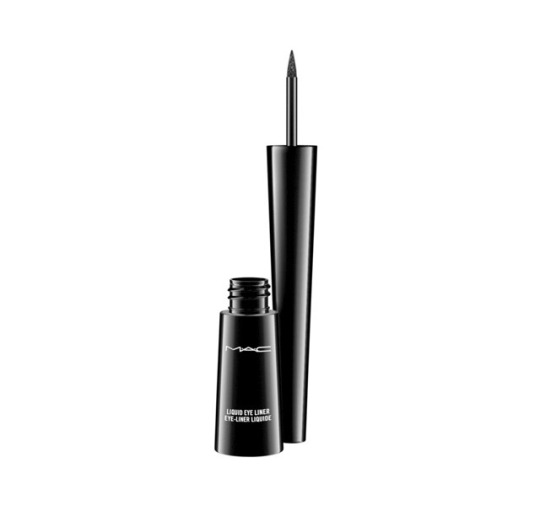
A perfect everyday look, a thin, steady line hugging the upper lashes and just angling out so adds just enough drama to eyes also they will be will be totally smudge-proof once dried.
Personally, I would recommend this for a daily basis routine as the formula is way easier to clean and remove at the end of the day.
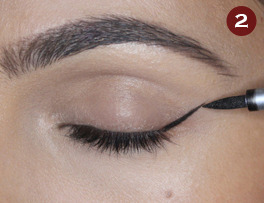
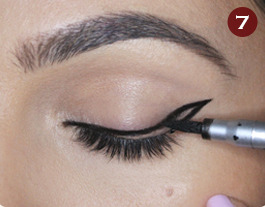
• USE MARKER EYELINER FOR:
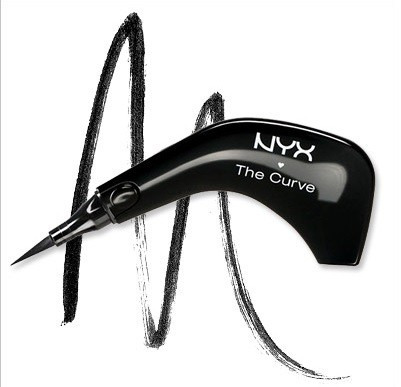
An effortless application but stunning look. The felt tip makes application precise, secure and best of all it’s so easy. Excellent color pay-off, quick drying, smudge proof, no feathering, no skipping.
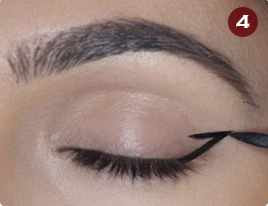
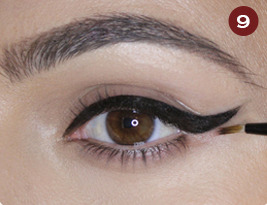
• USE GEL EYELINER FOR:
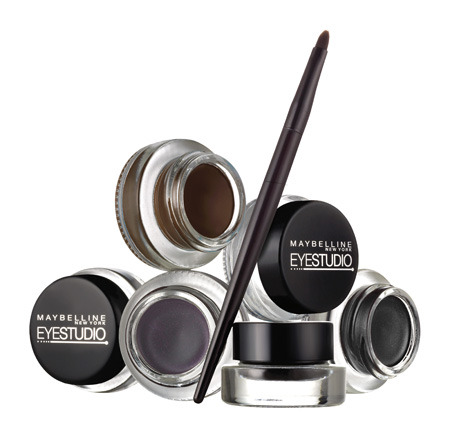
A unique look, they are both sweat and water proof eye liners, they allow you to make straight lines since they are easy to control, they last longer than liquid liners and they offer a wide range of eyeliner color so you have the freedom of mixing colors to obtain what you exactly want.
Gel eyeliners are a must for any makeup artists because they don’t easily smear.
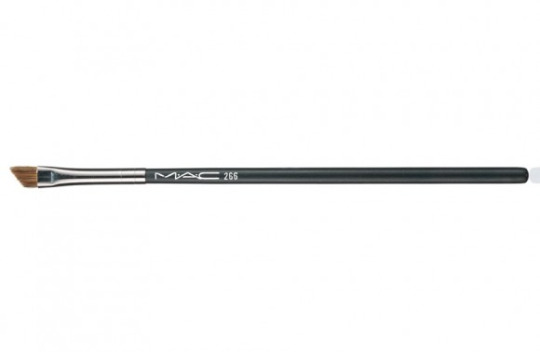
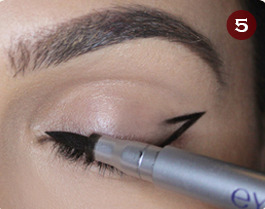
You will need an ANGLED BRUSH if you are wearing gel eyeliner. This brush has angled shaped packed hair which is useful to draw slant lines or even tight lines. These brushes come with a variety of angles: Small angled, Medium angled and Large angled Brushes.
It makes it the easiest cat eyeliner brush, adding the drama with dense lines.
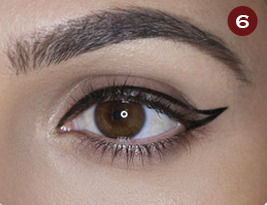
3. THIN OR THICK WINGS?
This steps depends on how wide and big your eye is and how thick or thin you want your eye line. However, if you have small or hallow eyes you can create a thick line but you need to be careful.
Small eyes are the most common ones. People tend to have hallow/sunken eyes and still you can show off your amazing eye line.
— Here you can see a tutorial for hallow eyes —


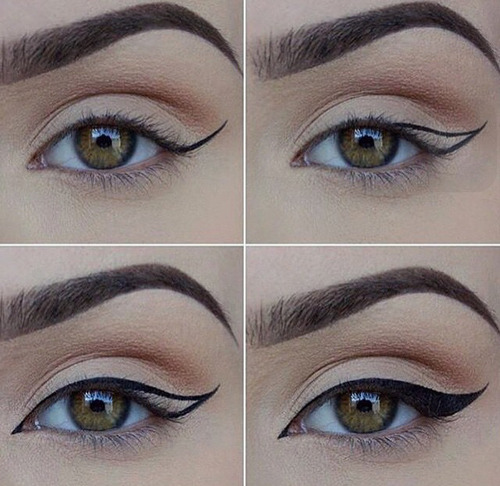
— This is a tutorial on how to apply eye liner for regular eyes ❀ —
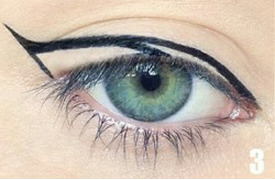
— Eyeliner application for almond eyes —
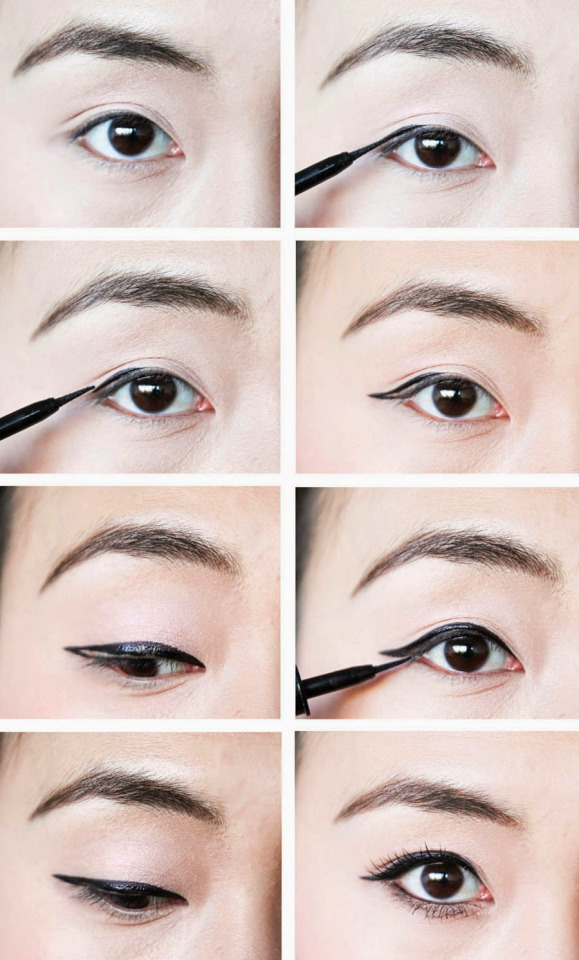
— Like I told you before if the eye is small then you need to do the wing smaller so you can show off your eyeliner. You can see asian people tend to do thin lines and thin long tails. —
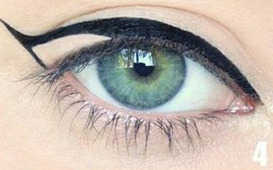
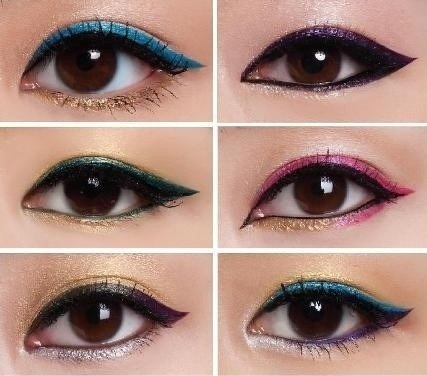
— Asian people can wear black eyeliner but as you can see here, bright and colorful eyeliners make asian eyes look so gorgeous. —
— Check out this double winged eyeline —

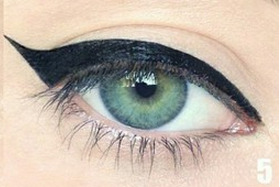
— Also you can try out new and different styles ❁ —

You can see that there are no rules when it comes to eyeliner. We can use our creativity and ideas to get a perfect look. Use any color you want and feel more comfortable with.
This has been all for today’s topic and I hope you can improve your routine with this post.
*As always I’m open to suggestions and opinions so if you need information about an specific topic don’t forget to tell us! *
If you found helpful/useful this post please like or reblog it so I know that you want me to publish more tips & tricks about makeup.
» Last but not least, if you are a makeup lover or if you want to join our family follow LEARNTOMAKEUP to read our posts and stay updated ♥ «
Thank you my angels for everything, Valeria.
1K notes
·
View notes
Photo
Hello my little angels! I hope you all are doing alright.
This is Valeria and welcome LEARNTOMAKEUP! ♥
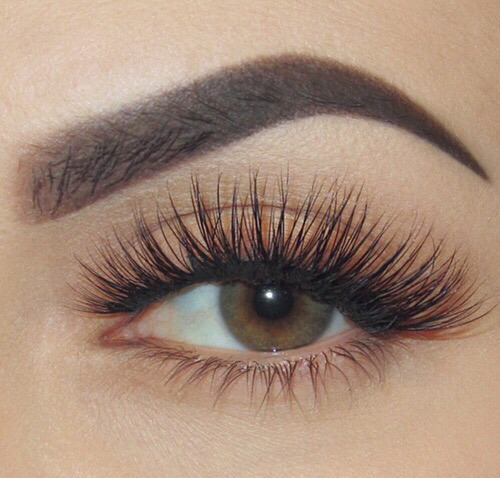
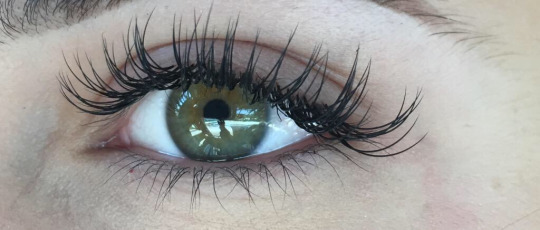
This time I will be talking about lashes. Don’t we love lashes? We do! No eye makeup is complete without a touch up in your eyelashes. Long eyelashes can take any look from 100 to 1000 in one second and make an attractive look.
That is why a lot of beauty lovers dream to have longer lashes.

But unfortunately, not all of us are blessed with long and thick eyelashes. We can make our eyelashes longer by makeup or by applying fake lashes. If you have naturally long eyelashes, you don’t have to spend a lot of mascara to make it look longer.
But if you don’t, then you may need to work on making it look longer. So why don’t you start growing your eyelashes naturally? You can make your eyelashes grow longer and stronger than ever before.
» Today you will learn 9 ways to get longer, thicker, fuller, healthier and stronger eyelashes ❀ «
1. TAKE CARE OF YOUR LASHES
To get a perfect amount of eyelashes, you must take care of your eye to make it work. If you try everything and don’t keep your eyes clean, then you will not get the benefit. Take off your makeup and clean your eyes every time before you go to bed.
When washing your makeup off, be sure not to pull at your eyelashes. I like mascara that comes off really easily to prevent tugging and pulling at lashes. Pulling stunts growth and undoes all the hard work you've put into making those lashes grow again!
2. BRUSH YOUR LASHES
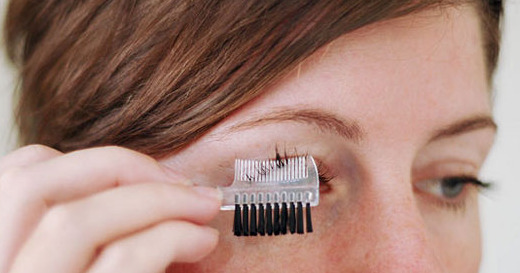
It sounds a little weird but there actually is a type of small comb which can help you to brush your eyelashes. Just by brushing your eyelashes, you can actually make them grow a little longer. Also this is truly one of my favorite tips on how to make your eyelashes grow that is easy to do.
So comb your eyelashes regularly and see the result.
3. VASELINE IS THE NEW HEAVEN
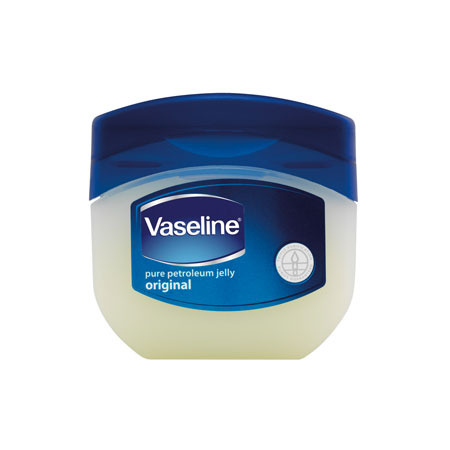
Instead of spending your money on something that could darken your eyes, why not try something easy and quick?
It is an old-age trick but it really works! And it is the simplest one! You just have to use a cotton stick or mascara brush and apply a swipe of Vaseline on your eyelid before you go to bed. It will make your lashes longer and thicker. You have to wait for the results but it will make a noticeable change.
4. NATURAL OILS
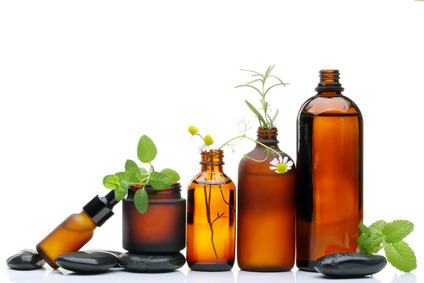
Olive oil, coconut oil, jojoba oil and castor oil are mostly common for making your lash longer. Applying them regularly on your lashes can simply make it work. To see the best result, do it regularly. Natural oil contains vitamins, minerals and lengthening agents which will not only enlarge your lashes but also moisturize them.
If you want to start doing it but you are kind of worried of what will happen you should start by trying out olive oil. Just adding a bit of olive oil to your lids at night will truly help your eyelashes soak up all of the vitamins and minerals in olive oil!
5. GREEN TEA
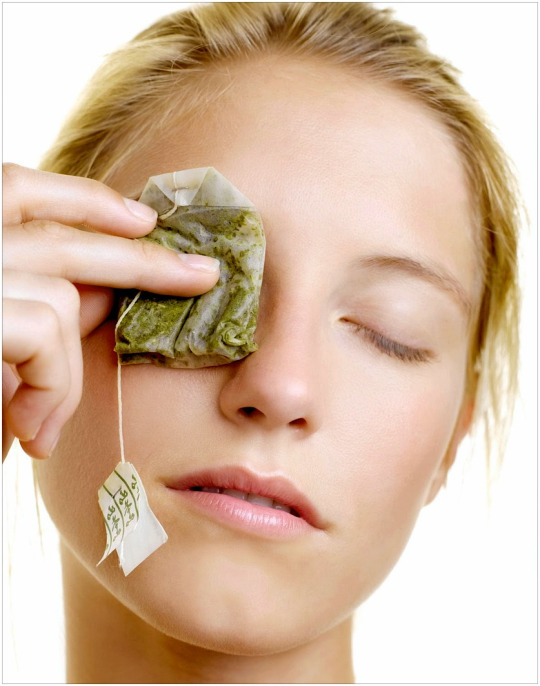
Here's another great reason to stock your pantry with green tea. Only in this case, you won't drink it. Instead, you are going to put it straight on your eyelashes. It might sound weird, but I promise that it works! Simply dip a cotton ball in freshly steeped green tea and gently swipe it on your lashes. It can help promote growth. Just make sure you steep a fresh cup for drinking!
6. MASSAGE YOUR EYELIDS
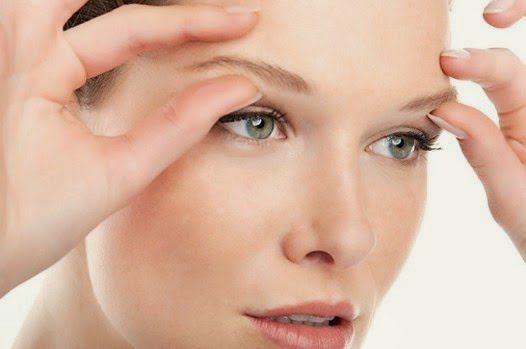
Most common problems you may have faced with eyelashes are that they can fall out and even break if you mistreat them. You can rub your eyelids to help it out. This means that by massaging the eyelids you will be stimulating the hair follicles which help to grow stronger eyelashes.
7. EAT YOUR VEGGIES AND PROTEINS
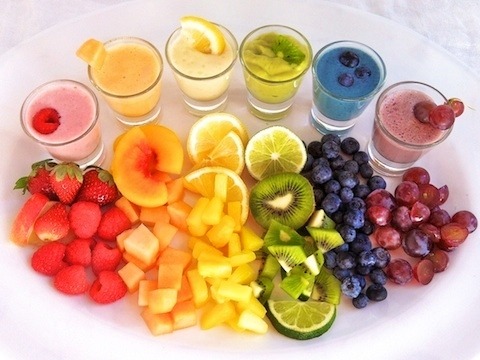
Your natural growth of hair depends on the diet you are following. If you have a bad diet then you will notice that your body will not support to the growths properly. Your eyelashes will not increase enough too. Try to intake fruits and veggies to make a remarkable difference.
Include lean proteins in your diet such as fish, cheese, eggs, beans, yoghurt, milk, almonds, fruits etc. Drink plenty of water to get rid of toxins. This will ensure you have longer and thicker lashes.
8. VITAMIN E
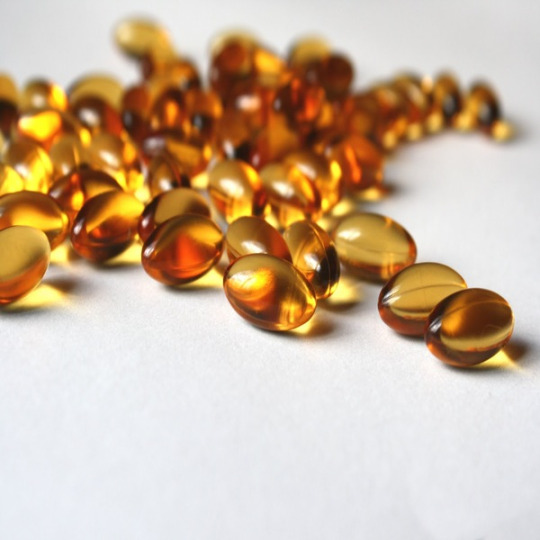
Sometimes people change their eating habits and start a healthier lifestyle, however, they want faster results without damaging their bodies. If you think you need a faster result, try Vitamin E supplements. Make a routine of taking one on a daily basis. Vitamin E lotion also helps to increase your lashes to its maximum growth.
9. LASH ACCELERATOR

Did you know that there are actually lash accelerator mascaras out there? While you might spend a little more on mascara, in the end, you'll save because your lashes will grow longer and thicker. Try it and tell me how you love it! This tip on how to make your eyelashes grow is as simple as applying a coat of mascara.
10. LASHES SERUM
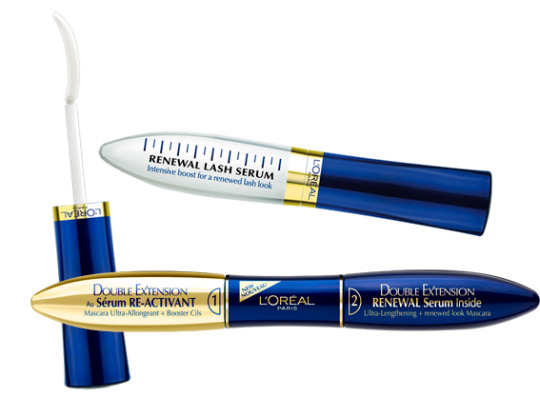
Yes, there is such a thing and it works wonders on your eyelashes. According to the experts, no matter how brittle, short, fragile, thin, or sparse your lashes are eyelash serum will strength follicles, which promotes growth. Serum moisturizes and conditions to prevent breakage and boosts volume and length.
*As always I’m open to suggestions and opinions so if you need information about an specific topic don’t forget to tell us! *
If you found helpful/useful this post please like or reblog it so I know that you want me to publish more tips & tricks about makeup.
Last but not least, if you are a makeup lover or if you want to join our family follow LEARNTOMAKEUP to read our posts and stay updated ♥
Thank you my angels for all your support and love, Valeria.
2K notes
·
View notes
Photo
DIY Home-made treatments for all skin stypes
Welcome to my blog LEARNTOMAKEUP! ♡
I’m Valeria and today we have a DIY for you all. This is a really exciting post and if you want to spend some time doing a face-mask keep on reading.
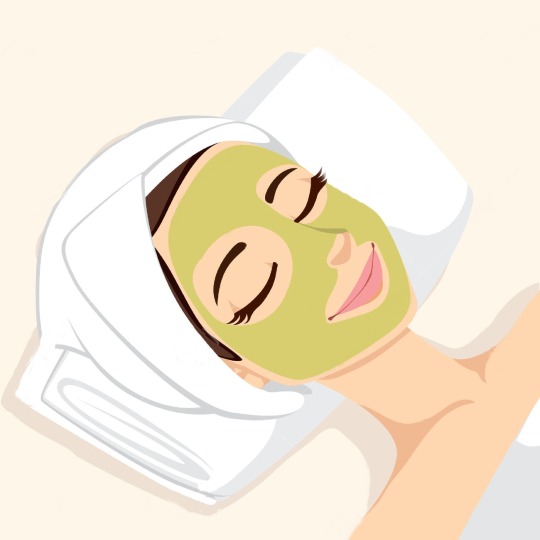
Now, it’s all about face masks! You can find different types in the drugstore and they promise to do thousand and thousand of magical effects in our faces.
What if we can do a face treatment in just minutes with our own ingredientes? Home-made are the answer, you don’t need to spend money anymore because you can use things you already have in your kitchen. Give them a try, see if it works for you and add them in your makeup routine. All this face-masks should be applied twice a week and keep them in your face for 15-20 minutes.
» Mask for Dull Skin «
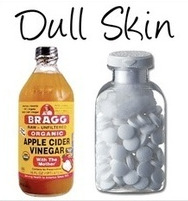
• 1 tablespoon organic apple cider vinegar • 5 plain aspirin tablets • 6 tablespoon mineral water
How should I prepare the mask?
Dilute 1 tablespoon organic apple cider vinegar with 6 tablespoon of mineral water. Crush your aspirin and add to the water/vinegar mix. Apply it to revive dull skin and get the glow back in your skin.
» Mask for Dry Skin «
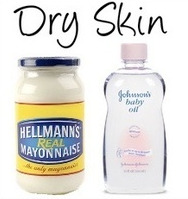
• 1 teaspoon baby oil • 2 tablespoon real mayonnaise
How should I prepare the mask?
Combine both ingredients, smooth onto your face, neck, rough elbows, and anywhere else that is feeling a bit dry. Leave on for 20 minutes and rinse. This will help you to moisturize your skin and leaves it looking and feeling softer.
» Mask for Oily Skin «

• 1 teaspoon lemon juice • 1 avocado • 1 egg white
How should I prepare the mask?
Combine all ingredients to make a paste. Apply to skin and wait for it to dry, rinse with cool water. These mask will gently exfoliate and absorb the oil in your face.
» Mask for Acne Pro Skin «
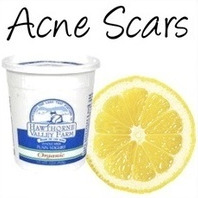
• 3 teaspoon plain yogurt • 4 teaspoon lemon juice • 4 tablespoon of honey • 1 egg white
How should I prepare the mask?
Apply to your clean face, let sit for 15 minutes then rinse with warm. This is an amazing way to cleanse your skin, absorb oil, remove blackheads and clear acne.
*As always I’m open to suggestions and opinions so if you need information about an specific topic don’t forget to tell us! *
If you guys enjoyed this DIY and you want me to post more DIY’s please like or reblog it so I know that you want me to publish more tips & tricks about makeup.
Last but not least, if you are a makeup lover or if you want to join our family follow LEARNTOMAKEUP to read our posts and stay updated.
Thanks for reading my posts and love you all, Valeria.
5K notes
·
View notes
Photo

Making the mascara-application face is an involuntary action all makeup lovers fall victim to.
Do you do it too? Because I do!
If you like beauty tips and tricks or posts related to makeup follow LEARNTOMAKEUP to join our family and stay updated ♥
98 notes
·
View notes
Photo

Hello angels! I hope you all are having a nice day.
I’m Valeria and this is LEARNTOMAKEUP ♥
You guys know I love reading your messages and suggestions so I can help you out based on your doubts. Whenever you feel like asking me something you can do it here because I will answer all your questions.
Yesterday I received this message:
So today’s topic is about the popular: FOUNDATION
If you just started wearing foundation it can be difficult to apply and you can have some trouble finding the right shade for your skin.
If you use foundation everyday it can crease and look cakey but the frustrating thing is that you don’t know what step is the one you are doing wrong.
No worries, you are not the only one. Achieving a flawless finish to our foundation is something almost every beauty lover wants. We are looking for a smooth, fresh and perfect finish.
To be honest, there is no magic ritual celebrities or makeup artists do to achieve a beautiful look. The only secret when it comes to apply foundation is preparation and application.
This time I will tell you some amazing tips to get the perfect foundation look you have been looking for.
1. PREPARE YOUR SKIN
Make sure your skin is clean and moisturized. You should wait five minutes before you apply foundation to let moisturizer sink in. Primer is a skippable step unless your makeup has to last through a late night. Or use it alone on lazy days as a quick complexion smoother. Primer can minimize pores and mattify your face.
2. SELECT YOUR FOUNDATION COVERAGE
Do you want sheer, medium or full coverage? How much of your natural skin do you want to show through your foundation? You’ll find foundation colors in all different types of coverage, so decide what finish you like best.
• IF YOU ARE LOOKING FOR A LIGHT COVERAGE:
— WEAR A POWDERY FOUNDATION
One of the best things abou this foundation is that you are going to save money because you don’t need a powder to set it anymore.
Powdery foundation is recommend for normal to oily skin.
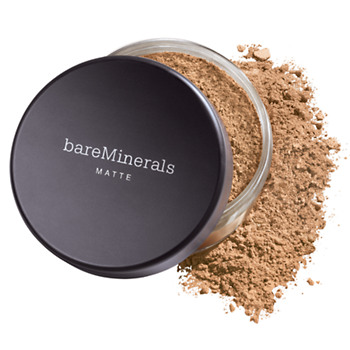
— WEAR A BB CREAM!
This is not considered as a foundation itself but if you just want to cover little blemishes and redness this is the best option for you.
BB cream is recommend for dry, normal and oily skin.
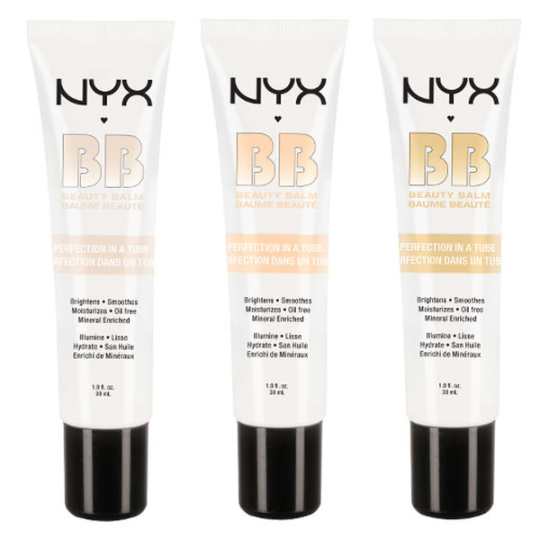
• IF YOU ARE LOOKING FOR A MEDIUM COVERAGE:
— WEAR A LIQUID FOUNDATION
To get a medium coverage you just need to build up your foundation in layers.
Liquid foundations are recommend for dry and normal skin.
If you have oily skin you can wear a liquid foundation just make sure you get an oily-free one.
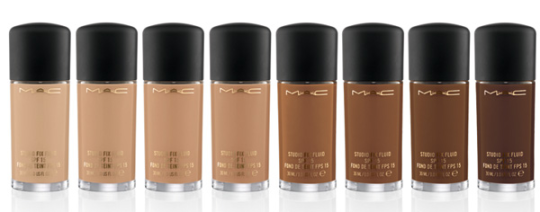
• IF YOU ARE LOOKING FOR A HIGH COVERAGE:
— WEAR A CREAMY FOUNDATION
Creamy foundations look amazing in HD videos and in professional photos, this is the product that models, artists and actresses wear to film shows, commercials and movies.
Creamy foundations are recommend for dry to normal skin.
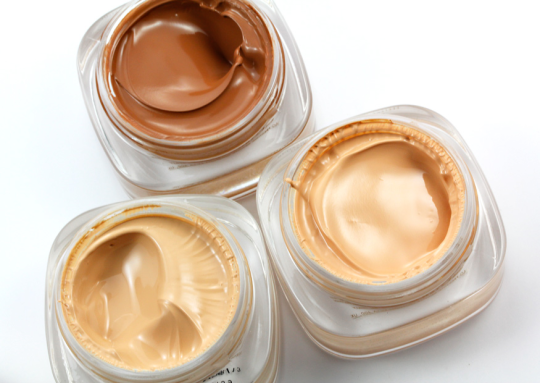
3. FIND THE PERFECT SHADE
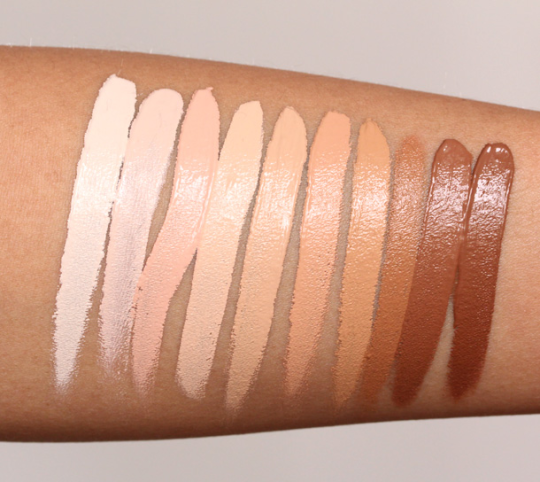
Test foundation on your jawline or cheeks and check it in the daylight. If you are not sure if you picked the right color make sure it disappears without blending. But, before you go selecting your shade we should be looking at our undertones. We are either cool, neutral or warm.
Down below you will discover what is your undertone.
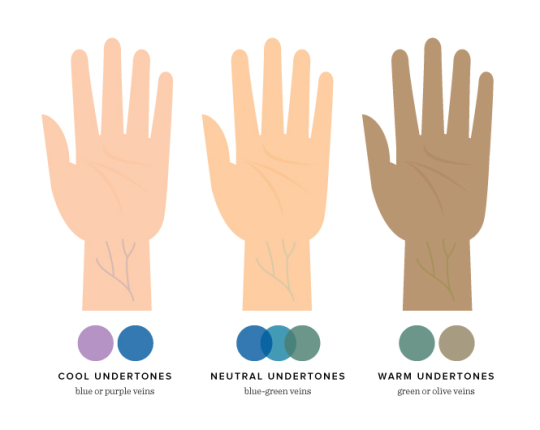
COOL UNDERTONES:
If you're cool, the veins on your inner wrist appear blue, you tend to turn a flushed pink color in the sun, and you burn easily, so you want to look for a foundation that has rosier, redder, or blue base.
WARM UNDERTONES:

If you're warm, the veins on your wrist appear green, and you quickly bronze or darken in the sun, so look for a foundation that has a golden or yellow base.
NEUTRAL UNDERTONES:
Neutral skin tones can pretty much pulls off any color but do tend to sway favorably one way. Neutral toned people can wear just about any color and look great. Some neutral skin tones pull towards warm or cool.If you're aneutral pulling warm tones then you will look best in warm but still look good in cool tones. If you are neutral pulling cool tones then you will look best in cools but still look good in warm tones.
4. TOOLS AND TOOLS
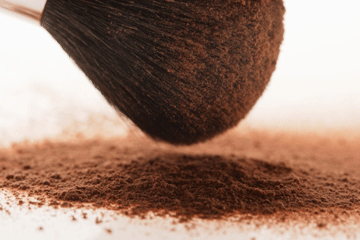
If you want just a little coverage, use your fingers, pros advise. If you don’t like wearing that much foundation for an everyday look, dab foundation only where you need it to hide pimples, camouflage redness or even out your T-zone.
WHAT BRUSH SHOULD I BUY IF I WANT ONE?
FLAT FOUNDATION BRUSH:

Dip your brush into foundation (using the back of your hand as a palette) and paint in downward strokes starting at the center, where you need the most coverage, and working outward. Going for a downward stroke also allows the product to skim over pores and fine lines, giving you more natural-looking coverage.
BUFFING OR KABUKI BRUSH:
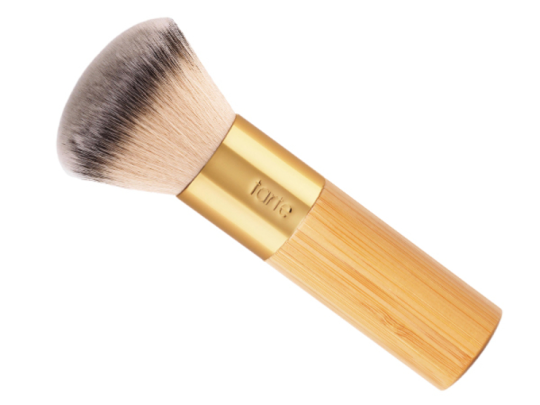
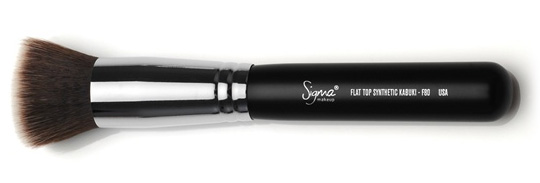
With foundation on the back of your hand, dip the tip of the brush into the makeup, and then work it into the skin from the center out in small circular motions.This dense brush is the key to achieve an airbrushed effect.
SPONGE:

For more coverage, use a sponge. Dip the tip of the sponge into foundation and apply to the larger areas of your face, starting from the center and working out in a stippling/patting motion. Once you’ve achieved the coverage you want, flip the sponge on its side and, with a little more makeup, hit the corners of your nose, under your eyes, and other tricky curves and contours.
5.PERFECT YOUR TECHNIQUE
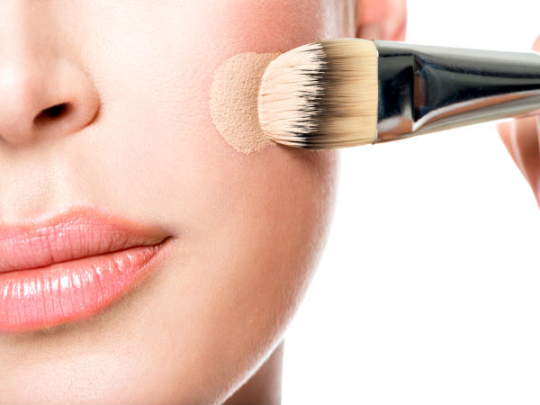
The way you apply foundation makes a big difference. The best technique is to blend thin layers into the skin. The problem areas to focus on when applying foundation will obviously be different for each individual, but the majority of women need a little bit of foundation around the centre of the face, so round the nose, mouth areas, the chin and the centre of the forehead. These are all areas where you often have blemishes or uneven skin tone. If you really focus on these areas and blend out, the foundation will become thinner as it goes towards the hairline, which will help achieve a much more natural finish.
6. DO CONCEALER AFTER FOUNDATION
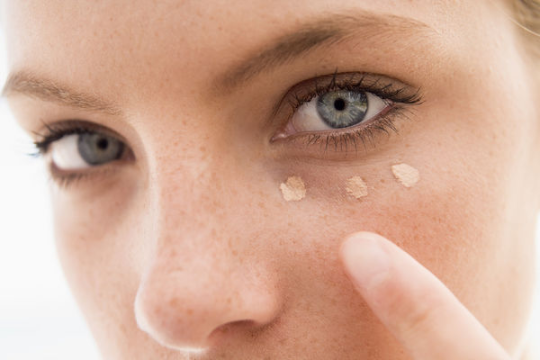
If you apply concealer before foundation, you’ll use more than you need. If you applied foundation first, that layer of foundation will keep concealer crease-free. Look for a lightweight liquid in a color one shade lighter than your skin. Use a small, pointy brush to cover the darkest part of under-eye circles usually right below the inner and outer corners. If other little skin flaws aren’t quite covered by your foundation, dab on a tiny bit of concealer there too.
7. SET YOUR FOUNDATION

A setting powder is basically a loose or compact sheer-to-medium coverage powder that helps to keep your foundation or other base makeup last longer throughout the day. It adheres to any damp and/or sticky part of the foundation and creates somewhat of a seal. It can also help remove excess shine. You only need the slightest amount use a light hand and just dab it along the areas where you want your makeup to be set or absorb any excess oil.
• FOR A LIGHT COVERAGE:
— WEAR A TRANSLUCENT POWDER
Translucent powder matches all skin tones when blended well. It’s great for killing shine and doesn’t add a ton of extra product to your skin as you touch up throughout the day. However, if it isn’t blended properly, you can end up with the dreaded FLASHBACK.
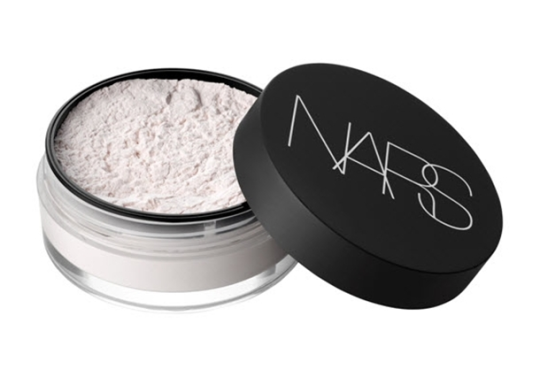
• FOR LIGHT TO MEDIUM COVERAGE:
— WEAR A LOOSE POWDER
Loose powder comes in a jar and you will be able to find it in your skin tone color. It has smaller particles and therefore a finer consistency and usually give lightweight coverage. They’re also messy and hard to transport, so these guys are meant to stay at home.
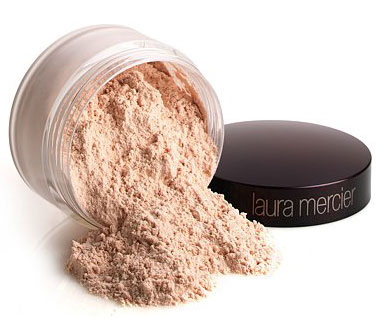
• FOR MEDIUM TO HIGH COVERAGE:
— WEAR A COMPACT POWDER
Pressed powder comes in a compact and contains ingredients used to turn the product into a semi-solid. The particles are slightly bigger and contain these stick-together ingredients, applying too much pressed powder can result in a cake-y appearance. Using a little as a touch-up throughout the day, though, is quick and easy.
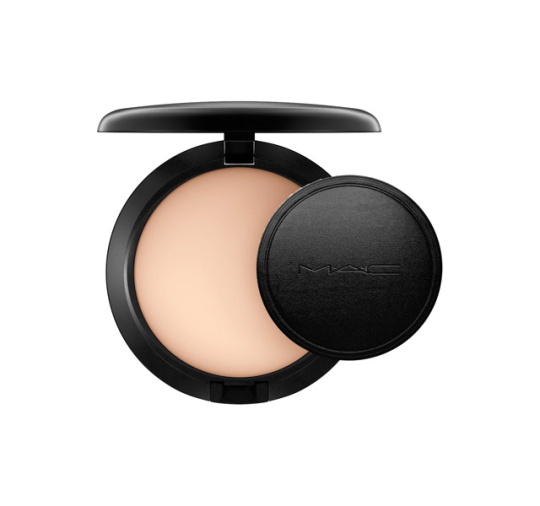
Remember that if you have a request about an specific topic let me know so I can help you. As always I’m open to suggestions and question so if you need any information I’m here for you!
If you found helpful this post please like or reblog it so I know that you want me to publish more tips & tricks about makeup.
Last but not least, if you are a makeup lover or if you want to join our family follow LEARNTOMAKEUP to read our posts and stay updated ♥
Love you all, Valeria.
3K notes
·
View notes
Photo

Happy weekend beauty lovers! My name is Valeria and this is my blog LEARNTOMAKEUP ♥
I’m really excited because this time I will be sharing some basic tips you will be able to apply on a daily basis.
If you need to get ready early in the morning for work, school, a meeting, go for a walk, have a breakfast with your old friends, this tips and tricks are for you.
Applying this tricks you will achieve a fresh and natural but amazing look, keep in mind that they are easier than you think, they will save you time and money if you decide to include this tips in your makeup routine. Let’s start!
1. EYELASH CURLER AND BLOW DRYER
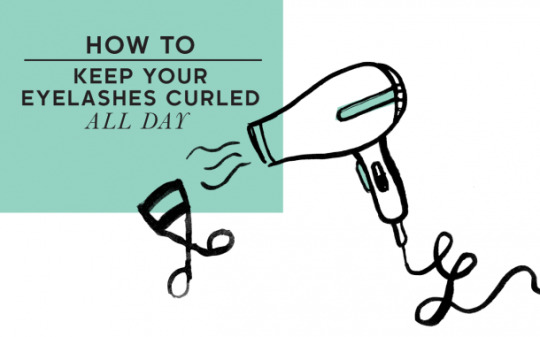
You don’t need to own a heated eyelash curler to achieve full length lashes anymore. You only need a regular eyelash curler and a blow dryer. Before you curl your lashes, heat up your lash curler with your blow dryer. Then, test the temperature on your wrist so you don’t burn yourself.
This will give your lashes the effect of longer-lasting, your eyes will look larger, brighter and more open. This trick works on false lashes too.
2. White eyeliner
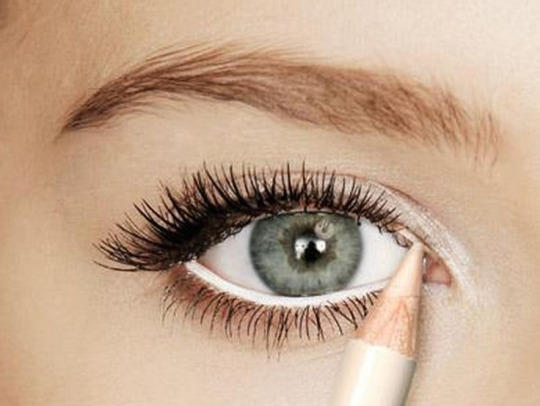
If you do not know, this is one of the most feared eyeliner because most people do not know how to use it. They are afraid it might make them look awful while it make smaller eyes look bigger.
When applied on inner lash lines, it makes the eyeballs to appear bigger by extending its white color. This use can be applied on people who have asian eyes or deep set eyes or anyone who wants their eyes pop, it will help to transform their looks to be more tad, bigger and nice looking.
For an awake look, you can use it in your inner eye corners. Using white eye liners in this way will make your eyes look much wider. To apply it, make a “V”on your inner eye corners using this eyeliner and smudge it or blend it with other colors.
3. PERFECT LIPS
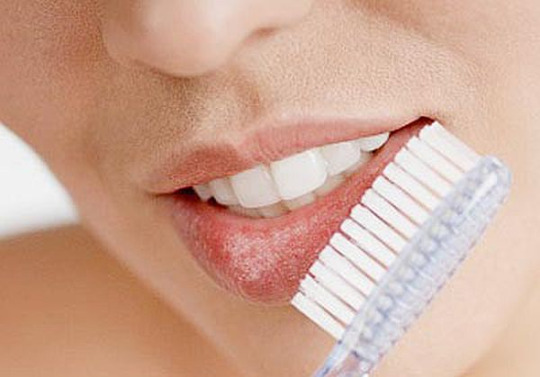
The fastest way to exfoliate your lips in less than a minute is brushing your lips. If you want soft lips and you want your lipstick to look bold and smooth, brush your top and bottom lips for 30 seconds each everyday and you will notice the difference.
Only use a soft or medium bristled toothbrush and warm water to avoid making your lips raw.
4. THE MAGIC OF TAPE
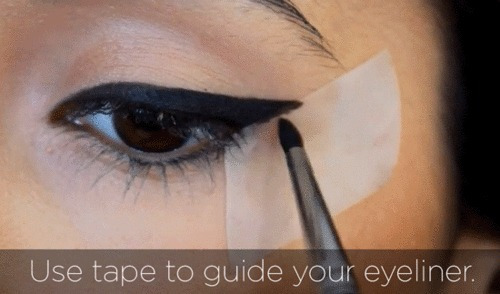
Use scotch tape to perfect your liquid eyeliner.
Let's face it: mastering the technique of liquid eyeliner is just plain hard. Luckily, sketching on exotic cat eyes just got a whole lot easier thanks to this one sticky trick. Here, we teach you how to use tape as a stencil.
Trust us, it's a game changer!
Use clear tape as a no-fail cat-eye guide. Place the edge of the tape in line with your bottom lash line and angle the top toward the end of your eyebrow.
5. FIX CUMPLY MASCARA
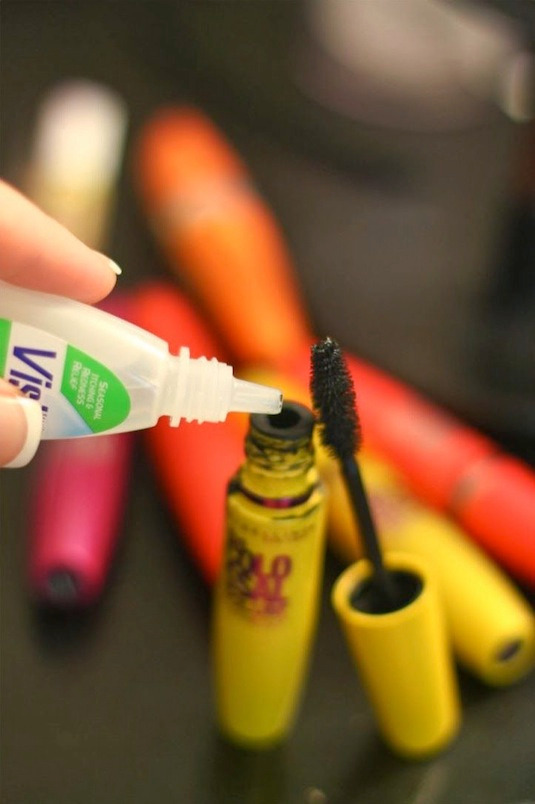
This happens to every tube of mascara over time. The problem is it dries out and then starts to form unattractive lumps. To help prevent this, don’t pump your mascara trying to get more on your wand; you’re basically pumping air into the tube causing it to dry out even faster.
Although mascara should be replaced every 3 to 4 months, I use to replace mine much sooner just because it dries out so fast and creates undesirable results. But, there’s an easy fix for that! Add a drop or two of eye drops into the tube, and then rub the wand around inside. The eye drops soften the mascara liquid, making it apply as if it were a brand new tube!
6. MAKE IT LAST
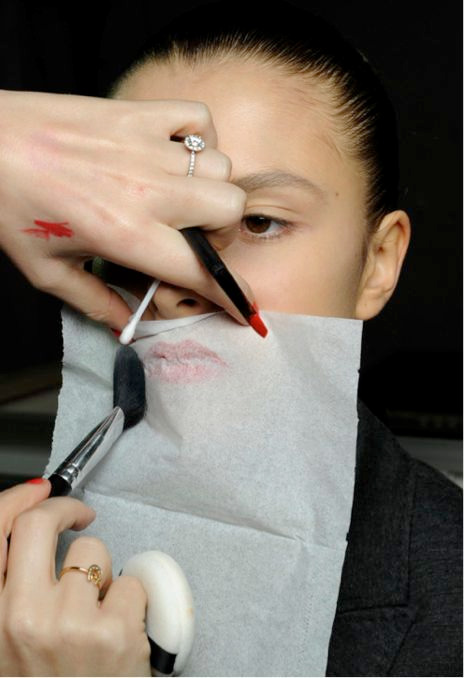
You can make your lipstick long laster using some powder. If you are tired that your lipstick fades away every single time you drink or eat something here is the solution.
After your lipstick is applied, hold a tissue over your lips and apply powder over the tissue. This creates a matte look that lasts much longer.
7. PENCIL EYELINER IS THE NEW GEL LINER

If you didn’t have time to pick a gel eyeliner from the drugstore or if you don’t want to spend money buying one, you can use a pencil you already have in your makeup bag. You don’t need about the finish because is similar and it will last the whole day.
How to do it? So simple. Turn a pencil eyeliner into a gel formula with the help of a match or lighter. Use a tiny brush, dab the brush in the pencil and apply it as you would apply gel liner. You need to put some black or brown eyeshadow above the line you just made to make it waterproof.
8. BIGGER BIGGER LIPS
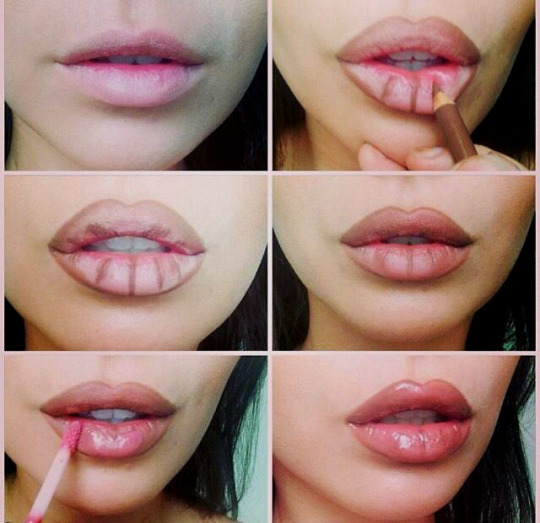
No injections, no harm, no fear. If you are scared of getting injections you can get bigger lips following this steps only using makeup.
• CONCEAL: Cover your lips with either foundation or concealer to brighten and highlight the lip line. Adding layers of light around the lips will make lips appear fuller.
• LINE: Firstly make sure your lip liner is sharpened before you use it, this will help with creating more precise lines. Using the same liner, overline the natural line of the bow. Line the lip from the underneath to create a shadow.
• SMUDGE: Using your finger or a small brush, blend the liner.
• PUT YOUR LIPSTICK ON: Fill in your lips with the lipstick. You can use any color you want to but remember that a nude colour will create the illusion of your lips being bigger.
• ADD LIPGLOSS: Apply a gloss to the centre of the lips to add light. The iridescent sheen from a glossy high shine product will help lips look instantly fuller. This a great tip for enhancing what you already have.
9. BROWS ON FLEEK
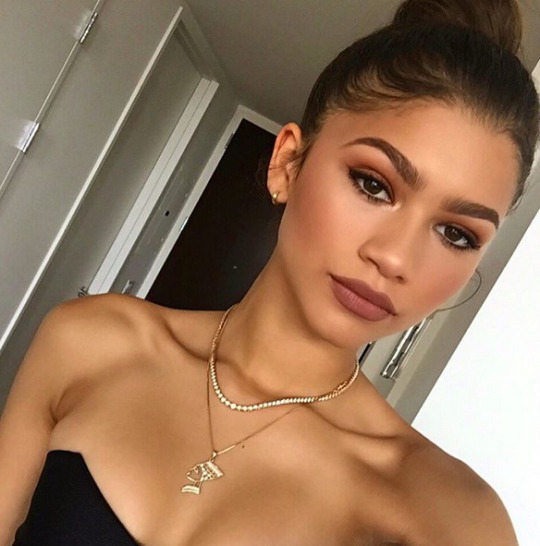
Create the perfect brows using a brow wand and eyeshadow. If you don’t have a brow wand, no problem you can replace it for a mascara spoolie.
To fill your brows use a mascara spoolie and some eyeshadow that fits your hair color. Take the wand, dab it in the eyeshadow and start shaping your brows until you fill all the gaps in your brows. If you need more coverage in the end of the brow, add more product and you are done.
If your brows look too harsh you can brush out your penciled/powdered-in brows to soften the look.
As always I’m open to suggestions and opinions so if you need information about an specific topic don’t forget to ask! Don’t be afraid to ask for help, if you want me to answer privately, I will do it. You can leave all your questions here
If you found helpful this post please like or reblog it so I know that you want me to publish more beauty tips & tricks.
Last but not least, if you are a makeup lover or if you want to join our family follow LEARNTOMAKEUP to read our posts and stay updated ♥
Love you all, Valeria.
11K notes
·
View notes
Photo


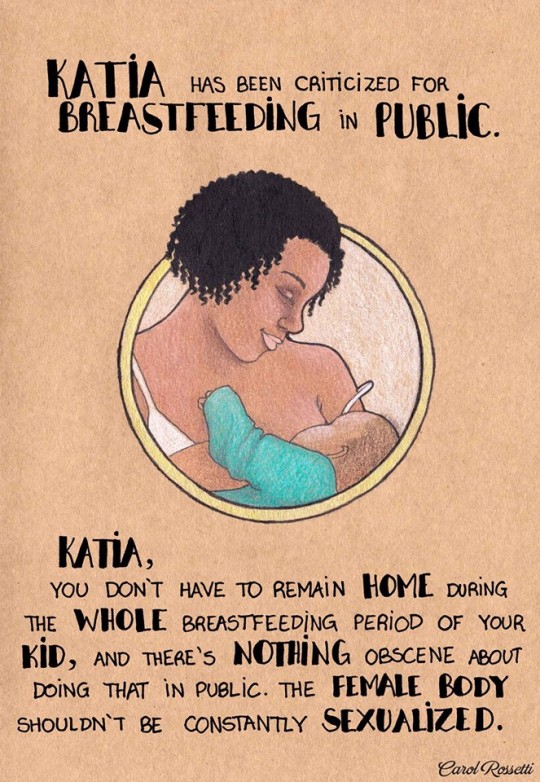
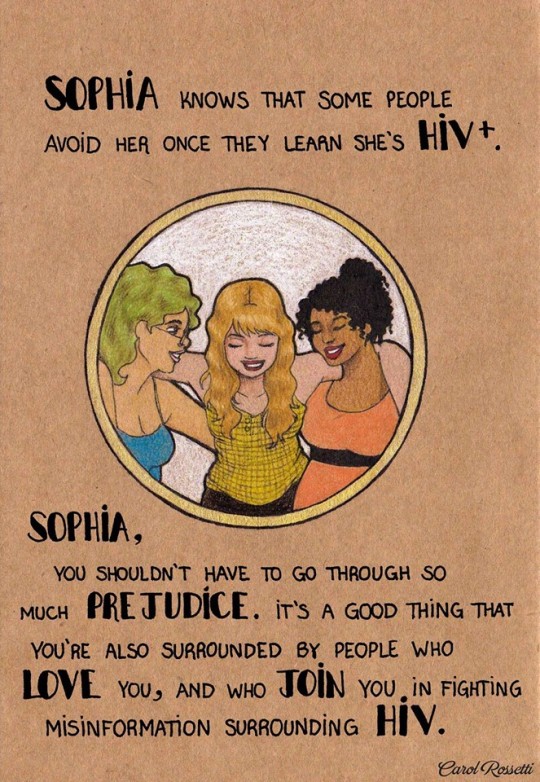


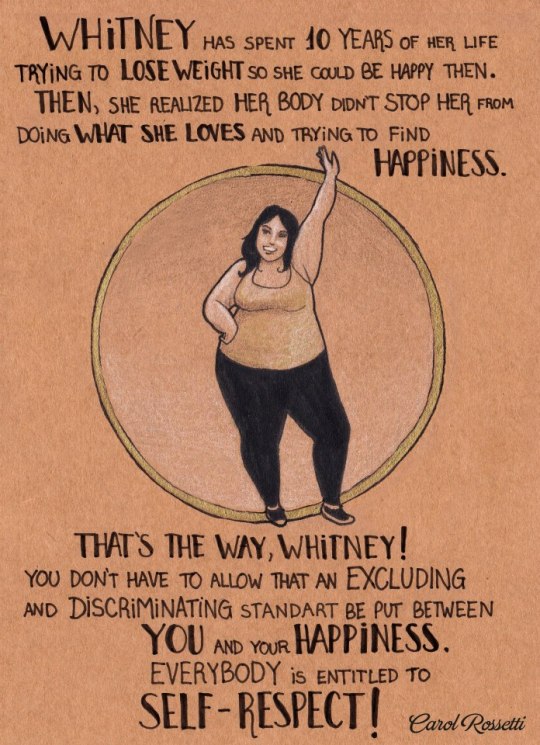
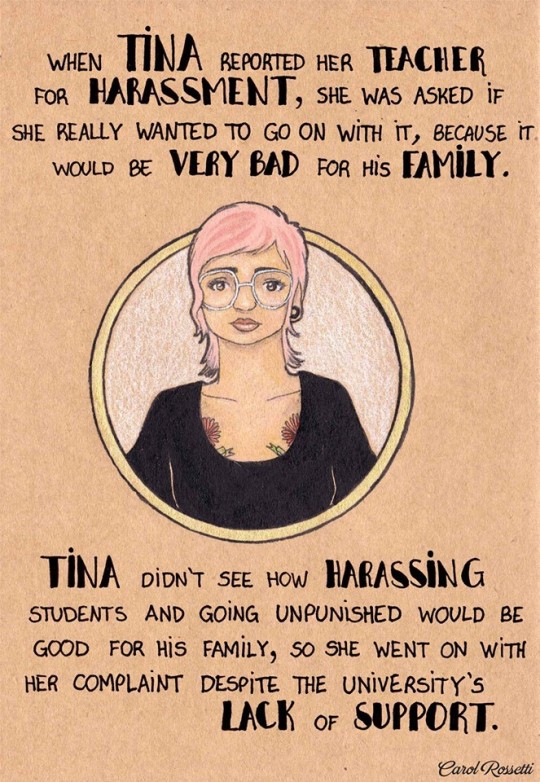
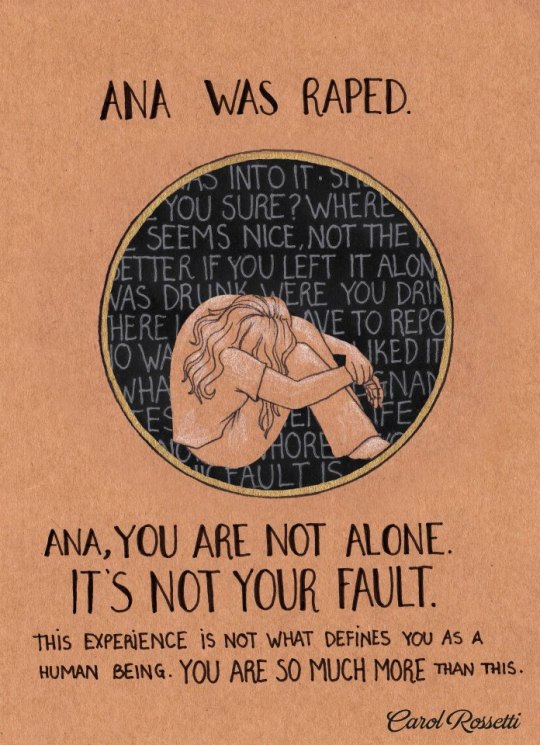
We all matter
Hey loves! I hope you are having a beautiful day.
I know, I know, this pictures seem off from topic since I always post beauty tips and tricks for you all. Before starting I want to say that I’m still posting makeup and beauty advice. However, I really wanted to share this content with my followers because a lot of young girls and females follow us. I believe that there are a lot of controversial topics out there that should be spoken out loud but most people feel ashamed and scared about opening to others or show their truly feelings.
With no more to say, I do believe that art is the best way to express what’s going on and the problems in our society.
I hope you enjoyed this pictures as much I do, if you like this pictures let me know so I can post more of this.
Drawings by Carol Rossetti
Last but not least, if you are a makeup lover or if you want to join our family follow LEARNTOMAKEUP to read our posts and stay updated ♥
Love you all, Valeria.
16K notes
·
View notes