#Add Firebase
Explore tagged Tumblr posts
Visit Tumblr Blog
Explore Tumblr blogs with no restrictions, modern design and the best experience.
Last Seen Tumblr Blogs


Fun Fact
In 2020, 44% of users from Denmark used Tumblr daily.
Text
0 notes
Text
How Much Does React Native App Development Cost in California?

With the growing demand for mobile applications, businesses are increasingly opting for cross-platform solutions like React Native to reduce development time and costs. California, being a tech hub, has a vibrant ecosystem of app development companies, but the cost of development can vary significantly based on several factors. In this blog, we’ll explore the cost of React Native app development in California and what influences the pricing.
Factors Influencing React Native App Development Cost
1. Complexity of the App
The complexity of your app plays a crucial role in determining the cost. Apps can be categorized into three levels of complexity:
Simple Apps – Basic apps with minimal features, such as a calculator or to-do list. ($10,000 - $30,000)
Medium Complexity Apps – Apps with additional functionalities like user authentication, API integration, and database management. ($30,000 - $80,000)
Complex Apps – Feature-rich apps with real-time data sync, AI, AR/VR, or blockchain integration. ($80,000 - $200,000+)
2. UI/UX Design
An intuitive and appealing UI/UX is essential for user engagement. Custom designs and animations can increase costs but significantly improve user experience. UI/UX design costs in California typically range from $5,000 to $30,000depending on complexity.
3. Development Team
Hiring a development team in California is costlier than in many other regions due to high labor costs. The pricing varies based on the team’s experience:
Freelancers – $30 - $100 per hour
Small Agencies – $50 - $150 per hour
Established Development Firms – $100 - $250 per hour
4. Backend Development & Third-Party Integrations
If your app requires a strong backend, the cost increases. Cloud-based solutions like AWS, Firebase, or custom-built servers influence pricing. Additionally, integrating third-party services (payment gateways, APIs, analytics tools) can add $5,000 - $50,000 to the development cost.
5. Maintenance & Updates
Post-launch maintenance is essential for app stability. Maintenance costs can range from 15-20% of the total development cost per year to fix bugs, update features, and ensure compatibility with the latest OS versions.
Estimated Cost Breakdown for React Native App Development in California
Basic App Development - $10,000 - $30,000
Medium Complexity App - $30,000 - $80,000
Complex App Development - $80,000 - $200,000+
UI/UX Design$5,000 - $30,000
Backend & Integrations - $5,000 - $50,000
Maintenance (Annual) - 15-20% of dev cost
Ways to Reduce React Native App Development Cost
Prioritize MVP Development – Focus on a Minimum Viable Product (MVP) to validate the idea before investing heavily.
Outsource Development – Hiring offshore or nearshore teams can reduce costs while maintaining quality.
Utilize Pre-built Solutions – Use pre-existing UI components and third-party integrations to speed up development.
Choose a Cost-effective Development Partner – Partnering with an experienced yet cost-effective development firm ensures quality without overspending.
Final Thoughts
React Native app development costs in California can vary widely based on complexity, team expertise, and required features. While it’s a cost-effective alternative to native development, strategic planning is essential to optimize the budget. If you’re considering building a React Native app, consult a reputable development firm to get a tailored cost estimate based on your specific needs.
Need help with React Native app development? Contact us today for a free consultation!
#app development company in California#mobile app development company in California#app development company California#mobile app developer in California#app developer in California
2 notes
·
View notes
Text
Education_Developer Project Lifecycle
I see a lot of people here on codeblr want to start some project but, not really know the best way to get started. To rectify this, hear is my very in depth guide on how to get started. Read this entire post (some of these are started early but its milestone is later).
Note, I highly suggest the use of Github and will be referencing some things that are specific to it (like Wikipedia pages). If you prefer some other method that's fine just be aware you may be making your life harder than it needs to be.
Milestone 1: Form Teams
Find your people, exchange contact information and determine a time to meet up, consistently. If you are working solo, ignore some of the instructions for this section. That is not to say ignore the parts about consistency and time management. In fact, because you are working solo that should be even more important.
At the first meeting establish chat service (teams, slack, google chat, discord). Establish the frequency of the meetings and how often everyone should check their messages (ex: every 24 hours). Discuss the options about the project.
Platform: Android, django, iOS, react native, etc.
IDE: Xcode, WebStorm, VSCode, etc. Note that modern IDEs now have built-in methods for sharing your editor view with teammates: code together, code with me, etc.
Backend: firebase, postgresql, not needed, etc.
Libraries
APIs you will access
Package manager: npm, yarn, gradle, etc.
Finally, discuss the roles you all want on the team, what should one person focus on, who is the manager, editor, client rep, tester, researcher, repo master, master of specific tech, analyst etc.
Deliverables:
Add a wiki page (or more) to your repo titled "Team Organization" and list there the decisions you made from above, along with any pother pertinent information for the team.
Add a page to your wiki titled "Project Description" which should be kept updated as you make decisions about your project. It should contain these sections:
Description: a short description of your project,
Technologies: a list of the technologies you plan to use: frameworks, libraries, hosting services, etc.
Client: your client's name and contact info, if you have one, otherwise just say "Startup."
Milestone 2: Personas and User Stories
If you have a client who wants you to build the app, or you have identified a group of users for your app, then try to meet with them. Ask them what they do? (that is relevant to why they will use the app), why they want the app? how do they currently do the things they want the app to do? etc. If this is a startup answer those questions and more.
The point of this section is to better understand the users of this website. You need to make personas and user stories and record them so that you can reference them as you complete this project. It is very easy to loose sight of who will be using your product and assume they know more than they actually do.
Deliverables:
Add at least three personas to your wiki. These should cover 3 distinct user-types for your app. Each Persona must have a name, photo, and personal history.
Add a "User Stories" wiki page with at least 9 user stories covering the most common use cases for your app. They should all be of the form: As <the name of one of your personas> I want a <feature> so that I can <satisfy a need>.
Milestone 3: Design
For those that are more artsy than everyone else, now is your time to shine. Use a tool like Pencil, figma, justinmind, balsamiq, mockflow.com to design your product.
Your design should include:
An image for each of the major screens and dialogs of your app. Show all the widgets in their proper placement. Name each screen and write some text to explain how actions in one screen will lead to other screens.
In the case of a widget-free apps, you should include diagrams for all the major 'areas', animation stills that detail the most common animations and game mechanics (for example, Super Mario would have a set of drawings showing Mario jumping, punching up, and landing on a Goomba's head), as well as story boards if they are more relevant to your game.
A goal of the design is for you to think about the usability of your app. Try to 'use' the app in your mind: simulate how a user might use the app. Printing the screens into sheets of paper of the correct size and shuffling them as you pretend to use the app is a very common way to test the usability.
Another goal is to save you time. Remember that making a change now, like adding or deleting a screen, is a thousand times easier than if you wait until after you have written the code.
Deliverable: Add one page to your wiki called "Design" and add the images of your design here, along with some textual description of each screen and what it is used for.
Milestone 4: Requirements
This will be the main requirements document for your project. If you were charging a client for your work, this document would form part of that contract, specifying exactly what features your software will implement. The other part of the contract would be the payment details.
The document includes the design you made before (so, embed or add links to those images) but extends on that with detailed descriptions of all the desired features.
You will also mark each feature with one of:
Required: Core functionality of the app. Must have these for it to even start working.
Desired: Added functionality, usability, features, cosmetic features.
Aspirational: Other cool stuff you would like to add
Remember: all good programmers should understate what can be done and then over deliver. If you think something is going to take you 4 weeks, tell the client it will take 8. Then, when it inevitably takes you 6 weeks, you will seem ahead of schedule. On a similar note, if the client is asking for a lot of shit, say no. Now is not the time to be a people pleaser. If you want to please them, do it as a surprise addition, after basic functionality has been achieved.
Roughly the required features are those that need to get done first before anything else can even get started: things like logins, navigation menu, connection to backend, etc. They lay the foundation for building the app. An app that only implements the required features will at most get a passing grade in the class: 70.
The desired features are what make your app worth using. They make the app functional, attractive, and easy to use. Roughly, an app that implements all the desired features gets a 90 in the class.
The aspirational features make your app a professional-quality app. Implementing some of these moves it towards 100.
Deliverables:
Make a Requirements wiki page and list your requirements there.
Each item should succinctly explain a feature.
Each one will have a number. You can add sub-numbering, 1.1, 1.2, 1.2.1, etc. if you want.
Each one will be marked as either: Required, Desired, or Aspirational.
Add all the Proof of Concept Issues to your GitHub Issues with label:enhancement, milestone:Proof Of Concept. These are what you will implement first.
Milestone 5: Research
As a developer, you need to be intimately familiar with the technologies you are or could be using. You need to understand the pros, cons, and requirements of each library and platform that is relevant to your project. Thus, you need to be up to date on technology and, since technology seems to be always changing, this will be something you need to do throughout your career.
Specifically, you need to
Know about the various platforms available to you: their options and limitations.
Know about the various libraries that you can use to make your work easier.
Download, install, and build sample 'Hello world' apps using the most promising technologies. It is not enough to just read about it, you have to do it in order to learn.
Learn how to use the specific framework+libraries you choose to use for the project by building little apps with them.
Learn to use your package manager.
All of the above needs to be done before you start coding together with your team. Do not assume your teammates will teach you. You are responsible for learning.
This milestone will take a lot of time and work, which is why you should start working on this milestone as soon as that first meeting occurs where you discussion options.
Deliverable: Create a separate repo (I suggest naming it research-<projectname>) where you will place your sample project built using your team's chosen framework. The project will be more than just "hello world", or cut-n-paste from a tutorial. Start with tutorial code but, add you own code to their code. The app should have some minimal interactivity: user enters some data, program does something with it and shows the user.
Milestone 6: Architecture
Now that you are comfortable working with your chosen framework, you will write a document that roughly describes the big parts of your code. The structure will depend a lot on your chosen framework.
If you are building a webapp then you will probably list the set of database tables (models, for example: rails:ActiveRecords, meteor:Collections, etc), the set Views, and the set of Controllers. For webapps you should also list the of your URLs app, and what lives at each one.
If you are building an Android app then you will list your Activities or Fragments, along with their corresponding Views, as well as your model Java classes. You will also list your database tables (firebase, sqlite, localStorage, etc) if you need persistence, which almost everyone does.
Think deeply about your design. Go over the most common use-cases and check how those will be accomplished in code: which methods will be invoked? do the methods have references to all the objects they need in order to perform their job? Remember that your main goal is *de-coupling** the various classes: the fewer references (method arguments, global variables) they need, the easier your life will be.
Deliverable: Add architecture document to the wiki containing:
List all the languages/frameworks/libraries/services/APIs you plan to use. Explain how they will tie together. For example: This will be a native Android app written in Kotlin, using the android.graphics library, using firebase real-time database for cloud data, and firebase authentication for user accounts.
What package/build manager will you use? npm, gradle, yarn, flutter, pipenv, etc.
List what each person will work on. Everyone must make significant code contributions, or they will fail the class, see Syllabus.
Make sure all the images (if any) are embedded in the wiki page and hosted at GitHub.
Make sure the wiki page is easy to read.
If you are building a webapp:
Deployment How will you deploy? Which hosting provider(s)? Automation? Scripts? Explain.
Are you using Virtual Machines (vmware, vbox, etc) or Containers (docker) for development or deployment? Explain.
Is it a SPA or traditional? or mix? Explain. (My web application development lectures explain the difference.)
List of URLs you will implement. Explain any search arguments in English. Link (actual hyperlink) each URL to the page it shows in your Detailed Design milestone.
If implementing a REST API, document it. List all methods, parameters, and give English description of what they do.
The Views of your app. Embed the images from your Design Milestone. Typically, a webpage includes multiple views. For example, this webpage has a Header, Menu, and Content views (at least).
The Database schema: set of tables/documents with list of attributes and their types. Describe each table and attribute in English.
List of common queries you expect will be needed. Do any of then need to join tables?
If you are building a mobile or desktop app:
Release: How will you create and deliver a binary to testers? Explain. Note that the testers include us (the teachers of this class, when we grade your app). You must deliver a simple to install app: double-click to install.
Are you using Virtual Machines (vmware, vbox, etc) or Containers (docker) for development? If so, explain.
The Models for your app. These could be UML class diagrams, or just models with attributes (with type) and descriptions (in English).
How will your app maintain state? in memory? or database? or both? Note this in your Model Classes.
If you are using a db-backend (say firebase) then include the Database schema: set of tables/documents with list of attributes and their types.
List of common queries you expect will be needed. Do any of then need to join tables?
The Views of your app: name, describe. Embed the images from your Design Milestone. Typically, one page in the app is composed of multiple View elements.
Below will be complete as I do for my Capstone project.
Source Control
Ethical, Legal, and Security Considerations
Proof of Concept (PoC)
PoC Demo
Testing
Beta Release
RC1 Release
Quality Assurance
Website
1.0 Release
Final Demo Video
#erozcodes#studyblr#codeblr#education#self study#production cycle#scrum#devlifecycle#this shit can be so painful and I hope this can help
3 notes
·
View notes
Text
100 Days Of Code Challenge - day 3/100
10/01/2024
Day 3:
I completed the to-do list project, and it was very helpful for practicing React states and using Firebase for the database 🚀.
I've been looking for information to start making a Trello clone to add to my web portfolio (if anyone has any project suggestions, leave me a comment :D) 💡
#100daysofcode#coder#coderlife#codeblr#coding#developers & startups#developers#html5#development#javascript#html#programming#latest tech#web developers#web development#technology#tech#study notes#geek#reactnative#reactjs#studygram#learning#studyblr#computer science#techcrunch#virtual reality#github
11 notes
·
View notes
Text
Navigating the Full Stack: A Holistic Approach to Web Development Mastery
Introduction: In the ever-evolving world of web development, full stack developers are the architects behind the seamless integration of frontend and backend technologies. Excelling in both realms is essential for creating dynamic, user-centric web applications. In this comprehensive exploration, we'll embark on a journey through the multifaceted landscape of full stack development, uncovering the intricacies of crafting compelling user interfaces and managing robust backend systems.

Frontend Development: Crafting Engaging User Experiences
1. Markup and Styling Mastery:
HTML (Hypertext Markup Language): Serves as the foundation for structuring web content, providing the framework for user interaction.
CSS (Cascading Style Sheets): Dictates the visual presentation of HTML elements, enhancing the aesthetic appeal and usability of web interfaces.
2. Dynamic Scripting Languages:
JavaScript: Empowers frontend developers to add interactivity and responsiveness to web applications, facilitating seamless user experiences.
Frontend Frameworks and Libraries: Harness the power of frameworks like React, Angular, or Vue.js to streamline development and enhance code maintainability.
3. Responsive Design Principles:
Ensure web applications are accessible and user-friendly across various devices and screen sizes.
Implement responsive design techniques to adapt layout and content dynamically, optimizing user experiences for all users.
4. User-Centric Design Practices:
Employ UX design methodologies to create intuitive interfaces that prioritize user needs and preferences.
Conduct usability testing and gather feedback to refine interface designs and enhance overall user satisfaction.

Backend Development: Managing Data and Logic
1. Server-side Proficiency:
Backend Programming Languages: Utilize languages like Node.js, Python, Ruby, or Java to implement server-side logic and handle client requests.
Server Frameworks and Tools: Leverage frameworks such as Express.js, Django, or Ruby on Rails to expedite backend development and ensure scalability.
2. Effective Database Management:
Relational and Non-relational Databases: Employ databases like MySQL, PostgreSQL, MongoDB, or Firebase to store and manage structured and unstructured data efficiently.
API Development: Design and implement RESTful or GraphQL APIs to facilitate communication between the frontend and backend components of web applications.
3. Security and Performance Optimization:
Implement robust security measures to safeguard user data and protect against common vulnerabilities.
Optimize backend performance through techniques such as caching, query optimization, and load balancing, ensuring optimal application responsiveness.
Full Stack Development: Harmonizing Frontend and Backend
1. Seamless Integration of Technologies:
Cultivate expertise in both frontend and backend technologies to facilitate seamless communication and collaboration across the development stack.
Bridge the gap between user interface design and backend functionality to deliver cohesive and impactful web experiences.
2. Agile Project Management and Collaboration:
Collaborate effectively with cross-functional teams, including designers, product managers, and fellow developers, to plan, execute, and deploy web projects.
Utilize agile methodologies and version control systems like Git to streamline collaboration and track project progress efficiently.
3. Lifelong Learning and Adaptation:
Embrace a growth mindset and prioritize continuous learning to stay abreast of emerging technologies and industry best practices.
Engage with online communities, attend workshops, and pursue ongoing education opportunities to expand skill sets and remain competitive in the evolving field of web development.
Conclusion: Mastering full stack development requires a multifaceted skill set encompassing frontend design principles, backend architecture, and effective collaboration. By embracing a holistic approach to web development, full stack developers can craft immersive user experiences, optimize backend functionality, and navigate the complexities of modern web development with confidence and proficiency.
#full stack developer#education#information#full stack web development#front end development#frameworks#web development#backend#full stack developer course#technology
2 notes
·
View notes
Text
Ambulance App Development
Imagine being stuck in traffic with a loved one in need of urgent medical attention. You dial emergency services, but help is delayed. Unfortunately, that scenario is far too common in many parts of the world. Now picture this: with just a few taps on your phone, an ambulance is on its way, with real-time tracking and updates. That’s the magic of Ambulance App Development.
In recent years, mobile technology has completely reshaped how we access healthcare. Much like ride-hailing apps changed the way we book taxis, on-demand ambulance app development is now doing the same for emergency medical services.
Let’s break it down.
What Is an Ambulance App?
An ambulance app is a digital platform that connects users with the nearest available ambulance in real time. It allows for fast booking, live location tracking, medical data sharing, and even direct coordination with hospitals.
You could think of it as an Uber for Ambulance. Just as ride-hailing services made cabs more accessible and efficient, ambulance apps are revolutionizing how emergency care reaches people.
Why Do We Need Ambulance Apps?
Across the globe, the traditional emergency medical system has struggled with delays, miscommunication, and lack of transparency.
Here’s what ambulance apps bring to the table:
Faster response times
Real-time GPS tracking
Digital patient records sharing
Route optimization for drivers
Cashless payments and digital receipts
These features not only help patients but also make operations smoother for healthcare providers and EMT teams.
Real-World Examples
India's Ziqitza Healthcare has been leading the charge in providing on-demand ambulance services in several states through a user-friendly mobile app. In Kenya, Flare offers an Uber-style service for ambulances, connecting users to a network of emergency responders across the country. The UK’s GoodSAM platform integrates with the NHS and uses crowd-sourced first responders to help patients before the ambulance even arrives.
These examples show that on-demand ambulance app development is not a luxury anymore—it’s a necessity.
Key Features of a Successful Ambulance App
Creating an ambulance app isn't just about throwing in a few features. You need a well-thought-out design that considers the needs of both patients and healthcare providers.
Here’s a quick peek at what makes a solid app tick:
1. Instant Booking
Users can book ambulances with a tap and share their live location instantly.
2. Real-Time Tracking
See exactly where your ambulance is and how long it will take to arrive.
3. Multiple Ambulance Types
Let users choose from basic, advanced, ICU-equipped, or neonatal ambulances.
4. Driver & EMT Profiles
Build trust by displaying driver and EMT details with ratings and certifications.
5. Digital Payments
Simplify transactions with integrated payment gateways and insurance options.
6. Emergency Contacts & Medical Info
Allow users to add medical history and emergency contact numbers in advance.
7. Hospital Integration
Hospitals can prepare for the incoming patient, reducing wait time on arrival.
Technology Stack: What’s Under the Hood?
Just like a high-performance car, an ambulance app needs a powerful engine behind it. Here’s what you’ll typically find:
Frontend: React Native or Flutter for cross-platform functionality
Backend: Node.js, Python, or Java with robust APIs
Database: MongoDB, PostgreSQL, or Firebase
GPS & Navigation: Google Maps, Mapbox, or OpenStreetMap
Payment Gateways: Stripe, Razorpay, or PayPal
Real-Time Features: WebSocket or Firebase for live updates
The key to success? Choosing scalable, secure, and fast technologies that ensure zero lag during critical moments.
Business Models for Ambulance Apps
Thinking of investing in ambulance app development? You’ve got options. Here are some popular business models:
Aggregator Model: Like Uber, connect multiple ambulance providers under one platform.
Hospital-Based Model: An internal app exclusively for a hospital’s emergency fleet.
Subscription-Based: Offer premium memberships with priority response and additional features.
Pay-Per-Use: Users pay a one-time fee per emergency trip.
Each model has its pros and cons. Your choice depends on your market, goals, and target audience.
Challenges to Watch Out For
Let’s be real: this isn’t an easy business. Here are some bumps on the road you’ll need to steer around:
Regulatory compliance with healthcare and transport authorities
Ensuring data security, especially with patient medical records
Maintaining a well-trained and verified network of EMTs and drivers
Managing operations during peak demand or natural disasters
With proper planning and the right tech partner, these challenges can absolutely be managed.
Conclusion
In a world where everything is moving faster, healthcare can’t afford to lag behind. Ambulance app development is more than just a tech trend—it’s a life-saving tool that brings emergency services to the fingertips of millions. From reducing response times to helping hospitals better manage patients, these apps are changing the game.
Whether you're a healthcare provider looking to modernize, an entrepreneur exploring med-tech, or a government agency wanting to improve emergency services, now’s the time to take the leap.
Don’t just follow the trend. Be the reason someone gets help when they need it most.
Building an Uber for Ambulance app can be your way of doing just that.
If you’re ready to dive into on-demand ambulance app development, find a tech partner with real healthcare experience, focus on user needs, and never compromise on reliability. Because when it comes to emergencies, there are no second chances.
0 notes
Text
Top 5 React JS Projects That Will Instantly Boost Your Developer Portfolio
At Fusion Software Training Institute, we help students not only learn the core concepts of React JS but also apply them in hands-on projects that stand out. Here are five impressive React JS projects you should consider adding to your portfolio to demonstrate your capabilities: 1. Personal Portfolio Website (with React & React Router) A personal portfolio is more than a resume—it's your digital presence. Use React Router for navigation, styled-components or Tailwind CSS for styling, and deploy it on GitHub Pages or Vercel. Showcase your skills, projects, blog, and contact form. Key Skills Highlighted: React Components, Routing, Responsive Design, Deployment Read for More Info : Top React JS Projects 2. E-commerce Product Store (with Cart Functionality) Create a mini e-commerce platform where users can browse products, add them to a cart, and place mock orders. Integrate context API or Redux for state management. Key Skills Highlighted: State Management, API Integration, Local Storage, Component Reusability 3. Real-time Chat App (with Firebase Integration) Build a modern chat application using Firebase for real-time database and authentication. Add features like group chats, typing indicators, and message timestamps. Key Skills Highlighted: Firebase Auth & Firestore, Hooks, Real-time Communication 4. Task or Productivity Tracker (with Drag-and-Drop) Develop a productivity tool where users can create tasks, set deadlines, and move them across stages (To-Do, In Progress, Done) using drag-and-drop functionality. Key Skills Highlighted: React DnD Library, Hooks, State Updates, UX/UI Design 5. Weather App (with External API Integration) Build a dynamic weather forecast app using the OpenWeatherMap API. Users can search for any city and get real-time weather data. Key Skills Highlighted: API Fetching, Conditional Rendering, User Input Handling, Environment Variables Ready to take the next step in your tech career? 📧 Email us at [email protected] 📞 Talk to our team at +91 98906 47273 or +91 74989 92609
0 notes
Text
Top Tools and Technologies to Use in a Hackathon for Faster, Smarter Development
Participating in a hackathon like those organized by Hack4Purpose demands speed, creativity, and technical prowess. With only limited time to build a working prototype, using the right tools and technologies can give your team a significant edge.
Here’s a rundown of some of the best tools and technologies to help you hack efficiently and effectively.
1. Code Editors and IDEs
Fast coding starts with a powerful code editor or Integrated Development Environment (IDE).
Popular choices include:
Visual Studio Code: Lightweight, extensible, supports many languages
JetBrains IntelliJ IDEA / PyCharm: Great for Java, Python, and more
Sublime Text: Fast and minimalistic with essential features
Choose what suits your language and style.
2. Version Control Systems
Collaborate smoothly using version control tools like:
Git: The most widely used system
GitHub / GitLab / Bitbucket: Platforms to host your repositories, manage issues, and review code
Regular commits and branch management help avoid conflicts.
3. Cloud Platforms and APIs
Leverage cloud services for backend, databases, or hosting without setup hassle:
AWS / Azure / Google Cloud: Often provide free credits during hackathons
Firebase: Real-time database and authentication made easy
Heroku: Simple app deployment platform
Explore public APIs to add extra features like maps, payment gateways, or AI capabilities.
4. Frontend Frameworks and Libraries
Speed up UI development with popular frameworks:
React / Vue.js / Angular: For dynamic, responsive web apps
Bootstrap / Tailwind CSS: Ready-to-use styling frameworks
These tools help build polished interfaces quickly.
5. Mobile App Development Tools
If building mobile apps, consider:
Flutter: Cross-platform, single codebase for iOS and Android
React Native: Popular JavaScript framework for mobile
Android Studio / Xcode: Native development environments
6. Collaboration and Communication Tools
Keep your team synchronized with:
Slack / Discord: Instant messaging and voice/video calls
Trello / Asana: Task and project management boards
Google Docs / Notion: Real-time document collaboration
Effective communication is key under time pressure.
7. Design and Prototyping Tools
Create UI/UX mockups and wireframes using:
Figma: Collaborative design tool with real-time editing
Adobe XD: Comprehensive UI/UX design software
Canva: Simple graphic design tool for quick visuals
Good design impresses judges and users alike.
8. Automation and Deployment
Save time with automation tools:
GitHub Actions / CircleCI: Automate builds and tests
Docker: Containerize applications for consistent environments
Quick deployment lets you demo your project confidently.
Final Thoughts
Selecting the right tools and technologies is crucial for success at a hackathon. The perfect mix depends on your project goals, team skills, and the hackathon theme.
If you’re ready to put these tools into practice, check out upcoming hackathons at Hack4Purpose and start building your dream project!
0 notes
Text
Enterprise FlutterFlow Training: Build Scalable Apps

In a world where mobile-first experiences dominate every industry, the pressure to deliver flawless, scalable apps has never been greater. Flutterflowdevs is here to transform your development pipeline with our Enterprise FlutterFlow Training—the ultimate weapon to crush deadlines, impress users, and catapult your team’s performance to elite levels.
Why settle for slow development cycles, bloated code, or hiring roadblocks? With our training, your in-house team can master FlutterFlow’s intuitive visual development platform and deploy enterprise-grade apps at record-breaking speed.
Accelerate App Delivery with FlutterFlow
Speed is everything in today’s fast-moving markets. FlutterFlow, powered by Google’s Flutter framework, revolutionizes how apps are built—no more weeks of redundant coding, no more chasing full-stack unicorns. Our Enterprise FlutterFlow Training teaches your team how to visually build, integrate, and scale robust apps using drag-and-drop components and backend logic without compromising on performance or flexibility.
With this training, your organization will go from idea to deployment in days—not months.
Who Is This For? Enterprises That Demand More
If your company is growing fast and facing bottlenecks in tech delivery, our program is tailored for you. Whether you’re a product manager, CTO, or head of engineering, you know the cost of delay. Empower your existing developers to build advanced, scalable apps without waiting on traditional workflows.
Perfect for:
SaaS companies needing rapid iterations
Startups scaling their MVPs into robust platforms
Agencies serving multiple clients
Corporations modernizing their internal systems
What You’ll Learn: Scalable Mastery from Day One
Our training goes far beyond the basics. It’s designed to turn your developers into FlutterFlow power users who can architect systems that scale.
You’ll learn:
Advanced app logic with Firebase & APIs
Custom Flutter code integration
State management & complex data modeling
Authentication and role-based access control
Deployment workflows and CI/CD integration
The end result? Enterprise-grade, scalable applications built with astonishing speed and clarity.
Why Flutterflowdevs?
Because Flutterflowdevs doesn’t just teach FlutterFlow. We build and deploy apps daily using this very tool for clients across the globe. Our training is rooted in real-world scenarios, case studies, and optimizations learned on the front lines.
You're not just learning the how. You're learning the why, the when, and the exact strategy top-tier companies use to leap ahead of competitors.
The Secret Power Add-On: SaaS Email Copywriting Course
Building an app is only half the battle. You need users, retention, and conversion. That's why every enrolment in our Enterprise FlutterFlow Training comes bundled with access to our SaaS Email Copywriting Course.
This isn’t some fluff-filled tutorial. It’s a proven framework used by SaaS growth experts to write emails that convert like crazy. You’ll learn:
How to craft irresistible onboarding sequences
How to reactivate dormant users with the perfect win-back email
How to write launch campaigns that actually get opened and clicked
How to segment and personalize messages at scale
When you combine a scalable app infrastructure with high-converting email flows, you don’t just build software—you build an unstoppable SaaS growth engine.
Urgency Matters: Why You Need to Enroll Today
Your competitors aren’t waiting—and neither should you. Every day you delay is another day you risk being outrun by startups with leaner, faster processes.
The FlutterFlow ecosystem is evolving rapidly. Those who master it early will dominate app markets, cut engineering costs, and retain users longer.
By enrolling now, your team will:
Slash development timelines by up to 70%
Eliminate costly dependencies on multiple tech stacks
Future-proof your app infrastructure
Unlock the growth playbook with expert email strategies
Real Results from Real Teams
Enterprises that have completed our training are shipping 3x faster, cutting contractor expenses in half, and delivering better UX thanks to rapid prototyping and deployment.
“We were stuck in dev hell. Now our team builds fully functional apps in a week. The bonus SaaS Email Copywriting Course helped us double our activation rates. Game changer!” — CTO, FinTech Startup
Let’s Recap What You Get:
Full Enterprise FlutterFlow Training (beginner to advanced)
Hands-on projects, templates, and guided walkthroughs
Expert instruction from seasoned app builders
Lifetime access and updates
FREE SaaS Email Copywriting Course
Scalable app development + scalable growth marketing in one package
Final Word: This Is More Than Training. It’s a Growth Revolution.
In a tech world filled with complexity, Flutterflowdevs offers clarity, speed, and results. Our Enterprise FlutterFlow Training is the fastest way to empower your team, slash your go-to-market time, and dominate your niche.
FOR MORE INFORMATION:
Flutterflow Web App
Flutterflow Web Development Agency
Top Flutterflow Development Company
0 notes
Text
Code the Future: Full Stack Web Development for Innovators
In today’s fast-evolving digital landscape, businesses and individuals alike are striving to innovate and stay ahead of the curve. One of the most powerful tools in this digital revolution is Full Stack Web Development — the backbone of websites, apps, and platforms that shape our everyday experiences. The demand for versatile developers who can code both the frontend and backend of web applications is higher than ever. This is where the concept of “Code the Future: Full Stack Web Development for Innovators” becomes crucial.
Why Full Stack Web Development Is the Future
Full stack developers are the digital architects of tomorrow. They possess the knowledge to work on all layers of a web application — from designing intuitive interfaces to handling robust databases and server-side logic. These developers are in high demand across tech startups, enterprises, and innovation-driven organizations.
By enrolling in a Full Stack Web Development Course, aspiring developers get hands-on training in:
Frontend technologies like HTML, CSS, JavaScript, React, or Angular
Backend technologies such as Node.js, Python, PHP, or Java
Database management using tools like MySQL, MongoDB, and Firebase
Version control systems such as Git and GitHub
Deployment and DevOps basics to make applications production-ready
This holistic training makes full stack developers capable of building, testing, and deploying scalable web solutions — a key skill for modern innovators.
Who Should Join a Full Stack Web Development Course?
The beauty of a Full Stack Web Development Course lies in its inclusivity. Whether you're a student, a career switcher, or a budding entrepreneur, learning full stack skills can drastically enhance your ability to innovate digitally.
Here’s who benefits the most:
Graduates from any stream looking for a rewarding tech career
Software engineers who want to upgrade from frontend/backend-only roles
Startup founders aiming to build MVPs without a large tech team
Freelancers wanting to offer complete web development packages
And if you're based in India’s IT capital, enrolling in a Java Certification Course in Pune adds tremendous value by strengthening your backend skills with one of the most widely-used programming languages in enterprise development.
Java Certification Course in Pune – Boost Your Backend Game
Java remains one of the most powerful and stable programming languages in the world of web development. A Java Certification Course in Pune equips learners with skills to write robust backend logic, build secure web services, and handle performance-intensive applications.
Why Pune?
Pune is one of India’s top IT hubs with growing job opportunities
Excellent training infrastructure and access to industry mentors
Networking opportunities with peers, startups, and hiring companies
Affordable course fees compared to other metropolitan cities
By combining a Java Certification Course in Pune with a Full Stack Web Development Course, developers can gain a significant edge in the job market and freelance projects.
Key Benefits of Learning Full Stack Web Development
Here’s why now is the perfect time to code the future and build your full stack skillset:
✅ High Earning Potential
Full stack developers are among the highest-paid professionals in tech. Their ability to manage both frontend and backend systems makes them highly valuable.
✅ Versatile Career Options
From web apps to AI platforms, full stack skills open doors to a range of industries: fintech, edtech, healthcare, e-commerce, and more.
✅ Better Project Ownership
Understanding the full tech stack gives you complete control over your projects, reducing dependency on others and speeding up development cycles.
✅ Future-Proof Skills
The digital ecosystem is constantly evolving. Full stack developers are better positioned to adapt to new tools, frameworks, and programming languages.
Course Curriculum Overview
A well-structured Full Stack Web Development Course typically covers:
HTML5/CSS3/Bootstrap for responsive design
JavaScript/ES6+ and frameworks like React or Vue.js
Node.js/Express.js or Java Spring Boot for server-side logic
RESTful APIs integration and backend connectivity
Databases: SQL (MySQL, PostgreSQL) and NoSQL (MongoDB)
Tools: Docker, GitHub, Jenkins, Firebase
Live Projects and Internships for real-world exposure
Pairing this with a Java Certification Course in Pune offers specialized backend training in:
Java syntax and OOP concepts
Spring Boot framework
RESTful services using Java
Database integration with JDBC and Hibernate
Final Thoughts: Innovate, Build, and Lead
The future is digital, and innovation starts with code. Whether you're dreaming of building the next big app or solving real-world problems with tech, becoming a full stack developer gives you the power to turn ideas into impactful solutions.
“Code the Future: Full Stack Web Development for Innovators” isn’t just a catchy phrase — it’s a roadmap to a meaningful career in tech.
Start your journey today by enrolling in a Full Stack Web Development Course and consider adding a Java Certification Course in Pune to your learning path. With the right skills, the future isn’t something to fear — it’s something you can build.
0 notes
Text
How to Win Your First Hackathon: A Beginner’s Blueprint
Joining your first hackathon can feel thrilling—and a little intimidating. You’ll be building something from scratch, under a tight deadline, with people you may not know well. But here’s the truth: winning a hackathon isn’t about being the best coder in the room. It’s about solving problems creatively, working as a team, and presenting a clear, usable solution.
Whether you’re a student, a fresher in tech, or someone from a non-coding background, here’s how to increase your chances of winning your first hackathon.
1. Choose the Right Hackathon
Your journey begins with picking a hackathon that aligns with your interests and skill level. Many beginner-friendly hackathons offer workshops, mentors, and support, making them ideal for first-timers. Look for themes you’re excited about—health, education, sustainability, fintech—and check whether the judging criteria value creativity, usability, or technical depth.
2. Build a Balanced Team
Winning teams often have a mix of:
Developers – to build the core product
Designers – to create a strong user interface and experience
Presenters/Thinkers – to craft the idea, pitch, and storytelling
It’s okay if you’re not the best coder. Teams that communicate well and delegate efficiently tend to outperform even highly technical but disorganized groups.
3. Solve a Real Problem
Judges love practical, user-focused solutions. Don’t just build something cool—build something useful. Ask yourself:
Who is the user?
What problem are they facing?
How does your idea help them?
Start with the “why”, not just the “how.” A simple solution to a real problem beats a complicated tool with no audience.
4. Keep It Simple: MVP First
Your time is limited, so don’t try to build the next Facebook. Aim for a Minimum Viable Product (MVP)—a basic version that proves your idea works. Focus on core functionality:
A working prototype with 1–2 main features
Clean, bug-free code
A basic user interface that clearly shows how it works
Once your MVP is stable, then add bonus features—if time allows.
5. Use Existing Tools and APIs
Hackathons aren’t the place to reinvent the wheel. Use frameworks, APIs, libraries, and platforms to save time:
Firebase for backend
Figma for UI/UX mockups
Bootstrap or Tailwind for quick frontends
OpenAI, Google Maps, or Stripe APIs for added features
Efficiency is key to standing out.
6. Focus on Presentation
Your demo or final pitch can make or break your hackathon journey. Even the best idea won’t win if it’s poorly explained. Make sure your presentation includes:
A short problem statement
A clear solution explanation
A demo of how it works (live or screen-recorded)
The impact or benefits of your solution
What you’d build next if given more time
Bonus tip: Tell a story. Make the judges feel the problem you’re solving.
7. Ask for Help
Most hackathons have mentors—use them! Whether it’s debugging, ideation, or pitch practice, mentors can give you clarity and direction. Don’t struggle in silence—ask, learn, and iterate.
8. Manage Time Like a Pro
Divide your hackathon time wisely:
First 2–3 hours: Finalize the idea and roles
Next 8–10 hours: Build MVP (back-end and front-end)
Last 2–3 hours: Debug, design, and prepare the pitch
Set mini deadlines for each phase and take breaks to stay sharp.
9. Stand Out with Soft Skills
Sometimes, what sets winners apart isn’t code—it’s communication. Friendly team spirit, clear thinking, and enthusiasm can shine through your pitch and demo. Judges remember teams that are confident, collaborative, and passionate.
Conclusion: Hack, Learn, Win
Your first hackathon is less about winning a trophy and more about gaining an unforgettable experience. But with the right mindset, planning, and teamwork, winning becomes a natural outcome of doing things right.
So dive in, experiment boldly, and remember: every expert was once a beginner. Your path to becoming a champion starts with that first line of code and a great idea.
0 notes
Text
How APIs Power Modern Websites – A Think To Share IT Solutions Insight
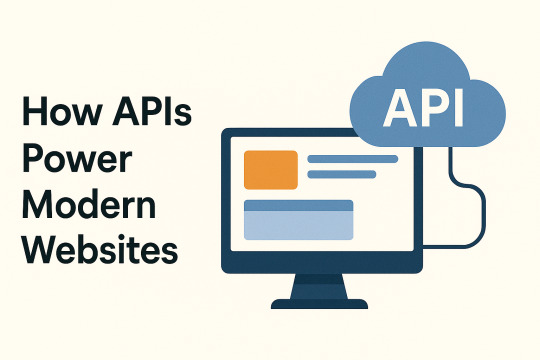
Modern websites are no longer static brochures. They’re dynamic, data-driven platforms that interact with various services in real time. At the core of this interactivity lies a powerful and essential component: the API, or Application Programming Interface.
At Think To Share IT Solutions, we engineer websites that aren’t just visually compelling—they’re functionally superior, thanks to smart API integrations that enable real-time performance, seamless communication, and scalable features.
What is an API?
An API (Application Programming Interface) is a set of protocols and tools that allow software applications to communicate with each other. In web development, APIs act as bridges that connect your website to external or internal systems.
Instead of building every function from scratch, APIs allow developers to integrate existing, trusted services—making websites faster, more reliable, and more scalable.
How APIs Power Modern Websites
1. Dynamic Content Delivery
APIs allow websites to fetch and display real-time content from a database or CMS without refreshing the page. This improves performance and user experience.
Example: A blog or news portal pulling updated articles from a headless CMS like Strapi or WordPress via REST API.
2. User Authentication and Access Control
APIs handle secure user logins and permission-based access. Authentication services like Google OAuth or Auth0 rely entirely on API interactions.
Example: "Sign in with Google" uses an external API to verify the user's identity securely without storing sensitive data on your own servers.
3. Third-Party Service Integrations
APIs enable seamless integration with third-party platforms for added functionality.
Function
API Providers
Payments
Stripe, Razorpay, PayPal
Email Marketing
Mailchimp, SendGrid
Analytics
Google Analytics, Matomo
Customer Support
Zendesk, Intercom
Maps & Location
Google Maps API, Mapbox
These integrations enhance user experience without compromising performance or security.
4. Real-Time Features and Updates
Websites that support live chat, order tracking, or instant notifications use APIs to communicate with real-time databases.
Example: Firebase and Pusher APIs power real-time chat interfaces or live delivery status updates.
5. E-Commerce Functionality
Modern eCommerce websites rely on APIs to handle inventory updates, pricing changes, order processing, and shipping logistics.
What We Implement:
Cart management via REST or GraphQL APIs
Real-time pricing and availability updates
Shipment tracking using courier APIs (e.g., Delhivery, Shiprocket)
6. Headless Architecture
In a headless setup, APIs serve as the communication layer between the front-end and the back-end. This decoupling improves performance and allows for more flexible design and delivery across platforms.
Example: Using Next.js (for the front-end) and Strapi or Sanity (as the headless CMS), data is fetched via API endpoints and rendered statically or server-side for speed and SEO.
Benefits of API-Driven Web Development
Benefit
Explanation
Faster Deployment
Plug in pre-built services instead of coding everything from scratch
Scalability
Easily add new features or services without overhauling your system
Enhanced Security
Offload sensitive functions like payments to trusted platforms
Maintainability
Isolated services reduce complexity and ease troubleshooting
Cross-Platform
Share the same API with mobile apps, web apps, and IoT devices
How Think To Share Implements API-Driven Architecture
Our development process incorporates API planning from the very beginning:
Architecture Planning: Identify necessary APIs based on business goals
Security: Implement OAuth2, JWT tokens, and rate limiting for secure access
Performance: Use caching mechanisms (Redis, CDN) to reduce API load
Monitoring: Set up logging, error tracking, and fallback handling for resilience
Documentation: Provide detailed API docs using tools like Swagger or Postman
Final Thoughts: APIs Are the Backbone of Modern Websites
APIs have evolved from technical add-ons to mission-critical infrastructure for digital platforms. Whether you're running a website, mobile app, or enterprise software, APIs allow you to build faster, scale smarter, and connect deeper with users.
At Think To Share IT Solutions, we design and develop high-performance web systems that are modular, connected, and built for long-term growth—powered by reliable, secure, and well-integrated APIs.
0 notes
Text
Flutter Training and Internship: Build Skills, Earn a Certificate, and Jumpstart Your Career

In today’s fast-paced tech industry, staying ahead means learning technologies that are in demand and can help you build real-world projects. flutter, Google's open-source UI toolkit, is one such technology that's revolutionizing mobile app development. With the growing popularity of cross-platform apps, many students and aspiring developers are now opting for Flutter training and internship programs to gain hands-on experience and a professional edge.
In this blog, we’ll explore the benefits of enrolling in a Flutter training and internship, the valuable skills you’ll gain, and how a Flutter internship certificate can enhance your career prospects.
What Is Flutter?
Before diving into internships and certifications, let’s understand what Flutter is.
Flutter is a framework developed by Google for building natively compiled applications for mobile, web, and desktop — all from a single codebase. It uses the Dart programming language and provides an expressive UI and fast performance. Flutter is used by companies like Alibaba, Google Pay, and eBay Motors, proving its strength and industry relevance.
Why Choose Flutter Training and Internship?
Choosing a Flutter training and internship offers more than just learning the framework. It combines structured education with real-world practice. Here's why it's a smart investment for your future:
1. Hands-On Experience
Unlike traditional courses that focus only on theory, internships allow you to work on live projects. You get to solve real problems, debug actual errors, and build deployable apps.
2. Structured Learning Path
Most Flutter training and internship programs start from the basics and gradually take you through intermediate to advanced concepts. This ensures that even beginners can follow along and grow steadily.
3. Mentorship and Feedback
You’ll get guidance from experienced developers who can review your code, offer suggestions, and help you improve. Personalized feedback is crucial in understanding your strengths and weaknesses.
4. Portfolio Development
By the end of your internship, you’ll have one or more completed projects that you can showcase to potential employers or clients.
5. Professional Certification
A Flutter internship certificate is a great way to validate your skills. It adds weight to your resume and shows employers that you’ve undergone formal training and completed practical work.
Skills You Will Learn in a Flutter Internship
Flutter internships are designed to make you industry-ready. Here's a breakdown of the key skills you’ll develop:
1. Dart Programming
Since Flutter is built on Dart, you’ll become proficient in this modern language — covering syntax, functions, classes, and object-oriented programming.
2. UI/UX Design Principles
You’ll learn to build responsive and interactive UIs using widgets, layout systems like Row, Column, Stack, and more. You'll also get familiar with Material Design and Cupertino styles.
3. State Management
Understanding how to manage app state is critical. Internships often cover providers, BLoC patterns, and Riverpod to manage app logic effectively.
4. API Integration
You’ll learn to connect Flutter apps to backend services using REST APIs or Firebase. This is key to building dynamic, data-driven apps.
5. Version Control (Git)
Version control is a must-have skill for any developer. You’ll use Git for code collaboration, version tracking, and deployment.
6. Debugging and Testing
You’ll become comfortable with debugging tools, logs, and Flutter’s built-in testing framework to ensure code reliability and performance.
Benefits of a Flutter Internship Certificate
Once you complete your training and internship, you’ll receive a Flutter internship certificate. Here’s how that can benefit your career:
✅ Boosts Resume Credibility
A certificate from a reputed institution or company proves that you've been trained and tested in real-world Flutter development.
✅ Shows Commitment to Learning
Employers value candidates who invest time in skill development. An internship certificate reflects your initiative and discipline.
✅ Opens Job Opportunities
With proof of your skills and internship experience, you’re more likely to land junior developer roles, freelance gigs, or even internships at bigger firms.
✅ Helps You Stand Out
In a crowded job market, a verified certificate backed by practical work helps you stand out from other applicants who only have theoretical knowledge.
Career Growth After Flutter Training and Internship
Now let’s talk about the future. Where can Flutter take you after completing your training and internship?
🧑💼 Entry-Level Jobs
Many companies are hiring Flutter developers for cross-platform app projects. With your certificate and project portfolio, you can apply for positions like:
Junior Flutter Developer
Mobile App Developer
Cross-Platform Developer
👨💻 Freelancing and Remote Work
Flutter is great for building apps quickly, which is perfect for freelancing. You can work with startups or businesses that need mobile solutions.
🚀 Startup Opportunities
If you’re entrepreneurial, you can build your own apps and publish them on the Play Store or App Store. Flutter helps you launch MVPs (Minimum Viable Products) fast.
📚 Advanced Learning
After your internship, you can deepen your expertise with advanced topics like:
Flutter with Firebase
Clean architecture in Flutter
Integrating Machine Learning in mobile apps
How to Choose the Right Flutter Training and Internship Program
Here are a few tips to select a high-quality program:
🔍 Check the Curriculum
Make sure the course covers Dart fundamentals, state management, APIs, and deployment.
🧑🏫 Look for Mentorship
Choose a program where you get personal guidance or live doubt sessions.
📂 Portfolio Projects
Ensure the internship includes project work that you can add to your resume or GitHub.
🏆 Verified Certification
Only join programs that provide an official Flutter internship certificate upon completion.
💬 Reviews and Ratings
Look for student testimonials, LinkedIn success stories, or positive reviews before enrolling.
Final Thoughts
A flutter training and internship can be a game-changer for your career, especially if you're looking to enter mobile app development with a strong foundation. You don’t just gain knowledge — you apply it in real-world scenarios, earn a certificate, and walk away with the confidence to take on developer roles.
0 notes
Text
How to Build a Food Delivery App Like Uber Eats: Step-by-Step Guide

The demand for convenient food delivery solutions has skyrocketed in this era of digitalization. Apps like Uber Eats have changed the method of ordering food by giving the customer a seamless experience-from searching through delivery. In this profitable industry, developing a profitable partner for the food delivery application could be a game-changer. Finally, Netscape Labs comes with an ultimate guide to the post-2025 Uber Eats App Development.
Why Invest in Food Delivery App Development in 2025?
Consumer behaviors and technological progress will see the food delivery market globally hitting an all-time high in 2025. With more individuals being dependent on mobile applications for all their everyday needs, food delivery app development can command a large user base. Whether you’re a startup founder, a business decision-maker, or a tech-savvy entrepreneur, now is the opportune moment to work with a mobile app development company to give life to your idea.
Essential Features for a Food Delivery App Like Uber Eats
For Your Users
An app that has a fast, no-fuss login with an OTP or one-tap Google/Apple sign-ins. Then comes the main dish: restaurant listings that don’t overwhelm, but give just enough detail (cuisine, reviews, delivery time filters) to help users decide in seconds. Live order tracking has become non-negotiable, and don’t forget payment flexibility, cards, wallets, and even UPI. Wrap it all up with a solid rating/review system. People love being heard.
For Your Restaurant Partners
They need control over menus, pricing, availability, and a dashboard that doesn’t require a manual to use. Throw in real-time order management and basic sales analytics, and you’ve got a system that helps them operate smoothly and stay loyal to your platform.
For Your Delivery Partners
Notifications need to be real-time and reliable. Help them with route suggestions, allow them to track their earnings transparently, and make the experience frictionless. The smoother it is, the faster the deliveries.
For You, the Admin
You should have visibility over every moving part: users, restaurants, delivery crew, commissions, offers, and reports. Your dashboard is your control tower. Use it to run campaigns, resolve issues, tweak pricing, and most importantly, make data-backed decisions.
Standout Features That Make Users Stick Around
AI recommendations: People love it when the app seems to “know” what they’re in the mood for. Use behavior-based suggestions.
Voice search: It’s faster than typing, and great for accessibility.
Loyalty rewards: Offer cashback, points, or discounts to keep users coming back.
Multi-language UI: Don’t assume your audience speaks English. Offer local language support.
Contactless delivery: It’s no longer just a pandemic feature; it’s now a convenience.
What’s Under the Hood: Tech Stack You Can Trust
For cross-platform mobile apps (iOS + Android with one codebase), we recommend Flutter or React Native, both reliable and fast-moving.
On the backend, Node.js or Django gets the job done well, depending on your team’s strengths. For databases, go with MongoDB for flexibility and PostgreSQL for structure.
Add Stripe or Razorpay for secure payments. Use Firebase Cloud Messaging for real-time order updates. And for maps and tracking, Google Maps API is still the gold standard.
Also Read- Gemini’s Multimodal Capabilities: A New Era for App Development
Why Choose Netscape Labs for Your Food Delivery App Development?
Specializing in custom mobile solutions at Netscape Labs, we design and develop mobile applications tailored to your businesses. Being an excellent mobile app development company having its establishments in Singapore, Canada, Malaysia, and Dubai, we have reservoirs of experience.
Our team of mobile app developers can create high-quality, scalable, and user-friendly applications. Perhaps, if you’re a startup looking to disrupt the food delivery industry or an established corporation with plans to expand its digital presence, Netscape Labs is your trusted partner in mobile app development.
Conclusion
Building a food delivery app like Uber Eats in 2025 presents a significant opportunity to tap into a growing market. By incorporating essential and advanced features, selecting the right technology stack, and partnering with an experienced mobile app development company, you can create a platform that meets user expectations and drives business growth.
Ready to embark on your food delivery app development journey? Contact Netscape Labs today to turn your vision into reality.
FAQs
Do we need separate apps for users, restaurants, and delivery partners?
Yes. A scalable food delivery platform typically includes three modules (User App, Restaurant Dashboard, and Delivery Partner App), plus a robust Admin Panel. A seasoned app development company will help you architect this with clean APIs and a unified backend.
We are based outside the US. Can we are still build a competitive food delivery app?
Absolutely. Whether you’re looking for a mobile app development company in Singapore, mobile app developers in Canada, or expertise in mobile app development in Malaysia, location is no barrier to innovation. Netscape Labs has helped global clients launch cross-border delivery apps with local flair and global standards.
How is a food delivery app different from other e-commerce apps?
Unlike regular e-commerce, food delivery apps need real-time inventory sync, live location tracking, ETA management, and instant notifications. This adds complexity, so you need a best app development company that gets the nuance of real-time logistics.
Can we add AI features to my food delivery app?
Definitely. From smart dish recommendations to dynamic delivery estimates, AI in mobile app development can supercharge user engagement and operational efficiency. Our team bakes intelligent features right into your stack.
How long does it take to launch a food delivery app?
With the right tech partner, you can launch a functional MVP in 8–12 weeks. Full feature development might take 4–6 months. As a mobile app development company, we prioritize agile sprints and weekly check-ins to keep you moving fast without surprises.
What makes Netscape Labs different?
We don’t just write code, we build businesses. Our team has worked with startups and enterprises worldwide to deliver digital products that scale. If you’re looking for the best app development company to create a food delivery app like Uber Eats, look no further.
#app developers#app developing company#app development#app development company#app development company in chandigarh#app development company in mohali#Food Delivery App#Food Delivery App Development#Food Delivery App Like Uber Eats
1 note
·
View note
Text
How Do You Choose the Right Tech Stack for Android App Development?
Several possibilities exist when choosing between a tech stack and tools. To give you a glimpse: the wrong choice of tech stack will result in issues in your software development performance, scalability, delivery time, and long-term maintenance. Both businesses and developers must learn what makes up a tech stack and how they can make informed choices because this knowledge will affect the final outcome's success.
So what are some of the factors on which the appropriate tech stack for Android app development depends?
Understand What a Tech Stack Includes
A tech stack refers to the set of programming languages, frameworks, libraries, tools, and technologies used to build a software application. For Android app development, the tech stack usually includes:
Programming Language: Kotlin and Java are two widely used languages to develop native Android applications. Kotlin is becoming the choice among developers when it comes to modern apps due to its concise syntax and full interoperability with Java. The language choice generally defines if we are going to build a native or cross-platform app.
Development Tools: Android Studio is Google-supported IDE, and it provides a full environment for code editing, debugging, and testing.
UI Frameworks: Jetpack Compose is the newer-native approach to Android UI designing replacing the older method based on XML layouts working with a much more dynamic and declarative approach.
Backend Technologies: This would usually depend upon requirements, and thus Node.js; Python with the Django framework; Ruby on Rails; or Java with Spring Boot would be considered.
Databases: SQLite, Firebase Realtime Database, or Room can be used for local and cloud storage.
API and Cloud Services: Third-party API integration and Google Cloud and AWS would present even more options for further enhancing the functionality and performance of the application.
Define Your App Requirements Clearly
Before you select the technology stack for development, be sure to keep your project's functional and technical requirements clear. Ask and answer the following:
What type of app is this: a simple or a complex one?
Will it have real-time features such as messaging or geolocation?
What kind of performance and scalability is demanded?
What are the security and compliance requirements?
If the application has demanding requirements such as performance, low latency, and intensive processing, native development with Kotlin might be your choice. For applications with less demanding requirements or tighter budgets, going with hybrid frameworks such as Flutter or React Native (although technically a cross-platform one) is the best choice.
Consider Development Time and Budget
Your budget and timeline are other important parameters in this regard. Some technologies may present quick development cycles, while others might just add to the complexity and therefore the cost. Kotlin, on the other hand, is very efficient but may require developers with more experience. Firebase provides several backend-as-a-service features that drastically cut down developer effort, making it perfect for startups and MVPs.
Also, developing fast should be kept balanced with maintenance in the long run. A tech stack may provide upfront rapid development at the cost of great cost later due to poor scalability.
Evaluate Community Support and Documentation
Another positive site of choosing more widely variant technologies is strong community support. Open source libraries and frequent updates, as well as well-maintained extensive documentation, can help solve any hurdle faced during the development phase. For instance, Android Studio, Kotlin, and Jetpack Compose have exceptionally large communities and high-standard documentation maintained by Google and the larger wider developer ecosystem.
Even if third parties need help saying so, the community provides even more third-party tools, plugins, auto-configuration, and standard building blocks that are used to develop your application faster.
Think Long-Term: Scalability and Maintainability
Your tech stack should support the future growth of your app. As your user base increases or your app’s features expand, your technology choices should not limit scalability. Opting for cloud-native backend solutions, modular architecture, and a maintainable codebase will help keep future updates smooth and cost-effective.
It’s also worth considering how easy it will be for a new developer to pick up and work on the project in the future. Clear documentation, consistent coding practices, and widely adopted tools make long-term maintenance easier.
Conclusion
Choosing the right tech stack for Android app development is a strategic decision that requires careful planning and analysis. By understanding your project requirements, budget, and long-term goals, you can select a set of tools and technologies that support not just development—but also growth and sustainability.
For businesses looking to build custom Android applications tailored to their unique needs, working with experienced professionals can make all the difference. Companies like Globosoft specialize in Android App Development in Ernakulam, offering end-to-end services from planning and UI design to development and deployment. With the right tech stack and a skilled team, your Android app can stand out in today’s competitive mobile landscape.
#Mobile App Development in Kochi#IOS App Development in Kochi#Android App Development in Kochi#Mobile App Development in Cochin#IOS App Development in Cochin#Mobile App Development in Ernakulam#IOS App Development in Ernakulam#Android App Development in Ernakulam
0 notes
Text
iOS App Development Costs in 2025: What You Need to Budget for Success
If you’re planning to launch an iOS app in 2025, one of the biggest questions you’re probably asking is: “How much is it going to cost me?”
That’s a fair question—and an important one. As technology evolves and user expectations grow, building a successful iOS app is no longer just about code. It’s about strategy, performance, design, and user experience. Whether you're a startup or an established brand, knowing what to budget can make or break your app’s success.
At Siddhi Infosoft, a leading iOS App Development Company in the USA, we have helped businesses across industries develop powerful, user-centric iOS applications. In this guide, we'll break down the iOS App Development costs in 2025, what influences those costs, and how to get the best value for your investment.
Why iOS App Development Still Dominates in 2025
Before diving into the budget specifics, let’s understand why iOS App Development continues to be a preferred choice for many businesses.
High User Spending: Apple users spend more on apps compared to Android users.
Security & Performance: iOS offers a secure and smooth user experience.
Premium Audience: The iOS ecosystem attracts a high-income, tech-savvy user base.
Global Reach: From the USA to Europe and Asia, iOS has a wide and loyal market.
If you want to tap into this premium user segment, investing in iOS App Development Services is a smart move.
Average iOS App Development Costs in 2025
Depending on the complexity and features of the app, iOS development costs can vary greatly. Here’s a rough breakdown:
App Type
Estimated Cost Range
Basic Utility App
$15,000 – $35,000
Medium Complexity App
$40,000 – $100,000
Complex App with Backend
$100,000 – $250,000+
Game or AR App
$150,000 – $300,000+
These are just ballpark figures. Many variables, like your development partner and project timeline, can significantly affect the cost.
Major Factors Affecting iOS App Development Costs
Here are the key factors that determine your final development budget:
1. App Complexity
A simple calculator app costs way less than a custom eCommerce or ride-sharing platform.
Features like payment gateways, user login, push notifications, and chat support all add to development time and cost.
2. UI/UX Design
Apple has high design standards, and users expect a smooth, aesthetic experience.
Investing in professional UI/UX is essential, especially if you want higher engagement.
3. Backend Infrastructure
If your app needs to store user data, interact with a server, or sync in real-time, you'll need a backend setup.
More backend logic = more cost.
4. Integration with Third-party APIs
Apps often integrate with services like Stripe, Firebase, Maps, or social media platforms.
Each integration adds development time and testing overhead.
5. iOS App Development Company or Freelancer
Hiring a trusted iOS App Development Company in the USA ensures quality, scalability, and long-term support.
Freelancers may be more affordable short-term, but companies provide a complete, reliable package.
6. Maintenance and Updates
Development doesn’t end at launch. You’ll need to fix bugs, update for new iOS versions, and improve features regularly.
Ongoing iOS App Development Services are a key part of the budget.
Breakdown of iOS App Development Costs in 2025
Let’s break it down by development phases:
1. Discovery & Strategy (5-10% of budget)
This phase includes:
Market research
Defining user personas
Competitive analysis
Tech feasibility
Estimated Cost: $3,000 – $10,000
2. UI/UX Design (10-20% of budget)
Design is the first thing users notice.
Wireframes
High-fidelity mockups
User flows
Prototype
Estimated Cost: $5,000 – $25,000
3. iOS Development (40-50% of budget)
This is the core coding phase where:
Frontend (client side)
Backend (server, APIs)
Database integration is handled.
Estimated Cost: $25,000 – $100,000+
4. Testing & QA (10-15% of budget)
No app should launch without thorough testing.
Functional testing
Performance testing
Device compatibility
Security checks
Estimated Cost: $5,000 – $20,000
5. Deployment & Launch (5% of budget)
App Store guidelines compliance
Apple submission process
Marketing materials (if needed)
Estimated Cost: $2,000 – $10,000
6. Maintenance & Support (15-20% annually)
After launch, your app still needs care.
Bug fixes
OS updates
New feature additions
Estimated Annual Cost: $5,000 – $30,000
How Siddhi Infosoft Helps You Save Time & Cost
At Siddhi Infosoft, we understand that app development isn’t just a project—it’s a business investment.
Here’s how we help you control and optimize your budget:
Tailored to You: No cookie-cutter solutions here. We shape our iOS App Development Services around your unique vision, ensuring you invest only in what drives real value for your app.
Agile Methodology: Faster, transparent, and efficient development cycles.
In-House Experts: From designers to iOS developers and testers—all under one roof.
Proven Track Record: Trusted by startups and enterprises alike for quality and timely delivery.
With our expertise, we make sure your dollars stretch further—without compromising quality.
Tips to Save on iOS App Development in 2025
Want to get the best value from your iOS App Development Company? Keep these tips in mind:
✅ Define Clear Requirements
Ambiguity leads to scope creep and cost overruns. Start with a well-defined roadmap.
✅ Start with an MVP
Don’t go all-in with every feature. Launch with a minimum viable product (MVP), listen to real user feedback, and improve step by step. That’s how you build an app people truly need—not just what you think they want.
✅ Choose the Right Partner
Hiring a reputable iOS App Development Company in the USA means fewer bugs, fewer delays, and higher ROI.
✅ Invest in Reusable Code
Use pre-built modules or frameworks where possible. This speeds up development and lowers cost.
✅ Prioritize Features
Not every feature is urgent. Rank them by user value and ROI, then phase them out strategically.
The Future of iOS App Development: 2025 Trends to Watch
As we step into 2025, iOS App Development is evolving rapidly. Here are a few trends that might influence costs:
AI Integration: More apps are leveraging AI/ML for personalization and automation.
AR and Spatial Computing: Thanks to Apple Vision Pro, AR-based apps are on the rise.
Voice Interfaces: SiriKit and voice commands are reshaping user experiences.
Enhanced Privacy: With Apple's continuous focus on privacy, expect stricter compliance needs.
Cross-platform Tools: Tools like SwiftUI and Flutter are streamlining development, possibly reducing long-term costs.
Think Ahead: A future-ready app isn’t just about today—it’s about planning for growth. Budget for scalability and adaptability so your app can evolve with your users and the market.
Final Thoughts
Building a successful iOS app in 2025 is more than just hiring developers—it’s about aligning your business goals with the right tech strategy. Costs can range widely based on scope, features, and your development partner.
But one thing is clear: Investing in high-quality iOS App Development Services in the USA pays off in the long run—both in terms of user satisfaction and business growth.
At Siddhi Infosoft, we’re not just coders. We’re your technology partners—helping you every step of the way, from concept to App Store launch and beyond.
Let’s build something amazing together.
Resource; iOS App Development Costs in 2025: What You Need to Budget for Success
0 notes