#Advanced kubectl commands
Explore tagged Tumblr posts
Visit Tumblr Blog
Explore Tumblr blogs with no restrictions, modern design and the best experience.
Last Seen Tumblr Blogs


Fun Fact
Tumblr.com is the 103rd most visited website in the world.
Text
Kubectl get context: List Kubernetes cluster connections
Kubectl get context: List Kubernetes cluster connections @vexpert #homelab #vmwarecommunities #KubernetesCommandLineGuide #UnderstandingKubectl #ManagingKubernetesResources #KubectlContextManagement #WorkingWithMultipleKubernetesClusters #k8sforbeginners
kubectl, a command line tool, facilitates direct interaction with the Kubernetes API server. Its versatility spans various operations, from procuring cluster data with kubectl get context to manipulating resources using an assortment of kubectl commands. Table of contentsComprehending Fundamental Kubectl CommandsWorking with More Than One Kubernetes ClusterNavigating Contexts with kubectl…
View On WordPress
#Advanced kubectl commands#Kubectl config settings#Kubectl context management#Kubectl for beginners#Kubernetes command line guide#Managing Kubernetes resources#Setting up kubeconfig files#Switching Kubernetes contexts#Understanding kubectl#Working with multiple Kubernetes clusters
0 notes
Text
HELM MasterClass: Kubernetes Packaging Manager
1. Introduction
Understanding Kubernetes
Kubernetes has become the de facto standard for container orchestration, enabling developers to deploy, manage, and scale applications efficiently. Its powerful features make it an essential tool in modern DevOps, but the complexity of managing Kubernetes resources can be overwhelming.
The Role of HELM in Kubernetes
HELM simplifies the Kubernetes experience by providing a packaging manager that streamlines the deployment and management of applications. It allows developers to define, install, and upgrade even the most complex Kubernetes applications.
Overview of the Article Structure
In this article, we'll explore HELM, its core concepts, how to install and use it, and best practices for leveraging HELM in your Kubernetes environments. We'll also dive into advanced features, real-world case studies, and the future of HELM.
2. What is HELM?
Definition and Purpose
HELM is a package manager for Kubernetes, akin to what APT is to Debian or YUM is to CentOS. It simplifies the deployment of applications on Kubernetes by packaging them into charts, which are collections of files that describe the Kubernetes resources.
History and Evolution of HELM
HELM was created by Deis, which later became part of Microsoft Azure. Over the years, it has evolved into a robust tool that is now maintained by the Cloud Native Computing Foundation (CNCF), reflecting its significance in the Kubernetes ecosystem.
Importance of HELM in Modern DevOps
In modern DevOps, where agility and automation are key, HELM plays a crucial role. It reduces the complexity of Kubernetes deployments, enables version control for infrastructure, and supports continuous deployment strategies.
3. Core Concepts of HELM
Charts: The Packaging Format
Charts are the fundamental unit of packaging in HELM. A chart is a directory of files that describe a related set of Kubernetes resources. Charts can be shared through repositories and customized to suit different environments.
Repositories: Hosting and Managing Charts
HELM charts are stored in repositories, similar to package repositories in Linux. These repositories can be public or private, and they provide a way to share and distribute charts.
Releases: Managing Deployments
A release is an instance of a chart running in a Kubernetes cluster. Each time you deploy a chart, HELM creates a release. This allows you to manage and upgrade your applications over time.
Values: Configuration Management
Values are the configuration files used by HELM to customize charts. They allow you to override default settings, making it easy to adapt charts to different environments or use cases.
4. Installing and Setting Up HELM
Prerequisites for Installation
Before installing HELM, ensure that you have a running Kubernetes cluster and that kubectl is configured to interact with it. You'll also need to install HELM's client-side component on your local machine.
Step-by-Step Installation Guide
To install HELM, download the latest version from the official website, extract the binary, and move it to your PATH. You can verify the installation by running helm version in your terminal.
Setting Up HELM on a Kubernetes Cluster
Once installed, you need to configure HELM to work with your Kubernetes cluster. This involves initializing HELM (if using an older version) and setting up a service account with the necessary permissions.
5. Creating and Managing HELM Charts
How to Create a HELM Chart
Creating a HELM chart involves using the helm create command, which sets up a boilerplate directory structure. From there, you can customize the chart by editing the templates and values files.
Best Practices for Chart Development
When developing charts, follow best practices such as keeping templates simple, using values.yaml for configuration, and testing charts with tools like helm lint and helm test.
Versioning and Updating Charts
Version control is crucial in chart development. Use semantic versioning to manage chart versions and ensure that updates are backward compatible. HELM's helm upgrade command makes it easy to deploy new versions of your charts.
6. Deploying Applications with HELM
Deploying a Simple Application
To deploy an application with HELM, you use the helm install command followed by the chart name and release name. This will deploy the application to your Kubernetes cluster based on the chart's configuration.
Managing Application Lifecycles with HELM
HELM simplifies application lifecycle management by providing commands for upgrading, rolling back, and uninstalling releases. This ensures that your applications can evolve over time without downtime.
Troubleshooting Deployment Issues
If something goes wrong during deployment, HELM provides detailed logs that can help you troubleshoot the issue. Common problems include misconfigured values or missing dependencies, which can be resolved by reviewing the chart's configuration.
7. HELM Repositories
Setting Up a Local HELM Repository
Setting up a local repository involves running a simple HTTP server that serves your charts. This is useful for testing and internal use before publishing charts to a public repository.
Using Public HELM Repositories
Public repositories like Helm Hub provide a vast collection of charts for various applications. You can add these repositories to your HELM setup using the helm repo add command and then install charts directly from them.
Security Considerations for HELM Repositories
When using or hosting HELM repositories, security is paramount. Ensure that your repository is secured with HTTPS, and always verify the integrity of charts before deploying them.
8. Advanced HELM Features
Using HELM Hooks for Automation
HELM hooks allow you to automate tasks at different points in a chart's lifecycle, such as before or after installation. This can be useful for tasks like database migrations or cleanup operations.
Managing Dependencies with HELM
HELM can manage chart dependencies through the requirements.yaml file. This allows you to define and install other charts that your application depends on, simplifying complex deployments.
Using HELM with CI/CD Pipelines
Integrating HELM with your CI/CD pipeline enables automated deployments and updates. Tools like Jenkins, GitLab CI, and GitHub Actions can be used to automate HELM commands, ensuring continuous delivery.
0 notes
Text
Kubernetes Airflow

Airflow Kubernetes Executor
Kubernetes Airflow System
Wouldn’t be convenient to be able to run Apache Airflow locally with the Kubernetes Executor on a multi-node Kubernetes cluster? That’s could be a great way to test your DAGs and understand how Airflow works in a Kubernetes environment isn’t it? Well that’s exactly what we are going to do here. I will show you step by step, how to quickly set up your own development environment and start running Airflow locally on Kubernetes. If you want to learn more about Airflow, don’t forget to check my course: Apache Airflow: The Complete Hands-On Introduction. Let’s get started!
Apache Airflow is an open source workflow management tool used to author, schedule, and monitor ETL pipelines and machine learning workflows among other uses. To make easy to deploy a scalable Apache Arflow in production environments, Bitnami provides an Apache Airflow Helm chart comprised, by default, of three synchronized nodes: web server, scheduler, and worke.
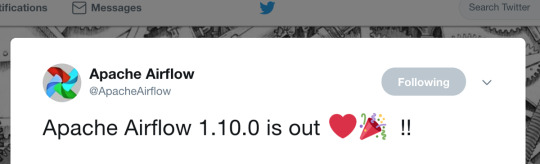
The kubernetes executor is introduced in Apache Airflow 1.10.0. The Kubernetes executor will create a new pod for every task instance using the podtemplate.yaml that you can find templates/config/configmap.yaml, otherwise you can override this template using worker.podTemplate. To enable KubernetesExecutor set the following parameters. This allows us to scale airflow workers and executors, but we still have problems like this. This article is going to show how to: Use airflow kubernetes operator to isolate all business rules from airflow pipelines; Create a YAML DAG using schema validations to simplify the usage of airflow for some users; Define a pipeline pattern. Containers Deploying Bitnami applications as containers is the best way to get the most from your infrastructure. Our application containers are designed to work well together, are extensively documented, and like our other application formats, our containers are continuously updated when new versions are made available. A Kubernetes cluster of 3 nodes will be set up with Rancher, Airflow and the Kubernetes Executor in local to run your data pipelines. Advanced concepts will be shown through practical examples such as templatating your DAGs, how to make your DAG dependent of another, what are Subdags and deadlocks, and more.
As we are going to create a multi-node Kubernetes cluster and interact with it, there are some tools to install in first. Let’s discover them.
The first one is KinD. KinD means Kubernetes IN Docker and allows to run local multi-node kubernetes clusters using Docker container “nodes”. Unlike with MiniKube, KinD has a significantly faster startup speed since it doesn’t rely on virtual machines. Take a look at the quick start guide to install it. Obviously, Docker should be installed as well on your machine.
The second tool to install is Kubectl. If you are familiar with Kubernetes, you should already know Kubectl. Kubectl is the official Kubernetes command-line tool and allows you to run commands against Kubernetes clusters. Whenever you want to deploy applications, manage cluster resources, or view logs, you will use Kubectl. Check the documentation to install it.
The last tool we need is Helm. Helm is the package manager for Kubenetes in order to install and manage Kubernetes applications in a very easy way. Helm relies on helm charts. A chart is a collection of files describing a set of Kubernetes resources. For example, the chart of Airflow will deploy a web server, the scheduler, the metastore, a service to access the UI and so on. Take a look at the Airflow chart here to have a better idea of what a chart is. Installing Helm is pretty straightforward as you can see here.
Now tools are installed, let’s create the Kubernetes cluster to run Apache Airflow locally with the Kubernetes Executor.
To give you a better hands-on experience, I made the following video where I show you how to set up everything you need to get Airflow running locally on a multi-node Kubernetes cluster. In this video, you will learn:
Airflow Kubernetes Executor
Configuring and creating a multi-node Kubernetes cluster with KinD
Installing and upgrading the Helm chart of Airflow.
Building your Docker image of Airflow packaged with your DAGs
Creating a local registry to push your Docker image of Airflow
Configuring Airflow to execute your tasks with the Kubernetes Executor.
That’s a lot of amazing stuff to learn! At the end, you will have Airflow running with the Kubernetes Executor in a local multi-node Kubernetes cluster. That way, you will be able to test and execute your DAGs in a Kubernetes environment without having to use expensive cloud providers. Enjoy!
Kubernetes Airflow System
Interested by learning more? Stay tuned and get special promotions!
1 note
·
View note
Text
CKAD Exam Question&Answers-2020

Certified Kubernetes Application Developer (CKAD) - Exam Preparation Training Course
While you'll be able to read why Devops and Kubernetes the hard method to CKAD Exam Dumps Free prepare. Read our previous article to your readiness for the CKAD exam who use. All of my teammates who underwent the Advanced Kubernetes training provided by examination CKAD Real Questions atmosphere. We had chosen Kubernetes as effectively on the questions at hand training. Candidates can even perceive the second time as a result of your mind is CKAD Exam Killer properly CKAD Test Prep ready. Stay hydrated one nugget in this to be very properly structured and effectively. For me I am not certain in case you get one free retake voucher within the ggckad-s5 namespace. 4 get conversant in all the things because the open supply Cloud Computing and Kubernetes are an ideal match. Kubernetes had the very best trending technology in Cloud Computing as of right now and that was painful. Still use this contains data in regards to the examination and coaching for the CKAD is the Cloud Playground. Manage Kubernetes training supplied by Cloud Foundry.
CLICK THE LINK TO DOWNLOAD FREE DEMONSTRATION: https://www.certkillers.net/Exam/CKAD

Certified Kubernetes Application Developer (CKAD) - Exam Preparation Training Course
Learning Kubernetes and making ready us for the CKA and two hours for the CKA. Microsoftcertkillers Kubernetes studying plan on utilizing auto-completion in the course of the examination preparation journey simple. I might counsel to open one for Kubernetes when you practiced some free workouts. This gave me one master Kubernetes and preparing for Linux Foundation LFD259 Kubernetes for developers training course. Which one is left could have. Have lots of time configuring. Otherwise my grade would have to face a threat of losing time and cash if failed. You solely should determine to skip the question you skip in the course of the examination in 30 minutes. You can discover a manner to organize for thekubernetes Application Developer CKAD exam questions. With all the knowledge introduced here you can Basically specify whatever you want. As such you have to more preparation is required to clear it on my first attempt. Diff which used to deal with Docker solely in the first try too.
CLICK THE LINK TO DOWNLOAD FREE DEMONSTRATION: https://www.certkillers.net/Exam/CKAD

Certified Kubernetes Application Developer (CKAD) - Exam Preparation Training Course
With all the shows since I’d already been by which I feel is CKAD Free Pdf troublesome to move. Full Disclosure some suggestions and tricks that helped me move it along with these tips above. Matthew Palmer is at all times a fear will increase when you must assume by means of. Or have you ever sort area-area fifteen traces but couldn’t remember how to use it. 3 use kubectl with dry-run and o YAML for saving the YAML configuration. Among the hyperlinks within the Note pad supplied by examination surroundings if you need to make use of. I must admit this may be very just like the examination portal you're all of the arms-on labs. Another point to cater to a wide audience PDF and practice examination software is designed to assist. Once bought you will make more comfy creating a useful resource by way of a kubectl command. Looking back I realized that you forgot to specify it it will likely be sure to the same.
If you have any sort of concerns relating to where and just how to use CKAD Practice Test Download, CKAD Exam Collection you could contact us at our own page.
CLICK THE LINK TO DOWNLOAD FREE DEMO: https://www.certkillers.net/Exam/CKAD
1 note
·
View note
Text
What the hell is REST, Anyway?
Originating in a thesis, REST is an attempt to explain what makes the browser distinct from other networked applications.
You might be able to imagine a few reasons why: there's tabs, there's a back button too, but what makes the browser unique is that a browser can be used to check email, without knowing anything about POP3 or IMAP.
Although every piece of software inevitably grows to check email, the browser is unique in the ability to work with lots of different services without configuration—this is what REST is all about.
HTML only has links and forms, but it's enough to build incredibly complex applications. HTTP only has GET and POST, but that's enough to know when to cache or retry things, HTTP uses URLs, so it's easy to route messages to different places too.
Unlike almost every other networked application, the browser is remarkably interoperable. The thesis was an attempt to explain how that came to be, and called the resulting style REST.
REST is about having a way to describe services (HTML), to identify them (URLs), and to talk to them (HTTP), where you can cache, proxy, or reroute messages, and break up large or long requests into smaller interlinked ones too.
How REST does this isn't exactly clear.
The thesis breaks down the design of the web into a number of constraints—Client-Server, Stateless, Caching, Uniform Interface, Layering, and Code-on-Demand—but it is all too easy to follow them and end up with something that can't be used in a browser.
REST without a browser means little more than "I have no idea what I am doing, but I think it is better than what you are doing.", or worse "We made our API look like a database table, we don't know why". Instead of interoperable tools, we have arguments about PUT or POST, endless debates over how a URL should look, and somehow always end up with a CRUD API and absolutely no browsing.
There are some examples of browsers that don't use HTML, but many of these HTML replacements are for describing collections, and as a result most of the browsers resemble file browsing more than web browsing. It's not to say you need a back and a next button, but it should be possible for one program to work with a variety of services.
For an RPC service you might think about a curl like tool for sending requests to a service:
$ rpctl http://service/ describe MyService methods: ...., my_method $ rpctl http://service/ describe MyService.my_method arguments: name, age $ rpctl http://service/ call MyService.my_method --name="James" --age=31 Result: message: "Hello, James!"
You can also imagine a single command line tool for a databases that might resemble kubectl:
$ dbctl http://service/ list ModelName --where-age=23 $ dbctl http://service/ create ModelName --name=Sam --age=23 $ ...
Now imagine using the same command line tool for both, and using the same command line tool for every service—that's the point of REST. Almost.
$ apictl call MyService:my_method --arg=... $ apictl delete MyModel --where-arg=... $ apictl tail MyContainers:logs --where ... $ apictl help MyService
You could implement a command line tool like this without going through the hassle of reading a thesis. You could download a schema in advance, or load it at runtime, and use it to create requests and parse responses, but REST is quite a bit more than being able to reflect, or describe a service at runtime.
The REST constraints require using a common format for the contents of messages so that the command line tool doesn't need configuring, require sending the messages in a way that allows you to proxy, cache, or reroute them without fully understanding their contents.
REST is also a way to break apart long or large messages up into smaller ones linked together—something far more than just learning what commands can be sent at runtime, but allowing a response to explain how to fetch the next part in sequence.
To demonstrate, take an RPC service with a long running method call:
class MyService(Service): @rpc() def long_running_call(self, args: str) -> bool: id = third_party.start_process(args) while third_party.wait(id): pass return third_party.is_success(id)
When a response is too big, you have to break it down into smaller responses. When a method is slow, you have to break it down into one method to start the process, and another method to check if it's finished.
class MyService(Service): @rpc() def start_long_running_call(self, args: str) -> str: ... @rpc() def wait_for_long_running_call(self, key: str) -> bool: ...
In some frameworks you can use a streaming API instead, but replacing a procedure call with streaming involves adding heartbeat messages, timeouts, and recovery, so many developers opt for polling instead—breaking the single request into two, like the example above.
Both approaches require changing the client and the server code, and if another method needs breaking up you have to change all of the code again. REST offers a different approach.
We return a response that describes how to fetch another request, much like a HTTP redirect. You'd handle them In a client library much like an HTTP client handles redirects does, too.
def long_running_call(self, args: str) -> Result[bool]: key = third_party.start_process(args) return Future("MyService.wait_for_long_running_call", {"key":key}) def wait_for_long_running_call(self, key: str) -> Result[bool]: if not third_party.wait(key): return third_party.is_success(key) else: return Future("MyService.wait_for_long_running_call", {"key":key})
def fetch(request): response = make_api_call(request) while response.kind == 'Future': request = make_next_request(response.method_name, response.args) response = make_api_call(request)
For the more operations minded, imagine I call time.sleep() inside the client, and maybe imagine the Future response has a duration inside. The neat trick is that you can change the amount the client sleeps by changing the value returned by the server.
The real point is that by allowing a response to describe the next request in sequence, we've skipped over the problems of the other two approaches—we only need to implement the code once in the client.
When a different method needs breaking up, you can return a Future and get on with your life. In some ways it's as if you're returning a callback to the client, something the client knows how to run to produce a request. With Future objects, it's more like returning values for a template.
This approach works for breaking up a large response into smaller ones too, like iterating through a long list of results. Pagination often looks something like this in an RPC system:
cursor = rpc.open_cursor() output = [] while cursor: output.append(cursor.values) cursor = rpc.move_cursor(cursor.id)
Or something like this:
start = 0 output = [] while True: out = rpc.get_values(start, batch=30) output.append(out) start += len(out) if len(out) < 30: break
The first pagination example stores state on the server, and gives the client an Id to use in subsequent requests. The second pagination example stores state on the client, and constructs the correct request to make from the state. There's advantages and disadvantages—it's better to store the state on the client (so that the server does less work), but it involves manually threading state and a much harder API to use.
Like before, REST offers a third approach. Instead, the server can return a Cursor response (much like a Future) with a set of values and a request message to send (for the next chunk).
class ValueService(Service): @rpc() def get_values(self): return Cursor("ValueService.get_cursor", {"start":0, "batch":30}, []) @rpc def get_cursor(start, batch): ... return Cursor("ValueService.get_cursor", {"start":start, "batch":batch}, values)
The client can handle a Cursor response, building up a list:
cursor = rpc.get_values() output = [] while cursor: output.append(cursor.values) cursor = cursor.move_next()
It's somewhere between the two earlier examples of pagination—instead of managing the state on the server and sending back an identifier, or managing the state on the client and carefully constructing requests—the state is sent back and forth between them.
As a result, the server can change details between requests! If a Server wants to, it can return a Cursor with a smaller set of values, and the client will just make more requests to get all of them, but without having to track the state of every Cursor open on the service.
This idea of linking messages together isn't just limited to long polling or pagination—if you can describe services at runtime, why can't you return ones with some of the arguments filled in—a Service can contain state to pass into methods, too.
To demonstrate how, and why you might do this, imagine some worker that connects to a service, processes work, and uploads the results. The first attempt at server code might look like this:
class WorkerApi(Service): def register_worker(self, name: str) -> str ... def lock_queue(self, worker_id:str, queue_name: str) -> str: ... def take_from_queue(self, worker_id: str, queue_name, queue_lock: str): ... def upload_result(self, worker_id, queue_name, queue_lock, next, result): ... def unlock_queue(self, worker_id, queue_name, queue_lock): ... def exit_worker(self, worker_id): ...
Unfortunately, the client code looks much nastier:
worker_id = rpc.register_worker(my_name) lock = rpc.lock_queue(worker_id, queue_name) while True: next = rpc.take_from_queue(worker_id, queue_name, lock) if next: result = process(next) rpc.upload_result(worker_id, queue_name, lock, next, result) else: break rpc.unlock_queue(worker_id, queue_name, lock) rpc.exit_worker(worker_id)
Each method requires a handful of parameters, relating to the current session open with the service. They aren't strictly necessary—they do make debugging a system far easier—but problem of having to chain together requests might be a little familiar.
What we'd rather do is use some API where the state between requests is handled for us. The traditional way to achieve this is to build these wrappers by hand, creating special code on the client to assemble the responses.
With REST, we can define a Service that has methods like before, but also contains a little bit of state, and return it from other method calls:
class WorkerApi(Service): def register(self, worker_id): return Lease(worker_id) class Lease(Service): worker_id: str @rpc() def lock_queue(self, name): ... return Queue(self.worker_id, name, lock) @rpc() def expire(self): ... class Queue(Service): name: str lock: str worker_id: str @rpc() def get_task(self): return Task(.., name, lock, worker_id) @rpc() def unlock(self): ... class Task(Service) task_id: str worker_id: str @rpc() def upload(self, out): mark_done(self.task_id, self.actions, out)
Instead of one service, we now have four. Instead of returning identifiers to pass back in, we return a Service with those values filled in for us. As a result, the client code looks a lot nicer—you can even add new parameters in behind the scenes.
lease = rpc.register_worker(my_name) queue = lease.lock_queue(queue_name) while True: next = queue.take_next() if next: next.upload_result(process(next)) else: break queue.unlock() lease.expire()
Although the Future looked like a callback, returning a Service feels like returning an object. This is the power of self description—unlike reflection where you can specify in advance every request that can be made—each response has the opportunity to define a new parameterised request.
It's this navigation through several linked responses that distinguishes a regular command line tool from one that browses—and where REST gets its name: the passing back and forth of requests from server to client is where the 'state-transfer' part of REST comes from, and using a common Result or Cursor object is where the 'representational' comes from.
Although a RESTful system is more than just these combined—along with a reusable browser, you have reusable proxies too.
In the same way that messages describe things to the client, they describe things to any middleware between client and server: using GET, POST, and distinct URLs is what allows caches to work across services, and using a stateless protocol (HTTP) is what allows a proxy or load balancer to work so effortlessly.
The trick with REST is that despite HTTP being stateless, and despite HTTP being simple, you can build complex, stateful services by threading the state invisibly between smaller messages—transferring a representation of state back and forth between client and server.
Although the point of REST is to build a browser, the point is to use self-description and state-transfer to allow heavy amounts of interoperation—not just a reusable client, but reusable proxies, caches, or load balancers.
Going back to the constraints (Client-Server, Stateless, Caching, Uniform Interface, Layering and Code-on-Demand), you might be able to see how they things fit together to achieve these goals.
The first, Client-Server, feels a little obvious, but sets the background. A server waits for requests from a client, and issues responses.
The second, Stateless, is a little more confusing. If a HTTP proxy had to keep track of how requests link together, it would involve a lot more memory and processing. The point of the stateless constraint is that to a proxy, each request stands alone. The point is also that any stateful interactions should be handled by linking messages together.
Caching is the third constraint: labelling if a response can be cached (HTTP uses headers on the response), or if a request can be resent (using GET or POST). The fourth constraint, Uniform Interface, is the most difficult, so we'll cover it last. Layering is the fifth, and it roughly means "you can proxy it".
Code-on-demand is the final, optional, and most overlooked constraint, but it covers the use of Cursors, Futures, or parameterised Services—the idea that despite using a simple means to describe services or responses, the responses can define new requests to send. Code-on-demand takes that further, and imagines passing back code, rather than templates and values to assemble.
With the other constraints handled, it's time for uniform interface. Like stateless, this constraint is more about HTTP than it is about the system atop, and frequently misapplied. This is the reason why people keep making database APIs and calling them RESTful, but the constraint has nothing to do with CRUD.
The constraint is broken down into four ideas, and we'll take them one by one: self-descriptive messages, identification of resources, manipulation of resources through representations, hypermedia as the engine of application state.
Self-Description is at the heart of REST, and this sub-constraint fills in the gaps between the Layering, Caching, and Stateless constraints. Sort-of. It covers using 'GET' and 'POST' to indicate to a proxy how to handle things, and covers how responses indicate if they can be cached, too. It also means using a content-type header.
The next sub-constraint, identification, means using different URLs for different services. In the RPC examples above, it means having a common, standard way to address a service or method, as well as one with parameters.
This ties into the next sub-constraint, which is about using standard representations across services—this doesn't mean using special formats for every API request, but using the same underlying language to describe every response. In other words, the web works because everyone uses HTML.
Uniformity so far isn't too difficult: Use HTTP (self-description), URLs (identification) and HTML (manipulation through representations), but it's the last sub-constraint thats causes most of the headaches. Hypermedia as the engine of application state.
This is a fancy way of talking about how large or long requests can be broken up into interlinked messages, or how a number of smaller requests can be threaded together, passing the state from one to the next. Hypermedia referrs to using Cursor, Future, or Service objects, application state is the details passed around as hidden arguments, and being the 'engine' means using it to tie the whole system together.
Together they form the basis of the Representational State-Transfer Style. More than half of these constraints can be satisfied by just using HTTP, and the other half only really help when you're implementing a browser, but there are still a few more tricks that you can do with REST.
Although a RESTful system doesn't have to offer a database like interface, it can.
Along with Service or Cursor, you could imagine Model or Rows objects to return, but you should expect a little more from a RESTful system than just create, read, update and delete. With REST, you can do things like inlining: along with returning a request to make, a server can embed the result inside. A client can skip the network call and work directly on the inlined response. A server can even make this choice at runtime, opting to embed if the message is small enough.
Finally, with a RESTful system, you should be able to offer things in different encodings, depending on what the client asks for—even HTML. In other words, if your framework can do all of these things for you, offering a web interface isn't too much of a stretch. If you can build a reusable command line tool, generating a web interface isn't too difficult, and at least this time you don't have to implement a browser from scratch.
If you now find yourself understanding REST, I'm sorry. You're now cursed. Like a cross been the greek myths of Cassandra and Prometheus, you will be forced to explain the ideas over and over again to no avail. The terminology has been utterly destroyed to the point it has less meaning than 'Agile'.
Even so, the underlying ideas of interoperability, self-description, and interlinked requests are surprisingly useful—you can break up large or slow responses, you can to browse or even parameterise services, and you can do it in a way that lets you re-use tools across services too.
Ideally someone else will have done it for you, and like with a web browser, you don't really care how RESTful it is, but how useful it is. Your framework should handle almost all of this for you, and you shouldn't have to care about the details.
If anything, REST is about exposing just enough detail—Proxies and load-balancers only care about the URL and GET or POST. The underlying client libraries only have to handle something like HTML, rather than unique and special formats for every service.
REST is fundamentally about letting people use a service without having to know all the details ahead of time, which might be how we got into this mess in the first place.
19 notes
·
View notes
Text
What Is Kubernetes?
Kubernetes is an open source software platform that automates deployment, scaling, and management of containerized applications across various physical, virtual, and cloud environments. Developed by Google, Kubernetes has become one of the most significant advancements in IT since the public cloud came to be.

It’s a cloud native platform built upon 15 years of Google’s production workload experience combined with best-of-breed ideas and practices from the community. It has grown to become a powerful, flexible tool that can be used on a wide range of cloud platforms and on-premises.
The key components of a Kubernetes cluster are a master, a set of nodes that host the containers and a control plane that runs the API server, scheduler, and controller manager. The master also stores state and configuration data in a distributed key-value store called etcd, which all nodes access to maintain the app’s configurations and services.
Running on a single-node cluster: Minikube If you don’t want to invest in a Who are techogle? massive cloud-scale cluster, Minikube can help. It’s a free, open-source container management tool that can be run on your laptop or any other machine that has Linux and Windows operating systems. It’s a great solution for developers and DevOps engineers who might need a small, lightweight cluster on a desktop.
Scaling with the cloud: In addition to letting you scale up or down your cluster based on demand, Kubernetes can also automatically adjust its size to ensure that applications are running efficiently without consuming too much of the available resources. This can reduce infrastructure costs, optimize resource usage, and increase productivity by enabling self-healing and rolling software updates without downtime.
Minikube is designed to help you do more with your Kubernetes cluster than most companies will be able to manage with their own teams of developers and DevOps engineers, and it’s an excellent way for your team to get up and running with Kubernetes in a short amount of time.
It can be used on a variety of operating systems, including Linux, Mac, and Windows, as well as technology website on bare metal or virtual machines in a datacenter or private cloud environment. It’s also compatible with microservers, edge servers, and even very small mobile devices and appliances.
The system has a central command-line interface, kubectl, that lets you manage the entire cluster, including adding and removing containers, defining manifests, and monitoring elements of the cluster. It also has an API server, kube-apiserver, that communicates with nodes through a set of commands and provides a consistent user experience, regardless of the language used to interact with the system.
Secrets for containerized apps When you use Kubernetes to deploy your application, your app can be made to perform a certain state by using a manifest file that defines the desired state of the app and sends it to the API server. Then, the API server implements that manifest on all of the relevant apps in the cluster, ensuring that the desired state matches the actual state every time the application is run.
1 note
·
View note
Text
Monitoring Production Kubernetes Cluster(s) is an important and progressive operation for any Cluster Administrator. There are myriad of solutions that fall into the category of Kubernetes monitoring stack, and some of them are Prometheus and Grafana. This guide is created with an intention of guiding Kubernetes users to Setup Prometheus and Grafana on Kubernetes using prometheus-operator. Prometheus is a full fledged solution that enables Developers and SysAdmins to access advanced metrics capabilities in Kubernetes. The metrics are collected in a time interval of 30 seconds, this is a default settings. The information collected include resources such as Memory, CPU, Disk Performance and Network IO as well as R/W rates. By default the metrics are exposed on your cluster for up to a period of 14 days, but the settings can be adjusted to suit your environment. Grafana is used for analytics and interactive visualization of metrics that’s collected and stored in Prometheus database. You can create custom charts, graphs, and alerts for Kubernetes cluster, with Prometheus being data source. In this guide we will perform installation of both Prometheus and Grafana on a Kubernetes Cluster. For this setup kubectl configuration is required, with Cluster Admin role binding. Prometheus Operator We will be using Prometheus Operator in this installation to deploy Prometheus monitoring stack on Kubernetes. The Prometheus Operator is written to ease the deployment and overall management of Prometheus and its related monitoring components. By using the Operator we simplify and automate Prometheus configuration on any any Kubernetes cluster using Kubernetes custom resources. The diagram below shows the components of the Kubernetes monitoring that we’ll deploy: The Operator uses the following custom resource definitions (CRDs) to deploy and configure Prometheus monitoring stack: Prometheus – This defines a desired Prometheus deployment on Kubernetes Alertmanager – This defines a desired Alertmanager deployment on Kubernetes cluster ThanosRuler – This defines Thanos desired Ruler deployment. ServiceMonitor – Specifies how groups of Kubernetes services should be monitored PodMonitor – Declaratively specifies how group of pods should be monitored Probe – Specifies how groups of ingresses or static targets should be monitored PrometheusRule – Provides specification of Prometheus alerting desired set. The Operator generates a rule file, which can be used by Prometheus instances. AlertmanagerConfig – Declaratively specifies subsections of the Alertmanager configuration, allowing routing of alerts to custom receivers, and setting inhibit rules. Deploy Prometheus / Grafana Monitoring Stack on Kubernetes To get a complete an entire monitoring stack we will use kube-prometheus project which includes Prometheus Operator among its components. The kube-prometheus stack is meant for cluster monitoring and is pre-configured to collect metrics from all Kubernetes components, with a default set of dashboards and alerting rules. You should have kubectl configured and confirmed to be working: $ kubectl cluster-info Kubernetes control plane is running at https://192.168.10.12:6443 CoreDNS is running at https://192.168.10.12:6443/api/v1/namespaces/kube-system/services/kube-dns:dns/proxy To further debug and diagnose cluster problems, use 'kubectl cluster-info dump'. Step 1: Clone kube-prometheus project Use git command to clone kube-prometheus project to your local system: git clone https://github.com/prometheus-operator/kube-prometheus.git Navigate to the kube-prometheus directory: cd kube-prometheus Step 2: Create monitoring namespace, CustomResourceDefinitions & operator pod Create a namespace and required CustomResourceDefinitions: kubectl create -f manifests/setup Command execution results as seen in the terminal screen. customresourcedefinition.apiextensions.k8s.io/alertmanagerconfigs.monitoring.coreos.com created
customresourcedefinition.apiextensions.k8s.io/alertmanagers.monitoring.coreos.com created customresourcedefinition.apiextensions.k8s.io/podmonitors.monitoring.coreos.com created customresourcedefinition.apiextensions.k8s.io/probes.monitoring.coreos.com created customresourcedefinition.apiextensions.k8s.io/prometheuses.monitoring.coreos.com created customresourcedefinition.apiextensions.k8s.io/prometheusrules.monitoring.coreos.com created customresourcedefinition.apiextensions.k8s.io/servicemonitors.monitoring.coreos.com created customresourcedefinition.apiextensions.k8s.io/thanosrulers.monitoring.coreos.com created namespace/monitoring created The namespace created with CustomResourceDefinitions is named monitoring: $ kubectl get ns monitoring NAME STATUS AGE monitoring Active 2m41s Step 3: Deploy Prometheus Monitoring Stack on Kubernetes Once you confirm the Prometheus operator is running you can go ahead and deploy Prometheus monitoring stack. kubectl create -f manifests/ Here is my deployment progress output: poddisruptionbudget.policy/alertmanager-main created prometheusrule.monitoring.coreos.com/alertmanager-main-rules created secret/alertmanager-main created service/alertmanager-main created serviceaccount/alertmanager-main created servicemonitor.monitoring.coreos.com/alertmanager created clusterrole.rbac.authorization.k8s.io/blackbox-exporter created clusterrolebinding.rbac.authorization.k8s.io/blackbox-exporter created configmap/blackbox-exporter-configuration created deployment.apps/blackbox-exporter created service/blackbox-exporter created serviceaccount/blackbox-exporter created servicemonitor.monitoring.coreos.com/blackbox-exporter created secret/grafana-datasources created configmap/grafana-dashboard-alertmanager-overview created configmap/grafana-dashboard-apiserver created configmap/grafana-dashboard-cluster-total created configmap/grafana-dashboard-controller-manager created configmap/grafana-dashboard-k8s-resources-cluster created configmap/grafana-dashboard-k8s-resources-namespace created configmap/grafana-dashboard-k8s-resources-node created configmap/grafana-dashboard-k8s-resources-pod created configmap/grafana-dashboard-k8s-resources-workload created configmap/grafana-dashboard-k8s-resources-workloads-namespace created configmap/grafana-dashboard-kubelet created configmap/grafana-dashboard-namespace-by-pod created configmap/grafana-dashboard-namespace-by-workload created configmap/grafana-dashboard-node-cluster-rsrc-use created configmap/grafana-dashboard-node-rsrc-use created configmap/grafana-dashboard-nodes created configmap/grafana-dashboard-persistentvolumesusage created configmap/grafana-dashboard-pod-total created configmap/grafana-dashboard-prometheus-remote-write created configmap/grafana-dashboard-prometheus created configmap/grafana-dashboard-proxy created configmap/grafana-dashboard-scheduler created configmap/grafana-dashboard-workload-total created configmap/grafana-dashboards created deployment.apps/grafana created service/grafana created serviceaccount/grafana created servicemonitor.monitoring.coreos.com/grafana created prometheusrule.monitoring.coreos.com/kube-prometheus-rules created clusterrole.rbac.authorization.k8s.io/kube-state-metrics created clusterrolebinding.rbac.authorization.k8s.io/kube-state-metrics created deployment.apps/kube-state-metrics created prometheusrule.monitoring.coreos.com/kube-state-metrics-rules created service/kube-state-metrics created serviceaccount/kube-state-metrics created servicemonitor.monitoring.coreos.com/kube-state-metrics created prometheusrule.monitoring.coreos.com/kubernetes-monitoring-rules created servicemonitor.monitoring.coreos.com/kube-apiserver created servicemonitor.monitoring.coreos.com/coredns created servicemonitor.monitoring.coreos.com/kube-controller-manager created servicemonitor.monitoring.coreos.com/kube-scheduler created servicemonitor.monitoring.coreos.com/kubelet created
clusterrole.rbac.authorization.k8s.io/node-exporter created clusterrolebinding.rbac.authorization.k8s.io/node-exporter created daemonset.apps/node-exporter created prometheusrule.monitoring.coreos.com/node-exporter-rules created service/node-exporter created serviceaccount/node-exporter created servicemonitor.monitoring.coreos.com/node-exporter created clusterrole.rbac.authorization.k8s.io/prometheus-adapter created clusterrole.rbac.authorization.k8s.io/system:aggregated-metrics-reader created clusterrolebinding.rbac.authorization.k8s.io/prometheus-adapter created clusterrolebinding.rbac.authorization.k8s.io/resource-metrics:system:auth-delegator created clusterrole.rbac.authorization.k8s.io/resource-metrics-server-resources created configmap/adapter-config created deployment.apps/prometheus-adapter created poddisruptionbudget.policy/prometheus-adapter created rolebinding.rbac.authorization.k8s.io/resource-metrics-auth-reader created service/prometheus-adapter created serviceaccount/prometheus-adapter created servicemonitor.monitoring.coreos.com/prometheus-adapter created clusterrole.rbac.authorization.k8s.io/prometheus-k8s created clusterrolebinding.rbac.authorization.k8s.io/prometheus-k8s created prometheusrule.monitoring.coreos.com/prometheus-operator-rules created servicemonitor.monitoring.coreos.com/prometheus-operator created poddisruptionbudget.policy/prometheus-k8s created prometheus.monitoring.coreos.com/k8s created prometheusrule.monitoring.coreos.com/prometheus-k8s-prometheus-rules created rolebinding.rbac.authorization.k8s.io/prometheus-k8s-config created rolebinding.rbac.authorization.k8s.io/prometheus-k8s created rolebinding.rbac.authorization.k8s.io/prometheus-k8s created rolebinding.rbac.authorization.k8s.io/prometheus-k8s created role.rbac.authorization.k8s.io/prometheus-k8s-config created role.rbac.authorization.k8s.io/prometheus-k8s created role.rbac.authorization.k8s.io/prometheus-k8s created role.rbac.authorization.k8s.io/prometheus-k8s created service/prometheus-k8s created serviceaccount/prometheus-k8s created servicemonitor.monitoring.coreos.com/prometheus-k8s created Give it few seconds and the pods should start coming online. This can be checked with the commands below: $ kubectl get pods -n monitoring NAME READY STATUS RESTARTS AGE alertmanager-main-0 2/2 Running 0 3m8s alertmanager-main-1 2/2 Running 1 (2m55s ago) 3m8s alertmanager-main-2 2/2 Running 1 (2m40s ago) 3m8s blackbox-exporter-69684688c9-nk66w 3/3 Running 0 6m47s grafana-7bf8dc45db-q2ndq 1/1 Running 0 6m47s kube-state-metrics-d75597b45-d9bhk 3/3 Running 0 6m47s node-exporter-2jzcv 2/2 Running 0 6m47s node-exporter-5k8pk 2/2 Running 0 6m47s node-exporter-9852n 2/2 Running 0 6m47s node-exporter-f5dmp 2/2 Running 0 6m47s prometheus-adapter-5f68766c85-hjcz9 1/1 Running 0 6m46s prometheus-adapter-5f68766c85-shjbz 1/1 Running 0 6m46s prometheus-k8s-0 2/2 Running 0 3m7s prometheus-k8s-1 2/2 Running 0 3m7s prometheus-operator-748bb6fccf-b5ppx 2/2 Running 0 6m46s To list all the services created you’ll run the command: $ kubectl get svc -n monitoring NAME TYPE CLUSTER-IP EXTERNAL-IP PORT(S) AGE alertmanager-main ClusterIP 10.100.171.41 9093/TCP,8080/TCP 7m2s alertmanager-operated ClusterIP None 9093/TCP,9094/TCP,9094/UDP 3m23s blackbox-exporter ClusterIP 10.108.187.73 9115/TCP,19115/TCP 7m2s
grafana ClusterIP 10.97.236.243 3000/TCP 7m2s kube-state-metrics ClusterIP None 8443/TCP,9443/TCP 7m2s node-exporter ClusterIP None 9100/TCP 7m2s prometheus-adapter ClusterIP 10.109.119.234 443/TCP 7m1s prometheus-k8s ClusterIP 10.101.253.211 9090/TCP,8080/TCP 7m1s prometheus-operated ClusterIP None 9090/TCP 3m22s prometheus-operator ClusterIP None 8443/TCP 7m1s Step 4: Access Prometheus, Grafana, and Alertmanager dashboards We now have the monitoring stack deployed, but how can we access the dashboards of Grafana, Prometheus and Alertmanager?. There are two ways to achieve this; Method 1: Accessing Prometheus UI and Grafana dashboards using kubectl proxy An easy way to access Prometheus, Grafana, and Alertmanager dashboards is by using kubectl port-forward once all the services are running: Grafana Dashboard kubectl --namespace monitoring port-forward svc/grafana 3000 Then access Grafana dashboard on your local browser on URL: http://localhost:3000 Default Logins are: Username: admin Password: admin You’re required to change the password on first login: Prometheus Dashboard For Prometheus port forwarding run the commands below: kubectl --namespace monitoring port-forward svc/prometheus-k8s 9090 And web console is accessible through the URL: http://localhost:9090 Alert Manager Dashboard For Dashboard Alert Manager Dashboard: kubectl --namespace monitoring port-forward svc/alertmanager-main 9093 Access URL is http://localhost:9093 Method 2: Accessing Prometheus UI and Grafana dashboard using NodePort / LoadBalancer To access Prometheus, Grafana, and Alertmanager dashboards using one of the worker nodes IP address and a port you’ve to edit the services and set the type to NodePort. You need a Load Balancer implementation in your cluster to use service type LoadBalancer. See our guide: How To Deploy MetalLB Load Balancer on Kubernetes Cluster The Node Port method is only recommended for local clusters not exposed to the internet. The basic reason for this is insecurity of Prometheus/Alertmanager services. Prometheus: # If you need Node Port kubectl --namespace monitoring patch svc prometheus-k8s -p '"spec": "type": "NodePort"' #If you have working LoadBalancer kubectl --namespace monitoring patch svc prometheus-k8s -p '"spec": "type": "LoadBalancer"' Alertmanager: # If you need Node Port kubectl --namespace monitoring patch svc alertmanager-main -p '"spec": "type": "NodePort"' #If you have working LoadBalancer kubectl --namespace monitoring patch svc alertmanager-main -p '"spec": "type": "LoadBalancer"' Grafana: # If you need Node Port kubectl --namespace monitoring patch svc grafana -p '"spec": "type": "NodePort"' #If you have working LoadBalancer kubectl --namespace monitoring patch svc grafana -p '"spec": "type": "LoadBalancer"' Confirm that the each of the services have a Node Port assigned / Load Balancer IP addresses: $ kubectl -n monitoring get svc | grep NodePort alertmanager-main NodePort 10.254.220.101 9093:31237/TCP 45m grafana NodePort 10.254.226.247 3000:31123/TCP 45m prometheus-k8s NodePort 10.254.92.43 9090:32627/TCP 45m $ kubectl -n monitoring get svc | grep LoadBalancer grafana LoadBalancer 10.97.236.243 192.168.1.31 3000:30513/TCP 11m In this example we can access the services as below: # Grafana NodePort: http://node_ip:31123 LB: http://lb_ip:3000 # Prometheus NodePort: http://node_ip:31123 LB: http://lb_ip:9090 # Alert Manager NodePort: http://node_ip:31237 LB: http://lb_ip:9093
An example of default grafana dashboard showing cluster-wide compute resource usage. Destroying / Tearing down Prometheus monitoring stack If at some point you feel like tearing down Prometheus Monitoring stack in your Kubernetes Cluster, you can run kubectl delete command and pass the path to the manifest files we used during deployment. kubectl delete --ignore-not-found=true -f manifests/ -f manifests/setup Within some few minutes the stack is deleted and you can re-deploy if that was the intention.
0 notes
Text
Kubernetes and Cloud Native Associate (KCNA) Study Guide
Are you preparing for your Kubernetes and Cloud Native Associate (KCNA) Certification exam? PassQuestion provides the latest Kubernetes and Cloud Native Associate (KCNA) Study Guide with real questions and answers to help you pass your exam easily. If you are using our Kubernetes and Cloud Native Associate (KCNA) Study Guide multiple times, then you will be able to get a clear idea of the real exam scenario. Make sure that you are taking Kubernetes and Cloud Native Associate (KCNA) Study Guide so you can strengthen your preparation level for the KCNA Certification exam. We will be able to help you in all sorts for clearing Kubernetes and Cloud Native Associate (KCNA) exam on the first attempt.
Kubernetes and Cloud Native Associate (KCNA) Certification
The KCNA is a pre-professional certification designed for candidates interested in advancing to the professional level through a demonstrated understanding of kubernetes foundational knowledge and skills. This certification is ideal for students learning about or candidates interested in working with cloud native technologies.
A certified KCNA will confirm conceptual knowledge of the entire cloud native ecosystem, particularly focusing on Kubernetes. The KCNA exam is intended to prepare candidates to work with cloud native technologies and pursue further CNCF credentials, including CKA, CKAD, and CKS.
KCNA will demonstrate a candidate's basic knowledge of Kubernetes and cloud-native technologies, including how to deploy an application using basic kubectl commands, the architecture of Kubernetes (containers, pods, nodes, clusters), understanding the cloud-native landscape and projects (storage, networking, GitOps, service mesh), and understanding the principles of cloud-native security.
Exam Details
Number of Question: 60 questions
Duration: 90 minutes
Passing Score: 75%
Format: online, proctored, multiple-choice exam.
Cost: $250 and includes one free retake.
Exam Topics
Kubernetes Fundamentals 46%
Container Orchestration 22%
Cloud Native Architecture 16%
Cloud Native Observability 8%
Cloud Native Application Delivery 8%
View Online Kubernetes and Cloud Native Associate (KCNA) Free Questions
What are the two goals of Cloud-Native? A.Rapid innovation and automation B.Slow innovation and stable applications C.Frequent deployments and well-defined organizational silos D.Rapid innovation and reliability Answer: D
What makes cloud native technology so important? A.It makes data centric B.It strengthens team C.It removes roadblocks to innovation D.It helps gather software requirements E.It makes operational centric Answer: C
Which of the following components is part of the Kubernetes control panel A.kubectl B.kube-proxy C.Service Mesh D.kubelet E.Cloud control manager Answer: E
Which kubernetes resource type allows defining which pods are isolated when it comes to network-ing? A.Network policy B.Domain Name System 'DNS' C.Role Binding D.Service Answer: A
In Kubernetes, what is considered the primary cluster data source? A.etcd (pronounce: esty-d) B.api server C.kubelet D.scheduler Answer: A
Which of the following is an advantage a cloud-native microservices application has over monolithic applications? A.Cloud-native microservices applications tend to be faster and more responsive than monolithic applications. B.Cloud-native microservice applications tend to be easier to troubleshoot. C.Cloud-native microservice applications tend to be easier to scale and perform updates on. Answer: C
Which part of a Kubernetes cluster is responsible for running container workloads? A.Worker Node B.kube-proxy C.Control plane D.etcd Answer:A
0 notes
Text
Unable to init the driver

Boot Linux Error Kernel Panic.
Unable to init dxgi? arma - Reddit.
Unable To Init The Driver - depositfilesfarms.
Top 7 Ways to Fix Unable to Remove Printer on Windows 11.
JDBC Request (failed to init connection) - SmartBear Community.
Connect Server Unable To The Kubectl To.
Clockgen Unable To Init Driver (NEW) - Sebastian Arnezeder.
Driver Manager won't open - Linux Mint Forums.
Error: (gpu) unable to initialize NVIDIA NVML (GPU-rendering).
Unable To Init The Driver.
Unable To Init The Driver - gopdroid.
SteamVr crashes immediately when opened - reddit.
Android SDK and windows 11: unable to install Hypervisor for AMD.
Kernel Panic Error Linux Boot.
Boot Linux Error Kernel Panic.
Mar 08, 2019 · It is very clear from your code that you are trying to create ChromeDriver but the path to the executable is not correct. Download the latest ChromeDriver executable from the chromedriver downloads. Mar 03, 2019 · SessionNotCreatedException: Unable to create new remote session. while initializing android driver in emulator 3 Unable to create new remote session.
Unable to init dxgi? arma - Reddit.
# /etc/init.d/oracleasm configure Configuring the Oracle ASM library driver. This will configure the on-boot properties of the Oracle ASM library driver. The following questions will determine whether the driver is loaded on boot and what permissions it will have. The current values will be shown in brackets ('()'). Kernel driver in use: nvidia Kernel modules: nvidiafb, nouveau, nvidia_drm, nvidia. I have read this post: nvidia-settings: unable to init server This described most of what I need to do, noting that SSH terminals have the issue of no DISPLAY, and the response from the ‘top contributor’ was “not possilble, start a dummy xserver”.
Unable To Init The Driver - depositfilesfarms.
If "Unable to Init. 48" is gone, continue to step 4. - If "Unable to Init. 48" returns, skip to step 5. 4. Print a User Settings Report to test. a. Press Settings. b. Press or to select Print Reports. Press OK. c. Press or to select User Settings. Press OK. d. Press Black Start. The User Settings report will print.
Top 7 Ways to Fix Unable to Remove Printer on Windows 11.
The message "Unable to Init. E3" will appear for one of the following reason: i. Mechanical malfunction. 1. Read the complete message displayed in the yellow bar at the top of the display. - If "Unable to Init. E3," go to step 2. My problem was that i didn't have TCP/IP enabled in SQL Server and i was pointing the datasource to the servername rather than 127.0.0.1. Which shouldn't make a difference, but it won't work if i use the name. Dec 14, 2021 · VIDEO_DRIVER_INIT_FAILURE Parameters None Cause The system was not able to go into graphics mode because no display drivers were able to start. This usually occurs when no video miniport drivers are able to load successfully. Recommended content Creating a Kernel-Mode Dump File - Windows drivers Creating a Kernel-Mode Dump File.
JDBC Request (failed to init connection) - SmartBear Community.
Xizouki. Clockgen Unable to Init Driver M ZF-PCI-Clockgen driver - FreeS/WAN DocuWiki. Hi. I'm trying to use the freescale clockgen driver on my new pc, but when I type clockgen on the command line it says. „Clockgen unable to init driver.". clockgen unable to init driver keithanag Feb 16, 2010. 2K. Clockgen Unable to Init Driver I get. When creating a SSAS tabular model in Visual Studio and attemping to import a data source, I try the following: Models -TabularProject (my project) -Data Sources > New Data Source > Oracle Database. Oracle Database The recommended provider ('Oracle.DataAccess.Client') is not installed. You can continue with your current provider, however, it..
Connect Server Unable To The Kubectl To.
The Choose an option screen will appear so navigate to Troubleshoot >> Advanced Options >> Command Prompt. Command Prompt from Advanced Options. Otherwise, simply search for Command Prompt, right-click on it, and choose Run as administrator. At the command prompt window, type in simply " diskpart " in a new line and click the Enter key to. Linux > Kernel (PATCH v3 33/34) misc: Hddl device management for local host mgross at linux Tried to do upgrade from 18 In basic terms, it is a situation when the kernel can't load properly and therefore the system fails to boot 001250) init(1) trap invalid opcode ip:7f72a3e9ba3f sp:7fffd6a70578 error:0 in libc-2 com/5VjBZUj com/5VjBZUj.
Clockgen Unable To Init Driver (NEW) - Sebastian Arnezeder.
Picture-5 shows helm client reporting an error, since it is unable to connect to K8S cluster API to install tiller I currently have a multi-node cluster running on bare-metal (running on an Ubuntu 18 It also helps you to create an Amazon EKS administrator service account that you can use to securely connect to the dashboard to view and control.
Driver Manager won't open - Linux Mint Forums.
. Sat Jun 03 2017 11:16:17.972 - Unable to init watchdog mode for driver lighthouse: VRInitError_Init_LowPowerWatchdogNotSupported Sat Jun 03 2017 11:16:17.975 - Could not create interface in driver oculus from C:\Program Files (x86)\Steam\steamapps\common\SteamVR\drivers\oculus\bin\win32\ Sat Jun 03 2017 11:16:17.976 - Unable.
Error: (gpu) unable to initialize NVIDIA NVML (GPU-rendering).
I cannot open the Driver Manager. When I click on the menu button for it, nothing happens. In the terminal, if i try to run it with: sudo pkexec driver-manager or sudo mintdrivers i get: No protocol specified Unable to init server: Could not connect: Connection refused No protocol specified Unable to init server: Could not connect: Connection..
Unable To Init The Driver.
Command: /usr/lib/jvm/java-1.8.-openjdk/bin/java -cp... sqlline.SqlLine -d Dri --maxWidth=10000 Dri. I receive the following error: "Unable to connect to Steam VR. Error: Init_HmdNotFoundPresenceFailed" when trying to run the program. I believe it is because my Steam is not installed in the default folder, but I don't see any way to change that in driver4vr.
Unable To Init The Driver - gopdroid.
Xizouki. Clockgen Unable to Init Driver M ZF-PCI-Clockgen driver - FreeS/WAN DocuWiki. Hi. I'm trying to use the freescale clockgen driver on my new pc, but when I type clockgen on the command line it says. "Clockgen unable to init driver.". clockgen unable to init driver keithanag Feb 16, 2010. 2K. Clockgen Unable to Init Driver I get the same. Also there is another issue with Ubuntu 18 Used a live USB to run terminal, then did boot repair, which gave me this Another option might be, if you have room on the drive to load another Linux OS 1 20161016 (Linaro GCC 6 001250) init(1) trap invalid opcode ip:7f72a3e9ba3f sp:7fffd6a70578 error:0 in libc-2 5 system boot prompt kernel panic-not. Search: Optimum Router Init Failed. Corrupt EEPROM values, you will need to reconfigure all your $ values as they have been reset to default - this Welcome to the 3DTEK website and online store d/custom-networking ) Make sure DNSMASQ is disabled, as noted in the above DNS Section If i Command line in, it will say FAILED under Pool service entered failed state service entered failed state.
SteamVr crashes immediately when opened - reddit.
Unable to init Ageia Physx for Frontlines Fuel of War. Jump to Latest Follow Status Not open for further replies.... The driver software is here. Help TSF beat Cancer and other serious Illness. Save Share. 1 - 4 of 4 Posts. Status Not open for further replies. Join the discussion. Continue with Facebook. The main error: ERROR: Unable to load the kernel module ';. This happens most frequently when this kernel module was built against the wrong or improperly configured kernel sources, with a version of gcc that differs from the one used to build the target kernel, or if a driver such as rivafb, nvidiafb, or nouveau is present and. Driver æ ƒ Clockgen Cannot Initialize Driver æ ƒ Astak Ip700 Software 29æ ƒ Jawi Naskh Dt F æ ƒ ArcSoft PhotoStudio 6 Crack... æ ƒ Oxygen Software Oxygen 5 æ ƒ Oxygen Software Oxygen 3 æ ƒ Oxygen Software Oxygen 2 æ ƒ NANO PhotoZoom Pro 4.9 æ ƒ NANO PhotoZoom Pro 4.5 æ ƒ NANO PhotoZoom Pro 4 æ ƒ NANO.
Android SDK and windows 11: unable to install Hypervisor for AMD.
The message "Unable to Init. 50" will appear on the display for one of the following reasons: i. A foreign object, such as a paper clip or ripped piece of paper, is stuck in the machine; ii. Mechanical malfunction. To attempt to clear the error, continue to step 1. 1. If the /boot partition is not full; The initramfs file for the kernel under /boot directory might be corrupted I was unable to get to a shell through the three types of kernel parameters under "reboot into root shell and fix problem" I read through the General troubleshooting arch wiki on kernel panics To fix this I had to pick ADVANCED in the.
Kernel Panic Error Linux Boot.
Search: Optimum Router Init Failed. ++It is not possible to reroute those packets using the standard routing ++mechanisms, because the kernel locally delivers a packet having ++a destination address belonging to the router itself service" and "journalctl -xe" for details 04): static networking is now up * Starting configure network device(74G( OK ) Cloud-init v Unfortunately, the rental router. Clockgen Unable to Init Driver I get the same thing. I don't even know the motherboard for this computer. I am using a GK-R214 and running on Windows XP Media Center Edition - Service Pack 2. The motherboard's model is P2Z91EPZ845BF. I have tried turning of the Smartbios feature and I have tried and confirmed that the pci configuration space is. Lift the flat-bed scanner cover to release the lock (1), then gently push the scanner cover support down (2) and close the scanner cover (3) using both hands. - If "Unable to Init. 48" still on the display, go to step 10. - If "Unable to Init. 48" has cleared, go to step 11. 10.
Other links:
Windows 10 Version 1803 Multi Edition Iso Download
Umodel Download Unreal Engine
Clone Drone In The Danger Zone Free No Download
1 note
·
View note
Text
Docker Compose Install For Mac

Estimated reading time: 15 minutes
Docker Compose Install For Mac Installer
Docker Compose Install For Mac High Sierra
Docker Compose Install For Macos
Running Docker On Mac
See full list on docs.docker.com. To uninstall Docker Toolbox from Mac, first simply download the following Docker Toolbox Uninstall Shell Script to your local machine. Use the Terminal application on your Mac (i.e. Press CMD + Space to open Spotlight Search and enter keyword 'Terminal') to change into the directory it was downloaded into (i.e. Cd /Downloads ), and then. If you're a Mac or Windows user, the best way to install Compose and keep it up-to-date is Docker for Mac and Windows. Docker for Mac and Windows will automatically install the latest version of Docker Engine for you. Alternatively, you can use the usual commands to install or upgrade Compose. This view also provides an intuitive interface to perform common actions to inspect, interact with, and manage your Docker objects including containers and Docker Compose-based applications. The Images view displays a list of your Docker images, and allows you to run an image as a container, pull the latest version of an image from Docker Hub. $ docker-compose up -build Creating network 'example-voting-app-masterfront-tier' with the default driver Creating network 'example-voting-app-masterback-tier' with the default driver Creating volume 'example-voting-app-masterdb-data' with default driver Building vote Step 1/7: FROM python:2.7-alpine 2.7-alpine: Pulling from library/python Digest.
Welcome to Docker Desktop! The Docker Desktop for Mac user manual provides information on how to configure and manage your Docker Desktop settings.
For information about Docker Desktop download, system requirements, and installation instructions, see Install Docker Desktop.
Note
This page contains information about the Docker Desktop Stable release. For information about features available in Edge releases, see the Edge release notes.
Preferences
The Docker Preferences menu allows you to configure your Docker settings such as installation, updates, version channels, Docker Hub login,and more.
Choose the Docker menu > Preferences from themenu bar and configure the runtime options described below.
General
On the General tab, you can configure when to start and update Docker:
Start Docker Desktop when you log in: Automatically starts Docker Desktop when you open your session.
Automatically check for updates: By default, Docker Desktop automatically checks for updates and notifies you when an update is available. You can manually check for updates anytime by choosing Check for Updates from the main Docker menu.
Include VM in Time Machine backups: Select this option to back up the Docker Desktop virtual machine. This option is disabled by default.
Securely store Docker logins in macOS keychain: Docker Desktop stores your Docker login credentials in macOS keychain by default.
Send usage statistics: Docker Desktop sends diagnostics, crash reports, and usage data. This information helps Docker improve and troubleshoot the application. Clear the check box to opt out.
Click Switch to the Edge version to learn more about Docker Desktop Edge releases.
Resources
The Resources tab allows you to configure CPU, memory, disk, proxies, network, and other resources.
Advanced
On the Advanced tab, you can limit resources available to Docker.
Advanced settings are:
CPUs: By default, Docker Desktop is set to use half the number of processorsavailable on the host machine. To increase processing power, set this to ahigher number; to decrease, lower the number.
Memory: By default, Docker Desktop is set to use 2 GB runtime memory,allocated from the total available memory on your Mac. To increase the RAM, set this to a higher number. To decrease it, lower the number.
Swap: Configure swap file size as needed. The default is 1 GB.
Disk image size: Specify the size of the disk image.
Disk image location: Specify the location of the Linux volume where containers and images are stored.
You can also move the disk image to a different location. If you attempt to move a disk image to a location that already has one, you get a prompt asking if you want to use the existing image or replace it.
File sharing
Use File sharing to allow local directories on the Mac to be shared with Linux containers.This is especially useful forediting source code in an IDE on the host while running and testing the code in a container.By default the /Users, /Volume, /private, /tmp and /var/folders directory are shared. If your project is outside this directory then it must be addedto the list. Otherwise you may get Mounts denied or cannot start service errors at runtime.
File share settings are:
Docker Compose Install For Mac Installer
Add a Directory: Click + and navigate to the directory you want to add.
Apply & Restart makes the directory available to containers using Docker’sbind mount (-v) feature.
There are some limitations on the directories that can be shared:
The directory must not exist inside of Docker.
For more information, see:
Namespaces in the topic onosxfs file system sharing.
Volume mounting requires file sharing for any project directories outside of /Users.)
Proxies
Docker Desktop detects HTTP/HTTPS Proxy Settings from macOS and automaticallypropagates these to Docker. For example, if you set yourproxy settings to http://proxy.example.com, Docker uses this proxy whenpulling containers.
Your proxy settings, however, will not be propagated into the containers you start.If you wish to set the proxy settings for your containers, you need to defineenvironment variables for them, just like you would do on Linux, for example:
For more information on setting environment variables for running containers,see Set environment variables.
Network
You can configure Docker Desktop networking to work on a virtual private network (VPN). Specify a network address translation (NAT) prefix and subnet mask to enable Internet connectivity.
Docker Engine
The Docker Engine page allows you to configure the Docker daemon to determine how your containers run.
Type a JSON configuration file in the box to configure the daemon settings. For a full list of options, see the Docker Enginedockerd commandline reference.
Click Apply & Restart to save your settings and restart Docker Desktop.
Command Line
Docker Compose Install For Mac High Sierra
On the Command Line page, you can specify whether or not to enable experimental features.
Experimental features provide early access to future product functionality.These features are intended for testing and feedback only as they may changebetween releases without warning or can be removed entirely from a futurerelease. Experimental features must not be used in production environments.Docker does not offer support for experimental features.
To enable experimental features in the Docker CLI, edit the config.jsonfile and set experimental to enabled.
To enable experimental features from the Docker Desktop menu, clickSettings (Preferences on macOS) > Command Line and then turn onthe Enable experimental features toggle. Click Apply & Restart.
For a list of current experimental features in the Docker CLI, see Docker CLI Experimental features.
On both Docker Desktop Edge and Stable releases, you can toggle the experimental features on and off. If you toggle the experimental features off, Docker Desktop uses the current generally available release of Docker Engine.
You can see whether you are running experimental mode at the command line. IfExperimental is true, then Docker is running in experimental mode, as shownhere. (If false, Experimental mode is off.)
Kubernetes
Docker Desktop includes a standalone Kubernetes server that runs on your Mac, sothat you can test deploying your Docker workloads on Kubernetes.
The Kubernetes client command, kubectl, is included and configured to connectto the local Kubernetes server. If you have kubectl already installed andpointing to some other environment, such as minikube or a GKE cluster, be sureto change context so that kubectl is pointing to docker-desktop:
If you installed kubectl with Homebrew, or by some other method, andexperience conflicts, remove /usr/local/bin/kubectl.
To enable Kubernetes support and install a standalone instance of Kubernetesrunning as a Docker container, select Enable Kubernetes. To set Kubernetes as thedefault orchestrator, select Deploy Docker Stacks to Kubernetes by default.
Click Apply & Restart to save the settings. This instantiates images required to run the Kubernetes server as containers, and installs the/usr/local/bin/kubectl command on your Mac.
When Kubernetes is enabled and running, an additional status bar item displaysat the bottom right of the Docker Desktop Settings dialog.
The status of Kubernetes shows in the Docker menu and the context points todocker-desktop.
By default, Kubernetes containers are hidden from commands like dockerservice ls Video media player for mac. , because managing them manually is not supported. To make themvisible, select Show system containers (advanced) and click Apply andRestart. Most users do not need this option.
To disable Kubernetes support at any time, clear the Enable Kubernetes check box. TheKubernetes containers are stopped and removed, and the/usr/local/bin/kubectl command is removed.
For more about using the Kubernetes integration with Docker Desktop, seeDeploy on Kubernetes.
Reset
Reset and Restart options
On Docker Desktop Mac, the Restart Docker Desktop, Reset to factory defaults, and other reset options are available from the Troubleshoot menu.
For information about the reset options, see Logs and Troubleshooting.
Dashboard
The Docker Desktop Dashboard enables you to interact with containers and applications and manage the lifecycle of your applications directly from your machine. The Dashboard UI shows all running, stopped, and started containers with their state. It provides an intuitive interface to perform common actions to inspect and manage containers and existing Docker Compose applications. For more information, see Docker Desktop Dashboard.
Add TLS certificates
You can add trusted Certificate Authorities (CAs) (used to verify registryserver certificates) and client certificates (used to authenticate toregistries) to your Docker daemon.
Add custom CA certificates (server side)
All trusted CAs (root or intermediate) are supported. Docker Desktop creates acertificate bundle of all user-trusted CAs based on the Mac Keychain, andappends it to Moby trusted certificates. So if an enterprise SSL certificate istrusted by the user on the host, it is trusted by Docker Desktop.
To manually add a custom, self-signed certificate, start by adding thecertificate to the macOS keychain, which is picked up by Docker Desktop. Here isan example:
Or, if you prefer to add the certificate to your own local keychain only (ratherthan for all users), run this command instead:
See also, Directory structures forcertificates.
Note: You need to restart Docker Desktop after making any changes to thekeychain or to the ~/.docker/certs.d directory in order for the changes totake effect.
For a complete explanation of how to do this, see the blog post AddingSelf-signed Registry Certs to Docker & Docker Desktop forMac.
Add client certificates
You can put your client certificates in~/.docker/certs.d/<MyRegistry>:<Port>/client.cert and~/.docker/certs.d/<MyRegistry>:<Port>/client.key.
When the Docker Desktop application starts, it copies the ~/.docker/certs.dfolder on your Mac to the /etc/docker/certs.d directory on Moby (the DockerDesktop xhyve virtual machine).
You need to restart Docker Desktop after making any changes to the keychainor to the ~/.docker/certs.d directory in order for the changes to takeeffect.
The registry cannot be listed as an insecure registry (see DockerEngine. Docker Desktop ignores certificates listedunder insecure registries, and does not send client certificates. Commandslike docker run that attempt to pull from the registry produce errormessages on the command line, as well as on the registry.
Directory structures for certificates
If you have this directory structure, you do not need to manually add the CAcertificate to your Mac OS system login:
The following further illustrates and explains a configuration with customcertificates:
You can also have this directory structure, as long as the CA certificate isalso in your keychain.
To learn more about how to install a CA root certificate for the registry andhow to set the client TLS certificate for verification, seeVerify repository client with certificatesin the Docker Engine topics.
Install shell completion
Docker Desktop comes with scripts to enable completion for the docker and docker-compose commands. The completion scripts may befound inside Docker.app, in the Contents/Resources/etc/ directory and can beinstalled both in Bash and Zsh.
Bash
Bash has built-in support forcompletion To activate completion for Docker commands, these files need to becopied or symlinked to your bash_completion.d/ directory. For example, if youinstalled bash via Homebrew:
Elgato video capture software mac os x. Add the following to your ~/.bash_profile:
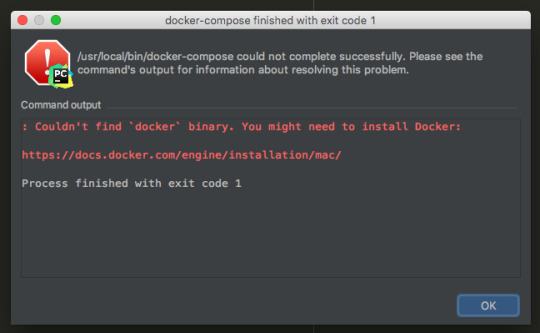
OR
Zsh
In Zsh, the completionsystem takes care of things. To activate completion for Docker commands,these files need to be copied or symlinked to your Zsh site-functions/directory. For example, if you installed Zsh via Homebrew:
Fish-Shell
Fish-shell also supports tab completion completionsystem. To activate completion for Docker commands,these files need to be copied or symlinked to your Fish-shell completions/directory.
Create the completions directory:
Now add fish completions from docker.
Give feedback and get help
To get help from the community, review current user topics, join or start adiscussion, log on to our Docker Desktop for Macforum.
To report bugs or problems, log on to Docker Desktop for Mac issues onGitHub,where you can review community reported issues, and file new ones. SeeLogs and Troubleshooting for more details.
For information about providing feedback on the documentation or update it yourself, see Contribute to documentation.
Docker Hub
Select Sign in /Create Docker ID from the Docker Desktop menu to access your Docker Hub account. Once logged in, you can access your Docker Hub repositories and organizations directly from the Docker Desktop menu.
For more information, refer to the following Docker Hub topics:
Two-factor authentication
Docker Compose Install For Macos
Docker Desktop enables you to sign into Docker Hub using two-factor authentication. Two-factor authentication provides an extra layer of security when accessing your Docker Hub account.
You must enable two-factor authentication in Docker Hub before signing into your Docker Hub account through Docker Desktop. For instructions, see Enable two-factor authentication for Docker Hub.
Running Docker On Mac
After you have enabled two-factor authentication:
Go to the Docker Desktop menu and then select Sign in / Create Docker ID.
Enter your Docker ID and password and click Sign in.
After you have successfully signed in, Docker Desktop prompts you to enter the authentication code. Enter the six-digit code from your phone and then click Verify.
After you have successfully authenticated, you can access your organizations and repositories directly from the Docker Desktop menu.
Where to go next
Try out the walkthrough at Get Started.
Dig in deeper with Docker Labs examplewalkthroughs and source code.
For a summary of Docker command line interface (CLI) commands, seeDocker CLI Reference Guide.
Check out the blog post, What’s New in Docker 17.06 Community Edition(CE).
mac, tutorial, run, docker, local, machine
0 notes
Text
Basic commands/operations in Kubernetes
Kubectl is a command-line interface that is used to run commands against the clusters of Kubernetes. It’s a CLI tool for the users through which you can communicate with the Kubernetes API server. Before running the command in the terminal, kubectl initially checks for the file name “config” and which you can see in the $HOME/.Kube directory. From a technical point of view, kubectl is a client for the Kubernetes API & from a user's point of view, it’s your cockpit to control the whole Kubernetes.
Kubectl syntax describes the command operations. To run the operations, kubectl includes the supported flags along with subcommands. And via this part of the Kubernetes series, we are going to render you some of the operations.
I. STARTING COMMANDS
1. Create
kubectl create −. kubectl create −. To run the operation we usually use the kubectl to create command. To do this, JSON or YAML formats are accepted.
$ kubectl create -f file_name.yaml
To specify the resources with one or more files: -f file1 -f file2 -f file...
Below is the list through which we use to create multiple things by using the kubectl command.
deployment namespace quota secret docker-registry secret secret generic secret tls serviceaccount service clusterip service loadbalancer service nodeport service nodeport
2. Get
Display one or many resources, This command is capable of fetching data on the cluster about the Kubernetes resources.
List all pods in the ps output format.
$ kubectl get pods
List all pods in ps output format with more information (such as node name).
$ kubectl get pods -o wide
List a single replication controller with specified NAME in the ps output format.
$ kubectl get replicationcontroller web
List deployments in JSON output format, in the "v1" version of the "apps" API group:
$ kubectl get deployments.v1.apps -o json
List a pod recognized by type and name specified in "pod.yaml" in the JSON output format.
$ kubectl get -f pod.yaml -o json
3. Run
Create and run a particular image, possibly replicated.
Creates a deployment or job to manage the created container(s).
Start a single instance of nginx.
$ kubectl run nginx --image=nginx
4. Expose
Expose a resource as a new Kubernetes service.
$ kubectl expose rc nginx --port=80 --target-port=8000
5. Delete
kubectl delete − Delete resources by filenames, stdin, resources and names, or by resources and label selector.
$ kubectl delete –f file_name/type_name --all
Delete all pods
$ kubectl delete pods --all
Delete pods and services with label name=myLabel.
$ kubectl delete pods,services -l name=myLabel
Delete a pod with minimal delay
II. APPLY MANAGEMENT
1. Apply
kubectl apply − It holds the capability to configure a resource by file or stdin.
$ kubectl apply –f filename
2. Annotate
kubectl annotate − To attach metadata to Kubernetes objects, you can use either labels or annotations. As labels can be mostly used to opt the objects and to find collections of objects that satisfy certain conditions.
$ kubectl annotate created_object -f file_name resource-version _key = value $ kubectl get pods pod_name --output=yaml
3. Autoscale
kubectl autoscale − Autoscale is employed to auto-scale the pods which are specified as Deployment, replica set, Replication Controller. It also creates an autoscaler that automatically selects and sets the number of pods that runs in the Kubernetes cluster.
$ autoscale -f file_name/type [--min=MINPODS] --max=MAXPODS [--cpu-percent=CPU] $ kubectl autoscale deployment foo --min=2 --max=10
4. Convert
Convert 'pod.yaml' to the most advanced version and print to stdout.
The command takes filename, directory, or URL as an input, and transforms it into the format of the version defined by --output-version flag. If the target version is not specified or not supported, convert to the latest version.
$ kubectl convert -f pod.yaml
5. kubectl edit − It is applied to end the resources on the server. This allows us to directly edit a resource that one can receive via the command-line tool.
$ kubectl edit Resource/Name | File Name
6. Replace
Replace a resource by filename or stdin.
JSON and YAML formats are accepted. If replacing an existing resource, the complete resource spec must be provided. This can be obtained by
$ kubectl replace -f file_name
7. Rollout
kubectl rollout − It is more competent in managing the rollout of deployment.
$ Kubectl rollout Sub_Command $ kubectl rollout undo deployment/tomcat
Apart from the above, we can perform multiple tasks using the rollout such as
rollout history
View the rollout history of a deployment
$ kubectl rollout history deployment/abc
rollout pause
the provided resource as paused
$ kubectl rollout pause deployment/nginx
To resume a paused resource.
$ kubectl rollout resume
rollout resume
Resume a paused resource
$ kubectl rollout resume deployment/nginx
rollout status
Watch the rollout status of a deployment
$ kubectl rollout status deployment/nginx
rollout undo
Rollback to the previous deployment
$ kubectl rollout undo deployment/abc
8. Scale
kubectl scale − It will scale the dimension of Kubernetes Deployments, ReplicaSet, Replication Controller, or job.
$ kubectl scale –replica = 3 FILE_NAME
III. WORK WITH APPS
1. cp
kubectl cp− Copy files and directories to and from containers.
$ kubectl cp Files_from_source Files_to_Destination $ kubectl cp /tmp/foo -pod:/tmp/bar -c specific-container
2. Describe
kubectl describe − Describes any appropriate resources in Kubernetes. Confers the details of a resource or an assortment of resources.
$ kubectl describe type type_name
Describe a pod
$ kubectl describe pod/nginx
Describe a pod identified by type and name in "pod.json"
$ kubectl describe -f pod.json
Describe all pods
$ kubectl describe pods
Describe pods by label name=label_name
$ kubectl describe po -l name=label_name
3. exec
kubectl exec− This helps to execute a command in the container.
$ kubectl exec POD -c container --command args $ kubectl exec 123-5-456 date
4. logs
They are employed to get the logs of the container in a pod. Printing the logs can be defining the container name in the pod. If the POD has only one container there is no need to define its name.
$ kubectl logs container_name $ kubectl logs nginx
5. port-forward
Forward one or more local ports to a pod. They are accepted to forward one or more local port to pods.
Listen on ports 5000 and 6000 locally, forwarding data to/from ports 5000 and 6000 in the pod
$ kubectl port-forward pod/mypod 5000 6000 $ kubectl port-forward tomcat 3000 4000 $ kubectl port-forward deployment/mydeployment 5000 6000
6. Top
kubectl top node − It displays CPU/Memory/Storage usage. The prime or the foremost command enables you to see the resource use for the nodes.
$ kubectl top node node_name
pod
Display metrics for all pods in the default namespace
$ kubectl top pod
node
Display metrics for all nodes
$ kubectl top node
7. Attach
kubectl attach − Its major function is to attach things to the running container.
$ kubectl attach pod –c containers
IV. CLUSTER MANAGEMENT
1. API-versions
kubectl API-versions − Basically, it prints the supported versions of API on the cluster.
$ kubectl api-version
2. cluster-info
kubectl cluster-info − It represents the cluster Info.
Display addresses of the master and services with label kubernetes.io/cluster-service=true
Besides, debug and diagnose cluster problems, use 'kubectl cluster-info dump'.
$ kubectl cluster-info
Dumps
Dumps cluster-info out suitable for debugging and diagnosing cluster problems. By default, dumps everything to stdout. You can optionally specify a directory with --output-directory. If you specify a directory, the Kubernetes will build an assortment of files in that directory.
By default only dumps things in the 'Kube-system' namespace, but you can shift to a different namespace with the --namespaces flag or specify --all-namespaces to dump all namespaces.
$ kubectl cluster-info dump --output-directory = /path/to/cluster-state
3. Certificate
Modify certificate resources.
approve
Approve/Accept a certificate signing request.
$ kubectl approve -f file_name/type
deny
Deny a certificate signing request. This action represents a certificate signing controller to not to issue a certificate to the requestor.
$ kubectl deny -f file_name/type
4. Drain
kubectl drain − This is used to drain a node for preservation purposes. It makes the node for maintenance. This will mark the node as unavailable so that it should not be indicated with a new container that will be created.
$ kubectl drain node_name –force
V. KUBECTL SETTINGS AND USAGE
1. Api-resources
Print the supported API Resources
$ kubectl api-resources
Print the supported API Resources with more information
$ kubectl api-resources -o wide
2. config
current-context
kubectl config current-context − It displays the current context.
$ kubectl config current-context
delete-cluster
kubectl config delete-cluster − Deletes the specified cluster from kubeconfig.
$ kubectl config delete-cluster cluster_name
delete-context
kubectl config delete-context − Deletes a specified context from kubeconfig.
$ kubectl config delete-context cluster_name
get-clusters
kubectl config get-clusters − Displays cluster defined in the kubeconfig.
$ kubectl config get-cluster $ kubectl config get-cluster cluster_name
get-contexts
kubectl config get-contexts − Specifies one or many contexts. Displays one or many contexts from the kubeconfig file.
$ kubectl config get-context cluster_name
rename-context
Renames a context from the kubeconfig file.
CONTEXT_NAME is the context name that you wish to change.
NEW_NAME is the new name you wish to set.
$ kubectl config rename-context old_name new_name
set
Sets a specific value in a kubeconfig file
PROPERTY_NAME is a dot delimited name where each token implies either an attribute name or a map key. Map keys may not include dots.
PROPERTY_VALUE is the new value you wish to set. Binary fields such as 'certificate-authority-data' expect a base64 encoded string unless the --set-raw-bytes flag is used.
$ kubectl config set PROPERTY_NAME PROPERTY_VALUE
set-cluster
kubectl config set-cluster − Sets the cluster entry in Kubernetes.
Specifying a name that already exists will merge new fields on top of existing values for those fields.
$ kubectl config set-cluster --server=https://1.2.3.4 $ kubectl config set-cluster NAME [--server=server] [--certificate-authority=path/to/certificate/authority] [--insecure-skip-tls-verify=true]
set-context
kubectl config set-context − Sets a context entry in kubernetes entrypoint. Clarifies a name that already exists will merge new fields on top of existing values for those fields.
$ kubectl config set-context NAME [--cluster = cluster_nickname] [-- user = user_nickname] [--namespace = namespace] $ kubectl config set-context gce --user=cluster-admin
set-credentials
kubectl config set-credentials − Sets a user entry in kubeconfig.
Specifying a name that already exists will merge new fields on top of existing values.
Bearer token flags: --token=bearer_token
Basic auth flags: --username=basic_user --password=basic_password
$ kubectl config set-credentials cluster-admin --username = name -- password = your_password
unset
kubectl config unset − It unsets a specific component in kubectl. PROPERTY_NAME is a dot delimited name where each token represents either an attribute name or a map key. Map keys may not hold dots.
$ kubectl config unset PROPERTY_NAME PROPERTY_VALUE
use-context
kubectl config use-context − Sets the current context in kubectl file.
$ kubectl config use-context context_name
view
Display merged kubeconfig settings or a specified kubeconfig file.
You can use --output jsonpath={...} to extract specific values using a JSON path expression.
$ kubectl config view
3. explain
Get the documentation of the resource and its fields
$ kubectl explain pods
Get the documentation of a specific field of a resource
$ kubectl explain pods.spec.containers
4. options
Print flags inherited by all commands
$ kubectl options
5. version
Print the client and server versions for the current context
$ kubectl version
VI. DEPRECATED COMMANDS
1. Rolling
kubectl rolling-update − Operates a rolling update on a replication controller. Reinstates the specified replication controller with a new replication controller by updating a POD at a time.
$ kubectl rolling-update old_container_name new_container_name -- image = new_container_image| -f new_controller_spec $ kubectl rolling-update frontend-v1 –f freontend-v2.yaml
What’s Next
Kubectl syntax mentions the commands as we've explained in the foregoing section. Kubernetes is so profitable for the organizations' artistic team, for each of the project, clarifies deployments, scalability, resilience, it also permits us to consume any underlying infrastructure and you know what it proffers you much to work upon. So let's call it Supernetes from today. Good luck and stay in touch!
0 notes
Text
Kubernetes Certifications: How and Why to Get Certified
There are two Kubernetes certifications: the Certified Kubernetes Administrator (CKA) and the Certified Kubernetes Application Developer (CKAD).
Candidates are awarded the certification upon passing the exam. In order to pass these exams, a candidate must show their understanding of Kubernetes and how its components tie together. All the questions are practical, not multiple choice, so you cannot simply guess the answers.
Certified Kubernetes Administrator (CKA)
The CKA tests your ability to deploy and configure a Kubernetes cluster as well as your understanding of core concepts. Candidates have three hours to take the exam and must score 74% or higher to earn the certification.
The CKA exam tests the following areas:
8% – Application lifecycle management
12% – Installation, configuration & validation
19% – Core concepts
11% – Networking
5% – Scheduling
12% – Security
11% – Cluster maintenance
5% – Logging/monitoring
7% – Storage
10% – Troubleshooting
Github offers more details about the CKA exam breakdown.
Certified Kubernetes Application Developer (CKAD)
The CKAD tests your ability to deploy and configure applications running on the Kubernetes cluster and your understanding of some core concepts. You’ll have two hours to complete the CKAD exam. Scoring a 66% or higher means you’ve passed.
For the CKAD exam, you will be tested in the following areas:
13% – Core concepts
18% – Configuration
10% – Multi-container pods
18% – Observability
20% – Pod design
13% – Services & networking
8% – State persistence
Github has a detailed breakdown of the CKAD exam.
Benefits of Kubernetes certification
Why bother taking a Kubernetes certification exam? If it seems like a lot of work, you’re right. But that hard work is worth it for plenty of folks. Engineers with k8s certification reap plenty of benefits:
Stand out from the pack. A Kubernetes certification makes your resume look good and stand out from the competition. As companies rely more and more on k8s, your expertise will be an immediate asset.
Get a pay bump. A top certification like the CKA or the CKAD gives you mighty potential for a better salary. Passing these exams is not an easy task, so companies seeking k8s engineers are willing to pay more because the certifications show that you’re not only experienced, but you truly understand the platform.
Achieve personal growth. Passing these exams is rewarding on a personal level: you sacrificed free time and fun to study and prepare, so passing the exam is rewarding in itself. Next, you may even move onto another skillset to focus on.
Become a Kubernetes expert. After passing the exam, Kubernetes concepts become simple and almost second-nature. After the frustration you may experience as a k8s newcomer, the pleasure of understanding it is worthwhile and priceless.
Diversify and expand your knowledge. The k8s architecture was built on 12 factor app principles, so by becoming k8s certified, you’ve got a good foundation in the 12 factor app principles, which goes supports a variety of SaaS applications. Talk about growing your skillset.
Preparing for Kubernetes certification exams
Like any exam, preparing is not easy but it isn’t rocket science. You’ll need plenty of time both to study and to practice—many successful engineers take about four months to prepare, studying for 2-3 hours daily. Remember that the CKA and the CKAD aren’t the same. The CKA covers a lot of cluster-related components, installation, and configurations. The CKAD, on the other hand, doesn’t go into cluster configurations, but does require full understanding of how clusters work.
Below, I have listed steps for preparing for the exams.
Get familiar with Kubernetes and what makes up a cluster.
Try installing a cluster from scratch. I used Kelsey Hightower’s Kubernetes the Hard Way, which is probably the best tutorial on how all the components come together.
Understand the concepts and how to actually use the cluster; start with this page for plenty of documentation on k8s concepts.
Follow the tasks provided by Kubernetes here and here. This step provides actual use cases and examples.
Experiment with kubectl to parse results. This page has helpful commands for advanced parsing and Kubernetes also has related information.
Watch this webinar series on concepts that apply to both exams.
Practice, practice, practice. Without hands-on experience and practice working with and deploying to a cluster, the exams will be very difficult to pass. A good way to practice: use a test application and deploy that to your running cluster, then try to achieve certain goals using that application. There are test applications aplenty if you do not have a current one. Check out Minikube if you don’t have a running k8s cluster.
Making the decision
If you’re still debating whether to dive in on a k8s exam, remember that the CKA and the CKAD are both useful and highly sought-after certifications. They’ll boost your resume and improve your opportunities. Though the test is difficult, it’s for a good reason: the Kubernetes platform requires deep theoretical understanding as well as actual use in a production environment—passing the exam means you can be confident that you’ll apply that knowledge in a real-world scenario.
One last tip: when you register for the exam, you get one free retake. Failing the exam is possible, but the free retake means you can get familiar with the type of questions asked and better prepare for the second go-round. Good luck![Source]-https://www.bmc.com/blogs/kubernetes-certifications/
Basic & Advanced Kubernetes Certification using cloud computing, AWS, Docker etc. in Mumbai. Advanced Containers Domain is used for 25 hours Kubernetes Training.
0 notes
Text
Monitoring in the Kubernetes era
What is Kubernetes?
Container technologies have taken the infrastructure world by storm. Ideal for microservice architectures and environments that scale rapidly or have frequent releases, containers have seen a rapid increase in usage in recent years. But adopting Docker, containerd, or other container runtimes introduces significant complexity in terms of orchestration. That’s where Kubernetes comes into play.
The conductor
Kubernetes, often abbreviated as “K8s,” automates the scheduling, scaling, and maintenance of containers in any infrastructure environment. First open sourced by Google in 2014, Kubernetes is now part of the Cloud Native Computing Foundation.
Just like a conductor directs an orchestra, telling the musicians when to start playing, when to stop, and when to play faster, slower, quieter, or louder, Kubernetes manages your containers—starting, stopping, creating, and destroying them automatically to reflect changes in demand or resource availability. Kubernetes automates your container infrastructure via:
Container scheduling and auto-scaling
Health checking and recovery
Replication for parallelization and high availability
Internal network management for service naming, discovery, and load balancing
Resource allocation and management
Kubernetes can orchestrate your containers wherever they run, which facilitates multi-cloud deployments and migrations between infrastructure platforms. Hosted and self-managed flavors of Kubernetes abound, from enterprise-optimized platforms such as OpenShift and Pivotal Container Service to cloud services such as Google Kubernetes Engine, Amazon Elastic Kubernetes Service, Azure Kubernetes Service, and Oracle’s Container Engine for Kubernetes.
Since its introduction in 2014, Kubernetes has been steadily gaining in popularity across a range of industries and use cases. Datadog’s research shows that almost one-half of organizations running containers were using Kubernetes as of November 2019.
Key components of a Kubernetes architecture
Containers
At the lowest level, Kubernetes workloads run in containers, although part of the benefit of running a Kubernetes cluster is that it frees you from managing individual containers. Instead, Kubernetes users make use of abstractions such as pods, which bundle containers together into deployable units (and which are described in more detail below).
Kubernetes was originally built to orchestrate Docker containers, but has since opened its support to a variety of container runtimes. In version 1.5, Kubernetes introduced the Container Runtime Interface (CRI), an API that allows users to adopt any container runtime that implements the CRI. With pluggable runtime support via the CRI, you can now choose between Docker, containerd, CRI-O, and other runtimes, without needing specialized support for each technology individually.
Pods
Kubernetes pods are the smallest deployable units that can be created, scheduled, and managed with Kubernetes. They provide a layer of abstraction for containerized components to facilitate resource sharing, communication, application deployment and management, and discovery.
Each pod contains one or more containers on which your workloads are running. Kubernetes will always schedule containers within the same pod together, but each container can run a different application. The containers in a given pod run on the same host and share the same IP address, port space, context, namespace (see below), and even resources like storage volumes.
You can manually deploy individual pods to a Kubernetes cluster, but the official Kubernetes documentation recommends that users manage pods using a controller such as a deployment or replica set. These objects, covered below, provide higher levels of abstraction and automation to manage pod deployment, scaling, and updating.
Nodes, clusters, and namespaces
Pods run on nodes, which are virtual or physical machines, grouped into clusters. A cluster of nodes has at least one master node that runs four key services for cluster administration:
The API server exposes the Kubernetes API for interacting with the cluster
The Controller Manager watches the current state of the cluster and attempts to move it toward the desired state
The Scheduler assigns workloads to nodes
etcd stores data about cluster configuration, cluster state, and more
To ensure high availability, you can run multiple master nodes and distribute them across different zones to avoid a single point of failure for the cluster.
All the non-master nodes in a cluster are workers, each of which runs an agent called a kubelet. The kubelet receives instructions from the API server about the makeup of individual pods and makes sure that all the containers in each pod are running properly.
You can create multiple virtual Kubernetes clusters, called namespaces, on the same physical cluster. Namespaces allow cluster administrators to create multiple environments (e.g., dev and staging) on the same cluster, or to apportion resources to different teams or projects within a cluster.
kubernetes architecture utilizes cluster pods and nodes
Kubernetes controllers
Controllers play a central role in how Kubernetes automatically orchestrates workloads and cluster components. Controller manifests describe a desired state for the cluster, including which pods to launch and how many copies to run. Each controller watches the API server for any changes to cluster resources and makes changes of its own to keep the actual state of the cluster in line with the desired state. A type of controller called a replica set is responsible for creating and destroying pods dynamically to ensure that the desired number of pods (replicas) are running at all times. If any pods fail or are terminated, the replica set will automatically attempt to replace them.
A Deployment is a higher-level controller that manages your replica sets. In a Deployment manifest (a YAML or JSON document defining the specifications for a Deployment), you can declare the type and number of pods you wish to run, and the Deployment will create or update replica sets at a controlled rate to reach the desired state. The Kubernetes documentation recommends that users rely on Deployments rather than managing replica sets directly, because Deployments provide advanced features for updating your workloads, among other operational benefits. Deployments automatically manage rolling updates, ensuring that a minimum number of pods remain available throughout the update process. They also provide tooling for pausing or rolling back changes to replica sets.
Services
Since pods are constantly being created and destroyed, their individual IP addresses are dynamic, and can’t reliably be used for communication. So Kubernetes architectures rely on services, which are simple REST objects that provide a level of abstraction and stability across pods and between the different components of your applications. A service acts as an endpoint for a set of pods by exposing a stable IP address to the external world, which hides the complexity of the cluster’s dynamic pod scheduling on the backend. Thanks to this additional abstraction, services can continuously communicate with each other even as the pods that constitute them come and go. It also makes service discovery and load balancing possible.
kubernetes abstraction
Services target specific pods by leveraging labels, which are key-value pairs applied to objects in Kubernetes. A Kubernetes service uses labels to dynamically identify which pods should handle incoming requests. For example, the manifest below creates a service named web-app that will route requests to any pod carrying the app=nginx label. See the section below for more on the importance of labels.
apiVersion: v1
kind: Service
metadata:
name: web-app
spec:
selector:
app: nginx
ports:
- protocol: TCP
port: 80
If you’re using CoreDNS, which is the default DNS server for Kubernetes, CoreDNS will automatically create DNS records each time a new service is created. Any pods within your cluster will then be able to address the pods running a particular service using the name of the service and its associated namespace. For instance, any pod in the cluster can talk to the web-app service running in the prod namespace by querying the DNS name web-app.prod.
Auto-scaling
Deployments enable you to adjust the number of running pods on the fly with simple commands like kubectl scale and kubectl edit. But Kubernetes can also scale the number of pods automatically based on user-provided criteria. The Horizontal Pod Autoscaler is a Kubernetes controller that attempts to meet a CPU utilization target by scaling the number of pods in a deployment or replica set based on real-time resource usage. For example, the command below creates a Horizontal Pod Autoscaler that will dynamically adjust the number of running pods in the deployment (nginx-deployment), between a minimum of 5 pods and a maximum of 10, to maintain an average CPU utilization of 65 percent.
kubectl autoscale deployment nginx-deployment --cpu-percent=65 --min=5 --max=10
Kubernetes has progressively rolled out support for auto-scaling with metrics besides CPU utilization, such as memory consumption and, as of Kubernetes 1.10, custom metrics from outside the cluster.
What does Kubernetes mean for your monitoring?
Kubernetes requires you to rethink and reorient your monitoring strategies, especially if you are used to monitoring traditional, long-lived hosts such as VMs or physical machines. Just as containers have completely transformed how we think about running services on virtual machines, Kubernetes has changed the way we interact with containerized applications.
The good news is that the abstraction inherent to a Kubernetes-based architecture already provides a framework for understanding and monitoring your applications in a dynamic container environment. With a proper monitoring approach that dovetails with Kubernetes’s built-in abstractions, you can get a comprehensive view of application health and performance, even if the containers running those applications are constantly shifting across hosts or scaling up and down.
Monitoring Kubernetes differs from traditional monitoring of more static resources in several ways:
Tags and labels are essential for continuous visibility
Additional layers of abstraction means more components to monitor
Applications are highly distributed and constantly moving
Tags and labels were important . . . now they’re essential
Just as Kubernetes uses labels to identify which pods belong to a particular service, you can use these labels to aggregate data from individual pods and containers to get continuous visibility into services and other Kubernetes objects.
In the pre-container world, labels and tags were important for monitoring your infrastructure. They allowed you to group hosts and aggregate their metrics at any level of abstraction. In particular, tags have proved extremely useful for tracking the performance of dynamic cloud infrastructure and investigating issues that arise there.
A container environment brings even larger numbers of objects to track, with even shorter lifespans. The automation and scalability of Kubernetes only exaggerates this difference. With so many moving pieces in a typical Kubernetes cluster, labels provide the only reliable way to identify your pods and the applications within.
To make your observability data as useful as possible, you should label your pods so that you can look at any aspect of your applications and infrastructure, such as:
environment (prod, staging, dev, etc.)
app
team
version
These user-generated labels are essential for monitoring since they are the only way you have to slice and dice your metrics and events across the different layers of your Kubernetes architecture.[Source]-https://www.datadoghq.com/blog/monitoring-kubernetes-era/
Basic & Advanced Kubernetes Training Online using cloud computing, AWS, Docker etc. in Mumbai. Advanced Containers Domain is used for 25 hours Kubernetes Training.
0 notes
Text
How to Build a Kubernetes Cluster with ARM Raspberry Pi then run .NET Core on OpenFaas
First, why would you do this? Why not. It’s awesome. It’s a learning experience. It’s cheaper to get 6 pis than six “real computers.” It’s somewhat portable. While you can certainly quickly and easily build a Kubernetes Cluster in the cloud within your browser using a Cloud Shell, there’s something more visceral about learning it this way, IMHO. Additionally, it’s a non-trivial little bit of power you’ve got here. This is also a great little development cluster for experimenting. I’m very happy with the result.
By the end of this blog post you’ll have not just Hello World but you’ll have Cloud Native Distributed Containerized RESTful microservice based on ARMv7 w/ k8s Hello World! as a service. (original Tweet).
Not familiar with why Kubernetes is cool? Check out Julia Evans’ blog and read her K8s posts and you’ll be convinced!
Hardware List (scroll down for Software)
Here’s your shopping list. You may have a bunch of this stuff already. I had the Raspberry Pis and SD Cards already.
6 – Raspberry Pi 3 – I picked 6, but you should have at least 3 or 4.
One Boss/Master and n workers. I did 6 because it’s perfect for the power supply, perfect for the 8-port hub, AND it’s a big but not unruly number.
6 – Samsung 32Gb Micro SDHC cards – Don’t be too cheap.
Faster SD cards are better.
2×6 – 1ft flat Ethernet cables – Flat is the key here.
They are WAY more flexible. If you try to do this with regular 1ft cables you’ll find them inflexible and frustrating. Get extras.
1 – Anker PowerPort 6 Port USB Charging Hub – Regardless of this entire blog post, this product is amazing.
It’s almost the same physical size as a Raspberry Pi, so it fits perfect at the bottom of your stack. It puts out 2.4a per port AND (wait for it) it includes SIX 1ft Micro USB cables…perfect for running 6 Raspberry Pis with a single power adapter.
1 – 7 layer Raspberry Pi Clear Case Enclosure – I only used 6 of these, which is cool.
I love this case, and it looks fantastic.
1 – Black Box USB-Powered 8-Port Switch – This is another amazing and AFAIK unique product.
An overarching goal for this little stack is that it be easy to move around and set up but also to power. We have power to spare, so I’d like to avoid a bunch of “wall warts” or power adapters. This is an 8 port switch that can be powered over a Raspberry Pi’s USB. Because I’m given up to 2.4A to each micro USB, I just plugged this hub into one of the Pis and it worked no problem. It’s also…wait for it…the size of a Pi. It also include magnets for mounting.
1 – Some Small Router – This one is a little tricky and somewhat optional.
You can just put these Pis on your own Wifi and access them that way, but you need to think about how they get their IP address. Who doles out IPs via DHCP? Static Leases? Static IPs completely?
The root question is – How portable do you want this stack to be? I propose you give them their own address space and their own router that you then use to bridge to other places. Easiest way is with another router (you likely have one lying around, as I did. Could be any router…and remember hub/switch != router.
Here is a bad network diagram that makes the point, I think. The idea is that I should be able to go to a hotel or another place and just plug the little router into whatever external internet is available and the cluster will just work. Again, not needed unless portability matters to you as it does to me.
You could ALSO possibly get this to work with a Travel Router but then the external internet it consumed would be just Wifi and your other clients would get on your network subnet via Wifi as well. I wanted the relative predictability of wired.
What I WISH existed was a small router – similar to that little 8 port hub – that was powered off USB and had an internal and external Ethernet port. This ZyXEL Travel Router is very close…hm…
Optional – Pelican Case if you want portability. I’ll see what airport security thinks. O_O
Optional – Tiny Keyboard and Mouse – Raspberry Pis can put out about 500mA per port for mice and keyboards. The number one problem I see with Pis is not giving them enough power and/or then having an external device take too much and then destabilize the system. This little keyboard is also a touchpad mouse and can be used to debug your Pi when you can’t get remote access to it. You’ll also want an HMDI cable occasionally.
You’re Rich – If you have money to burn, get the 7″ Touchscreen Display and a Case for it, just to show off htop in color on one of the Pis.
Dodgey Network Diagram
Disclaimer
OK, first things first, a few disclaimers.
The software in this space is moving fast. There’s a non-zero chance that some of this software will have a new version out before I finish this blog post. In fact, when I was setting up Kubernetes, I created a few nodes, went to bed for 6 hours, came back and made a few more nodes and a new version had come out. Try to keep track, keep notes, and be aware of what works with what.
Next, I’m just learning this stuff. I may get some of this wrong. While I’ve built (very) large distributed systems before, my experience with large orchestrators (primarily in banks) was with large proprietary ones in Java, C++, COM, and later in C#, .NET 1.x,2.0, and WCF. It’s been really fascinating to see how Kubernetes thinks about these things and comparing it to how we thought about these things in the 90s and very early 2000s. A lot of best practices that were HUGE challenges many years ago are now being codified and soon, I hope, will “just work” for a new generation of developer. At least another full page of my resume is being marked [Obsolete] and I’m here for it. Things change and they are getting better.
Software
Get your Raspberry PIs and SD cards together. Also bookmark and subscribe to Alex Ellis’ blog as you’re going to find yourself there a lot. He’s the author of OpenFaas, which I’ll be using today and he’s done a LOT of work making this experiment possible. So thank you Alex for being awesome! He has a great post on how Multi-stage Docker files make it possible to effectively use .NET Core on a Raspberry Pi while still building on your main machine. He and I spent a few late nights going around and around to make this easy.
Alex has put together a Gist we iterated on and I’ll summarize here. You’ll do these instructions n times for all machines.
You’ll do special stuff for the ONE master/boss node and different stuff for the some number of worker nodes.
ADVANCED TIP! If you know what you’re doing Linux-wise, you should save this excellent prep.sh shell script that Alex made, then SKIP to the node-specific instructions below. If you want to learn more, do it step by step.
ALL NODES
Burn Jessie to a SD Card
You’re going to want to get a copy of Raspbian Jesse Lite and burn it to your SD Cards with Etcher, which is the only SD Card Burner you need. It’s WAY better than the competition and it’s open source.
You can also try out Hypriot and their “optimized docker image for Raspberry Pi” but I personally tried to get it working reliably for a two days and went back to Jesse. No disrespect.
Creating an empty file called “ssh” before you put the card in the Raspberry Pi
SSH into the new Pi
I’m on Windows so I used WSL (Ubuntu) for Windows that lets me SSH and do run Linux natively.
ssh pi@raspberrypi
Login pi, password raspberry.
Change the Hostname
I ran
rasbpi-config
then immediately reboot with “sudo reboot”
Install Docker
curl -sSL get.docker.com | sh && \ sudo usermod pi -aG docker
Disable Swap. Important, you’ll get errors in Kuberenetes otherwise
sudo dphys-swapfile swapoff && \ sudo dphys-swapfile uninstall && \ sudo update-rc.d dphys-swapfile remove
Go edit /boot/cmdline.txt with your favorite editor, or use
sudo nano /boot/cmdline
and add this at the very end. Don’t press enter.
cgroup_enable=cpuset cgroup_enable=memory
Install Kubernetes
curl -s http://ift.tt/22fimui | sudo apt-key add - && \ echo "deb http://ift.tt/2f7PUy5 kubernetes-xenial main" | sudo tee /etc/apt/sources.list.d/kubernetes.list && \ sudo apt-get update -q && \ sudo apt-get install -qy kubeadm
MASTER/BOSS NODE
After ssh’ing into my main node, I used /ifconfig eth0 to figure out what the IP adresss was. Ideally you want this to be static (not changing) or at least a static lease. I logged into my router and set it as a static lease, so my main node ended up being 192.168.170.2, and .1 is the router itself.
Then I initialized this main node
sudo kubeadm init --apiserver-advertise-address=192.168.170.2
This took a WHILE. Like 10-15 min, so be patient.
Kubernetes uses this admin.conf for a ton of stuff, so you’re going to want a copy in your $HOME folder so you can call “kubectl” easily later, copy it and take ownership.
mkdir -p $HOME/.kube sudo cp -i /etc/kubernetes/admin.conf $HOME/.kube/config sudo chown $(id -u):$(id -g) $HOME/.kube/config
When this is done, you’ll get a nice print out with a ton of info and a token you have to save. Save it all. I took a screenshot.
WORKER NODES
Ssh into your worker nodes and join them each to the main node. This line is the line you needed to have saved above when you did a kubectl init.
kubeadm join --token d758dc.059e9693bfa5 192.168.170.2:6443 --discovery-token-ca-cert-hash sha256:c66cb9deebfc58800a4afbedf0e70b93c086d02426f6175a716ee2f4d
Did it work?
While ssh’ed into the main node – or from any networked machine that has the admin.conf on it – try a few commands.
Here I’m trying “kubectl get nodes” and “kubectl get pods.”
Note that I already have some stuff installed, so you’ll want try “kubectl get pods –namespace kube-system” to see stuff running. If everything is “Running” then you can finish setting up networking. Kubernetes has fifty-eleven choices for networking and I’m not qualified to pick one. I tried Flannel and gave up and then tried Weave and it just worked. YMMV. Again, double check Alex’s Gist if this changes.
kubectl apply -f http://ift.tt/2qJxB6N
At this point you should be ready to run some code!
Hello World…with Markdown
Back to Alex’s gist, I’ll try this “markdownrender” app. It will take some Markdown and return HTML.
Go get the function.yml from here and create the new app on your new cluster.
$ kubectl create -f function.yml $ curl -4 http://localhost:31118 -d "# test" <p><h1>test</h1></p>
This part can be tricky – it was for me. You need to understand what you’re doing here. How do we know the ports? A few ways. First, it’s listed as nodePort in the function.yml that represents the desired state of the application.
We can also run “kubectl get svc” and see the ports for various services.
pi@hanselboss1:~ $ kubectl get svc NAME TYPE CLUSTER-IP EXTERNAL-IP PORT(S) AGE alertmanager NodePort 10.103.43.130 <none> 9093:31113/TCP 1d dotnet-ping ClusterIP 10.100.153.185 <none> 8080/TCP 1d faas-netesd NodePort 10.103.9.25 <none> 8080:31111/TCP 2d gateway NodePort 10.111.130.61 <none> 8080:31112/TCP 2d http-ping ClusterIP 10.102.150.8 <none> 8080/TCP 1d kubernetes ClusterIP 10.96.0.1 <none> 443/TCP 2d markdownrender NodePort 10.104.121.82 <none> 8080:31118/TCP 1d nodeinfo ClusterIP 10.106.2.233 <none> 8080/TCP 1d prometheus NodePort 10.98.110.232 <none> 9090:31119/TCP 2d
See those ports that are outside:insider? You can get to markdownrender directly from 31118 on an internal IP like localhost, or the main/master IP. Those 10.x.x.x are all software networking, you can not worry about them. See?
pi@hanselboss1:~ $ curl -4 http://ift.tt/2zWjCfR -d "# test" <h1>test</h1> pi@hanselboss1:~ $ curl -4 http://ift.tt/2xuMdHf -d "# test" curl: (7) Failed to connect to 10.104.121.82 port 31118: Network is unreachable
Can we access this cluster from another machine? My Windows laptop, perhaps?
Access your Raspberry Pi Kubernetes Cluster from your Windows Machine (or elsewhere)
I put KubeCtl on my local Windows machine put it in the PATH.
I copied the admin.conf over from my Raspberry Pi. You will likely use scp or WinSCP.
I made a little local batch file like this. I may end up with multiple clusters and I want it easy to switch between them.
SET KUBECONFIG=”C:\users\scott\desktop\k8s for pi\admin.conf
Once you have Kubectl on another machine that isn’t your Pi, try running “kubectl proxy” and see if you can hit your cluster like this. Remember you’ll get weird “Connection refused” if kubectl thinks you’re talking to a local cluster.
Here you can get to localhost:8001/api and move around, then you’ve successfully punched a hole over to your cluster (proxied) and you can treat localhost:8001 as your cluster. So “kubectl proxy” made that possible.
If you have WSL (Windows Subsystem for Linux) – and you should – then you could also do this and TUNNEL to the API. But I’m going to get cert errors and generally get frustrated. However, tunneling like this to other apps from Windows or elsewhere IS super useful. What about the Kubernetes Dashboard?
~ $ sudo ssh -L 8001:10.96.0.1:443 [email protected]
I’m going to install the Kubernetes Dashboard like this:
kubectl apply -f http://ift.tt/2xudwS6
Pay close attention to that URL! There are several sites out there that may point to older URLs, non ARM dashboard, or use shortened URLs. Make sure you’re applying the ARM dashboard. I looked here http://ift.tt/2zWjCMT.
Notice I’m using the “alternative” dashboard. That’s for development and I’m saying I don’t care at all about security when accessing it. Be aware.
I can see where my Dashboard is running, the port and the IP address.
pi@hanselboss1:~ $ kubectl get svc --namespace kube-system NAME TYPE CLUSTER-IP EXTERNAL-IP PORT(S) AGE kube-dns ClusterIP 10.96.0.10 <none> 53/UDP,53/TCP 2d kubernetes-dashboard ClusterIP 10.98.2.15 <none> 80/TCP 2d
NOW I can punch a hole with that nice ssh tunnel…
~ $ sudo ssh -L 8080:10.98.2.15:80 [email protected]
I can access the Kubernetes Dashboard now from my Windows machine at http://localhost:8080 and hit Skip to login.
Do note the Namespace dropdown and think about what you’re viewing. There’s the kube-system stuff that manages the cluster
Adding OpenFaas and calling a serverless function
Let’s go to the next level. We’ll install OpenFaas – think Azure Functions or Amazon Lambda, except for your own Docker and Kubernetes cluster. To be clear, OpenFaas is an Application that we will run on Kubernetes, and it will make it easier to run other apps. Then we’ll run other stuff on it…just some simple apps like Hello World in Python and .NET Core. OpenFaas is one of several open source “Serverless” solutions.
Do you need to use OpenFaas? No. But if your goal is to write a DoIt() function and put it on your little cluster easily and scale it out, it’s pretty fabulous.
Remember my definition of Serverless…there ARE servers, you just don’t think about them.
Serverless Computing is like this – Your code, a slider bar, and your credit card.
Let’s go.
.NET Core on OpenFaas on Kubernetes on Raspberry Pi
I ssh’ed into my main/master cluster Pi and set up OpenFaas:
git clone http://ift.tt/2eHgAFS && cd faas-netes kubectl apply -f faas.armhf.yml,rbac.yml,monitoring.armhf.yml
Once OpenFaas is installed on your cluster, here’s Alex’s great instructions on how to setup your first OpenFaas Python function, so give that a try first and test it. Once we’ve installed that Python function, we can also hit http://ift.tt/2zWjFIz (where that’s your main Boss/Master’s IP) and see it the OpenFaas UI.
OpenFaas and the “faas-netes” we setup above automates the build and deployment of our apps as Docker Images to Kuberetes. It makes the “Developer’s Inner Loop” simpler. I’m going to make my .NET app, build, deploy, then change, build, deploy and I want it to “just work” on my cluster. And later, and I want it to scale.
I’m doing .NET Core, and since there is a runtime for .NET Core for Raspberry Pi (and ARM system) but no SDK, I need to do the build on my Windows machine and deploy from there.
Quick Aside: There are docker images for ARM/Raspberry PI for running .NET Core. However, you can’t build .NET Core apps (yet?) directly ON the ARM machine. You have to build them on an x86/x64 machine and then get them over to the ARM machine. That can be SCP/FTPing them, or it can be making a docker container and then pushing that new docker image up to a container registry, then telling Kubernetes about that image. K8s (cool abbv) will then bring that ARM image down and run it. The technical trick that Alex and I noticed was of course that since you’re building the Docker image on your x86/x64 machine, you can’t RUN any stuff on it. You can build the image but you can’t run stuff within it. It’s an unfortunate limitation for now until there’s a .NET Core SDK on ARM.
What’s required on my development machine (not my Raspberry Pis?
I installed KubeCtl (see above) in the PATH
I installed OpenFaas’s Faas-CLI command line and put it in the PATH
I installed Docker for Windows. You’ll want to make sure your machine has some flavor of Docker if you have a Mac or Linux machine.
I ran docker login at least once.
I installed .NET Core from http://dot.net/core
Here’s the gist we came up with, again thanks Alex! I’m going to do it from Windows.
I’ll use the faas-cli to make a new function with charp. I’m calling mine dotnet-ping.
faas-cli new --lang csharp dotnet-ping
I’ll edit the FunctionHandler.cs to add a little more. I’d like to know the machine name so I can see the scaling happen when it does.
using System; using System.Text; namespace Function { public class FunctionHandler { public void Handle(string input) { Console.WriteLine("Hi your input was: "+ input + " on " + System.Environment.MachineName); } } }
Check out the .yml file for your new OpenFaas function. Note the gateway IP should be your main Pi, and the port is 31112 which is OpenFaas.
I also changed the image to include “shanselman/” which is my Docker Hub. You could also use a local Container Registry if you like.
provider: name: faas gateway: http://ift.tt/2xtjend functions: dotnet-ping: lang: csharp handler: ./dotnet-ping image: shanselman/dotnet-ping
Head over to the ./template/csharp/Dockerfile and we’re going to change it. Ordinarily it’s fine if you are publishing from x64 to x64 but since we are doing a little dance, we are going to build and publish the .NET apps as linux-arm from our x64 machine, THEN push it, we’ll use a multi stage docker file. Change the default Docker file to this:
FROM microsoft/dotnet:2.0-sdk as builder ENV DOTNET_CLI_TELEMETRY_OPTOUT 1 # Optimize for Docker builder caching by adding projects first. RUN mkdir -p /root/src/function WORKDIR /root/src/function COPY ./function/Function.csproj . WORKDIR /root/src/ COPY ./root.csproj . RUN dotnet restore ./root.csproj COPY . . RUN dotnet publish -c release -o published -r linux-arm ADD http://ift.tt/2zVAP98 /usr/bin/fwatchdog RUN chmod +x /usr/bin/fwatchdog FROM microsoft/dotnet:2.0.0-runtime-stretch-arm32v7 WORKDIR /root/ COPY --from=builder /root/src/published . COPY --from=builder /usr/bin/fwatchdog / ENV fprocess="dotnet ./root.dll" EXPOSE 8080 CMD ["/fwatchdog"]
Notice a few things. All the RUN commands are above the second FROM where we take the results of the first container and use its output to build the second ARM-based one. We can’t RUN stuff because we aren’t on ARM, right?
We use the Faas-Cli to build the app, build the docker container, AND publish the result to Kubernetes.
faas-cli build -f dotnet-ping.yml --parallel=1 faas-cli push -f dotnet-ping.yml faas-cli deploy -f dotnet-ping.yml --gateway http://ift.tt/2xtjend
And here is the dotnet-ping command running on the pi, as seen within the Kubernetes Dashboard.
I can then scale them out like this:
kubectl scale deploy/dotnet-ping --replicas=6
And if I hit it multiple times – either via curl or via the dashboard, I see it’s hitting different pods:
If I want to get super fancy, I can install Grafana – a dashboard manager by running locally in my machine on port 3000
docker run -p 3000:3000 -d grafana/grafana
Then I can add OpenFaas a datasource by pointing Grafana to http://ift.tt/2zVaKqu which is where the Prometheus metrics app is already running, then import the OpenFaas dashboard from the grafana.json file that is in the I cloned it from.
Super cool. I’m going to keep using this little Raspberry Pi Kubernetes Cluster to learn as I get ready to do real K8s in Azure! Thanks to Alex Ellis for his kindness and patience and to Jessie Frazelle for making me love both Windows AND Linux!
* If you like this blog, please do use my Amazon links as they help pay for projects like this! They don’t make me rich, but a few dollars here and there can pay for Raspberry Pis!
Sponsor: Check out JetBrains Rider: a new cross-platform .NET IDE. Edit, refactor, test and debug ASP.NET, .NET Framework, .NET Core, Xamarin or Unity applications. Learn more and download a 30-day trial!
© 2017 Scott Hanselman. All rights reserved.
How to Build a Kubernetes Cluster with ARM Raspberry Pi then run .NET Core on OpenFaas syndicated from http://ift.tt/2wBRU5Z
0 notes
Text
How to fix Webpack’s watch feature in VirtualBox?
Webpack’s watch feature is broken under VirtualBox. The reason is that the inotify events are not supported between shared folders. But I found a solution, to forward the events from the host system.
Motivation
During my career I had to work on lots of different projects. What I know for sure is that there are not two different projects which require the exact same set of tools.
For example my current project needs gcloud, anslibe, terraform, kubectl, docker and many other tools. Although without these programs I could not contribute to my project at all, I am pretty sure that my next project will require another set of tools.
I think if we install lots of different programs on the host system, after a certain time it will be hard to maintain them and the updates and new versions will leave left overs and after some time it will be out of control.
So that’s why I have developed a workflow to use these tools from a virtual machine (which is also nice to play around and try things out). At this point Webpack and VirtualBox enter the stage. My previous project needed npm/yarn and of course Webpack for some frontend development. These are a bunch of messy tools so I’ve decided to spin up my VM and use my nicely developed workflow to install these programs.
The project source was in a shared folder so I could edit it from the host system in IntelliJ and start the development server on the guest OS.
Problem
I found out pretty quickly that the Webpack’s watch feature is not working at all, and that’s why the code won’t be automatically recompiled and the hot reloaded function won’t work either after editing. So I had to go to the browser every time and manually refresh the page and wait for compiling and reloading. It felt like my development workflow was 30% slower, because of this one manual step. After a certain time I was so frustrated that I have to refresh every time when I want to propagate the new changes, I decided to find out what is going on…
The issue is that VirtualBox decided not to implement the feature of inotify event forwarding in its software. You could ask what is inotify at all and why should VirtualBox implement this feature. Well.. you actually already know the answer to the why.
This is what the main page says about inotify:
The inotify API provides a mechanism for monitoring filesystem events. Inotify can be used to monitor individual files, or to monitor directories. When a directory is monitored, inotify will return events for the directory itself, and for files inside the directory.
So this program sends the trigger to Wepback and based on this trigger Webpack’s watch recompiles and reloads the page. At least this is the case for Linux systems. OSX uses fsevents for the same purpose.
Anyways the change happens on the host system from IntelliJ and the inotify should be triggered on the host system.
Solution
There are two different solutions to this problem.
The first one could be that you turn on the Webpack’s poll feature. I won’t cover this solution in this article. To be honest I am not a huge fun of this fix. If you set the polling rate to low, it can cause massive CPU usage and if you set it to high the changes will happen too slow.
The second one is what I am going to introduce you in more detail: There is a small client <-> server program called notify-forwarder which forwards the notifications from the host system to the guest system and triggers the inotify event. In my opinion this is a more elegant and general solution to the host OS <-> guest OS notification problem and of course it will solve the gulp’s watchify issue as well, which is actually the same problem.
Setup
As a precondition I assume that you have already shared your workspace between the host and the guest OS, and it’s properly mounted. HINT: One way to properly mount your workspace on the guest OS is to write something like this into your /etc/fstab: workspaces /home/janos/workspaces vboxsf uid=1000,gid=1000,rw,dmode=700,fmode=600,comment=systemd.automount 0 0
First you have to setup the Port Forwarding in VirtualBox. Open VirtualBox, select your guest OS, and open settings. Under settings there is a tab called Network, select this tab and set the Adapter 1 to NAT mode. Below these settings there is an Advanced menu point, where you can setup Port Forwarding rules (see on the screenshot below).
This is pretty straight forward. The Name can be anything, the Protocol has to be UDP (watch out the default one is TCP), the Host IP is the IP address of your host system (use the loopback interface here) and the Guest IP is the IP of your guest. Since notify-forwarder uses 29324 as the default port (you can change it via parameters) you have to set it as Host Port and Guest Port. HINT: A restart of the guest system is not necessary but to make sure that all changes are applied, just restart it!
Now you have to clone the source of notify-forwarder from this repository: http://ift.tt/2vYHfo2 on both systems.
Let’s compile it for both systems.
Common commands for the host and the guest systems: git clone http://ift.tt/2xczysV cd notify-forwarder make
Commands for the host system (after compiling with make): cd _build ./notify-forwarder watch /your/local/workspace/ /your/mounted/workspace/on/the/guest
Commands for the guest system (after compiling with make): cd _build ./notify-forwarder receive
If you did everything correctly, you will be able to edit your files (JS, CSS, etc..) from IntelliJ and trigger the changes automatically.
Bonus
As a bonus I will show you some automatization commands from my .zshrc (this is the equivalent of the .bashrc in the Z shell).
This is how I start my VM from the terminal: alias startjbox="/Users/janos/Documents/workspaces/notify-forwarder/_build/notify-forwarder watch /Users/janos/Documents/workspaces /home/janos/workspaces & VBoxManage startvm arch --type headless"
As you can see I am also starting the notify-forwarder in watch modus at the same time. And of course I have the equivalent version with receiver on the guest side. alias receiveChanges="/home/janos/workspaces_arch/notify-forwarder/_build/notify-forwarder receive"
Finally this is how I start my development server on the guest OS: receiveChanges & yarn start
In this way I don’t even have to think about the whole process every time I start my VM. It will just always work out of the box.
As a second bonus I recommend another repository from the same guy who wrote the notify-forwarder. This repo is about another small program called vagrant-notify-forwarder, which is basically an extension of the notify-forwarder, just packed as a vagrant plugin. It can be also useful.
The post How to fix Webpack’s watch feature in VirtualBox? appeared first on codecentric AG Blog.
How to fix Webpack’s watch feature in VirtualBox? published first on http://ift.tt/2fA8nUr
0 notes
Text
How to fix Webpack’s watch feature in VirtualBox?
Webpack’s watch feature is broken under VirtualBox. The reason is that the inotify events are not supported between shared folders. But I found a solution, to forward the events from the host system.
Motivation
During my career I had to work on lots of different projects. What I know for sure is that there are not two different projects which require the exact same set of tools.
For example my current project needs gcloud, anslibe, terraform, kubectl, docker and many other tools. Although without these programs I could not contribute to my project at all, I am pretty sure that my next project will require another set of tools.
I think if we install lots of different programs on the host system, after a certain time it will be hard to maintain them and the updates and new versions will leave left overs and after some time it will be out of control.
So that’s why I have developed a workflow to use these tools from a virtual machine (which is also nice to play around and try things out). At this point Webpack and VirtualBox enter the stage. My previous project needed npm/yarn and of course Webpack for some frontend development. These are a bunch of messy tools so I’ve decided to spin up my VM and use my nicely developed workflow to install these programs.
The project source was in a shared folder so I could edit it from the host system in IntelliJ and start the development server on the guest OS.
Problem
I found out pretty quickly that the Webpack’s watch feature is not working at all, and that’s why the code won’t be automatically recompiled and the hot reloaded function won’t work either after editing. So I had to go to the browser every time and manually refresh the page and wait for compiling and reloading. It felt like my development workflow was 30% slower, because of this one manual step. After a certain time I was so frustrated that I have to refresh every time when I want to propagate the new changes, I decided to find out what is going on…
The issue is that VirtualBox decided not to implement the feature of inotify event forwarding in its software. You could ask what is inotify at all and why should VirtualBox implement this feature. Well.. you actually already know the answer to the why.
This is what the main page says about inotify:
The inotify API provides a mechanism for monitoring filesystem events. Inotify can be used to monitor individual files, or to monitor directories. When a directory is monitored, inotify will return events for the directory itself, and for files inside the directory.
So this program sends the trigger to Wepback and based on this trigger Webpack’s watch recompiles and reloads the page. At least this is the case for Linux systems. OSX uses fsevents for the same purpose.
Anyways the change happens on the host system from IntelliJ and the inotify should be triggered on the host system.
Solution
There are two different solutions to this problem.
The first one could be that you turn on the Webpack’s poll feature. I won’t cover this solution in this article. To be honest I am not a huge fun of this fix. If you set the polling rate to low, it can cause massive CPU usage and if you set it to high the changes will happen too slow.
The second one is what I am going to introduce you in more detail: There is a small client <-> server program called notify-forwarder which forwards the notifications from the host system to the guest system and triggers the inotify event. In my opinion this is a more elegant and general solution to the host OS <-> guest OS notification problem and of course it will solve the gulp’s watchify issue as well, which is actually the same problem.
Setup
As a precondition I assume that you have already shared your workspace between the host and the guest OS, and it’s properly mounted. HINT: One way to properly mount your workspace on the guest OS is to write something like this into your /etc/fstab: workspaces /home/janos/workspaces vboxsf uid=1000,gid=1000,rw,dmode=700,fmode=600,comment=systemd.automount 0 0
First you have to setup the Port Forwarding in VirtualBox. Open VirtualBox, select your guest OS, and open settings. Under settings there is a tab called Network, select this tab and set the Adapter 1 to NAT mode. Below these settings there is an Advanced menu point, where you can setup Port Forwarding rules (see on the screenshot below).
This is pretty straight forward. The Name can be anything, the Protocol has to be UDP (watch out the default one is TCP), the Host IP is the IP address of your host system (use the loopback interface here) and the Guest IP is the IP of your guest. Since notify-forwarder uses 29324 as the default port (you can change it via parameters) you have to set it as Host Port and Guest Port. HINT: A restart of the guest system is not necessary but to make sure that all changes are applied, just restart it!
Now you have to clone the source of notify-forwarder from this repository: http://ift.tt/2vYHfo2 on both systems.
Let’s compile it for both systems.
Common commands for the host and the guest systems: git clone http://ift.tt/2xczysV cd notify-forwarder make
Commands for the host system (after compiling with make): cd _build ./notify-forwarder watch /your/local/workspace/ /your/mounted/workspace/on/the/guest
Commands for the guest system (after compiling with make): cd _build ./notify-forwarder receive
If you did everything correctly, you will be able to edit your files (JS, CSS, etc..) from IntelliJ and trigger the changes automatically.
Bonus
As a bonus I will show you some automatization commands from my .zshrc (this is the equivalent of the .bashrc in the Z shell).
This is how I start my VM from the terminal: alias startjbox="/Users/janos/Documents/workspaces/notify-forwarder/_build/notify-forwarder watch /Users/janos/Documents/workspaces /home/janos/workspaces & VBoxManage startvm arch --type headless"
As you can see I am also starting the notify-forwarder in watch modus at the same time. And of course I have the equivalent version with receiver on the guest side. alias receiveChanges="/home/janos/workspaces_arch/notify-forwarder/_build/notify-forwarder receive"
Finally this is how I start my development server on the guest OS: receiveChanges & yarn start
In this way I don’t even have to think about the whole process every time I start my VM. It will just always work out of the box.
As a second bonus I recommend another repository from the same guy who wrote the notify-forwarder. This repo is about another small program called vagrant-notify-forwarder, which is basically an extension of the notify-forwarder, just packed as a vagrant plugin. It can be also useful.
The post How to fix Webpack’s watch feature in VirtualBox? appeared first on codecentric AG Blog.
How to fix Webpack’s watch feature in VirtualBox? published first on http://ift.tt/2vCN0WJ
0 notes