#Bookbinding Kit
Explore tagged Tumblr posts
Visit Tumblr Blog
Explore Tumblr blogs with no restrictions, modern design and the best experience.
Last Seen Tumblr Blogs


Fun Fact
Users from the US are the majority of Tumblr visitors.
Text


My personal goal is to try and make fanfic binding as accessible to everyone as possible, so here are some resources on how to make a fanfic hardcover for under $25.
This is a barebones bind for the broke college students and such. Happy to field questions, too!
Here's a proposed budget breakdown:


Loosely organized thoughts:
Fanfic bookbinders often share typesets amongst each other. Never pay for a typeset for a fanfic.
You'll hear a lot about grain direction for your printer paper, but as a newbie on a budget without your own printer, settle for some nice 92 bright paper. If you like the hobby, splurge after but expect to pay at least 2-3x more for short grain paper.
Printing is a pain because some copy shops won't let you print intellectual property smut, and it's very expensive. You are better off bartering instead or looking for a free printer on Buy Nothing.
You know the thick paper wrapping that comes with online orders? It's a good weight for endpapers if you need to scrounge. Paper grocery bags or gift bags (birthday presents) might work, too.
Ask your local library to give you covers from books they are throwing out. Ask for outdated textbooks (those covers are built like tanks) or three-ring binders that are too busted to be binders anymore.
Obtain a used book that was mass produced (so your destruction of it does not impede anyone's access) and maybe even become a little vindictive with it.
If you can afford it, I recommend the Olfa SVR knife (~$10)
If you can afford it, upgrade your ruler to a t-square.


I really hope this resource is helpful! I want to stress how possible this is and encourage people to cherish what they love through art.
If you are interested in fanfic binding and have a little more disposable income, I have an affordable Fan Fiction Bookbinding Starter Pack that I carry on my site. I pack them myself and drop them 1x/month on the 15th.
10K notes
·
View notes
Text
i will forever be obsessed with how talented my friends are
#you all know i could rave forever about astra’s writing#and euge’s microfics#and heart’s art#and maggie’s bookbinding#and honestly this list could be a mile long#because i am constantly surrounded by such amazing and talented people#i’m not going to list everyone here because i’m terrified i’d miss someone accidentally#but if you are reading this#i am stunned by you and your work#(and yes this applies to you even if you’re sitting there thinking ‘oh surely kit couldn’t mean me’)
21 notes
·
View notes
Text
Commissions!
Art Cases

For all your on-the-go writing or drawing needs! Currently only one size available, but I will have more soon.
Books

Looking for a book but nothing in my shop really catches your eye? I also offer custom designs!
#commissions#commissions open#bookbinding#handmade books#leatherbound books#leathercraft#leatherworking#art kit#art case
20 notes
·
View notes
Text
Some highlights from my Halloween themed goblin journal 👀
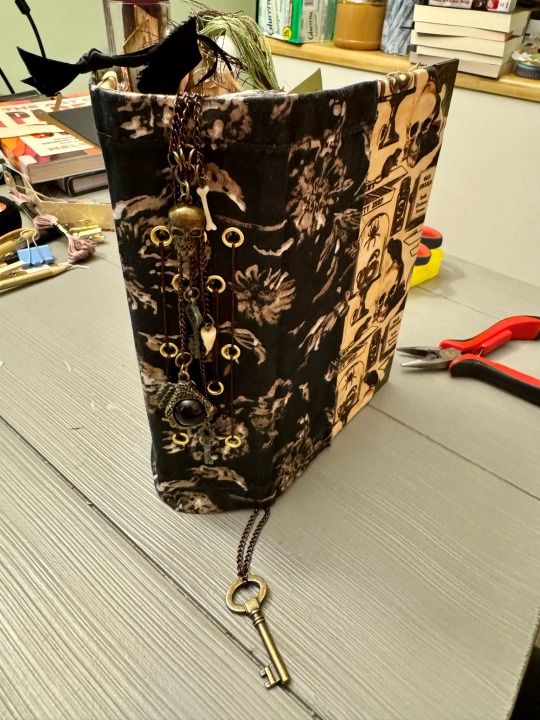


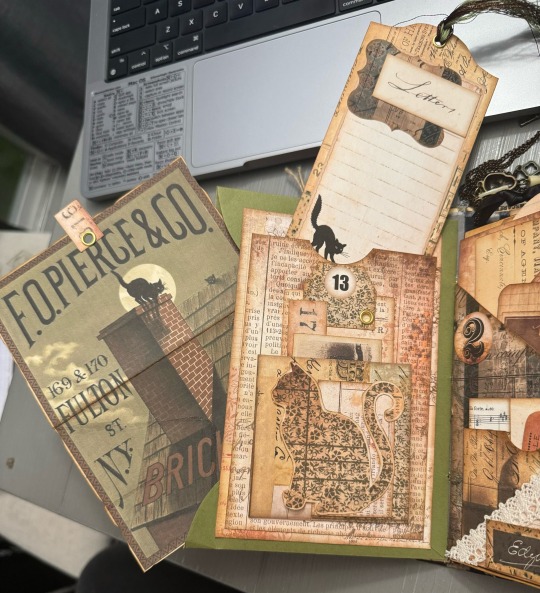


Still deciding what else to put on the cover but it’s otherwise pretty much done!
#these are from the different Halloween themed kits by pinkmonarchprints on Etsy!#goblin bookbinding#my art#Halloween#junk journal
13 notes
·
View notes
Text

Is this something people would be interested in?
#bookbinding#leatherworking#leathercraft#sketchbook#journal#diary#art kit#writing kit#custom gifts#handmade#a thing i made
6 notes
·
View notes
Text
bought paper. time to make tons of notebooks for fun <3

2 notes
·
View notes
Text
I'm so overwhelmed I can barely word anymore 😭😭😭😭💜 it's beautiful and precious tysfm 😭😭😭😭😭😭💜💜💜
I do not take commissions. I made these because I felt like it.
(That being said, if @morningstarwrites would like me to bind their fix when they finish it, I would love to. Though i only ship to the US becauseof cost).
A few pics of different parts of the process and the finished product.
Now that both recipients have received their gifts, I can share the books I bound. @inuhalfdemon and @redfoxwritesstuff


#look at how spoilt i am#look at what Sepphy is doing to me#vexi is in trouble for enabling#kit is in trouble for enabling#inu is in trouble for enabling#blue is in trouble for enabling#im a mess#bookbinding#i do not receive gifts well#imposter syndrome r us up in here#halp#😭💜#hazbin hotel#hazbin fanfic
61 notes
·
View notes
Text
So took the plunge and bought a kit to get started, and thought, "First one will always be the first, so make it memorable" and so I did; I make a Bookbinding Journey Journal!
Took a few days to decide what exactly I wanted in it and formatting the pages and testing out, and finally was happy and went ahead!
Space for 50 binds in total - I don't expect them to be perfect by any measure of means but I do want to have a chronological reminder to see my own growth!
My bookbinding journey actually soft-started a while ago when asked to make a prop for a friend's short film. I had considered getting into binding a long long time ago...but as a notorious notebook hoarder I didn't want or need to add more to the pile. And then I chanced found fanbinding, specifically @renegadeguild both through researching for the prop and also as part of my studies in Fandom Culture! Which actually came at a wonderful time as I was also in the process of getting physical copies of two of my favourite fanfics from the Authors! @nieded and @dustandhalos ! And there really is something about holding a physical piece of work that you love in your hands, reading fanfics online is one thing, but to have a tangible piece of work (and art!) In your hands just can't be replicated by a screen!
And so, with a culmination of all these things; we're taking the dive! Time is precious at the moment, I'm in the final weeks of my undergraduate course, and my assignments take priority, but I certainly look forward to this journey and hobby!


172 notes
·
View notes
Note
Playing pokemon y and an NPC mentioned that their arbok has shed skin and that they use the sheds to make wallets. Potential leather applications for pokemon with shed skin?
Okay so this line does two things.
It gives us yet another form of pokemon utility, in a world where you can get usable skin off a creature without having to kill it? Shit is going to be much more available and much more widely used
It tells us so much more about how the ability shed skin works- namely, since to be usable for something like a wallet there needs to be at least some heft, we know that shed skin doesn't just remove the outermost layer of skin like when animals shed their skin in our world, but instead a far thicker layer of it. And in fact the thicker skin comparatively pokemon must have to allow for this to even be a thing some of them can do may contribute to how durable they are. After all, with the bug-types we can say it's an additional layer of exoskeleton, but that don't work with the vertebrates.
Now, when discussing used for pokemon skins we need to discuss the wide range of applications leather has (and let's be real even if we're not strictly talking leather odds are the functionality is similar if not identical). It's not just wallets and belts, jackets and boots, leather can go into making instruments, boxes, sports balls. You can find it as part of polishing and blade sharpening kits, it's upholstery, bookbindings, knife sheathes, reins and halters, hammers- My mousepad is fucking leather since it gets so hot in my room the rubber or synthetic ones start to melt over time.
So needless to say there's a lot of openings to potentially fill.
I think it's likely that these sheds from pokemon like Arbok, Seviper, Sandaconda, Dragonair, are used to fill all, or at least most of these roles. Something like a jacket or pants may require a good bit of patchwork, you aren't going to get really wide lengths off any of them. Cyclizar maybe you could get a kid's jacket if they just shuck a whole mess like one, wouldn't even have to do any sewing, but beyond that. And of course all of them are likely to be thin for a piece of leather, so not as protective and such as something more heavy duty like leather off a dead pokemon.
Cyclizar is probably the pokemon with the longest history of being used as part of the leather trade, given it's been kept by humans for at least 10k years and shed skin is it's only non-Hidden ability. You probably see a lot of utility use for their skins, like upholstering chairs, wrapping hammers to soften their blows, sheathing knives, polishing and blade care, shit like that.
Arbok is probably similar, we know that it's used in wallet production, but you probably also see it a lot in upholstery, bookbinding, belts, boots, etc. Due to it's poison-type nature it's also probably been popular historically for sheaths and quivers.
Seviper and Sandaconda I would bet you see more often in fashion. All of these pokemon, of course, likely get fashion use, but I think with their patterns that stretch around their bodies these two would be more popular for it. So think the jackets, belts, boots, pants, hats. Things that will really let those lovely patterns shine.
Dragonair, meanwhile, I think you're more likely to find being used for musical instruments, sports balls, maybe other kinds of equipment depending on availability. It's mystical reputation is going to lend it more towards being used for these and other more culturally significant uses.
Meanwhile, I think Scrafty would be an interesting case. Their rubbery skins would probably be looked to for things like work boots, heavy-duty gloves, aprons, hammers, pads to work other materials on, etc. Very utility. But I think they would also be less commonly obtained, due to the connection the pokemon has to it's shed hides. The others I don't think would much care, but Scrafty keep at least one at a time, and I can easily see them hoarding them.
36 notes
·
View notes
Text
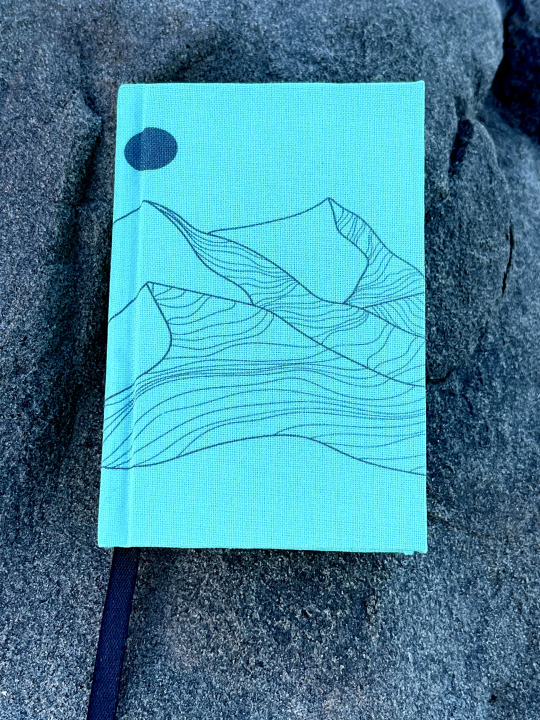
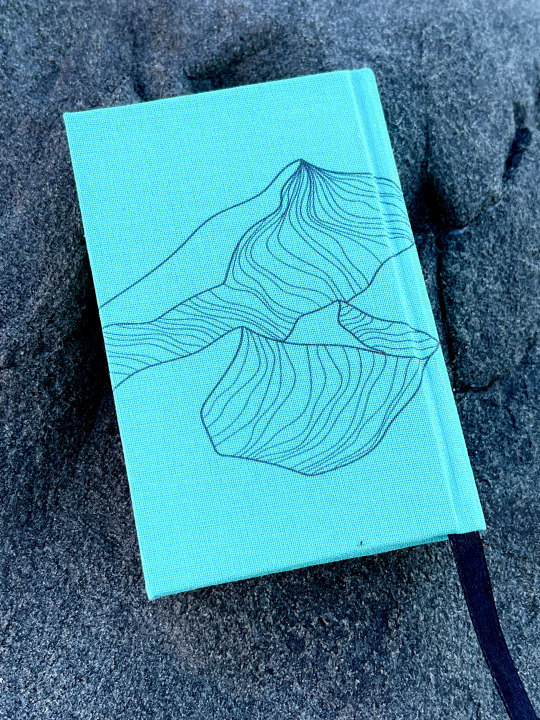
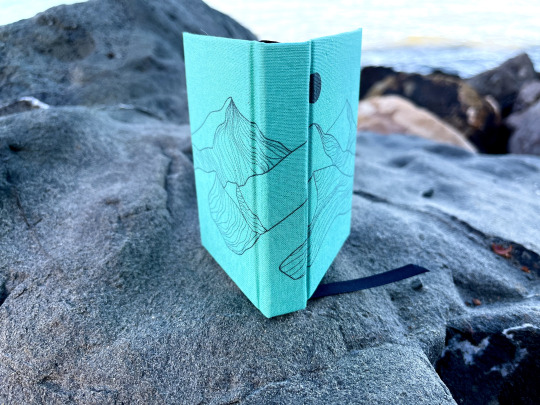
I bound a book!
Hello, I just bound this, which is I guess basically my second proper bookbinding project that I have fully finished. Also my first time binding a fic that I wrote myself, so the entire process from writing through typesetting and binding was my project.
Book information:
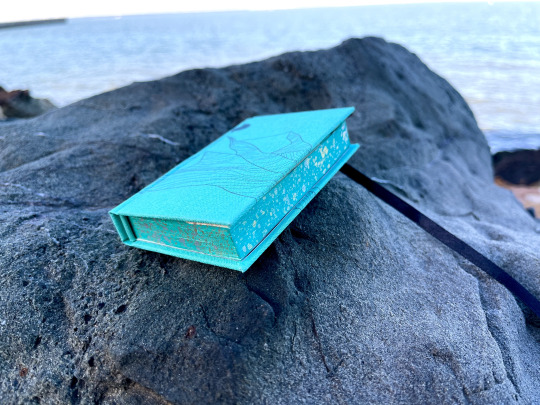
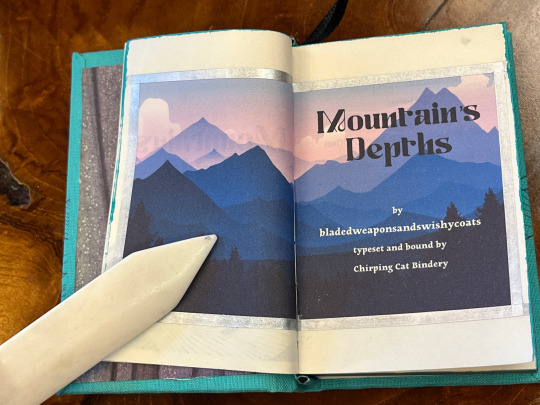
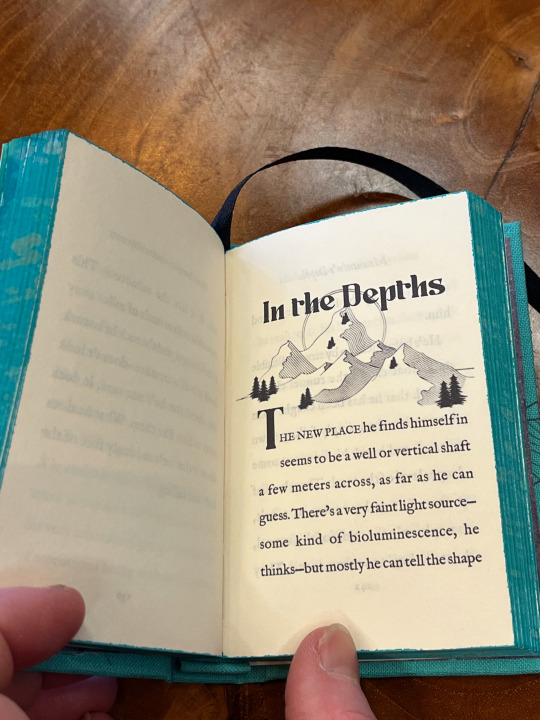
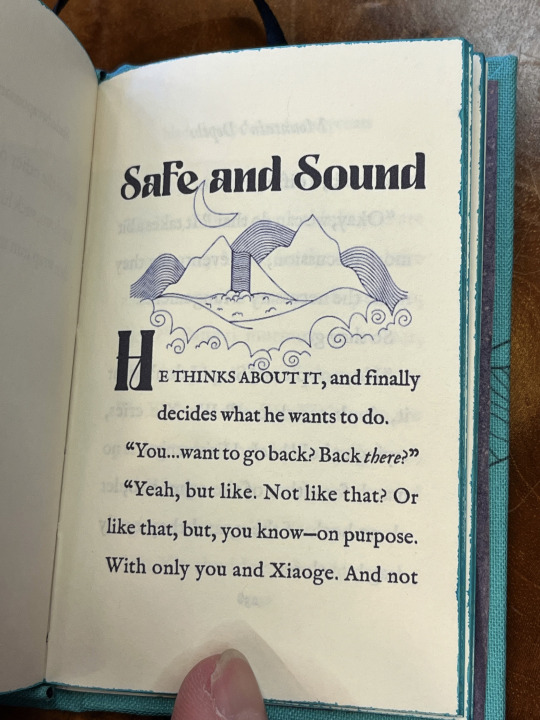
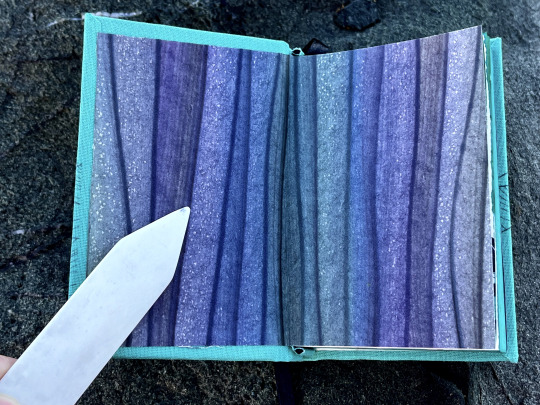
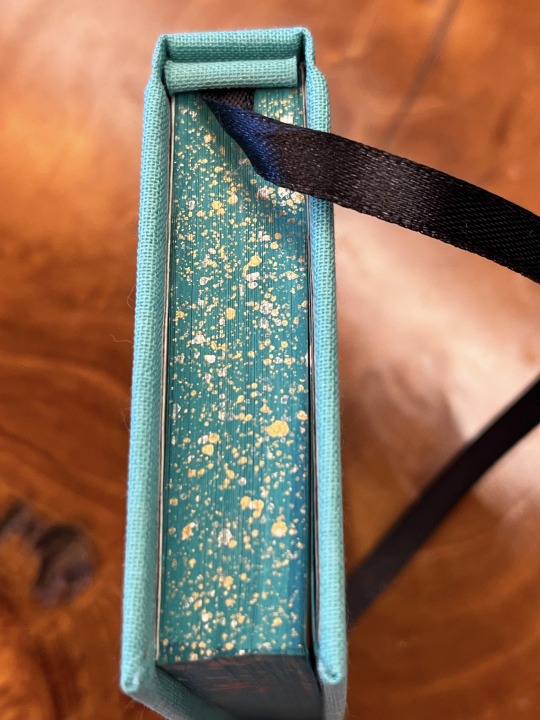
Title fonts - Frosty, Body font - IM Fell English, bound in octavo format with a square back bradel binding. Cover graphic printed onto book cloth with an inkjet printer. Edge painting underlayer with J. Herbin Émeraude de Chivor and sprinkled with Golden high flow acrylic in Iridescent Gold Deep (Fine), and Windsor & Newton ink in silver. Endpapers are paste paper I got at Codex this year. Book cloth is something from Book Craft Supply, though I am not sure what because I got it in a mix of samples in a kit. Anyway, I am really happy with how it turned out!
The fic: Mountain's Depths which I wrote for the Rare Kinks Buffet Prompt Fest 2024.
More pics below cut:
wrap-around cover image, before casing in:
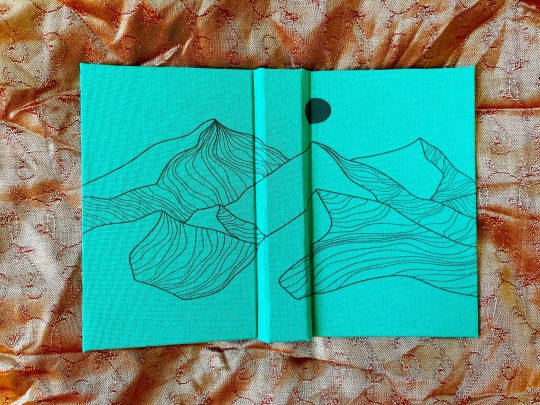
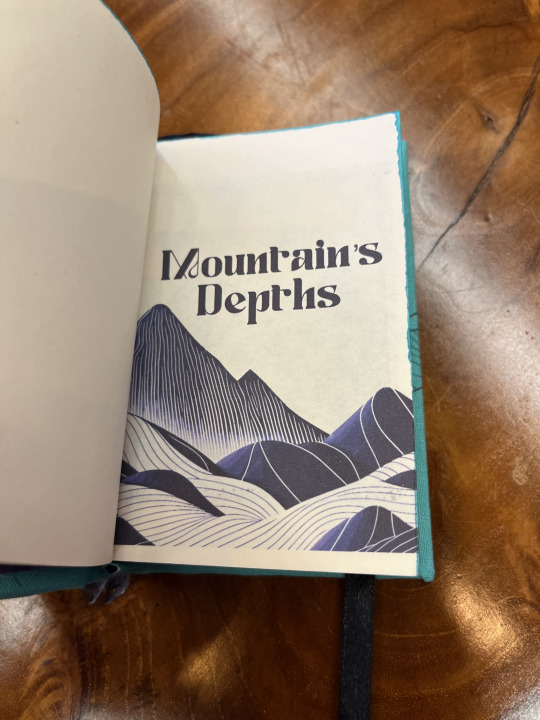

x
148 notes
·
View notes
Text
Fanfic Writers Appreciation Day
This year I participated in @renegadeguild's Renegade Loves Fic (Writers) event for the first time, in which we celebrate Fanfic Writers Appreciation Day by binding two copies of a fanfic we love and sending one copy to the author.

I chose Florigenesis by @nientedal (and its sequel your roots send down to grow as an epilogue), which is a Megamind/Roxanne hanahaki story. Or, in the words of the author, "Less 'Hanahaki' and more 'mutually-requited pining with flowers thrown in for flavor.' " I loved the imagery of the flowers and had a lot of fun typesetting it with as many floral motifs as I could fit in it.
The flower Megamind ends up coughing up for Roxanne are dahlias, so I found some open-source images of dahlias sourced from books in the public domain to use as scene breaks and as a watermark behind the table of contents. Additionally, I used the font "Lime Blossom Caps" to use as a drop-cap at the beginning of each chapter. The text ended up being a bit more than 380 pages.

This is the first time I've done a book partially covered in paper instead of all in bookcloth. Before gluing the paper to the cover, I sealed it with homemade paste wax, which I think turned out really well. The book has a lovely feel to it--I'll definitely do some more partial-paper covered books in the future.
Also for the first time I sewed a headband on each book. It turned out fairly well. I used waxed linen thread as the core (the waxed thread that came with my bookbinding kit--its braided and so thick I can't imagine using it for sewing signatures).
Additionally, I got myself a chisel (and sharpening kit) to trim the edges, which turned out much better than expected. I still don't have something to hold the book horizontally while I trim so I'm still trimming vertically for now, but it turned out much better than trying to use a utility knife like I was before.
Technical Details:
Quarto size (quarter-letter, about A6)
Sewn-on made endpapers
Rounded but not backed
Sewn-on headbands (no tailbands)
Chisel-trimmed pages
Oxford hollow
The linen tapes are frayed and glued to the exterior of the boards
Sewn-on bookmark
Things I especially liked about this bind:
CHISEL TRIMMING! I knew it would up my game to have a chisel to trim pages with rather than just a utility knife, but WOW, it made SO MUCH difference! Once they were finished I kept petting the edges of the pages because they were just so soft and smooth and perfect.
I really like the sewn-in headbands. I'd probably use a bit thicker core next time, but they turned out well and I'm pleased with them.
I'm surprised how much I liked the paper-covered covers. I had planned on most of my books being full-bookcloth with this one as an exception, but with how much I like the look and feel of this book I will probably switch that around and do just quarter-bound with bookcloth unless I have a good reason to make an exception.
For the made endpapers, I glued just the edge of the endpaper to the white instead of the whole page. I quite like it--it's a lot more flexible this way and doesn't have a "noticeably glued-together" feel to it.
The wax paste turned out really well. It makes the cover feel very "finished" instead of just like scrapbook paper, which is what it actually is.
Things I'd like to improve for next time:
Because the text block is rounded but not backed, there's a little wrinkling of the endpaper glued to the board right at the hinge so it doesn't pull when the book is opened all the way. I'll have to experiment a bit more with this to figure out a good hinge for a rounded-not-backed book.
Although I love the flower cover, it's a little busy to have the title legible on the cover, so it's only on the spine. That's not a bad thing, but I'm not sure what I would do if I definitely did want a title/design on the cover itself.
I think honestly there's not very much to improve for next time. I'm very pleased with how this one came out--it's very nearly perfect.
65 notes
·
View notes
Text
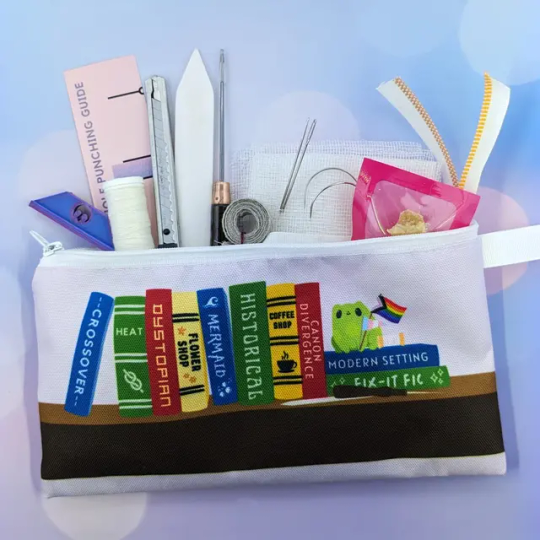
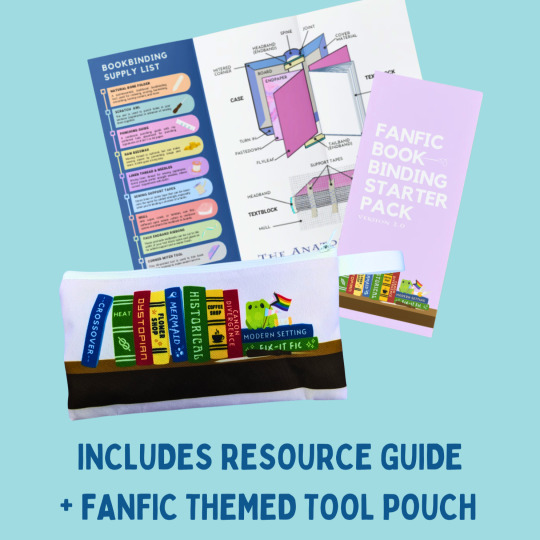

This is the bookbinding kit that I wish I had when I first started out. The goal was to put all of the hard-to-source supplies in one newbie starter kit--only the good stuff that we fanbinders actually use. (Also, I really, really wanted a storage pouch celebrating our hobby.) THE FANFIC BOOKBINDING STARTER PACK
So we've got:
Bone Folder
Awl
Hole Punching Guide
Bookbinding Needles
100% Linen Thread
Raw Beeswax
Linen or Ramie Tape
Mull
Pre-Made Endbands
Corner Miter
Resource Brochure
Fanfic Themed Pouch
Olfa Knife (optional, but so useful!)
I figure most people already have things like rulers and brushes at home, and other things like glue and boards are easier to source separately. I'm hoping this kit takes the stress out of finding all of the fiddly bits from people who are new to the hobby. (Seriously, why are Lineco products so expensive!!!)
I'm hoping to use this space to blog more about the kit as time goes by. It was several months in the making. Local fanfic binders in the SoCal area helped me figure out what to include and what to leave out. Their feedback on what to include in the resource brochure was invaluable.
I sourced materials from China, India, Poland, Lithuania, and even my local farmer's market. I taught myself 3D modeling to design the corner miter. I corresponded directly with linen and mull manufacturers. I learned a lot about bone folders. Fanbinding is an act of resistance, liberation, and celebration. We're creating codices and preserving what we love. I don't bind in the fandom that inspired v.2.0's theme, but I know a lot of my fellow binders do. It was important for me to put the progress pride flag and trans pride flag on the kit to stick it to you-know-who.
#fanbinding#bookbinding#fanfic binding#renegade bindery#ficbinding#fan fiction#manacled#bookbinding kit
283 notes
·
View notes
Text
2024 in Binding
I started bookbinding back in April, so it's been about nine months of learning. Here are the stats:
Fanbinds: 29 30 complete binds of 18 19 different typesets. (Mostly one typeset = one fic but I have a couple of compilations of shorter fics in there.) I might actually eke out one more before January 1, which would make the total a pleasingly round 30. Done!
Blank book binds: 21 blank books of various sizes, mostly gifted to friends.
Rebinds: Only 2! This is a great way to practice making cases, though. I will do more in the year to come.
Public Domain/Non-Fannish Binds: 8 books -- two public domain binds, two copies of a book of plays written by a friend's parent, and four copies of a book of stuff from a parent of mine.
Total binds: 60! 61! Whoa.
Some photos!
First book, feat. very ugly cover paper, scorch marks, and terrible hinges.

Fave book (that can currently be shared publicly):

Latest (fannish) book:

More rambling under the cut.
With my typical ADHD-style approach, I definitely didn't hone one style/technique at a time. Things I've learned/tried in binding include:
case binding (with and without bradel-style construction)
three-piece bradel binding
coptic binding (a journal, I didn't share it)
sewn-board binding
criss-cross binding (haven't shared yet!)
sewn pamphlet binding
stab binding
double fan/Lumbeck binding for paperbacks
many quirky small binding styles in my weekend course (matchbook, accordion, dos-a-dos, origami, and more)
In terms of finishing techniques, I've tried:
Endbands from bookcloth
Sewn endbands (French faux double-core) with cotton and silk
French link
Sewn on tapes
Made endpapers
Tete-beche binding (haven't shown y'all that one yet...)
Paper-covered boards
Homemade bookcloth
Hot foiling onto cloth (yet to be featured on a fanbind)
HTV on cloth (of course)
Toner-activated foiling
Wrap covers
Dust jackets
Box-making (for spouse - a card game needed a box)
I have acquired/made lots of equipment but my faves currently are:
Cricut Maker 3
HFS guillotine (love/hate relationship)
homemade book press out of cutting boards
Wrapped bricks for weights
Bone folders - real bone and teflon
Epson ET-15000 colour printer (still getting used to it but it's nice)
And of course I've honed and improved on typesetting and design skills using InDesign, Illustrator, Bookbinder.js, and (recently) Canva.
What do I want to do in 2025?
more gift binds!
thermal-bound paperbacks (binder acquired via Xmas!)
slipcases
a fanbind with foil-quilled covers
inlaid bookcloth covers
embroidered decoration
rounded spines
backed spines??? Maybe?
edge gilding/painting
bookmark charms
laser-cut insets on covers
a magnetic closure on a bind
get better at coptic binding
learn how to make straighter cuts with the stupid guillotine
learn how to marble papers (paper-marbling starter kit acquired via Xmas gifts!)
End of ramble.
#fanbinding#bookbinding#this is a niche bookbinding post#case binding#sewn endbands#handmade journal#drarry fanbinding#hp fanbinding
23 notes
·
View notes
Text
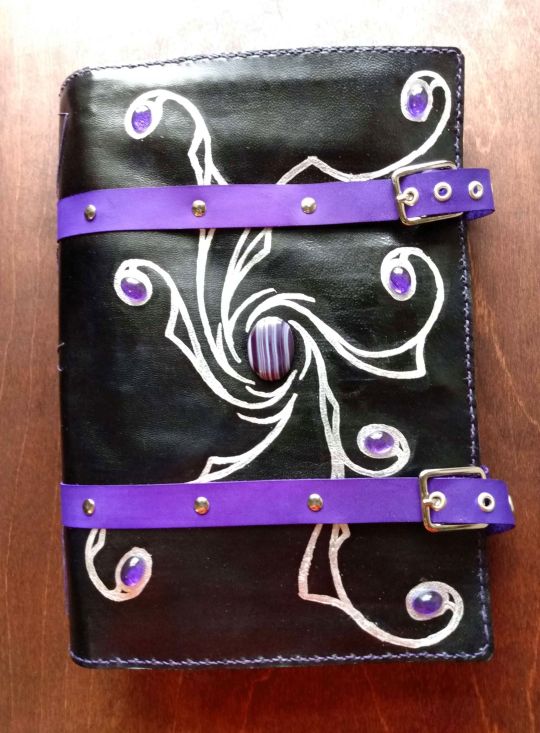
Silver Spiral Art Kit
Etsy | Commissions | Ko-Fi | Discord
I finally finished something! This is an art case I made as a gift for a friend for Christmas this year. C:


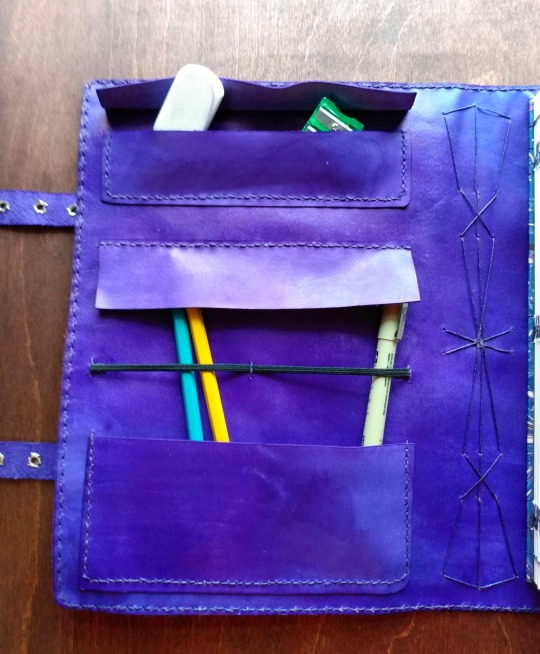
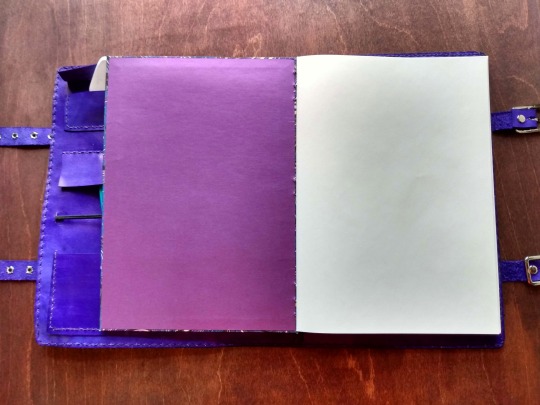
The case is 2 pieces of leather glued together. I riveted the straps onto one and sewed the pocket pieces onto the other before attaching them together. The right side of the case has a slot cut into it so the sketchbook can easily be removed and replaced once it’s filled.
As far as prototypes go, I’m actually really happy with how this one turned out, and am debating making more. 🤔
[Originally posted on December 13 2022]
Addendum January 20, 2024: These are now available for commission!
16 notes
·
View notes
Text
Part 2


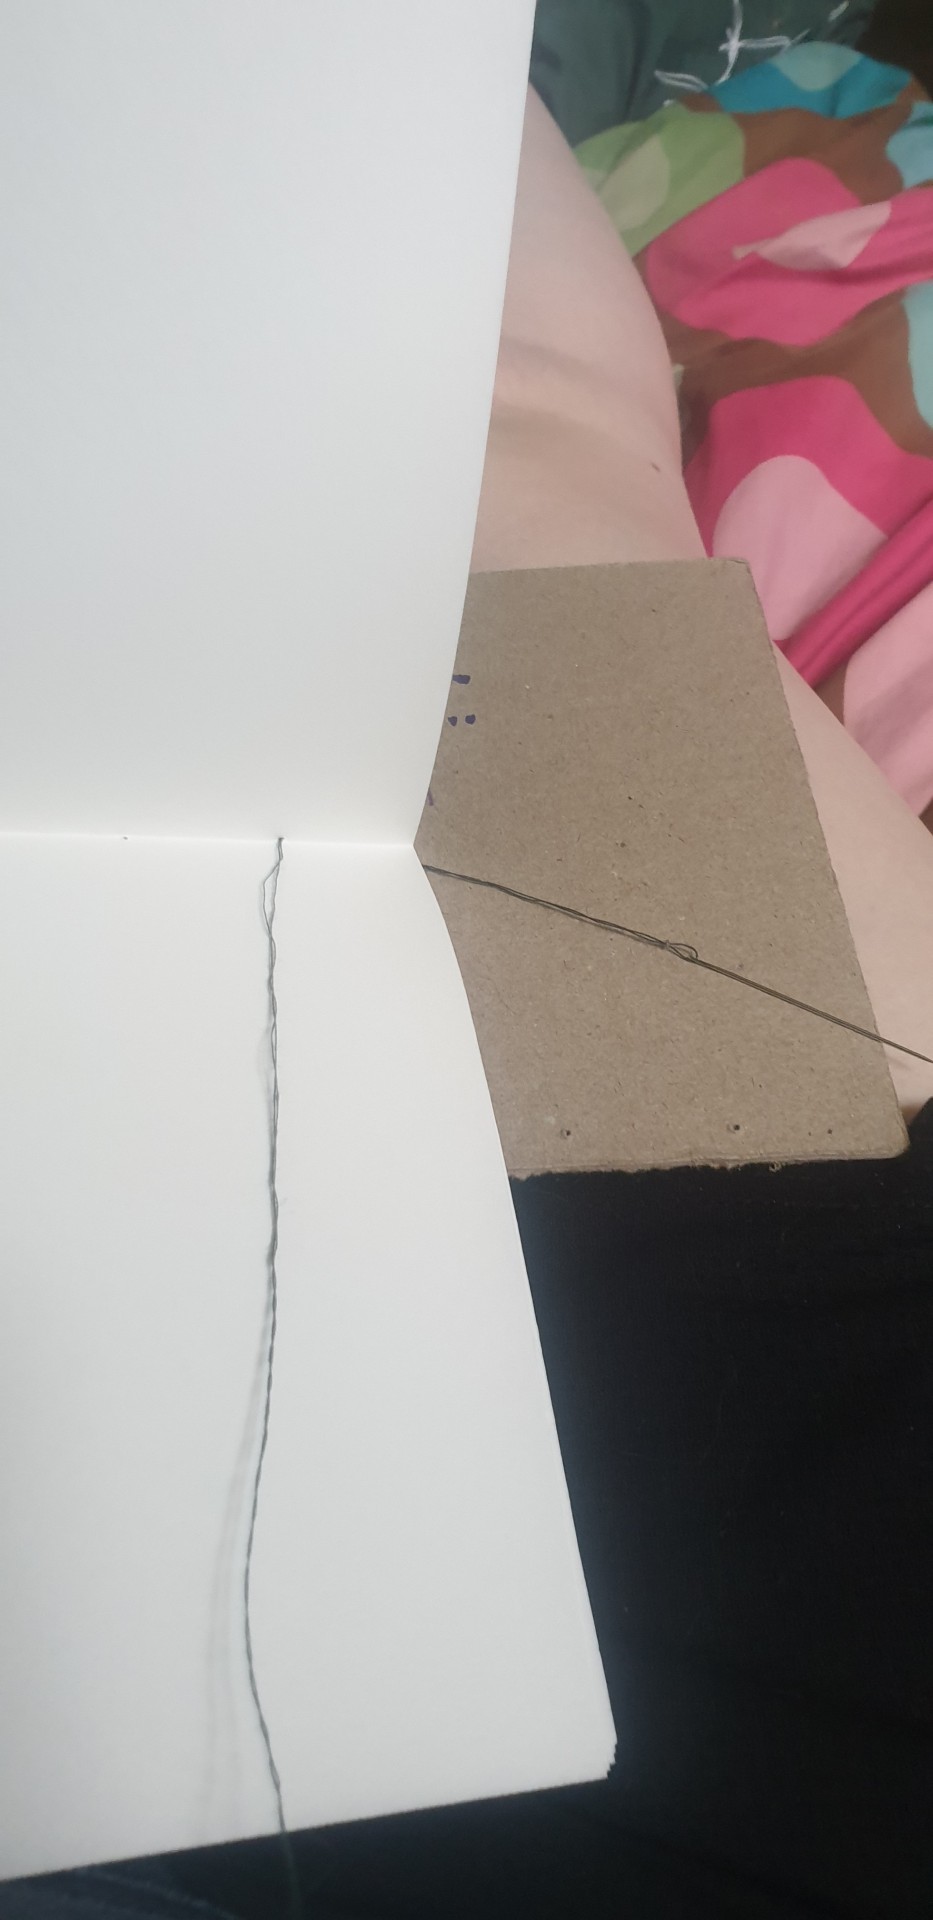
Next you wanna thread the needle between the first signature and the cardboard and behind the thread that connects them and then push the needle back through the hole you pulled it out of on the second signature. Repeat that for the rest of the signature and connect the next signature the same way you attached the previous one, but thread the needle between the first and second signature.
Keep going til it seems like you're about to run out of thread. You want enough left to tie it off so make sure you have at least double the length of your needle. But its best to stop at the end of a signature than part way through, though you definitely could. I just think it looks better if you tie it off at the end of the signature you're on.
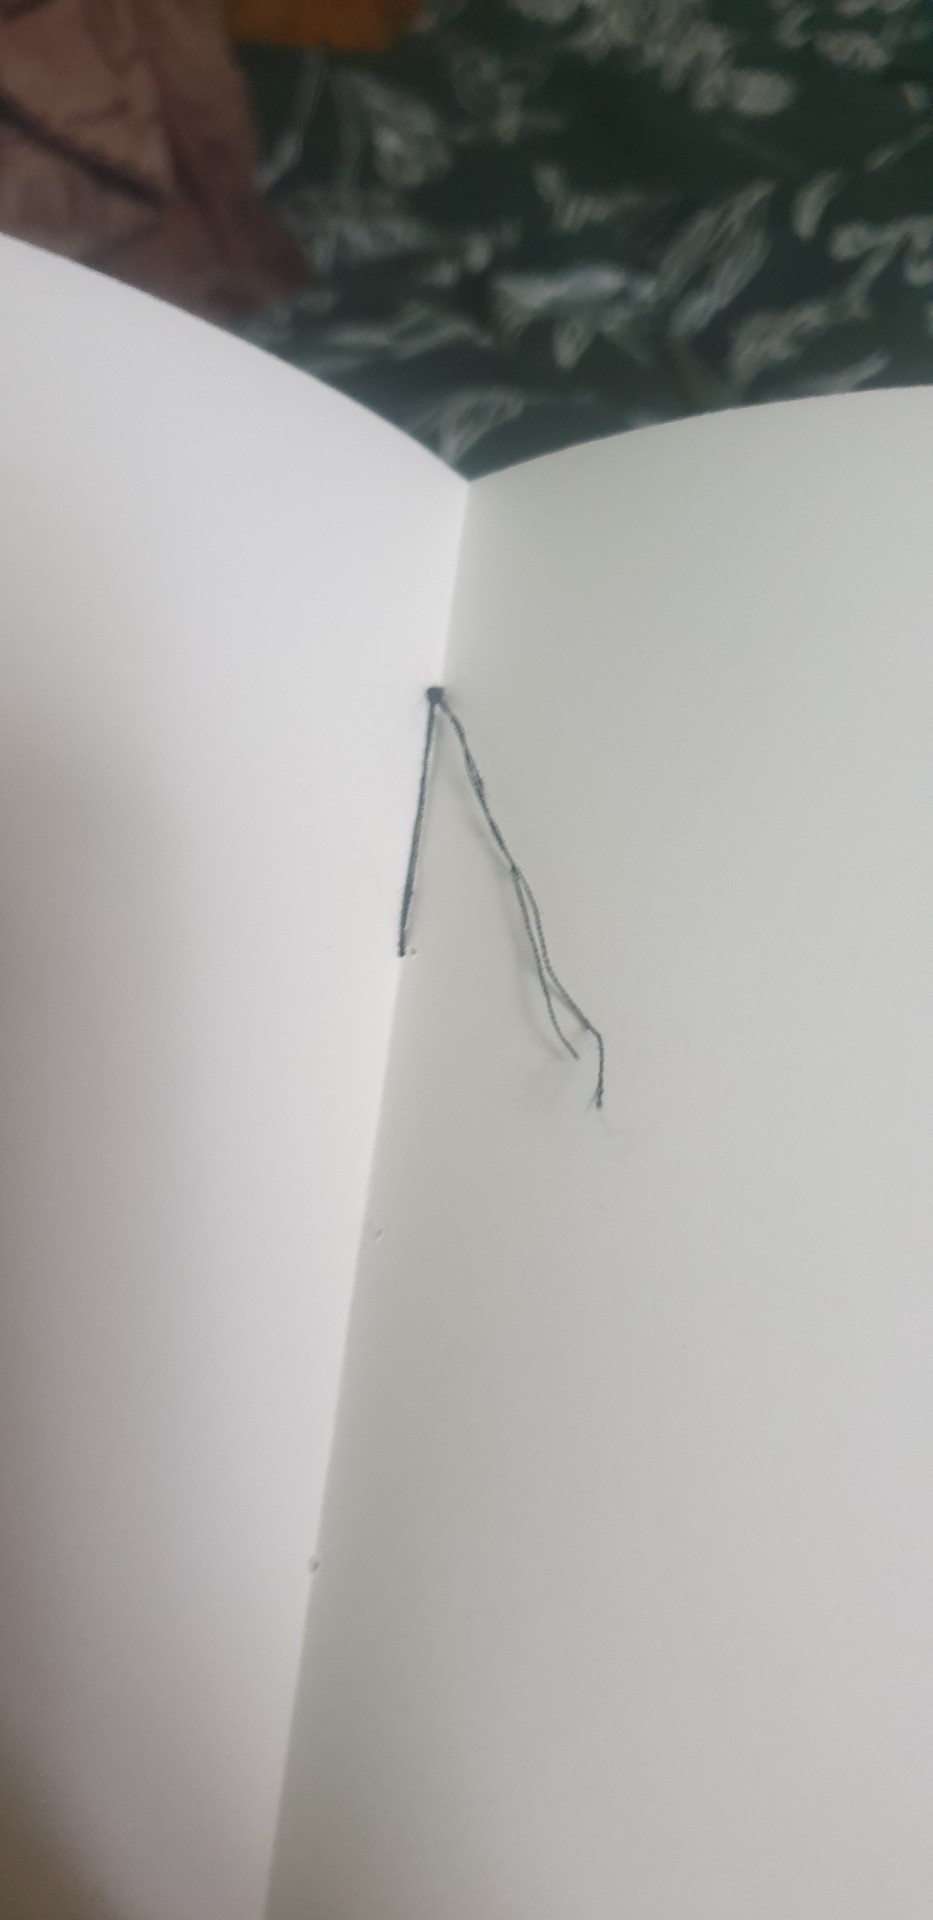
Tying it off is pretty easy. Once you get to the end of the signature, instead of attaching the next one, you just push the needle back through the last hole


And then make a loop around the thread on the inside of the signature to tie a knot.


To add the next signature, you start the same way you did with the first signature. But instead of looping it around the cardboard, you thread it between the previous 2 signatures and behind the thread holding them together like before. And just continue on the same as before.
I didnt take very good pictures while attaching the second cover and also I did it in a way in a way I don't think I was supposed to for this one so im gonna do my best to explain it with what I've got. So after you've attached the final signature, you're gonna take your second cover

And you're gonna thread the needle through the first hole and loop the thread around it twice like you did with the first cover. Then you're gonna stick it back through the corresponding hole on the last signature and repeat for all the holes. Once you get to the last hole you're gonna tie it off the same way you did when you ran out of thread.

And then ta-dah you have a book!
You can stop here if you want and just decorate the cover with paint or markers but im going to reinforce the spine a bit and also cover it with fabric which I will show in part 3 (and possibly 4 depending on how many pictures I have to take)
When I was binding my plant book I spent about an hour digging around online to figure out which stitch I would use and researching the different binding methods to figure out what would work best.
I also wanted a good written tutorial for how to do the stitch i ultimately chose (the coptic stitch) because I do not like video tutorials. Unfortunately none of the written tutorials had exactly what I needed. Specifically none of them told you what to do if you ran out of thread before finishing the binding. Their advice was "make sure to cut enough thread from the beginning" which was not going to work for me. While there is a way to measure out how much thread you need, I would likely still need to know how to add more thread. My plant book is quite a bit thicker than the books being made in the tutorials. And I dont know if you've ever tried to hand sew something by hand and thought "ehhh ill just cut off a bunch and hope its enough to do this in one go," but it NEVER works out that way.
DO NOT LISTEN TO THAT VOICE. THAT IS THE DEVIL SPEAKING.
All that will happen is you end up with a giant tangled mess of thread that you can never untangle. And im pretty good at untangling threads but its a pain in the ass and just not something I would like to waste my time on. Not to mention the wasted thread. So I ended up having to watch part of a video tutorial to figure out what I was supposed to do when the thread inevitably ran out. And I told myself that the next time I did this, I would make my own written tutorial with pictures showing what to do and also showing how I reinforce the spine because I go a bit further than any of the tutorials I found.
(Tutorial under the cut)
Most people seem to choose the coptic stitch because they like how it looks and they keep the stitching exposed. While I agree that it looks good, I dont personally like the exposed stitching. I like people to look at my books and be surprised when I tell them I bound them myself. And making a book that looks professionally done accomplishes that. Also I prefer it over the exposed stitching, ALSO I don't use proper bookbinding thread cuz I do this on a budget with stuff I can get at walmart or already have lying around the house and covering the stitching helps reinforce it. I ultimately decided on the coptic stitch partly because it allows the book to lie flat when open, but also because every article I read on different stitches to use said that it was the most complicated one and I looked at that and was like "pffffttt cant be that hard." And honestly I think I was right. Its pretty straightforward.
So what youre gonna need is some paper. Personally, I like to take those sketchbooks that are bound with tape or glue and pull all the pages out. This way you also get a front and back cover.
Again, every tutorial was telling me to fold the pages with a bone fold, which is nice if you have one, I guess, but I do not, so I used the clip on the side of my mechanical pencil to fold the pages in half. If youre using regular sketch paper then you wanna make some signatures which is a group of 4 to 5 sheets of paper, folded in half, and placed inside each other. But for something thicker like watercolor paper, I just sew each individual sheet on separately.
Next, you're gonna wanna take the hard piece of cardboard at the back of the taped together sketchbook and cut that shit in half. I use an exacto knife but ive also used scissors for this in the past. I do not recommend using scissors. Its possible to do but not worth the hand cramps. And then BOOM you have the covers of your sketchbook.
Another thing most people tell you to use is an awl to punch the holes in the paper. Again, I do not have an awl. Nor do I have the money to buy one. At first, I just punched the holes in with a thumbtack but thumbtacks are tiny and after awhile your fingers start to hurt and you may start to lose your grip on it and its just generally a bad time. But, ya bois got a lot of sewing needles (I kept losing them for awhile there and would give up and buy new ones only to then find the pack I lost. So I have like 3 packs of sewing needles.
Thats not counting the ones my mom has also bought because she's done the same thing) and out of frustration from using the thumbtack I decided to try sticking a sewing needle into one of my mechanical pencils and seeing if it would fit and not just immediately push back in when I tried to use it. And what do you fuckin know?

It worked extremely well and I wish id thought of it sooner. I cut the time spent poking holes into the signatures in half and it doesnt hurt my fingers at all.
Youre also going to need thread, of course. I use embroidery thread cuz thats what I already had. Normally you should go for a thicker thread. Preferably a waxed thread. And most people would recommend using a curved sewing needle. This is the one thing im considering getting for myself at some point. You CAN do it with a straight needle but a curved one would definitely make some aspects of this significantly easier.
Now to start off, you wanna take your string and put it in the needle and fold it in half and tie the ends together and then
You wanna thread the needle through the first signature and then


Pull it up through the bottom of the first hole in the cover and loop it around twice and pull it tight

Then push the needle back into the first hole in the paper

And put it through the next hole in the signature
Then repeat that process til you get to the end of the holes. When you get to the last one start like you did with all the others but after wrapping the thread around the cardboard twice you get the next signature


And push it in through the first hole and back out the second (tbc)
#so funny story#between writing part one and part two my mom gave me my bday present early#she gave me a leather working kit which has an awl and also curved needles#and thick waxed thread#which i think might be a little too thick for bookbinding but is a lot closer to what youre ''supposed'' to use#but my reasoning behind writing this still stands#i probably wouldnt have ever bought those things for myself cuz theyre not necessary as long as you got any needle amd thread#but i will definitely be using them the next time i make a book#i managed to make 5 books without the proper tools and they all look pretty good and seem like theyre gonna hold up ok#one of them is even leather bound#probably shouldn't have started off with the leather bound one but eh#also lmk if this is confusing at all#or if i need to explain something in more detail#like i prefer using written tutorials for myself but idk how good i am at talking through everything im doing#i feel like while i learn to do something best through reading and looking at pictures i teach best through showing it#but idk#like i understand what im saying but im the one saying it you know
10 notes
·
View notes
Text
hm gotta hunt the fandom bookbinding resources for how to easily format and print correctly through libreoffice writer, if it even can, and what sort of allowances to have on the pages
There's a fairly inexpensive bookbinding kit for an A6 style journal on etsy, which would be a good start! I can bind The Special Fanfiction From My Youth as practice, since both parts combined sits at a reasonable 40k words. I would like to be a little cringe and eventually bind my own stuff, on account of it sounds fun.
Presumably this will just be another craft project I acquire and proceed to never complete. But who knows! I haven't tried book binding yet it may hit that spot and be easy enough to complete that I'll do it a handful of times to have physical copies of my favorite fics just for me. Can't be any harder than me buying the supplies to sew a shirt when I don't own a sewing machine and only have experience doing haphazard fursuit repairs.
#no I will not elaborate on which fanfiction is but it's in my bookmarks#I have been obsessed with this fic for over ten years it deserves to exist irl so I can gently manhandle it#fanfiction#book binding#libreoffice#the dragoon diaries
16 notes
·
View notes