#Cortex-M0
Explore tagged Tumblr posts
Visit Tumblr Blog
Explore Tumblr blogs with no restrictions, modern design and the best experience.
Last Seen Tumblr Blogs


Fun Fact
Tumblr was attacked by a cross-site scripting worm deployed by the Internet troll group GNAA on Dec 3, 2012.
Video
youtube
GPS Clock Using Raspberry Pi Pico (RP2040) Arm Cortex-M0
#youtube#GPS Clock Using Raspberry Pi Pico (RP2040) Arm Cortex-M0+ & LCD Display | Make a GPS Clock With Arduino - Projects | Arduino GPS Clock | ras
0 notes
Text
clockwork PicoCalc
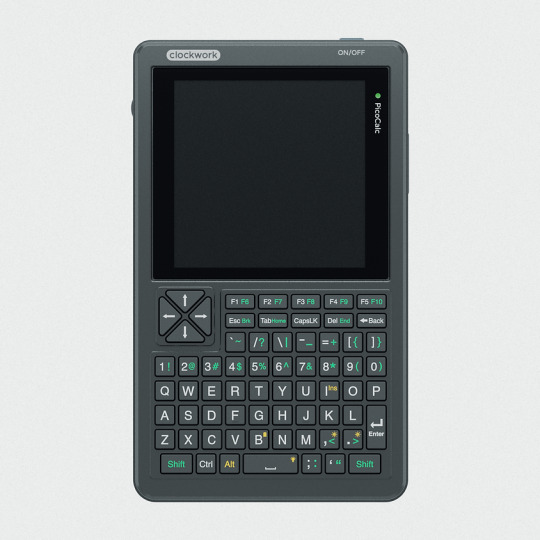
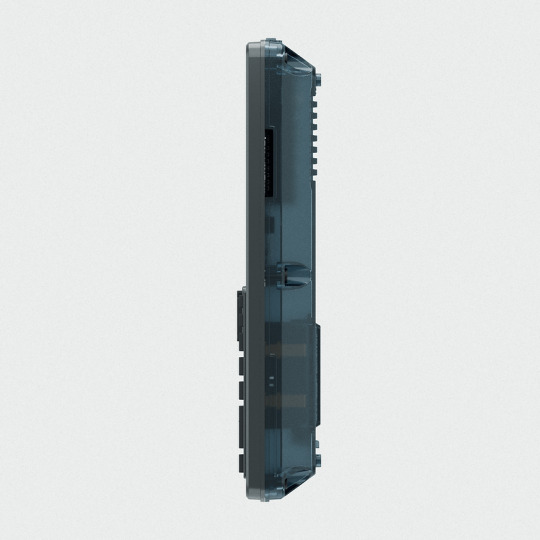
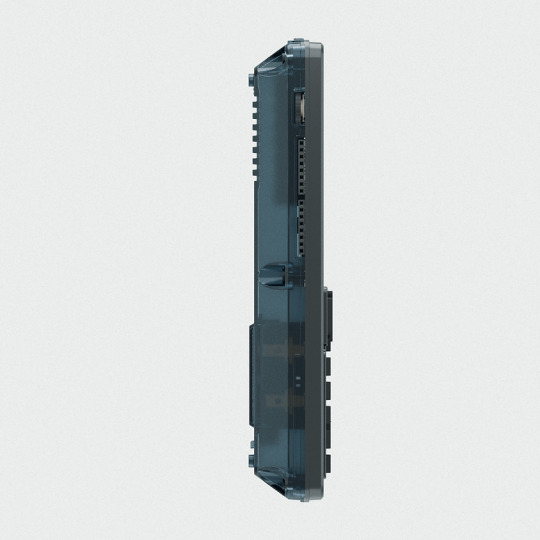


clockwork PicoCalc Back to Basics, rediscover the Golden Age of Computing
Code in BASIC, explore the magic of Lisp, taste the elegance of Unix, play retro games and digital music all in just 260KB memory. Infinite possibilities, inspired by the genius in you!
ClockworkPi v2.0 mainboard
Raspberry Pi Pico 1 H Core module (ARM32-bit Dual-core Cortex M0+, 264KB RAM, 2MB flash)
320x320 4-inch IPS screen (SPI interface)
Ultra-portable QWERTY Backlit keyboard on board (I2C interface)
Dual speaker
ABS plastic shell & 2.5mm Hex key
Tempered glass cover
32GB high-speed SD-card with optimized BASIC firmware
source: clockworkpi.com
7 notes
·
View notes
Text
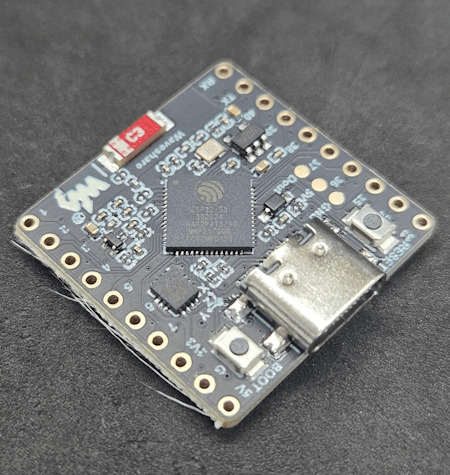
Raspberry Pi Pico W has been designed to be a low cost yet flexible development platform for RP2040, with a 2.4GHz wireless interface and the following key features:
RP2040 microcontroller with 2MB of flash memory
On-board single-band 2.4GHz wireless interfaces (802.11n)
Micro USB B port for power and data (and for reprogramming the flash)
40 pin 21mmx51mm ���DIP’ style 1mm thick PCB with 0.1″ through-hole pins also with edge castellations
Exposes 26 multi-function 3.3V general purpose I/O (GPIO)
23 GPIO are digital-only, with three also being ADC capable
Can be surface mounted as a module
3-pin ARM serial wire debug (SWD) port
Simple yet highly flexible power supply architecture
Various options for easily powering the unit from micro USB, external supplies or batteries
High quality, low cost, high availability
Comprehensive SDK, software examples, and documentation
Dual-core Cortex M0+ at up to 133MHz
On-chip PLL allows variable core frequency
264kByte multi-bank high-performance SRAM
2 notes
·
View notes
Text

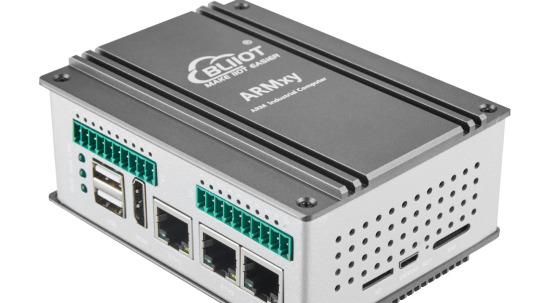
Launched New ARM Embedded Industrial Computer with RK3562J for ARMxy Series
The BL370 series is powered by the industrial-grade Rockchip RK3562/RK3562J processor, featuring a multi-core heterogeneous architecture with a quad-core ARM Cortex-A53 and a single-core ARM Cortex-M0, clocked at up to 1.8GHz/2.0GHz. It offers a robust solution with 4GB LPDDR4X RAM and 32GB eMMC storage, along with a rich set of I/O interfaces. The built-in 1 TOPS NPU supports deep learning capabilities, making it ideal for AI-driven applications.

Key Features:
High Reliability and Cost-Effectiveness: The BL370 series is widely used in industrial control, edge computing, AIoT, artificial intelligence, communication management, AGV robots, machine vision, robotics, industrial IoT gateways, energy storage systems, automation control, and rail transportation.
Versatile Connectivity:
Data Acquisition and Control: Supports communication, PWM output, pulse counting, and more.
Video Processing: Capable of 1080P@60fps H.264 encoding and 4K@30fps H.265 decoding.
Wireless Communication: Built-in Mini PCIe interface supports Bluetooth, WiFi, 4G, and 5G modules.
Software and Development Support:
Operating Systems: Linux-5.10.198, Linux-RT-5.10.198, Ubuntu 20.04, Debian 11 (planned), Android 13 (planned).
Development Tools: Docker containers, Node-RED, and Qt-5.15.2 for GUI development.
Industrial Software:
Robust Design for Harsh Environments:
The BL370 series has undergone professional electrical performance design and high/low-temperature testing, ensuring stable operation in extreme conditions with temperatures ranging from -40°C to 85°C and resistance to electromagnetic interference. Its DIN35 rail mounting makes it suitable for various industrial applications.
Typical Application Areas:
Industrial Control
Energy Storage Systems (EMS/BMS)
AIoT and Artificial Intelligence
Smart Manufacturing
Communication Management
AGV Robots
Machine Vision
Edge Computing
Motion Control
Robotics
Rail Transportation
Smart Devices
The BL370 series combines high performance, reliability, and versatility, making it an ideal solution for demanding industrial and IoT applications.
0 notes
Text
#PSoC4100TPlus#Microcontroller#MultiSense#CAPSENSE#InductiveSensing#LiquidLevelSensing#HMI#SystemControl#EmbeddedSystems#powerelectronics#powermanagement#powersemiconductor#infineon
0 notes
Text
Staff Firmware Engineer
Job title: Staff Firmware Engineer Company: Infraveo Technologies Job description: This is a remote position. We are seeking a Staff Firmware Engineer to join our team. Responsibilites: Design…. Experience with IPv6 networking. Experience with ARM Cortex-M0, M4, and M33 cores. Past work in IoT, robotics, drones… Expected salary: Location: Gujarat Job date: Tue, 29 Apr 2025 22:47:32 GMT Apply for…
0 notes
Text
Warum der Arduino trotz ESP32 & Co. nicht ausgedient hat

„Arduino? Das nutzt doch heute keiner mehr…“ Wer sich in den letzten Jahren mit Mikrocontrollern beschäftigt hat, stolpert überall über den ESP32. Dual-Core, WLAN, Bluetooth, 240 MHz, massig Speicher – und das alles für ein paar Euro. Kein Wunder also, dass der gute alte Arduino UNO im Schatten der neuen Mikrocontroller-Generation zu stehen scheint. Die Kommentare in Foren und Social Media klingen dann auch oft so: „Warum noch einen Arduino benutzen, wenn es doch den ESP32 gibt?“ Aber ist das wirklich so? Hat der Arduino tatsächlich ausgedient? Oder gibt es gute Gründe, auch heute noch auf den betagten Klassiker zu setzen? Und vor allem: Wenn ich gerade erst einsteige – sollte ich dann überhaupt noch mit einem Arduino anfangen, oder direkt auf einen ESP32 setzen? Genau um diese Fragen geht es in diesem Beitrag. Und so viel sei schon mal verraten: Leistung ist nicht immer alles.
ESP32 – das moderne Powerpaket (aber nicht für alles nötig)
Wenn man sich heute in der Maker-Szene oder auf YouTube umschaut, könnte man fast glauben, es gäbe nur noch den ESP32. Und das ist auch gar nicht so abwegig: Der ESP32 bringt schon ab Werk eine ganze Menge beeindruckender Features mit, die früher nur mit viel zusätzlicher Hardware möglich waren. 🔥 Ein kurzer Blick auf die Highlights: - Dual-Core mit bis zu 240 MHz - WLAN und Bluetooth direkt integriert - Bis zu 520 kB RAM und mehrere Megabyte Flash - Viele GPIOs, PWM, ADC, DAC, I2C, SPI, CAN, Touch-Sensoren, … - Bereits ab ca. 3 € (je nach Ausführung und Händler)
ESP32-S3-Matrix
ESP32-C3 mit LiPo Batterie
zwei Elecrow CrowPanels 2,4" & 5.0"
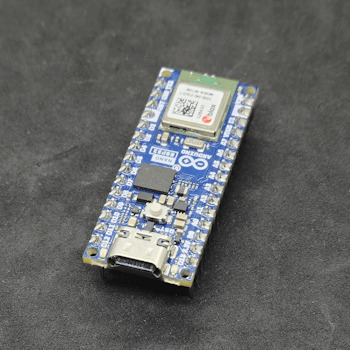
Arduino Nano ESP32
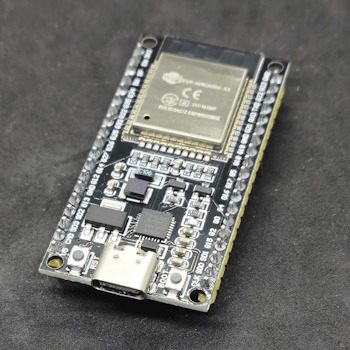
Generic-ESP32 Mikrocontroller

ESP32-C3 Super Mini

ESP32-S3-Zero Und dann wäre da noch ein echter Publikumsliebling: die ESP32-CAM.

Vergleich ESP32-CAM und ESP32-S3 CAM

ESP32-CAM mit externer Antenne und Board

ESP32-CAM

ESP32-CAM Modelle Für rund 5 € bekommt man hier nicht nur die Rechenpower des ESP32, sondern auch gleich eine kleine Kamera mit bis zu 5 Megapixeln dazu. Damit sind Projekte wie: - Überwachungskamera, - QR-Code-Scanner, - Fotos per E-Mail oder Telegram senden ganz einfach umsetzbar – ohne zusätzliche Hardware. Der Raspberry Pi Pico (RP2040) mischt kräftig mit – und bekommt Verstärkung Doch der ESP32 ist nicht allein auf dem Platz. Der Raspberry Pi Pico mit seinem RP2040 Dual-Core Cortex-M0+ Prozessor (133 MHz) hat sich schnell als leistungsfähige und günstige Alternative etabliert – und das in mehreren Varianten: BoardWLANBluetoothBesonderheitenRaspberry Pi Pico❌❌Basisversion, ohne FunkRaspberry Pi Pico W✅✅ (per Firmware)WLAN onboard, BT aktivierbarRP2350-Boards❌❌Mehr Power, keine Funkmodule (derzeit)


RP2040:bit
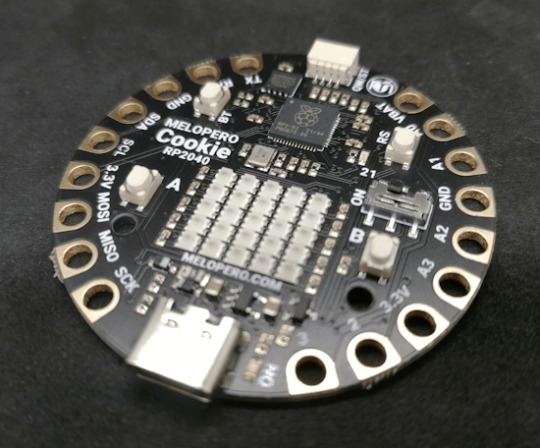
Melopero Cookie RP2040
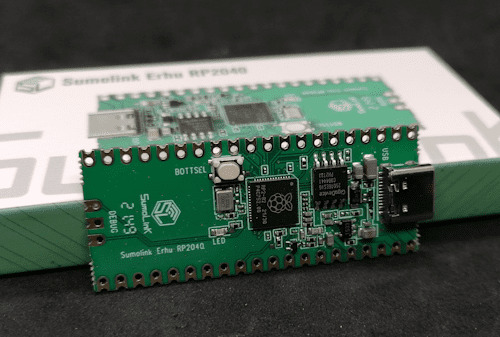
Sumolink Erhu RP240

Mikrocontroller - XIAO RP2040 & Raspberry PI Pico

Raspberry Pi Pico 2 - RP2350A

XIAO RP2350 Mit dem neuen RP2350-Chip steht mittlerweile ein leistungsstärkerer Nachfolger in den Startlöchern. Er wird derzeit auf einigen neuen Boards verbaut (z. B. auf Prototypen oder Dev-Boards asiatischer Hersteller) und bringt: - Höhere Taktraten (bis 200 MHz möglich), - Verbesserte Peripherie, - Und bleibt trotzdem kompatibel zur RP2040-Familie. Was aktuell noch fehlt: WLAN und Bluetooth sind (noch) nicht integriert – was den Chip für reine IoT-Projekte (noch) weniger attraktiv macht, aber für USB-HID oder Highspeed-Sensoranwendungen interessant sein kann.
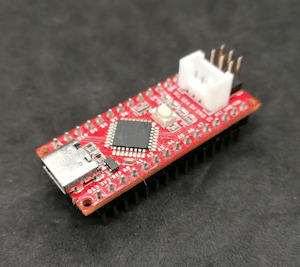
Arduino – Der Klassiker mit Kultstatus (und vielen Gesichtern)
Wenn man „Arduino“ sagt, denken viele sofort an das gute alte Original: Arduino UNO R3, Made in Italy, stabil, bewährt – aber auch nicht ganz billig. Und genau da beginnt der kleine Konflikt, den vermutlich viele kennen: ➡️ Das originale Board unterstützt die Plattform, die Entwicklung und das Open-Source-Projekt. ➡️ Aber: Der Preis liegt oft bei 20 € und mehr – während Clones für 2–3 € zu haben sind. Doch: Genau das ist eben auch der Spirit von Open Source. Die Arduino-Plattform wurde so entwickelt, dass jeder (mit Einhaltung gewisser Auflagen) eigene Boards bauen und verkaufen darf. Und das tun viele Hersteller – vor allem in Asien. Dabei gibt es längst nicht nur einfache UNO- oder Nano-Kopien. Die Vielfalt an Arduino-kompatiblen Boards ist inzwischen riesig: Board / CloneBesonderheitPreisbereichNano Clone (CH340G)Klassiker für einfache Projekte2–4 €Pro MiniOhne USB, super klein und sparsam2–4 €Nano mit integriertem OLEDAnzeige direkt am Mikrocontroller4–8 €Nano mit 2,4 GHz Funk (nRF24L01) oder 433 MHz ModulIdeal für Funkprojekte ohne WLAN5–10 €Nano mit ESP8266-Modul onboardWLAN-fähig, bleibt aber Arduino-kompatibel5–10 €Nano mit Bluetooth HC-05 oder HM-10Kabellose Kommunikation über BT Classic oder BLE5–10 €

Arduino Nano mit nRF24L01 Erweiterungsboard

Microcontroller BLE-Nano von Keywish

Arduino UNO R3
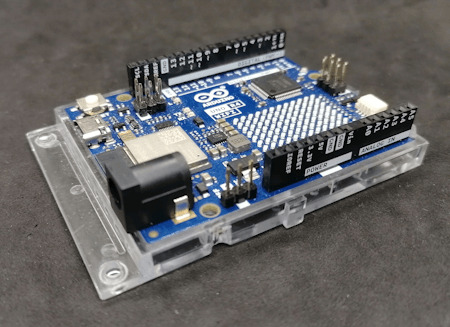
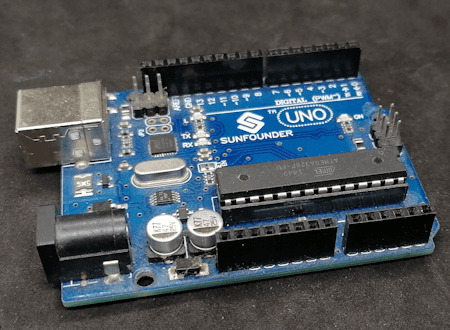
Arduino UNO R3 Clone von der Firma Sunfounder


Arduino Nano V3 , ATmega328P

Arduino Mega 2560 Pro mini

Arduino Nano V3
Seeeduino Nano Gerade diese Vielfalt an spezialisierten Clones und Abwandlungen ist ein echter Vorteil: Man wählt sich für sein Projekt genau die Features, die man braucht – und spart sich den Ballast von Funktionen, die gar nicht benötigt werden. ➡️ Keine WLAN-Probleme, wenn das Projekt gar kein WLAN braucht. ➡️ Keine Bluetooth-Komplexität, wenn ein simples Relais geschaltet werden soll. ➡️ Aber: Wenn ein Display gewünscht ist, einfach ein Clone mit integriertem OLED nehmen. Teures Original oder günstiger Clone? Das Original aus Italien unterstützt natürlich die Entwickler, die die Plattform erst möglich gemacht haben. Gerade wenn es um professionelle Projekte, Support oder Weiterentwicklung geht, ist das ein guter Grund, auch mal bewusst zum Original zu greifen. Wer dagegen einfach ein kleines Hobby-Projekt umsetzt oder ein günstiges Board für Lernzwecke sucht, wird vermutlich bei einem Clone aus Fernost landen – und das ist auch okay so. Beides hat seine Berechtigung. Im nächsten Abschnitt schauen wir uns an, warum diese Einfachheit und Flexibilität dem Arduino einen Platz auf dem Basteltisch gesichert haben – auch wenn ESP32, RP2040 & Co. daneben liegen. Clone statt Frust: Warum gerade Anfänger mit günstigen China-Boards besser fahren Seien wir ehrlich: Wer mit Mikrocontrollern anfängt, wird früher oder später mal einen Fehler machen. Ein Kabel verpolt, einen Pin aus Versehen kurzgeschlossen, eine Lötstelle zu heiß… ➡️ Passiert. Gehört zum Lernen einfach dazu. Wenn dann das teure Original-Board abraucht, ist der Frust groß – und das Projekt vielleicht erst mal gestorben. Anders sieht es aus, wenn das eingesetzte Board nur 2–3 € gekostet hat. Dann bestellt man sich einfach ein neues und weiter geht’s. Genau deshalb finde ich: ➡️ Gerade Anfänger sind mit einem günstigen Clone gut beraten. Das senkt die Hemmschwelle, etwas auszuprobieren, und macht es viel leichter, aus Fehlern zu lernen. Ob Arduino Nano Clone, Pro Mini oder einer der vielen China-Nachbauten mit Zusatzfeatures wie OLED oder Funk – hier kann man für kleines Geld experimentieren, lernen und Spaß haben. Und wenn das Projekt später stabil läuft und vielleicht sogar „ernsthaft“ eingesetzt werden soll, kann man immer noch überlegen, ob man auf ein höherwertiges Original umsteigt.
Wann ESP32, wann Arduino? – Entscheidungshilfe für Projekte
Natürlich ist es immer verlockend, einfach zum leistungsstärksten Mikrocontroller zu greifen. Aber genau das ist oft gar nicht nötig – und manchmal sogar umständlicher. Denn: Der beste Mikrocontroller ist der, der genau das kann, was dein Projekt braucht – nicht mehr und nicht weniger. Um dir die Wahl etwas leichter zu machen, hier eine kleine Entscheidungshilfe: ProjektideeEmpfehlungWarum?Blinkende LEDs, Relais steuern, Taster abfragenArduino UNO, Nano, Pro MiniEinfach, stabil, günstig, kein OverkillLCD/OLED-Anzeige mit Temperatur-/FeuchtesensorArduino oder PicoWLAN meist nicht nötig, einfache UmsetzungDaten per WLAN ins Netz (z. B. ThingSpeak, MQTT)ESP32, Pico WWLAN/BT bereits integriert, viele Beispiele vorhandenMobile Projekte mit Akku und langer LaufzeitPro Mini (mit LowPower-Mod) oder ESP32 mit Deep SleepStromsparend, je nach FunkbedarfKamera-Projekte (Foto/Video-Streaming)ESP32-CAMKamera onboard, einfache EinbindungUSB-Tastatur-Emulation, MacroPads, HID-GeräteArduino Leonardo / Micro oder Raspberry Pi Pico (RP2040)Beide unterstützen native USB-HIDFunkprojekte ohne WLAN (z. B. 433 MHz, nRF24L01)Arduino Nano Clone mit FunkmodulKein unnötiges WLAN, einfache FunkanbindungEchtzeitkritische Anwendungen mit viel GPIO und TimingRP2040 oder RP2350Schnelles Realtime-Processing dank PIO, viele GPIOs 💡 Zusatz-Tipp: Für USB-Tastatur-Emulation (z. B. MacroPads oder automatisierte Eingaben) ist der Arduino Leonardo eine super Wahl, weil er den ATmega32u4 verwendet, der USB nativ unterstützt. Alternativ funktioniert das auch mit dem Arduino Micro oder dem Raspberry Pi Pico (RP2040), dort oft über die TinyUSB-Bibliothek.

Keyestudio Leonardo

Arduino Leonardo Clone

Mini RP2040 Developmentboard
Fazit: Alt, aber alles andere als nutzlos!
Ja, der ESP32 ist ein echtes Powerpaket. Ja, der Raspberry Pi Pico (RP2040) mischt kräftig mit und hat auch seinen Platz auf dem Basteltisch. Und ja – es gibt mittlerweile zig Alternativen mit WLAN, Bluetooth, Kamera, HID und noch viel mehr. Aber: Gerade das macht den guten alten Arduino so sympathisch: Er will gar nicht alles können – sondern einfach das, was man für viele kleine bis mittlere Projekte wirklich braucht. Ein Relais schalten? Ein paar LEDs blinken lassen? Einen Sensor auslesen und auf dem Display anzeigen? ➡️ Warum dafür einen Dual-Core mit WLAN bemühen, wenn es ein Nano für 3 € auch tut? Und genau das ist der Punkt: 🔹 Der Arduino ist einfach. 🔹 Er ist stabil. 🔹 Er hat eine riesige Community und viele erprobte Bibliotheken. 🔹 Er eignet sich perfekt zum Lernen – und bleibt auch danach oft die pragmatische Wahl. Gerade Anfänger profitieren enorm davon, sich nicht direkt mit komplexen Themen wie WiFi-Stack, Sleep-Modes oder USB-Treiberherausforderungen herumschlagen zu müssen. Und: Auch fortgeschrittene Bastler greifen gerne zum „alten Bekannten“, wenn es mal schnell, unkompliziert und robust sein soll. Mein Fazit: Der Arduino hat seinen festen Platz – auch im Jahr 2025. Nicht überall, aber da, wo „Keep it simple“ gefragt ist, ist er oft genau die richtige Wahl. ➡️ ESP32, RP2040 & Co. sind keine Gegner – sie sind Mitspieler im Team der Mikrocontroller. Die Kunst ist es, je nach Projekt den passenden Baustein auszuwählen. Jetzt bist du dran! Arbeitest du noch mit dem Arduino? Oder hast du komplett auf ESP32, RP2040 & Co. umgestellt? Welche Projekte hast du schon umgesetzt – und welcher Mikrocontroller war dafür die beste Wahl? 👉 Schreib es mir gerne in die Kommentare – ich freue mich auf den Austausch! Read the full article
0 notes
Text
NUVOTON CORTEX M0 MICROCONTROLLER – Powerful and Compact M031FB0AE
Compact yet powerful, the M031FB0AE features a Cortex-M0 core with 128 KB Flash and rich analog and communication interfaces. Designed for sensor hubs, motor control, and industrial automation, it delivers reliable performance with low power consumption in space-constrained applications.
0 notes
Note
what if for powder-ti you just stored everything in the framebuffer? i'm unfamiliar with the CE and i come at it from an assembly on TI-83/84 b+w perspective, but doesn't the lcd chip still need to be fed each pixel over a port? (i.e. it's not memory mapped, unlike the TI-89[citation needed]). (of course this would give up on stacked elements like are possible in TPT) in that case, you could scan through the entire screen and do physics and calculate the colors on the fly as you send the new frame. if you can double buffer it, even better (so you can avoid double updating any pixels that move along the raster line). is the full screen write time too slow? (i know the b+w lcd chip needs wait cycles between bytes, so some display routines only send the pixels that differ to avoid having to delay as much) from what i remember the CE's ez80 is pipelined 40MHz and the resolution is like 300x240 or something? so you'd have a little over 9 opcodes per sand to achieve 60 fps. oh. i see now. but still, 30 fps at half the linear resolution would get you 74 clocks per pixel average which is enough that you can actually almost do something. if i had to do it on the black and white ti84 i'd have only like max 4 elements and use a bit plane for each one and try to do as much as the update logic as possible with bitwise operations (and perhaps a few 256 byte luts) so that i can update 8 pixels at once. it'd still probably be slow though but one might be able to do deterministic water, sand, smoke, and metl + spark (or wwld) at 30 fps (almost 700 t-states per byte)
also, if you're targeting the newer ones that have circuitpython, you might be able to pull some shenanigans with the circuitpy coprocessor (which i think is an arm cortex m0, but, unlike stm32 micropython, circuitpython probably doesn't have a way to execute inline assembly)
ima go look at your structs now (also lmk if this unsolicited advice is undesired)
Thanks a ton! Any help is appreciated.
Honestly it's been a long while since I worked on the project, but I initially wrote it in C, which probably didn't really help in the performance department. I at some point tried making an assembly version, but gave up pretty early... I think I should re-explore that. I experimented with many different pipelines, some performing physics over a linked list, then rendering the grid separately, and another with calculating the position and rendering each grain on the same iteration. It ultimately came down to as you guessed simply being too many too expensive operations happen too often so it didn't work. But I'd bet I'd have a better shot if the crux of it was coded in ASM. Also, I'm not sure how data is fed to the LCD, I just kind of used the function calls that the ce toolchain provided, but I could look into lower-level syscalls to for even greater efficiency.
As for circuitpy, I'm not really sure how to interface with the processor, and even if I could, I'm not sure how fast I could pull data from it, last I heard it was throttled down to make up for the main processor's speed, but who knows. If you could send some pointers my way, it'd be much appreciated!
Once again, thanks for your help and shown interest :)
#ez80#zilog#powder-ti#are you mmrv or pink? if not; may I know your handle? Either way; my dms are always open :3
0 notes
Text
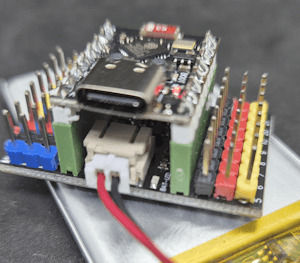
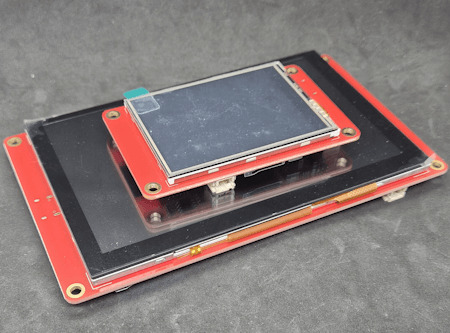
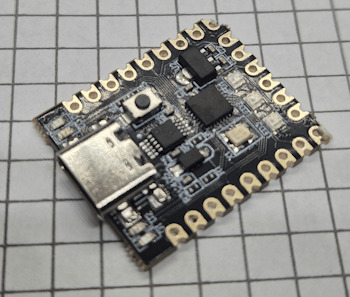
UHF Reader Based on Pico W & ESP32 with 50 Tags/Second Reading within 1.5 Meter Range

A UHF Reader (Ultra High Frequency Reader) is a device that is used to read and write data from UHF RFID tags within the 860MHz-960MHz frequency range. It is a multi tags 50 tags/second reading/writing device within 1-1.5 meter range designed with cutting edge UHF technology. It is a compact, portable and easy to use device.
The UHF reader has 2 variants: one is UHF Reader by Pico W and another is UHF Reader by ESP32. The Pico W variant comes with RP2040 microcontroller with Wi-Fi and BLE support. It is compatible with MicroPython, CircuitPython and Arduino for programming. ESP32 variant comes with ESP32 S3 series microcontroller and has 2.4GHz & Bluetooth 5 (LE) support. It is compatible with Arduino and Espressif IDE for programming.
Key Features and Specifications:
UHF Reader Pico Variant:

Powered by Raspberry Pi Pico W
RP2040 microcontroller dual-core Arm Cortex M0+ microprocessor with 264kB RAM
Supports Wi-Fi and BLE
1.14” TFT display for better visualization
Multi-tone buzzer for audio alerts
Micro USB Support for programming & Type C support for power
3 programmable buttons and Reset button
SD card slot for data storage/transfer
LED Status for power and battery charging
Multipurpose GPIOs breakout for interfacing external peripherals
SWD pins breakout for serial debugging
Supports MicroPython, CircuitPython, and Arduino for programming
UHF Reader ESP32 Variant:

Powered by ESP32 S3 WROOM-1
Dual-core 32 bit LX7 microprocessor with Up to 8 MB PSRAM and up to 16 MB flash memory
Supports 2.4GHz (802.11b/g/n) Wi-Fi and Bluetooth 5 (LE)
1.14” TFT display with ST7789 display driver
Comes with a Read and Write UHF module.
Frequency range of 865.1MHz-867.9MHz (for EU/UK) and 902.25MHz-927.75MHz (for US)
Can Identify 50 tags/second up to the 1.5-meter range.
TTL UART communication interface and communication baud rates 115200bps-38400bps
output power 18-26dBm and output power accuracy +/- 1dB
operation current 180mA at 3.5V (26 dBm Output), 110mA at 3.5V (18 dBm Output)
Multi-tone buzzer for audio alerts
2 user programmable buttons, Boot and Reset buttons
For power and programming support, the Type C Interface
SD Card slot for data transfer/storage
LED status for power and charging
Multipurpose GPIOs breakout for interfacing external peripherals
Supports Arduino and Espressif IDE for programming
By using ESP32 and RP2040, you can build a UHF RFID reader for scan tags and data tracking. This UHF Reader with ESP32 and Pico by SB Components is suitable for applications like warehouses, retail stores, and many other applications where you want to track your inventory data accurately.
#technology#innovation#tech#iot#rfid#uhf#uhf reader#arduino#espressif#iot applications#raspberry pi#rp2040#esp32#projects#programming#ultra high frequency reader#rfid tags#data tracking#electronics
1 note
·
View note
Text
Adafruit Playground Express
Diagram from Getting Started with Adafruit Playground Express:

It seems to have similar features to the micro:bit. However, it uses infrared to communicate rather than Bluetooth.
While it has LEDs, it does not have the display that the micro:bit does.
From the Adafruit Overview, it has:
10 x mini NeoPixels, each one can display any color
1 x Motion sensor (LIS3DH triple-axis accelerometer with tap detection, free-fall detection)
1 x Temperature sensor (thermistor)
1 x Light sensor (phototransistor). Can also act as a color sensor and pulse sensor.
1 x Sound sensor (MEMS microphone)
1 x Mini speaker with class D amplifier (7.5mm magnetic speaker/buzzer)
2 x Push buttons, labeled A and B
1 x Slide switch
Infrared receiver and transmitter - can receive and transmit any remote control codes, as well as send messages between Circuit Playground Expresses. Can also act as a proximity sensor.
8 x alligator-clip friendly input/output pins
Includes I2C, UART, 8 pins that can do analog inputs, multiple PWM output
7 pads can act as capacitive touch inputs and the 1 remaining is a true analog output
Green "ON" LED so you know its powered
Red "#13" LED for basic blinking
Reset button
ATSAMD21 ARM Cortex M0 Processor, running at 3.3V and 48MHz
2 MB of SPI Flash storage, used primarily with CircuitPython to store code and libraries.
MicroUSB port for programming and debugging
USB port can act like serial port, keyboard, mouse, joystick or MIDI
0 notes
Text
The several noteworthy features of LoRa-STM32WLE5 SOC module
SoC is short for System on Chip, which is an integrated chip that integrates all or most of the components of a computer or other electronic system. These components typically include a central processing unit (CPU), memory, input/output interfaces, and auxiliary storage interfaces.It integrates digital, analog, mixed-signal, and typically RF signal processing functionalities, depending on the application. The main difference between System-on-Chip (SoC) modules and LoRa modules lies in their functionalities and application scopes. SoC modules are highly integrated chips capable of executing complex computing and processing tasks, suitable for a wide range of embedded and consumer electronics applications. LoRa modules are specialized in low-power, long-distance wireless communication, primarily used in IoT applications such as remote monitoring and sensor networks. In summary, SoC module serves as a versatile computing platform, whereas a LoRa module focuses on wireless communication functionalities.

System-on-chip SOC applications
Since the SOC module is integrated on a single substrate, SoC modules consume significantly less power compared to equivalent multi-chip designs and occupy much smaller area. They can perform various functions, including signal processing, wireless communication, and artificial intelligence. SoCs are commonly used in embedded systems and IoT. with the rise of smart homes and connected devices, SoC technology has become essential in enabling these devices to communicate seamlessly. SoC technology enables these devices to process data quickly and accurately, making them more responsive and reliable.

Compared to SoC modules, LoRa communication modules require separate configuration of DPS or MCU for digital signal processing and storage, which increases their volume compared to SoC modules. However, LoRa modules benefit from unique LoRa modulation, offering advantages such as low power consumption and long-range transmission capabilities. These features make LoRa modules well-suited for sensor networks and remote data transmission applications.
Can SoC module also adopt LoRa modulation?
NiceRF Newly Launched LoRa-STM32WLE5 module ,whhich utilizes the STM32WLE5 chip from STMicroelectronics and integrates LoRa, (G)FSK, (G)MSK and BPSK modulation. The SOC module is equipped with a high-performance Arm Cortex-M4 32-bit RISC core, with an operating frequency of up to 48 MHz, and supports 256KB flash memory and 64KB RAM. At the same time, the module has a built-in industrial-grade crystal oscillator, which enables it to maintain a stable operating state in various working environments.
The earlier discussion mentioned that for LoRa communication modules to handle digital signal processing and data storage, a separate DSP or MCU is required, which increases module size. However, in the SOC module like the LoRa-STM32WLE5, the Arm Cortex-M4 32-bit core integrates a complete set of DSP instructions and an independent Memory Protection Unit (MPU). This integration enhances application security and significantly reduces module size.
The Features of STM32WLE Chip
The STM32WL5 micro-controller is based on Arm® Cortex®-M4 and Cortex®-M0+ cores running at a frequency of 48 MHz, along with Semtech's SX126x sub-GHz wireless technology. It supports an open platform with LoRa®, (G)FSK, (G)MSK, and BPSK modulations.
The STM32WL5 series adopts the development technologies similar to the ultra-low-power STM32L4 micro-controllers, offering comparable digital and analog peripherals. It is suitable for the wide range of simple or complex applications that require extended battery life and longer RF range using sub-GHz transceivers.
The STM32WL5 microcontroller complies with the physical layer requirements of the LoRaWAN® specification, which is published by the LoRa Alliance®.

The STM32WL5 series incorporates multiple communication features, including up to 43 GPIOs, integrated SMPS for optimized power consumption, and various low-power modes to maximize battery life. Dual power outputs and a wide linear frequency range ensure compatibility worldwide.
Overview of STM32WL5 Chip Features
Operating Environment: -40°C ~105°C
Frequency range150 -960 MHz
256KB Flash Memory, 64KB SRAM
True Random Number Generator (RNG), Hardware Encryption AES 256-bit
Sector Protection against Read/Write Operations (PCROP), Hardware Public Key Accelerator (KPA)
Efficient Embedded SMPS Buck Converter
SMPS to LDO Smart Switch
Low-Power BOR Power-On Reset
Ultra-Low-Power POR/PDR
Programmable Voltage Detector
For details, please click:https://www.nicerf.com/products/ Or click:https://nicerf.en.alibaba.com/productlist.html?spm=a2700.shop_index.88.4.1fec2b006JKUsd For consultation, please contact NiceRF (Email: [email protected]).
0 notes
Text
10 Exciting RP2040 Project Ideas
The Raspberry Pi Pico, powered by the RP2040 microcontroller, has taken the maker community by storm with its affordability and versatility. If you're looking for some exciting project ideas to try with your RP2040, you're in the right place! In this article, we'll explore 10 innovative projects that showcase the capabilities of the RP2040 and inspire your next creation.
Introduction
The RP2040 is a powerful microcontroller that can be used in a wide range of projects, from simple LED blinkers to complex IoT devices. Its dual-core ARM Cortex-M0+ processor and generous amount of RAM make it ideal for multitasking and handling various tasks simultaneously. Let's dive into some exciting project ideas to unleash the full potential of the RP2040.
1. Blinking LED
A classic project for beginners, the blinking LED demonstrates the basic functionality of the RP2040. By controlling the GPIO pins, you can make an LED blink at different rates, creating various patterns and effects.
2. Temperature Monitoring System
Use the RP2040's ADC to read temperature values from a sensor and display them on an LCD screen. You can also set up alerts to notify you when the temperature exceeds a certain threshold.
3. Motion-Activated Camera
Create a motion-activated camera using the RP2040 and a camera module. The RP2040 can detect motion using a PIR sensor and trigger the camera to capture images or videos.
4. Smart Weather Station
Build a weather station that collects data such as temperature, humidity, and air pressure using sensors. Display the data on an OLED screen and upload it to a cloud service for remote monitoring.
5. Home Automation System
Control lights, appliances, and other devices in your home using the RP2040 and relays. You can create a mobile app or a web interface to control the system remotely.
6. Game Console Emulator
Turn your RP2040 into a retro game console emulator by installing emulators for classic gaming consoles. Use the GPIO pins to connect controllers and play your favorite games.
7. MIDI Controller
Build a MIDI controller using the RP2040 and potentiometers, buttons, and sliders. Use it to control music software or hardware synthesizers.
8. Internet Radio
Create an internet radio player using the RP2040 and a Wi-Fi module. Stream music from online radio stations and control playback using buttons or a web interface.
9. AI Voice Assistant
Build an AI voice assistant using the RP2040 and a microphone. Use services like Google Assistant or Alexa to control smart devices, play music, and answer questions.
10. Conclusion
The RP2040 opens up a world of possibilities for makers and hobbyists. With its powerful features and affordable price, it's the perfect platform for experimenting with electronics and programming. Whether you're a beginner or an experienced maker, these project ideas will help you get started with the RP2040 and unleash your creativity.
0 notes
Text
The BL370 series is powered by the industrial-grade Rockchip RK3562/RK3562J processor, featuring a multi-core heterogeneous architecture with a quad-core ARM Cortex-A53 and a single-core ARM Cortex-M0, clocked at up to 1.8GHz/2.0GHz. It offers a robust solution with 4GB LPDDR4X RAM and 32GB eMMC storage, along with a rich set of I/O interfaces. The built-in 1 TOPS NPU supports deep learning capabilities, making it ideal for AI-driven applications.

Key Features:
High Reliability and Cost-Effectiveness: The BL370 series is widely used in industrial control, edge computing, AIoT, artificial intelligence, communication management, AGV robots, machine vision, robotics, industrial IoT gateways, energy storage systems, automation control, and rail transportation.
Versatile Connectivity:
Data Acquisition and Control: Supports communication, PWM output, pulse counting, and more.
Video Processing: Capable of 1080P@60fps H.264 encoding and 4K@30fps H.265 decoding.
Wireless Communication: Built-in Mini PCIe interface supports Bluetooth, WiFi, 4G, and 5G modules.
Software and Development Support:
Operating Systems: Linux-5.10.198, Linux-RT-5.10.198, Ubuntu 20.04, Debian 11 (planned), Android 13 (planned).
Development Tools: Docker containers, Node-RED, and Qt-5.15.2 for GUI development.
Industrial Software:
Robust Design for Harsh Environments:
The BL370 series has undergone professional electrical performance design and high/low-temperature testing, ensuring stable operation in extreme conditions with temperatures ranging from -40°C to 85°C and resistance to electromagnetic interference. Its DIN35 rail mounting makes it suitable for various industrial applications.
Typical Application Areas:
Industrial Control
Energy Storage Systems (EMS/BMS)
AIoT and Artificial Intelligence
Smart Manufacturing
Communication Management
AGV Robots
Machine Vision
Edge Computing
Motion Control
Robotics
Rail Transportation
Smart Devices
The BL370 series combines high performance, reliability, and versatility, making it an ideal solution for demanding industrial and IoT applications.
0 notes
Text
0 notes
Text
RP3250 is the second generation of the Pi Pico 2040, the Raspberry Pi team's MCU to compete with the Cortex M0 through M4.
You can already purchase RPi's version on a stick board. Adafruit's wonderful Metro line will now bring this chip to the larger Arduino board format along with general support for many existing shields. This makes it easier to run male-headed wires across to other devices and integrate.new features into decade-plus-old projects.

Metro RP2350 take 5 🔄🌟🤞
Sometimes mistakes are made in prototyping; that's why they're prototypes. The error in rev D was funny: while making the QFN80 footprint, the pins got placed clockwise rather than widdershins. Not surprisingly, that board didn't come up at all, so here's a full rip-up and reroute, with the correct pinout this time! Fingers crossed. Hopefully, this is the final revision, and we can move on to other RP2350 boards we have cooking.
187 notes
·
View notes