#Create Bootable USB
Explore tagged Tumblr posts
Visit Tumblr Blog
Explore Tumblr blogs with no restrictions, modern design and the best experience.
Last Seen Tumblr Blogs


Fun Fact
Forty percent of Tumblr users are between the ages of 18 to 25.
Text
Create a bootable USB on Mac: Proxmox VE Setup
#bootable#Bootable USB drive#Burn ISO#Create a Bootable WinPE Media#Create Bootable USB#Create Proxmox VE Cluster#FLASH#Flash ISO to USB#Install Proxmox#proxmox#Proxmox Server#Proxmox VE#Proxmox VE kernel#Proxmox Virtual Environment
1 note
·
View note
Text
Ventoy for Windows
In today’s fast-paced tech world, having a bootable USB drive is essential for software installation, system recovery, and troubleshooting. Traditionally, creating a bootable USB required formatting the drive and using dedicated software to burn an ISO file onto it. However, with the arrival of Ventoy, this process has become simpler, faster, and more flexible. Ventoy is a free and open-source…
#boot multiple iso usb#create bootable usb without formatting#download ventoy#ventoy#ventoy bootable usb#ventoy download#ventoy usb
0 notes
Link
Mastering the Art of Creating a Bootable USB for Windows 10 Creating a bootable USB for Windows 10 is a crucial skill that every computer user should master. Whether you need to install a fresh copy of Windows 10, troubleshoot your system, or recover data from a non-booting computer, having a bootable USB can be a lifesaver. In this article, we will guide you through the process of creating a bootable USB for Windows 10, using different methods, and provide essential tips for success. [caption id="attachment_63124" align="aligncenter" width="1280"] windows 10 creates bootable USB[/caption] Understanding Bootable USBs A bootable USB is a USB drive that contains the necessary files and software to start up a computer. Unlike regular USB drives used for data storage, a bootable USB is specifically designed to help you install or repair an operating system. It acts as a portable installation medium, allowing you to boot your computer from the USB drive and initiate the installation process. When it comes to Windows 10, having a bootable USB offers several advantages. Firstly, it allows you to perform a clean installation of Windows 10 without the need for a DVD drive. Additionally, it enables you to quickly recover your system if it becomes unbootable or encounters critical errors. Moreover, a bootable USB provides a convenient way to install Windows 10 on multiple devices, saving time and effort. Preparing for the Process Before you dive into creating a bootable USB for Windows 10, there are a few essential steps to take. Firstly, ensure that your computer meets the system requirements for Windows 10 installation. Check the minimum hardware specifications, such as processor speed, RAM, and disk space, to ensure compatibility. Next, gather the necessary tools and resources. You will need a USB drive with sufficient storage capacity (at least 8GB) and a working Windows 10 ISO file. The ISO file contains all the files required for the installation. You can download the Windows 10 ISO file directly from the Microsoft website or obtain it through other legitimate sources. Once you have the required tools, familiarize yourself with the different methods available to create a bootable USB for Windows 10. The two most popular methods are using the Windows Media Creation Tool and using Rufus, a third-party software. Additionally, advanced users can also create a bootable USB using PowerShell. Understanding these methods will help you choose the most suitable one for your needs and expertise. Using the Windows Media Creation Tool If you prefer a user-friendly and straightforward approach, the Windows Media Creation Tool is an excellent option for creating a bootable USB for Windows 10. Follow these step-by-step instructions: Download and install the Windows Media Creation Tool from the official Microsoft website. Launch the tool and accept the license terms. Select the "Create installation media (USB flash drive, DVD, or ISO file) for another PC" option and click "Next". Choose the desired language, edition, and architecture (32-bit or 64-bit) for Windows 10. Select the "USB flash drive" option and click "Next". Connect the USB drive to your computer and select it from the list. Make sure it has enough space for the Windows 10 files. Click "Next" and wait for the tool to download the necessary files and create the bootable USB. Once the process is complete, safely eject the USB drive from your computer. It is important to note that the Windows Media Creation Tool requires a stable internet connection to download the Windows 10 files. Additionally, make sure you have selected the correct language, edition, and architecture to match your requirements. If you encounter any issues during the process, refer to the troubleshooting section in the official Microsoft documentation or seek assistance from online forums and communities. Using Rufus If you prefer more control and flexibility, Rufus is a popular third-party tool for creating bootable USB drives. Follow these steps to create a bootable USB using Rufus: Download and install Rufus from the official website (available for Windows). Launch Rufus and insert the USB drive you want to use. In the Rufus interface, select the USB drive from the "Device" dropdown menu. Under the "Boot selection" section, click the "Select" button and browse to the location where you have the Windows 10 ISO file. Ensure that the "Partition scheme" is set to "MBR" (for BIOS or UEFI-CSM) or "GPT" (for UEFI only). Choose the "File system" as "NTFS" and leave the "Cluster size" as default. Enter a name for the USB drive in the "Volume label" field. Check the "Quick format" and "Create a bootable disk using" options. From the dropdown menu next to it, select "ISO image" and click the small disk icon to browse and select the Windows 10 ISO file. Finally, click the "Start" button to begin the process. Rufus will format the USB drive and copy the Windows 10 files onto it. Rufus offers more customization options, such as the ability to create a bootable USB for different operating systems and file systems. However, be cautious when using Rufus, as improper settings or selecting the wrong options can lead to data loss or other issues. Always double-check your selections before proceeding. Using PowerShell For advanced users who prefer a command-line approach, PowerShell provides a powerful method to create a bootable USB for Windows 10. Follow these steps: Open PowerShell as an administrator. You can do this by right-clicking on the Start button and selecting "Windows PowerShell (Admin)". Connect the USB drive to your computer. Type the following command: diskpart and press Enter. This will open the DiskPart utility. Type list disk and press Enter. This will display a list of available disks on your computer. Identify the disk number associated with your USB drive. Be careful to choose the correct disk, as selecting the wrong one can result in data loss. Type select disk X (replace X with the disk number of your USB drive) and press Enter. Type clean and press Enter. This will remove all existing partitions and data on the USB drive. Type
0 notes
Text
If you don’t like Windows 10, Windows 11, or other mainstream desktop operating systems for whatever reason, consider using linux. It isn’t as hard as you think.
I switched from Windows 10 to Linux Mint a few months ago, and it went pretty smoothly for me.
Linux has a reputation for being difficult to use, and while it is somewhat deserved, it is quite overblown.
For myself, I think the hardest part of switching was installing Linux on my device. It required me to learn some new software and took about 3 hours on my first try. After setting up my laptop, it was pretty easy. The user interface took a few days to adjust to, and I fiddled around with some settings to my preference, but it was not difficult to adjust from Windows 10 to Linux Mint.
And if you can get someone else to install linux for you, all you need to do it get used to some user interface changes!
INSTALLING LINUX ON YOUR COMPUTER
Here’s an installation guide for Linux Mint if you want more detail than what I give. Link: https://linuxmint-installation-guide.readthedocs.io/en/latest/
You will need: a laptop or desktop, a USB stick, and USB writing software.
Download a linux ISO file. An ISO file is all the data used to install an operating system onto a computer.
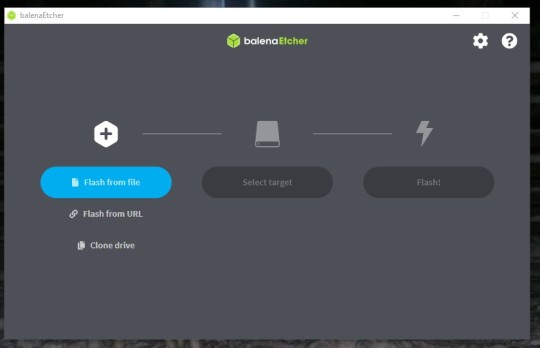
Then you will need to download a USB writing program. Then you can use USB writing software to put the ISO file onto a USB drive. This will create the “bootable media” which will be used to install linux onto your computer. For installing Linux Mint on my device, I used Balena Etcher to write the ISO file.

64 notes
·
View notes
Note
If you're looking for a basic Linux version that's easy to adapt to, Ubuntu is probably the most basic recommendation. There's a tutorial for creating a bootable USB (https://ubuntu.com/tutorials/create-a-usb-stick-on-windows) if you want to try it out without putting it onto your computer permanently, and then you can install it later if you want to
I acutally have an old ass laptop that I don't use anymore my plan is to use that to experiment with booting and trouble shooting Linux before I take it to my main system.
Thanks for the help, that goes for everyone who's taken the time to hand me so many different resources and narrowed down my options to either Ubuntu or Mint
27 notes
·
View notes
Note
do you have any Linux advice for someone Linux-curious? i have a copy of Ubuntu downloaded but have been hesitant to bite the bullet on it
Having a reason to switch to do something is generally the only way I'll make a major change. In this case, my laptop was dying, so it was the ideal time to break from Windows. If you're just curious, I would make a bootable USB and play around with the OS, see how it feels.
My experience is that the transition was fine. I think I'm a little more tenacious than most, so I may have forgotten the more painful parts, but thus far I think it's been worthwhile.
Advice if you go through with it
If you choose linux mint, it will offer the option to dual boot with Windows. I wanted to jump right in, so I said no. If I could do it again, I would dual boot. It's good to have a backup.
Replace libreoffice with OnlyOffice
Download Gnome Tweaks, Gnome Extensions, Caffiene extension, and either Dash to Dock or Dash to Panel for basic QoL improvements
when you install stuff, it generally doesn't show up in your list of applications. Usually rebooting fixes this.
Understand that it can take a while to grasp whether something is doable or not because Linux users struggle with understanding where new users are coming from. Sometimes "of course it's possible to do x" means "It's possible to do x but it will take you days to implement what is ultimately an inferior version of what you were asking for."
on that note, if you plan to use photoshop regularly, leave a partition for Windows. Yes, it's ostensibly possible to make photoshop work on linux through methods x, y, and z, but you'll sink a lot of time into creating an unstable, less less functional variant. Or try Krita.
make anki cards or print out a list of the more common commands, the kind of stuff they put on linux command mouse pads. Or get a linux command mouse pad.

^probably would have had a smoother install if I'd remembered I had this rolled up not three feet away from me
19 notes
·
View notes
Text
Just hear me out...
So, Edge, CoPilot, and worst of all, Recall are just terrible for a large number of reasons - namely privacy and security. We're in a time period where this is just going to get worse and worse that any number of precautions just aren't going to cut it because the people who are doing this to you aren't some random bad actor trying to hack your system. It's a specific bad actor that made the system FOR YOU. And that just about sucks any way you try to cut it.
There are some things you can do - but you might not like it:
Believe it or not, the absolute easiest solution is switching to Linux.
BUT WAIT! DON'T STOP READING JUST YET!
Hear me out. I get it, we grew up on MS Windows and a lot of us are on Apple systems too (which are also riddled with AI garbage), but Linux isn't what it used to be, even a decade ago. And yes, there's like a billion different distributions out there, how do you even choose, right? Let me tell you, even linux users are annoyed by it too. But, linux CAN give you a lot of the same things windows and mac can without the AI and spyware bullshit and the different distributions aren't really that different - it's really just a lot of engineers going, "well this is good, but this is how I WOULD DO IT," and still be able to use the same packages.
Here's how I'd recommend approaching linux without having to throw your os in a garbage fire:
grab a popular distribution of Linux - I recommend Linux Mint (it's pretty user friendly) - read through this: https://linuxmint-installation-guide.readthedocs.io/en/latest/choose.html#
get an empty USB stick (preferably around 64 gigs just to have the space, but you can get away with something much smaller) and create a bootable image with it
Restart your pc with the usb stick in - You can now run linux - for free (always free) - off the usb stick without affecting anything else. You can install stuff, mess around, play with it, yadda yadda.
So yes, there will also be a learning curve with it too. It's linux, it's new, it's different. But once you get your feet wet, you'll start seeing windows as super clunky and bloated.
If you don't want to do THAT, you can also try linux through your browser: Read through this article:
Basically it's a virtual machine that you can play with, but it's a little restricted sooo probably not the most accurate experience, but something to still play with. You can also learn a lot from this site as well:
BUT IF YOU DON'T WANT TO DO ANY OF THAT AND RATHER STAY ON WINDOWS (sorry not a mac user so I can't really think of solutions for mac users)
The alternative is really messing with registry keys and blocking ports that Copilot and Recall use through the firewall which can greatly mess up your PC if you don't know what you're doing.
Did i mention linux is free and it has a MASSIVE community for support?
Anyway - EITHER WAY YOU CHOOSE - we ALL need to start being a little more tech savvy. Things are going to get worse and if we're blind to it, we're walking to our doom willingly.
Just a side note: This doesn't mean linux is like the most secure thing in the world - you still need an antivirus and set up firewalls and be diligent about malware and privacy and such. Like, that's still a 'you' responsibility no matter what operating system you use. So keep that in mind
11 notes
·
View notes
Text
17 notes
·
View notes
Text


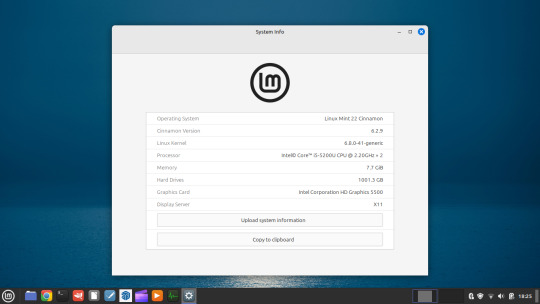
07.05.25
I tried out two Linux distributions on my test laptop today.
Before I started the task, I updated Linux Mint Cinnamon with the update manager to receive the latest updates for the system and installed apps.
I can also use the terminal to update everything by typing the APT command 'sudo apt-get update'.
'sudo' elevates root (admin) privileges, 'apt-get' receives the packages needed and 'update' checks for updates. I then type 'sudo apt-get upgrade' and press enter to upgrade all the applications and the system.
System up to date!
Firstly, I downloaded Debian from: https://www.debian.org/distrib/
I chose the Debian Live MATE desktop environment.
I then went to download Linux Mint from: https://linuxmint.com/download.php
I chose the Mint MATE Edition desktop environment.
Debian MATE was 3.1 Giga-Bytes and Linux Mint MATE was 2.9 Giga-Bytes to download.
Once they had downloaded, I located them in Downloads and opened the built in USB writer application.
I wrote the ISO files to the sticks to create two bootable USB sticks.
After this step I booted Debian 12 MATE.
I selected 'try' on the boot menu screen.
Here it is in action! I played around with the user interface and tested the sound, which worked brilliantly!
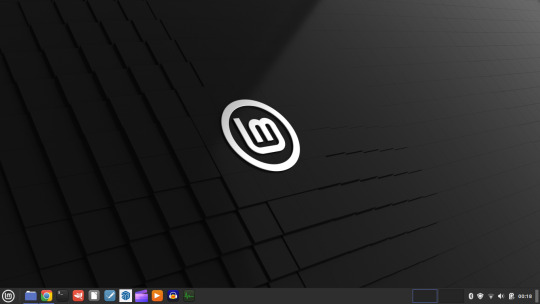
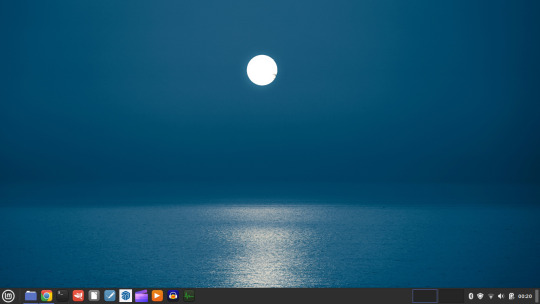
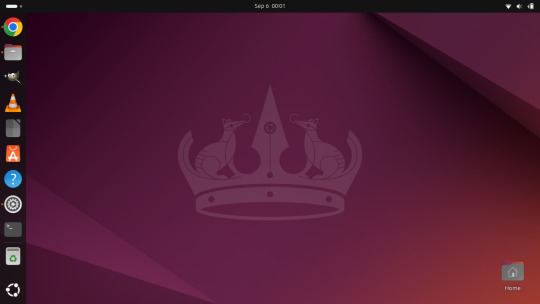
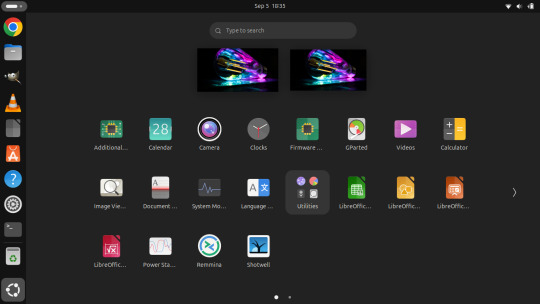
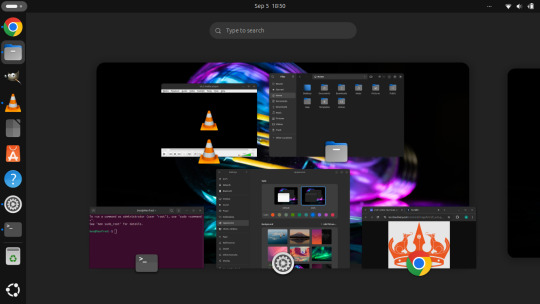
Next, I booted Linux Mint 22.1 MATE.
Again, I selected 'try' to boot up the live environment.
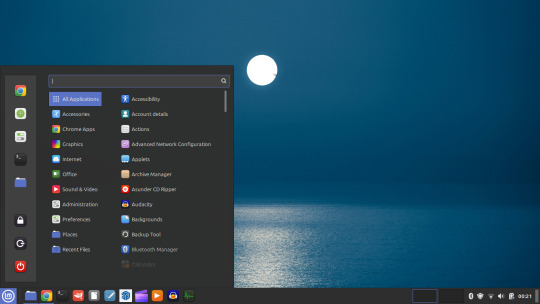
Here it is in action! Again I tested the sound, played a YouTube video in Firefox and customised the panels and themes.
Both MATE desktops in both distros were very interesting and seemed even snappier when compared to the operating systems I have installed on this laptop, which are Linux Mint 22.1 Cinnamon and Ubuntu 24.04!
I found Debian with the MATE desktop to be the most stable environment however.
See blog below to learn more about the modern take on the classic GNOME 2 experience!
4 notes
·
View notes
Text
Installing Kali Linux on a USB Stick: A Step-by-Step Guide
If you want a portable, powerful cybersecurity toolkit you can carry in your pocket, installing Kali Linux on a USB stick is the perfect solution. With Kali on a USB, you can boot into your personalized hacking environment on almost any computer without leaving a trace — making it a favorite setup for ethical hackers, penetration testers, and cybersecurity enthusiasts.

In this guide, we'll walk you through how to install Kali Linux onto a USB drive — step-by-step — so you can have a portable Kali environment ready wherever you go.
Why Install Kali Linux on a USB?
Before we dive into the steps, here’s why you might want a Kali USB:
Portability: Carry your entire hacking setup with you.
Privacy: No need to install anything on the host machine.
Persistence: Save your settings, files, and tools even after rebooting.
Flexibility: Boot into Kali on any system that allows USB boot.
There are two main ways to use Kali on a USB:
Live USB: Runs Kali temporarily without saving changes after reboot.
Persistent USB: Saves your files and system changes across reboots.
In this article, we’ll focus on setting up a Live USB, and I'll also mention how to add persistence if you want. and if you seek knowledge about kali linux you can visit our website any time
Website Name : Linux Tools Guide
What You’ll Need
✅ A USB drive (at least 8GB; 16GB or more recommended if you want persistence). ✅ Kali Linux ISO file (download it from the official Kali website). ✅ Rufus (for Windows) or Etcher/balenaEtcher (for Mac/Linux/Windows). ✅ A computer that can boot from USB.
Step 1: Download the Kali Linux ISO
Go to the Kali Linux Downloads page and grab the latest version of the ISO. You can choose between the full version or a lightweight version depending on your USB size and system requirements.
Tip: Always verify the checksum of the ISO to ensure it hasn't been tampered with!
Step 2: Insert Your USB Drive
Plug your USB stick into your computer. ⚠️ Warning: Installing Kali onto the USB will erase all existing data on it. Backup anything important first!
Step 3: Create a Bootable Kali Linux USB
Depending on your operating system, the tool you use may vary:
For Windows Users (using Rufus):
Download and open Rufus (Get Rufus here).
Select your USB drive under Device.
Under Boot selection, choose the Kali Linux ISO you downloaded.
Keep the Partition scheme as MBR (for BIOS) or GPT (for UEFI) based on your system.
Click Start and wait for the process to complete.
For Mac/Linux Users (using balenaEtcher):
Download and open balenaEtcher (Get Etcher here).
Select the Kali ISO.
Select the USB drive.
Click Flash and wait until it's done.
That's it! You now have a Live Kali USB ready.
Step 4: Boot Kali Linux from the USB
Restart your computer with the USB plugged in.
Enter the BIOS/UEFI settings (usually by pressing a key like F12, Esc, Del, or F2 right after starting the computer).
Change the boot order to boot from the USB first.
Save changes and reboot.
You should now see the Kali Linux boot menu! Select "Live (amd64)" to start Kali without installation.
(Optional) Step 5: Adding Persistence
Persistence allows you to save files, system changes, or even installed tools across reboots — super useful for real-world usage.
Setting up persistence requires creating an extra partition on the USB and tweaking a few settings. Here's a quick overview:
Create a second partition labeled persistence.
Format it as ext4.
Mount it and create a file /persistence.conf inside it with the content: cppCopyEdit/ union
When booting Kali, choose the "Live USB Persistence" option.
Persistence is a little more technical but absolutely worth it if you want a real working Kali USB system!
Troubleshooting Common Issues
USB not showing up in boot menu?
Make sure Secure Boot is disabled in BIOS.
Ensure the USB was properly written (try writing it again if necessary).
Kali not booting properly?
Verify the ISO file integrity.
Try a different USB port (preferably USB 2.0 instead of 3.0 sometimes).
Persistence not working?
Double-check the /persistence.conf file and make sure it's correctly placed.
Conclusion
Installing Kali Linux onto a USB stick is one of the smartest ways to carry a secure, full-featured hacking lab with you anywhere. Whether you’re practicing ethical hacking, doing security audits, or just exploring the world of cybersecurity, a Kali USB drive gives you power, portability, and flexibility all at once.
Once you’re set up, the possibilities are endless — happy hacking! 🔥
2 notes
·
View notes
Text
Create Multiboot OS ISO files on a single bootable USB Disk
Learn how to use WinSetupFromUSB to create multiboot OS ISO files
Create Multiboot OS ISO files on a single bootable USB Disk If you’re tired of juggling multiple USBs for different operating systems, WinSetupFromUSB might be exactly what you need. With it, you can create a USB stick loaded with several ISO bootable images—Windows, Linux, or even utilities—all on a single drive. This guide covers how to set it up, comparisons to other similar tools, and tips…
#Bootable USB drive#Create Bootable USB#Microsoft Windows#USB#USB Disk#USB Drive#Windows#Windows 10#Windows 11#Windows Server
0 notes
Text
I switched to Linux
Eight days ago I finally switched to Linux full time.
I've been a dabbler with Linux for near on 25 years, about as long as I've had access to a home computer. My first experiences of Linux came from Linux ISO's bundled on Computer Shopper magazine (and other similar styled magazines) demo discs; and about 5 years ago I started running Linux as a desktop on at least one computer fairly regularly. But I always used Windows on my main system.
As of eight days ago now, that is no longer the case. The only trace of Windows I will have now is if I ever have to run a virtual machine.
The reasons for the switch are many, but they boil down to three main reasons: 1. Issues with Windows itself; 2. Being tired of Microsoft's bullshit; and 3. No longer trusting Microsoft given the current political climate.
1. Issues with Windows. Windows is slow. I have a pretty powerful computer, it has a fast processor (a Ryzen 6800h), 32Gb of RAM, and two NVME SSDs. It therefore shouldn't take 30 seconds for an explorer window to open, just because I have the audacity to have an optical drive (at least I think that's the reason for the delay); it shouldn't take dozens of seconds for a folder of a hundred images to respond to me creating a new folder and then another dozen seconds after dragging some images into it; I shouldn't need to keep on disabling shit I don't want every time Windows wants to do an update, nor should I have shit installed on my system that I don't even know about until I visit my start menu. In short a lot of issues I have are, for the most part, pretty well known, and I'm tired of it.
2. Microsoft's Bullshit. You know what people really love. Being tracked. People really love AI being shoehorned into their computers. They also love their perfectly functional machines becoming unsupported in October this year (yeah just to remind you, Windows 10 support is ending October 2025). There are ways of mitigating a lot of this stuff. It's possible to disable the tracking and AI, and it's possible to build a Windows 11 bootable USB without the restrictions (and also with out the tracking and AI too). But I shouldn't have to do that. And honestly even doing that, there was always the nag in the back of my mind asking if I actually had closed all the doors.
Points 1 and 2 on their own, while compelling reasons for me to make the switch, were never quite enough for me to take that final step. The effort in actually committing was just a fraction more than staying. But point 3 pushed me over
3. Lack of Trust in Microsoft. The current political climate (aka President Elon and King Trumps new and hopefully (literally) short lived dynasty) is, uh, not ideal let's just say. Big companies are already folding on various inclusivity policies; even though the current Executive Orders are essentially just suggestions. They are for all intents, covering their arses in an effort to protect themselves from their new dictators. But that also means that any big company in America simply can't be trusted any more. Would Microsoft say no if they are ordered to give Elon and his goons a back door into anyone's computer?
I don't think, in reality Microsoft would actually do that, and I doubt they'd even be asked, as that'd be an own goal for Elon and Trump that I'd hope a lot of republicans would be upset by. But the possibility remains. I don't know, I realise this sounds a bit conspiracy theory; and it sort of is. But the simple fact is that with rising Fascism in the US among politics and business bowing to it, I can't ignore that possibility.
So, finally I switched.
I'm currently running Linux Mint 22.1, and honestly it's been a pretty painless experience. I knew already that basic stuff like web browsing is already a solved problem in Linux, so I knew I'd have no issues with that, but I've also got nearly all the software I used on Windows running too (I even compiled my first piece of software, MakeMKV, and it works). The only exception is Affinity Photo, but I can spin up a Windows VM for that until I can figure out how to run it in Bottles.
Would I recommend everyone switch to Linux. No I don't. As mentioned, I've been a dabbler in Linux for over 25 years, so I've long gotten used to it. I've also had a long time to prepare for it. For example with exception to Affinity and MakeMKV all the software I routinely use is Free and/or Open Source and thus already has native Linux versions. I also don't make money from working on my computer and I mostly play indie games that tend to have good Linux support too. In addition, I enjoy actively working to get my computer to do stuff; it actually feels a bit nostalgic for me to a time when I had a 486 computer with a stack of demo discs and playing the first few levels of Quake 2 at like 7 frames a second, and thinking it was awesome. Linux is by far not nearly that bad, but I feel like I'm actually using my computer, and not merely a device that lets me go on the internet and play games.
If you're all those things, then a switch to Linux might be something you should consider, and either way I'll probably be writing updates on a fairly frequent basis (I plan monthly), at least as long as I have something interesting to report.
2 notes
·
View notes
Text
Helped a friend install Windows last night and the experience was comical.
Making the install media was irritating; I wanted to download an ISO and flash a USB with it, as I've done with a half dozen linux distros dozens of times. That kept failing for whatever reason, once because there wasn't a boot partition?? on the drive yet, and like. That's what flashing the drive is for. It's to make bootable media. But ok fine we can just use the "create install media" tool windows provides.
Then, for some baffling reason, the install media didn't include audio? or wifi?? drivers??? Keep in mind that windows by default will not let you install without an internet connection. Their latest OS install tool will not give you the tools to connect to the internet, and won't let you install without the internet.
Luckily the OOBE\BYPASSNRO thing still works (unclear why, I've heard people saying it doesn't anymore; maybe they were just barely smart enough to realize that there should be a way to install without networking IF THERE'S NO FUCKING NETWORKING DRIVERS), so we were able to finish the install eventually, download the drivers on a network connected laptop and get things working.
Legitimately just faster and a better experience installing any user facing linux distro. Mint, Ubuntu, Pop!OS, whatever. At least, when I fucked up my arch install, it was because I forgot to include the wifi drivers, not because they were literally unavailable.
2 notes
·
View notes
Text
Adobe has no fix yet for the issue with gif previews in photoshop with macOS 14 Sonoma and so I’ve spent literally all day trying to downgrade back to Ventura which Apple makes it very difficult to do. I’m finally in the home stretch and hoping that once it’s done the bug is gone. 🤞 At which point I will go back to almost never updating my shit. The one time I decided to update and it broke a bunch of stuff and Adobe is dragging their feet on resolving the issue. 😩
After backing up my computer, creating a bootable installer of Ventura on a USB flash drive (I had to go buy a fucking USB because I haven’t had to use one in like 5 years???), formatting my drive completely, and then installed Ventura from the USB—I’m now restoring my files. There’s so many other hoops and trial/error shit I had to deal with but this is the short version (yeah, THIS is the short version.) and if this doesn’t work I will lose it


EDIT: IT WORKED 😭
4 notes
·
View notes
Text
If you want to try out a Linux distribution to see if you like it before committing to installing it permanently, you can run it from that 16GB USB drive OP mentioned earlier
When you create a Linux installation USB, it has the option to be a "bootable drive", which lets you run Linux on the USB drive without affecting anything on the PC you plugged it into
This tutorial is for Ubuntu, the most common desktop version of Linux, but it'll work for any distribution of Linux - just download the .iso file of whichever one you'd like to try!
https://ubuntu.com/tutorials/install-ubuntu-desktop#1-overview
Here are the links to Linux Mint, Xubuntu, and Kubuntu (the version I use):
https://www.linuxmint.com/download.php
(by default Ubuntu uses the Gnome desktop environment. Xubuntu uses XFCE, and Kubuntu uses KDE instead. Under the hood they all work the same, the only difference is their appearance. Linux Mint uses Cinnamon and is slightly different, but is still based on Ubuntu.)
I don't think people realize how absolutely wild Linux is.
Here we have an Operating system that now has 100 different varieties, all of them with their own little features and markets that are also so customizable that you can literally choose what desktop environment you want. Alongside that it is the OS of choice for Supercomputers, most Web servers, and even tiny little toy computers that hackers and gadget makers use. It is the Operating System running on most of the world's smartphones. That's right. Android is a version of Linux.
It can run on literally anything up to and including a potato, and as of now desktop Linux Distros like Ubuntu and Mint are so easily to use and user friendly that technological novices can use them. This Operating system has had App stores since the 90s.
Oh, and what's more, this operating system was fuckin' built by volunteers and users alongside businesses and universities because they needed an all purpose operating system so they built one themselves and released it for free. If you know how to, you can add to this.
Oh, and it's founder wasn't some corporate hotshot. It's an introverted Swedish-speaking Finn who, while he was a student, started making his own Operating system after playing around with someone else's OS. He was going to call it Freax but the guy he got server space from named the folder of his project "Linux" (Linus Unix) and the name stuck. He operates this project from his Home office which is painted in a colour used in asylums. Man's so fucking introverted he developed the world's biggest code repo, Git, so he didn't have to deal with drama and email.
Steam adopted it meaning a LOT of games now natively run in Linux and what cannot be run natively can be adapted to run. It's now the OS used on their consoles (Steam Deck) and to this, a lot of people have found games run better on Linux than on Windows. More computers run Steam on Linux than MacOS.
On top of that the Arctic World Archive (basically the Svalbard Seed bank, but for Data) have this OS saved in their databanks so if the world ends the survivors are going to be using it.
On top of this? It's Free! No "Freemium" bullshit, no "pay to unlock" shit, no licenses, no tracking or data harvesting. If you have an old laptop that still works and a 16GB USB drive, you can go get it and install it and have a functioning computer because it uses less fucking resources than Windows. Got a shit PC? Linux Mint XFCE or Xubuntu is lightweight af. This shit is stopping eWaste.
What's more, it doesn't even scrimp on style. KDE, XFCE, Gnome, Cinnamon, all look pretty and are functional and there's even a load of people who try make their installs look pretty AF as a hobby called "ricing" with a subreddit (/r/unixporn) dedicated to it.
Linux is fucking wild.
#I switched to Linux after microsoft dropped support for windows 7 and I've never looked back#This is your sign to give Linux a go
11K notes
·
View notes
Text

05.09.24
Linux laptop project 2024.
I decided to upgrade my old laptop by making it a Linux dual boot system. I had never done this before. I downloaded the ISO files for Linux Mint 22 'Wilma' and Ubuntu 24.04.1 'Noble Numbat' LTS.
The selected files include the standard desktop environments for each, Cinnamon, for Linux Mint and GNOME for Ubuntu.
Then using the built in USB disk creator on Linux Mint, I created bootable USBs, one for Linux Mint and one for Ubuntu. I decided to install Linux Mint first. The installation includes creating partitions and I used the installation partition creator to create a 25 Giga-byte partition in which I installed Linux Mint. The installation went ahead smoothly, and when it completed, I booted up Linux Mint. It looked perfect.
See screenshots below.


I then installed GParted, which is a more powerful partition manager to create the additional partitions I needed. I created a 25 Giga-byte partition for Ubuntu, two other 25 Giga-byte partitions and I hundred Giga-byte data partition formatting them all using ext4.
I then installed Ubuntu. During the installation, I selected the extended install, rather than the minimal install, so I had a full Ubuntu desktop installation on the second partition on my laptop hard drive. This all went well and at the end of it all I had a system which could boot either Linux Mint or Ubuntu.


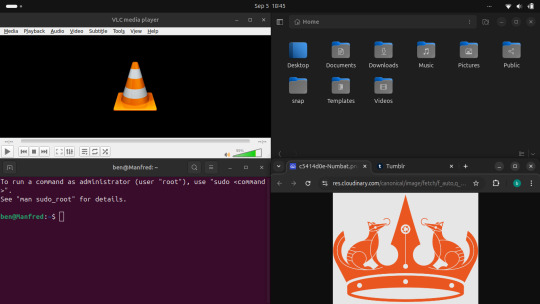
After installation, I booted each system up individually and updated them with the latest updates available, and then I installed necessary software that I wanted such as the Google Chrome Browser, Audacity, VLC Media Player, GIMP, Asunder CD ripper.
I also reinstalled the Chrome web apps for Microsoft Clipchamp and Trimble SketchUp web.
The majority of software bundled on these Linux distros is already preinstalled. I then had fun tweaking each install and making them look how I wanted.
Here is a list of some of the tasks I did in both installs:
- configuring the desktop environment to my liking, e.g. background, theme colour, dark theme (Ubuntu) mixed colour scheme (Mint). - added Bluetooth devices (headphones, Mini-Rig speaker) - added the printer device - dual booted into each one to check them out!
-
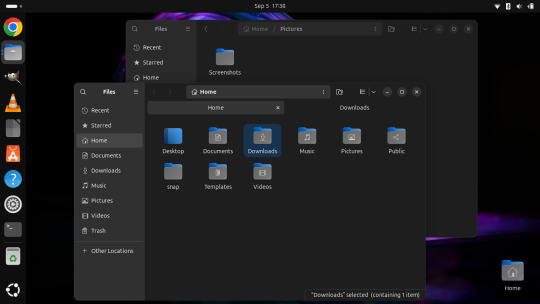
After this, Dad wanted to finish the set-up in such a way that I could link my local laptop Documents, Downloads, Pictures, Music and Video folders directly to the data partition, which would mean that I could access those folders automatically from any installed Linux distributions, however this didn't quite go to plan and messed some things up, so we decided to re-install both operating systems again and I repeated all the previous steps and left out the folder sharing part for now.
-
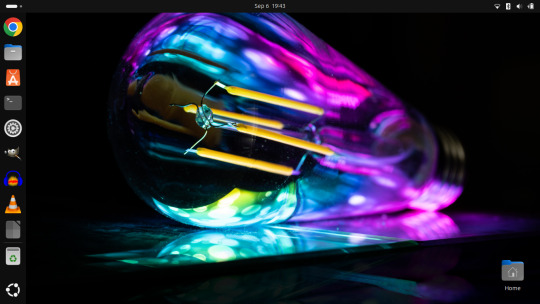
The images underneath show the final desktop installs with my various theme and desktop personalisation's applied and all the installed apps.
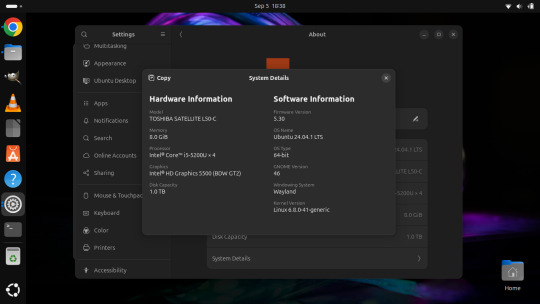
Here is a screenshot of the 'GNOME image viewer' in Mint and Ubuntu.

Ubuntu Linux is celebrating its 20th anniversary with a web post.
See link below:
https://ubuntu.com/20years
For more information about the Linux laptop project, search 'Linux' on my Tumblr blog!
6 notes
·
View notes