#Flash ISO to USB
Explore tagged Tumblr posts
Visit Tumblr Blog
Explore Tumblr blogs with no restrictions, modern design and the best experience.
Last Seen Tumblr Blogs


Fun Fact
28.6 is the average number of monthly visits per US mobile user.
Text
Create a bootable USB on Mac: Proxmox VE Setup
#bootable#Bootable USB drive#Burn ISO#Create a Bootable WinPE Media#Create Bootable USB#Create Proxmox VE Cluster#FLASH#Flash ISO to USB#Install Proxmox#proxmox#Proxmox Server#Proxmox VE#Proxmox VE kernel#Proxmox Virtual Environment
1 note
·
View note
Text
ughhhhhhh my shitty chromebook stopped booting but all of my recovery stuff says the hardware is fine but every time i try to install some garbage debian based os to just try and get something i can use libreoffice and firefox on the installer quits with no log and an error that nobody seems tl have ever gotten with this installer program before and like the fact that it boots at all even just from live is better than nothing but i'm so fuckin tired i just want this thing to work
#also generally: the fact that linux overall reports file copies as complete when 99% of the file is in cached ram#is REALLY FUCKING STUPID#like i'm copying iso after iso to a slowass usb stick and it's like ~3 seconds “Done :)”#but the light on the stick keeps flashing for ~5 minutes like#hot take it should not tell you it's done copying until it's done copying
4 notes
·
View notes
Text
Installing Linux (Mint) as a Non-Techy Person
I've wanted Linux for various reasons since college. I tried it once when I no longer had to worry about having specific programs for school, but it did not go well. It was a dedicated PC that was, I believe, poorly made. Anyway.
In the process of deGoogling and deWindows365'ing, I started to think about Linux again. Here is my experience.
Pre-Work: Take Stock
List out the programs you use regularly and those you need. Look up whether or not they work on Linux. For those that don't, look up alternatives.
If the alternative works on Windows/Mac, try it out first.
Make sure you have your files backed up somewhere.
Also, pick up a 5GB minimum USB drive.
Oh and make a system restore point (look it up in your Start menu) and back-up your files.
Step One: Choose a Distro
Dear god do Linux people like to talk about distros. Basically, from what all I've read, if you don't want to fuss a lot with your OS, you've got two options: Ubuntu and Linux Mint. Ubuntu is better known and run by a company called Canonical. Linux Mint is run by a small team and paid for via donations.
I chose Linux Mint. Some of the stuff I read about Ubuntu reminded me too much of my reasons for wanting to leave Windows, basically. Did I second-guess this a half-dozen times? Yes, yes I did.
The rest of this is true for Linux Mint Cinnamon only.
Step Two: Make your Flash Drive
Linux Mint has great instructions. For the most part they work.
Start here:
The trickiest part of creating the flash drive is verifying and authenticating it.
On the same page that you download the Linux .iso file there are two links. Right click+save as both of those files to your computer. I saved them and the .iso file all to my Downloads folder.
Then, once you get to the 'Verify your ISO image' page in their guide and you're on Windows like me, skip down to this link about verifying on Windows.
Once it is verified, you can go back to the Linux Mint guide. They'll direct you to download Etchr and use that to create your flash drive.
If this step is too tricky, then please reconsider Linux. Subsequent steps are both easier and trickier.
Step Three: Restart from your Flash Drive
This is the step where I nearly gave up. The guide is still great, except it doesn't mention certain security features that make installing Linux Mint impossible without extra steps.
(1) Look up your Bitlocker recovery key and have it handy.
I don't know if you'll need it like I did (I did not turn off Bitlocker at first), but better to be safe.
(2) Turn off Bitlocker.
(3) Restart. When on the title screen, press your Bios key. There might be more than one. On a Lenovo, pressing F1 several times gets you to the relevant menu. This is not the menu you'll need to install, though. Turn off "Secure Boot."
(4) Restart. This time press F12 (on a Lenovo). The HDD option, iirc, is your USB. Look it up on your phone to be sure.
Now you can return to the Linux Mint instructions.
Figuring this out via trial-and-error was not fun.
Step Four: Install Mint
Just follow the prompts. I chose to do the dual boot.
You will have to click through some scary messages about irrevocable changes. This is your last chance to change your mind.
I chose the dual boot because I may not have anticipated everything I'll need from Windows. My goal is to work primarily in Linux. Then, in a few months, if it is working, I'll look up the steps for making my machine Linux only.
Some Notes on Linux Mint
Some of the minor things I looked up ahead of time and other miscellany:
(1) HP Printers supposedly play nice with Linux. I have not tested this yet.
(2) Linux Mint can easily access your Windows files. I've read that this does not go both ways. I've not tested it yet.
(3) You can move the taskbar (panel in LM) to the left side of your screen.
(4) You are going to have to download your key programs again.
(5) The LM software manager has most programs, but not all. Some you'll have to download from websites. Follow instructions. If a file leads to a scary wall of strange text, close it and just do the Terminal instructions instead.
(6) The software manager also has fonts. I was able to get Fanwood (my favorite serif) and JetBrains (my favorite mono) easily.
In the end, be prepared for something to go wrong. Just trust that you are not the first person to ever experience the issue and look it up. If that doesn't help, you can always ask. The forums and reddit community both look active.
175 notes
·
View notes
Text
Have YOU got an old Windows PC Microsoft has told you can't run Windows 11? It's time to give it a new life!
How to install Windows 11 on unsupported PC Hardware using Rufus. You can also disable some other Windows 11 bullshit like data harvesting and needing a Microsoft account.
It has been in the news a lot lately that Windows 11 isn't allowed to be installed on PCs without certain requirements, including the TPM 2.0, a chip that was only included in PCs made in 2018 or later. This means that once Windows 10 stops receiving security updates, those PCs will not be able to (officially) run a safe, updated version of Windows anymore. This has led to an estimated 240 million PCs bound for the landfill. Thanks Microsoft! I get you don't want to be seen as the insecure one, but creating this much waste can't be the solution.
(I know nerds, Linux is a thing. I love you but we are not having that conversation. If you want to use Linux on an old PC you are already doing it and you don't need to tell me about it. People need Windows for all sorts of reasons that Linux won't cut.)
So lately I have been helping some under privileged teens get set up with PCs. Their school was giving away their old lab computers, and these kids would usually have no chance to afford even a basic computer. They had their hard drives pulled so I have been setting them up with SSDs, but the question was, what to do about the operating system? So I looked into it and I found out there IS actually a way to bypass Microsoft's system requirement and put Windows 11 on PCs as old as 2010.
You will need: Rufus: An open source ISO burning tool.
A Windows 11 ISO: Available from Microsoft.
A USB Flash Drive, at least 16GB.
A working PC to make the ISO, and a PC from 2018 or older you want to install Windows 11 on.
Here is the guide I used, but I will put it in my own words as well.
Download your Windows 11 ISO, and plug in your USB drive. It will be erased, so don't have anything valuable on it. Run Rufus, select your USB drive in the Device window, and select your Windows 11 ISO with the Select button. (There is supposed to be a feature in Rufus to download your ISO but I couldn't get it to work.?
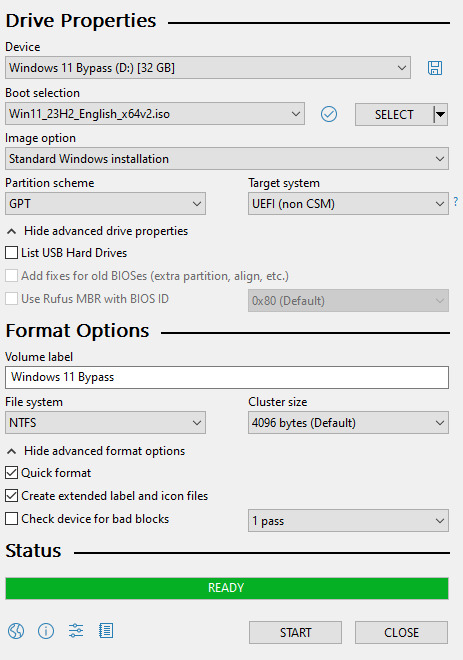
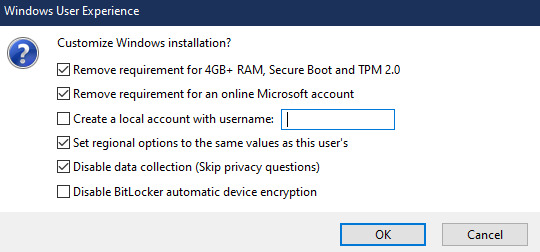
Choose standard windows installation, and follow the screenshot for your settings. Once you are done that, press Start, and then the magic happens. Another window pops up allowing you to remove the system requirements, the need for a microsoft account, and turn off data collecting. Just click the options you want, and press ok to write your iso to a drive.
From there you just need to use the USB drive to install windows. I won't go into details here, but here are some resources if you don't know how to do it.
Boot your PC from a USB Drive
Install Windows 11 from USB Drive
If you had a licensed copy of Windows 10, Windows 11 will already be licensed. If you don't, then perhaps you can use some kind of... Activation Scripts for Microsoft software, that will allow you to activate them. Of course I cannot link such tools here. So there you go, now you can save a PC made from before 2018 from the landfill, and maybe give it to a deserving teen in the process. The more we can extend the lives of technology and keep it out of the trash, the better.
Additional note: This removes the requirement for having 4GB Minimum of RAM, but I think that requirement should honestly be higher. Windows 11 will be unusable slow on any system with below 8GB of RAM. 8GB is the minimum I think you should have before trying this but it still really not enough for modern use outside of light web and office work. I wouldn't recommend trying this on anything with 4GB or less. I am honestly shocked they are still selling brand new Windows 11 PCs with 4GB of ram. If you're not sure how much RAM you have, you can find out in the performance tab of Task Manager in Windows, if you click the More Details icon on the bottom right. If you don't have enough, RAM for old systems is super cheap and widely available so it would definitely be worth upgrading if you have a ram starved machine you'd like to give a new life.

#Windows#Windows 11#tech#tech advice#pc#TPM 2.0#rufus#open source#open source software#technology#tech tips
725 notes
·
View notes
Note
Please, please explain how to install and use linux like I'm 5 years old. I'm so sick of windows adding AI and other bullshit to my already struggling elderly laptop but I'm really not good with computers at all so I have no idea where to start with Linux.
Okay, so, I'm going to break this down into steps I would give the average tumblr user first, and then if any of them are confusing or use words you don't understand, ask me and I'll explain that step in greater detail.
Step 0) BACK. UP. YOUR. SHIT.
NEVER EVER EVER CHANGE YOUR OPERATING SYSTEM WITHOUT A COMPLETE BACKUP OF ALL YOUR FILES.
Step 1) Learn your machine. You need to know:
How much RAM you have
If your processor is 32 or 64 bit
How big your hard drive is
On windows, you can find out all of this by going to the start menu, typing "about" and opening the first result on your system instead of the internet.
For additional instructions, visit this page.
Step 2) Pick your Linux.
There's like 10,000 kinds of Linux, each tailored to particular functions that the end-user (that is you!) might want to have. The sheer amount is very daunting, so first I'm going to give my suggestions, then I'll explain how to pick for yourself.
For Mac users, I suggest Kubuntu. For windows users, I suggest Mint Cinnamon. If your laptop is really REALLY old, I recommend Sparky Stable, which is the lightest weight Linux I would ever suggest for a new user. In every case, download the version suited to your processor (32 bit can be labelled "x86" or "32 bit"; 64 bit is always labelled "64 bit").
If you want to try a different type of linux, you'll need to make sure your laptop meets the "minimum specs" or "system requirements." These numbers tell you how much RAM, processor and hard drive space the linux will use. (That's why you needed those numbers at the beginning.)
Step 3) Collect your supplies. You're going to need:
An ISO burning program compatible with your current system, like Balena Etcher.
A copy of the ISO file for the Linux you want to use.
Your laptop.
An 8gb or larger USB flash drive.
Step 3) Make a bootable USB drive
Install Balena Etcher, hitting "okay" and "next" when prompted. Last I checked, Etcher doesn't have adware attached, so you can just hit next every time.
Plug your USB drive into the laptop.
Open Etcher.
Click "flash from file" and open the ISO file with your Linux on it.
Click "Select target" and open the USB drive location. Hit the "flash" button. This will start writing all the linux installer data to your flash drive. Depending on the speed of your machine, this could take as long as 10 minutes, but shouldn't be much longer.
Step 4) Boot to the USB drive
This is, in my opinion, the trickiest step for a lot of people who don't do "computer stuff." Fortunately, in a rare act of good will, Windows 10 made this process a lot easier.
All you'll need to do is go to settings, then recovery, then advanced startup and pick the button labelled "use a device."
This tutorial has images showing where each of those is located. It's considered an "advanced setting" so you may get a spooky popup warning you that you could "harm your system by making changes" but we're not doing anything potentially harmful so you can ignore that if you get it.
Step 5) Try out linux on the flash drive first.
Linux installs using a cool little test version of itself that you can play around in. You won't be able to make changes or save settings, but you can explore a bit and see if the interface is to your liking. If it's hideous or hard to navigate, simply pick a new linux version to download, and repeat the "make a bootable USB" step for it.
Step 6) Actually install that sucker
This step varies from version to version, but the first part should be the same across the board: on the desktop, there should be a shortcut that says something like "install now." Double click it.
Follow the instructions your specific linux version gives you. When in doubt, pick the default, with one exception:
If it asks you to encrypt your drive say no. That's a more advanced feature that can really fuck your shit up down the road if you don't know how to handle it.
At some point you're going to get a scary looking warning that says 1 of 2 things. Either:
Install Linux alongside Windows, or
Format harddrive to delete all data
That first option will let you do what is called "dual booting." From then on, your computer will ask every time you turn it on whether you want Windows or Linux.
The second option will nuke Windows from orbit, leaving only linux behind.
The install process is slower the larger your chosen version is, but I've never seen it take more than half an hour. During that time, most linux versions will have a little slideshow of the features and layout of common settings that you can read or ignore as you prefer.
Step 7) Boot to your sexy new Linux device.
If you're dual booting, use the arrow keys and enter key to select your linux version from the new boot menu, called GRUB.
If you've only got linux, turn the computer on as normal and linux will boot up immediately.
Bonus Step: Copy Pasting some code
In your new start menu, look for an application called "terminal" or "terminal emulator." Open that up, and you will be presented with an intense looking (but actually very harmless) text command area.
Now, open up your web browser (firefox comes pre-installed on most!), and search the phrase "what to do after installing [linux version you picked]"
You're looking for a website called "It's FOSS." Here's a link to their page on Mint. This site has lots and lots of snippets of little text commands you can experiment with to learn how that functionality works!
Or, if you don't want to fuck with the terminal at all (fair enough!) then instead of "terminal" look for something called "software manager."
This is sort of like an app store for linux; you can install all kinds of programs directly from there without needing to go to the website of the program itself!
295 notes
·
View notes
Text

Fruit Jam RP2350B credit-card mini computer with all the fixin's 🍓🍇💾
We were catching up on a recent Hackaday hackchat with Eben Upton (https://hackaday.io/event/202122-raspberry-pi-hack-chat-with-eben-upton) and learned some fun facts: such as the DVI hack for the RP2040 was inspired by a device called the IchigoJam (https://www.hackster.io/news/ichigojam-combines-strawberry-and-raspberry-to-deliver-a-raspberry-pi-pico-powered-educational-micro-66aa5d2f6eec). We remember reading about this back when it was an LPC1114, now it uses an RP2040. Well, we're wrapping up the Metro RP2350 (https://www.adafruit.com/product/6003), and lately, we've been joking around that with DVI output and USB Host support via bit-banged PIO, you could sorta build a little stand-alone computer. Well, one pear-green-tea-fueled-afternoon later we tried our hand at designing a 'credit card sized' computer - that's 3.375" x 2.125", about the same size as a business card (https://hackaday.com/2024/05/07/the-2024-business-card-challenge-starts-now/) and turns out there's even a standard named for it: ISO/IEC 7810 ID-1 (https://www.iso.org/standard/70483.html).
Anyhow, with the extra pins of the QFN-80 RP2350B, we're able to jam a ridonkulous amount of hardware into this shape: RP2350B dual 150MHz Cortex M33 w/ PicoProbe debug port, 16 MB Flash + 8 MB PSRAM, USB type C for bootloading/USB client, Micro SD card with SPI or SDIO, DVI output on the HSTX port, I2S stereo headphone + mono speaker via the TLV320DAC3100 (https://www.digikey.com/en/products/detail/texas-instruments/tlv320dac3100irhbt/2353656), 2-port USB type A hub for both keyboard and mouse or game controllers, chunky on-off switch, Stemma QT I2C + Stemma classic JST 3-pin, EYESPI for TFT displays, 5x NeoPixels, 3x tactile switches, and a 16-pin socket header with 10 A/D GPIO + 5V/3V/GND power pins. The PSRAM will help when we want to do things like run emulations that we need to store in fast RAM access, and it will also let us use the main SRAM as the DVI video buffer.
When we get the PCBs back and assembled, what should we try running on this hardware? We're pretty sure it can run DOOM. Should that be first? :) We also need a name. Right now, we're just calling it Fruit Jam since it's inspired by the IchigoJam project.
#fruitjam#rp2350b#raspberrypi#microcomputer#hackaday#diyelectronics#retrocomputing#creditcardpc#hardwarehacking#usbhost#dvioutput#psram#retrogaming#makercommunity#opensourcehardware#homemadecomputer#minipc#embeddeddevelopment#techinnovation#electronicsproject#tinkering#cortexm33#doomport#custompcb#hacktheplanet#hardwaredesign#diytech#retroconsole#handheldgaming#fruitjampc
34 notes
·
View notes
Text
Okay. So here's my current situation: I'm trying to get The Sims 3 to run on my Linux machine. The Sims 3 has a "Gold" rating on the Wine AppDb, so it should run fine. I can't even get in game to test anything because of this:
The game's brightness, by default, is extremely low. As a result, it's supposed to hijack your screen controls and make the brightness like 200% or something. I've seen this behavior on macOS. However, for some reason, on Linux it isn't doing that, and the window stays dark. The solution is to run it in windowed mode, which does fix it, but... then it's in windowed mode (ew). So I saw on Reddit that Lazy Duchess's Smooth Patch came force the game into a borderless window mode. Great! That'll fix all my problems. However.
In order to make the Smooth Patch run, you have to launch the game from TheSims3Launcher.exe
Problem: I don't have a disc drive on this computer. I backed up all my TS3 DVDs onto a 128 GB flash drive, and I installed the game from there. My usual method of playing is to bypass the launcher entirely and launch the game directly using the TS3.exe file. However, doing so will cause the Smooth Patch not to launch. If I do try to open the launcher, of course, I can't launch the game because I don't have the disc inserted.
So, like, wtf do I do? I can't use LD's Custom Launcher because it's for 1.69 only, and the disc version is 1.67. So, like, is there any way to launch the game from the launcher without a DVD? Like, are there cracked launchers or some way of bypassing the disc requirement. Idk.
I can use a USB disc drive, but digging that thing out every single time I want to launch the game is gonna be tedious. I'd be nice to just be able to launch it normally. So any tips would be appreciated.
I could also, in theory, try compressing my TS3 Base Game folder into a .iso file and seeing if that'll trick the game. Idk, though, because idk what the launcher is looking for when it's verifying the disc.
26 notes
·
View notes
Text
An Okay-ish guide on How to find a good laptop for creating digital art on -2025
This is my first time making a post like this, but as someone who went from having very sparse technical knowledge to working helpdesk, I wanted to give my advice on drawing tablets/drawing workflows for comfort.
Something I ran into when trying to figure out a comfortable way for me to draw was the sea of like confusion when it came to drawing tablets. Initially, I was advised by a friend that a tablet like the Surface would be good for drawing and I really stuck to that closely- as it seemed like the alternative was to be stuck at a desk with a drawing tablet. This is not very comfy and also not very practical or easy for me to casually draw digitally. After becoming more technically literate, I realized that a 2in1 laptop serves practically the same function as a surface, is about half the price, and has a lot more power as a drawing "tablet" to also multitask things like music applications/ youtube in the background/ having a ton of tabs / ect...
So- here's a little guide on how to figure out what to look for in a laptop as of 2025!
Why 2in1? 2in1 laptops have a touch screen, can fold all the way back to a 'tablet mode' in case you like that sort of set up & come with a keyboard attached that's easy to use. Otherwise, a laptop with a touch screen should work just fine- but most likely might not be as physically flexible. What should I look for in a drawing laptop? There's some basic things I can advise as well as more nuanced things, I've also included links to some laptops that seem good: OS or Operating System: -ARM processor vs not (Windows 11 VS Windows11 ARM): I would personally avoid any sort of ARM processors, as it acts like a weaker version of+ lacks a lot of the functionality of windows 11. I had a surface laptop that I exchanged back because it did not have touch gestures. A way to see if the laptop you want has an ARM processor vs not is to check the OS or Operating System, if it has a arm processor it will likely say something like "Windows 11 ARM" or you can CTRL + F to find the word ARM in the description in your web browser.
-Linux VS MACOS VS Windows: Unfortunately I have less EXP with MAC devices, but as the price point is very high and they are not built to last AS LONG (No devices last unfortunately) I can't recommend them. -If you have an older device with touch screen capabilities that you would like to use, and would like to try to dive into Linux- I'd say go for it! Be aware that changing your OS will wipe your entire drive, so please back up your files first! If you end up not (Depending on how you go about installing it) I've been enjoying a new-er version of Kubuntu as our home media set-up! Generally, a lot of Linux distributions aren't as 'hard' on your hardware. When choosing what version of Linux to go with- as there are a lot of different types or distributions of Linux, it has been advised to choose a more stable download release version rather then the new-est version- to be able to know this, it may say if the download version is supported long term or not. I'm not a Linux expert and have generally followed guides on how to use this OS, to install a OS you will need some sort of flash media- like a flash drive/usb drive! If you end up not liking Linux, Windows has ISO files you can put on your flash drive to put it back, again this will wipe your data! It's a good idea to try and check to see if your software of choice works on the version of Linux you would like to install, there seems to generally be workarounds however, it's up to your comfort level when seeking these out.
-Windows is familiar! However, Windows 11 has this thing where it wants to back up all your files/data to OneDrive. I, Personally have been enjoying this service, as it makes backing up my files easy-cheesy. However, with the current political climate, this opens you/us up to having our privacy stripped/or our files erased without our consent as Microsoft sees fit. To combat this, I back up my files to a physical hard drive(S) as it is safer to have multiple back-ups rather then just 1.
-AVOID ChromeOS or chromebooks- is my advice GPU or Graphics Card: https://www.videocardbenchmark.net/ -Using this link, you can compare how the GPU of your device compares to the standard/other devices/ect... -Honestly, if you are not doing heavy-duty gaming or 3D sculpting, or video editing, you're probably just fine with a mid-tier GPU!
Where the files are stored / the Disk Drive: -As long as you avoid a HDD you're probably good to go! HDD drives use a physical disk that spins to save your data- this is more prone to failing and this is a lot of the reason why older laptops seem "slow"
-One of the ways to to check this- or a weird way I check this, is I click the Windows button/Windows search and type "Defrag" & You should see something that says something "Defragment and Optimize Drives" In this window, under 'Media Type' it should say something like Solid State Drive, and not 'Hard Disk Drive' or HDD -How much storage is important depending on if you store your all data on your device or not- I'd recommend at LEAST 500+GB to be safe, any more does not hurt!
RAM: For doing just art, you're probably good to go at just 8-16GB of RAM! Any more does not hurt.
Processors: I have less knowledge in this domain, however, if you are going for a intel processor, something like i5, 1255u is communicating that: i(NUMBER), the higher number = more processing power. I would recommend anything i5 and above, and the 1255u- a number I am using in this example, the 12 = 12th generation. 12 gen and up Is what I would personally recommend.
Do I need a separate stylus pen? Yes, however, there's a lot of good knock off brand pens that are cheaper if not better then official brand pens. I'd take into account how they charge, I like rechargeable pens that use Type C ports- like new-er phones!
Link Examples of 2in1 laptops that should be good for digital art- again, if the price has changed for the worse, you can use these as a guide: This is the laptop I have, I got it on sale (I exchanged my surface for this) for around 500$: https://www.bestbuy.com/site/hp-envy-2-in-1-16-2k-touch-screen-laptop-intel-core-ultra-7-16gb-memory-1tb-ssd-glacier-silver/6571084.p?skuId=6571084 Upon a glance this looks good due to the processor being i7 & the 12th generation- a new-ish one: https://www.newegg.com/lenovo-ideapad-flex-5-16iau7-82r80000us-16-0-intel-core-i7-1255u-1-tb-pcie-ssd-16gb-memory/p/N82E16834840489
Finishing notes: This is not a like solid template, more of a loose advising guide- I hope this is helpful to some folx! Feel free to ask questions!
#digitalart#artists on tumblr#digital drawing#digital painting#art#artwork#surface#2in1#stylus pen#drawing tablet#disabled artist#disability#disabled#disability art#mental illness#mental health#art ergonomics#ergonomicsupport#adhd artist#adhd problems#neurodiverse stuff#neurodiverse artist#2025 art#gpu#help desk#queer artist#queer artwork#buying a laptop#laptop#digital art supplies
5 notes
·
View notes
Text
one, i thought my pc got scared bc i downloaded UUI and ubuntu to start learning linux on my tablet bc the pc started whirring loud and disconnecting from monitors but it was just the gpu cable got jostled and re-plugging it in fixed the issue.
two, though - this whole process was drawn out and had me worrying about the Curses because. well the iso is over 5gb and the largest flash drive in my apartment before today was. um. a 4gb memory card into a USB stick with a card slot. this, of all things, is what has made me feel the most old lately. like what am i doing with this floppy disk ass storage tech and nothing else ?
#peter posts#i have e.g. an external hard drive and so on but flash drives? that was IT.#and this fucked up one was inherited from i think 3ds modding/digital camera shenanigans#but also. what do you mean 128gb flash drives are like 15 bucks or less. hello?
4 notes
·
View notes
Text
Installing Kali Linux on a USB Stick: A Step-by-Step Guide
If you want a portable, powerful cybersecurity toolkit you can carry in your pocket, installing Kali Linux on a USB stick is the perfect solution. With Kali on a USB, you can boot into your personalized hacking environment on almost any computer without leaving a trace — making it a favorite setup for ethical hackers, penetration testers, and cybersecurity enthusiasts.

In this guide, we'll walk you through how to install Kali Linux onto a USB drive — step-by-step — so you can have a portable Kali environment ready wherever you go.
Why Install Kali Linux on a USB?
Before we dive into the steps, here’s why you might want a Kali USB:
Portability: Carry your entire hacking setup with you.
Privacy: No need to install anything on the host machine.
Persistence: Save your settings, files, and tools even after rebooting.
Flexibility: Boot into Kali on any system that allows USB boot.
There are two main ways to use Kali on a USB:
Live USB: Runs Kali temporarily without saving changes after reboot.
Persistent USB: Saves your files and system changes across reboots.
In this article, we’ll focus on setting up a Live USB, and I'll also mention how to add persistence if you want. and if you seek knowledge about kali linux you can visit our website any time
Website Name : Linux Tools Guide
What You’ll Need
✅ A USB drive (at least 8GB; 16GB or more recommended if you want persistence). ✅ Kali Linux ISO file (download it from the official Kali website). ✅ Rufus (for Windows) or Etcher/balenaEtcher (for Mac/Linux/Windows). ✅ A computer that can boot from USB.
Step 1: Download the Kali Linux ISO
Go to the Kali Linux Downloads page and grab the latest version of the ISO. You can choose between the full version or a lightweight version depending on your USB size and system requirements.
Tip: Always verify the checksum of the ISO to ensure it hasn't been tampered with!
Step 2: Insert Your USB Drive
Plug your USB stick into your computer. ⚠️ Warning: Installing Kali onto the USB will erase all existing data on it. Backup anything important first!
Step 3: Create a Bootable Kali Linux USB
Depending on your operating system, the tool you use may vary:
For Windows Users (using Rufus):
Download and open Rufus (Get Rufus here).
Select your USB drive under Device.
Under Boot selection, choose the Kali Linux ISO you downloaded.
Keep the Partition scheme as MBR (for BIOS) or GPT (for UEFI) based on your system.
Click Start and wait for the process to complete.
For Mac/Linux Users (using balenaEtcher):
Download and open balenaEtcher (Get Etcher here).
Select the Kali ISO.
Select the USB drive.
Click Flash and wait until it's done.
That's it! You now have a Live Kali USB ready.
Step 4: Boot Kali Linux from the USB
Restart your computer with the USB plugged in.
Enter the BIOS/UEFI settings (usually by pressing a key like F12, Esc, Del, or F2 right after starting the computer).
Change the boot order to boot from the USB first.
Save changes and reboot.
You should now see the Kali Linux boot menu! Select "Live (amd64)" to start Kali without installation.
(Optional) Step 5: Adding Persistence
Persistence allows you to save files, system changes, or even installed tools across reboots — super useful for real-world usage.
Setting up persistence requires creating an extra partition on the USB and tweaking a few settings. Here's a quick overview:
Create a second partition labeled persistence.
Format it as ext4.
Mount it and create a file /persistence.conf inside it with the content: cppCopyEdit/ union
When booting Kali, choose the "Live USB Persistence" option.
Persistence is a little more technical but absolutely worth it if you want a real working Kali USB system!
Troubleshooting Common Issues
USB not showing up in boot menu?
Make sure Secure Boot is disabled in BIOS.
Ensure the USB was properly written (try writing it again if necessary).
Kali not booting properly?
Verify the ISO file integrity.
Try a different USB port (preferably USB 2.0 instead of 3.0 sometimes).
Persistence not working?
Double-check the /persistence.conf file and make sure it's correctly placed.
Conclusion
Installing Kali Linux onto a USB stick is one of the smartest ways to carry a secure, full-featured hacking lab with you anywhere. Whether you’re practicing ethical hacking, doing security audits, or just exploring the world of cybersecurity, a Kali USB drive gives you power, portability, and flexibility all at once.
Once you’re set up, the possibilities are endless — happy hacking! 🔥
2 notes
·
View notes
Text
Okay: speaking of the Drama of the World's Stupidest Netbook: often the problem is me, actually!
Remember how I complained that my ISO flash drives didn't work? There was a reason for that.
I only figured this out today, when I grew so angry about not being able to job hunt that I started scouring Public Surplus, Craigslist, eBay, and Facebook Marketplace for used laptops. My RAM threshold was 8 GB and I wanted an AMD CPU.
This town is a great place to look for electronics. There's money here. So within an hour I find a perfectly suitable ASUS laptop (Intel, though. Boooo) under $100. I jumped on it, I didn't give a single fuck.
I bring back my prize. Start it up. Windows immediately loads. I stare in deep revulsion at the opening screen. Every load screen is worse than the last. Think of all the privacy failures, the AI, the unintuitive GUI, the fascism, the monopoly. Decide I'm going to fucking do it, I'm going to fucking make this a devoted Linux machine. I will run Scrivener on Wine.
Machine refuses to boot from USB.
Re-read to-do list.
You have to flash the fucking flash drive. I feel that this is offensive and an unnecessary extra step.
Downloaded Balena, which refused to flash anything. Looked up the error message. The solution was to not use Balena. The querent asking about my error message was snootily reprimanded about using "gimmicky packages" in one of the most Linuxy sentences ever recorded. Ventoy was suggested. Am sure that the developers of Balena would be confused to hear their program described as "gimmicky."
Linuxy user proved instantly right. Ventoy is fucking elegant. You can load multiple ISOs on a single flash drive. Cool as fuck!!! Guess who has a devoted ISO flashdrive now.

The process of looking all of this up was a fucking nightmare. I used Edge because I wasn't intending on using Windows at all. Jesus fucking Christ! Some of the websites were borderline unusable. Pop-ups and embedded ads covered the text and the only reason I could follow the article at all was because I could suss out the width of the margins. There were ads everywhere, some in text mirroring the formatting of the article, and they broke up the margins and covered paragraphs. Half of the pop-ups were from Microsoft itself using my own fucking operating system and I must stress that they were advertisements.
On a list of advice about installing an operating system.
Oh my god. That just made me angrier.
Anyway. I have Linux Mint, Cinnamon edition, on a computer I have named "zip." Time to set up Scrivener!
btw the dogs are going to wake me up tomorrow at 5 am so this is going to be great
2 notes
·
View notes
Text
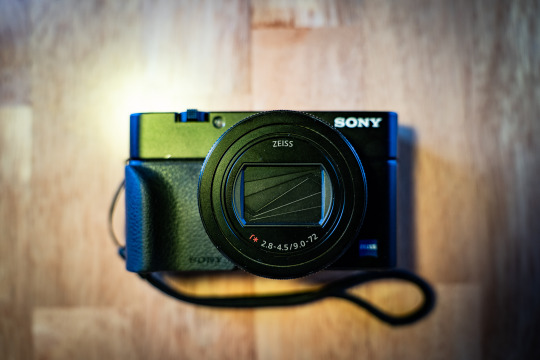
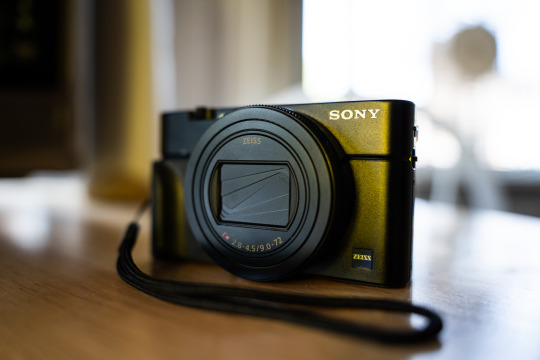
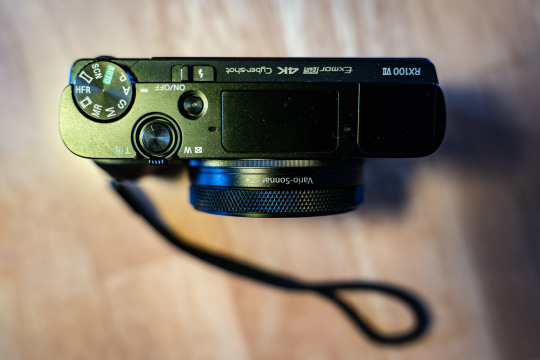
Sony RX100 VII Thoughts After Two Months
PROS:
Stacked sensors are the future. Well, technically the present considering that Canon, Nikon, Sony, Fuji, and OM Systems all use stacked sensors in their top of the line cameras. Either way, finally getting to experience shooting with one on a daily basis has made me want one in pretty much any camera going forward. The benefits are twofold: Not only do you get shutter speeds up to 20 frames per second, and without a mechanical shutter flipping in the way obscuring your view in between shots, but you also get no rolling shutter while doing it. Pretty much every Sony camera can shoot 10 fps bursts with the silent shutter, but any movement can give you a jello-like effect since the sensor reads out so slow on non-stacked cameras. The only con, at least on this camera, is that you can’t shoot flash at higher than 1/100 with the electronic shutter. That’s still plenty fast for a lot of stuff, but well below the 1/2000 you get when shooting the mechanical shutter.
The fast frame rate wouldn’t make much of a difference if the camera was bad at autofocusing, but this camera is great at it. It has a lot of the same fancy focusing stuff that my full frame Sony has like human/animal eye autofocus and all the tracking modes I’m used to. It actually makes the camera pretty solid for wildlife if you can get close enough at the 200mm end.
Speaking of that, the 24-200mm equivalent is a great range, and one that I missed a lot since I traded away my Tamron 28-200 to help cover the cost of my A7RIV. The small size and extra 4mm on the wide end actually makes it even more convenient than that Tamron.
Aside from covering a broader range than the 24-70 equivalent lens from the older RX100 cameras, this lens also seems noticeably sharper. The last RX100 model I had, the Mk. IV, just didn’t seem as crispy as this lens is.
It has a touchscreen! It’s wild to think that the previous RX100 cameras I owned didn’t have this basic ass feature, but Sony was very late in putting touch screens in their cameras. Ironically, I don’t really use it in this one because the AF is good enough that I can just do focus and recompose with tracking.
CONS:
It’s still only a 1” style sensor so high ISO isn’t the cameras strong suit. Programs like DXO PureRAW help a lot and let you get somewhat usable images at ISO 6400 in a pinch, but you’re kinda pushing things at that point.
While the lens is sharper and covers a wider range than the older models, it’s also significantly slower. At 24mm equivalent it’s already at f/2.8 where the old cameras were f/1.8. It’s f/3.2 at 25mm, f/3.5 at 33mm, and f/4 at 40mm. From 109mm to 200mm you’re at f/4.5. The relative slowness of the lens combined with the small sensor means that this can struggle getting quality images in low light without a tripod or something.
No USB-C. My Fuji, Ricoh, and larger Sony all have USB-C charging, which is amazingly convenient when traveling. I haven’t really gone anywhere with this camera yet, but having to account for a micro USB cable is annoying since pretty much everything aside from my iPhone uses USB-C.
It’s expensive. Just like my Mk III and Mk IV I got it used so it was cheaper than retail, but the copy I got cost about twice what I paid for the previous models.
Start up time is just a tad bit slower than I’d like. The GRIII and X100V both beat it that regards, albeit those aren’t zoom lens so I have to cut the Sony some slack.

SAMPLE PHOTOS:
(The sample photos were edited in Lightroom Classic and DXO PureRAW2. Also, the sensor creates a roughly 2.7x crop factor, so the 9-72mm lens equates to 24-200ish)

Young Bird | ISO 160. 72mm. f/4.5. 1/200.

Graffiti Shot from a Car | ISO 100. 33.98mm. f/4. 1/400.
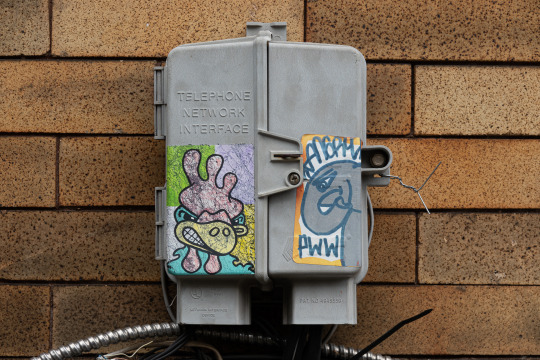
Stickers | ISO 100. 29.67mm. f/4.5. 1/100.

City Hall | ISO 100. 38.13mm. f/4.5. 1/200.

Flip Up Screen Selfie with My Friend Hanae | ISO 3200. 9mm. f/2.8. 1/40.

Zoomed in Graffiti | ISO 640. 72mm. f/4.5. 1/500.

Fishing Store Neon | ISO 800. 28.67mm. f/8. 1/200.

Flowers | ISO 200. 72mm. f/5. 1/640.

Selfie Shots with My Sister | ISO 3200. 9mm. f/2.8. 1/100.
33 notes
·
View notes
Text
Helped a friend install Windows last night and the experience was comical.
Making the install media was irritating; I wanted to download an ISO and flash a USB with it, as I've done with a half dozen linux distros dozens of times. That kept failing for whatever reason, once because there wasn't a boot partition?? on the drive yet, and like. That's what flashing the drive is for. It's to make bootable media. But ok fine we can just use the "create install media" tool windows provides.
Then, for some baffling reason, the install media didn't include audio? or wifi?? drivers??? Keep in mind that windows by default will not let you install without an internet connection. Their latest OS install tool will not give you the tools to connect to the internet, and won't let you install without the internet.
Luckily the OOBE\BYPASSNRO thing still works (unclear why, I've heard people saying it doesn't anymore; maybe they were just barely smart enough to realize that there should be a way to install without networking IF THERE'S NO FUCKING NETWORKING DRIVERS), so we were able to finish the install eventually, download the drivers on a network connected laptop and get things working.
Legitimately just faster and a better experience installing any user facing linux distro. Mint, Ubuntu, Pop!OS, whatever. At least, when I fucked up my arch install, it was because I forgot to include the wifi drivers, not because they were literally unavailable.
2 notes
·
View notes
Text
okay here's my problem currently:
there's some bug in the official arch iso from 2022 I have installed in this USB drive. it does not recognize my sata SSD and freaks out when I try to partition it. I can't simply update the packages because there's not enough space on the live CD media.
I need to install a newer version of the archiso. I do not have a working computer with an operating system installed (reason I'm trying to install arch in the first place), and I can't flash a new image onto the USB drive without one.
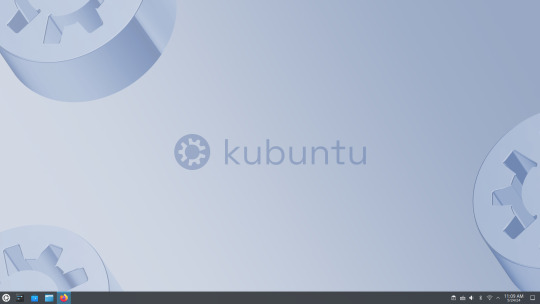
I'm using ventoy to have two live CD media on the same USB drive, and it just so happens I have have another iso with kubuntu in a different partition. it occurs to me I can use the live kubuntu environment to download the newest archiso and flash it over the old one.
BUT. I can't mount the arch partition, because the device it is on is currently busy (running kubuntu). I can't unmount the USB without everything breaking because kubuntu has not been loaded to ram. I can't reboot and load it to ram because I can't access the grub boot options from the legacy/bios version of grub. I can't change to UEFI grub because I explicitly set up ventoy with the legacy/bios configuration. and I can't change the way ventoy is setup BECAUSE I DON'T HAVE A COMPUTER
3 notes
·
View notes
Text
Howdy been a bit busy not only from the job hunt but also cause I've been making the switch to Linux specifically Kubuntu. I should be back to my art soon. Luckily I should have an easier time adapting as I've never really used much Windows only software LibreOffice/Krita have always been my go to etc.
Also figured I'd add if y'all wanna make the switch with Kubuntu as the sole operating system here's what I did in the end.
IMPORTANT NOTE I AM NOT IN ANYWAY RESPONSIBLE FOR WHAT YOU AS A HOPEFULLY SANE PERSON DO TO YOU COMPUTER.FOR THE LOVE OF GOD RESEARCH SHIT BEFORE SWITCHING TO A DIFFERENT OPERATING SYSTEM.
Optional but suggested use Oracle VM to test if Kubuntu is right for you!If not maybe try out some other distros Linux Mint for instance is considered a wonderful choice for new bros. Flash Kubuntu's ISO to a Usb I used BalenaEtcher. Optional With important files use Winrar/7Zip to compress em down. Archive any files important to you this can be done via Blank DVDS,USBS,CLOUD STORAGE SYSTEMS.I used mega.io. Prepare ze purge get KillDisk on a DVD/USB and wipe the Windows partition to scorched earth. Insert the Kubuntu USB then Restart your PC. Boot into Kubuntu (I also had to spam repeat press ESC whilst the computer was restarting to boot it, this which is something to do with HP from what I understand???) Install it how you'd like it!
ALSO LITERALLY NOT EVEN JOKING IT TOOK ME 8 HOURS TO FIGURE ALL THIS SHIT OUT I MAY BE A DUMBASS STILL I GOT IT IN THE END!

2 notes
·
View notes
Text
I remember running a terrible Zoostorm laptop when I was 12 and It had 1GB of RAM in a time when machines came with at least 2 as a standard option, and some people believed that you'd never need more than 4GB for anything.
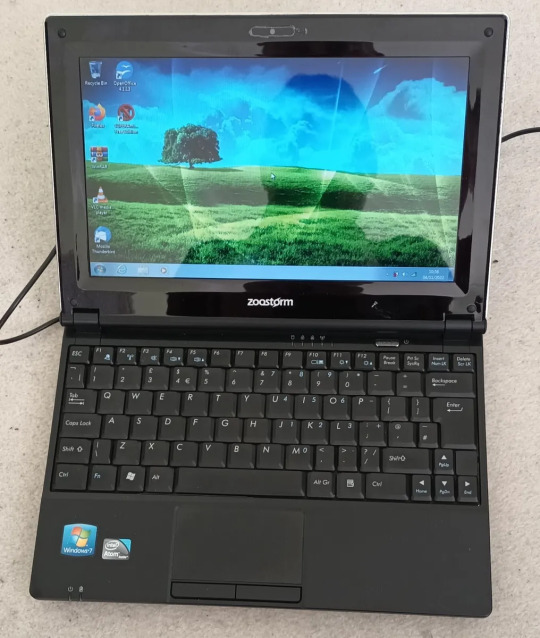
Image source
My parents bought me this thing because I had caused a little bit of an issue in our house, and that was my constant need for floppy disks post year 2000. We ran an Amiga 1200 in the dining room of our home as it was what my parents both used to code on in the mid 90's. We had tons of software for that thing but the coolest by far was a programming environment called AMOS. It used a proprietary (read: now unsupported) programming language called AMOS BASIC and the only resources we had for the language was whatever my dad remembered and the official language guide which, if i remember correctly, was thick enough to beat a goat to death with.
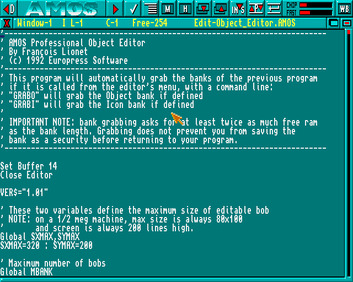
Image credit
The guide was sometimes really good at explaining language features and best use cases for mid 90's game development methodologies.
You can actually still download AMOS and run it on a Windows machine, or OSX and GNU/Linux if you have the tools to run applications meant for windows.
I moved from an Amiga sporting 2MB of chip RAM and 8MB of fast RAM to a Windows 7 laptop with a whopping, for the time, Gigabyte of Random Access Memory.
I couldn't wait to see the types of software that I could make with 32 bit technology and how I could use new... Oh, it crashed.
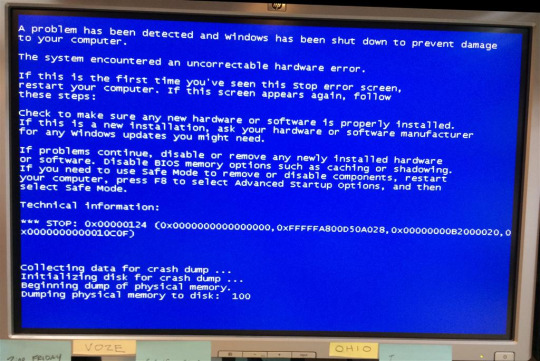
Image credit
Windows 7, at least on my machine, was a garbage fire. Somewhere along the way when we transitioned from floppy disks to hard drives and hard drives to solid state, programmers suddenly forgot how to make good decisions. The amount of driver errors, lag spikes, and crashes I experienced on that platform made me hate Windows, and even to this day, I really don't trust it.
I once turned my laptop on to find Windows using 90% of my available RAM, and it wasn't even running anything.
This frustration led me to look further afield. I knew that I liked the UNIX like systems from helping my dad run a FreeBSD server, and because of that, I very nearly bought a mac. Nearly. I still like to have a usable computer and do things that Apple don't want me to do, like change my settings in a way that matters.
Image credits
I finally found out enough to flash Arch to my USB drive and install it using a guide i found on a reddit thread. after editing all of my settings, i pressed enter, sat back... And bricked the fucking thing. Archinstall was a blessing from the gods, but we didn't have that yet.
2nd choice was Debian. Not only was it pre-configured out of the box, it had a package manager that made sense and came with development tools already built in. I played around with a few other distributions over the years until i discovered that they're all either Debian or Arch with a different package manager and desktop environment.
GNU/Linux blew my mind. The fact that all of this software was just out there for free fort anybody to use and change astounded me, and it still does to this day. You need to run a piece of hardware that nobody has made a driver for in about 20 years? Debian probably has it built in. You want to make video games? Debian can do that flawlessly. You want to play video games? Steam installs natively and comes with Proton!
By the time I was ready to go to College at 16, I was using Linux full time, and Archinstall had been added to the installation ISO (thank god). I used arch for all of my studies there, and all of my studies at University. I passed my degree because my software was free. I even had a C# compiling and running for my Programming 101 classes.
I do occasionally run Windows at some point from time to time, but i always make sure that WSL is installed. I do not see the need to download a piece of software to do something when Debian has the command built-in.
If it were not for the FOSS community, and GNU/Linux as a whole, I probably would not be the programmer that I am today, and I wouldn't have been able to learn many of the complex topics I needed for the field I have worked in due to the closed, corporate nature of the vast majority of software out there.
Sorry for yapping.
3 notes
·
View notes