#GarageBand Tips
Text
GarageBand iPad YouTube Tutorials
I’ve recently uploaded my first 5 videos for a new GarageBand iPad YouTube playlist.
Check the playlist out here… and here’s a quick rundown of the content. Also, please don’t forget to subscribe to the channel for all the latest uploads and updates here. The YouTube channel isn’t just about GarageBand, I also have playlists for:
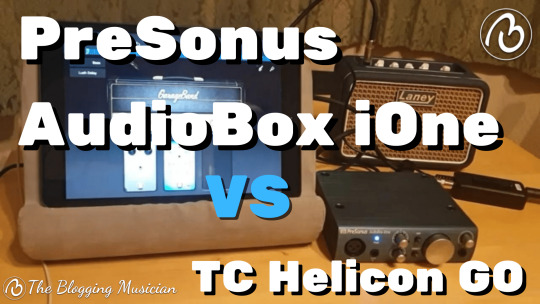
Guitar Reviews
Guitar Tips
Guitar Amplifier Reviews
Original…
View On WordPress
#Apple Garageband#Garageband#Garageband iOS#Garageband iPad#GarageBand Lesson#GarageBand Tips#GarageBand Tutorial#GarageBand YouTube#Music#Music Business#Music Industry#Music Production
1 note
·
View note
Text
youtube
iPad Tricks for Beginners. Let’s check out 6 iPad tricks if you are new to using one. Also, if you are planning to give this to your grandparents then save yourself from the questions and just show them this video!
#ipad tricks#ipad tips and tricks#ipad for beginners#ipad tips and tricks for beginners#tips and tricks for ios 7#5 tips for beginner ipad lettering#ipad basics for beginners#ipad tutorial for beginners#ipad tips for seniors#procreate for beginners ipad#procreate for beginners#digital art for beginners ipad#procreate layers for beginners#garageband tutorial for beginners#tips and tricks for ios 8#ipad mini 5 tips and tricks#ipad pro#ipad tips#ht tech#tricks#Youtube
1 note
·
View note
Note
What software do you use for your music? Do you have tips and recommendations for beginners? (Also your music is wonderful, I wanna compose like you someday!)
I just use garageband because it came free with my laptop like forever ago (Along with some free plugins that came with my MIDI keyboard) and it's definitely the easiest DAW I've used. I know there's a couple web based DAWs that are like super super simple but I don't know them by name. I'd definitely recommend it to beginners if you have access to it, but obviously it's an Apple thing so that's not gonna work great for everyone. I would not recommend FLStudio to beginners but some people really gel with it (somehow) so that's up to you.
As for specific tips? (wall of text below)
Honestly my music learning process has been a lot of just trial and error. I've always been good at like "visualizing" what a song should be like, it was just a matter of figuring out how to get it out of my brain in a way that sounds good. Something that I do think is helpful is to make music on a time limit. Don't get caught up in tweaking things and getting stuck on the intro for hours and then trashing the song. Just keep it moving and then come back later if you feel like you need to and have the ideas for it.
And if you're like a complete total beginner with basically no music knowledge and you don't have the time to dedicate to studying theory like at a professional level, I would actually advise *against* trying to get into learning music theory. As you'll likely just end up limiting yourself to the few "rules" that you do have time to learn which will stifle your organic growth. I had a chunk of time where I was trying to learn proper theory and it made my music worse than when I basically first started because it became super rigid and stale. Obviously everyone is different and can learn more in less amounts of time than me, but I think it's good to avoid creating a rigid template in your mind of what a "good" song should be when you're starting out.
Something else I found very useful was to recreate songs by ear in a few hours. No downloading MIDIs to tweak, just listening to a song, trying to figure out what kind of instruments it has, and reconstructing the composition yourself. You'll pick up a lot of useful info and skills!
Hope that helps! and thanks a ton!
35 notes
·
View notes
Text
here's a demo i made on garageband the other day tihi, i wanna get better at producing but dont rlly know where to start, any tips?
8 notes
·
View notes
Text
Let's hear from our adventurous audience:
"You know it. You love it. It will almost certainly without a doubt sweep
Incredible that some guy in GarageBand could make such a banger
Made me realize that love is holding on and not letting go or something idk
I did 1/4 of my final music theory project on this song"
"Its a song that still gets me hype years after first hearing it. Its also my opinion that Balance is the best TAZ has ever been, and the Wonderland arc is really where things get tipped on their head. This song reminds me of experiencing that for the first time. And its super hype dude."
36 notes
·
View notes
Text
How to start a podcast: a complete step by step tutorial- Podcast Insights
Part 1 l Part 2 l Part 3
The fourth article in the excellent post Sydney provided is by a website called Podcast Insights. They laid down a mind-boggling stat- there are over two million podcasts out there. But they were making a comparison between podcasting and blogging, and said that podcasting isn't as crowded as blogging because there are over six hundred million blogs.
The article goes over the basics of planning. It says to choose a topic that you can talk about for over a hundred episodes, which seems daunting.
It talks about the pros and cons of having a co-hosted show, too- scheduling conflicts are a thing, but having someone to talk to is great. The article also talks about naming briefly, and includes a handy search bar to see if the domain link is already taken.
Then the article moves onto format, length, and style. It doesn't go into full detail with any, but the article stresses that you should do what's right for you and your podcast, not just chase trends.
Then it's onto podcast cover art and music (the link is to another article that goes into more detail about it, including sites you can use to get music for your show easily).
Microphones are brushed past, including a helpful starter kit article, then it's onto guests if you choose to have any.
The article lists a few options for recording and editing, plus a second article that covers software from the ones for beginners to the ones for more advanced users.
The article offers several tips on recording and editing, including how to build a template in garageband on apple computers.
Then it's time to find a hosting site and launch!
After launching, the article recommends some further steps- like building a website and making transcripts.
2 notes
·
View notes
Note
Hello! I think I remember that you guys do voice acting. I was wondering if you have any tips for getting into voice acting, or any tips for someone who's POC specifically who wants to go that route? My friend has been thinking about doing so, and I've been trying to help her out with it so I thought to ask
Huh, ok, so I guess for context, we do this as a hobby! We really could have turned this into paid work (not by joining the big industy, but by charging for lines in general), but figuring out prices has been very weird for us- it's different from charging for art!
I'm going to talk about voice acting at home, not on set/at a studio. We're also more of a character voice actor, s if your friend is looking to go into advertising, narration, etc, our knowledge will be limited on that! But the general idea should be very similar if not the same for some things. (Some companies and businesses or paid work in general will let your record at home, etc.)
We're going to ramble, so I'll put this under a read-more
(Also, a lot of us actually contributed to this post over the last few days, so it’s possible we repeat a few things, or our first-pronouns keep changing. Hope it still makes sense!)
Under the read-more, we’ll talk Equipment, Getting started (Auditions), and Other random advice we threw in.
Equipment
Anyway, you first want to start with your equipment. In our opinion, what matters isn't the name of what you have- but the quality of your end product. If you're recording with an iPhone for example (which is said to have one of the clearest microphones for a phone), that's fine! We knew someone who recorded his lines using his headset microphone. There's this knowledge that headset microphones have really bad quality, and the brand he has is known for being very bad in our country: CDR King, but it was VERY VERY CLEAR.. I remember in voice calls, we'd be at awe with how crisp his voice was! If you're using what you have, just make sure you take care of your equipment- what matters is how it sounds in the end. I will say though, that what's more required of you should be good headphones or earphones, so you can hear what you sound like, you should be able to pick up any mistakes or your background noise (i applicable), the fuzz, etc..
We use Garageband, since it came free with our macbook. I’ve seen a lot of professionals use Adobe Audition. These are not requirements:
Get Audacity. As a voice actor, your job isn't to clean up your lines, but if you're working without professional equipment (AND even if you DO have professional equipment, get Audacity), this really helps with Noise Removal! It's free! You can look up "how to do noise removal in audacity" and there is a lot of information on how to use this thing. For every recording, we put it through Noise Removal in audacity, unless our director specifically tells us not to (we usually ask every director when we meet a new one).
Additionally, you can record in audacity, which is once again free! It makes voice acting so much more accessible to those that can only use what they have
But if you're here to look for microphone and equipment recommendations:
We haven't tried that many Microphones; we've only been voice acting since 2014, and have only had literally 2 microphones over the 8 years! We got our first microphone in maybe 2016, though? When we started taking things seriously, and got a replacement microphone in maybe 2019, which has been our current microphone ever since. I say this, because we might not be the best perspective to suggest microphones from! Stuff's expensive, haha.
Our first microphone was an AT2020 USB by Audio Technica.
In our opinion, it's a good starter microphone. It does it's job, but it's most for talking in our opinion. If you need to sing or scream, it might not be the best, but it did serve us alright. It was a USB microphone, which will not be as good as an XLR. We replaced it because its quality started to degrade (it couldn't handle us screaming). But, Like I said, if you take care of your equipment, everything can last you a long time. We know a fellow voice actor who owns an AT2020 USB right now, and his audio is crisp :-)
Our second microphone, our current one, is a B-2 Pro by Behringer!
We finally got a mic stand so if we start slapping our desk, it doesn't absorb our shock hahaha. The quality is much better, and it can handle us screaming and shouting without the audio clipping. It came with a pop filter that hugged the microphone, and we could switch between different microphone modes! For solo voice acting, you just need it set to taking in audio only from the front side.
Also, when looking for your microphone, I highly suggest doing some personal researches on what ranges microphones can pick up. Some microphones can not handle screaming, while others can. Some microphones are only for talking, some can include singing, some will better pick up lower registers, some can pick up higher voice betters, etc. It’s complicated, but it’s something we looked up because microphones are expensive. And we wanted to make it worth it!
The best microphones will always be XLR's, which means you'll need an audio mixer so you can actually plug it into your computer!
I have nothing to add here, finding the right audio mixer for you depends on your preferences: Do you want every dial possible, so you can adjust the different frequencies in real life and in real time, or are you alright with handling all that in post production (Audacity, garageband, etc.)? With that in mind, do you want a small mixer instead? That will take up less space, and is portable. The only thing you need to worry about is making sure it has a USB output so you can actually plug it into your computer.
The first and only mixer we've ever owned is currently a XENYX Q802 USB. It has a bunch of dials and allows us for more than one XLR plugged in- which we don't need hahaha. It does its job! We just have to replace our microphone wire because you can hear its age now.
Before the pandemic, we were able to try a friend's audio mixer, because we recorded singing for him, and his audio mixer made our recordings so CLEAR without noise removal, but we were using the same microphone. IT WAS CRAZY. It was a Focusrite Scarlet (If you forget the name, searching "scarlet audio mixer" helps. It's a very small thing, and we know two people who own it! Very worth it.
Stepping In To Voice Acting (Auditions)
Like with any acting gig- go to auditions! This may be physical, or online. On Youtube, Twitter, and Tumblr, searching "casting call" and "auditions", then filtering by most recent, should help you! If you like certain medias, you can also type in the name in the search bar. For a huge majority of our voice acting ‘career’. We found casting calls via Youtube.
Otherwise, I highly recommend Casting Call Club, and joining discord servers surrounding casting calls and voice acting :-) For a long time now, we’ve been using CCC and Youtube to look for casting calls, but with Discord now existing, there’s plenty of servers out there. And just the other day, we found a casting call on tumblr!
Other Stuff (We throw random advice)
After that, the rest is just taking care of your responsibilities as a voice actor. Be on time, and respond to messages!
Unfortunately, we can’t give advice on how to price your work, we don’t have enough experience on that. but as usual, don’t go below minimum wage unless you’re totally fine with that. This is a service work, so just like how physical actors will have varied prices, it depends on your reputation and experience.
Editing your audio is literally not supposed to be your priority, unless you want to do that and it’s something you’d prefer than have someone else edit. If anything, the most I would suggest any voice actor do, is noise removal; But you shouldn’t be adding your own reverbs and echo’s unless, once again, you’re alright with that. I say this, because a voice actor’s job is to come in with your lines, give good takes, and leave. Just because you’re able to record at home, doesn’t mean you should be doing literally all the other work for every single project. That’s your director’s problem, unless you offer it
Don’t record more than 3-5 takes per line or paragraph. It will give the editor a headache, and it’s useless if all 5 takes will sound the same, anyway. What we do, is that after we finish recording a whole session, we go to audacity for noise removal. While we do that, we also listen through the whole recording to remove any useless takes to keep things quick and precise. this is Extra work, but a personal choice so we can look more professional and to-the-point.
If you need to scream for the line, then scream! Whisper screaming does nothing. Voice acting is not just saying the lines just because; you still have to be in character.
It’s ok if you’re not friends with the director or other cast members. It’s never an obligation for you to hang out in the cast servers. if you feel like you’re being forced to participate in a project server, that’s personally a red flag. You are allowed to say no to roles or events, this is especially if you are doing this as a hobby, or for free.
Voice acting needs you to be unafraid to be silly and goofy. Even if you’re introverted outside of the booth, you need to be able to show as much emotion with your voice when called for it! Allowing yourself to let loose means you can act for almost any role.
Speaking of the above, find out what you can do, and run with it. While we do original voices for characters of original works or creations, we actually started out with doing impressions of MLP Characters. To shorten the story, we’ve always wanted to play Fluttershy roles growing up, but the Fluttershy role is honestly oversaturated with voice actors who aren’t always the most accurate. Turns out, we’re extremely good at Twilight Sparkle, but originally never wanted to voice her. Thing is, No one ever voices Twilight Sparkle, it’s surprisingly in-demand since no one can do her much. Obabscribbler described us recently as one of the best Twilights out there. Even right up there with IMShadow :-). If you find your niche, it’s ok to run with it, even if you never originally planned to do that. Maybe something you never liked originally doing, was something plenty of other people of needed.
But if you feel stuck, practicing outside of your comfort zone will always be the best recommendation.
Lastly, take care of your voice! If you feel a sore throat coming on or a cold, immediately get as much rest. Your voice box is your tool, and you will be out of commission literally until you fully recover.
Also, I just realized that we didn’t include any advice for POC.. We’re Asian (Filipino), and I unfortunately don’t have a lot to add. I suppose this is because as a voice actor, you’re behind a curtain so no one will see you or your skin and features. I will say though- you can make it as a voice actor no matter who you are or what you look. As long as you’re a decent person, you can go anywhere and do anything. What matters, as a voice actor, is your skill. I say this as someone who voice acts at home, and does not go to physical auditions where people can see my face.
Your luck may especially come from those who are specifically looking for voice actors of color. If you want, looking for characters that have your ethnicity or accent might be something you’d be interested in! We personally just go after characters we want to voice, and it’s just a bonus if our ethnicity and background might match the character :-) (See: we voice a lot of non-humans haha). After all, you are supposed to be the character, unless the character was specifically molded after you. The different voice acting communities we’ve been in have been extremely diverse! The world is truly your oyster
9 notes
·
View notes
Text
Good singing plugins for garageband free

GOOD SINGING PLUGINS FOR GARAGEBAND FREE HOW TO
GOOD SINGING PLUGINS FOR GARAGEBAND FREE PRO
GOOD SINGING PLUGINS FOR GARAGEBAND FREE SOFTWARE
GOOD SINGING PLUGINS FOR GARAGEBAND FREE PROFESSIONAL
GOOD SINGING PLUGINS FOR GARAGEBAND FREE MAC
Naturally, you may want to move on to a better plugin with more options, specifications, parameters, and other distinctive features. Users can only select the key and make modifications based on a numerical scale. GarageBand has its pitch correction/autotune plugin, but it’s pretty restricted in its parameters. These are the best autotune plugins for GarageBand. What Is The Best Autotune Plugin For GarageBand?
GOOD SINGING PLUGINS FOR GARAGEBAND FREE SOFTWARE
Step 3 – Verify plugin software is correctly installedīut if you still get errors, simply google the error name, and you’ll find plenty of forums that have answered several users’ questions.Īcoustic garage band coming to a venue near you soon #Acousticband #livemusic #Thursdaymotivations #garageband #blackcountry /HJb8n圓Y1s Follow these instructions to make it available. Say you are trying to load your Waves plugins in GarageBand but you cannot find them. But to have them work smoothly, you should ensure you follow the steps needed to add the plugin. Yes, Waves plugins do work in GarageBand.
GOOD SINGING PLUGINS FOR GARAGEBAND FREE MAC
Recording a new tune in GarageBand on my Mac Studio using my Odyssey Neo G9 monitor – so good! /3vNLKsS5sS Pro tip: A good reverb makes a world of difference, but too much reverb makes things messy and is the hallmark of a newbie. And if you’re disturbed by unwanted noise, GarageBand’s noise gate would save the day. You may also need a de-esser plugin if the sibilances in the vocal performances are distracting. When mixing the lead vocal track, position the panning to the center. When you have an awesome recording, you can apply an EQ to raise or cut any high frequencies that you need to modify, and you can apply it to a vocal track. Even so, one USB condenser mic like the Snowball or Yeti is decent for getting started. Ensure you record several takes until you get the best vocal performance you can deliver.īut since you’re utilizing GarageBand, it’s reasonable to assume you don’t have excellent pro-quality gear (yet). Simply use a good microphone and work in a good-sounding room with as little background noise as possible, preferably soundproof.
GOOD SINGING PLUGINS FOR GARAGEBAND FREE PROFESSIONAL
How Do I Get Professional Vocal On GarageBand? With only 3 days, a $100 mic, and GarageBand Lupe Fiasco was still able to make a song like this. See the Set Audio/MIDI preferences in GarageBand on Mac for more info. See the Add and change impact modules in GarageBand on Mac for more info.īefore using Audio Units in your GarageBand projects, ensure that the Enable Audio Units checkbox is selected in GarageBand > Preferences > Audio/MIDI. You can turn Audio Units modules on or off, transform them, alter their settings and eliminate them similarly to modules included with GarageBand. You add Audio Units plugins to a track (counting the expert track) in the plugins region. You can use Audio Units instrument plugins on software instrument tracks only. Instrument plugins: These involve pianos, organs, synthesizers, other keyboards, and additional instruments. You can utilize Audio Units effect plugin on individual tracks and the expert track. There are two types of Audio Units plugins you can use in your projects:Įffect plugins: These include common audio effects, such as reverb, blowers, delays, and other distinct effects. Just make sure to avoid VST plugins as they are not compatible with GarageBand. These are often called Audio Units and are provided to Apple products by Core Audio.īut you can purchase more 3rd party plugins from other vendors such as: Some GarageBand plugins are pre-installed on your Mac. How Do I Get Vocal Plugins in GarageBand?
GOOD SINGING PLUGINS FOR GARAGEBAND FREE HOW TO
Without further ado, let’s get started by finding out how to get some vocal plugins in GarageBand.Īuthentic soundtrack 😉🪘🇨🇺🎹 🎤 #gameDev #SoloDev #IndieGameDev #indieDev #Indiegame #madewithUnit圓d #iOS #garageband #liverecording #congas #aloCubano /e9Jf2r7WT7
GOOD SINGING PLUGINS FOR GARAGEBAND FREE PRO
And you can opt for the pro version or the free version of these plugins. The plugins we will explore are simple-to-use tools for making terrific vocal recordings, whether you are a pro or a newbie. GarageBand is Apple’s free software for music production. Overall, you’ll be able to do tons of interesting stuff you couldn’t do before. You can use them with any DAW (digital audio workstation) to work on the sound quality of an entire song and you can add unique effects and instruments. These are some of the best free vocal plugins for GarageBand: So, what are the best vocal plugins for GarageBand? But if you’re just starting out, you can’t afford high-end equipment. Let’s face it, recording and mixing vocals is a lot of work.
2 notes
·
View notes
Text
Professional Music Tracks on a Shoestring Budget: Best Tools and Techniques
Producing professional music tracks might seem like an expensive endeavor, but with advancements in technology, even independent artists on a tight budget can achieve high-quality results. Whether you're just starting out or looking for ways to cut costs while maintaining professional sound, there are numerous best alternatives to record a professional music track without breaking the bank. This article explores various affordable tools, techniques, and services that can help you produce music with a professional polish—without the need for a traditional, high-cost studio.
From free digital audio workstations (DAWs) to budget-friendly microphones, we'll break down all the essentials you need to know. Additionally, we’ll discuss cost-effective soundproofing techniques and introduce some online mixing and mastering services. If you’re an independent artist or someone just starting in music production, these tips will guide you in creating music that sounds just as good as anything made in a full-fledged studio.
1. Free and Affordable DAWs (Digital Audio Workstations)
One of the most essential tools for recording music is a DAW. While premium software like Pro Tools and Logic Pro might be industry standards, there are several free or low-cost DAWs that can help you achieve a professional sound.
Audacity: This open-source, cross-platform audio software is ideal for beginners who need to edit and mix audio without learning complicated software. It offers a simple interface but provides all the basics needed for recording tracks.
Reaper: Available for a very affordable price, Reaper offers a full suite of recording, editing, and mastering tools. It supports third-party plugins, making it highly versatile and powerful, even compared to more expensive DAWs.
GarageBand: For Mac users, GarageBand offers a complete solution for recording, editing, and mixing tracks. It even has built-in virtual instruments, loops, and effects, allowing you to produce full-fledged songs without additional software.
These DAWs are great alternatives to record a professional music track without spending hundreds of dollars.
2. Budget Microphones
A quality microphone is crucial for capturing vocals and instruments with clarity. Thankfully, there are excellent budget options that can produce professional results.
Audio-Technica AT2020: This affordable condenser microphone is highly regarded for its excellent sound quality at a budget-friendly price. It's ideal for home studios and can handle both vocals and instruments with ease.
Shure SM57: Known for its durability and versatility, the Shure SM57 is a workhorse microphone used in professional studios and live performances alike. It's an excellent choice for recording instruments like guitars and drums, and its affordability makes it accessible for beginners.
Samson Q2U: This hybrid dynamic microphone connects via both USB and XLR, making it perfect for podcasters, singers, and musicians working in home studios. The USB option eliminates the need for an expensive audio interface, keeping costs down.
These budget microphones are excellent alternatives to recording a professional music track with crisp and clean audio without breaking the bank.
3. Low-Cost Soundproofing Solutions
One of the challenges of home recording is dealing with room acoustics. Poor acoustics can affect the quality of your recordings, but luckily, there are low-cost soundproofing solutions available.
Acoustic Foam Panels: These foam tiles can be placed on walls and ceilings to absorb sound and reduce echo. They are relatively inexpensive and can make a big difference in improving the quality of your recordings.
Rugs and Carpets: Hard surfaces reflect sound, so placing rugs or carpets on the floor can help reduce echo. Heavy curtains can also help absorb sound waves and prevent outside noise from interfering with your recordings.
DIY Solutions: You can also build DIY soundproofing using materials like thick blankets, cushions, or even egg cartons. While they may not provide professional-level soundproofing, they can help on a shoestring budget.
These techniques make it easier to record a professional music track at home without investing in costly renovations or soundproofing equipment.
4. Affordable Audio Interfaces
An audio interface is necessary for connecting instruments or microphones to your computer. However, you don't need to spend a fortune on this essential piece of gear.
Focusrite Scarlett 2i2: One of the most popular and affordable audio interfaces on the market, the Focusrite Scarlett 2i2 provides excellent sound quality and reliable performance. It’s perfect for small home studios and supports two simultaneous input channels, making it great for recording vocals and instruments.
Behringer UMC22: If you're looking for something even more budget-friendly, the Behringer UMC22 offers solid audio conversion for its price. While it doesn’t have as many features as higher-end models, it is sufficient for beginners looking to produce clean recordings.
PreSonus AudioBox USB 96: Another great affordable option, this interface comes with its own DAW (Studio One) and offers reliable sound quality for a low price.
These audio interfaces offer the necessary tools for capturing professional-quality recordings and are some of the best alternatives to record a professional music track without a hefty price tag.
5. Online Mixing and Mastering Tools
Mixing and mastering are essential steps in the music production process, but hiring professionals for these services can be costly. Fortunately, online tools can help you achieve professional-level mixing and mastering at a fraction of the cost.
LANDR: LANDR is an automated mastering platform that offers AI-powered mastering for a low monthly fee. It provides quick and affordable mastering services that can give your track a polished, professional sound.
eMastered: Like LANDR, eMastered is an AI-based mastering service designed for independent artists. It's user-friendly and produces high-quality results that are comparable to more expensive mastering studios.
BandLab: BandLab offers free cloud-based collaboration, and its integrated mixing and mastering tools allow you to produce professional-sounding tracks without spending a dime. It’s perfect for musicians who are on a budget but still want a polished final product.
These services are ideal alternatives to traditional studio mastering and offer cost-effective ways to achieve professional results.
Conclusion:
Recording professional music tracks doesn't have to be an expensive or overwhelming process. With the right tools, such as free DAWs, budget microphones, and affordable audio interfaces, independent musicians can create high-quality tracks from home without breaking the bank. Moreover, incorporating cost-effective soundproofing techniques and utilizing online mixing and mastering services provide further opportunities to produce polished music. These best alternatives to record a professional music track not only help artists save money but also allow for more creative control over the recording process.
Whether you're a seasoned musician looking to cut down on studio costs or a newcomer eager to create professional music at home, these budget-friendly tools and techniques will help you get started. Producing music on a shoestring budget is not only possible but can also yield incredible results with a bit of creativity and resourcefulness.
0 notes
Text
500 YouTube Subs
The Blogging Musician YouTube channel enriches my blog with video content. I’m now approaching 500 YouTube subs and over 50 videos. Check it out!
As the content has expanded, I’ve broken down the following content categories into playlists. Check them out by clicking on the headings.
Calling all readers! Help the channel get to 500 YouTube subs by subscribing here:
Fender Stratocaster
I’ve…

View On WordPress
#Fender Stratocaster#Garageband#Garageband iPad#Guitar#Guitar amp reviews#Guitar lessons#Guitar Multi-FX reviews#Guitar Pedal reviews#Guitar reviews#Guitar Tips#multi-fx#Original Music#Songwriting#youtube#YouTube Channel#YouTube subs
1 note
·
View note
Text
How to Choose the Right Music Equipment Online for Beginners

Purchasing music equipment online can be a thrilling experience, especially for beginners who are just starting their musical journey. With a vast range of options available across e-commerce platforms, from guitars to keyboards, recording gear, and even production equipment, the choices can be overwhelming. However, finding the right equipment that meets your needs and fits within your budget is essential to ensure a smooth and enjoyable learning experience.
This guide will provide you with practical tips and considerations to help you choose the right music equipment online as a beginner.
1. Identify Your Musical Goals
Before diving into the online marketplace, it's crucial to understand your musical goals. Are you learning to play an instrument like the guitar, keyboard, or drums? Are you focused on vocal performance or producing your own music at home? Identifying what you want to achieve will help you determine the right type of equipment to purchase.
Instrumentalists: If you're learning an instrument, such as the guitar, look for beginner models that offer good sound quality and durability without being too complex. Avoid advanced models that may overwhelm you with unnecessary features.
Vocalists: For those focusing on singing, investing in a good microphone and basic recording equipment is crucial for capturing high-quality vocals during practice sessions or performances.
Producers and DJs: If you're interested in music production, consider starting with a basic MIDI controller, digital audio workstation (DAW) software, and headphones to create and mix tracks at home.
Having a clear goal in mind will streamline your search and help you focus on the specific gear that will best suit your needs.
2. Set a Realistic Budget
Budgeting is one of the most important steps when buying music equipment online. As a beginner, you don’t necessarily need the most expensive or professional gear. The goal should be to find a balance between affordability and quality.
Here are some guidelines for budgeting:
Instruments: For beginners, a decent quality guitar, keyboard, or drum set can range from ₹3,000 to ₹10,000 depending on the brand and features. Mid-range options are usually a good starting point, offering reliability and good sound quality.
Microphones and Recording Gear: For vocalists or podcasters, a basic microphone and audio interface can cost between ₹2,000 and ₹7,000. USB microphones are a great option for beginners as they are easy to set up and use with a computer.
Production Equipment: Aspiring producers can get a basic MIDI controller for around ₹5,000 to ₹10,000, while a reliable pair of studio headphones can range from ₹2,000 to ₹6,000. DAW software can range from free versions like Audacity or GarageBand to paid software like FL Studio, which may cost ₹7,000 or more.
Having a budget will not only prevent you from overspending but also ensure that you purchase equipment that meets your current needs without compromising on quality.
3. Research Brands and Read Reviews
When buying music equipment online, it's essential to research trusted brands and read user reviews to ensure you're purchasing reliable products. Established brands like Yamaha, Fender, Casio, Shure, and AKG are known for producing high-quality instruments and recording gear for beginners.
Trusted Brands: Opting for well-known brands can provide peace of mind in terms of durability and performance. These brands also typically offer warranties or customer support if any issues arise.
User Reviews: Online reviews and ratings from other buyers can give you valuable insights into the product’s performance and durability. Reviews can highlight common problems, standout features, and overall user satisfaction, making it easier to decide whether the product suits your needs.
Additionally, watching video reviews or demonstrations of the equipment on platforms like YouTube can give you a real-world feel of how the product sounds and performs before making a purchase.
4. Consider Beginner Bundles and Kits
Many online music retailers offer beginner bundles or kits that include all the essential equipment needed to get started. These bundles often provide great value for money and ensure that you have everything you need without purchasing individual components separately.
For example:
Guitar Starter Pack: A guitar starter pack might include a guitar, amplifier, strap, picks, and a tuner.
Home Recording Bundle: A recording bundle may come with a microphone, audio interface, headphones, and necessary cables.
Buying a bundle ensures you have all the essential tools to start learning or recording right away and can save you money compared to purchasing each item individually.
5. Check Return Policies and Warranties
When buying music equipment online, it's important to check the return policies and warranties provided by the seller. As a beginner, there’s always a chance that the product may not meet your expectations, or you may face an issue after purchase.
Ensure that the online store has a customer-friendly return policy that allows you to return or exchange the product if needed. Additionally, look for warranties that cover defects or malfunctions, especially for more expensive items like keyboards, guitars, and studio gear.
Conclusion
Choosing the right music equipment online as a beginner doesn’t have to be overwhelming. By identifying your musical goals, setting a realistic budget, researching brands, and considering bundles or kits, you can find high-quality gear that will support your musical development. Remember to prioritize durability and ease of use, as the right equipment will help make your learning process more enjoyable and productive. With careful planning and a bit of research, you can invest in the perfect gear to start your musical journey.
0 notes
Text
The Emergence Of Australia Podcasting In Business Landscape

Podcasting has witnessed tremendous growth over the past few years in Australia. According to recent surveys, one in three Australians now listen to podcasts on a regular basis. This reflects a massive increase from just 10% regular listeners in 2015. The popularity of podcasts has surged among both personal and professional users. More and more Australian businesses are realizing the potential of podcasts to connect with customers and promote their brands.
Rise Of Podcasts For Business
Several Australian companies in Australia Podcasting have started producing business podcasts focused on skills, thought leadership and networking. These podcasts help businesses share expertise, spark new ideas and enable two-way interactions with other professionals. Some examples include 'StartUpMuster' by StartupAus, 'Women in Business' by Westpac, and 'HQ Masters' by Hays recruiting agency. Such podcasts open new channels for businesses to authentically engage target audiences and position themselves as leaders. The business podcast genre is growing steadily and bringing more opportunities for brands.
Podcasting For Lead Generation
Many businesses have found podcasts to be an effective lead generation tool. Podcasts allow promoting products/services to a qualified listener base in an entertaining format. Listeners who enjoy the content are highly likely to engage further with the hosting brand. Business podcasts can include calls-to-action asking listeners to sign up for email lists, download resources or schedule consultations. Podcast advertisements and sponsored segments also provide revenue opportunities for hosts. With strong messaging and promotion, podcasts can drive measurable leads and sales for B2B as well as B2C companies.
Using Podcasts For Employee Communications
Some forward-thinking businesses like Atlassian and Canva have started internal podcasts for updating and engaging employees across locations. These 'all-hands' podcasts keep staff informed about company updates, strategy discussions and cultural initiatives—without needing physical gatherings. They showcase role models through interviews and spread inspirational messages. Podcasts personalize the employee experience, foster bonding over shared interests and boost workplace collaboration. With remote and flexible work gaining prominence, internal podcasts effectively maintain connections within distributed workforces.
Platforms And Technology For Australia Podcasting
While iPod/iPhone paved the way initially, podcast platforms have diversified today. Popular options for creating, hosting and distributing podcasts are Anchor, Buzzsprout, Captivate, SoundCloud, YouTube and dedicated podcast apps. Audio editing software like Adobe Audition and GarageBand enable easy production. Business podcasts can leverage analytics from platforms to track stats like downloads, locations and engagement. They provide monetization support through sponsorships, paid subscriptions and tip jars. Technologies like artificial intelligence are enhancing podcast experiences through smart transcriptions, translations and personalized recommendations.
Podcasting Challenges And Growth Drivers
The main challenge for podcasting adoption in businesses remains the time commitment required for consistent, high-quality content production. However, factors like growing listenership demographics, proliferation of connected devices, 5G networks and VR/AR applications will continue fueling the rise of podcasting. As more sectors recognize its diverse applications, demand for specialized podcast services and third-party content creation is bound to increase. With proper strategic focus and investment, podcasting holds immense untapped potential to power business communications and bolster brands across Australia podcasting in the coming years.
Get more insights on this topic: https://www.trendingwebwire.com/australia-podcasting-the-rise-of-podcasting-down-under/
About Author:
Ravina Pandya, Content Writer, has a strong foothold in the market research industry. She specializes in writing well-researched articles from different industries, including food and beverages, information and technology, healthcare, chemical and materials, etc. (https://www.linkedin.com/in/ravina-pandya-1a3984191)
*Note:
1. Source: Coherent Market Insights, Public sources, Desk research
2. We have leveraged AI tools to mine information and compile it
0 notes
Text
Exploring Mobile Studios: The Future of Professional Music Recording
Mobile studios have emerged as a game-changer in the music recording industry. Offering flexibility and convenience, they allow artists to record professional music tracks anywhere, from hotel rooms to outdoor locations. This revolutionary approach has democratized music production, enabling more artists to create high-quality recordings without the constraints of traditional studio environments. This article explores the future of professional music recording through mobile studios, highlighting the advantages, essential gear, and tips for setting up your mobile studio.
1. Advantages of Mobile Studios
Flexibility and Convenience of Recording on the Go:
Mobile studios provide unparalleled flexibility, allowing artists to record wherever inspiration strikes. Whether you're on tour, traveling, or simply prefer recording in different environments, mobile studios make it possible to capture your creativity without being tied to a single location.
How Mobile Studios Have Democratized Music Recording:
By lowering the barriers to entry, mobile studios have made professional music recording accessible to a broader range of artists. This democratization has led to a surge in creativity and diversity in the music industry, as more voices can now produce high-quality recordings.
Examples of Successful Artists Using Mobile Studios:
Billie Eilish: Known for recording much of her debut album "When We All Fall Asleep, Where Do We Go?" in a home studio setup.
Bon Iver: Recorded his critically acclaimed album "For Emma, Forever Ago" in a remote cabin using minimal equipment.
Imogen Heap: Frequently uses mobile recording setups to capture unique sounds and performances on the go.
2. Essential Mobile Studio Gear
Overview of Portable Recording Equipment:
To set up a mobile studio, you need compact, high-quality equipment that is easy to transport and set up. Essential gear includes a portable audio interface, a versatile microphone, a laptop or tablet, and reliable headphones.
Recommendations for Mobile Audio Interfaces, Microphones, and Laptops:
Portable Audio Interfaces:
iRig Pro I/O: A compact and versatile interface that connects to both mobile devices and computers, offering high-quality sound.
Zoom H6: A handheld recorder with multiple inputs, ideal for capturing professional recordings on the go.
Microphones:
Shure MV88: A digital stereo condenser microphone designed for iOS devices, providing excellent sound quality in a small package.
Rode NT-USB Mini: A compact USB microphone with studio-quality sound, perfect for mobile recording setups.
Laptops/Tablets:
MacBook Pro: Known for its powerful performance and compatibility with various DAWs, making it a popular choice for mobile recording.
iPad Pro: With apps like GarageBand and Cubasis, the iPad Pro offers a powerful and portable recording solution.
Tips on Selecting the Best Gear for Mobile Recording:
Portability: Choose lightweight and compact equipment that is easy to transport.
Durability: Look for gear that can withstand the rigors of travel and frequent setup and breakdown.
Compatibility: Ensure your devices and software are compatible with each other to avoid technical issues.
3. Mobile Recording Software
Best Recording Apps and Software for Mobile Studios:
Recording software designed for mobile devices offers a range of features to facilitate high-quality music production. Some of the top recording apps include:
GarageBand: Available for iOS devices, GarageBand is a powerful and user-friendly DAW with a wide range of virtual instruments and recording features.
Cubasis: A mobile version of the popular Cubase DAW, Cubasis offers professional-grade recording and editing tools for iOS and Android devices.
Auria Pro: Known for its advanced mixing and editing capabilities, Auria Pro is a top choice for serious mobile recording projects.
Features That Make These Apps Suitable for Professional Use:
Multi-Track Recording: Allows simultaneous recording of multiple instruments and vocals.
Virtual Instruments and Effects: Access to a vast library of sounds and effects to enhance your recordings.
High-Quality Plugins: Integration with third-party plugins for additional functionality and sound customization.
How to Integrate Mobile Software with Other Recording Tools:
Cloud Storage: Use cloud storage services like Dropbox or Google Drive to save and share project files across devices.
MIDI Controllers: Connect MIDI controllers to your mobile device to play and record virtual instruments.
External Storage: Use external hard drives or USB drives to expand your storage capacity and back up your recordings.
4. Setting Up a Mobile Studio
Step-by-Step Guide to Setting Up a Mobile Recording Studio:
Choose a Location: Find a quiet and comfortable space where you can set up your mobile studio.
Set Up Your Equipment: Connect your audio interface to your laptop or tablet, plug in your microphone, and position your headphones.
Optimize Acoustics: Use portable soundproofing solutions like reflection filters or foam panels to improve the acoustics of your recording space.
Test Your Setup: Perform a few test recordings to ensure everything is working correctly and adjust your settings as needed.
Considerations for Acoustics and Power Sources:
Acoustics: Mobile studios often face challenges with acoustics. Consider using portable soundproofing solutions or recording in naturally quiet environments.
Power Sources: Ensure you have reliable power sources for your equipment. Portable power banks and battery-powered interfaces can be useful for recording in remote locations.
Tips for Optimizing Your Mobile Studio Setup:
Minimal Setup: Keep your setup minimal to reduce setup time and potential technical issues.
Organization: Keep your cables and equipment organized to avoid clutter and ensure quick setup and teardown.
Backup Plans: Always have backup plans for power and storage to avoid disruptions during recording sessions.
5. Challenges and Solutions
Common Challenges Faced in Mobile Recording:
Noise and Interference: Recording in various locations can introduce unwanted noise and interference.
Limited Equipment: Mobile setups may lack the extensive gear available in traditional studios.
Technical Issues: Mobile devices can sometimes face compatibility and performance issues with recording software.
Solutions to Overcome Issues Like Noise and Connectivity:
Noise Reduction: Use portable soundproofing solutions and choose quiet recording environments to minimize noise.
Gear Optimization: Select versatile and high-quality equipment that can handle a range of recording scenarios.
Software Updates: Keep your recording software and device firmware up to date to avoid technical issues.
Advice from Professional Mobile Studio Users:
Preparation: Always prepare your setup and test your equipment before recording sessions.
Flexibility: Be adaptable and ready to make quick adjustments to your setup based on the recording environment.
Creativity: Embrace the unique opportunities that mobile recording provides, such as capturing sounds and performances in diverse locations.
Conclusion:
Mobile studios represent the future of professional music recording, offering unparalleled flexibility and accessibility. With the right gear and setup, artists can achieve high-quality recordings anywhere. Embracing mobile recording technology opens up new possibilities for creativity and allows musicians to capture their inspiration wherever they are.
0 notes
Text
Using media more often and efficiently involves a combination of understanding the tools available, developing good habits, and leveraging best practices. Here are some tips and strategies for different types of media:
Images
Organize Your Photos:
Storage: Use cloud storage solutions like Google Photos, iCloud, or Dropbox to store and organize your images.
Albums and Tags: Create albums or use tags to categorize your photos for easy retrieval.
Enhance Your Photography Skills:
Composition: Learn about the rule of thirds, leading lines, and framing.
Editing: Use apps like Lightroom or VSCO for more advanced editing features.
Frequent Sharing:
Social Media: Post regularly on platforms like Instagram and Pinterest to build a visual portfolio.
Blogging: Use images to enhance your blog posts.
Videos
Efficient Recording:
Planning: Plan your shots and create a storyboard to save time during shooting.
Equipment: Invest in a tripod and a good microphone to improve video quality.
Editing Workflow:
Software: Use user-friendly software like Adobe Premiere Rush or Filmora for quick edits.
Templates: Utilize templates and presets for titles, transitions, and effects to speed up the editing process.
Publishing:
Regular Content: Create a content calendar to post videos consistently.
Optimization: Use appropriate titles, descriptions, and tags for better discoverability on platforms like YouTube.
Audio
Quality Recording:
Environment: Record in a quiet space with minimal background noise.
Equipment: Use a quality microphone and pop filter for clearer sound.
Editing Tools:
Software: Audacity and GarageBand are excellent for beginners and offer advanced features as well.
Editing Tips: Learn to normalize audio levels, remove background noise, and add effects.
Podcasting and Sharing:
Regular Episodes: Start a podcast and release episodes on a schedule.
Platforms: Use services like Anchor or Podbean to distribute your audio content.
Documents
Efficient Creation:
Templates: Use templates in Word or Google Docs to save time on formatting.
Collaboration: Use cloud-based tools like Google Docs for real-time collaboration.
Organized Storage:
Folders and Labels: Keep your documents organized in clearly labeled folders.
Version Control: Use version history features to keep track of changes.
Effective Sharing:
Links: Share documents via links to cloud storage instead of attachments to save space and maintain version control.
Security: Set appropriate permissions for viewing and editing.
Social Media
Strategic Posting:
Content Calendar: Plan your posts ahead of time.
Engagement: Interact with your audience through comments, likes, and shares.
Content Variety:
Mix Media: Use a mix of images, videos, and text to keep your feed interesting.
Stories and Reels: Utilize features like Instagram Stories and Facebook Reels for short, engaging content.
Analytics:
Track Performance: Use analytics tools provided by social media platforms to understand what works best.
Adjust Strategy: Modify your approach based on the insights you gather.
General Efficiency Tips
Learning and Development:
Courses: Take online courses on platforms like Coursera, Udemy, or YouTube to improve your media skills.
Practice: Regularly practice creating and editing different types of media to improve your proficiency.
Tools and Software:
Keep Updated: Stay updated with the latest tools and software that can enhance your media creation and editing processes.
Integrations: Use tools that integrate well with each other to streamline your workflow (e.g., Adobe Creative Cloud).
Time Management:
Set Goals: Set clear, achievable goals for your media projects.
Allocate Time: Dedicate specific times for media creation, editing, and sharing to maintain consistency.
Implementing these tips and strategies can help you use media more often and efficiently, making your communication and creative efforts more impactful.
0 notes
Text
Title: Mastering Your Music: Dive into Logic Pro
Introduction: In the realm of music production, having the right tools at your disposal can make all the difference. Whether you’re a budding musician or a seasoned producer, the right software can amplify your creativity and streamline your workflow. Among the plethora of digital audio workstations (DAWs) available, Logic Pro stands out as a powerhouse, offering a comprehensive suite of features tailored for professionals and beginners alike. In this blog, we’ll explore the ins and outs of Logic Pro, highlighting why it's a top choice for music production enthusiasts and why taking a Logic Pro Course could be your gateway to musical mastery.
Why Logic Pro? Logic Pro, developed by Apple, has established itself as a go-to DAW for musicians, producers, and audio engineers worldwide. Its intuitive interface, extensive sound library, and powerful editing capabilities make it a versatile tool for creating music across various genres. Here’s why Logic Pro stands out:
Intuitive Interface: Logic Pro’s user-friendly interface makes it accessible to beginners while offering advanced features for seasoned professionals. Its layout is designed to facilitate efficient workflow, allowing users to focus on creativity rather than technicalities.
Comprehensive Sound Library: With thousands of virtual instruments, loops, and samples included, Logic Pro provides a rich palette of sounds to experiment with. From realistic orchestral instruments to cutting-edge synthesizers, the possibilities are endless.
Professional-grade Effects and Plugins: Logic Pro comes bundled with a vast array of high-quality effects and plugins, allowing users to sculpt their sound with precision. Whether you’re tweaking EQs, adding reverbs, or experimenting with distortion, Logic Pro has you covered.
Flex Time and Flex Pitch: These features enable users to manipulate the timing and pitch of audio recordings with ease, offering unparalleled flexibility in editing performances.
Scalability and Integration: Logic Pro seamlessly integrates with other Apple products, such as GarageBand and Final Cut Pro, enhancing its versatility and interoperability.
Why Take a Logic Pro Course? While Logic Pro boasts a plethora of features, mastering its intricacies requires guidance and practice. Here are some compelling reasons to enroll in a Logic Pro course:
Structured Learning: A Logic Pro course provides a structured learning environment, guiding students through the software’s features and functionalities step by step. From basic navigation to advanced production techniques, courses cover a wide range of topics to cater to different skill levels.
Expert Instruction: Logic Pro courses are often taught by experienced instructors who possess in-depth knowledge of the software. Their expertise allows them to impart valuable insights, tips, and tricks that might otherwise go unnoticed.
Hands-on Experience: Courses typically include practical exercises and projects that enable students to apply what they’ve learned in real-world scenarios. This hands-on experience is invaluable for reinforcing concepts and honing skills.
Community and Networking: Joining a Logic Pro course introduces you to a community of like-minded individuals who share your passion for music production. Collaborating with peers, exchanging feedback, and networking can enrich your learning experience and open doors to future opportunities.
Stay Updated: Technology evolves rapidly, and software updates often introduce new features and enhancements. By enrolling in a Logic Pro course, you ensure that you’re up to date with the latest developments, maximizing your productivity and creativity.
Conclusion: In a world where music production has become increasingly accessible, mastering a powerful tool like Logic Pro can set you apart as a skilled and versatile creator. Whether you’re a musician, producer, or aspiring audio engineer, investing in a Logic Pro course can unlock a world of possibilities and accelerate your journey towards musical excellence. So, if you’re ready to elevate your music production game, why not take the plunge into Logic Pro? Your musical masterpiece awaits.
1 note
·
View note
Text
The Empire State of Mind Principle
I'm in New York this week visiting my dear grandmother, and I can't help but be reminded of one of my favorite guidelines in songwriting: the Empire State of Mind principle!
Like many songwriters I know, I am a perfectionist. It's easy for me to obsess over whether a line in a song is perfect or communicates precisely what I mean exactly as intended. This is exhausting, leads me to be envious of the freedom I see in other writers' works, and sometimes keeps me from putting out anything at all! (There's another tip-- don't let perfect be the enemy of the good.)
Jay Z and Alicia Keys' "Empire State of Mind" was released in 2009 and won a Grammy Award for Best Rap Song. Its signature drum intro and catchy hook make it instantly recognizable, but for songwriters and producers alike, there's more than meets the eye (ear). For example, that signature drumbeat? Straight from Apple Loops, free for anyone to use commercially and accessible for anyone with GarageBand or Logic. The minute I start to feel bad for using an Apple Loop, telling myself it's a cop out or a shortcut, I just remember: if Jay Z did it, so can I!
The REAL lesson, in my opinion, lies in Alicia Keys' hook. Anyone who's heard the track has probably been a little perplexed at some point about what exactly she's saying-- and no, it's not "concrete jungle wet dream tomato". The real line Keys uses to describe New York is "concrete jungle where dreams are made of".
What the hell does that mean?
No one can agree. This 2011 Reddit thread from r/grammar is full of users trying to dissect and parse the line, and similar grammatical discussions can be found on forums like Quora, WordReference, and HiNative. While conclusions are mixed at best, the answer I've seen pop up the most, and the one I agree with the most, is that the line actually makes no grammatical sense, but it more or less conveys an idea consistent with the rest of the song, and it sounds good.
Life changing! Every time I've held myself back in a fit of doubt over a lyric, I've revisited the Empire State Principle and it has allowed me to push through. It doesn't matter if it doesn't completely make sense-- if it sounds good and embodies the spirit of what I'm trying to say, that's what matters. This has increased my confidence in my writing and allowed me to speed up the draft writing process by a lot! Next time you find yourself lost in the weeds or unable to see the trees for the forest, try the Empire State approach and give yourself the freedom to be a little nonsensical.
0 notes
Last Seen Blogs

coyotecoining
Epic Coining Space

casualstarowl
havik brain rot

nolimitoutbound-blog
Outbound Nolimit

funeraldirectors11
Funeral directors Blog

mysticaldeputysaladzine-blog
Untitled