#Gelfling in cosplay
Text


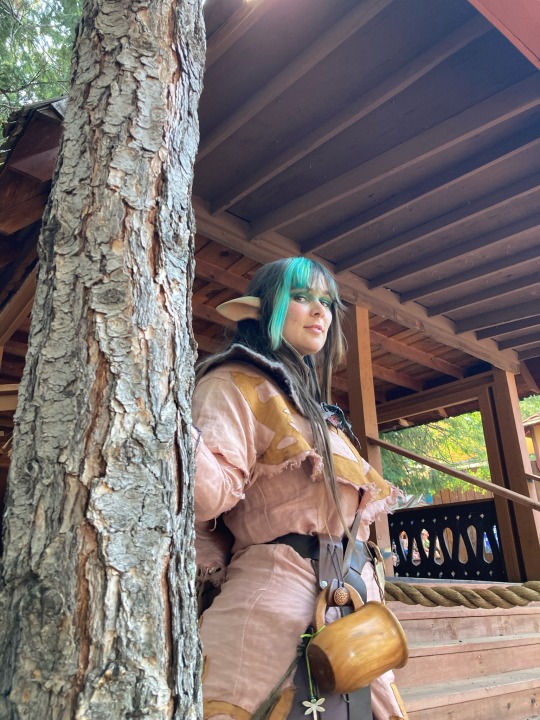
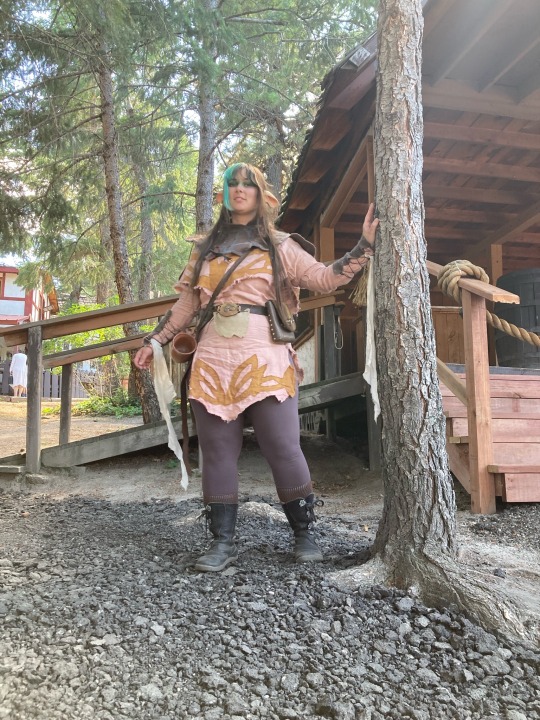
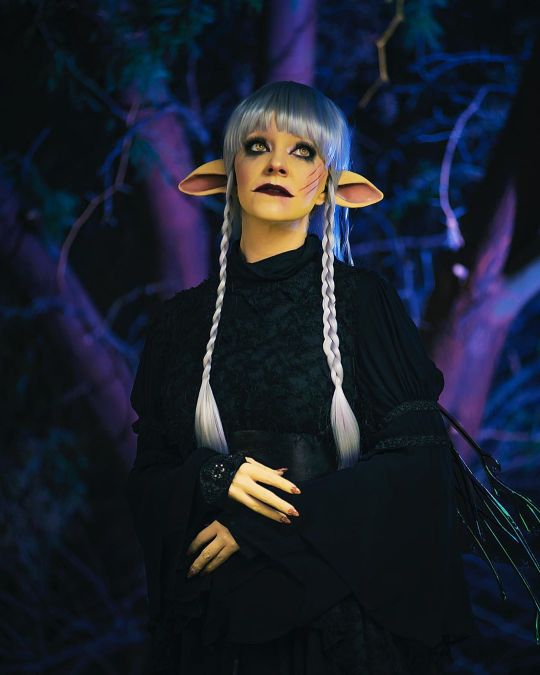
I guess I could acknowledge I’m still alive haha. I went to Holmat 2023 as Deet from dark crystal!
#holmat 2023#deet cosplay#cosplay#dark crystal cosplay#Floridian demigod cosplays#my face#dark crystal#gelfling#this app is a mess
16 notes
·
View notes
Text
I finally got to wear this cosplay I made three years ago hahaha. I was sewing it early March 2020 then got so sad I put it in a box for three years
#the dark crystal#age of resistance#Rian#gelfling#cosplay#renfest#colorado renaissance festival#me#original content#Rian stonewood
25 notes
·
View notes
Text


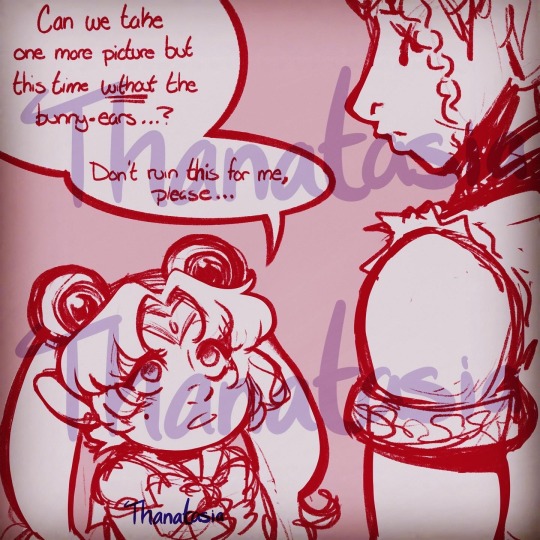


Sketches from a mix between last year and yesterday about Modern AU Fleur and her anime phase as a tween.
These are fun times in her life but also a time that she wants to keep hidden because she was a pretty cringey young lass. And believe me I have a few cringey scenarios for her lol
Both Maeve and Bhihaar alternated between accompanying Fleur since she was too young to attend a convention by herself. Maeve gets into it and dresses up with Fleur. The first piece of them is them both cosplaying Sailor Jupiter, the second is the two of them cosplaying Sakura and her mom from, “Naruto.” I feel like cosplaying for tween Fleur was one of her confidence boosters and adult Fleur has to thank her anime phase for that lol
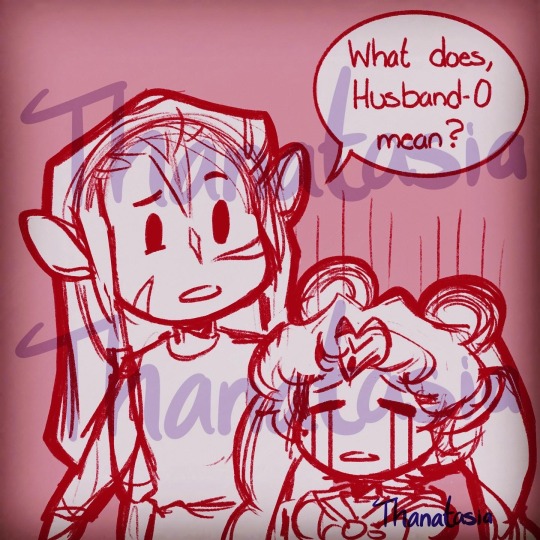
Bhihaar is that confused parent about the anime lingo/terminology but is happy to see Fleur happy and confident amongst her fellow weebs. The last image of them is a bit hard to read but Fleur bought a figure and Bhihaar said it would be a good idea to get a bag. The only bag available is one promoting an Otome Romance game- he offered to hold it in Fleur’s stead.
And yes, tween Fleur played Otome romance games but the ones that were appropriate for her age group. Idk if that’s something, I’ve vaguely going off an old innocent flash dating sims from y8.com and this other zombie apocalypse one that was a mobile game. An innocent one because I know some dating sims can be suggestive.
The last sketch is Fleur realizing she’s gonna have to face her tween past with Razer and prepare for the laughs he will make lol
I had to include the last sketch because I know Fleur would have the best reaction to Razer catching a glimpse of a scrapbook she forgot to hide much better 😆
Razer belongs to my dear friend @jack-toons
Once I get some other pieces finished I gotta do a Shiyoon and Cha’l one because 1) Cha’l loves his wife’s love for anime but he doesn’t understand the lore of most anime lol and 2) I get a kick out of the sketch I made of their son, Iry talking about an anime with him and asking Shiyoon to help him understand! Oh the hilarity!
#thanatasia#dark crystal#dark crystal age of resistance#dark crystal aor#gelfling#gelfling oc#gelfling fleur#stonesan#stonewood#Dousan#gelfing bhihaar#Gelfling maeve#gelfing cosplaying#the bag is a reference to a time my dad and I went to a convention maybe I’ll share a picture of the bag#if the bag part seems too specific that’s why#there are a few cringey scenarios I have for Fleur aahhh my poor girl is gonna get hit with memories
20 notes
·
View notes
Text


😏 yeh
#my photos#funny af#elf girl#elf ears#dark elf#high elf#elf#night elf#half elf#gelfling#sexy elf#cosplay girls#cosplay#my bewbs#free the bewbs#body worship#body ch3ck#girlblogging#this is a girlblog#just girly posts#just girly thoughts#just girly things#girly blog#girly tumblr#girly stuff#girly girl#girly aesthetic
11 notes
·
View notes
Photo

The Dark Crystal print is up in my #etsy shop! 🔺 💎 #jimhenson #ageofresistance #skeksis #darkcrystal #thedarkcrystalageofresistance #netflix #gelfling #fizzgig #cosplay #puppets #aughra #henson #darkcrystalageofresistance #repost #jen #puppet #art #deet #themystics #puppetry #chronicle #greatconjunction #thinkgeek #fantasy #castle #skeksil #skeksiscosplay #brianfroud #jimhensoncompany https://www.instagram.com/p/CkOX61ss3Vf/?igshid=NGJjMDIxMWI=
#etsy#jimhenson#ageofresistance#skeksis#darkcrystal#thedarkcrystalageofresistance#netflix#gelfling#fizzgig#cosplay#puppets#aughra#henson#darkcrystalageofresistance#repost#jen#puppet#art#deet#themystics#puppetry#chronicle#greatconjunction#thinkgeek#fantasy#castle#skeksil#skeksiscosplay#brianfroud#jimhensoncompany
0 notes
Text
Torn between not doing any big cosplays once I finish Beebo.... And mmmmm could make onna them murder elves.
But also sad deer elves (gelflings).
#All these elves are idiots and they suck#I love them#I have cosplayer disease#Instead of brain there is cosplay#Text#I'd have to choose a murder elf though. I think I'll need to finish my spreadsheet first#I get that Bilbo isn't really a 'big cosplay' but I've over-complicated it a lot#Also coats are hard
1 note
·
View note
Text


Y'all have been so supportive with this costume seriously 😭💜 I'm finally finding the motivation I need to finish it, until then I present you some selfies from my latest makeup test 💜
#the dark crystal: age of resistance#the dark crystal#tdc:aor#tdc: age of resistance#tdc: aor#tdc#tavra#gelfling#cosplay#my art
159 notes
·
View notes
Text
Our Dark Crystal costumes remind me how tragic it was the Netflix show was cancelled after only one season.


6 notes
·
View notes
Photo

Age of Resistance may be cancelled (for now), but the franchise and the fandom still live. Help us to grow both by participating in the next Thra-athon in December where we'll be celebrating the 38th anniversary of The Dark Crystal !
And of course, we will host another Fan Art Contest ! We will make an official announcement very soon.
#the dark crystal#age of resistance#tdc aor#skeksis#gelflings#fanart contest#art contest#cosplay contest#80s movies#jim henson#puppetry#thra athon
81 notes
·
View notes
Photo
🖤#fallforcostume Day 4 ::NOIR:: • I don’t have anything that really fits Noir as a genre but my fallen Seladon from the Dark Crystal Age of Resistance came to mind. She is a complicated character and I really ended up feeling sorry for her circumstances. I was hoping we would get to see her make better, redemptive choices in a new season but alas. • 💜Costume, wig, makeup by me 💜Ears from Cottage Emporium on Etsy 💜Wings by @fancyfairyangela 💜Photos by @courtex.studios @darkcrystalofficial @hensoncompany #thedarkcrystal #darkcrystal #darkcrystalageofresistance #seladon #gelfling #jimhenson #muppet #puppet #netflix #costume #costumeart #cosplay #darkcrystalcosplay https://www.instagram.com/p/CF88_DGDmxg/?igshid=1cxkx8d0ksiwk
#fallforcostume#thedarkcrystal#darkcrystal#darkcrystalageofresistance#seladon#gelfling#jimhenson#muppet#puppet#netflix#costume#costumeart#cosplay#darkcrystalcosplay
46 notes
·
View notes
Photo

We will be back in December with a new Fanart Contest ! Applications would normally open in the first week of November but now we are open to suggestions !
If you have some ideas for the entries, themes, prizes or other things let me know, by interacting with this post or sending me a message !
I’m looking forward, and stay tuned !
#the dark crystal#age of resistance#thra-athon#gelfling#skeksis#podling#aughra#art contest#fanart contest#tdc aor#puppetry#sculpture#cosplay contest#jim henson
47 notes
·
View notes
Text
Day 12, 13, 14 of my 21 day Skeksis Costume Build
DAY 12: OCTOBER 21th
Just ten days to go until Halloween! Today I took some time off to go to my best friend’s house to make Wizarding World Wands for our annual Hogwarts Feast. I will post these later! For Skekso, I didn’t do much today but work on the framed backpack and take some silly pictures.
1.) This is the updated frame all sealed together, PVC pipe and PVC glue. You can also see the end caps have little metal loops on them where the arms will attach. Husband and I did this part together, and I would recommend a buddy for any part of a project that needs PVC glue and math.


2.) “Paint me like one of your Thra Gelflings!”

DAY 13: OCTOBER 22th
It’s a busy one to make up for having fun yesterday: Bulking out the body and frame, beginning to add clothes to the body, and adding cloth and jewelry to the hands.
1.) I wanted to add something soft around the frame where my head would eventually go, just to minimize annoyance and bonking sounds from my helmet. This also is handy so I will have something to sew cloth and glue to. I used PVC insulation foam from the hardware store, both hot glued and zip tied on. I needed it to STAY pur and carry weight.

You can see I also added a roll of bubble wrap to the back for a lightweight way to bulk out the hump back to give the Skeksis their signature vulture look.
2.) Then I started to add fabric to make up what is the torso of the costume. For future understanding, there are 4 parts to this costume that come apart: the head, the arms, the upper torso, and the skirt. These photos are all as I add different fabrics, all from thrift stores, to the torso part. To find cheaply priced but originally expensive fancy looking pieces I actually went to the tablecloth/curtain section of thrift stores and found eerily exactly what I was looking for. The most expensive piece was maybe $4? Great deal.


3.) Next, time to add cloth to the hands. I never found red velvet at a thrift store, so I ended up finding it in a discount bin at Joanne’s Fabrics – yay! It and the gold lame you’ll see in a bit are the only 2 fabrics I knew I had to have and wasn’t willing to compromise on. I am just cutting and gluing it to the hands to make the red velvet gloves he wears.

That’s Lady Gaga’s performance at Coachella on the TV. There are a few things I love re-watching while I do serious crafting; like Christine McConnell’s Netflix or Youtube shows, Bucky O’Hare, Jem and The Holograms, and any Lady Gaga concert or special. These things will always interest me and inspire me and are fun to watch. I really love Gaga’s special with The Muppets, and her gritty and perfectly gross show at South By Southwest.
4.) After I finished my velvet base and tidied it up, I started adding jewelry. I got this at Goodwill and distressed it on an earlier day, but I knew they were a little heavy so I was very careful about attaching them both with hot glue and tying them around each finger, and gluing again so they wouldn’t fall off during use.


DAY 14: OCTOBER 23rd
Hand Armor, Collar spikes, beetle broche, and starting the ruffled shirt.
1.) Starting today with more hands. Like the face, the hands will be a focal point because they will be on fully movable arms so people will pay attention to them. They’ve gotta look good! I carved and sculpted some armor that will go on the back of the hand once it is dry and painted. Here it is while drying.

2.) I decided I wanted some more jewelry on the fingers but without the weight, so I used fun foam, various beads, hot glue, and plumber’s tape to create some different looking lightweight pieces to add to the hands.

Here they are being made, and a few further along in the background. Below, the hand is mostly done, with the new jewelry added to the distressed rings from Goodwill.

You’ve maybe seen the painting hanging on my wall in some photos, as well as the princess pastel work behind he hand here. These are both by the fabulous and fantastical artist named Ashton Guy. Please check out her beautiful work!
3.) Around Skekso’s collar are different types of spikes. I’ve already completed and set aside the large spiked ornaments that go on the back and around the sides, so now I’ve got to make a bunch of small, medium, and large spikes to go around the front of the collar. These were just Crayola Model Magic made into the right shapes, left to dry. Then covered in plumber’s tape, carved into a little with sculpting tools to create a texture, then painted black and wiped off for a hammered metal look (just like the neck ornaments finished earlier).

4.) Next, finishing the beetle Broche. This was a lot of different materials; a base of craft foam, different pieces of Crayola Model Magic (left to dry a few days after forming), then Plumber’s Aluminum tape, jewelry wire, various sized beads, then painted and distressed.

For the paint on the pretty beetle wings I did regular cheapo acrylic, then covered it in a glitter glue paint, then clear coated for protection.
5.) The last thing I worked on today was starting the black ruffle shirt front I mentioned earlier. This will look like fancy Skeksis clothing, but will secretly serve as a place for me to see out of the costume so I don’t ruin it and my face (I mean, it’s a great human face, but would look real strange popping out of a Skeksis chest). I used black chiffon, from a discount bin at Joann’s. Speaking of Joanne, that’s another motivational Gaga concert on the TV. I see a theme here.

That’s all for today! Come back for more posts about my journey through the very Bog of Eternal Stench to build this Skeksis costume in 21 days. Happy Halloween All Year!
#halloween#halloween costume#lady gaga#little monsters#the dark crystal#Age of Resistance#netflix#cosplay#costuming#the dark crystal costume#skeksis costume#the dark crystal cosplay#skeksis cosplay#thra#gelfling#maker
24 notes
·
View notes
Text

Young at heart Skeksis with rising career opportunities seeks Gelfling for lasting friendship. Must be willing to venture to the Castle of the Crystal.
Gelfling's friends welcome too.
All accommodations will be provided.
#cat cosplay#dark crystal#the dark Crystal age of resistance#Henson#netflix#Chamberlain#skeksis#gelfling#fandom#fan art#humor#dating profile#cat costumes#pet costume#Halloween ideas#funny#caturday#pics#pictures
1K notes
·
View notes
Text
It's not the best, but~
Live Unbruised by @tofadeawayagain ~ with my Amri cosplay
#the dark crystal#the dark crystal age of resistance#tdc aor#gelfling#amri#amri x naia#drenchgrot#the dark crystal cosplay#cosplay
15 notes
·
View notes
Text
Akron Canton Comic Con 2021
Akron Canton Comic Con 2021

View On WordPress
2 notes
·
View notes
Text
If anyone knows a link for a good wig for a Kira cosplay, lemme know please
#ramblings#the dark crystal#Kira#i wanna try something#jus see how i look as her w the hair and makeup before i contact anyone about making the dress etc#gelfling#cosplay#also if u have any other useful links or know anybody who can make anything (wings dress fizzgig etc) for me lmk too thank you
3 notes
·
View notes
Last Seen Blogs

slashslut
𝑠𝑙𝑢𝑡 ♡˚✧

splashbeaw
Beeg Boi Enthusiast (BBE)

maxhell-carter
You're starving.

d-artist-himanshu
Untitled

apricotlion
My eyes adored you though I never laid a hand on u