#HTML Underline Tag
Explore tagged Tumblr posts
Visit Tumblr Blog
Explore Tumblr blogs with no restrictions, modern design and the best experience.
Last Seen Tumblr Blogs


Fun Fact
Tumblr was the first site to host the blog for President Barack Obama in 2011.
Note
hi! i love reading your fics but i specifically love the social media shenanigans in dearly beloathed. i was wondering how you would feel if i took some inspiration from that for a fic of mine because i would love to write something that's very similarly formatted but i wanted to make sure you were fine with that (cause i'm assuming it took some time and effort to come up with) before i did. anyways your writing is awesome and i love reading it
Yes sure of course! I took inspiration from ao3 fics (F1 fandom in particular is stunning at formatting, I have so much respect for their dedication), such as this one (I basically took the formatting from this) and this Twitch streamer AU. If you're posting on ao3, there's the option of playing with HTML/CSS for a more "realistic" socmed interface, for example this one for Twitter which is magic to me. This one is an extremely impressive Discord mockup. An Unauthorised Fandom Treatise is a nice look into mid 2010s Superwholock era fandom whereas F1 rpf and indeed mcyt / streamer stuff is more "modern". Anyways yeah there's a lot of potential in this genre of fics and loads of stuff to check out on ao3 if you wish :) I love scrolling through the Unconventional Format tag because people are just so creative. Good luck with your writing!
#im serious about the f1 thing. go into the f1 tag and search for social media or unconventional format and boom#theres also more simple css with different coloured text which can mimic socmed better than black and white#still the basic italics bold underlines is usually enough to sculpt the look of socmed#text symbols and emojis are also fun. the document is your sandbox yipppee#ao3 has a faq section about their built in html which is very helpful. lots of css tutorials on ao3 too#sorry if this is a lot i get excited about formatting <3#ask box#answered#writing#dearly beloathed#hrm posting on stuff like neocities gives even more customisation... but yeah it takes effort and time#theres also sth i like about simple mockups with no css and minimal html (it's easy to copy and paste / edit)
12 notes
·
View notes
Text
Random AO3 Tips
I have a list of resources on my pinned post, but I don't really have a place for the simple miscellaneous tips and tricks, so here's this!
I didn't know most of these existed for probably far too long, so this post is mostly to spread awareness for new users or those who may not have heard of them before <3
I'll update this post if I learn of any other handy tricks. If you know any, let me know and I'll add it here :D
Basic HTML codes for A/Ns and etc
Note: Screenshots of the HTML "codes" at work are shown under the cut!
Center Text <center>TEXT</center> Clickable Link <a href="LINK">TEXT</a> Hideable Information <details> <summary>SHOWN</summary> HIDDEN </details> Insert Image from Link < img src="LINK" alt="IMAGE DESCRIPTION" width="100%" align="center" />
Italicize/Slant Text <i>TEXT</i> Line Breaks <br>TEXT</br> Paragraphs <p>TEXT</p> Strikethrough Text <strike>TEXT</strike> Underline Text <u>TEXT</u>
Single-post AO3 Guides
short guide on how to tag your own fics
short guide on how to title your fics/stories
how to embed images and links on AO3 [via Rich Text]
how to sign up for AO3-based exchanges (ft. @trafficteamsupportexchange)


Note: This is for formatting with HTML for the work, and for the authors notes where you Rich Text doesn't exist/work. Rich Text, on the other hand, should transfer most of these from whatever document resource you're using, but I've personally had issues with strikethrough not transferring from Google Docs copy-pasted to AO3 Rich Text, so just double check those areas!
#rain's tips#ao3 help#html#html coding#ao3 html#ao3 guide#ao3#archive of our own#ao3 writers#ao3 author#how do i even tag this
39 notes
·
View notes
Note
Hi hiiiii! Do you have any tips for this app?
tumblr? hopefully that’s what you mean 😭😭 but tags are your best friend on here to find anything or get reach on your posts. things don’t have to be all cutesy and aesthetic but if you want to the site i use for the text colors is this! (click on the word underlined!) all you have to do is choose the colors, copy, come on to here (on desktop only i think 😖) the three dots on top of the post you should see something that says “rich text” switch it to HTML and paste, then switch it back to rich text and voila!
for borders and such i use @cafekitsune but you can probably look up borders to find some.
reblogging is helpful on this app cause it’s very community based so if you like something share it if you want! let your followers see it too and help it get reach! all notes are appreciated!
that’s all i can think of rn i’m very tired but i hope this helped a bit !
#evangelineshifts ˖⋆࿐໋₊#angel messages 🪽✨#reality shifting#shiftblr#shifting realities#shifting#desired reality#law of assumption#quantum jumping#manifestation#shifting help#shifting tips
7 notes
·
View notes
Text
after ending up with wayyyy more emotional plot than intended, editing it at 2 am, and fighting the html for twenty minutes to make sure it looks the way i want it to, i am very happy to finally present the finished fic.
as every author, i'm always desperate for comments so feel free to go wild on ao3 or here (or in the tags or wherever you want, really).
also sorry for footnote n. 3 :) <- using that one very intentionally
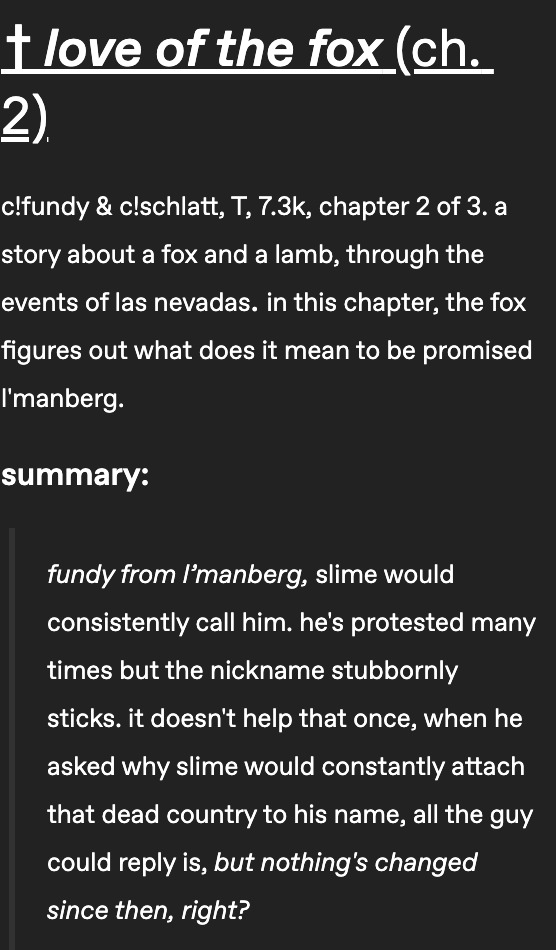
hidden in the space between (~2.6k, T)
Summary:
Sometimes all you need to find your way back to the person you love is an apocalypse right outside the door, a REALLY horrible ex-boss, a lot of late nights, and just enough courage to be vulnerable when it counts. Or: They finally get to take a nap in each other's arms. - A galaxy of freckles decorates his cheekbones, light and almost as golden as his eyes (he remembers the colour, Someone, he remembers even after not seeing it for centuries at a time), and strands of his now shoulder-length hair shift to cover half his face, a curtain of blooming red. He is the most beautiful being Aziraphale has ever seen, and he aches for him.
tag list under the cut, tell me if you want to be added/removed
@ineffabledeathtoallmetatrons @ineffablymanic @violet-prism-creatively @wraithee @underlined-in-spirit @acheemient @queer4cryptids @aroaceblackhole @six-of-snakes @im-the-son-of-rage-and-lov3 @adverbian @oboextra @demonic-mnemonic @eybefioro @aq-uatic @khlara @ifigenia-in-aulide @thetigersrise @littlelodell @weasleywrinkles @eevee436 @ineffabledeathtoallmetatrons @aydracz
#alex writes good omens#good omens#ineffable husbands#crowley#aziraphale#good omens season 2#go2#aziracrow#crowley x aziraphale#ineffable divorce#good omens fic
44 notes
·
View notes
Note
HOW DO YOU MAKE THE TEXTS IN OTHER COLORS THAN THE STANDARD ONES-
Hope you're familiar with HTML :)
On Tumblr, there's an HTML editing option for posts (not available on mobile)
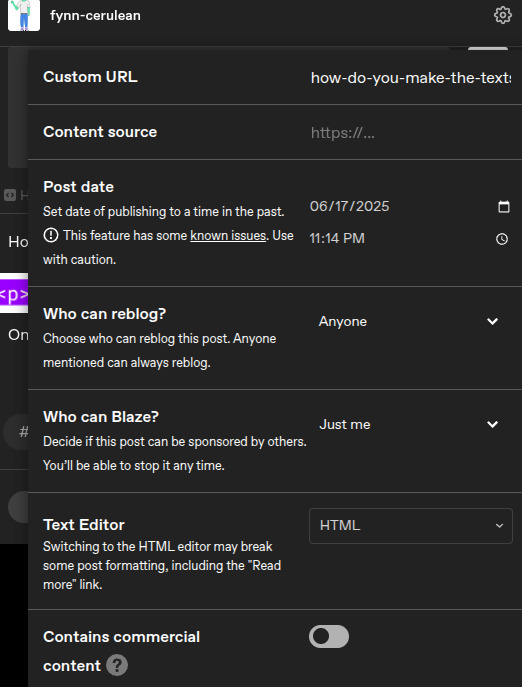
Basically, you can switch the Text Editor option to HTML, and it will open up an HTML editor.
In the image below, the purple tags can be any regular tag you want, like <p>, <h1>, <li>, etc.

The <span> tag is where it gets interesting, but its exact contents aren't too important, except for the underlined portion. That's where you put the custom color, in Hex format. The text inside the <span> is the text that will end up the color you input. In this case, the color is #abcdef, which is a light blue.
If you input that into the HTML editor, you get:
text
And that's all there is to it.
Color picker
3 notes
·
View notes
Note
hi, hello! i'm sassaffrassa on ao3 and i was wondering what CSS you used in your workskin for *Wolf, Fox, Hound?* i've trying something similar and got one that works part way, but it doesn't look nearly as good as yours, and wondered if you might share 😅
Oh, you mean with the Hen Llinge hover translations? Yeah, for sure! Here’s the whole work skin incl. my little arrow dinkus: https://pastebin.com/v5ei7Gye
The HTML set-up works exactly the same way as in La_Temperanza’s How To Change Text on AO3 When the Cursor is Hovering Over It, plus em tags for italics. You might’ve found this one yourself; it was the basis for mine and it’s great except for two things:
It hard-codes the background color & text color of the links to white and dark gray respectively, which is just awful for anyone whose archive-wide skin isn’t white, such as Reversi users.
It’s 2024 and this is a fic, not a webpage! Text underlines are distracting!
To fix this, I removed the color: #2a2a2a; rule from each of the hovertext rules and had each set background-color to transparent and border-bottom to none, and the actual linky part of my code starts with this to get rid of underlines:
a { text-decoration: none; border-bottom: none; }
(You might be able to nix the border-bottom: none declarations in each of the hovertext rules for redundancy if you want? It’s been ages since I last fiddled with this skin and I don’t remember which parts were overkill.)
La_Temperanza mentions CSS entities at the bottom of their work. Note that apostrophes MUST be converted to CSS entities (\2019) or they’ll break the code. When I made the skin there was some fuckery with accented characters, which sometimes needed to be made into entities to show up and sometimes didn’t. I also discovered a goofy bug where sometimes if you have a CSS entity in there, the back half of your text goes missing; fix this by converting the characters after the entity into entities themselves one by one until it shows up properly, sometimes including the spaces. Full list of character entities can be found here.
hope that helps & let me know if this doesn’t make it do what you want it to!
13 notes
·
View notes
Text
Let's understand HTML

Cover these topics to complete your HTML journey.
HTML (HyperText Markup Language) is the standard language used to create web pages. Here's a comprehensive list of key topics in HTML:
1. Basics of HTML
Introduction to HTML
HTML Document Structure
HTML Tags and Elements
HTML Attributes
HTML Comments
HTML Doctype
2. HTML Text Formatting
Headings (<h1> to <h6>)
Paragraphs (<p>)
Line Breaks (<br>)
Horizontal Lines (<hr>)
Bold Text (<b>, <strong>)
Italic Text (<i>, <em>)
Underlined Text (<u>)
Superscript (<sup>) and Subscript (<sub>)
3. HTML Links
Hyperlinks (<a>)
Target Attribute
Creating Email Links
4. HTML Lists
Ordered Lists (<ol>)
Unordered Lists (<ul>)
Description Lists (<dl>)
Nesting Lists
5. HTML Tables
Table (<table>)
Table Rows (<tr>)
Table Data (<td>)
Table Headings (<th>)
Table Caption (<caption>)
Merging Cells (rowspan, colspan)
Table Borders and Styling
6. HTML Forms
Form (<form>)
Input Types (<input>)
Text Fields (<input type="text">)
Password Fields (<input type="password">)
Radio Buttons (<input type="radio">)
Checkboxes (<input type="checkbox">)
Drop-down Lists (<select>)
Textarea (<textarea>)
Buttons (<button>, <input type="submit">)
Labels (<label>)
Form Action and Method Attributes
7. HTML Media
Images (<img>)
Image Maps
Audio (<audio>)
Video (<video>)
Embedding Media (<embed>)
Object Element (<object>)
Iframes (<iframe>)
8. HTML Semantic Elements
Header (<header>)
Footer (<footer>)
Article (<article>)
Section (<section>)
Aside (<aside>)
Nav (<nav>)
Main (<main>)
Figure (<figure>), Figcaption (<figcaption>)
9. HTML5 New Elements
Canvas (<canvas>)
SVG (<svg>)
Data Attributes
Output Element (<output>)
Progress (<progress>)
Meter (<meter>)
Details (<details>)
Summary (<summary>)
10. HTML Graphics
Scalable Vector Graphics (SVG)
Canvas
Inline SVG
Path Element
11. HTML APIs
Geolocation API
Drag and Drop API
Web Storage API (localStorage and sessionStorage)
Web Workers
History API
12. HTML Entities
Character Entities
Symbol Entities
13. HTML Meta Information
Meta Tags (<meta>)
Setting Character Set (<meta charset="UTF-8">)
Responsive Web Design Meta Tag
SEO-related Meta Tags
14. HTML Best Practices
Accessibility (ARIA roles and attributes)
Semantic HTML
SEO (Search Engine Optimization) Basics
Mobile-Friendly HTML
15. HTML Integration with CSS and JavaScript
Linking CSS (<link>, <style>)
Adding JavaScript (<script>)
Inline CSS and JavaScript
External CSS and JavaScript Files
16. Advanced HTML Concepts
HTML Templates (<template>)
Custom Data Attributes (data-*)
HTML Imports (Deprecated in favor of JavaScript modules)
Web Components
These topics cover the breadth of HTML and will give you a strong foundation for web development.
Full course link for free: https://shorturl.at/igVyr
2 notes
·
View notes
Text
ohh, is something like this kind of a change the reason "underline" is no longer a formatting option on websites?
I don't think so. Instead, see the last line here:

But it does really annoy me that, in markdown, you get:
*italic*
**bold**
***bold italic***
_italic_
__bold__
___bold italic___
there's no way, in markdown, to indicate the text should be underlined except to drop into pure html
... though I wonder if tumblr will let me underline text if I do drop into HTML and use the tag?
If it does, this text should be underlined
6 notes
·
View notes
Text
The semantic-html tag for this is <abbr>! Default AO3 styling will render it as a dashed underline so your readers know that there's a tooltip for that section of the text, and of course you can use workskins to modify its appearance as you see fit.
A Simple Trick for Fic Writers
Hey, if you're a fic writer and a character speaks in a different language, you don't just have to add the translation in the notes. Use the following HTML coding to add 'text on hover' to the word(s). If the reader is on a computer they can hover over the text to see the translation.
<div title="This is the text in the box!">This is the text that shows in your fic!</div>
Here are some examples from a fic on my AO3.
This coding here <div title="a fool, idiot (lit. emptyhead)">Eyn utreekov</div> will show this on hover.

This next example shows that you can add a lot of text. The formatting is the same as above.

PS: When doing this, there may be spacing issues, but you can edit the text through AO3's html or rich text editor. From there you can add italics (like I did), bold, etc, and fix any weird spacing issues. Just be careful not to delete the coding that you worked so hard on 😂
16K notes
·
View notes
Text
Understanding HTML: The Foundation of Web Development
HTML (HyperText Markup Language) is the standard language used to create and structure web pages. It provides the foundation for web development by defining the content and layout of a webpage. HTML uses a series of elements and tags to organize text, images, links, and multimedia. One essential aspect of HTML is HTML Text Formatting, which allows developers to style and emphasize text using tags like <b> for bold, <i> for italic, and <u> for underline. These formatting tags help improve the readability and presentation of content. HTML is easy to learn and is compatible with other web technologies like CSS and JavaScript, making it a crucial skill for anyone interested in web development.
0 notes
Note
Formatting fics on tumblr!!! Compiled by me (taurie) for ur convenience <33
Benefits of fics on tumblr?
Outreach!! A lot of people are overwhelmed by the sheer amount of fics on ao3 and other platforms and find it hard to format. On tumblr, you can use any tagging method, and you can also personally reach out to people to ramble about their fic!!
Furthermore, tumblr doesn’t rely on html to format fics, which can make it really easy for people (like me) who do not know how to use html at all lol! This makes it easier to include images, links, videos, etc etc.
Where to even begin ??
Tumblr is really easy to post works on. Im not going to go into how to bold, underline, highlight words etc because you can find all of that helpful info here–im just going to talk about fic-specific formatting!!
Here are a few examples of tumblr fics:
[NOTE !!!! i just found these while searching for good examples, i dont read some of this/dont condone it/whatever yknow ?? :D]


Notice the pattern? They all usually include a title, a rating/any warnings, a pairing/character, and general tags! This is so that a reader can tell at a glance if the fic is something they’d be interested in. it can also be fun to include header images, gifs, etc at the top to catch people’s attention and draw them to your fic. It’s also important to include warnings at the top as well! Especially if you write nsfw or heavy gore, you want to make that clear so anybody who doesn’t want to read it can scroll on quickly :D
The extremely important ‘keep reading’ button!!
Probably the MOST IMPORTANT thing to include when posting fic is the ‘keep reading’ button. This is inserted right after your last ‘tagging’ thing (summary, warning, authors note, etc etc.) you probably already know what this is but in case you don’t, it cuts off your post where you insert it. When a reader clicks it, the post is expanded to the rest of the post. This is extremely important so that there aren’t huge walls of text when somebody is scrolling!! If they aren’t interested, they don’t have to scroll past an entire fic, and if someone’s interested, they can open it :] the ‘keep reading’ button is inserted by clicking the grey button on the far right:

It’s helpful, but it's also courteous of other people’s interests :]
When someone scrolls past your fic, they see this:
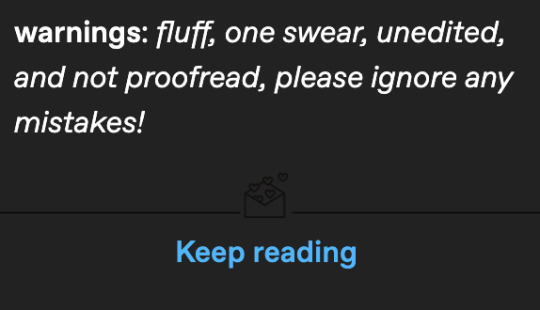
See? Very helpful!! :D
Tagging!!
Again, here are some examples of tags on tumblr fics!
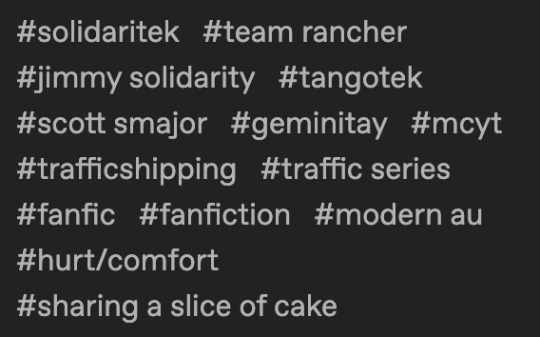

Similar to the fic itself, tags are very helpful for readers to find what they’re interested in reading!! The best way to tag (in my opinion) is to include:
major characters
pairings
AUs (if applicable)
warnings
the fandom
and the all-important tag ‘fanfiction’!
The more specific and plentiful your tags are, the more people will be able to easily sort their feed and find your fics :D
Thats all i think i can fit for now!! Please lmk if theres anything else you want me to explain, good luck and have a great day/night !! :D
-taurie :]
Thank you!!
1 note
·
View note
Text
How much to value in HTML in your knowledge?
HTML
1. Define Your Audience
Determine whether your course is for beginners, intermediate learners, or advanced developers.
Tailor the content and teaching style to the knowledge level of your audience.
2. Outline the Course Structure
Introduction to HTML
What is HTML and why it's important?
Basic structure of an HTML document.
HTML Elements and Tags
Headings, paragraphs, links, images, lists.
Attributes and Formatting
Common attributes (id, class, style, etc.).
Text formatting (bold, italic, underline).
Creating Forms
Input types, labels, buttons, form handling.
Tables and Semantic HTML
How to create and style tables.
Importance of semantic HTML tags (header, footer, article, etc.).
Multimedia Integration
Embedding videos, audio, and using the canvas tag.
Responsive Web Design Basics
Introduction to media queries and responsive layouts.
3. Hands-On Projects
Include practical assignments, like creating a basic webpage, a portfolio site, or a simple form.
Encourage students to apply what they’ve learned by building their own projects.
4. Supplemental Materials
Provide downloadable resources like cheat sheets, example code, and template files.
Share links to further reading or tools like HTML validators and editors.
5. Interactive Elements
Use quizzes, interactive coding exercises, and peer reviews to engage learners.
Consider incorporating videos or live coding sessions to explain concepts visually.
6. Assessment and Feedback
Design assessments at the end of each module to test comprehension.
Offer feedback on projects and assignments, or create a peer-review system.
7. Regular Updates
HTML and web standards evolve, so regularly update your course content to reflect best practices.
Stay informed about changes in the field and incorporate new trends or tools.
8. Community and Support
Create a forum or group where students can ask questions, share projects, and collaborate.
Offer support through Q&A sessions, live chats, or a dedicated helpdesk.
9. Certification
Provide a certificate of completion or a badge to encourage students to complete the course.
10. Promotion and Feedback
Promote your course through relevant channels, such as social media, blogs, or coding communities.
Gather feedback from students to continually improve the course.
By following these steps, you'll be able to create a comprehensive and valuable HTML course that helps learners build solid foundational skills in web development.
1 note
·
View note
Text
HTML Text Formatting

HTML provides various tags to format text, allowing you to change the appearance and structure of your content. Here's a guide to the most commonly used text formatting tags in HTML:
1. Headings
HTML provides six levels of headings, from <h1> (most important) to <h6> (least important). Headings are used to create titles and organize content hierarchically.<h1>Main Heading</h1> <h2>Subheading</h2> <h3>Sub-subheading</h3> <h4>Sub-sub-subheading</h4> <h5>Sub-sub-sub-subheading</h5> <h6>Smallest Heading</h6>
2. Paragraphs
Paragraphs are used to group blocks of text together. HTML automatically adds space before and after paragraphs.<p>This is a paragraph of text. Paragraphs are block-level elements, meaning they take up the full width available.</p>
3. Line Breaks
To create a line break within a paragraph or other text, use the <br> tag. This tag is an empty element and doesn’t have a closing tag.<p>This is the first line.<br>This is the second line, on a new line.</p>
4. Horizontal Lines
A horizontal line (thematic break) can be created using the <hr> tag. This is often used to separate sections of content.<p>This is some text before the line.</p> <hr> <p>This is some text after the line.</p>
5. Bold Text
To make text bold, you can use the <b> or <strong> tag. While both tags visually render text in bold, <strong> also indicates that the text is of strong importance.<p>This is <b>bold</b> text.</p> <p>This is <strong>strong</strong> text, which also has semantic importance.</p>
6. Italic Text
To italicize text, you can use the <i> or <em> tag. The <em> tag emphasizes the text semantically, meaning it can affect the way assistive technologies interpret the content.<p>This is <i>italicized</i> text.</p> <p>This is <em>emphasized</em> text.</p>
7. Underlined Text
To underline text, use the <u> tag. This is not as commonly used today due to styling being handled by CSS, but it's available in HTML.<p>This is <u>underlined</u> text.</p>
8. Superscript and Subscript
Superscript: The <sup> tag raises text slightly above the baseline, often used for exponents or footnotes.
Subscript: The <sub> tag lowers text slightly below the baseline, often used for chemical formulas.
<p>This is superscript: x<sup>2</sup></p> <p>This is subscript: H<sub>2</sub>O</p>
9. Strikethrough Text
To strike through (cross out) text, use the <s> or <del> tag.<p>This is <s>strikethrough</s> text.</p> <p>This is <del>deleted</del> text, often indicating something that has been removed.</p>
10. Monospaced (Code) Text
To display text in a monospaced (fixed-width) font, typically used for code, use the <code> tag.<p>This is <code>inline code</code> within a paragraph.</p> <pre> <code> function example() { console.log('This is code'); } </code> </pre>
11. Small Text
The <small> tag decreases the font size of the text, often used for disclaimers or fine print.<p>This is normal text.</p> <p>This is <small>small</small> text.</p>
12. Marked Text
The <mark> tag highlights text with a yellow background, similar to using a highlighter.<p>This is <mark>highlighted</mark> text.</p>
13. Quotations
Inline Quotes: The <q> tag is used for short quotations and automatically adds quotation marks.
Block Quotes: The <blockquote> tag is used for longer quotes, usually indented.
<p>This is an inline quote: <q>To be or not to be, that is the question.</q></p> <blockquote> This is a block quote. It is usually used for longer quotations. </blockquote>
Source: Understanding HTML: From Basics To Advance
0 notes
Text
Simple Methods to Underline Text in WordPress

Enhancing your WordPress content with text formatting is essential for improving readability and engagement. A frequently asked question is, "How do I underline text in WordPress?" Underlining text can highlight important points and make your content stand out. Here’s a comprehensive guide on various ways to underline text in WordPress.
Underlining Text in the Classic Editor
Using the Classic Editor makes underlining text simple:
Highlight the text you want to underline.
Click the ‘Underline’ button in the toolbar (represented by a ‘U’ with an underline).
If the underline option isn’t visible, use the shortcut Ctrl + U (Windows) or Cmd + U (Mac).
Underlining Text in the Gutenberg Editor
The Gutenberg Editor doesn’t include a direct underline option, but you can use HTML to underline text:
Highlight the text you want to underline.
Click the three dots for more options and select ‘Edit as HTML’.
Wrap your text with <u></u> tags, like this: <u>Your text here</u>.
Using CSS to Underline Text
For more customization, CSS is a powerful tool to underline text:
Go to Appearance > Customize in your WordPress dashboard.
Select ‘Additional CSS’.
Add the following CSS code:
.custom-underline { text-decoration: underline; }
Save your changes.
In the post or page editor, switch to HTML view and add the class to your text: <span class="custom-underline">Your text here</span>.
This method allows you to apply consistent underlining across your site using the custom-underline class.
Using Plugins to Underline Text
Plugins like "TinyMCE Advanced" can add more formatting options, including underlining:
Install and activate the TinyMCE Advanced plugin.
Go to Settings > TinyMCE Advanced and add the underline button to your toolbar.
Highlight your text in the editor and click the underline button.
Conclusion
There are multiple ways to underline text in WordPress, catering to different editors and user preferences. Whether using the Classic Editor, Gutenberg Editor, CSS, or a plugin, these methods will help you effectively underline text. For more detailed instructions, visit How to Underline in WordPress.
1 note
·
View note
Text
CSS Selectors
New Post has been published on https://thedigitalinsider.com/css-selectors/
CSS Selectors
Overview
CSS is really good at many things, but it’s really, really good at two specific things: selecting elements and styling them. That’s the raison d’être for CSS and why it’s a core web language. In this guide, we will cover the different ways to select elements — because the styles we write are pretty much useless without the ability to select which elements to apply them to.
The source of truth for CSS selectors is documented in the Selectors Module Level 4 specification. With one exception (which we’ll get to), all of the selectors covered here are well-covered by browsers across the board, and most certainly by all modern browsers.
In addition to selectors, this guide also looks at CSS combinators. If selectors identify what we are selecting, you might think of combinators as how the styles are applied. Combinators are like additional instructions we give CSS to select a very particular element on the page, not totally unlike the way we can use filters in search engines to find the exact result we want.
Quick reference
Common Selectors
/* Universal */ * box-sizing: border-box; /* Type or Tag */ p margin-block: 1.5rem; /* Classname */ .class text-decoration: underline; /* ID */ #id font-family: monospace; /* Relational */ li:has(a) display: flex;
Common Combinators
/* Descendant */ header h1 /* Selects all Heading 1 elements in a Header element. */ /* Child */ header > h1 /* Selects all Heading 1 elements that are children of Header elements. */ /* General sibling */ h1 ~ p /* Selects a Paragraph as long as it follows a Heading 1. */ /* Adjacent sibling */ h1 + p /* Selects a Paragraph if it immediately follows a Heading 1 */ /* Chained */ h1, p /* Selects both elements. */
General Selectors
When we talk about CSS selectors, we’re talking about the first part of a CSS ruleset:
/* CSS Ruleset */ selector /* Style rule */ property: value;
See that selector? That can be as simple as the HTML tag we want to select. For example, let’s select all <article> elements on a given page.
/* Select all <article> elements... */ article /* ... and apply this background-color on them */ background-color: hsl(25 100% 50%);
That’s the general process of selecting elements to apply styles to them. Selecting an element by its HTML tag is merely one selector type of several. Let’s see what those are in the following section.
Element selectors
Element selectors are exactly the type of selector we looked at in that last example: Select the element’s HTML tag and start styling!
That’s great and all, but consider this: Do you actually want to select all of the <article> elements on the page? That’s what we’re doing when we select an element by its tag — any and all HTML elements matching that tag get the styles. The following demo selects all <article> elements on the page, then applies a white (#fff) background to them. Notice how all three articles get the white background even though we only wrote one selector.
I’ve tried to make it so the relevant for code for this and other demos in this guide is provided at the top of the CSS tab. Anything in a @layer can be ignored. And if you’re new to @layer, you can learn all about it in our CSS Cascade Layers guide.
But maybe what we actually want is for the first element to have a different background — maybe it’s a featured piece of content and we need to make it stand out from the other articles. That requires us to be more specific in the type of selector we use to apply the styles.
Let’s turn our attention to other selector types that allow us to be more specific about what we’re selecting.
ID selectors
ID selectors are one way we can select one element without selecting another of the same element type. Let’s say we were to update the HTML in our <article> example so that the first article is “tagged” with an ID:
<article id="featured"> <!-- Article 1 --> </article> <article> <!-- Article 2 --> </article> <article> <!-- Article 3 --> </article>
Now we can use that ID to differentiate that first article from the others and apply styles specifically to it. We prepend a hashtag character (#) to the ID name when writing our CSS selector to properly select it.
/* Selects all <article> elements */ article background: #fff; /* Selects any element with id="featured" */ #featured background: hsl(35 100% 90%); border-color: hsl(35 100% 50%);
There we go, that makes the first article pop a little more than the others!
Before you go running out and adding IDs all over your HTML, be aware that IDs are considered a heavy-handed approach to selecting. IDs are so specific, that it is tough to override them with other styles in your CSS. IDs have so much specificity power than any selector trying to override it needs at least an ID as well. Once you’ve reached near the top of the ladder of this specificity war, it tends to lead to using !important rules and such that are in turn nearly impossible to override.
Let’s rearrange our CSS from that last example to see that in action:
/* Selects any element with id="featured" */ #featured background: hsl(35 100% 90%); border-color: hsl(35 100% 50%); /* Selects all <article> elements */ article background: #fff;
The ID selector now comes before the element selector. According to how the CSS Cascade determines styles, you might expect that the article elements all get a white background since that ruleset comes after the ID selector ruleset. But that’s not what happens.
So, you see how IDs might be a little too “specific” when it comes to selecting elements because it affects the order in which the CSS Cascade applies styles and that makes styles more difficult to manage and maintain.
The other reason to avoid IDs as selectors? We’re technically only allowed to use an ID once on a page, per ID. In other words, we can have one element with #featured but not two. That severely limits what we’re able to style if we need to extend those styles to other elements — not even getting into the difficulty of overriding the ID’s styles.
A better use case for IDs is for selecting items in JavaScript — not only does that prevent the sort of style conflict we saw above, but it helps maintain a separation of concerns between what we select in CSS for styling versus what we select in JavaScript for interaction.
Another thing about ID selectors: The ID establishes what we call an “anchor” which is a fancy term for saying we can link directly to an element on the page. For example, if we have an article with an ID assigned to it:
<article id="featured">...</article>
…then we can create a link to it like this:
<a href="featured">Jump to article below ⬇️</a> <!-- muuuuuuch further down the page. --> <article id="featured">...</article>
Clicking the link will navigate you to the element as though the link is anchored to that element. Try doing exactly that in the following demo:
This little HTML goodie opens up some pretty darn interesting possibilities when we sprinkle in a little CSS. Here are a few articles to explore those possibilities.
Class selectors
Class selectors might be the most commonly used type of CSS selector you will see around the web. Classes are ideal because they are slightly more specific than element selectors but without the heavy-handedness of IDs. You can read a deep explanation of how the CSS Cascade determines specificity, but the following is an abbreviated illustration focusing specifically (get it?!) on the selector types we’ve looked at so far.
That’s what makes class selectors so popular — they’re only slightly more specific than elements, but keep specificity low enough to be manageable if we need to override the styles in one ruleset with styles in another.
The only difference when writing a class is that we prepend a period (.) in front of the class name instead of the hashtag (#).
/* Selects all <article> elements */ article background: #fff; /* Selects any element with class="featured" */ .featured background: hsl(35 100% 90%); border-color: hsl(35 100% 50%);
Here’s how our <article> example shapes up when we swap out #featured with .featured.
Same result, better specificity. And, yes, we can absolutely combine different selector types on the same element:
<article id="someID" class="featured">...</article>
Do you see all of the possibilities we have to select an <article>? We can select it by:
Its element type (article)
Its ID (#someID)
Its class (.featured)
The following articles will give you some clever ideas for using class selectors in CSS.
But we have even more ways to select elements like this, so let’s continue.
Attribute selectors
ID and class selectors technically fall into this attribute selectors category. We call them “attributes” because they are present in the HTML and give more context about the element. All of the following are attributes in HTML:
<!-- ID, Class, Data Attribute --> <article id="#id" class=".class" data-attribute="attribute"> </article> <!-- href, Title, Target --> <a href="https://css-tricks.com" title="Visit CSS-Tricks" target="_blank"></a> <!-- src, Width, Height, Loading --> <img src="star.svg" width="250" height="250" loading="laxy" > <!-- Type, ID, Name, Checked --> <input type="checkbox" id="consent" name="consent" checked /> <!-- Class, Role, Aria Label --> <div class="buttons" role="tablist" aria-label="Tab Buttons">
Anything with an equals sign (=) followed by a value in that example code is an attribute. So, we can technically style all links with an href attribute equal to https://css-tricks.com:
a[href="https://css-tricks.com"] color: orangered;
Notice the syntax? We’re using square brackets ([]) to select an attribute instead of a period or hashtag as we do with classes and IDs, respectively.
The equals sign used in attributes suggests that there’s more we can do to select elements besides matching something that’s exactly equal to the value. That is indeed the case. For example, we can make sure that the matching selector is capitalized or not. A good use for that could be selecting elements with the href attribute as long as they do not contain uppercase letters:
/* Case sensitive */ a[href*='css-tricks' s]
The s in there tells CSS that we only want to select a link with an href attribute that does not contain uppercase letters.
<!-- 👎 No match --> <a href="https://CSS-Tricks.com">...</a> <!-- 👍 Match! --> <a href="https://css-tricks.com">...</a>
If case sensitivity isn’t a big deal, we can tell CSS that as well:
/* Case insensitive */ a[href*='css-tricks' i]
Now, either one of the link examples will match regardless of there being upper- or lowercase letters in the href attribute.
<!-- 👍 I match! --> <a href="https://CSS-Tricks.com">...</a> <!-- 👍 I match too! --> <a href="https://css-tricks.com">...</a>
There are many, many different types of HTML attributes. Be sure to check out our Data Attributes guide for a complete rundown of not only [data-attribute] but how they relate to other attributes and how to style them with CSS.
Universal selector
CSS-Tricks has a special relationship with the Universal Selector — it’s our logo!
That’s right, the asterisk symbol (*) is a selector all unto itself whose purpose is to select all the things. Quite literally, we can select everything on a page — every single element — with that one little asterisk. Note I said every single element, so this won’t pick up things like IDs, classes, or even pseudo-elements. It’s the element selector for selecting all elements.
/* Select ALL THE THINGS! 💥 */ * /* Styles */
Or, we can use it with another selector type to select everything inside a specific element.
/* Select everything in an <article> */ article * /* Styles */
That is a handy way to select everything in an <article>, even in the future if you decide to add other elements inside that element to the HTML. The times you’ll see the Universal Selector used most is to set border-sizing on all elements across the board, including all elements and pseudo-elements.
*, *::before, *::after box-sizing: border-box;
There’s a good reason this snippet of CSS winds up in so many stylesheets, which you can read all about in the following articles.
Sometimes the Universal Selector is implied. For example, when using a pseudo selector at the start of a new selector. These are selecting exactly the same:
*:has(article) :has(article)
Pseudo-selectors
Pseudo-selectors are for selecting pseudo-elements, just as element selectors are for selecting elements. And a pseudo-element is just like an element, but it doesn’t actually show up in the HTML. If pseudo-elements are new to you, we have a quick explainer you can reference.
Every element has a ::before and ::after pseudo-element attached to it even though we can’t see it in the HTML.
<div class="container"> <!-- ::before psuedo-element here --> <div>Item</div> <div>Item</div> <div>Item</div> <!-- ::after psuedo-element here --> </div>
These are super handy because they’re additional ways we can hook into an element an apply additional styles without adding more markup to the HTML. Keep things as clean as possible, right?!
We know that ::before and ::after are pseudo-elements because they are preceded by a pair of colons (::). That’s how we select them, too!
.container::before /* Styles */
The ::before and ::after pseudo-elements can also be written with a single colon — i.e., :before and :after — but it’s still more common to see a double colon because it helps distinguish pseudo-elements from pseudo-classes.
But there’s a catch when using pseudo-selectors: they require the content property. That’s because pseudos aren’t “real” elements but ones that do not exist as far as HTML is concerned. That means they need content that can be displayed… even if it’s empty content:
.container::before content: "";
Of course, if we were to supply words in the content property, those would be displayed on the page.
Article
on
Feb 4, 2022
Meet the Pseudo Class Selectors
Video
on
Feb 25, 2015
#94: Intro to Pseudo Elements
▶ Running Time: 18:37
Article
on
Aug 29, 2018
::before vs :before
Article
on
Sep 21, 2021
7 Practical Uses for the ::before and ::after Pseudo-Elements in CSS
Article
on
Aug 3, 2021
Use Cases for Multiple Pseudo Elements
Article
on
Aug 19, 2021
A Whole Bunch of Amazing Stuff Pseudo Elements Can Do
Article
on
Jul 9, 2019
A Little Reminder That Pseudo Elements are Children, Kinda.
Article
on
Dec 14, 2020
One Invalid Pseudo Selector Equals an Entire Ignored Selector
Article
on
Sep 27, 2021
CSS Pseudo Commas
Article
on
Apr 16, 2013
List of Pseudo-Elements to Style Form Controls
Article
on
Oct 24, 2020
Animating the `content` Property
Article
on
May 31, 2017
Animating Single Div Art
Article
on
Jun 5, 2020
Text Wrapping & Inline Pseudo Elements
Article
on
Jul 25, 2011
3D Cube with One Element
Complex selectors
Complex selectors may need a little marketing help because “complex” is an awfully scary term to come across when you’re in the beginning stages of learning this stuff. While selectors can indeed become complex and messy, the general idea is super straightforward: we can combine multiple selectors in the same ruleset.
Let’s look at three different routes we have for writing these “not-so-complex” complex selectors.
Listing selectors
First off, it’s possible to combine selectors so that they share the same set of styles. All we do is separate each selector with a comma.
.selector-1, .selector-2, .selector-3 /* We share these styles! �� */
You’ll see this often when styling headings — which tend to share the same general styling except, perhaps, for font-size.
h1, h2, h3, h4, h5, h6 color: hsl(25 80% 15%); font-family: "Poppins", system-ui;
Adding a line break between selectors can make things more legible. You can probably imagine how complex and messy this might get. Here’s one, for example:
section h1, section h2, section h3, section h4, section h5, section h6, article h1, article h2, article h3, article h4, article h5, article h6, aside h1, aside h2, aside h3, aside h4, aside h5, aside h6, nav h1, nav h2, nav h3, nav h4, nav h5, nav h6 color: #BADA55;
Ummmm, okay. No one wants this in their stylesheet. It’s tough to tell what exactly is being selected, right?
The good news is that we have modern ways of combining these selectors more efficiently, such as the :is() pseudo selector. In this example, notice that we’re technically selecting all of the same elements. If we were to take out the four section, article, aside, and nav element selectors and left the descendants in place, we’d have this:
h1, h2, h3, h4, h5, h6, h1, h2, h3, h4, h5, h6, h1, h2, h3, h4, h5, h6, h1, h2, h3, h4, h5, h6, color: #BADA55;
The only difference is which element those headings are scoped to. This is where :is() comes in handy because we can match those four elements like this:
:is(section, article, aside, nav) color: #BADA55;
That will apply color to the elements themselves, but what we want is to apply it to the headings. Instead of listing those out for each heading, we can reach for :is() again to select them in one fell swoop:
/* Matches any of the following headings scoped to any of the following elements. */ :is(section, article, aside, nav) :is(h1, h2, h3, h4, h5, h6) color: #BADA55;
While we’re talking about :is() it’s worth noting that we have the :where() pseudo selector as well and that it does the exact same thing as :is(). The difference? The specificity of :is() will equal the specificity of the most specific element in the list. Meanwhile, :where() maintains zero specificity. So, if you want a complex selector like this that’s easier to override, go with :where() instead.
Almanac
on
Dec 2, 2022
:is
:is(ul, ol) li color: #f8a100;
Almanac
on
Jul 14, 2021
:where
main :where(h1, h2, h3) color: #f8a100;
Article
on
Apr 1, 2021
:where() has a cool specificity trick, too.
Article
on
Jun 10, 2020
CSS :is() and :where() are coming to browsers
Article
on
Apr 15, 2021
Platform News: Prefers Contrast, MathML, :is(), and CSS Background Initial Values
Article
on
Jul 12, 2021
Using the Specificity of :where() as a CSS Reset
Nesting selectors
That last example showing how :is() can be used to write more efficient complex selectors is good, but we can do even better now that CSS nesting is a widely supported feature.
This browser support data is from Caniuse, which has more detail. A number indicates that browser supports the feature at that version and up.
Desktop
Chrome Firefox IE Edge Safari 120 117 No 120 17.2
Mobile / Tablet
Android Chrome Android Firefox Android iOS Safari 126 127 126 17.2
CSS nesting allows us to better see the relationship between selectors. You know how we can clearly see the relationship between elements in HTML when we indent descendant elements?
<!-- Parent --> <article> <!-- Child --> <img src="" alt="..."> <!-- Child --> <div class="article-content"> <!-- Grandchild --> <h2>Title</h2> <!-- Grandchild --> <p>Article content.</p> </div> </article>
CSS nesting is a similar way that we can format CSS rulesets. We start with a parent ruleset and then embed descendant rulesets inside. So, if we were to select the <h2> element in that last HTML example, we might write a descendant selector like this:
article h2 /* Styles */
With nesting:
article /* Article styles */ h2 /* Heading 2 styles */
You probably noticed that we can technically go one level deeper since the heading is contained in another .article-content element:
article /* Article styles */ .article-content /* Container styles */ h2 /* Heading 2 styles */
So, all said and done, selecting the heading with nesting is the equivalent of writing a descendant selector in a flat structure:
article .article-content h2 /* Heading 2 styles */
You might be wondering how the heck it’s possible to write a chained selector in a nesting format. I mean, we could easily nest a chained selector inside another selector:
article /* Article styles */ h2.article-content /* Heading 2 styles */
But it’s not like we can re-declare the article element selector as a nested selector:
article /* Article styles */ /* Nope! 👎 */ article.article-element /* Container styles */ /* Nope! 👎 */ h2.article-content /* Heading 2 styles */
Even if we could do that, it sort of defeats the purpose of a neatly organized nest that shows the relationships between selectors. Instead, we can use the ampersand (&) symbol to represent the selector that we’re nesting into. We call this the nesting selector.
article &.article-content /* Equates to: article.article-content */
Compounding selectors
We’ve talked quite a bit about the Cascade and how it determines which styles to apply to matching selectors using a specificity score. We saw earlier how an element selector is less specific than a class selector, which is less specific than an ID selector, and so on.
article /* Specificity: 0, 0, 1 */ .featured /* Specificity: 0, 1, 0 */ #featured /* Specificity: 1, 0, 0 */
Well, we can increase specificity by chaining — or “compounding” — selectors together. This way, we give our selector a higher priority when it comes to evaluating two or more matching styles. Again, overriding ID selectors is incredibly difficult so we’ll work with the element and class selectors to illustrate chained selectors.
We can chain our article element selector with our .featured class selector to generate a higher specificity score.
article /* Specificity: 0, 0, 1 */ .featured /* Specificity: 0, 1, 0 */ articie.featured /* Specificity: 0, 1, 1 */
This new compound selector is more specific (and powerful!) than the other two individual selectors. Notice in the following demo how the compound selector comes before the two individual selectors in the CSS yet still beats them when the Cascade evaluates their specificity scores.
Interestingly, we can use “fake” classes in chained selectors as a strategy for managing specificity. Take this real-life example:
.wp-block-theme-button .button:not(.specificity):not(.extra-specificity)
Whoa, right? There’s a lot going on there. But the idea is this: the .specificity and .extra-specificity class selectors are only there to bump up the specificity of the .wp-block-theme .button descendant selector. Let’s compare the specificity score with and without those artificial classes (that are :not() included in the match).
.wp-block-theme-button .button /* Specificity: 0, 2, 0 */ .wp-block-theme-button .button:not(.specificity) /* Specificity: 0, 3, 0 */ .wp-block-theme-button .button:not(.specificity):not(.extra-specificity /* Specificity: 0, 4, 0 */
Interesting! I’m not sure if I would use this in my own CSS but it is a less heavy-handed approach than resorting to the !important keyword, which is just as tough to override as an ID selector.
Combinators
If selectors are “what” we select in CSS, then you might think of CSS combinators as “how” we select them. they’re used to write selectors that combine other selectors in order to target elements. Inception!
The name “combinator” is excellent because it accurately conveys the many different ways we’re able to combine selectors. Why would we need to combine selectors? As we discussed earlier with Chained Selectors, there are two common situations where we’d want to do that:
When we want to increase the specificity of what is selected.
When we want to select an element based on a condition.
Let’s go over the many types of combinators that are available in CSS to account for those two situations in addition to chained selectors.
Descendant combinator
We call it a “descendant” combinator because we use it to select elements inside other elements, sorta like this:
/* Selects all elements in .parent with .child class */ .parent .child
…which would select all of the elements with the .child class in the following HTML example:
<div class="parent"> <div class="child"></div> <div class="child"></div> <div class="friend"></div> <div class="child"></div> <div class="child"></div> </div>
See that element with the .friend classname? That’s the only element inside of the .parent element that is not selected with the .parent .child descendant combinator since it does not match .child even though it is also a descendant of the .parent element.
Child combinator
A child combinator is really just an offshoot of the descendant combinator, only it is more specific than the descendant combinator because it only selects direct children of an element, rather than any descendant.
Let’s revise the last HTML example we looked at by introducing a descendant element that goes deeper into the family tree, like a .grandchild:
<div class="parent"> <div class="child"></div> <div class="child"> <div class="grandchild"></div> </div> <div class="child"></div> <div class="child"></div> </div>
So, what we have is a .parent to four .child elements, one of which contains a .grandchild element inside of it.
Maybe we want to select the .child element without inadvertently selecting the second .child element’s .grandchild. That’s what a child combinator can do. All of the following child combinators would accomplish the same thing:
/* Select only the "direct" children of .parent */ .parent > .child .parent > div .parent > *
See how we’re combining different selector types to make a selection? We’re combinating, dangit! We’re just doing it in slightly different ways based on the type of child selector we’re combining.
/* Select only the "direct" children of .parent */ .parent > #child { /* direct child with #child ID */ .parent > .child /* direct child with .child class */ .parent > div /* direct child div elements */ .parent > * /* all direct child elements */
It’s pretty darn neat that we not only have a way to select only the direct children of an element, but be more or less specific about it based on the type of selector. For example, the ID selector is more specific than the class selector, which is more specific than the element selector, and so on.
General sibling combinator
If two elements share the same parent element, that makes them siblings like brother and sister. We saw an example of this in passing when discussing the descendant combinator. Let’s revise the class names from that example to make the sibling relationship a little clearer:
<div class="parent"> <div class="brother"></div> <div class="sister"></div> </div>
This is how we can select the .sister element as long as it is preceded by a sibling with class .brother.
/* Select .sister only if follows .brother */ .brother ~ .sister
The Tilda symbol (~) is what tells us this is a sibling combinator.
It doesn’t matter if a .sister comes immediately after a .brother or not — as long as a .sister comes after a brother and they share the same parent element, it will be selected. Let’s see a more complicated HTML example:
<main class="parent"> <!-- .sister immediately after .brother --> <div class="brother"></div> <div class="sister"></div> <!-- .sister immediately after .brother --> <div class="brother"></div> <div class="sister"></div> <!-- .sister immediately after .sister --> <div class="sister"></div> <!-- .cousin immediately after .brother --> <div class="brother"></div> <div class="cousin"> <!-- .sister contained in a .cousin --> <div class="sister"></div> </div> </main>
The sibling combinator we wrote only selects the first three .sister elements because they are the only ones that come after a .brother element and share the same parent — even in the case of the third .sister which comes after another sister! The fourth .sister is contained inside of a .cousin, which prevents it from matching the selector.
Let’s see this in context. So, we can select all of the elements with an element selector since each element in the HTML is a div:
From there, we can select just the brothers with a class selector to give them a different background color:
We can also use a class selector to set a different background color on all of the elements with a .sister class:
And, finally, we can use a general sibling combinator to select only sisters that are directly after a brother.
Did you notice how the last .sister element’s background color remained green while the others became purple? That’s because it’s the only .sister in the bunch that does not share the same .parent as a .brother element.
Adjacent combinator
Believe it or not, we can get even more specific about what elements we select with an adjacent combinator. The general sibling selector we just looked at will select all of the .sister elements on the page as long as it shares the same parent as .brother and comes after the .brother.
What makes an adjacent combinator different is that it selects any element immediately following another. Remember how the last .sister didn’t match because it is contained in a different parent element (i.e., .cousin)? Well, we can indeed select it by itself using an adjacent combinator:
/* Select .sister only if directly follows .brother */ .brother + .sister
Notice what happens when we add that to our last example:
The first two .sister elements changed color! That’s because they are the only sisters that come immediately after a .brother. The third .sister comes immediately after another .sister and the fourth one is contained in a .cousin which prevents both of them from matching the selection.
Learn more about CSS selectors
Table of contents
References
The vast majority of what you’re reading here is information pulled from articles we’ve published on CSS-Tricks and those are linked up throughout the guide. In addition to those articles, the following resources were super helpful for putting this guide together.
#:has#:not#2022#250#3d#amazing#amp#approach#aria#Art#Article#Articles#artificial#attention#background#beats#board#box#browser#buttons#cascade#cascade layers#Children#classes#code#Color#Conflict#container#content#course
0 notes
Text
HTML Links

Links, also known as hyperlinks, are one of the fundamental elements of the web. They allow users to navigate between different pages on the internet, jump to specific sections within a page, or even trigger actions like downloading files or opening an email client. Here’s a detailed guide on how to create and use HTML links.
Basic Structure of an HTML Link
The basic HTML link is created using the <a> (anchor) tag. The most essential attribute for an anchor tag is href, which stands for "hyperlink reference". It specifies the destination URL or the action triggered when the link is clicked.
Basic Example
<a href="https://www.example.com">Visit Example</a>
In this example:
href: Specifies the URL of the page the link goes to.
Link Text: “Visit Example” is the clickable text.
Types of Links
External Links
These links point to a different website.
<a href="https://www.google.com">Go to Google</a>
Internal Links
These links point to another page within the same website.
<a href="about.html">About Us</a>
Anchor Links (Jump Links)
These links jump to a specific section within the same page. To create an anchor link:
Define an id attribute for the target element.
Link to this id.
<h2 id="section1">Section 1</h2> <a href="#section1">Jump to Section 1</a>
Mailto Links
These links open the user’s email client to send an email to a specified address.
<a href="mailto:[email protected]">Send an Email</a>
Telephone Links
These links allow users to make a phone call when clicked on a device that supports calling.
<a href="tel:+1234567890">Call Us Now</a>
Download Links
These links trigger the download of a file when clicked.
<a href="file.pdf" download>Download PDF</a>
Opening Links in a New Tab
To open a link in a new tab, you use the target="_blank" attribute:<a href="https://www.wikipedia.org" target="_blank">Open Wikipedia in a New Tab</a>
Adding Titles to Links
You can add a title attribute to provide additional information that appears as a tooltip when hovering over the link:<a href="https://www.example.com" title="Visit Example Website">Visit Example</a>
Link Styling with CSS
You can style links using CSS to change their appearance. Common states include:
a:link: The default state for an unvisited link.
a:visited: The state for a link that the user has visited.
a:hover: The state when the user hovers over the link.
a:active: The state when the link is being clicked.
Example CSS:a { color: blue; text-decoration: none; }a:hover { color: red; text-decoration: underline; }
Using Links as Buttons
You can style links to look like buttons using CSS:<a href="https://www.example.com" class="button">Click Me</a><style> .button { background-color: #4CAF50; color: white; padding: 10px 20px; text-align: center; text-decoration: none; display: inline-block; font-size: 16px; border-radius: 5px; } </style>
No-Follow Links
Adding rel="nofollow" to a link tells search engines not to follow the link, which is often used for sponsored links or to prevent passing link authority:<a href="https://www.example.com" rel="nofollow">Sponsored Link</a>
Linking to Images
You can link to images so that when the image is clicked, it navigates to a different page:<a href="https://www.example.com"> <img src="image.jpg" alt="Example Image"> </a>
Combining Multiple Attributes
You can combine multiple attributes in a single anchor tag to create complex behaviors:<a href="https://www.example.com" target="_blank" title="Visit Example" rel="noopener noreferrer"> Visit Example </a>
Key Takeaways
Anchor Tag: The <a> tag is used to create links. The href attribute is essential.
Link Types: Links can be external, internal, anchor, mailto, telephone, or download links.
Attributes: Enhance links with target, title, rel, and more to control their behavior and provide additional context.
Styling: Links can be styled with CSS to fit the design of your website.
Understanding these basics will allow you to effectively use links in your HTML documents to navigate and structure your website’s content.
Read From the Original Blog
0 notes