#How to generate SSH key
Explore tagged Tumblr posts
Visit Tumblr Blog
Explore Tumblr blogs with no restrictions, modern design and the best experience.
Last Seen Tumblr Blogs


Fun Fact
Forty percent of Tumblr users are between the ages of 18 to 25.
Text
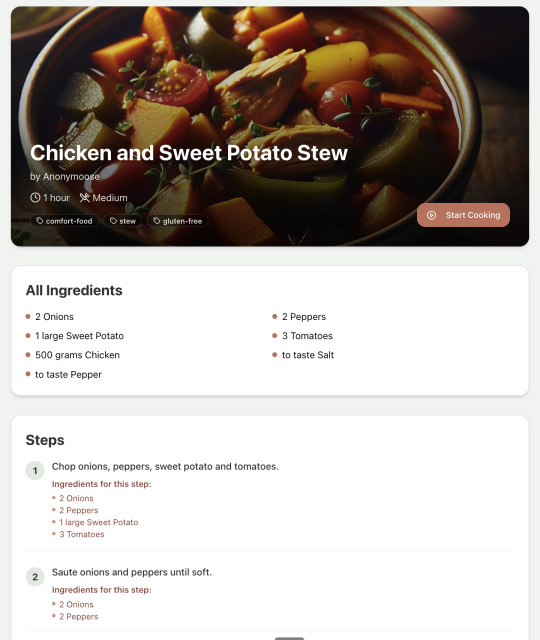
How to Generate SSH Key for Secure Authentication
How to Generate SSH Key In the realm of secure communication and remote access, understanding “How to Generate SSH Key” is a fundamental skill for individuals and organizations alike. SSH, or Secure Shell, is a cryptographic protocol that allows for encrypted communication between a client and a server, ensuring the confidentiality and integrity of data during transmission. What is SSH and why…

View On WordPress
#how to add ssh key to github#How to generate SSH key#How to Generate SSH Key for Secure Authentication#How to generate ssh key on Linux or Mac OS#How to generate SSH key on Windows 10 or Windows 11#how to get ssh key
0 notes
Text
When y'all told me to use Linux, ain't nobody warned me about how much more annoying Git Bash would be in it
#its better this way though#i was always worried someone would get my info and like fuck up my github repositories lmao#now i was forced to go through the uncomfortable process of generating a ssh key and setting up a connection. it wasnt fun#ssh keys were the reason i gave up on learning git the first time i came across them in 2022#after twoish years of using git and NOW FINALLY somewhat knowing how to set up proper authentication i am a changed woman#thank you linux#devposting on main
2 notes
·
View notes
Text
Vibecoding a production app
TL;DR I built and launched a recipe app with about 20 hours of work - recipeninja.ai
Background: I'm a startup founder turned investor. I taught myself (bad) PHP in 2000, and picked up Ruby on Rails in 2011. I'd guess 2015 was the last time I wrote a line of Ruby professionally. I've built small side projects over the years, but nothing with any significant usage. So it's fair to say I'm a little rusty, and I never really bothered to learn front end code or design.
In my day job at Y Combinator, I'm around founders who are building amazing stuff with AI every day and I kept hearing about the advances in tools like Lovable, Cursor and Windsurf. I love building stuff and I've always got a list of little apps I want to build if I had more free time.
About a month ago, I started playing with Lovable to build a word game based on Articulate (it's similar to Heads Up or Taboo). I got a working version, but I quickly ran into limitations - I found it very complicated to add a supabase backend, and it kept re-writing large parts of my app logic when I only wanted to make cosmetic changes. It felt like a toy - not ready to build real applications yet.
But I kept hearing great things about tools like Windsurf. A couple of weeks ago, I looked again at my list of app ideas to build and saw "Recipe App". I've wanted to build a hands-free recipe app for years. I love to cook, but the problem with most recipe websites is that they're optimized for SEO, not for humans. So you have pages and pages of descriptive crap to scroll through before you actually get to the recipe. I've used the recipe app Paprika to store my recipes in one place, but honestly it feels like it was built in 2009. The UI isn't great for actually cooking. My hands are covered in food and I don't really want to touch my phone or computer when I'm following a recipe.
So I set out to build what would become RecipeNinja.ai
For this project, I decided to use Windsurf. I wanted a Rails 8 API backend and React front-end app and Windsurf set this up for me in no time. Setting up homebrew on a new laptop, installing npm and making sure I'm on the right version of Ruby is always a pain. Windsurf did this for me step-by-step. I needed to set up SSH keys so I could push to GitHub and Heroku. Windsurf did this for me as well, in about 20% of the time it would have taken me to Google all of the relevant commands.
I was impressed that it started using the Rails conventions straight out of the box. For database migrations, it used the Rails command-line tool, which then generated the correct file names and used all the correct Rails conventions. I didn't prompt this specifically - it just knew how to do it. It one-shotted pretty complex changes across the React front end and Rails backend to work seamlessly together.
To start with, the main piece of functionality was to generate a complete step-by-step recipe from a simple input ("Lasagne"), generate an image of the finished dish, and then allow the user to progress through the recipe step-by-step with voice narration of each step. I used OpenAI for the LLM and ElevenLabs for voice. "Grandpa Spuds Oxley" gave it a friendly southern accent.
Recipe summary:
And the recipe step-by-step view:

I was pretty astonished that Windsurf managed to integrate both the OpenAI and Elevenlabs APIs without me doing very much at all. After we had a couple of problems with the open AI Ruby library, it quickly fell back to a raw ruby HTTP client implementation, but I honestly didn't care. As long as it worked, I didn't really mind if it used 20 lines of code or two lines of code. And Windsurf was pretty good about enforcing reasonable security practices. I wanted to call Elevenlabs directly from the front end while I was still prototyping stuff, and Windsurf objected very strongly, telling me that I was risking exposing my private API credentials to the Internet. I promised I'd fix it before I deployed to production and it finally acquiesced.
I decided I wanted to add "Advanced Import" functionality where you could take a picture of a recipe (this could be a handwritten note or a picture from a favourite a recipe book) and RecipeNinja would import the recipe. This took a handful of minutes.
Pretty quickly, a pattern emerged; I would prompt for a feature. It would read relevant files and make changes for two or three minutes, and then I would test the backend and front end together. I could quickly see from the JavaScript console or the Rails logs if there was an error, and I would just copy paste this error straight back into Windsurf with little or no explanation. 80% of the time, Windsurf would correct the mistake and the site would work. Pretty quickly, I didn't even look at the code it generated at all. I just accepted all changes and then checked if it worked in the front end.
After a couple of hours of work on the recipe generation, I decided to add the concept of "Users" and include Google Auth as a login option. This would require extensive changes across the front end and backend - a database migration, a new model, new controller and entirely new UI. Windsurf one-shotted the code. It didn't actually work straight away because I had to configure Google Auth to add `localhost` as a valid origin domain, but Windsurf talked me through the changes I needed to make on the Google Auth website. I took a screenshot of the Google Auth config page and pasted it back into Windsurf and it caught an error I had made. I could login to my app immediately after I made this config change. Pretty mindblowing. You can now see who's created each recipe, keep a list of your own recipes, and toggle each recipe to public or private visibility. When I needed to set up Heroku to host my app online, Windsurf generated a bunch of terminal commands to configure my Heroku apps correctly. It went slightly off track at one point because it was using old Heroku APIs, so I pointed it to the Heroku docs page and it fixed it up correctly.
I always dreaded adding custom domains to my projects - I hate dealing with Registrars and configuring DNS to point at the right nameservers. But Windsurf told me how to configure my GoDaddy domain name DNS to work with Heroku, telling me exactly what buttons to press and what values to paste into the DNS config page. I pointed it at the Heroku docs again and Windsurf used the Heroku command line tool to add the "Custom Domain" add-ons I needed and fetch the right Heroku nameservers. I took a screenshot of the GoDaddy DNS settings and it confirmed it was right.
I can see very soon that tools like Cursor & Windsurf will integrate something like Browser Use so that an AI agent will do all this browser-based configuration work with zero user input.
I'm also impressed that Windsurf will sometimes start up a Rails server and use curl commands to check that an API is working correctly, or start my React project and load up a web preview and check the front end works. This functionality didn't always seem to work consistently, and so I fell back to testing it manually myself most of the time.
When I was happy with the code, it wrote git commits for me and pushed code to Heroku from the in-built command line terminal. Pretty cool!
I do have a few niggles still. Sometimes it's a little over-eager - it will make more changes than I want, without checking with me that I'm happy or the code works. For example, it might try to commit code and deploy to production, and I need to press "Stop" and actually test the app myself. When I asked it to add analytics, it went overboard and added 100 different analytics events in pretty insignificant places. When it got trigger-happy like this, I reverted the changes and gave it more precise commands to follow one by one.
The one thing I haven't got working yet is automated testing that's executed by the agent before it decides a task is complete; there's probably a way to do it with custom rules (I have spent zero time investigating this). It feels like I should be able to have an integration test suite that is run automatically after every code change, and then any test failures should be rectified automatically by the AI before it says it's finished.
Also, the AI should be able to tail my Rails logs to look for errors. It should spot things like database queries and automatically optimize my Active Record queries to make my app perform better. At the moment I'm copy-pasting in excerpts of the Rails logs, and then Windsurf quickly figures out that I've got an N+1 query problem and fixes it. Pretty cool.
Refactoring is also kind of painful. I've ended up with several files that are 700-900 lines long and contain duplicate functionality. For example, list recipes by tag and list recipes by user are basically the same.
Recipes by user:

This should really be identical to list recipes by tag, but Windsurf has implemented them separately.
Recipes by tag:

If I ask Windsurf to refactor these two pages, it randomly changes stuff like renaming analytics events, rewriting user-facing alerts, and changing random little UX stuff, when I really want to keep the functionality exactly the same and only move duplicate code into shared modules. Instead, to successfully refactor, I had to ask Windsurf to list out ideas for refactoring, then prompt it specifically to refactor these things one by one, touching nothing else. That worked a little better, but it still wasn't perfect
Sometimes, adding minor functionality to the Rails API will often change the entire API response, rather just adding a couple of fields. Eg It will occasionally change Index Recipes to nest responses in an object { "recipes": [ ] }, versus just returning an array, which breaks the frontend. And then another minor change will revert it. This is where adding tests to identify and prevent these kinds of API changes would be really useful. When I ask Windsurf to fix these API changes, it will instead change the front end to accept the new API json format and also leave the old implementation in for "backwards compatibility". This ends up with a tangled mess of code that isn't really necessary. But I'm vibecoding so I didn't bother to fix it.
Then there was some changes that just didn't work at all. Trying to implement Posthog analytics in the front end seemed to break my entire app multiple times. I tried to add user voice commands ("Go to the next step"), but this conflicted with the eleven labs voice recordings. Having really good git discipline makes vibe coding much easier and less stressful. If something doesn't work after 10 minutes, I can just git reset head --hard. I've not lost very much time, and it frees me up to try more ambitious prompts to see what the AI can do. Less technical users who aren't familiar with git have lost months of work when the AI goes off on a vision quest and the inbuilt revert functionality doesn't work properly. It seems like adding more native support for version control could be a massive win for these AI coding tools.
Another complaint I've heard is that the AI coding tools don't write "production" code that can scale. So I decided to put this to the test by asking Windsurf for some tips on how to make the application more performant. It identified I was downloading 3 MB image files for each recipe, and suggested a Rails feature for adding lower resolution image variants automatically. Two minutes later, I had thumbnail and midsize variants that decrease the loading time of each page by 80%. Similarly, it identified inefficient N+1 active record queries and rewrote them to be more efficient. There are a ton more performance features that come built into Rails - caching would be the next thing I'd probably add if usage really ballooned.
Before going to production, I kept my promise to move my Elevenlabs API keys to the backend. Almost as an afterthought, I asked asked Windsurf to cache the voice responses so that I'd only make an Elevenlabs API call once for each recipe step; after that, the audio file was stored in S3 using Rails ActiveStorage and served without costing me more credits. Two minutes later, it was done. Awesome.
At the end of a vibecoding session, I'd write a list of 10 or 15 new ideas for functionality that I wanted to add the next time I came back to the project. In the past, these lists would've built up over time and never gotten done. Each task might've taken me five minutes to an hour to complete manually. With Windsurf, I was astonished how quickly I could work through these lists. Changes took one or two minutes each, and within 30 minutes I'd completed my entire to do list from the day before. It was astonishing how productive I felt. I can create the features faster than I can come up with ideas.
Before launching, I wanted to improve the design, so I took a quick look at a couple of recipe sites. They were much more visual than my site, and so I simply told Windsurf to make my design more visual, emphasizing photos of food. Its first try was great. I showed it to a couple of friends and they suggested I should add recipe categories - "Thai" or "Mexican" or "Pizza" for example. They showed me the DoorDash app, so I took a screenshot of it and pasted it into Windsurf. My prompt was "Give me a carousel of food icons that look like this". Again, this worked in one shot. I think my version actually looks better than Doordash 🤷♂️
Doordash:

My carousel:

I also saw I was getting a console error from missing Favicon. I always struggle to make Favicon for previous sites because I could never figure out where they were supposed to go or what file format they needed. I got OpenAI to generate me a little recipe ninja icon with a transparent background and I saved it into my project directory. I asked Windsurf what file format I need and it listed out nine different sizes and file formats. Seems annoying. I wondered if Windsurf could just do it all for me. It quickly wrote a series of Bash commands to create a temporary folder, resize the image and create the nine variants I needed. It put them into the right directory and then cleaned up the temporary directory. I laughed in amazement. I've never been good at bash scripting and I didn't know if it was even possible to do what I was asking via the command line. I guess it is possible.

After launching and posting on Twitter, a few hundred users visited the site and generated about 1000 recipes. I was pretty happy! Unfortunately, the next day I woke up and saw that I had a $700 OpenAI bill. Someone had been abusing the site and costing me a lot of OpenAI credits by creating a single recipe over and over again - "Pasta with Shallots and Pineapple". They did this 12,000 times. Obviously, I had not put any rate limiting in.
Still, I was determined not to write any code. I explained the problem and asked Windsurf to come up with solutions. Seconds later, I had 15 pretty good suggestions. I implemented several (but not all) of the ideas in about 10 minutes and the abuse stopped dead in its tracks. I won't tell you which ones I chose in case Mr Shallots and Pineapple is reading. The app's security is not perfect, but I'm pretty happy with it for the scale I'm at. If I continue to grow and get more abuse, I'll implement more robust measures.
Overall, I am astonished how productive Windsurf has made me in the last two weeks. I'm not a good designer or frontend developer, and I'm a very rusty rails dev. I got this project into production 5 to 10 times faster than it would've taken me manually, and the level of polish on the front end is much higher than I could've achieved on my own. Over and over again, I would ask for a change and be astonished at the speed and quality with which Windsurf implemented it. I just sat laughing as the computer wrote code.
The next thing I want to change is making the recipe generation process much more immediate and responsive. Right now, it takes about 20 seconds to generate a recipe and for a new user it feels like maybe the app just isn't doing anything.
Instead, I'm experimenting with using Websockets to show a streaming response as the recipe is created. This gives the user immediate feedback that something is happening. It would also make editing the recipe really fun - you could ask it to "add nuts" to the recipe, and see as the recipe dynamically updates 2-3 seconds later. You could also say "Increase the quantities to cook for 8 people" or "Change from imperial to metric measurements".
I have a basic implementation working, but there are still some rough edges. I might actually go and read the code this time to figure out what it's doing!
I also want to add a full voice agent interface so that you don't have to touch the screen at all. Halfway through cooking a recipe, you might ask "I don't have cilantro - what could I use instead?" or say "Set a timer for 30 minutes". That would be my dream recipe app!
Tools like Windsurf or Cursor aren't yet as useful for non-technical users - they're extremely powerful and there are still too many ways to blow your own face off. I have a fairly good idea of the architecture that I want Windsurf to implement, and I could quickly spot when it was going off track or choosing a solution that was inappropriately complicated for the feature I was building. At the moment, a technical background is a massive advantage for using Windsurf. As a rusty developer, it made me feel like I had superpowers.
But I believe within a couple of months, when things like log tailing and automated testing and native version control get implemented, it will be an extremely powerful tool for even non-technical people to write production-quality apps. The AI will be able to make complex changes and then verify those changes are actually working. At the moment, it feels like it's making a best guess at what will work and then leaving the user to test it. Implementing better feedback loops will enable a truly agentic, recursive, self-healing development flow. It doesn't feel like it needs any breakthrough in technology to enable this. It's just about adding a few tool calls to the existing LLMs. My mind races as I try to think through the implications for professional software developers.
Meanwhile, the LLMs aren't going to sit still. They're getting better at a frightening rate. I spoke to several very capable software engineers who are Y Combinator founders in the last week. About a quarter of them told me that 95% of their code is written by AI. In six or twelve months, I just don't think software engineering is going exist in the same way as it does today. The cost of creating high-quality, custom software is quickly trending towards zero.
You can try the site yourself at recipeninja.ai
Here's a complete list of functionality. Of course, Windsurf just generated this list for me 🫠
RecipeNinja: Comprehensive Functionality Overview
Core Concept: the app appears to be a cooking assistant application that provides voice-guided recipe instructions, allowing users to cook hands-free while following step-by-step recipe guidance.
Backend (Rails API) Functionality
User Authentication & Authorization
Google OAuth integration for user authentication
User account management with secure authentication flows
Authorization system ensuring users can only access their own private recipes or public recipes
Recipe Management
Recipe Model Features:
Unique public IDs (format: "r_" + 14 random alphanumeric characters) for security
User ownership (user_id field with NOT NULL constraint)
Public/private visibility toggle (default: private)
Comprehensive recipe data storage (title, ingredients, steps, cooking time, etc.)
Image attachment capability using Active Storage with S3 storage in production
Recipe Tagging System:
Many-to-many relationship between recipes and tags
Tag model with unique name attribute
RecipeTag join model for the relationship
Helper methods for adding/removing tags from recipes
Recipe API Endpoints:
CRUD operations for recipes
Pagination support with metadata (current_page, per_page, total_pages, total_count)
Default sorting by newest first (created_at DESC)
Filtering recipes by tags
Different serializers for list view (RecipeSummarySerializer) and detail view (RecipeSerializer)
Voice Generation
Voice Recording System:
VoiceRecording model linked to recipes
Integration with Eleven Labs API for text-to-speech conversion
Caching of voice recordings in S3 to reduce API calls
Unique identifiers combining recipe_id, step_id, and voice_id
Force regeneration option for refreshing recordings
Audio Processing:
Using streamio-ffmpeg gem for audio file analysis
Active Storage integration for audio file management
S3 storage for audio files in production
Recipe Import & Generation
RecipeImporter Service:
OpenAI integration for recipe generation
Conversion of text recipes into structured format
Parsing and normalization of recipe data
Import from photos functionality
Frontend (React) Functionality
User Interface Components
Recipe Selection & Browsing:
Recipe listing with pagination
Real-time updates with 10-second polling mechanism
Tag filtering functionality
Recipe cards showing summary information (without images)
"View Details" and "Start Cooking" buttons for each recipe
Recipe Detail View:
Complete recipe information display
Recipe image display
Tag display with clickable tags
Option to start cooking from this view
Cooking Experience:
Step-by-step recipe navigation
Voice guidance for each step
Keyboard shortcuts for hands-free control:
Arrow keys for step navigation
Space for play/pause audio
Escape to return to recipe selection
URL-based step tracking (e.g., /recipe/r_xlxG4bcTLs9jbM/classic-lasagna/steps/1)
State Management & Data Flow
Recipe Service:
API integration for fetching recipes
Support for pagination parameters
Tag-based filtering
Caching mechanisms for recipe data
Image URL handling for detailed views
Authentication Flow:
Google OAuth integration using environment variables
User session management
Authorization header management for API requests
Progressive Web App Features
PWA capabilities for installation on devices
Responsive design for various screen sizes
Favicon and app icon support
Deployment Architecture
Two-App Structure:
cook-voice-api: Rails backend on Heroku
cook-voice-wizard: React frontend/PWA on Heroku
Backend Infrastructure:
Ruby 3.2.2
PostgreSQL database (Heroku PostgreSQL addon)
Amazon S3 for file storage
Environment variables for configuration
Frontend Infrastructure:
React application
Environment variable configuration
Static buildpack on Heroku
SPA routing configuration
Security Measures:
HTTPS enforcement
Rails credentials system
Environment variables for sensitive information
Public ID system to mask database IDs
This comprehensive overview covers the major functionality of the Cook Voice application based on the available information. The application appears to be a sophisticated cooking assistant that combines recipe management with voice guidance to create a hands-free cooking experience.
2 notes
·
View notes
Text
A Guide to Choosing the Right Hosting Plan for Your Clients
Web developers, freelancers, and agencies in the UK are increasingly looking for flexible, reliable, and cheap web hosting solutions for their clients. Whether you're managing multiple client websites or looking to launch your own web design business, choosing the right and affordable web hosting plan is crucial.

This comprehensive guide will walk you through everything you need to consider when choosing a cheap web hosting plan for your clients, with a focus on reseller hosting, cheap and reliable options, Linux hosting environments, whitelabel solutions, and managed reseller hosting services. We'll also explore how each of these options supports scalable and professional webdesign services.
1. Understanding Your Clients' Needs
Before diving into the technical aspects of hosting, it’s essential to clearly understand your clients’ specific needs and expectations. Start by identifying the type of websites they intend to run—whether it's an eCommerce store, a portfolio, a blog, or a business website. This will help determine the necessary resources and software compatibility. Evaluate the expected traffic volume, as high-traffic websites may require more robust web hosting solutions.
Additionally, consider whether they need specific applications like WordPress, Magento, or other CMS platforms, which may influence your choice of server environment. For clients targeting a specific audience or bound by data regulations, location based servers can offer SEO advantages and ensure legal compliance. Lastly, assess the level of technical support and maintenance they expect—some clients may need full support, while others prefer more control. Taking the time to conduct this initial analysis ensures you select a cheap web hosting plan that aligns with your clients' goals and enhances their overall satisfaction.
2. Why Reseller Hosting is Ideal for Agencies and Freelancers
Reseller hosting is an ideal solution for developers, freelancers, and digital agencies looking to expand their service offerings and generate recurring revenue. This type of web hosting enables you to purchase server space in bulk from the best web hosting provider and then resell it to your clients under your own brand name, creating a seamless and professional experience. One of the major advantages is scalability—you can manage multiple client websites under a single master account, making it easier to grow your business.
It also offers excellent profit potential, as you set your own pricing and retain full control over billing. With whitelabel capabilities, you can fully customise the hosting environment to reflect your brand, enhancing your professional credibility. Additionally, tools like WHM (Web Host Manager) and cPanel streamline administrative tasks, allowing you to efficiently manage accounts and resources. For those in the webdesign industry, offering hosting as part of your package not only increases client retention but also positions your business as a comprehensive digital solution provider.
3. Choosing Between Linux and Windows Hosting
When it comes to selecting the best web hosting environment, most web developers and agencies in the lean towards Linux reseller hosting—and with good reason. Linux offers several key advantages that make it a preferred choice for a wide range of projects. It is highly compatible with open-source technologies such as PHP, MySQL, and Python, which are commonly used in web development. This compatibility allows for seamless integration with popular content management systems like WordPress, Joomla, and Drupal, making it easier to build and manage client websites.
Additionally, Linux hosting is known for its robust security features and cost-effective maintenance, making it a cheap yet reliable option. Advanced users also benefit from features like SSH access and cron jobs, which provide greater control and automation capabilities. Unless your clients specifically require Windows-based technologies such as .NET or MSSQL, Linux hosting remains the more affordable and flexible choice for most UK-based webdesign professionals.
4. The Importance of Whitelabel Hosting
Whitelabel reseller hosting plays a crucial role in helping developers and agencies establish a professional, branded experience for their clients. With whitelabel hosting, you can offer hosting services entirely under your own brand—your clients will see your business name and logo on their control panel, reinforcing your identity every time they log in. This not only enhances your credibility but also builds stronger brand recognition and trust.
By presenting yourself as a full-service provider that handles both webdesign and web hosting, you position your business as a one-stop solution, which adds significant value to your client offerings. In the highly competitive digital market, providing whitelabel hosting can give you a distinct edge, helping you stand out from freelancers or agencies that rely on third-party branding. It’s a strategic move that elevates your brand while opening up new revenue opportunities.
5. Managed Reseller Hosting: Let Experts Handle the Backend
For freelancers and small agencies who prefer to focus on client work rather than technical upkeep, managed reseller hosting offers an ideal solution. This hosting option allows you to hand over the responsibilities of server maintenance, software updates, and security patching to your web hosting provider. One of the main benefits is access to 24/7 technical support, ensuring any issues are resolved quickly and professionally without requiring your direct involvement. Managed reseller hosting also includes automated backups and regular security scans, providing peace of mind that your clients’ data is protected. In addition, server optimisation is handled by experts, ensuring websites perform at their best. By saving time on backend tasks, you can dedicate more energy to your core services like webdesign and client relationship management.
6. What to Look for in a Hosting Provider
Choosing the right hosting provider is a critical decision for any webdesign business or agency offering reseller services. To ensure your clients receive the best experience, your web hosting provider should offer location based data centres, which significantly reduce website load times for local users and provide SEO advantages in regional search results.
Look for hosting providers that offer affordable plans without compromising on performance, so you can maintain healthy profit margins while delivering quality service. A Linux server environment with full access to control panels like cPanel and WHM is essential for ease of management and compatibility with popular web applications. Whitelabel support with the ability to customise branding allows you to present a unified, professional image to clients. If you're looking to avoid the technical burden of server management, make sure your hosting provider offers managed reseller hosting packages.
7. How Cheap Doesn’t Mean Low-Quality
For many resellers, finding a cheap reseller hosting plan is an effective way to maximise profit margins while offering competitive pricing to clients. However, opting for a low-cost plan doesn't have to mean compromising on quality. The key lies in choosing the best and most affordable web hosting provider that balances affordability with performance and reliability. Look for established web hosting companies with a strong reputation in the industry, as they are more likely to offer consistent uptime and responsive support. The right cheap web hosting plan should still include essential features such as SSD storage for fast loading times, free SSL certificates for security, and access to cPanel for easy management.
Additionally, reviewing customer feedback and testimonials can offer valuable insight into a provider’s real-world performance. Some of the best UK hosting providers offer cheap Linux reseller hosting that delivers excellent service, reliability, and even full whitelabel branding support—proving that affordable can still mean professional.
8. Integrating Hosting with Webdesign Services
For webdesign professionals, integrating hosting into your service offerings is a smart way to enhance value and streamline the client experience. By bundling hosting with your webdesign services, you position yourself as a one-stop solution—clients benefit from the convenience of having everything managed under one roof. This approach not only simplifies project delivery but also opens the door to recurring revenue streams through web hosting subscriptions.
Another key advantage is the ability to control the hosting environment, ensuring optimal website performance, faster load times, and seamless compatibility with your designs. When selecting an affordable web hosting plan for integration, look for features that support professional web projects—such as staging environments for testing, reliable email hosting, automated backups for data security, and SSL certificates for encrypted connections. These features are essential for delivering a complete and professional webdesign package, helping you stand out in the competitive market while building long-term client relationships.
9. Control Panels Matter: cPanel and WHM
When offering Linux reseller hosting, having access to user-friendly and powerful control panels is essential. That’s why most reputable web hosting providers include cPanel and WHM in their reseller packages—these tools are industry standards that simplify hosting management for both you and your clients. For your clients, cPanel provides an intuitive interface that makes everyday tasks easy to handle, including setting up email accounts, managing FTP access, handling files, and installing popular web applications through Softaculous with just one click.
On the other hand, WHM (Web Host Manager) gives you the ability to create and manage multiple hosting accounts from a single dashboard. It allows you to monitor resource usage across accounts, set limits, and customise hosting packages to suit the varying needs of your webdesign clients. This combination of cPanel and WHM empowers you to deliver a professional, fully managed experience while giving clients the autonomy they expect—without requiring extensive technical expertise from either party.
10. SEO Advantages of Local Hosting
For UK businesses, search engine optimisation (SEO) is a top priority, and the location of your hosting server can significantly impact local search rankings. Google takes several factors into account, including the server’s IP location, website load speed, and the presence of a secure HTTPS protocol. By choosing Linux reseller hosting, you ensure that your clients’ websites load faster for visitors within the region, which not only improves user experience but also positively influences SEO performance.
Faster load times reduce bounce rates and encourage longer visits, both of which are signals Google rewards. Additionally, hosting locally helps establish relevance in regional search results by associating the server’s IP. When combined with whitelabel branding, this setup allows you to offer a premium, fully optimised hosting service that meets the demands of businesses focused on improving their online visibility and search rankings.
11. Security and Backups: Non-Negotiables
In today’s digital landscape, security is absolutely non-negotiable—especially when you’re managing multiple client websites through reseller hosting. It’s essential to choose a web hosting provider that offers robust security measures to protect your clients’ data and maintain their trust. Key features to look for include free SSL certificates, which encrypt website traffic and enhance user confidence. Regular backups, whether daily or weekly, are critical to ensure data can be restored quickly in case of accidental loss or cyberattacks.
Additional layers of protection such as firewalls and malware scanning help safeguard websites from unauthorized access and malicious software. DDoS (Distributed Denial of Service) protection is also vital to prevent downtime caused by traffic overload attacks. These security protocols are particularly important if you opt for managed reseller hosting, as your clients will expect high availability and data safety as part of a professional service package. Prioritising security not only protects your clients but also strengthens your reputation as a reliable hosting provider in the competitive market.
12. Making the Final Choice: Checklist
Before finalising your reseller hosting plan for your clients, it’s important to carefully evaluate your options to ensure you select a solution that aligns with both your immediate needs and long-term business goals. Start by confirming that the plan offers Linux hosting with industry-standard control panels like cPanel and WHM, which are essential for efficient account management and client usability. Next, consider whether the plan is cheap yet reliable—affordability shouldn’t come at the cost of performance or support.
Check if the web hosting provider supports whitelabel and branding options, enabling you to deliver a seamless, professional experience under your own brand name. Also, assess whether there’s an option for managed reseller hosting, which can be invaluable if you prefer to delegate server management tasks. Finally, reflect on whether the cheap web hosting plan will support your ongoing webdesign projects and business growth, providing the scalability and features you need to succeed in the market. Taking the time to run through this checklist ensures you make an informed decision that benefits both your agency and your clients.
Conclusion-
Choosing the right and cheap web hosting plan for your clients is more than a technical decision—it’s a strategic business move. Whether you're just starting out or scaling your webdesign agency, reseller hosting with Linux, whitelabel branding, and optional managed reseller hosting can elevate your service offerings and boost client satisfaction.
By focusing on performance, reliability, and branding, you not only meet client expectations but also create new revenue opportunities. With the right cheap hosting solution, your business can grow sustainably while delivering real value.

Janet Watson
MyResellerHome MyResellerhome.com We offer experienced web hosting services that are customized to your specific requirements. Facebook Twitter YouTube Instagram
#best web hosting#webhosting#myresellerhome#webhostingservices#cheap web hosting#affordable web hosting#reseller#resellerhosting
0 notes
Text
🔐 How to Create an SSH Key in Linux: Step-by-Step Guide for Secure Server Access
Ditch passwords and secure your Linux server like a pro! At ServerMO, we recommend using SSH keys for fast, safe, and passwordless remote access to your dedicated servers.
Learn how to generate SSH keys, upload your public key to your server, and disable password-based login for maximum security.
0 notes
Text
CircleCI is a continuous integration and delivery platform that helps organizations automate application delivery with faster builds and simplified pipeline maintenance. CircleCI in particular offers the ability to automate testing during the CI/CD process as part of their daily team habits.CircleCI jobs require secrets in order to pull code from Git repo (e.g. GitHub token) and for installing this code on a newly defined environment (e.g. CSP credentials - access key). By integrating CircleCI with Akeyless Vault, you would not need to keep hard coded secrets within the CircleCI jobs such as API-keys, tokens, certificates and username & password credentials.With an Akeyless Vault integration to CircleCI, Akeyless acts as a centralized secrets management platform by efficiently provisioning user secrets into CircleCI jobs. Akeyless handles secret provisioning through injecting Static or Dynamic Keys into CircleCI jobs. While doing so, Akeyless leverages existing CircleCI functionalities such as jobs, workflows, contexts, in order to securely fetch secrets to CircleCI pipelines. Benefits of Using a Centralized Secrets Management SolutionWith a centralized secrets management platform like Akeyless Vault, CircleCI and all other DevOps tool’s secrets are unified and secured. A secrets management platform like the Akeyless Vault makes it operationally simpler to maintain compliance and generate secret access reports with a usage visibility of what secret, when accessed, and from where.Operation-Wise - For an organization with multiple DevOps tools, managing secrets becomes complicated and requires considerable effort to maintain workforce efficiency. With a holistic secrets management platform like Akeyless, an organization maintains a single source of secrets into different DevOps applications and workflows simultaneously.Audit-Wise - With a consolidated audit of all application secrets directly through the Akeyless Vault, an organization can ensure audit compliance centrally instead of auditing multiple secret repositories. Functionality-Wise - Most DevOps tools, including CircleCI, lack the Zero-Trust strategy while administering secrets. A centralized secrets management solution like Akeyless, secrets are generated on-the-fly to fetch into CircleCI jobs Just-in-Time, thereby aiding a Zero-Trust posture.Security-Wise - Through Akeyless, CircleCI job secrets are provisioned through Static and Dynamic Keys instead of the default way of storing secrets as plain text. Additionally, with automatic expiry of SSH Certificates, Akeyless avoids abuse and theft of access privileges. How to Fetch a Secret with Akeyless Vault in CircleCIWith benefits like ease of operation and enhanced security allowed by Akeyless Vault's centralized secrets management platform, let’s go through the simple steps to fetch a secret in CircleCI.Prerequisites1.You need to have an existing repo that is followed by CircleCI (in our example it’s named TestRepo):2. Sign In or create an account with Akeyless (it’s free) by accessing the URL: https://console.akeyless.io/register 3. In case you are a new user, create your first secret in Akeyless as shown below: Configuration1. Setup global configuration in your CircleCI projecta. Go into Project Settings:b. Go into Environment Variables to setup global configuration:In our example, you would need to configure the following environment variables:· api_gateway_url· admin_email· admin_passwordIf you have your own Akeyless API Gateway setup - set the URL for the Restful API, otherwise you can use Akeyless Public API Gateway with the following URL:https://rest.akeyless.io Similarly, set your admin_email and admin_password as environment variables: 2. Create/update your config.yml file for CircleCI (should be in .circleci/config.yml): 3. Pipeline will be triggered and you'll be able to view your build:To Sum Up With the Akeyless Vault plugin for CircleCI, an
organization can manage CircleCI secrets effortlessly, cutting down operational hassles in addition to maintaining security. With the use of Static or Dynamic secrets, access policies are efficiently permission-controlled across multiple layers of a DevOps workflow.
0 notes
Text
AWS Secret Manager Cost, Access Control And Authentication

Access control and authentication for AWS Secret Manager
AWS Identity and Access Management (IAM) is used by Secrets Manager to protect secret access. Access control and authentication are offered by IAM. Authentication confirms the legitimacy of people’s requests. Multi-factor authentication (MFA) tokens, access keys, and passwords are used in Secrets Manager’s sign-in procedure to confirm users’ identities. Look logging into AWS. Only authorized users are able to access AWS resources, including secrets, thanks to access control. Policies are used by Secrets Manager to specify who can access what resources and what actions an identity can do on them. View IAM’s policies and permissions.
Reference to AWS Secret Manager permissions
The Secrets Manager permissions reference may be found in the Service Authorization Reference under Actions, resources, and condition keys for AWS Secrets Manager.
Administrator permissions for Secrets Manager
Attach the following policies and complete the steps at Adding and deleting IAM identity permissions to provide AWS Secret Manager administrator permissions:
SecretsManagerReadWrite
IAMFullAccess
AWS advises against giving end users administrator privileges. The permission needed to enable rotation (IAMFullAccess) gives substantial access that are inappropriate for end users, even while this lets your users generate and manage own secrets.
Lambda rotation function permissions
Secrets Manager rotates secrets using AWS Lambda functions. Both the secret and the database or service for which the secret includes login credentials must be accessible to the Lambda function.
Keys for encryption permissions
AWS Secret Manager encrypts secrets using AWS Key Management Service (AWS KMS) keys. The proper permissions are immediately present in the AWS managed key aws/secretsmanager. Secrets Manager need permissions to the KMS key if you use a different one.
Replication permissions
You can limit which users or services are able to duplicate your secrets to other regions by utilizing IAM authorization policies.
Which secrets are allowed to be kept in Secrets Manager?
Database credentials, on-premises resource credentials, SaaS application credentials, third-party API keys, and Secure Shell (SSH) keys are among the secrets that can be managed.
Please be aware that while AWS Secret Manager lets you save a JSON document that lets you handle any text blurb that is 64 KB or less, allowing it to be utilized in a variety of situations, there are better ways to maintain some sorts of secrets in AWS, such as:
AWS credentials: Rather than using Secrets Manager to store or get AWS credentials, we can utilize AWS IAM.
Use the AWS KMS service for encryption keys.
Use AWS EC2 Instance Connect instead of SSH keys.
Use AWS Certificate Manager for private keys and certificates.
Beginning to Use AWS Secret Manager
Step 1: Create an AWS account and log in
You can secure access to your IT resources, services, and apps with AWS Secrets Manager.
Step 2: Access the Console for Secrets Management
Throughout their existence, database credentials, API keys, and other secrets can be effortlessly rotated, managed, and retrieved.
Step 3: To start the wizard, click on Store a new secret
Our 30-day free trial allows you to test Secrets Manager without paying anything extra. When you store your first secret, the free trial begins.
AWS Secrets Manager pricing
Pricing Overview
You can rotate, manage, and recover secrets at any point in their lifecycle using AWS Secret Manager, which makes it simpler to keep your environment safe and compliant. You pay for Secrets Manager according to how many secrets are saved and how many API calls are made. There are no long-term agreements or up-front fees. You only pay for usage; you don’t have to pay for the staff, infrastructure, or licenses needed to guarantee that your secrets are highly accessible and dependable.
Free Trial
Trial Period of 30 Days
With a 30-day free trial, you may test AWS Secrets Manager without paying anything more. You can rotate, manage, and retrieve secrets during the 30-day free trial.
When you store your first secret, your free trial begins.
Pricing
Monthly Per Secret
Each secret costs $0.40 a month. Replica secrets are billed at $0.40 per replica each month and are regarded as separate secrets. The cost is prorated (according to the amount of hours) for secrets that are kept for less than a month.
Get in touch with AWS if your company intends to use a lot of secrets.
Per 10,000 API calls
$0.05 per 10,000 API calls
Read more on Govindhtech.com
#AWSSecretManagerCost#AWSSecret#SecretManager#AWSSecretManager#IAM#KMSkey#News#Technews#Technology#Technologynews#Technologytrends#Govindhtech
0 notes
Text
How to deploying Laravel projects on a live server – Complete Step-by-Step Guide
Learn How to deploying Laravel projects on a live server with this comprehensive guide. Step-by-step instructions on setting up hosting, configuring files, and deploying your Laravel app smoothly.Read Laravel Docs
How to deploying Laravel projects on a live server, you’ll need to follow a structured process. Here’s a step-by-step guide to help you:

1. Purchase Domain and Hosting
Make sure you have a domain and a hosting plan. Most shared hosting plans (like cPanel-based ones) or a VPS will work for Laravel, but ensure your server supports PHP and MySQL and meets Laravel’s requirements (PHP version, required extensions, etc.).
2. Prepare Your Laravel Project
Make sure your Laravel project is working locally.
Run the following command to clear any cached configuration and to optimize the project:
php artisan cache:clear
php artisan config:clear
php artisan route:clear
php artisan view:clear
Set up your environment variables (.env file). Make sure they are correctly configured for the live server (e.g., database, mail, and app URL settings).
3. Zip and Upload Your Laravel Project
Compress your entire Laravel project folder (without the node_modules and vendor directories) into a .zip file.
Use FTP (with FileZilla or any other FTP client) or File Manager in cPanel to upload the .zip file to your server. Typically, upload the file to the public_html or a subdirectory within it if you want to run your Laravel app in a subdirectory.
4. Extract the Files
Once uploaded, use File Manager in your hosting control panel to extract the .zip file.
5. Set Up the Public Directory
By default, Laravel’s entry point is the public folder, which contains the index.php file. On a shared hosting server:
Move everything in the public folder (including the .htaccess and index.php files) to the root directory (usually public_html).
Edit the index.php file to update the paths:
Change:
require __DIR__.'/../vendor/autoload.php';
$app = require_once __DIR__.'/../bootstrap/app.php';
To:
require __DIR__.'/vendor/autoload.php';
$app = require_once __DIR__.'/bootstrap/app.php';
This ensures that Laravel can find the necessary files in the correct directory.
6. Set File Permissions
Ensure that the following directories are writable by the server:
/storage
/bootstrap/cache
Use the following command via SSH (if available) or through the hosting file manager:chmod -R 775 storage chmod -R 775 bootstrap/cache
7. Set Up a Database
Create a MySQL database and a user with privileges in cPanel (or via SSH if using VPS).
Update the .env file with your database credentials:
DB_HOST=localhost DB_DATABASE=your_database_name DB_USERNAME=your_database_username DB_PASSWORD=your_database_password
8. Install Composer Dependencies
If you have SSH access:
SSH into your server using a terminal or a tool like PuTTY.
Navigate to your project directory
cd /path/to/your/project
Run Composer to install the dependencies:
composer install --optimize-autoloader --no-dev
If you don’t have SSH access, you can run composer install locally, zip the vendor folder, and upload it to the server.
9. Run Migrations
If you have SSH access, run the following command to migrate the database:
php artisan migrate --force
If you don’t have SSH access, you can run the migrations locally and then export/import the database to the server via phpMyAdmin.
10. Set App Key
Generate a new application key if you haven’t already:php artisan key:generate
Ensure the key is set in the .env file:
Read Full Tutorials
0 notes
Text
Deploying Coreum Node: A Comprehensive Guide
As blockchain technology continues to evolve, more developers and businesses are looking to participate in decentralized networks. One of the fastest-growing blockchain platforms is Coreum, a next-generation decentralized platform built to support enterprise-grade applications. Whether you're a blockchain enthusiast, developer, or business looking to run decentralized services, deploying a Coreum node is an essential step to fully engage with the Coreum network. In this comprehensive guide, we will walk you through everything you need to know about how to deploy coreum node successfully.
What is Coreum?
Before diving into the process of deploying a Coreum node, let’s first understand what Coreum is and why you may want to run a node on this platform. Coreum is a blockchain platform designed with a focus on enabling decentralized finance (DeFi), smart contracts, and enterprise applications. Its advanced infrastructure allows developers to create highly scalable and secure applications on top of the blockchain, benefiting from Coreum’s fast transaction times and low fees.
Unlike many other blockchain networks, Coreum also offers a more energy-efficient consensus mechanism, meaning it is more sustainable and cost-effective. This combination of features makes deploying a Coreum node attractive to individuals and businesses alike.
Why Deploy Coreum Node?
There are several reasons why someone would want to deploy Coreum node:
Support the Network: By running a node, you help decentralize the Coreum network, enhancing its security and resilience.
Transaction Validation: Nodes play a crucial role in validating transactions and blocks, helping maintain the integrity of the blockchain.
Stake and Earn Rewards: Many blockchain networks offer staking rewards for node operators. By deploying a Coreum node, you may have the opportunity to earn tokens for your contribution.
Run Decentralized Applications (dApps): If you are building decentralized applications on Coreum, running your node ensures smoother performance and more control over the network environment.
Private Network Participation: Businesses looking to deploy enterprise-grade applications can run private nodes to control data flow and ensure operational integrity.
Prerequisites Before You Deploy Coreum Node
Before you embark on deploying a Coreum node, there are several technical and system-related prerequisites to ensure smooth operation:
Hardware Requirements: Make sure your machine meets the necessary hardware specifications, including enough RAM, CPU power, and storage. Coreum nodes are designed to operate efficiently, but adequate resources are critical to maintaining optimal performance.
CPU: A modern multi-core processor
RAM: At least 16GB of RAM
Storage: SSD storage, preferably with several terabytes available to accommodate growing blockchain data
Network: High-speed, stable internet connection with ample bandwidth
Operating System: Ensure that your operating system is compatible with the Coreum software. Linux distributions like Ubuntu or CentOS are typically recommended for deploying blockchain nodes because of their reliability and performance.
Basic Blockchain Knowledge: While deploying a node does not require deep technical knowledge, having a basic understanding of how blockchains work, along with the specificities of Coreum, will make the process much easier.
Wallet Setup: Before starting, you’ll need to create a Coreum wallet. This is necessary to interact with the blockchain and can be used to stake tokens or participate in governance activities.
Security Considerations: As with any blockchain node deployment, security is crucial. Ensure that your system has adequate firewall protection, and configure SSH keys to access the server securely. You may also want to consider using a Virtual Private Server (VPS) from a reliable provider for additional security and uptime reliability.
Step-by-Step Overview to Deploy Coreum Node
Step 1: Get the Necessary Software
The first step in deploying Coreum node is to download the necessary software from the official Coreum repository. The Coreum team provides binaries and instructions on their GitHub page. Make sure to download the most up-to-date version of the software to avoid any compatibility issues.
Step 2: Set Up Dependencies
Before you can run a Coreum node, you will need to install several dependencies. These include programming languages like Go or Rust, databases, and specific libraries required by the Coreum blockchain software. Ensuring that all dependencies are properly installed is critical to the smooth deployment of your node.
Step 3: Configure the Node
Once the necessary software and dependencies are in place, you will need to configure your Coreum node. This involves editing a configuration file, typically in JSON format, to define key parameters such as node type (validator or full node), network settings, and syncing options.
Validator Node: If you’re looking to participate in the consensus mechanism and validate transactions, you’ll need to configure your node as a validator.
Full Node: If you just want to maintain a copy of the blockchain and help propagate transactions, configure your node as a full node.
Step 4: Sync the Blockchain
After configuring your node, it will start syncing with the Coreum blockchain. This process may take a significant amount of time, depending on the size of the blockchain and your network speed. During this time, your node will download and verify all historical transactions, ensuring it is up-to-date with the network.
Step 5: Monitor and Maintain Your Node
Once your Coreum node is deployed and fully synced, ongoing monitoring is important. You can use various monitoring tools to keep track of performance, network latency, and resource usage. If you’re running a validator node, you'll also want to ensure that your node remains online to avoid downtime, which could affect your staking rewards.
Deploying a Coreum node is not a one-time task. Regular software updates are released by the Coreum team, and staying up-to-date is critical for the security and performance of your node. Maintenance is just as important as deployment, and you should plan for routine checks to ensure everything is running smoothly.
Troubleshooting Common Issues
Deploying Coreum node can sometimes come with challenges. Some common issues include:
Network Issues: Ensure your firewall settings allow your node to connect to the necessary ports.
Syncing Delays: Slow syncing can often be mitigated by increasing your network bandwidth or upgrading hardware components.
Outdated Software: Always ensure you’re running the latest version of the Coreum node software to avoid compatibility issues with the blockchain network.
Final Thoughts
Deploying Coreum node offers significant benefits, from earning staking rewards to participating in the blockchain's governance and transaction validation. While the deployment process requires some technical knowledge and preparation, the rewards are well worth the effort. By following the steps outlined in this guide, you’ll be well on your way to successfully deploying your Coreum node and contributing to the future of decentralized applications and enterprise solutions.
Whether you are an individual or part of an organization, deploying Coreum node can help you capitalize on the benefits of decentralized technology, ensuring security, scalability, and performance in your blockchain ventures.
1 note
·
View note
Link
0 notes
Text
Unlocking the Power of Ansible Automation: A Comprehensive Guide
In today’s fast-paced technological landscape, automation has become a cornerstone for achieving efficiency and reliability in IT operations. Among the myriad of automation tools available, Ansible stands out for its simplicity, flexibility, and power. This blog post delves into what Ansible is, how it works, and why it’s an essential tool for IT professionals and organizations looking to streamline their workflows.
What is Ansible?
Ansible is an open-source automation tool used for IT tasks such as configuration management, application deployment, and orchestration. Developed by Michael DeHaan and introduced in 2012, Ansible has quickly gained popularity due to its agentless architecture and straightforward approach to automation.
Key Features of Ansible:
Agentless Architecture: Unlike many automation tools, Ansible does not require any agents or additional software on the client systems. It uses SSH for Unix-like systems and WinRM for Windows systems to execute tasks.
Playbooks: Written in YAML, playbooks are the heart of Ansible's automation. They describe the desired state of the system and the steps needed to achieve that state.
Idempotency: Ansible ensures that repeated executions of a playbook will produce the same result, preventing unintended changes.
Extensible: With a robust set of built-in modules and the ability to create custom modules, Ansible can be tailored to meet a wide range of automation needs.
How Ansible Works
Ansible operates by connecting to your nodes and pushing out small programs, called "Ansible modules," to them. These programs are written to be resource models of the desired state of the system. Ansible then executes these modules over SSH (or WinRM for Windows), and once the desired state is achieved, it removes them.
Basic Components:
Control Node: The machine where Ansible is installed and from which tasks are executed.
Managed Nodes: The networked systems that Ansible manages.
Inventory: A list of managed nodes, which can be defined in a simple text file or dynamically generated.
Playbook: A YAML file containing one or more plays, which define the tasks to be executed on the managed nodes.
Why Use Ansible?
Simplified Management
Ansible's simplicity is one of its strongest points. Its agentless nature means less overhead and fewer points of failure. By using straightforward YAML syntax, playbooks are easy to read, write, and understand, making Ansible accessible even to those with minimal coding experience.
Scalability and Flexibility
Whether managing a few servers or thousands, Ansible scales efficiently. It supports complex deployments with multiple environments, ensuring consistent configuration across development, testing, and production.
Enhanced Collaboration
Ansible's human-readable playbooks serve as documentation, making it easier for teams to collaborate. Everyone from developers to operations teams can understand and contribute to the automation process.
Security and Compliance
With Ansible, maintaining security and compliance is streamlined. Automated tasks reduce the risk of human error, and consistent configurations ensure systems adhere to organizational policies.
Ansible Use Cases
Configuration Management
Ansible can manage configurations across diverse environments, ensuring consistency and compliance. From setting up new servers to maintaining existing ones, it handles tasks such as package installation, system updates, and service management.
Application Deployment
Deploying applications can be complex, but Ansible simplifies the process. Whether you’re deploying web applications, databases, or microservices, Ansible automates the entire workflow, from code checkout to configuration and service restart.
Orchestration
Beyond individual configurations and deployments, Ansible excels in orchestrating entire workflows. It can manage complex, multi-tier deployments involving load balancers, databases, and web servers, ensuring each component is configured correctly and deployed in the right order.
Continuous Delivery
Ansible integrates seamlessly with CI/CD pipelines, automating the deployment of applications and updates. This ensures that software changes are consistently tested and deployed, accelerating the delivery process.
Getting Started with Ansible
Install Ansible: Ansible can be installed on various operating systems using package managers like apt, yum, or pip.
Set Up Inventory: Define your managed nodes in a simple text file.
Create Playbooks: Write YAML playbooks to describe your automation tasks.
Execute Playbooks: Run your playbooks using the ansible-playbook command.
Conclusion
Ansible is a powerful automation tool that simplifies IT management and accelerates workflows. Its agentless architecture, ease of use, and flexibility make it an ideal choice for organizations of all sizes. By adopting Ansible, you can enhance efficiency, ensure consistency, and focus on innovation rather than repetitive tasks.
Ready to take your automation to the next level? Start exploring Ansible today and unlock the full potential of your IT infrastructure. For more details click www.qcsdclabs.com
#redhatcourses#information technology#docker#containerorchestration#container#linux#kubernetes#containersecurity#dockerswarm#aws
0 notes
Text
Delinea Secret Server: Safeguarding Your Digital Secrets

In today's digital landscape, where data breaches and cyber threats loom large, safeguarding sensitive information is paramount. As organizations navigate through the intricacies of digital security, the demand for robust solutions to protect confidential data grows. One such solution gaining prominence is the Delinea Secret Server, renowned for its unparalleled secrecy and security measures.
Introduction to Secret Servers
What is a secret server? A secret server, also known as a privileged access management (PAM) solution, is a specialized software designed to securely manage and monitor access to privileged accounts and sensitive information within an organization's IT infrastructure. These servers act as gatekeepers, controlling and auditing user access to critical systems and data.
Understanding Delinea Secret Server
Delinea Secret Server stands out in the realm of secret servers, offering a comprehensive suite of features tailored to meet the evolving security needs of modern enterprises. At its core, Delinea Secret Server provides a centralized platform for securely storing, managing, and sharing privileged credentials, such as passwords, SSH keys, and API keys.
Features and functionalities
Robust encryption: Delinea Secret Server employs advanced encryption algorithms to safeguard sensitive data against unauthorized access or breaches.
Access control: Administrators can define granular access policies, ensuring that only authorized users can view or modify privileged credentials.
Audit trails: The platform generates detailed audit logs, enabling organizations to track user activities and maintain compliance with regulatory requirements.
Session monitoring: Delinea Secret Server offers real-time session monitoring capabilities, allowing administrators to monitor and terminate suspicious sessions promptly.
How it ensures security and secrecy Delinea Secret Server employs a multi-layered approach to security, combining encryption, access controls, and monitoring mechanisms to safeguard confidential information. By encrypting data at rest and in transit, the platform ensures that sensitive credentials remain protected from unauthorized access or interception. Additionally, granular access controls enable organizations to enforce the principle of least privilege, limiting user access to only the resources and information necessary for their roles.
Benefits of Delinea Secret Server
Enhanced data protection By centralizing privileged account management and implementing robust security measures, Delinea Secret Server helps organizations mitigate the risk of data breaches and insider threats. The platform's encryption capabilities ensure that sensitive information remains secure, even in the event of a security breach or unauthorized access attempt.
Improved access control Delinea Secret Server empowers organizations to enforce strict access controls and authentication mechanisms, reducing the risk of unauthorized access to critical systems and data. With features such as role-based access control and two-factor authentication, the platform provides organizations with the tools they need to enforce strong security policies and prevent unauthorized access.
Compliance with regulations In an increasingly regulated business environment, compliance with data protection regulations and industry standards is crucial. Delinea Secret Server helps organizations achieve compliance with regulations such as GDPR, HIPAA, and PCI DSS by providing robust security features, audit trails, and reporting capabilities. By maintaining a comprehensive record of privileged access activities, the platform enables organizations to demonstrate compliance with regulatory requirements and industry standards.
Implementation of Delinea Secret Server
Implementing Delinea Secret Server within an organization's IT infrastructure is a straightforward process, thanks to its intuitive user interface and comprehensive documentation. The following steps outline the implementation process:
Step-by-step setup guide
Installation: Begin by installing the Delinea Secret Server software on a dedicated server or virtual machine within your organization's network.
Configuration: Configure the platform according to your organization's security policies and requirements, including setting up user accounts, access controls, and encryption settings.
Integration: Integrate Delinea Secret Server with existing systems and applications, such as Active Directory, LDAP, and ticketing systems, to streamline user authentication and access management processes.
Training and support: Provide training to administrators and end-users on how to use Delinea Secret Server effectively, and ensure ongoing support and maintenance to address any issues or concerns that may arise.
Case Studies
Real-world examples of Delinea Secret Server implementation
Company A: Company A, a leading financial institution, implemented Delinea Secret Server to manage privileged access to its critical banking systems and applications. By centralizing password management and enforcing strict access controls, the organization was able to enhance security and compliance while streamlining privileged access management processes.
Company B: Company B, a global technology company, leveraged Delinea Secret Server to secure access to its cloud infrastructure and development environments. With features such as session monitoring and audit trails, the organization gained visibility into user activities and improved its ability to detect and respond to security incidents proactively.
Comparison with Other Solutions
Contrasting Delinea Secret Server with similar products While there are several privileged access management solutions available in the market, Delinea Secret Server distinguishes itself through its robust security features, ease of use, and scalability. Unlike traditional password management solutions or ad-hoc access control mechanisms, Delinea Secret Server provides a comprehensive platform for managing privileged credentials and enforcing strong security policies across the organization.
Unique selling points
Centralized management: Delinea Secret Server offers a centralized platform for managing privileged access to critical systems and data, simplifying administration and enhancing security.
Scalability: The platform is highly scalable, making it suitable for organizations of all sizes, from small businesses to large enterprises.
Flexibility: Delinea Secret Server supports a wide range of authentication methods and integration options, allowing organizations to tailor the platform to their specific security requirements and infrastructure.
Future Trends and Developments
Predictions for the future of secret servers As organizations continue to grapple with evolving cyber threats and regulatory requirements, the demand for secret servers and privileged access management solutions is expected to grow
0 notes
Text
SNOWFLAKE SSH

Title: Beyond the Web: Secure SSH Access to Your Snowflake Data Warehouse
Introduction
Snowflake’s cloud-based data warehousing solution offers a convenient web interface for management and queries — but sometimes, you need more profound control and flexibility. That’s where SSH (Secure Shell) comes in. In this blog post, we’ll explore the benefits of SSH access to Snowflake, how to set it up, and some common scenarios where it shines.
What is SSH?
A brief explanation of SSH as a secure network protocol that allows encrypted command-line access and file transfers to remote machines.
Why Use SSH with Snowflake?
Advanced Data Loading and Transformations: SSH lets you run complex shell scripts or tools on your local system to clean, transform, or load data directly into Snowflake.
Automation: To interact with Snowflake and orchestrate tasks (ETL pipelines, scheduled jobs) using your preferred scripting languages.
Enhanced Security: Key-based authentication with SSH can add an extra layer of security compared to solely relying on Snowflake’s web interface.
Troubleshooting: Connect directly to the Snowflake environment for in-depth debugging and problem resolution.
Setting Up SSH Access to Snowflake
Key-pair Generation: Use tools like ssh-keygen to create a secure public/private key pair.
Upload Your Public Key: Add your public key to your Snowflake user profile for authentication. (Snowflake’s documentation has detailed instructions)
Choosing an SSH Client: Popular options include the built-in command-line tools on Linux/macOS (Terminal) or dedicated clients like PuTTY (Windows).
Connecting: Connect to Snowflake using your SSH client and provide your Snowflake username, hostname, and private key.
Common Use Cases
Secure File Transfers: To move data files in and out of Snowflake, use tools like scp or sftp over the established SSH connection.
Managing Snowflake Objects: Connect to the SnowSQL CLI via SSH to perform advanced administration tasks (creating users, roles, warehouses, etc.)
Custom Tooling: Develop your scripts and tools in your favorite languages (Python, etc.) to automate interactions with Snowflake using the client libraries it provides.
Security Considerations
Enforce Key-Based Authentication: Always use key-based authentication instead of passwords with SSH.
Rotate Keys Regularly: Establish a schedule for rotating your SSH key pairs to maintain strong security.
Least Privilege: Grant specific Snowflake user permissions for the SSH connection, matching only the required actions.
Conclusion
Mastering SSH access to Snowflake opens up a new level of power and flexibility when interacting with your data warehouse. Whether you’re automating processes, performing intricate data manipulations, or prefer working in a command-line environment, SSH is invaluable for every Snowflake power user’s toolkit.
youtube
You can find more information about Snowflake in this Snowflake
Conclusion:
Unogeeks is the No.1 IT Training Institute for SAP Training. Anyone Disagree? Please drop in a comment
You can check out our other latest blogs on Snowflake here – Snowflake Blogs
You can check out our Best In Class Snowflake Details here – Snowflake Training
Follow & Connect with us:
———————————-
For Training inquiries:
Call/Whatsapp:��+91 73960 33555
Mail us at: [email protected]
Our Website ➜ https://unogeeks.com
Follow us:
Instagram: https://www.instagram.com/unogeeks
Facebook: https://www.facebook.com/UnogeeksSoftwareTrainingInstitute
Twitter: https://twitter.com/unogeeks
0 notes
Text
does making a vpn with raspberry pi
🔒🌍✨ Get 3 Months FREE VPN - Secure & Private Internet Access Worldwide! Click Here ✨🌍🔒
does making a vpn with raspberry pi
Raspberry Pi VPN setup
Title: Setting Up a VPN on Raspberry Pi: A Comprehensive Guide
In today's digital age, ensuring online privacy and security is paramount. One effective way to achieve this is by setting up a Virtual Private Network (VPN). While there are numerous commercial VPN services available, building your VPN using a Raspberry Pi can offer both flexibility and control over your network.
Why Choose Raspberry Pi for VPN?
Raspberry Pi, a low-cost, credit card-sized computer, is an excellent choice for hosting a VPN server. Its affordability and energy efficiency make it an attractive option for individuals and small businesses looking to establish a secure connection without breaking the bank.
Step-by-Step Setup Process:
Gather Your Materials: You'll need a Raspberry Pi board (such as Raspberry Pi 4), a microSD card, power supply, and an ethernet cable.
Install Operating System: Download and install Raspberry Pi OS (formerly Raspbian) on the microSD card using a tool like Etcher.
Update and Upgrade: Once booted, run sudo apt update and sudo apt upgrade to ensure your system is up to date.
Install VPN Software: Several VPN server software options are compatible with Raspberry Pi, including OpenVPN and PiVPN. Follow the installation instructions provided by your chosen software.
Configuration: Configure your VPN server settings, including encryption protocols, authentication methods, and user credentials.
Port Forwarding: If you want to access your VPN server from outside your local network, configure port forwarding on your router to redirect traffic to your Raspberry Pi's IP address.
Connect and Test: Connect your devices to the VPN server using the provided client software or native VPN settings. Test the connection to ensure everything is working correctly.
Conclusion:
Setting up a VPN on Raspberry Pi is a cost-effective and customizable solution for safeguarding your online activities. By following these steps, you can establish a secure connection and enjoy peace of mind knowing your data is protected. Whether you're browsing the web, accessing sensitive information, or connecting to public Wi-Fi networks, a Raspberry Pi VPN provides an extra layer of security.
DIY VPN with Raspberry Pi
Title: Building Your Own VPN with Raspberry Pi: A Step-by-Step Guide
In today's digital age, privacy and security are paramount concerns. With the increasing threats of hacking and surveillance, many individuals are turning to Virtual Private Networks (VPNs) to safeguard their online activities. While there are numerous VPN services available, some users prefer to create their own VPN for added control and customization. One popular method is using a Raspberry Pi, a versatile and affordable single-board computer.
Here's a step-by-step guide on how to set up your own VPN using Raspberry Pi:
Gather Your Materials: To get started, you'll need a Raspberry Pi board (such as Raspberry Pi 4), a microSD card, power supply, and an Ethernet cable.
Install Raspbian OS: Begin by installing the Raspbian operating system on your Raspberry Pi. You can download the latest version of Raspbian from the official website and flash it onto the microSD card using software like Etcher.
Configure Raspberry Pi: Once Raspbian is installed, boot up your Raspberry Pi and configure it according to your preferences. Make sure to enable SSH for remote access.
Install VPN Software: Next, you'll need to install VPN server software on your Raspberry Pi. OpenVPN is a popular choice for its robust security features and ease of use. Follow the installation instructions provided by the OpenVPN documentation.
Generate Certificates: After installing OpenVPN, generate the necessary certificates and keys for authentication. These certificates will ensure secure communication between your devices and the VPN server.
Configure OpenVPN: Edit the OpenVPN configuration files to customize your VPN settings, including server IP address, port, encryption method, and authentication details.
Start VPN Server: Once everything is configured, start the OpenVPN server on your Raspberry Pi. You can do this via the command line interface using the 'sudo systemctl start openvpn@server' command.
Connect Devices: Finally, connect your devices to the newly created VPN server using OpenVPN client software. Enter the server's IP address and credentials, and you're ready to browse the internet securely and privately.
By following these steps, you can create your own VPN with Raspberry Pi, giving you greater control over your online privacy and security. So why wait? Take charge of your digital life today!
Raspberry Pi VPN server
A Raspberry Pi VPN server is a cost-effective and convenient way to set up your own virtual private network. Running a VPN server on a Raspberry Pi allows you to securely connect to your home network while you're away or encrypt your internet connection when using public Wi-Fi.
Setting up a Raspberry Pi VPN server is relatively easy and requires minimal hardware and software. You'll need a Raspberry Pi board, a microSD card with Raspbian or another compatible operating system, and an internet connection. There are several open-source VPN server software options available for Raspberry Pi, such as OpenVPN, PiVPN, and WireGuard.
To set up a VPN server on your Raspberry Pi, you'll first need to install and configure the VPN software of your choice. You'll then need to forward the necessary ports on your router to allow external connections to your VPN server. After configuring client devices to connect to your VPN server, you can enjoy a secure and private connection to your home network from anywhere in the world.
Using a Raspberry Pi as a VPN server is a great way to enhance your online privacy and security without breaking the bank. Whether you need to access sensitive information remotely or simply want to protect your internet traffic from prying eyes, a Raspberry Pi VPN server can help you achieve your goals effectively and affordably.
Building VPN on Raspberry Pi
If you are looking to enhance your online privacy and security, setting up a VPN on your Raspberry Pi can be a great solution. A VPN, or Virtual Private Network, encrypts your internet connection and routes it through a server to hide your IP address and protect your data from prying eyes.
To build a VPN on your Raspberry Pi, you will need to start by installing a VPN server software such as OpenVPN. OpenVPN is a popular choice for setting up a secure VPN connection and offers strong encryption protocols for maximum security.
Once you have installed the OpenVPN software on your Raspberry Pi, you will need to configure it to create certificates and keys to secure the connection. This process involves generating a server certificate, a client certificate, and a key for authentication.
Next, you will need to set up port forwarding on your router to allow external connections to reach your Raspberry Pi VPN server. This step is crucial to ensure that your VPN can be accessed from outside your local network.
Finally, you will need to configure the VPN client on your devices to connect to your Raspberry Pi VPN server. This typically involves importing the client certificate and key and setting up the connection details on your device.
By following these steps, you can build a VPN on your Raspberry Pi to enhance your online security and privacy. Remember to keep your software up to date and choose strong encryption protocols to ensure the highest level of protection for your data.
Raspberry Pi VPN configuration
Title: Setting Up a VPN on Raspberry Pi: A Comprehensive Guide
In today's digital landscape, ensuring online privacy and security is paramount. One effective way to achieve this is by setting up a Virtual Private Network (VPN). While there are numerous VPN services available, configuring a VPN on your Raspberry Pi can provide an affordable and customizable solution. Here's a comprehensive guide on how to configure a VPN on your Raspberry Pi.
Choose the Right VPN Protocol: Before diving into the configuration process, decide which VPN protocol you want to use. OpenVPN is a popular choice due to its robust security features and flexibility.
Install OpenVPN: Start by updating your Raspberry Pi's software to ensure you have the latest packages. Then, install the OpenVPN software by running the appropriate commands in the terminal.
Set Up Configuration Files: Generate configuration files for your VPN server using the EasyRSA tool included with OpenVPN. These files contain the necessary cryptographic keys and settings for establishing a secure connection.
Configure OpenVPN Server: Once you have the configuration files, configure the OpenVPN server by editing the server configuration file. Customize settings such as port number, protocol, and encryption to suit your preferences.
Create Client Profiles: Generate client profiles for each device that will connect to the VPN. These profiles include the necessary configuration settings for establishing a secure connection.
Transfer Configuration Files: Transfer the server and client configuration files to their respective devices. Ensure that the files are securely transferred to prevent unauthorized access.
Start the VPN Server: Start the OpenVPN server on your Raspberry Pi using the systemctl command. Monitor the server logs to ensure everything is functioning correctly.
By following these steps, you can configure a VPN on your Raspberry Pi to enhance your online privacy and security. Whether you're browsing the web, accessing sensitive information, or connecting to public Wi-Fi networks, a VPN provides an added layer of protection for your data.
0 notes
Text
Python for Automation: Supercharge Your Productivity

In today's fast-paced world, automation is essential for productivity and efficiency. Python is a popular choice for automating jobs across fields because of its simplicity, versatility, and powerful libraries.
Programmers, data analysts, system administrators, and anybody wishing to automate monotonous operations can benefit from Python. So, let’s explore more about how python for automation can boost productivity.
Top 5 Processes You Can Automate with Python

Email automation
Email is standard in personal and business settings. Python libraries like smtplib and imaplib automate email sending, receiving, and processing. Python simplifies email administration, from mass sending to screening messages.
File operations
Many workflows include file and directory manipulation. Use Python's os modules to automate file renaming, copying, relocating, and deleting. Python is efficient for local file organization and server file operations.
Data compilation
Many businesses and projects need to collect and process data. Python excels at data compilation. Pandas lets you read data from many formats, clean and preprocess it, and easily merge datasets. Python automates data collecting and analysis.
Web scraping
Manually scraping webpage data is tedious. This method can be automated with Python's web scraping packages BeautifulSoup and Scrapy. Python simplifies web scraping for market study and content curation.
Generate reports
Monitoring and assessing a business or project requires reporting. Data manipulation and visualization make report generation easy in Python. You can automate PDF, Excel, and interactive online dashboard report generating to save time and ensure consistency.
Top Python Modules for Automation
Paramiko
Paramiko is a Python SSH implementation that lets you securely automate remote server functions. Paramiko streamlines remote admin tasks like command execution, file transfer, and SSH key management.
Pandas
The Panda framework is critical for any data analyst because structured data manipulation and analysis become easy. Pandas reduces any computational effort required from reading and writing to clever transformations, hence it is fundamental for data speed up.
Selenium
Selenium is an extensively adopted web automation tool for an interactive and behaviour-driven automated testing approach. By means of robotics, performing humanoid tasks becomes possible, like filling out form fields, clicking on buttons or harvesting dynamic content, for instance.
JSON
JSON, which is a straightforward data interchange format, is used for JSON configuration files and API response. The reason for Json support in Python, parsing and producing Json data becomes really easy, which makes simple JSON data interchanging automation chores.
Requests
Python portraying the Requests HTTP library is simple but powerful. Requests library also makes executing requests and calls in when automation is required for API clients or web services quite a simple task.
AutoMagica
AutoMagica, a Python library, facilitates RPA by offering a high-level API for desktop application automation. AutoMagica automates computer operations, including data entering, form filling, and application testing, without sophisticated programming.
PyBuilder
Python project build automation tool PyBuilder streamlines dependency management, testing, and packaging. PyBuilder helps python development serviceprovidersto automate Python development with consistent and reliable builds across environments.
Use Cases of Python Automation

Test automation
Software quality and dependability require automated testing. Python's testing frameworks like pytest and unit test make unit, integration, and end-to-end testing easy to automate, speeding up development process.
Web scraping
Web scraping can be performed for detecting market changes, competitive analysis and data extraction. Python's web scraping modules and the capabilities of HTTP PoS makes it suitable for automated cross-domain web scraping.
System administration
The work of a system administrator, such as server arrangement, log analysis, and user management, is always a job that is done repeatedly. A system admin is able to perform these operations seamlessly and efficiently due to powerful system administration tools and the scripting environment of Python, which allow them to automate the operations, thereby saving time for other essential tasks.
Data analysis and visualization
Data analysis and visualization are consequential for identifying insights and insightful decision-making. A broader category of data manipulation and visualization libraries, as well as its ability to automate tiresome data analysis processes and simply create visuals, composes the Python ecosystem and allows analysts to focus on more strategic tasks.
Robotics and IoT
The Python language is a great choice when automating software, robots, and IoT. Now, you can make robots and IoT work, for example, by monitoring sensors, activating actuators, and communication interfaces by using libraries like Raspberry Pi GPIO and PySerial that allow the computer to have almost indefinite automation capabilities.
Conclusion
The Python scripting, module, and library ecosystem makes Python a promising language for automating repetitive tasks. Web scraping, data visualization, data analysis, system administration, and robotics are just a few of the many niches that have praised Python for its exceptional task execution capabilities.
To top it all off, Python's simplicity and ease of understanding have become even more appealing to developers who want to use the language for automation purposes. Shiv Technolabs a professional python development company helps you leverage the full potential of Python for bringing automation benefits to your business.
0 notes
Text
Vultr setup - Deploy Ubuntu and Login via SSH Key [Video]
Watch the video above to see how to generate an SSH key, add it to Vultr, deploy a server and login using your SSH Key. Vultr Free credit Video summary Setting Up SSH Key Create SSH Key on Your Computer: Use ssh-keygen command to generate an Ed25519 key. Optionally, add a passphrase for extra security. Add SSH Key to Vultr: Go to Vultr, navigate to “Account” > “SSH Keys”. Click “Add SSH…

View On WordPress
1 note
·
View note