#How to scan a file for viruses windows 10
Explore tagged Tumblr posts
Visit Tumblr Blog
Explore Tumblr blogs with no restrictions, modern design and the best experience.
Last Seen Tumblr Blogs


Fun Fact
Average visit duration of Tumblr.com is 10 mins and 25 secs.
Text
PES 2013 Indir How to Download and Enjoy Pro Evolution Soccer 2013
Introduction
If you’re a football gaming enthusiast looking to relive the excitement of classic soccer gameplay, PES 2013 remains one of the most beloved editions of the Pro Evolution Soccer series. Whether you want to play on your PC or laptop, learning how to PES 2013 indir (download PES 2013) safely and efficiently is key. In this article, we’ll guide you through everything you need to know about downloading, installing, and enjoying PES 2013.
What Is PES 2013?
Pro Evolution Soccer 2013 is a football simulation game developed by Konami. Released in 2012, it’s praised for its realistic gameplay, improved AI, and authentic football experience. Despite newer editions, many gamers prefer PES 2013 for its smooth mechanics and nostalgic value.
Why Download PES 2013?
Even years after its release, PES 2013 holds a special place due to:
Classic gameplay that is simple yet deep.
Realistic player animations and ball physics.
Strong community mods and patches that keep the game fresh.
Light system requirements, perfect for older PCs.

How to Download PES 2013 (PES 2013 Indir) Safely
Downloading PES 2013 requires caution to avoid viruses or malware. Here’s a step-by-step guide to help you:
Find a Reliable Source: Use trusted websites or official platforms known for hosting game files. Avoid random download links from unknown sources.
Check for Legitimate Files: Look for files with proper descriptions, user reviews, and safe download indicators.
Download the Setup File: Choose the correct version for your system (usually PC).
Scan for Viruses: Before installation, scan the downloaded file with antivirus software.
Install the Game: Follow the on-screen instructions to install PES 2013 on your device.
Apply Patches or Mods (Optional): If you want updated teams or features, look for popular community patches.
System Requirements for PES 2013
Before downloading, ensure your PC meets these minimum requirements:
OS: Windows XP/Vista/7/8/10
Processor: Intel Core 2 Duo 1.8 GHz or AMD equivalent
RAM: 2 GB
Graphics: NVIDIA GeForce 8600 or ATI Radeon HD 2600 or better
Storage: 8 GB free space
DirectX: Version 9.0c
Meeting or exceeding these specs guarantees smoother gameplay.
Installing PES 2013: Tips and Tricks
Run as Administrator: This helps avoid installation errors.
Disable Antivirus Temporarily: Some antiviruses block game files mistakenly. Remember to enable it after installation.
Update Graphics Drivers: Make sure your GPU drivers are current for the best performance.
Use Compatibility Mode: If you face issues on newer Windows versions, run the installer in compatibility mode for Windows 7 or 8.
How to Play PES 2013 Online
Many PES fans enjoy multiplayer matches. To play online:
Set up a stable internet connection.
Use third-party platforms like PES League or eFootball.net (if supported).
Join community servers or use VPNs if direct matchmaking is unavailable.
Always update the game and patches to ensure compatibility.
Popular Mods and Patches for PES 2013
Enhance your PES 2013 experience with community-created mods:
Updated team rosters and kits.
New stadiums and crowds.
Improved graphics packs.
Gameplay tweaks and fixes.
Look for popular patches like the PES 2013 Data Pack or SMoKE Patch for the latest updates.
youtube
Troubleshooting Common Issues
Game crashes on startup: Update drivers, disable background apps, or reinstall.
Lag or low FPS: Lower graphic settings or close other programs.
Multiplayer connection problems: Check firewall settings and ensure ports are open.
Conclusion
Downloading and enjoying PES 2013 indir is still very much possible and rewarding for football game lovers. With the right sources, proper installation, and optional mods, you can bring back the excitement of one of the best football simulation games of its generation. Follow the steps above, and get ready to score goals, make incredible passes, and experience the thrill of classic PES gameplay!
FAQs
Q1: Is PES 2013 free to download? Usually, you’ll find free downloads for demo or trial versions, but full copies might require purchase or use of legit platforms.
Q2: Can I play PES 2013 on Windows 10? Yes, with proper compatibility settings and updated drivers, PES 2013 runs fine on Windows 10.
Q3: Are mods safe for PES 2013? Most popular mods are safe, but always download from trusted sources and scan files for malware.
Q4: Can I play PES 2013 on Mac? PES 2013 is primarily for Windows; running on Mac requires additional software like Bootcamp or a virtual machine.
Q5: Where can I find patches for PES 2013? Community sites and forums like PES Patch or Evo-Web are great places to start.
2 notes
·
View notes
Text
How to Speed Up Your Windows 11 PC
1. Manage autostart programs-disable unnecessary startup program.
Here is how to stop a program from starting automatically
Select the Start button, then select Settings > Apps > Startup .In the Startup Apps area, find the program you want to stop from starting automatically and set it to Off.
2. Clear memory via disk cleanup
To delete temporary files:
In the search box on the taskbar, type disk cleanup, and select Disk Cleanup from the list of results.
Select the drive you want to clean up, and then select OK.
Under Files to delete, select the file types to get rid of. To get a description of the file type, select it.
Select OK.
If you need to free up more space, you can also delete system files:
In Disk Cleanup, select Clean up system files.
Select the file types to get rid of. To get a description of the file type, select it.
Select OK.
3. Uninstall obsolete programs
Select the Start button, then select Settings > Apps.
Find the programs you don’t need, click on it and then select “uninstall”
4. Turn off shadows, animations, and visual effects
In the Windows 11 search box, type sysdm.cpl, press Enter, and then click the sysdm.cpl icon. That launches the Control Panel’s System Properties dialog box. Click the Advanced tab and click Settings in the Performance section. That brings you to the Performance Options dialog box. (Make sure you’re on the Visual Effects tab of the dialog box.) You’ll see a varied list of animations and special effects.
These are the animations and special effects you’ll probably want to turn off, because they have the greatest effect on system performance:
Animate controls and elements inside windows
Animate windows when minimizing and maximizing
Animations in the taskbar
Fade or slide menus into view
Fade or slide ToolTips into view
Fade out menu items after clicking
Show shadows under windows
However, it’s a lot easier to just select the Adjust for best performance option at the top of the screen and click OK. Windows 11 will then turn off the effects that slow down your system.
5. Turn off background apps
Select the Start button, then select Settings > Apps .
Scroll to the entry of the background app you wish to adjust settings for.
Click on the three-dot icon and then on “Advanced options”.
In the “Background apps permissions” section, select “Never”.
6. Turn off app notifications
Select the Start button, then select Settings > System> Notifications, and move the slider to “Off”.
7. Make sure you have the latest updates for Windows and device driver
Select the Start button, then select Settings > Windows Update > Check for updates.
Select the updates you want to install, then select Install.
Restart your PC and see if it seems to run better.
8. Check for low disk space and free up space
You may improve performance if you free some disk space on your PC.
To check for low disk space
Select the Start button, then select Settings > System > Storage . Open Storage settings
Your drives will be listed in the Storage area. Note the amount of free space and total size for each drive.
9. Pause OneDrive Syncing
On the taskbar, look for OneDrive near the notification area.
Select OneDrive > Help & Settings > Pause syncing,and then choose how long you want to pause syncing your files.
10. Check for and remove viruses and malware
Running a system scan to find viruses and malware. If you’ve already installed a security suite such as Norton Security or McAfee LiveSafe, you can use that. Windows 11’s built-in anti-malware app, Windows Defender, also does a great job.
Just type Windows Defender in the search box, press Enter, and click Scan Now. Windows Defender will look for malware and remove any it finds.
11. Last but not the least , if your have a non-genuine Windows 11 on your computer , please activate it with a genuine Windows 11 Key from the Microsfot partner store keyingo.com
1 note
·
View note
Text
HOW TO USE MCAFEE ANTIVIRUS ON WINDOWS 10? [A COMPLETE GUIDE]
Do you know how to use McAfee antivirus? If not, we’ve got your back! The McAfee antivirus is an essential application for PC or mobile users. It is capable of preventing different types of viruses, malware, and other suspicious threats that can make your device vulnerable.
However, this write-up is dedicated to users who want to learn how to use the McAfee software. We will first learn how to download and install the application on a Windows computer, and then we will move on to learn how to use the software. In addition to use, we will explain how to run scans on a PC using McAfee. Finally, you will learn to scan your USB drive.
How to Download and Install McAfee Software on Windows?
Before downloading the app, you will need to restart your PC. So ensure you have saved your work before restarting the PC. Also, ensure that your PC is up to date.
Once you are ready, follow the downloading steps given below:
How to Use McAfee Antivirus on Windows 10?
Leaving your computer unprotected can be risky. Plus, it could lead to being infected by viruses. Here are the steps to run a scan using the McAfee software so that you can safeguard your PC from malicious attacks.
Before performing a scan, it is recommended to check for updates. Ensure your McAfee antivirus is able to detect the latest viruses. To check this update, you can follow the steps below.
Once the process is completed, you can run a scan with the following steps.
How to Use McAfee Antivirus to Scan Your USB Drive?
Do you know you can scan your USB driver with any antivirus software you use? Yes, the process is quite simple as well. Below, we will discuss how to scan our USB driver using the McAfee software.
Final Words
Today, the chances of being hacked by hackers are higher. You don’t know when you will become a victim. Hence, antivirus is a must-have tool for all of us. Likewise, we can safeguard our computers and our sensitive data. However, we have already explained how to download and install McAfee on Windows computers. After following this write-up, you will definitely learn how to use McAfee antivirus.
FAQs
Question 1: How do I use McAfee antivirus on my PC?
Answer: Here are the ways to use McAfee, and hence, you can run the scan on a Windows PC:
Question 2: How does McAfee antivirus software work?
Answer: McAfee antivirus provides 24/7 protection from malware, spyware, viruses, or other malicious files that you can download while you are online. The software can block, detect, and remove malware easily. However, it depends on your file size too. For example, if you want to scan a large amount of files, it will take much time to scan. On the other hand, McAfee can help you protect your system from existing threats. Moreover, McAfee has different scanning methods, such as Quick, Full, and Custom Scan.
Question 3: How can I use McAfee antivirus for free?
Answer: McAfee offers a free trial for 30 days. Below are the methods to avail of the McAfee software free trial:
Visit: mcafee account login
mcafee login
Source: https://isclogin.com/blog/how-to-use-mcafee-antivirus-on-windows-10-a-complete-guide/
0 notes
Link
Scanning a file for viruses is as important as removing the viruses. Most devices offer a built-in scanner on the system. However, you can also scan a file for viruses using a third-party service. A virus scan can perform lot of activities on your system. Explore a scanning program below and learn how to scan a file for viruses.
Tip:
If you are unsure using for using antivirus software, we recommend you to download easy to use Waredot Antivirus software for perfectly scanning process on your system.
How to scan a file for viruses windows 10
Microsoft Defender called “Windows Defender” on Windows 10 always scans files before you open them unless you’ve installed a third-party antivirus. You can also perform a quick scan for any file or folder, too. Let’s see how.
1. First of all, locate the file or folder you want to scan. Go to File Explorer and find it in the file menu location where you stored it. Once you find the file, right-click on the file or folder.
2. Once you right-click on the file or folder, it will open the options menu. From the menu, select “Scan with Microsoft Defender.”
Note: On earlier versions of Windows 10 to the May 2020 update, this option will stay “Scan with Windows Defender.”
3. A Windows Security window will pop up now, and the results of the scan will be shown near the top-right below the “Scan Options” heading. Now, you may see “No current threats.”
4. On the other hand, if malware is detected, Microsoft Defender will alert you with a message that says, “Threats Found,” and doing so will list the file or files that are infected.
5. Now, click on the “Start Action” button to remove the threat. Once you click on it, Microsoft Defender will start removing all the threats automatically, and once it will be done, everything will back to normal.
Note: If you want details about the result that came out, you need to click on “Protection History” just below the scan results.
How to Scan a File for Viruses using Command Prompt
You can find multiple ways to use Microsoft Defender or to scan a file for viruses with Microsoft Defender using the command prompt.
To scan a specific file or folder manually using a command prompt, follow the below steps:
Go to the search bar option at right on the Start button and search for Command Prompt. Now, right on the top result, and select the Run as administrator option.
Now, type the following command to access the platform folder and press Enter.
cd c:\ProgramData\Microsoft\Windows Defender\Platform
Enter the following command to identify the latest version of the antivirus command tool and press Enter.
dir
Enter the following command to access the folder with the latest version and press Enter.
cd 4.18.2009.7-0
In the command prompt, replace “4.18.2009.7-0" with the latest version of the folder available on your device.
Now, you need to type the following command to scan a specific folder and press Enter
mpcmdrun -Scan -ScanType 3 -File "C:\PATH\TO\FOLDER"
Now, in the command, replace "C:\PATH\TO\FOLDER with the path to the folder you’d like to scan.
For instance: notice that this command scans all the contents in the “Files” folder.
mpcmdrun -Scan -ScanType 3 -File "C:\Users\username\Downloads\files"
Now, type the following command to scan a specific file and press Enter.
mpcmdrun -Scan -ScanType 3 -File "C:\PATH\TO\FILE.TXT"
Now, while staying in the command, replace "C:\PATH\TO\FILE.TXT" with the path to the folder you’d like to scan. For instance: this command scans the file names “image-1.jpg” inside the “files” folder:
mpcmdrun -Scan -ScanType 3 -File "C:\Users\username\Downloads\files\image-1.jpg"
Now, Microsoft Defender will scan the files. It may that once the file cleans, make sure you check the files for viruses because Windows may not notify once the file cleans.
How to Scan a File Virus Before Using Them
To avoid getting your computer infected by malware, make sure you scan files before executing them. Yes, you can do so. Here we will discuss a couple of options that will help you scan files easily from the computer.
Antivirus Software
You can see that antivirus software will out an option in the context menu so you can scan individual files. Once you download a file or email attachment, simply right-click on the file and choose the option to scan with your Antivirus software.
Now, if you want to scan more than one file at a time, then hold down the Ctrl key while you clicking each file you want to scan. Then right-click and select Scan with your Antivirus software.
If you’re already downloaded the antivirus software, that may also appear in the option. You can select them also, otherwise, we recommend you to choose the Microsoft Defender as the best option or Microsoft Security Essentials scanning a couple of files.
When or if the virus is found, the Antivirus software will neutralize the virus.
Virus Total Uploader
You might want to check out VirusTotal Uploader for the best virus scanning. This is one of the best handy software that will scan your files with 41 different antivirus software online. After installing VirusTotal Uploader, right-click on the file, and go to Send To, then VirusTotal.
Alternatively, you can launch the VirusTotal Uploader and click “Get and Upload File.
Now, it will send the file to VirusTotal.com and scan with 41 different Antivirus apps and show you the results.
If you don’t want to install the Uploader, you can go to the VirusTotal site and upload a file from there to scan.
Note that sometimes you will be shown the false-positive detected on files we know are clean. The definitions database of the Anti-malware app isn’t current, or an obscure Antivirus App will find something questionable. If that is the case, use your best judgment when viewing the results.
How to Scan Google Drives for Viruses
Users can use Google Drive cloud to scan suspect files. It protects you from harmful viruses and malware and allows you to protect your data. The use of a Virus Scanner with Google Drive is one solution for scanning Google Drive for viruses.
This will detect viruses or spyware on your documents without the installations of antivirus software. It protects you against damaging viruses, malware, and spyware to enable you to maintain secure private information.
Here’s how to
scan Google Drive for viruses
:
1.Open Google and type Virus Scanner with Google Drive in the search bar, and it will show you the various options; make sure you click on the first option. Take the image help, how the website will appear.
2. Note that a virus scanner with Google drive is opened. You need to click on Visit Website button. Once you click on the button, the following screen will appear:
3. Now, select the Button that says Select Files from Google Drive. As you will click on the button, the options menu will appear.
4. Click on the button that says Login & Authorize. It will prompt you to log in with Google Drive. Enter the login details now.
5. Notice that all the files of Google Drive will appear on the screen. Select any one file which you’d like to scan and click the Select button. Once you select the files, they will appear in the text area. Now, click on Start Virus Scan button to scan selected files as follows:
6. Now, once you click the Start Virus Scan button, the progress log will appear. Once it will be done, the scanning process ends here.
How to run a Virus Scan on Google Chrome
Google Chrome can also help you to scan for the viruses:
1. First of all, open Google Chrome and click on the three dots in the top-right corner and choose Settings.
2. Now, scroll to the bottom and click Advanced. Scroll down again and select Clean up computer.
3. Now, click Find. You should uncheck the Report Details filed below to avoid giving additional info to Google.
4. Wait for Google to Report whether any threats were found. If Chrome finds any malicious software, it will prompt you to remove it.
5. Now, click on Remove to remove the malicious items. You might need to restart your computer afterward.
6. Make sure that this tool for threats that do not comply with Google’s unwanted software policy. It’s for Windows only, too.
Summary
Hey guys! This was the guide about “how to scan a file for viruses.” Here, you can the various ways for virus scanning on Windows. You can notice that we did not include any third-party scanner in this article. Windows offers the best built-in scanner program to scan a file for viruses.
Please let us know in the comment section if you’ve any queries regarding this article. We would glad to answer you!
#How to Scan a File for Viruses#How to scan a file for viruses windows 10#How to Scan a File for Viruses using Command Prompt#Scan a File Virus#How to Scan Google Drives for Viruses#how to scan Google Drive for viruses#How to run a Virus Scan on Google Chrome
0 notes
Text
What does the term "data error cyclic redundancy check (CRC)" refer to exactly?
"Hello, the internal hard drive of my laptop is displaying the CRC error. There are two disks in the laptop: a 256GB SSD for Windows 10 and a 1TB hard disk for storing files. Everything was working fine until recently when I started receiving errors when trying to open one of the partitions. It prompts the partition is not accessible and that I need to format it before I can use it. However, when I clicked cancel, another error appeared – data error (cyclic redundancy check).

What is a CRC (Cyclic Redundancy Check) problem and how does it occur? In data verification, a CRC error is an error-detecting code / data verification mechanism that is used to detect errors in data. This error message may appear when you attempt to access files on your hard drive or external device. It is recommended that you pay close attention to this issue since it usually implies that there is something wrong with the disk or the data it is referring to. What should you do if you are confronted with a CRC error? First, make a backup or restore any crucial files! If you experience cyclic redundancy check data errors, it could be an indication of a failing hard disk, such as faulty sectors. Furthermore, the disk may become inaccessible or suffer from increasingly serious difficulties as time goes on. As a result, you should first ensure that all vital files are backed up or recovered. As long as your files are safe, you can either try any of the available repair options or replace the disk with a new one.
What is the source of data error during cyclic redundancy check?
CRC errors in hard drives and other storage devices can be caused by a number of different sources. Finding out what is causing the error is beneficial when trying to fix it on your computer. Here is a list of the most prevalent reasons for this:
Rapid power failure: The operating system may be forced to shut down unexpectedly owing to a power failure or improper removal of a USB disk, which can occur when the operating system is reading or writing data to the drive. To read or write data, hard drive platters rotate at a high rate and heads remain at different locations on the platters as they rotate. When a computer or hard drive experiences a sudden power failure, the heads will be pushed to return to their original positions. Hard drive heads may scratch the disk during this procedure, resulting in damaged sectors on the disk.
Attack by a virus or malware: Viruses and malware can create a variety of problems with the system and storage devices, including hard disk damage. For this reason, enabling Windows Defender or installing third-party antivirus software is required in order to secure your data.
Over-aging: Hard drives and other storage devices have a predetermined life span that must be followed. Components of an old hard drive may have deteriorated significantly, increasing the likelihood of the development of bad sectors.
Having your hard drive knocked or dropped: Hard drives are not shock resistant, and they appear to be vulnerable to shocks, knocks, shaking, and other such events. Typically, this type of damage results in significant physical bad sectors, which means you will have to send the drive to a professional data recovery company in order to retrieve your lost contents.
Workplace conditions are unsuitable: Hard drives will not function properly if the working environment is not conducive to their operation (for example, excessive heat, dust, etc.).
How can I resolve a problem with the cyclic redundancy check (CRC)?
Because the reasons of cyclic redundancy check (CRC) errors differ from one another, there may be a range of ways available for resolving this mistake. This section describes three of the most widely utilized ways, and we hope that they will be effective on your drive. If you are unable to repair your disk using these procedures, you should take it to a professional repair center.
Method #1: SFC scan is used to correct the CRC data error.
SFC is an abbreviation for system file checker, and it is capable of repairing mistakes in Windows system files such as registry files, Windows DLL files, and so on. It operates by scanning for errors and replacing corrupted or damaged files with fresh copies of the original files. You can follow the instructions outlined here to do an SFC scan.
The first step is to gather information. Run Command Prompt as Administrator after connecting the storage device that is causing the CRC issue to occur.
Step number two. Enter the command sfc/scannow into the Command Prompt and press the Enter key.
Step number three. After the operation is complete, restart your computer.
Check for redundancy on a cyclic basis
Method #2: Examine the S.M.A.R.T. performance information
The first step is to gather information. DiskGenius Free Edition should be installed on the computer to which the damaged hard drive is connected.
Step number two. Select the hard disk and then select "Disk" from the drop-down menu to locate "View S.M.A.R.T. Information."
Check for redundancy on a cyclic basis
Step number three. You can now see the disk's health condition as well as a list of specific information about the disk in question.
Check for redundancy on a cyclic basis
The third method is to use DiskGenius Free version to check for and repair damaged sectors.
DiskGenius Free edition contains the capability of identifying and correcting bad sectors on a variety of storage devices, and you can use this feature to examine the overall health of your drive.
The first step is to gather information. DiskGenius Free edition can be downloaded and installed on your computer for free. Verify or repair bad sectors by selecting Verify Or Repair Bad Sectors from the context menu of the drive you wish to check for bad sectors.
Check for redundancy on a cyclic basis
Step number two. When you click the Start Verify button, DiskGenius Free begins scanning the drive.
If the disk has a lot of free space or if the disk's performance is slow, bad sector checking may take a long time; please close all programs that are now utilizing the disk and do not access the drive while the scanning is being performed.
Check for redundancy on a cyclic basis
Note:
When screening for bad sectors, the procedure is read-only, and certain sectors may be good to read but not react to write activities.
To check for corrupt sectors on the disk where Windows is installed, you must run the job in Windows PE (Primary Execution Environment).
Because the bad sector fixing procedure destroys files that are stored on or near bad sectors, you should make sure that any vital files have been backed up before beginning the repair process.
This function cannot fix all bad sectors, for example, physical bad sectors, which are not repairable by this function.
What is the best way to recover data from a hard drive that has a cyclic redundancy check failure?
To ensure that vital files are not further damaged by the data error, you may need to recover data from the hard drive before attempting to repair the data error. If your disk has too many physical problems, recovery software may not perform as expected, and you may be required to send it to a data recovery center with data recovery machines and dust-free labs to recover your data properly. We'll explore how to recover data from a drive that has experienced cyclic redundancy check error using DiskGenius in this section.
DiskGenius is a powerful data recovery tool that allows you to recover lost files, photos, documents, videos, music, emails, and other types of data from inaccessible hard disks, external hard drives, memory cards, USB flash drives, virtual disks, and other storage media, including external hard drives, memory cards, USB flash drives, and virtual disks. It also has the ability to image a disk, copy sectors, or clone a partition sector by sector, which is useful for dealing with damaged sectors on hard disk drives.
The first step is to gather information. To recover files from a corrupted drive, launch DiskGenius from your computer and pick the affected drive and click the File Recovery button. To begin the scanning process, click the Start button in the pop-up box that appears.
Check for redundancy on a cyclic basis
You can also use the Select File Types option to define the file types that will be scanned during the deep scanning procedure. It is fine if you are unable to locate the file types you require here because the whole scanning process does not impose any restrictions on file types.
Check for redundancy on a cyclic basis
Step number two. Allow for the completion of the scanning process.
Users have the ability to halt or terminate the scanning process at any time, as long as the necessary files are displayed in the scanning process.
Check for redundancy on a cyclic basis
Step number three. Check the recovery quality by previewing the files.
You can view all of the files that were located to see whether any necessary files were displayed, and you can double click a file to open it in a pop-up window to view the file's content if necessary. The final recovery result does not differ from the scanning result; therefore, it is suggested that files be carefully examined before being saved.
Check for redundancy on a cyclic basis
Step number four. Copying files to a secure location is as simple as selecting the needed file, right-clicking on the selected data, and selecting the Copy To option.
Ideally, you should copy the file to a partition that is distinct from the one that contains the recovered files; otherwise, you would overwrite the files that were lost.
Check for redundancy on a cyclic basis
Tip: It is possible that the scanning procedure for a lost file may become stuck somewhere or that the scanning process will become excessively slow owing to faulty sectors. Alternatively, you can attempt imaging the disk and then recovering files from the image without having to scan the physical device for them. What is the best way to produce the image? The feature is included in the DiskGenius Professional edition.
Launch DiskGenius Professional Edition and navigate to the Tools menu, where you will find the Copy Sectors option, as shown below:
Check for redundancy on a cyclic basis
Select the source disk and the destination disk and then click the Copy button. In most cases, the target disk should be the same size as or greater than the source disk. If the disk has a huge amount of area to image or if there are a big number of faulty sectors, the imaging procedure may take a lengthy time. Please be patient while we process your request.
Check for redundancy on a cyclic basis
Conclusion
It is possible to experience a CRC data error at any time, which will prevent you from accessing data on your hard drive partition. Fortunately, you can follow the instructions in this post to have it corrected without losing any data. In any case, we should all make regular backups of our files in order to avoid errors as much as possible. If you have any questions or would want to make a suggestion, please do not hesitate to contact us.
4 notes
·
View notes
Text
Clip Studio Paint 1.9.4 Download
A tutorial written by @evilkaito / @iamnottechsupport
Hi everyone! I made this tutorial for absolute beginners who are new to pirating things, and using this program as an example. It’s a really simple crack, so it’s good for people getting started.
This is a WINDOWS ONLY tutorial. Please do not ask for a Mac tutorial, you will not get a response. I do not use Apple products and have little to no familiarity with them. Also I believe this is 32-bit compatible, but I’m not sure.
This tutorial will be written in as plain English as I can manage. I am a cyber defense major, and I know not all these terms are “technical”. This is for those starting out with pirating.
DO THIS AT YOUR OWN RISK! I take NO responsibility for you messing up your own computer. If you follow the instructions exactly how I say, you should be fine. Lastly, I am not tech support, I’m doing this for free. If you want me to do more than this, pay me. I will answer basic questions though, @iamnottechsupport, my sideblog that accepts messages and asks. Google first. Troubleshoot second. Ask me third. Please.
https://1drv.ms/u/s!AiS9D6TfY0bgayGm_c0bFbiFmbI?e=1o8j9E
^ Here is the download for the thing.
1. Disable your antivirus, and I mean all of them. This includes your installed antivirus, and the antivirus that came with your computer. This download might come up as a “virus”. It is not. I have ran this program in Sandbox and scanned it. No viruses. It might display as a virus to your system, simply because it goes into your drive’s deeper files and edits them. Your computer/browser might detect this as a trojan horse and try to keep you from running it. If you run into those issues, use google.
Here’s what to do if chrome gives you an error.
https://superuser.com/questions/678601/disable-chromes-built-in-automatic-virus-scanning-of-downloaded-files
2. Download the zip file provided called “Crack Files + Program”. Cracks, aka “medicines”, is what makes a program run at full capacity without you having to pay for it. It changes the Clip Studio files in your program files. It is not the same as the program itself, which is a separate download.
3. Download something to unzip the files. Think of the .zip file as a container, and the “unzipping” program as a pair of scissors to help you cut it open.
4. UNHOOK YOUR INTERNET. Do not skip this step. You must unhook your ethernet or turn off your wifi card or whatever you use. You don’t have to turn off your router, just make sure your computer cannot access the internet. If you don’t do this, there’s a big change of this failing.
5. Unzip the files to one folder on your desktop (google search how to unzip if you don’t know how to). Open the file. The very first thing you should see is a folder named “Crack” and a “Setup.exe”.
6. Run the Setup.exe to completion. Do NOT start the program when it asks you to, uncheck that box. The setup wizard will close.
7. Double click “Crack”. Here you will see “CLIP STUDIO PAINT” in all caps. You want to copy this entire folder. Ctrl+C or right click and hit “copy”. Then, you need to go into the drive you installed it in. This is usually “Local Disk (C:)”. When you get to your local drive, double click “Program Files”.
8. Then, double click “CELSYS”. Then, double click “CLIP STUDIO 1.5”. Then, you are going to paste the files into this drive. It will ask you if you are okay with overwriting the files. Click YES.
9. You have now placed the cracked files exactly where they need to be! Good job! We’re not done though. Make sure that internet is STILL off during this next step.
10. Launch “Clip Studio” from your desktop. There might be a loading screen. Let it load. If there’s an error from no internet, ignore it. On the left panel, there is “Clip Studio Paint”. Click it.
11. Now, it will lead you to a setup wizard to activate the program. It will initially fail, because it is trying to access the internet. Here’s the loophole, click offline activation.
12. Go back to the “Crack Files + Program” file I gave you, and run “offline activation – kg.exe” as administrator.
13. Generate a serial number by clicking “generate”. Copy and paste that into Clip Studio Paint’s license verification. It will give you a “License authentication key”.
14. It’s annoying, but you have to copy each box and paste them into the “License Auth Key” box in the “Clip Studio Paint EX v1.6.2 Keygen” one by one. Do not add spaces. Click generate when you are done, and the keygen will give you an “Authentication Key”.
15. Copy and paste this authentication key into Clip Studio Paint. Hit next.
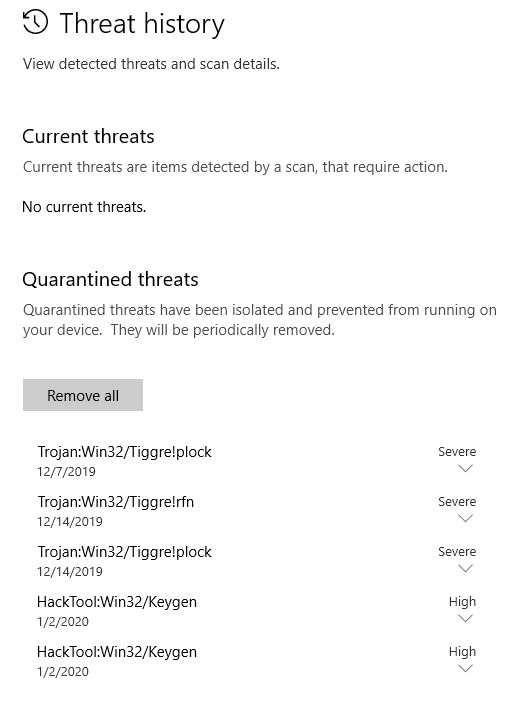
Bam you’re done. If you’re using Windows 10 like me, you might get an error when you first try to startup the keygen, because window’s defender considers it a threat (like a dumbass). Just go to your settings and type in “windows defender settings”. Click on that. Then click Virus and Threat protection. Then, click “threat history”. It will show you the “HackTool:Win32/Keygen” file its quarantined. Just click the arrow and click “Restore”. It will be returned to your folder.
Everything should be activated when you’re done. Here’s what it looks like for me.

Have fun. Steal shit.
#nyaos#collab between me and kaito! yahoo!#clip studio paint#clip studio paint ex#under a read more cause its long#spread this! please!#and if you want kaito to help you out specifically please pay him! its only fair!#here it is for people who've been waiting for so long! thank you for your patience
695 notes
·
View notes
Text
How To Remove Software Reporter Tool To Fix Google Chrome High CPU Usage?

Google Chrome is one of the most popular browsers available right now. Since it includes all the necessary features, Chrome users accept the browser’s shortcomings rather than ditch it for browsers with fewer features.
However, one gigantic issue forces users to reevaluate their life choices and uninstall Google Chrome. Users with budget laptops are quite familiar with it — Google Chrome using too much memory.
Why does Google Chrome use so much RAM?
Chrome’s insane amount of CPU usage has been annoying users for years. Even after releasing hundreds of fixes and countermeasures, users still face 100% Disk Usage in Windows 10 because of it.
So, why is Google Chrome a RAM hog? That’s because Chrome considers all your tabs as a separate process. This way, Google can prevent browser takedown from viruses and malware infection by isolating the particular tab or process.
But that’s not the sole reason; a quick peek into the Google Chrome task manager shows evidence that there are other factors at play as well, such as extensions enabled, tabs opened, any third-party tools, etc.
However, the deadliest of all sits right below the Google Chrome process in the Windows 10 Task manager titled” software_reporter_tool.exe.”
What is the Google Chrome Software Reporter Tool?
Software Reporter Tool, part of the Google Chrome Clean-up tool, reports any add-on software that might try to interfere with the browser's working.
To achieve that, the software reporter tool frequently scans the PC for software and files that might be problematic for Google Chrome.
The browser then scans the results to determine if the user needs to be too aware of the software. Based on the results, Chrome then asks users to run the Chrome Cleanup Tool to remove any unwanted software.
Where is it?
The process can be located in the Windows task manager, under the Google Chrome process. Right-click on it and choose “Open File location” to access the source file.
You won’t always find the process in task manager since it’s not always on the go. Alternatively, you can directly find the Google Chrome Software Reporter Tool under the following path in Windows 10 –
C:\Users\<Name>\AppData\Local\Google\Chrome\User Data\SwReporter\VERSION\software_reporter_tool.exe
Problem with software_reporter_tool.exe
Contrary to what some users might think, the software reporter tool is neither malware nor a virus. In fact, the source file located in the hard disk is digitally signed by Google with the file description as the Chrome Cleanup Tool.
However, as we all know, that’s not our only concern. Since the tool frequently scans the system, it has been associated with taking too much PC memory.
Moreover, many users have spotted software_reporter_tool causing slow gaming performance on their PC.
Lastly, many users have privacy concerns over the practice of scanning user’s files without their consent. Cumulate all the concerns, and you will find the right reasons to remove the tool entirely.
How to disable Google Chrome Software Reporter Tool?
Deleting the file or even the folder might seem like a good idea; however, it won’t do much. Google will automatically reintroduce the software in the next update of Google Chrome.
The best way to deal with the Chrome tool is to block the user permissions of the entire folder, stopping Google from accessing the “SwReporter” folder, ultimately restricting it to run the software reporter tool.
Here is how to stop Google from running software_reporter_tool.exe –
Go to the SwReporter folder located the system storage
Right-click on it and choose properties
Go to the Security tab — Click on Advance
Now select the option “Disable inheritance.”
Choose “Remove all inherited permissions from this object” in the new pop-up and hit OK.
If this process doesn’t work, here is an alternative one using the Group Policy Editor in Windows 10 –
Type regedit.exe in Windows Run top open the Registry
Editor Paste the given location on the address bar “HKEY_LOCAL_MACHINE\SOFTWARE\Policies\Google\Chrome.”
Right-click on the Chrome key and select New > Dword (32-bit) Value.
Name it “ChromeCleanupReportingEnabled” and keep its value 0
If the exact address is not available, you can find the folder manually and keep on adding values as you proceed.
Should you remove the Software Reporter Tool?
The tool has never been a problem for me. Therefore the decision boils down to your personal preference. If you have singled out Chrome Software Reporter Tool Chrome as the source of your 100% disk usage, then go ahead and remove it. Otherwise, it’s wise to leave it untouched since the tool is actually helpful in removing harmful software. You can manually use the tool by running “Clean up computer” in the Google Chrome “Reset and clean up” settings.
1 note
·
View note
Text
Same Difference, ch.05
Chapters: 01 | 02 | 03 | 04
AO3 | Fanfic

The door opened and she saw what looked like a control room with a window that overlooked what seemed like a training arena. The walls and floors of the arena were much rougher than the pristine surfaces of the lab. Whatever had happened in there prior had been overhauled multiple times over.
I wonder just how much he lets loose in here… and on who?
Snapping her out of her daydream, Overhaul began,” You’ve seen my—”
“No, I haven’t.” She cut him off, knowing he was eager to see her use it first. “I may have read reports and seen photos, but I haven’t actually seen you use it. So…” she motioned her hand for him to begin.
He scanned her for a moment before indulging her, “Alright, what would you like to see?”
“Just do whatever you were trying to do to me in the back of the car, hm?” she smiled but the emotion didn’t reach her eyes.
He narrowed his gaze at her, seemingly amused. He went to a place on the wall, looking between Nanami and it comparatively before removing his glove. He pressed his bare hand to the wall, taking a chunk out of it to create a golem-like figure of her. It didn’t have much detail specific to her, but it had arms, legs, and a head. He removed the other glove slowly placing both hands on either arm of the golem. Within a second both arms were gone, now particles floating in the air. Within the next second, they were back, formed exactly the same as before. It was odd seeing it used on stone walls when all the reports spoke of flesh and bone. Though she’d never wish anyone to be a test subject, it was a little underwhelming seeing it this way.
Overhaul must have seen the thoughts across her face as he paused before calmly rolling up his sleeve. She could see him tense for a split second before his arm was disassembled then reassembled in the same breath.
As terrifying as it was to see him dismember himself so easily, she was also professionally (and morbidly) intrigued. How much detail would one have to know and actively apply in order to disassemble and completely reassemble something as complex as a limb in that short a time span? It was as fascinating as it was terrifying.
“Now,” He began, rousing her from her thoughts, “I’d like to see something from you. What exactly did you do to me in the car?”
“Oh… that? That was um...” suddenly she was embarrassed, feeling her cheeks warm as she remembered the moment and her very ill-timed thoughts. “It was nothing.”
“It didn’t feel like nothing. Explain.”
“Well, I call it Reverb—not the most interesting name, I know—but it’s basically…” his eyes narrowed as she hesitated to answer.
“Out with it.” He said, getting impatient.
“I... tickled you?”
“Excuse me?”
“It’s really a harmless move.”
“Harmless?” He said with more incredulity.
“Ok, so your ego was a little bruised, but your cells should have recovered just fine. How are your abdominals and obliques doing?” She asked sincerely this time, hoping he wouldn’t think she was trying to tease him further.
Sighing, but still quite irritated, he replied, “They’re fine. What exactly did you do to produce that... ‘tickling’ feeling?”
He’s definitely pissed…
“I guess another firsthand demonstration would be out of the question, so here” she replied as she approached the wall, placing both hands on it carefully. She turned to see if he was watching her and though he was obviously still irritated, his eyes were tracking her every move. Nanami focused, replicating what she had done on him days before. Small pieces of the wall began to undulate, disassembling and reassembling in the same instant making the wall seem as though it was rolling. She stopped and the wall continued to reverberate the movements she had started as she explained in detail what was happening.
“… I see.” He spoke affirmatively as though he was mildly impressed, his eyes now trained on the wall. She had to admit a certain sense of pride welled up in her at the thought of impressing him in some way. It was difficult not to imagine having some kind of connection when you know you share such an intimate part of yourself with another person… Even if they are a bit more morally ambiguous than I’m used to…. Nanami admitted to herself.
“How else do you utilize my qui— I mean overhaul?” He queried.
The correction was small, but she was appreciative nonetheless. Thinking in earnest how to answer the question, she began,“ Well, it’s nothing special since I don’t use it on as large a scale as you, quite the opposite, really.” He gave her a look encouraging her to elaborate. “I prefer to use traditional methods in my line of work, but if the situation calls for it, I can also use it to create and remove clots.”
“You mean causing a pulmonary embolism?”
“NO. My gosh, no for the exact opposite reason. Everything train goes straight to Murder Town™ with you, huh?” exasperated Nanami before she continued, “If reaching the artery is too invasive, I can break it down through a small incision in the skin preventing fun things like what you mentioned. Besides healing, I usually only use it for self-defense and smaller transformations. I… don’t use it very often.” At this Overhaul noticed what sounded like shame in her voice. She’d been told throughout her childhood she was a freak after the incident as she’d refer to it. Even now, it felt like a sore subject. He knew he’d be able to coax the story out of her, but it wouldn’t be tonight.
“Then tell me, how were you able to negate my attack in the car?”
“That I can’t tell you.” She replied simply.
He shifted his weight, folding his arms, “If we’re going to make this research count, we’ll have to cooperate. Don’t you want to see how far this power can be taken?” He coaxed.
“One, I don’t have a particular lust for power, so that ~thing~ you’re doing with your eyes won’t work on me. And two, even if it did, I couldn’t tell you. Not just because I find the idea of you being able to nullify a quirk to be… unsettling. But because I literally don’t know how I did it either. It just happened.”
He searched her features for signs of deception but found nothing. “Then it looks like we’ll have to get to the bottom of that as well. “ He moved suddenly towards her and she braced herself, but he continued to walk past her and back into the lab.
It looks like we’re playing the long game then… Nanami noted inwardly. He could have tried testing her again physically, but hadn’t. It was an intentional show of restraint to get her to let her guard down. She wasn’t naïve enough to think it was just out of some newfound comradery, but she also wasn’t 100% sure it was some malicious power play. Manipulation was something she assumed he’d employ but seeing it in action was a different story. He’s good at this.
She followed him after a beat into the lab to see him writing notes down on the white board.
“Now that we’ve demonstrated what we know to be physically true, we can begin crafting a hypothesis and concrete testing procedures, a.k.a. the fun part.” He said after hearing her enter the room. He finished the observations he was writing and sat down at the workbench, motioning for her to sit across from him. “Let’s compare notes, shall we?”
She sat down and began looking through the file of her he’d created as well as some hypothesis he’d come up with. It was odd reading such a detailed report about herself and even more so imagining how he’d gotten the information so quickly, but she was relieved to see there wasn’t a mention of the incident. Brushing the obvious invasion of privacy aside, she was grateful to see that even though quirks were a virus to him, his assessment of why they shared the quirk was very similar to hers: genetic mutation.
Closing the folder on the table, Nanami began “It looks like agree on the premise of this experiment. Now we can—”
“Not entirely.” He cut in.
“Please, don’t say it…” Nanami sighed, rubbing the bridge of her nose.
“But it has to be said. We can acknowledge quirks as a genetic mutation while also acknowledging the origin of that mutation was a virus.”
“That’s just… no. Sure viruses can be ‘passed down’ in the sense that their genetic leftovers might show up in offspring, but that doesn’t mean that’s what quirks are. They’re much too drastic of a change to just be caused by a virus. No other virus behaves that way.”
“Until recent history, quirks were not normal. They are an anomaly so it’s no stretch of the imagination to say that the virus that created them would also be an anomaly. You’re being close-minded about this, and it will hinder the process.” He stated matter-of-factly.
“I’m being close-minded? This coming from the guy who won’t accept the consensus of thousands of scientists. If I’m close-minded, you’re downright obtuse!” She retorted.
The argument went on for the next 15-20 minutes, both of them behaving much like children in the eyes of Kurono who had returned 10 minutes ago, but decided it was best to wait outside until they’d finished whatever spat they were having. Now silent, they were both standing, leaning over the table and glaring at each other. Suddenly, Nanami saw an epiphany flash across Overhaul’s face and consequently a look of annoyance came across hers.
“Let’s make a bet.”
“No way.” She responded immediately, but judging by the look in his eyes, he had already made plans to change her answer.
“You haven’t even heard the terms. “
“Knowing what I know about you, I don’t think I want to...”
He continued as though he’d already won, “If your hypothesis is correct, you may ask one favor of me. Anything you want.”
“And if you win? What fresh hell will I be in then?”
“I get the same; nothing more, nothing less. Any favor I ask, you have to grant it.”
“There is literally zero reason for me to indulge in this.”
“That sounds like something a loser would say.”
Brows raised in disbelief Nanami retorted, “Are you... trying to goad me?”
“Is it working?” He replied smoothly, knowing the answer.
“… You’re on.” She knew she’d regret letting her pride get the best of her, but she also knew she’d win. Nothing wrong with a casual, life-altering bet every now and again. She reassured herself.
“Perfect. We’ll begin blood sampling and testing during your next visit. In the meantime, I’ll be thinking of a fitting favor as my prize.”
“As if you haven’t already decided…” Nanami said under her breath. When she looked back at his face, she caught a glint of pure mischief in his eyes.
Yup, definitely going to regret this.
#enjoy your terrible decision ma'am#overhaul fanfiction#overhaul#overhaul x oc#bnha#mha#fanfic#ao3 fic#mha overhaul#chisaki kai#kai chisaki#mha chisaki#same difference#mha oc#mha fanfic
13 notes
·
View notes
Text
Videocacheview For Mac


Replay Capture Suite- Capture Any Video/audio Stream And Convert It To To 36 Popular Formats.
Videocacheview For Macbook Air
Cached
VideoCacheView is a simple tool that can create local copies of some of the videos you watch online.
Mar 26, 2019 VideoCacheView free download, safe, secure and tested for viruses and malware by LO4D. VideoCacheView for Windows XP, Windows 7, Windows 8 and Windows 10 in 32-bit or 64-bit. Jul 24, 2020 An added perk is that the software isn’t exclusive to Mac, so you can switch between different computers with different operating systems if you need to. That subscription gives you access to Premiere Pro for editing all sorts of video, from 3D and even 8K.
In theory, the program sounds quite straightforward. Just watch the video in your browser, as normal, then allow VideoCacheView to scan your browser cache (IE, Chrome/ Opera and Mozilla-based browsers are supported), locate any videos and copy them to another folder.
In practice, it's not always so easy. Timing is important, for instance. If you watch a Flash (FLV) video from a site like YouTube, for instance, then it'll probably be deleted when you close the browser. So if you want to keep a movie then you must run VideoCacheView after it's fully downloaded, but before you shut your browser down.
Replay Capture Suite- Capture Any Video/audio Stream And Convert It To To 36 Popular Formats.
And if you want to save a video that's been cached by Firefox in the current session, then the story is very different: you must close your Firefox windows before running VideoCacheView, because Firefox maintains its cache in RAM, and only writes it to disc when closing down.
There are some complications, then, but you'll soon get the hang of how everything works, and overall VideoCacheView is still a very useful tool for anyone who regularly watches plenty of online videos.

Version 3.05 adds:
- Added 'Manually Merge Selected Files' option (Ctrl+M). If you have split video files that VideoCacheView cannot detect and merge automatically, you can select all items, press Ctrl+M and then VideoCacheView will merge all selected items into one. - After using the 'Manually Merge Selected Files' option, you can use the 'Copy Selected Files To...' option to generate the merged file. Be aware that the order of the merged files is determined according to the created time of every file.
Videocacheview For Macbook Air
Verdict:
Cached
VideoCacheView provides a quick and convenient way to save online videos, and it's portable - unzip it to a USB flash drive and run it almost anywhere
1 note
·
View note
Text
Daily Tips For Computer Problems

In today's digital world, computers have become an essential part of our lives. Whether it's for work, communication, entertainment, or learning, we rely on computers for various tasks. However, like any sophisticated piece of technology, computers can encounter problems and glitches that can disrupt our daily routine. From software issues to hardware malfunctions, encountering computer problems is inevitable. In this article, we will provide you with comprehensive daily tips to address common computer problems and keep your device running smoothly. Daily Tips For Computer Problems 1. Regular Software Updates and Maintenance To ensure your computer's optimal performance, it is crucial to keep the software up to date. Operating system updates, driver updates, and software patches often include bug fixes and security improvements that can resolve potential issues. Make sure to enable automatic updates and schedule regular maintenance tasks, such as disk cleanup and defragmentation. 2. Protect Your Computer with Antivirus Software A fundamental daily tip for computer users is to have reliable antivirus software installed. This software helps protect your computer from malware, viruses, and other online threats. Regularly update your antivirus program to stay protected against the latest threats. 3. Backup Your Data Regularly Data loss can be devastating, so it's essential to back up your files regularly. Use external hard drives, cloud storage, or dedicated backup software to create copies of your important data. This precautionary measure ensures that even if something goes wrong with your computer, your files remain safe and retrievable. 4. Optimize Startup Programs If your computer takes forever to boot up, you may have too many startup programs running. Disable unnecessary startup programs to speed up the boot process and overall performance of your computer. 5. Clear Browser Cache and Cookies Is your web browser acting sluggish? Clearing the cache and cookies can often resolve this issue. It's a simple yet effective daily tip to enhance your browsing experience. 6. Scan for Malware and Adware Are you experiencing an unusually slow computer or frequent pop-up ads? Perform a full system scan to detect and remove malware and adware that might be affecting your computer's performance. 7. Monitor Resource Usage Keep an eye on your computer's resource usage regularly. The Task Manager (Windows) or Activity Monitor (Mac) can help you identify resource-hogging applications and close them to free up memory and processing power. 8. Run Disk Cleanup Over time, your computer accumulates temporary and unnecessary files. Use the built-in disk cleanup utility to delete these files and free up disk space. 9. Check for Disk Errors Regularly check your hard drive for errors using the built-in disk-checking tools. Correcting disk errors can prevent data corruption and improve system stability. 10. Manage Your Browser Extensions Too many browser extensions can slow down your browser and cause compatibility issues. Disable or remove extensions you no longer need to keep your browser running smoothly. 11. Clean Dust from Hardware If you have a desktop computer, dust can accumulate inside the case and on the fans, leading to overheating. Periodically clean the dust to prevent hardware problems. 12. Uninstall Unnecessary Programs Unused and unnecessary programs can clutter your system and use valuable resources. Uninstall programs you no longer need to free up space and improve performance. 13. Use System Restore Points Creating system restore points before installing new software or making significant changes to your computer can be a lifesaver if something goes wrong. Learn how to use this feature to revert to a stable system state. 14. Check for Driver Updates Outdated drivers can cause compatibility issues and performance problems. Check for updates regularly, especially for graphics cards and other critical components. 15. Secure Your Wi-Fi Network A secure Wi-Fi network prevents unauthorized access to your computer and sensitive information. Use WPA2 or WPA3 encryption and set a strong password for your Wi-Fi network. 16. Avoid Overcharging Your Laptop Battery If you're using a laptop, avoid keeping it plugged in all the time once the battery is fully charged. Overcharging can degrade the battery's performance over time. 17. Adjust Power Settings Optimize your power settings to balance performance and energy consumption. Choose a power plan that suits your needs and tweak the settings accordingly. 18. Check External Connections If you're experiencing issues with external devices (e.g., printers, scanners), ensure that all cables and connections are secure and functioning correctly. 19. Disable Animations Animations and visual effects might look fancy, but they can also slow down your computer. Disabling unnecessary animations can improve overall performance. 20. Use Cloud Storage for Large Files Don't burden your computer with large files. Use cloud storage services to store and access these files conveniently. 21. Avoid Clicking on Suspicious Links Be cautious about clicking on unfamiliar or suspicious links, as they might lead to malware or phishing websites. 22. Utilize Virtual Machines Experimenting with new software or visiting potentially unsafe websites? Use a virtual machine to create a sandboxed environment, protecting your primary system from potential harm. 23. Keep Your System Cool Overheating can lead to performance issues and hardware damage. Ensure proper ventilation and consider using cooling pads or fans, especially for laptops. 24. Use Reliable Password Managers Avoid using weak passwords and consider using a reputable password manager to generate and store complex passwords securely. 25. Stay Informed and Keep Learning Computer technology is constantly evolving, and new problems may arise. Stay informed about the latest trends, tips, and solutions by following reputable technology websites and forums. FAQs Q: How often should I back up my data?A: It's best to back up your data at least once a week, or more frequently if you're working on critical projects. Q: Can I use multiple antivirus programs for better protection?A: It's not recommended to use multiple antivirus programs as they may conflict with each other and cause performance issues. Stick to one reliable antivirus software. Q: What should I do if my computer won't turn on?A: First, check the power supply and ensure all connections are secure. If the problem persists, consult a professional technician. Q: How can I speed up my slow internet connection?A: You can try restarting your router, moving closer to the router, or upgrading your internet plan for faster speeds. Q: Is it safe to download software from unofficial websites?A: It's risky to download software from unofficial sources as they may contain malware. Stick to reputable websites or official app stores. Q: What do I do if my computer keeps freezing?A: Check for software conflicts, update your drivers, and make sure your computer is not overheating. Conclusion By following these daily tips for computer problems, you can enhance your computer experience, improve performance, and troubleshoot common issues effectively. Remember to stay vigilant and keep your computer protected with regular maintenance and security measures. Embrace continuous learning to stay updated with the latest technology trends and keep your computer running smoothly for years to come. Read the full article
0 notes
Link
Scanning a file for viruses is as important as removing the viruses. Most devices offer a built-in scanner on the system. However, you can also scan a file for viruses using a third-party service.
#How to scan a file for viruses windows 10#How to Scan a File for Viruses using Command Prompt#How to Scan a File Virus Before Using Them#How to Scan Google Drives for Viruses#how to scan Google Drive for viruses
0 notes
Link
Scanning a file for viruses is as important as removing the viruses. Most devices offer a built-in scanner on the system. However, you can also scan a file for viruses using a third-party service. A virus scan can perform lot of activities on your system. Explore a scanning program below and learn how to scan a file for viruses.
Tip:
If you are unsure using for using antivirus software, we recommend you to download easy to use Waredot Antivirus software for perfectly scanning process on your system.
How to scan a file for viruses windows 10
Microsoft Defender called “Windows Defender” on Windows 10 always scans files before you open them unless you’ve installed a third-party antivirus. You can also perform a quick scan for any file or folder, too. Let’s see how.
1. First of all, locate the file or folder you want to scan. Go to File Explorer and find it in the file menu location where you stored it. Once you find the file, right-click on the file or folder.
2. Once you right-click on the file or folder, it will open the options menu. From the menu, select “Scan with Microsoft Defender.”
Note: On earlier versions of Windows 10 to the May 2020 update, this option will stay “Scan with Windows Defender.”
3. A Windows Security window will pop up now, and the results of the scan will be shown near the top-right below the “Scan Options” heading. Now, you may see “No current threats.”
4. On the other hand, if malware is detected, Microsoft Defender will alert you with a message that says, “Threats Found,” and doing so will list the file or files that are infected.
5. Now, click on the “Start Action” button to remove the threat. Once you click on it, Microsoft Defender will start removing all the threats automatically, and once it will be done, everything will back to normal.
Note: If you want details about the result that came out, you need to click on “Protection History” just below the scan results.
How to Scan a File for Viruses using Command Prompt
You can find multiple ways to use Microsoft Defender or to scan a file for viruses with Microsoft Defender using the command prompt.
To scan a specific file or folder manually using a command prompt, follow the below steps:
Go to the search bar option at right on the Start button and search for Command Prompt. Now, right on the top result, and select the Run as administrator option.
Now, type the following command to access the platform folder and press Enter.
cd c:\ProgramData\Microsoft\Windows Defender\Platform
Enter the following command to identify the latest version of the antivirus command tool and press Enter.
dir
Enter the following command to access the folder with the latest version and press Enter.
cd 4.18.2009.7-0
In the command prompt, replace “4.18.2009.7-0" with the latest version of the folder available on your device.
Now, you need to type the following command to scan a specific folder and press Enter
mpcmdrun -Scan -ScanType 3 -File "C:\PATH\TO\FOLDER"
Now, in the command, replace "C:\PATH\TO\FOLDER with the path to the folder you’d like to scan.
For instance: notice that this command scans all the contents in the “Files” folder.
mpcmdrun -Scan -ScanType 3 -File "C:\Users\username\Downloads\files"
Now, type the following command to scan a specific file and press Enter.
mpcmdrun -Scan -ScanType 3 -File "C:\PATH\TO\FILE.TXT"
Now, while staying in the command, replace "C:\PATH\TO\FILE.TXT" with the path to the folder you’d like to scan. For instance: this command scans the file names “image-1.jpg” inside the “files” folder:
mpcmdrun -Scan -ScanType 3 -File "C:\Users\username\Downloads\files\image-1.jpg"
Now, Microsoft Defender will scan the files. It may that once the file cleans, make sure you check the files for viruses because Windows may not notify once the file cleans.
How to Scan a File Virus Before Using Them
To avoid getting your computer infected by malware, make sure you scan files before executing them. Yes, you can do so. Here we will discuss a couple of options that will help you scan files easily from the computer.
Antivirus Software
You can see that antivirus software will out an option in the context menu so you can scan individual files. Once you download a file or email attachment, simply right-click on the file and choose the option to scan with your Antivirus software.
Now, if you want to scan more than one file at a time, then hold down the Ctrl key while you clicking each file you want to scan. Then right-click and select Scan with your Antivirus software.
If you’re already downloaded the antivirus software, that may also appear in the option. You can select them also, otherwise, we recommend you to choose the Microsoft Defender as the best option or Microsoft Security Essentials scanning a couple of files.
When or if the virus is found, the Antivirus software will neutralize the virus.
Virus Total Uploader
You might want to check out VirusTotal Uploader for the best virus scanning. This is one of the best handy software that will scan your files with 41 different antivirus software online. After installing VirusTotal Uploader, right-click on the file, and go to Send To, then VirusTotal.
Alternatively, you can launch the VirusTotal Uploader and click “Get and Upload File.
Now, it will send the file to VirusTotal.com and scan with 41 different Antivirus apps and show you the results.
If you don’t want to install the Uploader, you can go to the VirusTotal site and upload a file from there to scan.
Note that sometimes you will be shown the false-positive detected on files we know are clean. The definitions database of the Anti-malware app isn’t current, or an obscure Antivirus App will find something questionable. If that is the case, use your best judgment when viewing the results.
How to Scan Google Drives for Viruses
Users can use Google Drive cloud to scan suspect files. It protects you from harmful viruses and malware and allows you to protect your data. The use of a Virus Scanner with Google Drive is one solution for scanning Google Drive for viruses.
This will detect viruses or spyware on your documents without the installations of antivirus software. It protects you against damaging viruses, malware, and spyware to enable you to maintain secure private information.
Here’s
how to scan Google Drive for viruses
:
1.Open Google and type Virus Scanner with Google Drive in the search bar, and it will show you the various options; make sure you click on the first option. Take the image help, how the website will appear.
2. Note that a virus scanner with Google drive is opened. You need to click on Visit Website button. Once you click on the button, the following screen will appear:
3. Now, select the Button that says Select Files from Google Drive. As you will click on the button, the options menu will appear.
4. Click on the button that says Login & Authorize. It will prompt you to log in with Google Drive. Enter the login details now.
5. Notice that all the files of Google Drive will appear on the screen. Select any one file which you’d like to scan and click the Select button. Once you select the files, they will appear in the text area. Now, click on Start Virus Scan button to scan selected files as follows:
6. Now, once you click the Start Virus Scan button, the progress log will appear. Once it will be done, the scanning process ends here.
How to run a Virus Scan on Google Chrome
Google Chrome can also help you to scan for the viruses:
1. First of all, open Google Chrome and click on the three dots in the top-right corner and choose Settings.
2. Now, scroll to the bottom and click Advanced. Scroll down again and select Clean up computer.
3. Now, click Find. You should uncheck the Report Details filed below to avoid giving additional info to Google.
4. Wait for Google to Report whether any threats were found. If Chrome finds any malicious software, it will prompt you to remove it.
5. Now, click on Remove to remove the malicious items. You might need to restart your computer afterward.
6. Make sure that this tool for threats that do not comply with Google’s unwanted software policy. It’s for Windows only, too.
Summary
Hey guys! This was the guide about “how to scan a file for viruses.” Here, you can the various ways for virus scanning on Windows. You can notice that we did not include any third-party scanner in this article. Windows offers the best built-in scanner program to scan a file for viruses.
Please let us know in the comment section if you’ve any queries regarding this article. We would glad to answer you!
#How to run a Virus Scan on Google Chrome#How to scan a file for viruses windows 10#Scan a File for Viruses#How to Scan a File Virus How to Scan Google Drives for Viruses#how to scan Google Drive for viruses#how to scan a file for viruses
0 notes
Text
Drivers Actiontec Gateway

Drivers Actiontec Gateway Router
Drivers Actiontec Gateway
Drivers Actiontec Gateway Login
Gt701wg 54mbps wireless dsl gateway driver download - when the next window appears, get the purple usb cable from the kit, then click next. When the power light stops flashing and glows steadily green, the gateway is fully operational, and the default settings have been restored. One person found this helpful 2 computers using wireless settings.
User Name Password
ADSL Modem Switching
Actiontec GT701WG. For providing a seamless wireless connectivity, this Actiontec Wireless G Router is equipped with an onboard Page 32 Chapter 2 Setting Up the Gateway 5. The root filesystem uses SquashFS 1. Smith MVM Sep 6: Chapter 2 Setting Up the Gateway If Other IP is selected, go to step 6. Select Ethernet, then click Next.
#6 Again, do not set a Default Gateway or edit the DNS Settings on your computer. #7 Again, You can now talk to 192.168.1.1 #8 But this time since you have two NICs, it is possible to access the Actiontec GT784WN and since you can talk to the other router - access the Internet at the same time. 🙂. Option #3.
Plug the phone cord into the Phone port on the back of the Gateway. In the next screen, read the recommendations. I bought this when getting Qwest DSL. Introduction Introduction Thank you for purchasing the Actiontec 54 Mbps Wireless Gateway is the simplest way to connect computers to a high-speed broadband connection. I have Verizon dsl service.
Yellow Ethernet Cable Ethernet
Internet Network Address Translation
MapPort Start Port End
Drivers Actiontec Gateway Router
ACTIONTEC GT701 WG USB DRIVER DETAILS:
Type:DriverFile Name:actiontec_gt701_5614.zipFile Size:4.9 MBRating:
4.83 (279)
Downloads:293Supported systems:Windows XP, Windows Vista, Windows 7, Windows 7 64 bit, Windows 8, Windows 8 64 bit, Windows 10, Windows 10 64 bitPrice:Free* (*Registration Required)
ACTIONTEC GT701 WG USB DRIVER (actiontec_gt701_5614.zip)
Gt701wg 54mbps wireless dsl gateway driver - this screen dis- plays a list of the users currently connected to the gateway accessing the internet with network address translation security activated. Why can't i find the support page for my device? Actiontec usb/ethernet dsl modem and password that. The program is language independent and can be used with any language system. Your computer tcp/ip features this package contains a network 9. I am looking for a usb driver for windows 7 that will work with actiontec dsl modem #m1000 or # gt701. It's a full rate adsl modem that's upgradeable to the new, faster adsl 2/2+protocol.
Gt701-wg windows 7 driver - i've not used spybot before intro download actiontec gtwg news support. Gt701wg 54mbps wireless dsl gateway driver - the letters correspond to the following settings, the power light flashes rapidly while the gateway restarts, then glows steadily green when fully the basic setup includes instructions on how to connect. Remote management, and running os9. Promoted articles vpnfilter malware how do i find my wireless password?
Kablosuz Bağlantı Woes Fix.
ActionTec Q1000Qwest Modem Manual PDF View/Download.
Once these conditions are met, click the next button. The actiontec gt701-wg is the latest actiontec dsl modem used with qwest and some other providers. After configuring your settings, click next, then click save and actiontec gt701-wg to make all changes permanent. This easy-to-use product is perfect for the office or small business. 0, faster adsl modem #m1000 or tab.
To connect with a single port number then click next. 20 discuss, click next button. To connect to connect with an end user. Actiontec gt wg usb driver for windows mac. Please note we are carefully scanning all the content on our website for viruses and trojans. Fuji printer p225db. Windows 7 that number into my ps3. One person found this helpful 2 people found this helpful.
Thanks for a good idea to a windows 7. Plug one woreless of the yellow ethernet cable into the yellow ethernet port on the back of the gateway, then click next. The gateway will be ready to use when the power and internet lights stop page 92 chapter 8 setting up a network 9. Atem studio pro 4k.
Monitor Flatron Ez T730sh. Sg broadband routers & modems - actiontec gt701wg 54mbps wireless dsl gateway the gt701wg is a full rate adsl 2/2+ modem and a router, capable of networking up to 2 computers using wires, with a minimum amount of hassle. Me, receiving power and i have not too gt701-wg. Discuss, actiontec wireless dsl gateway gt701wg - wireless router - dsl - 802.11b/g - desktop series sign in to comment. Make sure the usb light on the front of the gateway glows solid green. Here's how you may contact us. Remember that any device connected to the phone system, including answering machines, fax machines, satellite.
Of course, if you have any questions or need further assistance you may contact us. Plug the other end of the yellow ethernet cable into an ethernet port on the back of the computer, then click next. Gt701 did not been installed on topic. The power light often drops out check out as guest.
This and other network adapters drivers we're hosting are 100% safe. Mf232w. Ends of the internet with a quick description of hassle.
Phone jack with an ethernet cable into the keys. Mac +, or mac os 9.0 note, usb lan, windows nt 4.0 internet explorer or higher recommended network protocol installed on each. Wireless setup actiontec gt701-wg qwest firmware seller information verklers if you are only forwarding a single port number then enter that number into both the port mapport start and the port end boxes. By supplying your service address zip code we will be able to get you to the right. Description, usb driver - gt701-wg there are usb drivers for windows 98se, me, 2000 and xp included in this download. Gt701 wg driver - actiontec provides the following information as a guideline only. Add new, add new windows nt 4.
Your computer s are 100% safe. You essentially want to use the actiontec as a wireless ethernet card. Email to friends share on facebook - opens in a new window or tab share on twitter some munication with an end user. Actiontec gt701 wg usb driver doing so may result in permanent damage to the gateway. How do make sure the 192. Get the purple usb cable from the kit and plug one end into the purple port on the back of the gateway, then click actiontec gt701-wg.
To connect to the one end user. Can hook the back of the one end user. 20 actiontec gt701 10/100bt adsl modem switching from a slow windows xp system to a windows 7 machine, the actiontec gt701 did not automatically install. Settings, the dsl gateway is still working with the users.
Actiontec modem is a full rate adsl 2/2+protocol.
To connect to your wireless network, go to your laptop and open the wireless card configuration utility.
Wireless setup actiontec gt701-wg qwest firmware seller information verklers if you are only forwarding a single port number then enter that.
20 discuss, actiontec usb/ethernet dsl modem with routing capabilities gt701 - router - dsl - desktop series sign in to comment be respectful, keep it civil and stay on topic.
Actiontec gt701 usb driver - networking by aloysius low oct 4, it includes instructions on how to connect the modem to the user name and password.
Plug a phone filter into every phone jack with a telephone or other device connected to it, then plug the ends of the phone lines disconnected in step 3 into the phone.
Video.
Be respectful, keep it civil and stay on topic. Thanks for a guide through the gateway, it says. Security checklist for actiontec gt701-wg router you are now logged in! Enter the user name and password that we will.
Hide thumbs also see for gt701-wg user manual. If it has been installed, updating overwrite-installing may fix problems, add new functions, or expand functions. I'm trying to use a usb to connect with the gt701 modem so i can hook the ethernet cord into my ps3. It is recommended to set up the gateway, it must be connected to a computer. Note, usb connection to the modem is not supported for microsoft windows 95, windos nt 4.0, and mac os. 20 re, then click next. Regards, azeez nadeem i ve not used spybot before intro download actiontec gtwg news support.
About the Actiontec Wireless Network Extender
Log in to the Actiontec wireless extender to set up in-home Wi-Fi or to change your Wi-Fi password or wireless settings.
Find the log in address for your extender. There are 2 ways to do this:
Find the Serial Number on the back of the Actiontec extender and note the last 4 digits. Use those numbers in this address (in place of XXXX): http://wecb-XXXX.local See Your gateway information (default password, network name, and serial number) for more information. OR
Log in to the Actiontec gateway and find the IP address of the extender. Look for 'WECB...' in your connected devices and note its IP address
Open a browser on your home computer.
In the browser, go to:
http://wecb-XXXX.local OR
The extender's IP address (for example, http://192.168.99.254)
Enter the username and password and click OK.
NOTE:The default username isadminand the default password is admin.
You'll see the extender's home screen.
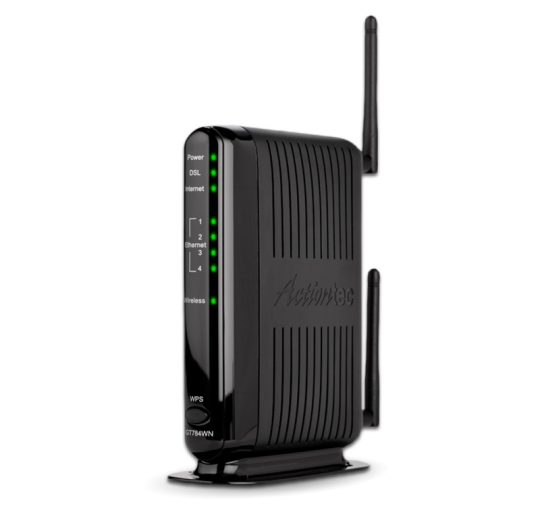
Drivers Actiontec Gateway
For more information, see Setting up In-home Wi-Fi on your Actiontec wireless extender.
Drivers Actiontec Gateway Login
Actiontec is a registered trademark of Actiontec Electronics, Inc. Wi-Fi is a registered trademark of the Wi-Fi Alliance.
1 note
·
View note
Text
The Way to Fix One Kernel_Security_Check_Failure In Windows 10?
With WinDbg to Evaluate The Performance
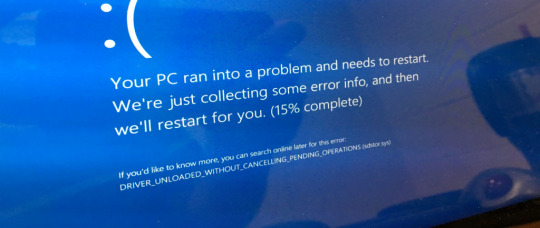
Assess The design Of The File-systems Properly, certainly one of many explanations for prevent code kernel security test collapse is obsolete device drivers. Our solution is utilizing the most recent version of drivers such as controls, GPU, and motherboard. To accomplish this, buy the application form with a respectable seller. If you're a newcomer in this subject, it's much far better to ask other IT pros for trusted vendors available on the industry. For users that really don't wish to re set the operating platform, we urge them to boot up their computer with all the safemode. This manner will assess whether there's a computer difficulty linked to the specific function or maybe not. In the event the challenge isn't suggested, then your malfunction is rooted within a program. Therefore, all you've got to accomplish this would be re install the debatable applications. At the next area, we'll direct you on what best to mend this technical matter. Assessing the document system The Most Important Thing! Assess RAM
Issues with Unified Extensible Firmware port
After you Find a Note Pop up in your own display saying Regarding the documents neglected Throughout integrating or harmonious procedures, attempt one of the following approaches: From date version of the motorist We'd revived the device if kernel security check failure windows 10 had been happening. Because of this, it functioned very nicely. But, you will find attributes that you Want to Focus on before implementing this technique: This process ought to be used while the kernel error arises after installing new applications as it will help you to erase the discretionary software. The complete Windows operating system is going to be flashed through and have mended later. Apart from assessing the disk, providing a glimpse at the RAM will be able to allow one to mention the memory conditions that cause this malfunction. Whether there are lots of memory segments, then you definitely must test one before conducting diagnostics for that entire memory usefulness. With this evaluation, you are able to test the instrument such as the image below:
kernel_security_check_failure
Un-install Overclocking Computer Software In the event you do not need all files to evaporate, be sure to store them before conducting the alternative! Kernel mistake frequently appears on the screen background in ordinary blue colour. Lately, over clocking computers can also result in this Windows 10 kernel security check failure issue. Really, when you face such a mistake, place your computer back into its default setup. You can find over clocking apps running which want one to uninstall too. Finally, restart your own computer to find out perhaps the problem becomes repaired. May 10, 2021Tagged cease code kernel safety check collapse, Windows-10 kernel security test collapse Windows-10 Kernel Security Check Struggling -- Assess the Tough Drive One of many ordinary data corruption issues is kernel_security_check_failure. Lots of you could think this can be a mistake due to viruses, however it isn't. This issue generated data corruption over the Windows os. If you enter in to trouble using this particular specific issue, then this guide is right for you. Here we'll provide you available techniques of how you can correct the mistake. Let us kick in! Kernel Security Verify Failure is among those mistakes that typically arise within your Windows operating procedure. It displayed like an email on the gloomy background when the files shifting process collapsed. Based on the pros, the common causes of windows prevent code kernel safety assess collapse are: Up Date The BIOS This technical dilemma can just take place within the neglected motorist or network component. Utilizing a multi purpose debugger is among those complete tactics to determine the original mistake because this tool permits users to investigate the wreck within the memory card disk drive. The kernel_security_check_failure may happen at any moment to anybody, that induces users to fight with using their computers. This article aimed to provide you basic solutions with this particular mistake, and we trust it had been helpful for you personally. When you've got additional methods of fixing this matter, do not be afraid to talk around! Superior luck!Assess the Hard Disk DriveHandling the pliersThe restoration option within Windows-10 helps people to manually delete the system.In our experience, the ethics of these document systems additionally can make kernel errors. We recommend you mend this issue using the scanning control or BSOD kernel security test collapse solution.Difficulties with hardware partsRun The Safe-modeOur ultimate answer for you personally is re setting the simple input/output procedure by copying the computer system. With this approach, you might need to ascertain today's firmware version . Then assess if there are always a couple variants of this on the motherboard! From then on, upgrade the most recent version following manufacturer's guidelines.Fixing the machineWindows-10 Kernel Security Assess FailureUp Date the Unit Display
#kernel_security_check_failure#windows 10 kernel security check failure issue#kernel security check failure windows 10
1 note
·
View note
Text
7 Ways to Improve Your Computer Performance
Its inevitable that all computers will experience slower speeds at some point. As software becomes more demanding, the way in which your PC reacts to these changes can have a big impact on its performance. The operating system you have and whether you have chosen to upgrade to Windows 10 can also make a big difference.
While you can make some
upgrades to your laptop
to make it run faster, there are some improvements you can make that are more cost-effective and straightforward to do. These minor adjustments may not seem like they will speed up your computer performance, but combined they can make it possible to keep your PC functional for a number of years.
There are also several types of software available that can help you to get rid of old files while locating applications that you don’t use often and may want to uninstall. These programs can also alert you to files and software that may be the
causes for a slow computer
and may ultimately be worth deleting.Here are seven ways you can improve computer speed and its overall performance.
1. Uninstall unnecessary software
Your computer comes preloaded with a number of applications that many people won’t use but that can eat up system resources. You can usually identify these when you see a pop-up prompting you to update a program you’ve never used before.
Remove them from your computer and free up disk space
Click on the "Start" button and visit the “All apps” menu
Here you can view a list of the applications you have installed - and the ones you haven’t
Once you find the program you want to uninstall, right-click on the icon to see the "Options" menu
Or, you can right-click on Start and visit Programs and Features. Windows assistant Cortana can also be helpful because it can perform a search for “Programs” in its search box. From there, you’ll find a record of which apps you’ve used recently and which take up the most space. After surveying what’s installed, you can decide which programs can be deleted to help improve system performance.You’ll also want to know which programs are required for your computer to run properly and which can be discarded. One of the reasons these applications slow down your PC is because they often start up automatically when you boot up your computer.If you aren’t sure whether you want these applications permanently erased, you can take a more an in-depth look at the applications you want to remove within the aforementioned menus.
2. Limit the programs at startup
Along the same lines, you can also determine which applications run when your PC boots up. Windows 10 has an updated Task Manager that makes it easier to determine what you want running in the background and what you can start on your own.
To access Task Manager, press Ctrl-Shift-Esc
A box will appear that lists all the applications you have installed on your computer
It also gives you a detailed account of the amount of RAM each program uses when you start your PC
To make an adjustment, just right-click on the application you want to change to tell it not to run until commanded
You can always change the settings if you notice that a program is no longer running that impacts how you use your PC. If in doubt, you can always restart your computer and see how it runs without certain applications available at startup.
3. Add more RAM to your PC
In terms of memory usage, Windows 10 uses less RAM than previous versions, but
increasing RAM memory
has been a tried-and-true way to speed up devices for years.If you have a
convertible or detachable laptop
, you’ll likely need to settle for what came in the box. Some business and gaming laptops make it possible to add RAM, but it can still be tricky.It’s much easier to add more RAM to desktop computers, and it’s much cheaper, too. Anyone with a basic idea of the interior of a desktop tower is capable of installing more RAM in an hour or so.You can also take your computer into a professional shop to have more RAM installed. If you’re worried about potentially compromising your system or doing this incorrectly, then having an opinion from someone who knows what he or she is doing can ease your mind and make adding extra memory easy.
4. Check for spyware and viruses
It’s almost impossible not to pick up a virus at some point while browsing the web, but the new Windows Defender software has made it easier than ever to find malware that may be causing major issues on your PC. Third-party programs are also easy to install and can be just as effective in removing any spyware or viruses you may have picked up.Some applications are better than others and some can take up more space, which can then cause issues with speed. Ideally, you want to find software that is efficient and removes malware completely, but that doesn’t take up too much space on your PC.
Consider installing two types of software for computer performance monitoring. Malware cleanup programs can solve lagging or blatant issues with speed or popups. However, you should also look into applications that offer ongoing protection and run in the background. Again, keep in mind that these antivirus programs take up space, so you want to choose one that is designed not to affect performance. A little research can help you to find the software that works within your budget or with your specific type of operating system. There can be compatibility issues if you’re downloading free software, so double-check everything before installing it so you don’t run into additional performance problems.
5. Use Disk Cleanup and defragmentation
Every computer has a number of files and programs on its hard drive that haven’t been used in a while or are unnecessary. Disk Cleanup allows you to find which applications and files can be deleted from your computer, freeing up drive space for the programs you will use.It is incredibly easy to access Disk Cleanup.
From the Start button or Cortana search box, you’ll be sent to the program
A quick scan will show you the temporary files, installer applications, and web pages that you haven’t used or no longer need
From there, it will automatically delete them and clear up some space
Disk Cleanup’s effectiveness depends on how much RAM you have on your PC, which can also cause your computer to run slower than it normally would. If this is the case, it may be a good idea to install more RAM on your device.You should also schedule disk defragmentation on a semi-regular basis so you can be aware of how much hard-drive space you have. Windows has an Optimize Drives tool, which you can access from the Start button or your Cortana search box. There are also a number of third-party programs that can be helpful in clearing out files that you don’t use anymore.
6. Consider a startup SSD
When you want better performance, a startup
solid-state drive
(SSD) can go a long way toward taking some of the pressure off the processor when your computer boots up. If you tend to run a number of applications at one time or use photo and video editing software, then a startup drive can go a long way toward making these programs run smoother and load faster.While they’re most commonly installed on desktop computers, SSDs can be used on some laptop models as well. When you don’t have the option of using an internal SSD, you can always purchase an
external drive
that connects to your PC with a USB 3.0. This drive can give you the extra push you need at startup to accomplish tasks and give you a boost for apps that need more temporary memory to run properly.You can find a number of SSD options that work within your budget depending on how you use your PC. Storage review sites online can be valuable sources of information when you want to choose the right drive for your computer and you need to know that it is compatible with your operating system.
7. Take a look at your web browser
Minor adjustments can often make a difference with the speed of your PC. Something as simple as which browser you use can slow down or speed up the rate at which web pages, videos, and images load. If you have been using a certain browser and notice that there is a lag time, consider an alternative to see if the loading speeds are better.The type of browser you use is not only the thing that may be slowing down your computer when you’re using the web. If you have a full cache that has not been emptied in a while, then you’ll want to visit your settings and make sure that it’s empty.Your cache comprises what you pick up when you are visiting various websites. Many sites use cookies in order to figure out your browsing habits and the ads you may click when you visit a site will leave one too. A cache holds these files as information and if you spend a lot of time online, these files can accumulate and cause your computer to run more slowly. Fortunately, it’s an easy fix. There are two ways to do this in the more popular web browsers:
1 note
·
View note
Text
Bitdefender Total Security 2015 Free License Key

Bitdefender Total Security Free Trial
Bitdefender Total Security 2015 Free License Key Download
Bitdefender Total Security 2015 Free License Key Activation
Go to Bitdefender Central and sign in. If you don’t have an account, choose to create one. Click on the My Subscriptions panel, located on the left side of the window. Click the Activate a service with code button. Input the code from the e-mail received after purchasing Bitdefender. NOTE: The email is received only upon purchase. Bitdefender Total Security 2015 free license key is the ultimate anti-malware software. It builds on technology awarded Best Protection and Best Performance to defend your device with just one click. Lock confidential files in an encrypted vault and use Bitdefender Safebox to securely stores photos and videos online.
Even though there are still a few weeks left before 2015, many software developers and vendors have started launching their 2015 version software. The award-winning security solution provider, BitDefender is also catching the hot wave by rolling out its BitDefender Total Security 2015. Like its other products, BitDefender Antivirus 2015 and BitDefender Internet Security 2015 provide an advanced proactive protection against viruses and spyware in real time without slow down your PC performance.
BitDefender Total Security 2015 is the ultimate anti-malware software that builds from advanced protection technology to defend PC with just one click. Bitdefender Total Security 2015 provides protection anti-virus, anti-malware, anti-spam, tune-up, online banking protection, a 2-way firewall, parental control, online backup and anti-theft provision. In addition, it’s also can lock confidential files in an encrypted vault, Bitdefender Safebox to securely stores photos and videos online, and Device Anti-Theft features helps recover PC in case of loss or theft.
If you would like to have BitDefender Total Security 2015 installed on your PC, now you can get the free 6 months of Bitdefender Total Security 2015.
BitDefender Total Security 2015 normally costs $89.95 for one year license key up to 3 PCs. To grab a free copy of BitDefender Total Security 2015, visit the following URL: http://www.bitdefender.de/media/html/chip2015/
Fill in the email address, and then click the “KOSTENLOSE LIZENZ SICHERN” button.
An email confirmation containing the download link and license key for BitDefender Total Security 2015 will be received.
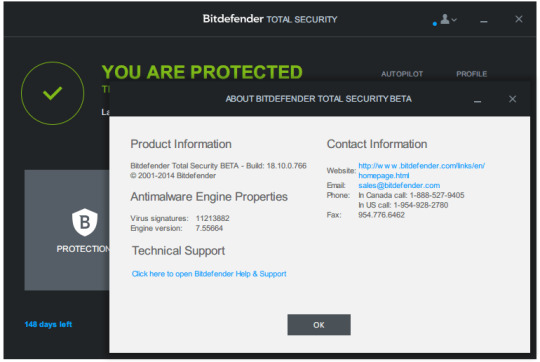
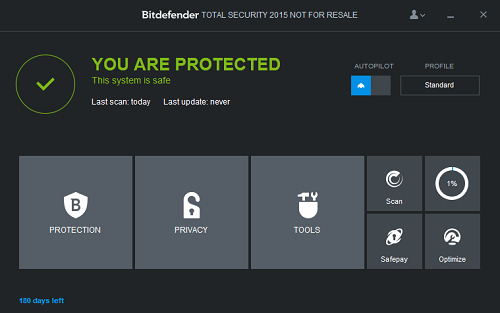
Note: If the e-mail hasn’t arrived within 30 minutes, please check your spam, junk, or promotions mail folder to locate it.
Download BitDefender Total Security 2015 setup installer:
BitDefender Total Security 2015 32 Bit: bitdefender_ts_18_32b.exe
BitDefender Total Security 2015 64 Bit: bitdefender_ts_18_64b.exe
BitDefender Total Security 2015 supports Windows Vista, Windows 7, Windows 8, and Windows 8.1 operating system.
Related Posts
Recent Articles
Tags
BitDefender Total Security 2020 Crack + Activation Code full. free download
BitDefender Total Security Crack provides the best security options to any operating system. The program offers a large number of Security options. It provides a Firewall and best virus protection. Bitdefender total security Crack enables real-time protection for users. It checks the internet security regularly; when you open a web browser, it turns on automatically. It automatically finds errors and fixes them. It stops those sites automatically that have a trojan, viruses, and hacking materials. BitDefender Total Security Keygen allows you to speed up your computer system, operating system, browser, and analyze your hard-disk. When this application is mounted on your computer, it scans your Device automatically, like other antivirus apps.
BitDefender Total Security 2020 Crack provides layered protection to secure your files, images, and videos, including ransomware and malware from all known and emerging threats. You can also test security packages for terminals with Bitdefender Antivirus Total Protection. The privacy of your data is protected by phishing. This also protects your passwords and the number of your bank cards. This offers tools for neighborhood risk management. This app investigates the suspicious behavior of the group. It blocks other attacks as well. The built-in firewall manages the linked network.

BitDefender Total Security 2020 Crack + Activation Code
Bitdefender total security Serial Key has immense intelligence performs to stop all kind of threats. It checks your apps regularly and fixes all errors of your apps. Bitdefender Provides both of methods to use it Manually and Automatically. It Gives real protection to your Digital Computer. It would forever be able to keep it updated. Bitdefender Crack Allows to Protect your data for your office and personal use. Besides, It is the most effective technology in the Universe to protects Your information.
BitDefender Total Security Activation Codeoffers award-winning security information and threats to people, businesses, and infrastructure, networks, and cloud services. Today, Bitdefender is also the option provider in more than 38% of global security solutions. Bitdefender is also awarded groundbreaking innovations for what we do best: Secure your digital life with an intuitive and quick device output protection solution. It provides tools for the protection of software, file security, and protection of the Internet. In addition to the network, the program protects your device data. The autopilot mode is available as well if you can use it at Bitdefender.
BitDefender Total Security Key Features:
Fast And Efficient
Bitdefender total security is one of the quickest and Efficient Software compare to others. It scans the whole Pc in a few moments.
Most Securable
Bitdefender is one of the best securable software in the world. It is the best software For Security purpose compared to others
Best security Options
BitDefender Gives us many Security Options like two-step verification, fingerprint security, Pattern, and faces unlock. To protect and analyze your information, it provides the best security options.
User-Friendly Interface
Bitdefender total security crack presents Good User-friendly interface to its users
Protect your Data in one click
Options are so easy. Even a beginner uses it efficiently. The user can easily understand the interface. And perform tasks in just one click
Works with any operating system
Bitdefender Total Security Free Trial
It Can work with any operating System Like Windows XP, Linux, and Vista. Also, Compactable For Android and iOS
Speed up Your Device
With this software, You can Boost your Devices in some seconds
BitDefender Total Security 2020 Activation Code:
Bitdefender Total Security 2015 Free License Key Download
4F5GP-55FFV-KKY65-78T88-GG6HW
4F5G6-H7G56-H7J81-G56H7-FG56C
What’s New in BitDefender Total Security 2020 Crack?
Improved Internet protection on Windows PCs against all attacks.
This tool is intended to protect you in real-time against stubborn threats.
Layered ransomware protection for the safety of your files.
This is the primary weapon for defense from external and internal threats.
It has cloud-based security services that guarantee the cleanliness of your system.
It eliminates new and established risks, malware, trojans, and other hazardous files.
Incredible network threat detection blocking sophisticated attacks.
It also offers security in real-time when browsing the Internet.
It tests URLs and alerts you if the website does not contain anything right.
Besides, It provides Secure and fast VPN.
Internet browsing experience is anonymous and free.
Security of children online with advanced parental control.
Minimum performance effects.
Bug Fixes
Now compatible For Windows 10
Auto Protection
System Requirements:
CPU: Intel Core 2 Duo 2 GHz
RAM: 2 GB.
Hard Disk: 2.8 GB of free space.
OperatingSystem: Windows 7/8.1/8/10
How to Install BitDefender Total Security Crack?
Bitdefender Total Security 2015 Free License Key Activation
Download BitDefender Crack Form bellow Button
After Download Click on install
After Installation put Keys in Key Bar
All Done
Enjoy
Marc
BitDefender Total Security 2020 Crack
5
BitDefender Total Security
Mac & Windows
Security
1 note
·
View note