#I have some veggies like shallots and potatoes and sweet potato
Text
meals for the near future :
- i didn’t end up making the chorizo sweet potato pepper hash last week so that’s what i’m making for dinner tonight, usually w little sunny side up eggs nestled between the potato cubes
- i made brownies today w rice flour and the rest of my expensive dutch process cocoa i had leftover from my gf’s bday cake. they came out springy and chocolatey and mochi adjacent. i like them a lot :-)
- i spatchcocked and dry brined chicken and prepped some potatoes and swiss chard for tomorrow’s dinner when i roast the bird and cook the veg in the schmaltz. im such a sucker for a good roast chicken and i love having the leftover carcass for stock !
- i have so many veggies on my list rn bc i’m missing summer and it’s bountiful produce. when i grocery shopped i got a couple bunches of broccolini i want to roast w parmesan and lemon, persian cucumbers i want to smash and serve w chili crisp and fried shallots and vinegar, and some small squashes i want to bake in cream and top w breadcrumbs or something
- i have a focaccia dough proofing for the night to make a potato parmesan focaccia pizza situation
- i have a couple filets of cod i want to cook en papillote with saffron and shaved fennel and lemon for a tender flaky fish dinner bc im nothing if not a fish enjoyer
34 notes
·
View notes
Text

The annual Thanksgiving feast is not only a time to give thanks over a big meal while bonding with family and friends, but it also offers a savory succor to our palates after all the sugary, chocolatey excesses of Halloween. While turkey is traditionally the main centerpiece of a Thanksgiving table, it is typically accompanied by an array of seasonally appropriate side dishes whose ingredients reflect the new world bounty that greeted the Pilgrims upon their arrival at these shores. Here are some ways to bring a fresh, new farmers market spin to several of these iconic Thanksgiving side dishes this year:
1. Green Bean Casserole
Green bean casserole is considered a quintessential Thanksgiving side dish thanks to the clever marketing machine behind Campbell’s Soup Company. In 1955, executives at the company were looking to increase sales by developing quick and easy recipes that incorporated their soups within the roster of ingredients. And, presto, the green bean casserole was invented by Dorcas Reilly who featured frozen, packaged green beans, French’s fried onions and Campbell’s condensed cream of mushroom soup in her test kitchen prototype.
Of course, nothing compares to a green bean casserole made from scratch using fresh, unprocessed, locally grown foods. This quick and simple Saveur recipe is an adaptation of the original Campbell’s Soup version, but can be made using seasonal ingredients you can easily find in the farmers market this weekend:
Ingredients
3 cups Yellow Bell Farm chicken stock
1⁄2 oz. Mushrooms.NYC shiitake mushrooms, stemmed (when using fresh farmers market mushrooms, skip first part of Step 1 in recipe which calls for reconstitution)
2 lb. Norwich Meadows Farm green beans, cut into 2" pieces
Canola oil
1 1⁄4 cups flour
2 small Newgate Farms yellow onions, thinly sliced
5 tablespoons SOVA Farms butter
1⁄3 heavy cream
Freshly ground black pepper and Kosher salt, to taste
2. Cider Glazed Brussels Sprouts
Brussels sprouts have not always enjoyed the coveted spotlight of the Thanksgiving table. Historically speaking, brussels sprouts were the least favorite vegetable of many children who went to great lengths to avoid eating them (ahem, I had several good strategies back in the day) because they became mushy and bitter when boiled. However, in the 1990s, a Dutch scientist named Hans van Doorn identified the chemicals that made brussels sprouts taste bitter and successfully bred out the compounds from crops, resulting in a major cruciferous makeover.
Not only do the new and improved brussels sprouts taste better, which has helped catapult them into Thanksgiving table superstar status, they’re now typically served roasted instead of boiled, which further mellows their bite and enhances their natural sweetness and nutty flavor. So, pick up some of these miniature-cabbage-like veggies in the market and give this cider-glazed recipe a whirl that is sure to lure in even the pickiest of young, yet discerning, palates:
Ingredients for 6 servings
2 pounds Norwich Meadows Farm brussels sprouts, trimmed and halved or quartered if very large
3 tablespoons extra virgin olive oil
1½ teaspoons kosher salt
1 teaspoon black pepper
2 tablespoons SOVA Farms unsalted butter
½ cup finely chopped Orchard Hill shallots (about 2 medium shallots)
2 cups farmers market Fino Farms LLC apple cider
3 tablespoons apple cider vinegar
1½ teaspoons Dijon mustard
3. Maple Mashed Sweet Potatoes
Sweet potatoes are native to Central and South America but were cultivated in Virginia starting around 1648, several decades after the first Thanksgiving which took place in Plymouth, Massachusetts in 1621. Since that time, sweet potatoes have become an iconic staple at modern-day Thanksgiving tables with their naturally high sugar content providing a sweet counterpoint to platefuls of turkey, stuffing and other savory delights. This recipe calls for baking versus boiling the sweet potatoes before mashing, while the addition of maple syrup, butter and fresh thyme adds an indulgently decadent, yet earthy, overtone.
Ingredients for 4-6 Servings
3 pounds medium-sized Newgate Farms sweet potatoes (3 or 4)
6 tablespoons SOVA Farms unsalted butter
6 tablespoons SOVA Farms maple syrup
½ cup milk
1½ teaspoons salt
¼ teaspoon freshly ground black pepper
Fresh thyme leaves, for serving (optional)
We hope you enjoy these Thanksgiving classics that perfectly capture the cornucopia of harvest season that abounds in our farmers markets right now. In the meantime, we wish you a wonderful holiday full of gratitude and special moments with loved ones.
#downtoearthmkts#farmersmarket#buylocal#shoplocal#localfood#eatdowntoearth#eatlocal#agriculture#harvest#thanksgiving 2023#side dishes#farmersmarkets
0 notes
Text
Weekly Grocery List
Happy Sunday! This post is a day later than I anticipated but never the less let’s get into it. As promised I will be giving my go to grocery list. Having a list makes shopping so much easier and less overwhelming. I have come to realize that having a list also keeps my grocery bill from spiking from impulse items. So let’s start with the veggies, I lean towards getting a few fresh each week but having a stockpile of a variety of frozen veggies because that way there is no pressure to use them before going bad. I like to keep small sweet potatoes in the pantry as they make a good snack and healthy carb, a large bag of leafy greens, fresh tomatoes and a zucchini complete my fresh produce. I like to keep it simple. I also usually grab a sweet onion and some shallots to add some more flavor to my meal. Then when it comes to fruit a bag of small apples and a bunch of bananas will do, I opt for frozen berries rather than fresh so they store longer. Most of my shopping is done at Trader Joe’s, so I love to grab their difference varieties of chicken sausage for protein, in addition to their already prepared frozen chicken breasts. Can’t forget a dozen eggs to have for breakfast! For grains, I like to have some pasta and rice on hand but also enjoy couscous and quinoa for other alternatives. I pick up some goat cheese because its the one thing I cannot live with out, some Greek yogurt, and oat milk to complete the dairy. I also try to have some turkey or chicken breast in the fridge with sliced cheese for sandwiches and wraps. Now this is just the typical week but of course I branch out when I want to make particular dishes but this normally gives me plenty of variation in my meals. Thats it for this week! Check in next week and I will be sharing my favorite easy week night dinner!
January 29th
0 notes
Text
I recently made lots of chicken stock! I wanna make soup but I don’t know any recipes. Any suggestions?
#I have some veggies like shallots and potatoes and sweet potato#I won’t be able to cook in a couple of days so I just wanna gather some recipes and buy whatever vegs I need for the soup#it’s getting closer to spooky season that means SOUP
103 notes
·
View notes
Text
fruits and veggies in swedish 🥦🍓🌽
i felt like making a new vocab list! spring is in the air and soon the homegrown, fresh produce will finally make their way to our tables again. some of their names in swedish are just like in english, others are completely different. let’s have a look!
grönsaker (sing. grönsak(en)) - vegetables (literally means “green things”)
aubergine(n) - aubergine/eggplant
avokado(n) - avocado
broccoli(n) - broccoli
gurka(n) - cucumber
kronärtskocka(n) - artichoke
majs(en) - corn
oliv(en) - olive
paprika(n) - bell pepper/capsicum
pumpa(n) - pumpkin
ruccola(n) - aragula
sallad/sallat(en) - lettuce (and also salad)
selleri(n)/stjälkselleri - celery
spenat(en) - spinach
squash(en)/zucchini(n) - zucchini
tomat(en) - tomato
lök(en) - usually means onion, but is also a word for all alliums;
gul/röd lök - yellow/red onion
vitlök - garlic
purjolök - leek
gräslök - chives
silverlök - white onion
schalottenlök - shallots
vårlök/salladslök - spring onion
kål(en) - usually menas cabbage, but used in anything related to it;
vitkål - cabbage
spetskål - cabbage, but the pointy looking one
kinakål/salladskål - napa cabbage
savoykål - savoy cabbage
grönkål - kale
svartkål - couldn’t find the translation for this but it’s a mix between kale and savoy
blomkål - cauliflower
kålrabbi(n) - kohlrabi
fänkål - fennel
rotfrukter (sing. rotfrukt(en)) - root vegetables (literally “root fruits”)
morot(en) - carrot
rotselleri(n) - celeriac
kålrot(en) - turnip
palsternacka(n) - parsnip
sötpotatis(en) - sweet potato
potatis(en) - potato
jordärtskocka(n) - jerusalem artichoke
frukt - fruit
äpple(t) - apple
banan(en) - banana
päron(et) - pear
apelsin(en) - orange
persika(n) - peach
nektarin(en) - nectarine
clementin(en)/satsuma(n) - clementine
citron(en) - lemon
lime(n) - lime
mango(n) - mango
kiwi(n) - kiwi fruit
aprikos(en) - apricot
fikon(et) - fig
melon(en) - melon
vattenmelon(en) - watermelon
vindruva(n) or just druva - grape
grape(n) - grape fruit
sharonfrukt(en)/kaki(n)/persimmon(en) - persimmon/khaki
ananas(en) - pineapple
bär - berries
jordgubb(en) - strawberry
smultron(et) - the small strawberries that grow in the wild
hallon(et) - raspberry
blåbär(et) - bilberry
amerikanskt blåbär/stort blåbär - blueberry
björnbär(et) - blackberry
körsbär(et) - cherry
tranbär(et) - cranberry
lingon(et) - lingonberry
if you feel like i forgot any, feel free to add them yourself ^^
119 notes
·
View notes
Photo


Viranlly hosts Thanksgiving Dinner.
in partnership with Wines of British Columbia.
IT’S CRUNCH TIME Y’ALL!
I don’t even where time went but here we are now, just over a week before Thanksgiving. The aroma of PSL is in the crisp fall air, the days are getting shorter, and the meals we preppin’ are getting cozier each day. The holidays are upon us and so is the (grape) harvest month.
To celebrate both festivities, I’ve teamed up with the Wines of British Columbia to come up with some fun thanksgiving recipes and of course delicious BC wine pairings to go with them. I’m skipping the turkey, because let’s be honest, I don’t trust myself with a bird that size, nor that I have the space and capacity both physically and mentally to handle a turkey. I want to make sure that this holiday cooking will be as stress-free and as boozy as possible, because we all deserve that kind of holidays.
Please note that these recipes serve 4-6 people.
First thing first, it’s not a dinner party at Viranlly’s without a damn-well-put-together CHARCUTERIE AND CHEESE BOARD. Here’s the fun part about this board: there’s no recipe. The trick is you want to make sure you have a balance in flavours, textures and colours (because ya know.. aesthetic).
THE MEAT : variety of cured meats with different flavour profiles - hot genoa salami, prosciutto, iberico ham, chorizo, and capicollo are always a great start.
THE CHEESE : make sure you have at least hard and soft cheese, everything in between never hurts either - jammy brie or camembert is a crowd pleaser, manchego is delicious, especially when you can find the truffle-y ones. Can never go wrong with parmigianio-reggiano, or a nutty pecorino. Aged cheddar and smoked gouda if you want a little funk. The possibility is honestly, endless.
THE FRUITS AND VEGGIES : grapes and olives (olives are veggies, right? I prefer unpitted Castelvetrano) are staple on my board. Seasonal fruits and veggies always add amazing flavours to the board : pears and figs in the fall, peaches and berries in the summer.
THE EVERYTHING ELSE: honey, hummus, nuts, preserves, bread, crackers, pate, and everything your heart and stomach desire.
I always love to start the night off with a bottle or two of bubbly, something really crisp, citrusy and refreshing. The Howling Bluff Faux Paw has a ton of berry notes with a just a zest of spice, perfect to be enjoyed with everything on this board. Another great bubbly is the Haywire Pink Bub, which, we consumed throughout the summer.
The next two dishes are heavily inspired by my friends’ thanksgiving last year, with a view adjustments to meet what I have readily in my, and most kitchens.
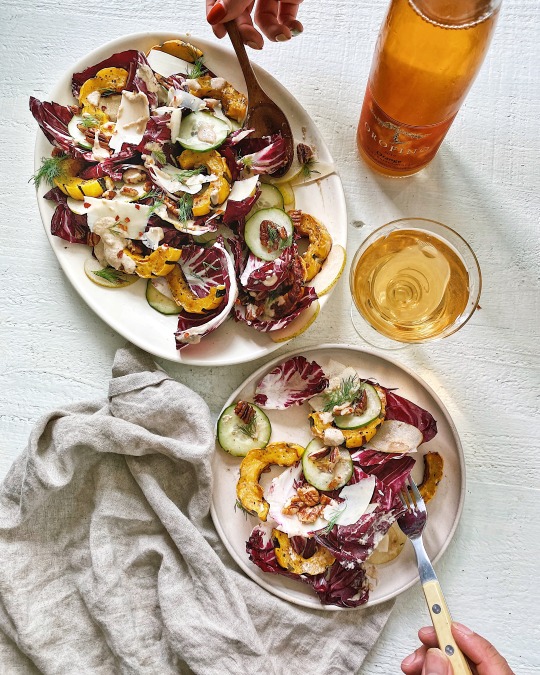
This RADICCHIO AND SQUASH SALAD is my definition of the perfect autumn salad: rich and nutty, a hint of bitterness and lots of crunch.
THE VEGGIES:
1 medium-sized delicata squash, sliced up to half-an-inch-thick half moons (wow that’s wordy). Toss them in olive oil, salt and pepper before hitting the 450F preheated oven for 25-35 mins, or until fork tender. Occasionally turn your sheet tray to make sure they’re cooked evenly, and flip the squash over halfway.
Tear up and cut one head of radicchio into quarter, soak them in ice bath for a couple minutes before assembly.
Thinly slice one medium-sized asian pear, toss in the juice of half a lemon and season with salt and pepper.
THE DRESSING:
Toss half a cup (minus a handful for later) of pecan, or walnut, or hazelnuts (really, any nuts you have around -- 2 tablespoon peanut butter work too), 1 small shallot, juice of half an orange and one lemon, 1 tablespoon dijon mustard, a splash of red wine vinegar and 2 tablespoon maple syrup (or honey) into a blender. Blend together and gradually add in a 1/4 cup of olive oil until a silky consistency is achieved. Season with salt and pepper.
THE ASSEMBLY:
Spread leftover nuts in a small sheet tray, drizzle with olive oil, salt and one tbsp maple syrup.Put them in the still-hot oven just enough to get them slightly toasty. I tend to forget about them and burn the nuts to the ground, so leave this step until the last 5-10 mins before assembly.
Combine squash, radicchio in a big bowl, coat with dressing. Transfer to serving plate.
Sprinkle the toasted nuts, and the asian pear allover squash and radicchio.
Shave some parmesan or piave.
Drizzle with some more olive oil and lemon juice, and crack some more black pepper.
I thought this salad can use the brightness and the blossoming freshness of the Orofino orange wine: stunning colour, burst of tropical fruits and elegant floral notes. My mouth is watering as typed this.
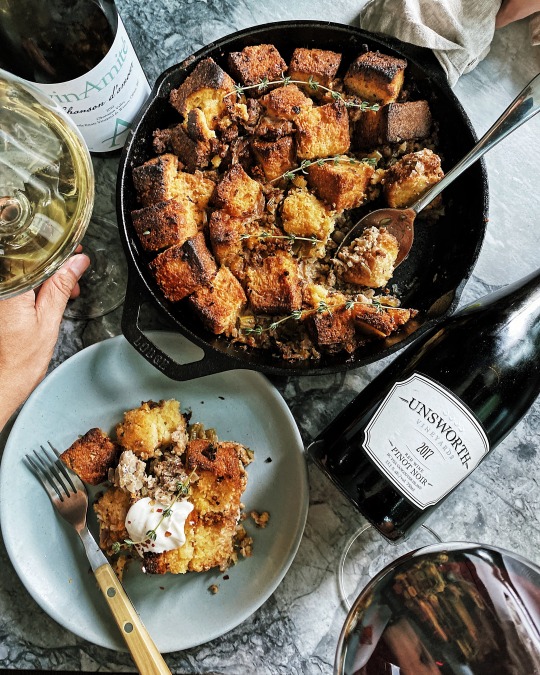
This SAUSAGE AND CORNBREAD STUFFING changed the stuffing game forever. Honestly, you’d never want to eat another crusty, white bread stuffing for any holidays ever again. It’s so very indulgent, buttery, and loaded with aromatics. Crispy up top, soft and moist -- yes, moist inside.
THE CORNBREAD:
I am obsessed with the cornbread from Boulevard Kitchen and Oyster Bar. And since this recipe relies quite heavily on the cornbread, trust me, you’d want to use the best cornbread you can find. In this case, I’ve found the winner. Cut up 1 1/2 lb cornbread to 3/4″ pieces and leave them in a 350F oven for 40 mins or so until they’re dry. Don’t worry we’ll the moisture back later. Transfer cornbread to a big mixing bowl.
THE STUFFING:
Cook and a lb or so of breakfast sausage in a skillet. Break them apart with a wooden spoon and let brown about 8 minutes. Transfer sausages to a plate.
In the same skillet, leaving the sausage brown bits, add 1/4 cup of butter and cook one diced onion and two stalks of cubed up celery until softened. Add three cloves of chopped garlic and one sliced japaleno, cook for another minute or so. Add 1/2 cup of dry white wine and another 1/4 cup of butter and let the liquid evaporate. Add thyme and chopped sage.
THE ASSEMBLY:
Combine cornbread and stuffing in the mixing bowl, add 2 eggs and 1 1/2 cups of chicken stock. Stir them occasionally until cornbread absorbs most of the liquid.
Lightly butter a cast iron pan, or baking dish and transfer mixture in.
Put the pan in the 350F oven for 40-ish minutes then turn up the heat to 425F for 15-20 mins until the outside is crisp and golden brown.
The VinAmité Chanson d’Amour is quite a delightful pairing for this dish. The chardonnay in the blend gives that soft minerality while keeping the palate fresh and peachy. Another great option is the Unsworth Pinot Noir: plum-y, dark cherry, a swift hint of earthy herbs - brings out the thyme aroma in the dish.
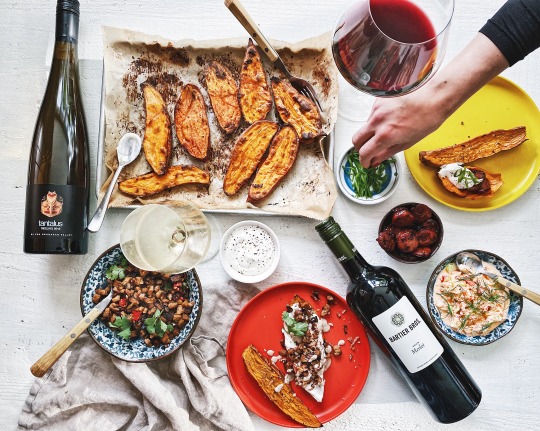
The last recipe is a simple, choose-your-own-adventure kind of recipe to replace the boring old sweet potato casserole. It’s a BYOB: Build Your Own Baked sweet potato bar!
THE SWEET POTATO:
Cut 4 medium-sized sweet potatoes into half and coat them in olive oil, salt and pepper. Put them cut side down on a sheet tray and into a 425F oven for 30 minutes or until they’re fork tender.
THE TOPPINGS:
The toppings, again, can honestly be anything you’re in the mood for buuut these are my three favourites:
Spicy chorizo cooked in vermouth and butter. It’s as simple as it sounds. In a skillet, heat a tablespoon or so olive oil and bloom chili flakes in it. Slice two links of spanish chorizo and toss into the chili oil. Add vermouth and butter and cook until sauce thickens.
Spicy soy garlic tempeh. Dice one slab of tempeh (I used tempea) into 1/2 cm cubes and season with salt and pepper. In a skillet, add one table spoon of oil and add 2 cloves of chopped garlic. Toss the tempe in, and add 1 tablespoon of soy sauce, and 1 tablespoon of kecap manis. If you like the heat, add 1-2 sliced up birdseye chili. Serve with cilantro and green onion.
Lobster salad. Cut 2 lobster claws into chunks, add the juice of half a lemon and season with salt and pepper. Add 2 tablespoon of kewpie mayo, one teaspoon of honey, and mix together. Add 2 stalks of thinly sliced celery and top it off with dill. Season with salt and pepper as needed.
THE SAUCE:
As simple as sour cream (or plain greek yoghurt), lemon juice, olive oil, grated garlic cloves, seasoned with salt and pepper.
The salad dressing leftover works well too!
THE ASSEMBLY:
Go wild ;)
The wines for this particular dish can be as playful as you want them to be buuuut I decided to go with something a bit more crisp, fruity and floral like the Tantalus Vineyard Riesling especially if you go on the lobster route. Another great option is the Bartier Bros Merlot, which, is a slightly nutty, savoury with a touch more of cherry and dark fruits.
Hosting a holiday dinner is a pretty big job and I admit, it can get really stressful but I hope these easy-ish recipes and the wine (I know the wines work) will help you guys through. A MASSIVE thank you to the team at Legends Haul for making my grocery shopping for this dinner SO. MUCH. EASIER.
And just another PSA that the holiday is the PERFECT time to support you local wineries and enjoy the delicious wines BC has to offer. And BC has A LOT to offer. So, explore, sip and savour your way throughout this Harvest month. Find more information about BC Harvest Month here.
#thanksgiving#cooking#homecooking#BCWine#Local wine#wineries#wine#British Columbia#BC#foodie#foodblog#bonappetitmag#radar#popular
10 notes
·
View notes
Text
Quarantine Cuisine: Soup Making 101
So here’s another installment that’s more technique than recipe (though don’t worry... there is a recipe at the end). Forgive me for going a little long with this one, but I feel like not enough people know how to look at their pantry contents and summon soup. So... here we go. Soup-making 101.
Here are the basic building blocks of soup:
Protein:
If you’re wanting soup that is an actual meal, you’ll need protein, and since it’s sort of the central component of your soup, it informs every decision trickling down. Cook time, flavor palate, additional ingredients. On and on and on... And the list of soup-worthy proteins is endless. In fact, it’s probably best to list what -doesn’t- make good soup. And generally, what doesn’t make good soup is anything that is best cooked on high heat for a short amount of time. So... lean steak, delicate fish... things of that sort. Here are your best choices in most categories...
Meat: anything tough like roasts, shoulders, shanks. And sausage... links or ground. And anything cured like bacon or ham. (watch your salt with those though). You basically want things that aren’t going to just boil away... things with some fat and connective tissue.
Chicken: Thighs. 100%. You can do breasts but it’s a pain because they dry out with long cooking. And they’re more expensive. Just do chicken thighs.
Seafood: shrimp or clams... tougher fish like swordfish. But unlike the proteins above, you don’t want to add them in until the very end.
Veg: any sort of bean or mushroom. Lentils... all that good stuff.
If you’re new to soup making, I recommend starting with something forgiving. Chicken thighs, bacon, ground beef or sausage, mushrooms, or chick peas... These things stand up to being souped and are pretty hard to overcook.
That said, your meat choice will arbitrate your cooking time. Meat with lots of connective tissue needs a longer cooking time, whereas chicken thighs will only take about 20-30 minutes to cook through. Keep that in mind moving forward.
Broth:
Your broth choice depends largely on your previous decision... but you can sort of think of it like wine. Red wine is like darker heavier broths like beef... save it for the red meat. Chicken broth is like a dry sturdy white wine... good for chicken obvs but also veggies. Fish broth is really only good if you’re making a fish dish. And veggie broth... I really only ever use it for keeping a dish vegetarian... it’s good but the flavor isn’t super strong. My go-to is chicken broth for most everything except heavy beef stew. And even then it would work in a pinch.
There are other liquids to consider as well. Wine... vinegars... acids... juice... coconut milk... but we don’t want to really settle those until we decide the following.
Fat: All soups need a little fat. It can come from your protein if you’re using meat... or you can go with oil or butter. Keep it fairly neutral.
Aromatics and spices: Herbs, spices, and things like onion, lemongrass, garlic, or ginger. This is where you decide your flavor palate. And don’t worry... it’s not complicated. I tend to choose my flavors based on geographical location. Here... watch.
French soup: onion/shallot, celery, carrots, tarragon, parsley, lemon, thyme, rosemary.
Italian soup: onion, celery, carrots, a shitload of garlic, oregano, basil (fresh or dried).
Thai: onion, ginger, garlic, chili paste, lemongrass, Thai basil
Indian: red onion, garlic, ginger, garam masala, curry powders, turmeric
Central American: lime, garlic, cilantro, onion, cumin
Or if you really want an advanced course in flavor matching, check out this book:
The Flavor Bible by Karen Page and Andrew Dornenburg.
You can search by ingredient and see what goes with it. Magic! It’s probably the most well used cook book on my shelf and it’s not even a cook book!
Veg: Again... go with things that are forgiving when it comes to cooking time: Mushrooms, carrots, celery, bell peppers, sturdy beans, frozen corn. But that being said, you can add things in stages. Simmer your meat and onions and carrots for awhile... add more sensitive things like potatoes in a little later. Then when everything is almost done, toss in your spinach or fresh peas and such like that to just cook through at the end.
Carbohydrate: Honestly... pick your poison. Potatoes, rice, barley, pasta... go nuts. Just pay attention to the cooking time and be careful not to overcook.
***
So, with those base ingredient categories in mind, we’re just going to think like we did with the scrappy pasta from last week. You want certain flavor roles filled: Salty, sweet, fat, acid, umami.
Salty: salt. Just... straight up. You don’t always have to have something filling in... but other things to think about that might help in that department are sausage, bacon, soy sauce, grated cheese. And bear in mind... if you’re using a lot of starch like with beans, pasta, or potatoes, keep tasting as you work along to make sure you use enough salt.
Sweet: Okay we’re not talking sugar... but think about things that have a sweet component to them. Carrots, sweet peas, sweet corn... it isn’t a must have but it helps keep a dish from falling too flat.
Fat: This can come from the meat you’re using or be added by you. Keep the smoke point high so things like plain olive oil (not Extra Virgin), bacon fat, or a little butter are best. Save your fancy stuff for something else. This is more utility than anything.
Acid: This will also help keep your soup from just being all one note. Tomatoes make a great acid. As does a splash of red wine vinegar or lemon juice right at the end of cooking.
Umami: Ah that witchy little concept... the X factor of every dish. It’s hard to explain exactly what umami is. It’s a complexity that usually comes from a combination of flavors... think about chocolate and pretzels, and the way those two ingredients bring out flavors that don’t exist when those two things are eaten on their own. Have a look at this list and you’ll know what you’re looking for... bacon, toasted sesame oil, olives, parmesan cheese, miso paste, balsamic vinegar. For savory dishes, it’s usually something aged, brined, or smoked. You get the picture.
Alright... all that out of the way. I’m going to make an example soup from just crap in my pantry. I’ll give substitutions as we go along as well. Another thing you can do is google soup recipes and use this guide to make substitutions. It’s like you’re one of those neural net learning computers! Only with better context clues.
***
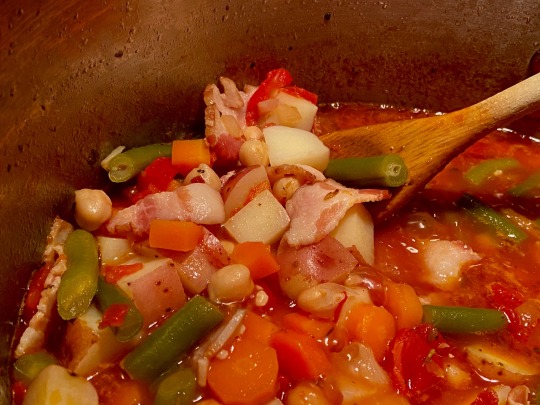
Pantry soup:
6 pieces of bacon, cut into one inch pieces (could also be literally any kind of fatty meat... sausage, ground critter. I wanted this to be a mostly veggie soup, so I’m going with this one)
one onion, chopped (could also be some shallots)
four carrots, cubed (could also use some celery here if you have it. I don’t.)
3-4 cloves of garlic
Some white wine... 1/2 cup-ish (for my acid and for liquid... you could totally just use more broth, but a note about cooking with alcohol... there are flavors that are soluble in alcohol but not in water. Use both broth and wine... you get the best of both worlds.)
Chicken broth (enough to liberally cover all the ingredients... this took about 48oz)
one Parmesan rind (or a little Parmesan cheese)
1 14oz can diced tomatoes, juice and all. (Pro tip... rinse the can out with about half a cup of water and dump that into the pot too so you get all the flavor.)
1 bay leaf
1 tsp Italian herbs
1/4 tsp red pepper flakes
salt and pepper
1 14oz can chick peas drained
one cup frozen green beans
3-4 potatoes cut small
spritz of lemon juice.
Things I don’t have but really wish I could add to this: Mushrooms, celery, bell peppers, and fresh spinach. Other possible adds could be frozen corn, frozen peas, sweet potatoes, kale, fresh grape tomatoes (halved), other beans like kidney, cannellini, or great northerns.
In a large, heavy bottomed pot or dutch oven, cook bacon until it starts to get some color and most of the fat is rendered. Scoop the bacon out with a slotted spoon. Add onion and carrots and saute until softened. Add garlic and cook for a minute more.
Add white wine and scrape up any bits stuck to the bottom of the pan and allow to cook down by half. Add the broth, bacon, tomatoes, Parmesan rind, and spices. Bring to a simmer and cook for about 20 minutes. Taste for salt here. I’d go easy up to now, what with the bacon and the parm. But with the potatoes and the chickpeas coming into the mix, you’re going to want to make sure the broth is well seasoned.
Scoop out the Parmesan rind. Add the chick peas, green beans, and potatoes and cook for an additional 30 minutes, or until potatoes and carrots are fork tender (it was closer to 40 minutes for me). Taste again for salt.
Spritz with lemon juice and serve.
27 notes
·
View notes
Text
♡ Vegan Eats - Restaurant Tips Part 1♡
Check out Part 2 here!
Following a vegan diet can sometimes be difficult when eating out at restaurants, but in most cases, there are ways one can mold the menu to make options for you to enjoy a meal away from home!
Here are some tips to help make eating at restaurants seem less like a hassle and more like a breeze:
1. If possible, try to do your research on the menu before arriving!
Since vegetarian and vegan diets continue to become more common, many restaurants are expanding their menus to provide more plant-based options. Whether in the form of salads or mock meat meals, even the most popular restaurants are beginning to cater to plant-based diets a bit more!
Here are some examples of both dine-in and fast food restaurants with vegan meal options on their menu:
☆ Bolay

One of my personal favorites! They sell bowls with vegetables and protein (kind of like Chipotle, which also has some vegan options) and are also gluten-free. Places like this are great because you get to choose what goes in your bowl, so you can potentially have more options to choose from for variety!
*Certified Vegan: Bases - Basmati Rice, Forbidden Black Rice, Kale Yeah Salad, Baby Spinach, Asian Sweet Potato Noodles | All Vegetable Options | Protein - Miso Glazed Tofu | Add-Ons - Freshly Chopped Cilantro, Avocado | Sauce - Creamy Garlic & Herb
➥ Elizabeth’s Pick: Bowl with Forbidden Black Rice, Power Beans, Miso Glazed Tofu and Creamy Garlic & Herb Sauce
☆ The Cheesecake Factory

Though I may not go to The Cheesecake Factory often, it is definitely a popular chain restaurant with many locations, so it is always important to know whether there are options available! Surprisingly enough, the restaurant provides multiple vegan options, with opportunity to adjust others to suit your diet.
*Certified Vegan: Most of their salads can be made vegan by removing the cheese, butter, or sauce/dressing. | Veggie Burger (Verify with waiter first as locations may vary -- ask for NO cheese/mayo and change bun to sourdough, wheat, Rustic Batard, or lettuce wrap) | Vinaigrettes - Lemon Blueberry, House, Lemon, Pomegranate, and Shallot
(They also provide the Impossible Burger with cheese, but the company, Impossible Foods, tests on animals, so I wouldn’t recommend that option.)
Part 1 | 2
[Images: Bolay, The Cheesecake Factory]
2 notes
·
View notes
Text
Cheap, low spoon cooking
My cooking tends to start with protein, and because of my food issues, that protein is generally meat, and if you argue with me about that, I’ll block you, because if you want to do a thread on low cost vegan cooking, go right ahead, you’ve got your own blog right there.
Holler if you want more specific instructions for any of these, and let me know whether you just need a basic recipe or “how to for a complete noob to the kitchen” or anything in between.
1. Chicken
Chicken is at the top of the list for cheap and easy, because it can often be had for less than $1.50 per pound, and because many preparations of it can be done with less than 5 minutes of work (oven time not included.)
Basic: get whole chicken. Preheat oven to 450. Pull out giblets. Sprinkle salt on skin. Roast at 450 for 1 hour. Enjoy crispy skin, tender meat. Same method (shorter cooking time, about 45 minutes) works for bone-in skin-on thighs. With the whole chicken, you can usually make one bird into several meals, by using the meat for one meal, and making soup out of the bones and whatnot for the next meal.
If you get skinless boneless thighs, they’ll usually be a little cheaper than skinless boneless breasts. Don’t roast them, cut them up, drench them in a marinade, and pan fry the pieces. Serve with pasta or rice and stir fried veggies.
2. Pork
Pork tends to range in price from $2.50 per pound up to $8 per pound. I’m usually getting pork shoulder for about $3 per pound. Shoulder and “country style ribs” are incredibly cheap and can be pressure cooked (instant pot) or slow cooked into pulled pork with seasonings, or you can get slightly fancier, make a marinade of coconut aminos and orange juice (or apple juice and apple cider vinegar, or rice wine vinegar, mirin, soy sauce, whatever, just make sure there’s some salt and some acid and some sweetness in the marinade to help tenderize the meat), and cut the shoulder roast into 3/4 inch thick steaks, cutting across the grain, then put in a bag or bowl with the marinade overnight. We add onions and garlic and shallots to the marinade because I can digestively tolerate them only if they’ve been soaking in acid of some sort for a while.
My favorite is to marinade in orange juice, coconut aminos, chilis, onion, garlic, etc. overnight, then pan fry the steaks, turning often, until golden brown. The resulting pork shoulder steaks get cut into strips and served a variety of ways--tacos, sandwiches, lettuce wraps, whatever. We usually use about 8 oz per person if there’s no fancy sandwich toppings, and 6 oz per person or less if making wraps or tacos. I have to have a little more energy for this method, and will often have someone else prep the aromatics.
3. Eggs
Even farm eggs, if you live anywhere near a rural area, can be had for less than 50 cents an egg, and regular conventional eggs have been $2 per dozen or less basically as long as I’ve been alive. Basic egg recipes can go from fridge to table in about 5 minutes. I usually get eggs from a friend whose neighbors have backyard chickens, for about $4 per dozen. A good nonstick egg pan + eggs is a fast way to get protein into you without spending all your energy doing it. Over easy, scrambled, omelet, or my kid’s favorite, egg in the hole... all cheap and incredibly fast.
4. Beef
Most beef is not cheap, and has been getting steadily more expensive for years. That said, if you understand how to cook various less fancy cuts, and shop at a local butcher, chances are you can get your meat for far less than a typical grocery store. I rarely go for things like ribeye or filet. We’re all about the round roast, chuck roast and flat iron here. Also like the shank. I rarely spend more than $7 per pound on beef, usually closer to $6. But again, we’re shopping at a local butcher who sources meat locally and does all breakdown themselves.
Tricks: Look for a whole flat iron and ask the butcher to cut it. The method I ask for is “Please cut it off the silverskin and then into 6 oz portions.” This eliminates most of the gristle layer, leaving incredibly tender meat with a ton of flavor. The flat iron is from the chuck, but is a specific muscle that doesn’t get used a lot, so it’s very tender.
Round roast, tip roast... these can be just salted and roasted very slowly (like, 200 F) if you have a meat thermometer with a probe that can stay in the meat, so that you roast it at very low temp until it comes up to about 110-120 degrees, then you take it out, turn the oven up to like 450, put a rub on the meat, and blast it at high heat until the probe is at 140. Then you let it rest for a while and come up a few more degrees, and what you get is a roast with a crust, as tender as the cut is likely to get while staying pink, which, cut thin, will be fantastic roast beef. If you don’t have a fancy thermometer, we usually start it high, then turn it down without opening the oven and let it go for an hour or so before checking with a cheap thermometer. But you can also cut into smaller pieces, marinade, and stir fry. You can ask the butcher to cut your roast into chunks for stir fry, if you aren’t up to the cutting.
Chuck, shank, and other tough cuts can be pressure cooked into super tender pot roast very quickly. Wine, mushrooms... We use cheap sulfite-free wine and whatever mushrooms are most affordable for this.
5. Lamb
Lamb can be pricey, but we get a boneless leg roast (grass fed) at Costco for about $6 per pound, which is one of the best prices out there for grass fed meat. We use the roast in one of two ways: We either roast it low and slow like beef, serving it rare, or we cube it and pressure cook it with savory liquids and then serve it with coconut milk and curry paste over rice. So good.
6. Duck
Our local Asian markets usually have whole duck for $3.50-ish per pound. It’s outrageously expensive literally anywhere else. Duck doesn’t cook like chicken, exactly... you must score the fat if you want it crispy, which means poking the fat without poking the meat. We roast at high temp, flipping as needed, to get a very crisp duck without drying out the breast. SAVE the drippings and use them in soup, or to cook eggs or potatoes in. Duck fat is like gold. So much flavor. 1 duck feeds 3 of us an indulgent amount of duck.
Cooking gadgets for reducing the amount of physical energy you need to cook things:
I never, ever use slow cookers because even used properly they seem to create less flavor than the pressure cooker methods. Pressure cookers are like slow cookers for procrastinators. Things that normally would take all day take an hour. Things that would take a couple of hours will take 30 minutes. The amount of money you can save in cooking beans alone vs. canned will pay for it. Pressure cooker is often the difference between me making homemade stock and throwing the carcass away. They’re also about as efficient at transferring heat into meat as any form of cooking you can get, so the energy savings are not irrelevant. Instant Pot is $70-ish at Costco right now, I’m just saying.
An oven is helpful, but if you don’t have a full sized oven or can’t bend that way, a toaster oven can do a LOT. If you can get one that is large enough to cook a chicken in, you don’t need a larger oven if you aren’t doing large scale cooking. If you have a child who wants to learn to cook, a cheap toaster oven costs about the same as an EZ bake, but is an actual real kitchen device which can do real cooking. Spend a little more and get one with air circulation and a little more interior space if you can afford the counter space and the money.
I know people like air fryers, I’ve not seen the point. Very few things an air fryer can do that a convection toaster oven can’t, and the form factor is better for the toaster oven for cooking a reasonable amount of tater tots. (priorities!)
Food processor: If you find chopping things a barrier, food processors can slice and grate very quickly, and rinse off nicely without a lot of elbow grease. I don’t usually bother, but I have minions who will do chop prep for me. If you don’t, even a small food processor will be less taxing on sore joints than most chopping. If you want to make pastry, a food processor is a must if you have energy issues.
Knives and a means to sharpen them: dull knives make cooking incredibly exhausting and tedious. Sharp knives make it all work so much better. The base price of the knife is less important than the condition you keep it in, as youtube will be happy to show you in a variety of mesmerizing videos.
Meat thermometer: Sort by reviews, ignore any where the reviews are suspicious. My strong preference is for digital quick-read ($10ish) OR probe-style leave-in. ($20-ish) You want this for food safety AND so that you can avoid overcooking roasts.
Cutting board: ideal is something with a groove (prevents juices from flooding the counter and contaminating everything) that runs around the edge. Cheap plastic boards can be convenient, I guess, but are harder to get reliably clean than wood, which tends to kill off germs. My favorites are bamboo. Not terribly spendy, super pretty, work very well.
The pans I use: 9x13 pyrex baking dish for most of our chicken stuff
dark enamel roaster (not huge unless you’re going to do turkeys) for beef roasts (very cheap)
large baking trays lined with silpats (both bought at costco, idek, they’re ideal for tater tots and such and don’t get problems with sticking and are easy to clean)
Nonstick PFOA-free egg pan, sautee pan and 11 inch griddle. I think I spent $22 at Target on three egg-type pans of different sizes? Not particularly spendy, but you do need to replace them every 5 years or so.
variety of saucepans and pots in stainless (I have cuisnart and Kirkland and they’re fine and last kind of forever barring disasters and sometimes even then. Can be bought second hand.)
We use a lot of pyrex stuff because it’s convenient for leftovers and mise en place. If you have someone helping with chop prep, little dishes full of prepped things make the cooking go so much easier. But you can do that in regular dishes too, we’re just fancy that way (and I stg the pyrex breeds in the cupboard.)
I’ll talk starches if people want.
13 notes
·
View notes
Text
33 Nourishing Anti-Inflammatory Soups
Warm, savory, creamy, or brothy—these soups will satisfy whatever hankering you have and fight inflammation while doing it.
Yes, these intensely flavorful soups all include anti-inflammatory ingredients like turmeric, ginger, cayenne pepper, apple cider vinegar, and cacao. Not only do these spices and flavorings make for some uber-delicious soup, but they also fight disease-causing inflammation while boosting your gut health.
Fortunately, food is the perfect medicine for managing excess inflammation. You’ll find soups on this list containing one or more of these ingredients:
Turmeric (1)
Ginger (2)
Cayenne pepper (3)
Apple cider vinegar (4)
Cacao (5)
So, whether you’re looking for a velvety carrot soup or a hearty, broth-based meatball soup, you can rest assured that these recipes will keep you fed, healthy, and happy.
Ginger, Carrot and Sweet Potato Soup
Sweet potatoes and carrots, when puréed, make for a creamy soup, while ginger gives this soup an anti-inflammatory boost.
Recipe: PaleoPlan | Ginger, Carrot and Sweet Potato Soup
Turmeric Chicken Soup with Zucchini Noodles
This chicken zoodle soup delivers a healthy dose of veggies while fighting inflammation, thanks to the anti-inflammatory turmeric.
Recipe: PaleoHacks | Turmeric Chicken Soup with Zucchini Noodles
Ginger, Turmeric and Carrot Soup with Fennel
You already know all the good ginger and turmeric do for inflammation, but this soup also packs intense flavors thanks to ingredients like fennel, leeks, and garlic.
Recipe: Simply Quinoa | Ginger, Turmeric and Carrot Soup with Fennel
Apple Pumpkin Soup with Turmeric
Sweet and spicy, dig into this apple pumpkin soup to fight inflammation and satisfy any craving.
Recipe: PaleoHacks | Apple Pumpkin Soup with Turmeric
Detox Turmeric Chicken Soup
Loaded with veggies like golden beets, celery, carrots, kale, and cauliflower, this turmeric-spiced chicken soup will fill you up, the healthy way.
Recipe: Unbound Wellness | Detox Turmeric Chicken Soup
Carrot-Ginger Soup with Anti-Inflammatory Turmeric
Pack a one-two anti-inflammatory punch thanks to the combination of ginger and turmeric in this recipe.
Recipe: PaleoHacks | Carrot-Ginger Soup with Anti-Inflammatory Turmeric
Anti-Inflammatory Coconut, Ginger, and Turmeric Soup
Coconut gives this dish a heavenly, creamy texture with a subtle sweetness.
Recipe: Mind Body Green | Anti-Inflammatory Coconut, Ginger, and Turmeric Soup
One-Pot Detox Vegetable Soup
Fill up on veggies in this detox-fueling soup, so colorful you can rest assured you’re eating the rainbow.
Recipe: PaleoHacks | One-Pot Detox Vegetable Soup
Cleansing Turmeric Vegetable Soup
Get your dose of veggies with this turmeric-spiced meal. Be sure to omit the optional white beans to keep this Paleo.
Recipe: Eat Well Enjoy Life | Cleansing Turmeric Vegetable Soup
Immune-Boosting Soup
This green-hued soup fights flus, colds, and inflammation with its blend of turmeric, ginger, and probiotics from coconut yogurt.
Recipe: PaleoHacks | Immune-Boosting Soup
Slow Cooker Golden Soup
With a name like golden soup, you know this turmeric-laced veggie soup is bound to be good.
Recipe: The Natural Nurturer | Slow Cooker Golden Soup
Bone Broth Turmeric Soup with 5-Ingredient Meatballs
Cozy up to this soothing hearty soup while also boosting your gut health with collagen-rich bone broth.
Recipe: PaleoHacks | Bone Broth Turmeric Soup with 5-Ingredient Meatballs
Anti-Inflammatory Thai Pumpkin Soup
Loaded with Thai flavors like coconut, lemongrass, and kaffir lime leaves, this ginger and turmeric-laced soup packs a ton of flavor.
Recipe: Ascension Kitchen | Anti-Inflammatory Thai Pumpkin Soup
Crockpot Chicken and Cauliflower Rice
A simple, comforting chicken and cauliflower rice soup is the easiest meal to throw together on a busy day—and the extra dose of turmeric certainly helps!
Recipe: PaleoHacks | Crockpot Chicken and Cauliflower Rice
Green Goddess Immune-Boosting Soup
This intensely green soup will ensure you get your daily dose of veggies. Opt for coconut milk to add creaminess without the dairy.
Recipe: The View from Great Island | Green Goddess Immune-Boosting Soup
Creamy Cauliflower Bacon Chowder
Rosemary and garlic add fragrant, deep flavors to this creamy chowder, which gets its health boost and vibrant yellow hue from turmeric.
Recipe: PaleoHacks | Creamy Cauliflower Bacon Chowder
Carrot Ginger Soup with Crispy Shallots and Coconut Cream
The crispy shallots add a savory, crispy texture to this creamy ginger-laced soup.
Recipe: Downshiftology | Carrot Ginger Soup with Crispy Shallots and Coconut Cream
Instant Pot Chicken and Ginger Noodle Soup
This ginger-packed “noodle” soup nixes grain or rice noodles for Paleo-friendly kelp noodles!
Recipe: So Let’s Hang Out | Instant Pot Chicken and Ginger Noodle Soup
Lemon Chicken Turmeric Ginger Soup
The name spells out all the flavor-packed, anti-inflammatory goodness in this soup: lemon, chicken, turmeric, and ginger.
Recipe: Hey Hey Mae | Lemon Chicken Turmeric Ginger Soup
Thai Curry Carrot Soup
With turmeric, cayenne pepper, and fresh ginger, the anti-inflammatory benefits of this bright soup are undeniable.
Recipe: The Roasted Root | Thai Curry Carrot Soup
Creamy Sweet Potato Ginger Soup
The holy trifecta of anti-inflammatory spices strike again in this sweet potato soup: ginger, turmeric, and cayenne pepper.
Recipe: Nutriholist | Creamy Sweet Potato Ginger Soup
Red Curry Carrot Ginger Soup
Whip up this Paleo and vegan veggie-packed soup loaded with warm flavors from fresh ginger, red curry paste, chili flakes, and garlic.
Recipe: Smart in the Kitchen | Red Curry Carrot Ginger Soup
Turmeric Ginger Kabocha Squash Soup
Topped with quickly-sautéed kale, this velvety kabocha squash soup boasts ground turmeric and fresh ginger.
Recipe: I Heart Umami | Turmeric Ginger Kabocha Squash Soup
Instant Pot Butternut Squash Apple Ginger Soup
Sweet and savory, this fall-inspired soup blends anti-inflammatory ginger with warming spices like cinnamon, cumin, and coriander.
Recipe: Yay for Food | Instant Pot Butternut Squash Apple Ginger Soup
Paleo Coconut Curry Butternut Squash Soup
Veggie-packed butternut squash makes for the perfect soup base when mixed with fresh spicy-sweet ginger.
Recipe: Fake Ginger | Paleo Coconut Curry Butternut Squash Soup
Summer Lime Ginger Detox Soup
We’re used to seeing ginger in warm, fall-inspired soups, but it works its anti-inflammatory magic just as well in summer recipes too. Skip the optional rice add-in to keep this soup Paleo.
Recipe: Going Cavewoman | Summer Lime Ginger Detox Soup
Carrot Ginger Soup with Chicken and Spinach
Silky turmeric and ginger-laced soup gets some heft with added chicken and spinach leaves.
Recipe: Tasting Page | Carrot Ginger Soup with Chicken and Spinach
Cayenne Kicks Your Ass Chicken Soup
As the title suggests, this cayenne-spiced soup will really warm you up, and fight inflammation to boot!
Recipe: Paleo Porn | Cayenne Kicks Your Ass Chicken Soup
Cold-Busting Chicken Soup
Fight inflammation with apple cider vinegar and cayenne in this cold-busting meal.
Recipe: Worthy Pause | Cold-Busting Chicken Soup
Spicy Carrot Soup
How do you make a bowl of creamy carrot soup even better for you? You kick it up a notch with some cayenne pepper.
Recipe: Primavera Kitchen | Spicy Carrot Soup
Roasted Butternut Squash Soup
Roasting the butternut squash delivers warm, caramelized flavors to this soup, while cayenne pepper and ginger add an anti-inflammatory boost. Skip the optional sour cream garnish, or opt for a tasty Paleo alternative like coconut cream.
Recipe: The Seasoned Mom | Roasted Butternut Squash Soup
Cleansing Detox Soup
Not only is this detox soup loaded with every colorful veggie under the sun, it also features anti-inflammatory spices like ginger, turmeric, and cayenne!
Recipe: The Glowing Fridge | Cleansing Detox Soup
Smoky Butternut Squash and Cacao Soup
Chocolate, in a soup? Trust us, this anti-inflammatory cacao and chocolate-flecked soup strikes all the right flavor notes. Skip the non-Paleo-friendly, optional garnishes in favor of silky coconut cream.
Recipe: Earthy Delights Blog | Smoky Butternut Squash and Cacao Soup
Get More Tasty Recipes: 27 Paleo Soups and Stews (Dairy-Free and Whole30 Friendly)
The post 33 Nourishing Anti-Inflammatory Soups appeared first on PaleoPlan.
Source: https://ift.tt/10qRbxJ
15 notes
·
View notes
Text
Best Roast Beef Sandwich [Must Try]
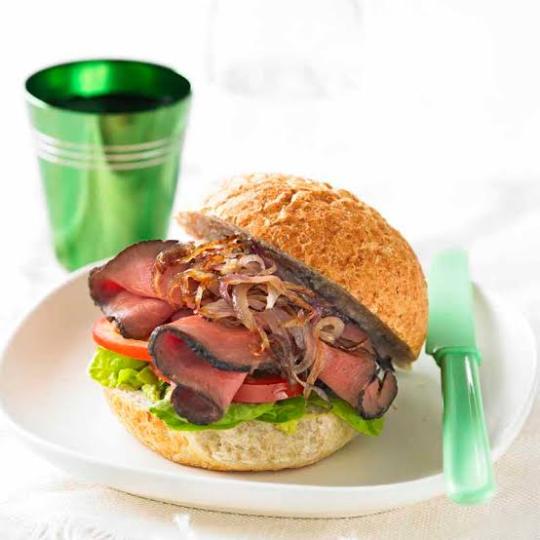
The Roast Beef Sandwich is a traditional American sandwich popularized by diners and fast-food restaurants such as Arby's.
This delicious homemade sandwich is made with slices of meaty roast beef, veggies, sauces, and melted cheese. It can be eaten hot or cold and can be customized with all of your favorite toppings.
Best Roast Beef Sandwich
WHAT CUT OF BEEF IS BEST FOR ROAST BEEF SANDWICHES?
The meat for your roast beef sandwich should ideally be lean but not chewy.
A top loin roast is possibly your best option, as it provides a lot of flavor without a lot of fat. Bottom loin or eye round steaks are less expensive options that taste just as good.
WHAT TYPE OF BREAD TO USE?
For this recipe, the first thing to decide on is bread. This alone can go in a variety of directions, and there are no bad options.
I would suggest using the following bread:
- Ciabatta
- French
- Sourdough
- Kaisar
- Croissant
- Artisan Rustic
Since you're looking in, I'll tell you that I used a Kaiser roll, and it's delicious.

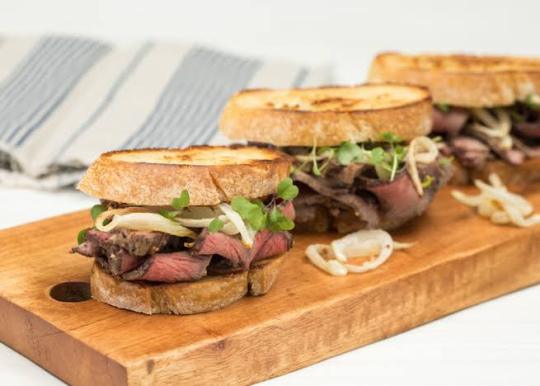
Roast Beef Sandwich
Suggested:
- Best Ceramic Honing Rod to Buy
- Best Salad Spinner Test
- Best Thermal Cookers to Buy
WHAT YOU NEED?
This recipe requires only a few ingredients but provides an elevated flavor for your everyday sandwich.
- Horseradish Cream Sauce- This quick three-ingredient sauce adds a flavorful punch as well as a nice creamy texture to the sandwich. For the ultimate roast beef accompaniment, combine mayonnaise, dijon mustard, and prepared horseradish.
- Ciabatta Bread– Ciabatta bread is ideal for this sandwich because it has a crusty exterior and a chewy interior that, when toasted, provides a good crunchy base.
- Arugula– Arugula's peppery bite adds much-needed freshness to the sandwich.
- Roast Beef– For this sandwich, I like to get thinly sliced roast beef from the deli counter so I can pile it high.
- Mild Cheddar Cheese– Mild cheddar cheese adds just the right amount of flavor to the sandwich without overpowering the other flavors. (My favorite sliced cheese is Tillamook.)
- Quick Pickled Onions– The recipe for my Quick Pickled Onions can be found here. They are the ideal acidic and crunchy complement to these sandwiches.
WHAT KIND OF CHEESE IS BEST FOR THIS RECIPE?
Simple Beef Chimiaassi
We usually use Provolone cheese because of its flavor and "melt-ability," but you have a lot of options here. Gouda, Asiago, Swiss, and Mozzarella are all excellent choices.
In general, melted white cheese is your best bet for an irresistible roast beef sandwich.
TOPPINGS
We've decided on the two main components, bread and beef, and now we need to figure out the toppings.
Close your eyes and concentrate solely on the meat. Now consider all of the amazing things beef pairs well with and what would make this epic!
Potatoes, horseradish, balsamic vinegar, onions, and cream are all things that come to mind.
The next step is to figure out how to get all of those things that are typically served as a sauce on top or as a vegetable on the side. Continue reading to find out what I did.
- I used a mandolin slicer to thinly slice a large russet potato and a sweet pcotato, then tossed them in olive oil, salt, and pepper before baking them on a sheet tray lined with parchment paper at 400° for 20 minutes, or until lightly browned and cooked. Potatoes go great with beef, and they'll be fantastic on this sandwich.
- Then, using the same mandolin, I thinly sliced two shallots and placed them on a sheet tray lined with parchment paper.
- I whisked together some balsamic vinegar, sugar, and olive oil in a bowl and brushed it on the shallots before baking them at 400° for 25 minutes. Beef with caramelized onions! You clearly need to see what's going on with this roast beef sandwich, or you'll miss it completely.
- This also allowed me to hit two birds with one stone when it came to the toppings. Remember how I said beef goes well with balsamic and onions? Well, I just combined the two.

Delicious Roast Beef Sandwich
WHAT ARE GOOD CONDIMENTS TO USE?
While there are a few more items on this list, I wanted to focus on the ingredients that require effort, such as this horseradish cream.
This is by far the best condiment to put on it because it is nothing short of delicious.
The sauce that goes on the roast beef sandwich is the last thing we'll look at. It has a lot going on, but it's so worth it:
- Mayonnaise
- The sour cream
- Cream cheese
- Horseradish, freshly grated (yes you can use prepared in a jar)
- Fresh basil chiffonade
- chives, chopped
- The parmesan cheese
- seasoned with salt and pepper
- Worcestershire sauce (Worcestershire sauce)
- Mustard
WHAT CHEESE GOES BEST?
While I didn't use sliced cheese, I did use parmesan cheese in the horseradish cream sauce, which goes well with roast beef. Other cheeses that go well with roast beef include:
- The blue cheese
- Cheddar
- Asiago
- Gouda
- Fontina
HOW TO MAKE IT?

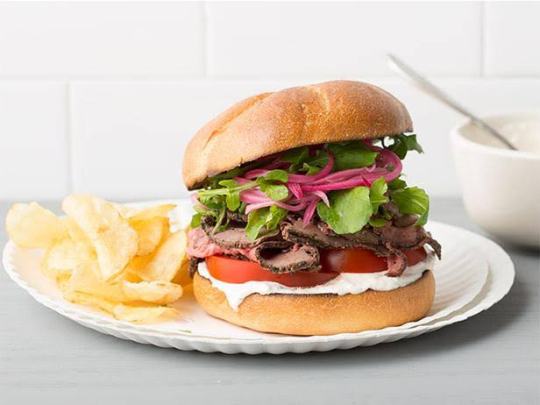
Roast Beef Sandwich
Making the best roast beef sandwich ever can be difficult because you want to add ingredients that are subtle in flavor and complement the roast beef, which is what we did with all of the toppings.
- Spread the horseradish cream on the bottom of the toasted kaiser bun.
- Sprinkle some arugula leaves on top of the horseradish cream.
- Fold over several slices of sliced meat and place them on top of the arugula.
- F thinly sliced radishes, kale microgreens (optional), and top bun.
This sandwich is my absolute favorite. It's flavorful, it's a show stopper, and it's always the hero when I serve it to family and friends.
WHAT GOES WITH BEEF SANDWICHES?
Add some flavor to your sandwich with these tasty side dishes! Roast beef sandwiches are delicious on their own, but any of these additions will take them to the next level.
We enjoy French fries or potato wedges with our roast beef sandwiches, which are simple to make at home.
Cole slaw, mashed or roasted potatoes, and steamed vegetables are all delicious accompaniments to your roast beef sandwich.
RECIPE CHEF NOTES + TIPS
- Storing and freezing: Refrigerate the toppings, bread, horseradish cream spread, and buns separately wrapped in plastic wrap for up to 1 week. The asiago sauce is fantastic on a variety of other sandwiches, including chicken, turkey, andwell.
- Outside of this sandwich, ham.
- I basted the shallots with the balsamic mixture every 6 to 7 minutes or so to help intensify the flavor and caramelize them.
Frequently Asked Questions
What comes on a classic roast beef sandwich?The roast beef sandwich is also commonly made up of bread, cold roast beef (either leftovers from a homemade dinner or deli meat), lettuce, tomatoes, and mustard, though cheese, horseradish, fresh/powdered chili pepper, and even red onion are not uncommon.What cut of beef is used for roast beef sandwiches?It's best to use a top loin roast. It has a strong brawny flavor and all of the fat is on the surface, which you can easily trim off after the meat has been cooked. The beef is roasted low and slow here to ensure tender, juicy meat. However, if you want a more cost-effective cut, use bottom, top, or eye round instead.What is a three way roast beef sandwich?Everyone knows that New England has the best roast beef sandwiches. The traditional version, known as the "three-way" in local parlance, stuffs a soft roll with thinly sliced roast beef and then smothers it with American cheese, James River barbecue sauce, and mayonnaise.What is the Arby's sauce made of?In a saucepan over medium heat, combine ketchup, water, corn syrup, molasses, Worcestershire sauce, hot sauce, steak sauce, garlic powder, onion powder, salt, black pepper, and nutmeg until smooth; bring to a boil and immediately remove from heat to cool completely.
Other recipes to try:
Classic Roast Beef Sandwich
Roast Beef Sandwiches
Christine's Roast Beef Sandwich
Read the full article
0 notes
Text

Ratatouille
Serving: 4
Ingredients
1 cup crushed tomatoes
1 Tablespoon extra virgin olive oil
1/4 teaspoon apple cider vinegar
1 teaspoon minced garlic
1 Tablespoon fresh basil, about 3-4 large leaves, sliced , plus more for garnish
1 teaspoon herbs de Provence spice mix
1/4 teaspoon salt
1/4 teaspoon black pepper
1/4 teaspoon chili powder
1 medium sweet or red onion,, sliced
1-2 large zucchini, (about 1 1/2 cups slices, sliced)
1 large Japanese eggplant, (about 3 cups slices, sliced)
3 large fresh tomatoes, (roma is best; about 3 cups slices, sliced)
Directions
Preheat oven to 350°F. Lightly grease a 6" x 9" baking dish and set aside. (see notes for baking in an 8" x 8" square pan)
In a medium mixing bowl, combine the crushed tomatoes, oil and vinegar. Stir in the garlic, basil, herbs de Provence, salt, pepper, and chili powder.
Pour the tomato mixture into the prepared baking dish and smooth it into an even layer on the bottom of the pan.
Stack the veggie slices in alternating patterns (e.g.: onion, zucchini, eggplant, tomato; repeat) and place them on their side in the pan, leaning against the edge of the pan. Repeat until you've formed a couple of rows of veggies, filled the pan, and used up all of the veggie slices.
Optionally, spray or brush the exposed tops of the veggies with oil to encourage browning in the oven. This is more for appearance, so feel free to skip this step if you want.
Bake for about an hour, until the tomato sauce at the bottom is bubbling and the veggies are tender.
Garnish with additional chopped fresh basil before serving (optional). Serve hot or cold.
Notes
If you'd like to bake this in an 8" x 8" square pan, you can. The bake time is about the same.
The vegetables, including the crushed tomatoes, take center stage in this dish and there is relatively little in the ingredient list to season them, so flavor is very important. Try to get the absolute best quality vegetables you can. It really is worth the splurge, and will take this dish from good to great.
If you can't get Japanese eggplant, you can use Italian eggplant (the fat, inky purple eggplant you commonly see in supermarkets). Try to cut it so that it is roughly the same size as the onions and tomatoes, even if that means cutting each slice into halves or quarters. That way, all of the vegetables will cook evenly.
If you must replace some of the vegetables, try to go with similarly summery vegetables with a high water content (again, for even cooking). Try things like a bell pepper or yellow squash instead of zucchini, shallots instead of onions, or - like I mentioned above - Italian eggplant in place of Japanese eggplant.
Some people have cautioned that Herbs de Provence contains a little bit of Lavender, so if you are especially sensitive to that flavor, replace the herbs de Provence with a heaping 1/4 teaspoon each: dried or fresh rosemary, oregano and thyme.
This may seem like a lot but is really enough for 2-3 people. If you're feeding a family or a crowd, double the recipe and bake it in a 9" x 12" pan.
Optionally, you can finish the dish by drizzling it with a little bit of good quality olive oil.
As written, this recipe is gluten free, vegetarian, vegan, paleo friendly, low carb and Whole30 compliant.
To make it heartier, you can add vegan or dairy cheese on top, and/or serve over quinoa, mashed sweet or white potatoes, rice, or your grain of choice.
Store leftovers in an airtight container in the refrigerator for up to 3 days.
Or, if you'd like to make this ahead for a future dinner, cool it completely and transfer it to an airtight container. It will keep in the freezer for up to three months. To prepare, bring to room temperature (just leave it in the fridge for a day or two) and then microwave until heated through.
(Source)
1 note
·
View note
Text
How to Heal IBS Naturally for Good
Can you heal IBS naturally? Well, Natural IBS healing IS possible…here’s what you need to know
IBS 101
IBS (irritable bowel syndrome) is a collection of unspecific signs and symptoms also known as a “disease of exclusion” when other gut problems that have a structural component (like IBD, GERD or diverticulitis) have been ruled out. I will discuss how you can heal IBS properly.
IBS Symptoms
Ideally, IBS symptoms must have been present at least 3 months before a diagnosis is given. The most common symptoms include reoccurring abdominal pain with two or more of the following:
Chronic diarrhea or loose, watery stools
Chronic Constipation
Interchanging constipation and loose stools (never consistent)
Improvement with defecation
Onset associated with a change in frequency or consistency of the form of stool.
Causes of IBS
There is no one single cause of IBS. Some potential triggers of the onset of IBS include:
Food poisoning
Gut infections (like parasites)
Antibiotic use
Low stomach acid
Heavy metal and toxin exposure
Suppressed immune system
SIBO (small intestinal bacterial overgrowth)
Leaky gut
Gut dysbiosis (unhealthy balance of gut bacteria)
Gluten and food intolerances
Regardless of what started your IBS symptoms, there is no doubt that it is UNCOMFORTABLE, and can keep many enchained to always needing to know where the nearest bathroom is (diarrhea), or praying every time they are on the toilet “please help me go #2!” (constipation).
What to do about it?!
There’s a wide variety of both pharmacological (drugs, like laxatives, stool softeners and steroids) and non-pharmacological (non drug, natural) treatments for IBS.
However, in BOTH clinical practice and the scientific literature, the non-drug treatments are not only safer and have LESS side effects, but they are also MORE effective in many cases.
Here is a 4-step natural healing protocol for IBS—both IBS-C (constipation) and IBS-D (diarrhea).
Heal IBS Naturally
Step 1: Identify Underlying Food Intolerances
Testing for sensitivity to gluten and dairy can be game changing if you are sensitive to these foods. In addition, other foods (particularly FODMAPS, like apples and high fructose fruits, Brussels sprouts and other cruciferous veggies) can trigger symptoms.
People with IBS are often but not always FODMAP intolerant. The Low-FODMAP diet is one of the most, if not the most, effective treatments according to research studies (1). This is an important step to heal IBS.
The top recommended ways to “test,” include either:
An elimination & customized diet (see Step 3) to test and experience how certain foods make you feel or don’t feel (first hand)
Cyrex Food Intolerance Testing
Array 3 (gluten and gluten derivatives, if you are currently eating gluten)
Array 4 (gluten cross contaminating foods)
Also, Array 10 (list of 100+ foods, like FODMAPs)
Step 2: Identify Additional Gut Dysfunction (if any)
In addition to assessing for food intolerances, testing and assessing for other gut conditions that may be behind your IBS is crucial. Work with a functional medicine practitioner or nutritionist to determine if any further testing is necessary to find out what may be driving your IBS condition, such as:
SIBO Breath Testing (SIBO)
Comprehensive Stool Testing (Parasites, Bacterial or Gut Infections)
Functional Blood Chemistry Analysis (Thyroid Testing, Iron Deficiency/Overload, Nutrient Deficiencies)
DUTCH Hormone Testing (HPA-Axis Dysregulation and cortisol imbalances)
Organic Acids Testing (gut imbalances)
Toxic Burden Testing (urine, hair, serum)
By assessing and addressing the “root” causes of health imbalances, you may find the real reason IBS is prevalent in the first place. This is a great start to heal IBS for good.
Step 3: Integrate a Real, Foods Diet
It sounds simple, but simplifying your nutrition can get you far.
After all, if you have a “dirty windshield” and keep getting more dirt on it, you won’t notice if it’s still dirty. BUT if you have a clean windshield, and then put more dirt on it, you certainly will notice. The same thing goes for our diet and when you try to heal IBS.
Real whole foods should comprise the base of a diet to heal IBS in order to give yourself the best possible chance to allow your IBS healing supplement protocol can also work for you (below).
In addition, I find that an anti-inflammatory Gut Reset dietary approach or AIP style (autoimmune protocol) diet can be tremendously impact early to heal IBS—especially during times of a “flare.”
Foods to Include
Sustainable Proteins (wild caught fish, pastured poultry, grass-fed beef, etc.)
Leafy Greens
Colorful Starchy Tubers (sweet potatoes, winter squashes, carrots, beets)
Fibrous Veggies
Healthy Fats (avocado, coconut, olives/olive oil, grass-fed butter, ghee, animal fats)
Clean Filtered Water & Herbal Teas
Foods to Avoid
Eggs (pastured egg yolks ok in moderation)
Nuts
Nightshade Veggies & Spices (peppers, tomatoes, chilis, chili powder, paprika, eggplant, white potatoes)
Grains
Dairy (except for fermented full fat kefir or yogurt)
Alcohol (no more than 2-4 glasses/week)
Instant Coffee (even Starbucks; opt for 1 cup organic black roast if you drink)
Sweeteners & Sugars
Additives
Next Level
Already “eat clean” or eat real food, but don’t feel any differently?
Some people find a short-term (30-90 days) “therapeutic” Low FODMAP diet. This helps them take their diet to the next level to heal IBS. Also, this allows inflammation to cool down. FODMAPS are ___ . They include dozens of foods with these sugars that trigger IBS symptoms in some.
No, NOT ALL FODMAPS have to be avoided.
A low-FODMAP diet can provide short-term relief and it can be used partially. For example, you can remove YOUR biggest triggers from the low-FODMAP diet. This includes broccoli, apples and onions but continue eating other FODMAPs that don’t necessarily trigger you.
Check out this complete list of FODMAPS
Low FODMAP Diet
Eat Freely: Low FODMAP Foods
Veggies
Bamboo shoots
Beet
Bok choy
Carrot
Cucumber (including pickles made without sugar)
Dandelion greens Eggplant Endive
Fermented vegetables (raw sauerkraut, or lacto- fermented vegetables)
Green beans
Kale
Lettuce
Olives
Parsnip
Sea vegetables
Spinach
Spring onion (green partonly)
Sprouts and microgreens (including alfalfa and sunflower)
Summer squash (zucchini, pattypan and yellow squash)
Swiss chard
Tomatoes (including cherry tomatoes)
Winter squash (acorn, butternut, pumpkin and spaghetti squash)
Fruits
Banana
Blueberries
Grapefruit
Kiwi
Lemon
Lime
Melons (including cantaloupe and honeydew)
Orange
Papaya
Mandarin
Passionfruit
Pineapple
Raspberries
Rhubarb
Strawberries
Proteins
Muscle meats
Organ meats
Homemade bone broth
Fish and Seafood
Poultry
Eggs
Bacon (made without sugar)
Fats
Avocado oil
Coconut oil
Cod liver oil
Ghee
Grass-fed butter
Lard from pastured animals
Olives and EVOO (extra virgin olive oil)
Macadamia oil
Homemade mayonnaise
Sprouted nuts and seeds minimal quantities
Starches
Cassava / Yuca
Plantain
Rutabaga
Taro
Turnip
White potato
Sweet potato
White rice
Best Avoided: High FODMAP Foods
Veggies
Asparagus (fructose)
Broccoli (fructans)
Cabbage (fructans)
Cauliflower (polyol)
Garlic (fructans)
Jerusalem artichoke (fructans)
Leeks (fructans)
Okra (fructans)
Artichoke (fructose)
Onion (fructans) Shallots (fructans)
Snow peas (fructans, polyols)
Sugar snap peas (fructose)
Raddichio (fructans)
Tomato sauces and tomato paste (fructose, fructans)
Avocado (polyol)
Brussels sprouts (fructans)
Celery (polyol)
Fennel bulb (fructans)
Green peas (fructans)
Mushrooms (polyol)
Fruits
Apple (fructose and polyol)
Apricot (polyol)
Cherries (fructose and polyol)
Mango (fructose)
Nectarine (polyol)
Peach (polyol)
Pear (fructose and polyol)
Persimmon (polyol) Plum (polyol)
Watermelon (fructose and polyol)
Proteins
Legumes (lentils, beans, and peanuts)
Soy (including edamame, tofu, tempeh, and soy milk)
Fats
Vegetable oils and high pro-inflammatory omega-6 fats (canola, sunflower, safflower, grape seed, soybean, cottonseed and peanut oils)
Processed mayonnaise and salad dressings
Pistachios (fructans)
Almonds
Hazelnuts
Most nut and seed butters (unless raw, sprouted nuts)
Starches
Wheat
Gluten
Gluten-cross contaminating grains (oats, quinoa, barley)
Dairy
Cheese
All commercial dairy products made from non- pastured, grain-fed cows, such as commercial yogurt, whey and pasteurized milk.
Additives & Seasonings
Sugar-, grain-, soy- or gluten-containing seasonings or condiments (ketchup, soy sauce, some tamari sauces, balsamic glaze, commercial mayonnaise and salad dressings)
Chicory (fructans)
Sugar alcohols (sorbitol, mannitol, xylitol, etc.)
Gums, carrageenan, soy lecithin
MSG and colorings
Agave syrup (fructose)
Artificial sweeteners (Splenda, aspartame, etc.)
High-fructose corn syrup (fructose)
Honey (fructose)
Refined sugars
Beverages
Beer (most contain gluten and/or mannitol)
Fruit juice Soda
Wine (ports, late harvest, ice wine)
Bonus: Low FODMAP Optimization
Consume organ meat. For example, liver from pastured animals one to two times weekly will help to replenish your vitamin B12, iron, and other nutrients IBS commonly depletes you of. This will help heal IBS.
Sip homemade bone broth between meals or with meals
Slow cook, stew, braise and poach meats for best digestion at low cooking temperatures. You can take this step to heal IBS effectively.
Vegetables should be well-cooked with any seeds removed to improve digestibility; minimize
intake of raw, fibrous fruits and vegetables.
WHAT IF LOW FODMAP DOESN’T WORK?!: THE GAPS DIET
Beyond an anti-inflammatory (real foods) diet, and the Low FODMAP approach, one more short term dietary approach the works for some is the GAPS Diet—specifically a diet developed to heal gut dysfunction and bacterial imbalance.
It’s a subset of the real foods, anti-inflammatory diet with the main distinction of forbidding starchy plants. This means avoiding or significantly restricting potatoes, sweet potatoes, plantains, yuca, taro, and all grains, such as white rice, oats and quinoa.
GAPS DIET BASICS
The GAPS diet is similar to the customized anti-inflammatory diet, with the following distinctions:
• It eliminates all starch sources (e.g., sweet potatoes, potatoes, plantains, etc.).
• It emphasizes the use of fermented foods and bone broths to restore healthy gut
microbiota and gut barrier integrity
• It allows dairy that contains little or no lactose, like grass-fed butter, ghee, homemade
kefir and yogurt, hard cheeses, and fermented cream. Milk, soft cheeses, and unfermented
cream are NOT allowed.
• GAPS begins with an “introductory phase” that allows only meat, fish, bone broth, ginger tea, and small amounts of fermented foods and progresses through several stages, concluding with the “full GAPS diet,” which is much less restrictive.
You can find out all the details at the website.
Step 4: Lifestyle Gamechangers
Once a baseline of “real foods” is established, a few lifestyle game changers can make a difference in how you feel.
Sleep Enough. Get 7-9 hours of sleep (shortened sleep shortens the elimination process)
Drink Half Your Bodyweight in Ounces of Water. Essential for healthy bowels
Stress Management. Stress is the #1 driver of all disease—IBS included. In addition, stress is NOT just mental either, it involves physiological and sociological stress too, such as circadian rhythm dysfunction. For example, staring at screens all day, shift work, eating late or working out late at night, nature and fresh air deprivation, lack of social connection, working long hours without breaks. Eliminate one habit stressing your body out and integrate a balance of work and play to heal IBS.
Increase Soluble Fiber (prebiotics). These foods help you go #2 and form healthy bulk in stools (i.e. partially hydrolyzed guar gum (PHGG) supplements, and prebiotic foods, like cooked and cooled sweet potatoes/potatoes, carrots, and squashes, green tipped bananas and plantains, and cooked and cooled white rice).
Step 5: Supplement Smart
Last but not least, some supplemental supports can help your body rewire healthy bowel function. Keep in mind though, you CANNOT supplement your way out of a stressful lifestyle or unhealthy diet.
IBS-C (Constipation) Natural Supplement Protocol
Antimicrobial Herbal Supplements. Kill off bad gut bacteria. (Recommendation: Dysbiocide + FC Cidal)
Bitter Herbs: Take under tongue to stimulate bile (waste) production. (Recommendation: Iberogast)
GI Revive (Designs for Health). A blend or herbals to support elimination.
Magnesium
Magnesium Glycinate (200-600 mg/day) *don’t use high doses over long term
Also, Magnesium Citrate (like Natural Calm, 1-2 tsp. before bed)
Ox Bile. Liver Support to encourage detoxification and proper waste production (Recommendation: Beta Plus).
Peppermint. Natural stimulant and soother for constipation. (Recommendation: IB Gard)
Soil Based Probiotics, Promote healthy gut bacteria in the microbiome. (Recommendation: Primal Probiotics)
Prebiotics. Help form healthy stools and support healthy gut bacteria. (Recommendation: Sunfiber)
Prokinetic: Helps move bowels through. (Recommendation: MotilPro)
Vitamin-Electrolyte Blends Vitamin C stimulates digestion and elimination. (Recommendation: Ageless Hydro-C)
IBS-D (Diarrhea) Natural Supplement Protocol
Antimicrobial Herbal Supplements. Kill off bad gut bacteria. (Recommendation: Dysbiocide + FC Cidal)
Bitter Herbs. Calm stomach aggravation or abdominal upset. (Recommendation: Iberogast)
Butyrate Supplement* (sodium/potassium form + pre-biotic powder in water, like this one)
Peppermint. Natural stimulant and soother for constipation. (Recommendation: IB Gard)
Soil Based Probiotics, Promote healthy gut bacteria in the microbiome. (Recommendation: Primal Probiotics)
Prebiotics. Help form healthy stools and support healthy gut bacteria. (Recommendation: Sunfiber)
Saccharomyces boulardii (Recommendation: Floramyces)
BONUS
For bloating symptoms: Atrantil (2 capsules with meals, diminishes bloating as well)
Resources
1. Hill, P., Muir, J. G., & Gibson, P. R. (2017). Controversies and Recent Developments of the Low-FODMAP Diet. Gastroenterology & Hepatology, 13(1), 36–45.
The post How to Heal IBS Naturally for Good appeared first on Meet Dr. Lauryn.
Source/Repost=>
https://drlauryn.com/gut-health/how-to-heal-ibs-naturally-for-good/ ** Dr. Lauryn Lax __Nutrition. Therapy. Functional Medicine ** https://drlauryn.com/
1 note
·
View note
Text
Vita Benedetta’s Guide to Madison
MadTown. A city characterized by badger red, brats, burgers, and beer (at least that is what I used to think). Moving away from college made me realize just how much I love this city and inspired me to explore. Through downtown areas, Willy Street, and adjacent small towns I discovered an entirely new meaning to Madison. This is my guide to Madison to show you all of the grub goodness and hideaways in unfamiliar places.
The Guide
$: least expensive
$$$: most expensive
Grub Goodness
The reality today is that social settings revolve around food. Want to grab a coffee? Want to meet for drinks after work? This is practically inevitable. It is important not to settle for boring, overly pasteurized crap that will make you feel like a** in the morning. I mean really, who wants to feel gassy, post cheeseburger when on a first date? Not I. There are so many places in Madison deciding to serve up food that will make you feel bomb. This does not mean you will be eating lettuce and drinking water for a meal. Trust me. Oh and the aesthetics are totally worth the visit.
Gotham Bagels $
Bae-goals let me tell you. Gotham bagels is located directly off the square downtown Madison and is serving up some banging bagels. The line is always out the door on weekends. You can put about anything in the galaxy on your bagel and customize it just how you like it. The atmosphere is very downtown Boston like. The owner adds a little spunk to the joint since he graduated with his PhD and decided he would rather just run a bagel joint. RAD.
My go-to: YELLOW C.A.B.
Cheddar, Bacon, Avocado, Lettuce, Tomato, Mayo Add Egg & Vegetable Cream Cheese On Egg Bagel
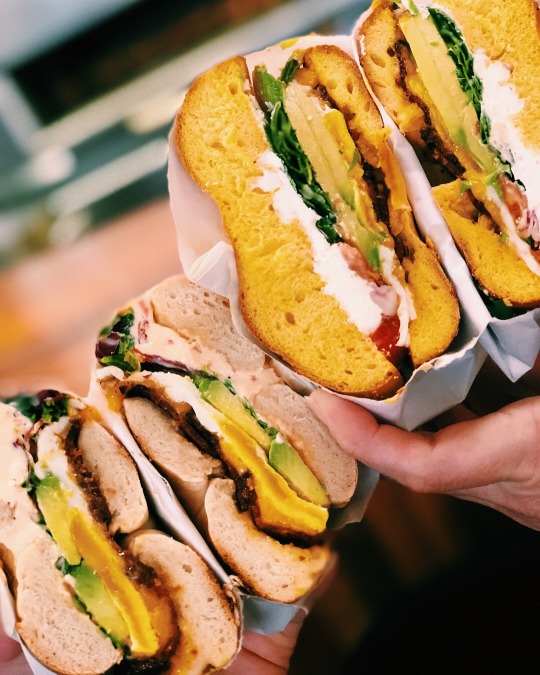
Bowl of Heaven $$$
Bowl of Heaven is about as close to California as Madison can get. This quaint bar creates the most awe-worthy bowls and smoothies. The bowls are a bit pricy, but worth a try. It’s the only place in Madison where I have found a yummy açaí bowl. All of the ingredients are real and will make you feel good about your choice.
My go-to: PEANUT BUTTER BOWL
Organic Açaí, Bananas, Strawberries, Peanut Butter, Chocolate Almond Milk Topped with Organic Hemp Flax Seeds, Granola, Fresh Banana, and Honey
Novanta Pizza $
Because you cannot forget about the ZAA. This stone fired pizza is something to brag about, with all ingredients sourced from Italy. You can build your own pizza, grab a wine and sit outside on the patio (during Madison’s 3 months of warmth). You will never see much of a wait at Novanta, which makes it great for grab and go because Novanta means 90 in Italian. All of their pizzas are ready in 90 seconds. The pizzas are personally sized so you won’t feel sluggish from overeating.
My go-to: PESTO
Mozzarella, Pesto, Cherry Tomatoes, Pecorino Romano

Marigold Kitchen $$
What is better than a boozy brunch after a walk around the farmers market? Be prepared for about an hour wait. Mimosas, pancakes, breakfast sammies, oh my! Marigold Kitchen won “Best Breakfast” in Madison and your taste buds will tell you why. Even better, the customer service is phenomenal. I could not pick a favorite, so here are my best picks.
CITRUS RICOTTA BUCKWHEAT PANCAKES
Orange Almond Butter, Fresh Strawberries, Whipped Butter
MARIGOLD BREAKFAST SANDWICH
Fried Egg, Cheddar Spiked Boursin, Bacon, Tomato, Green Onion, Toasted Ciabatta

Miko Poke $
This spot is goals-AF. For someone who loves sushi as much as me, this place is a win. With the perfect location on Monroe Street you will leave wanting to come back. I am salivating just thinking about it. Poke is comprised of raw fish (tuna, salmon, scallops) on top of baby greens, topped with veggies, and all the good sauces! These bowls are truly Instagram worthy.
My go-to: HAWAII STYLE
Smashed Avocado, Cucumbers, Edamame, Poke Sauce, Spicy Aioli, Scallions, White Black Sesame Seeds

Bloom Bake Shop $$
You are what you eat, so be sweet. This cute little bakeshop is tucked away on Monroe Street. The focus is all about good food. All grub is made from locally sourced and organic ingredients. The price tag reflects this, but you are doing something good by sending dollars back into the community. Grab a coffee, some brunch, and hella baked goods and be sweet.
My go-to: WISCONSIN SANDWICH
Classic Bacon, Egg, Cheese, Stoneground Mustard, Flakey Buttermilk Biscuit
SWEET POTATO DONUT
CINNAMON ROLL
VANILLA CHAI TEA LATTE
Ancora Coffee Roasters $$$
If you are looking for some coffee to keep you awake on these food adventures, look no further. Ancora has bomb lattes and even better outdoor seating. Their mission is to serve the best beans in the world. So you can drink that amazing cup knowing you can be proud of everything that went into it.
My go-to: ICED HONEY ALMOND ZOMBIE
White Espresso, Almond, Honey, Almond Milk

Gloria’s Mexican $
Wasted away again in Margaritaville (literally). You cannot go wrong with any of Gloria’s margs! The restaurant is hella authentic; the only thing missing is sand underneath your toes. During happy hour, margs are only $2! DANGER. Just make sure you have an Uber ride home. My absolute favorite is their house margarita. ¡Olé!

Saints Juice Co. $$$
Pressed juice in Madison is hard to come by. Actually, it was impossible before Saints Juice Co. opened this year. In my favorite neighborhood of Williamson Street, you can now grab a fresh pressed juice or mylk to go! The owners are always behind the counter and are extremely passionate about what they do. Feel free to ask questions about ingredients and the process, or just pick the prettiest color drink and go at it.
My go-to: PROPHE-SEE
Carrot, Apple, Lemon, Ginger
Tastes like a Capri Sun
Also tastes like you will never get sick again

Bassett Street Brunch Club $$
Avocado toast will always text you back. Bassett Street Brunch Club is a Madison Favorite. Make sure to make a reservation!! They are known for their wild donut flavors and their famous boozy brunch. Because brunch without booze is just a sad, late breakfast. Go check them out on Instagram to see what all the hype is about.
My go-to: TOASTEST WITH THE MOSTEST
Thick Cut 8 Grain Toast, Avocado Mash, Corn, Black Bean Salsa, Queso Fresco, Pickled Red Onion, and Cilantro
Café Hollander $$
Because who doesn’t want to feel like they are drinking a bloody marry on the rooftop of a Chicago bar. VIBES. This is the #1 restaurant atmosphere in Madison, hands down. You will never want to leave and your phone battery will die from all the pictures taken. The bloody mary and mimosa selection is remarkable. It is a perfect stop for a late brunch after walking through the Hilldale farmers market. Don’t leave without ordering frites with your choice of dipping sides—basil aioli, siracha mayonnaise, Korean BBQ!!
My go-to: AMERICANA
Two Eggs, Hollander Potatoes, Multigrain Toast, Breakfast Sausage Links
BERRY BLAST MIMOSA
New Amsterdam Berry Vodka, Champagne, Pineapple Juice

Everly $$
Brussel sprouts are misunderstood—probably because people do not know how to cook them properly. Everly takes brussels to a whole new meaning. MUST TRY. This natural lit space is easily the cutest craft cocktail bar in Madison. You will feel 10x richer, classier, and straight out of New York. You might even catch your pinky in the air while sipping on a fantabulous spritzer.
My go-to: ROASTED BRUSSEL SPROUTS
Gribiche/Shallots/Lemon
HOUSE BURGER
Sharp Cheddar, Pickles, Red Onions, Butter Lettuce, Garlic Aioli

Canteen $$
Destination→Mexico. A vibrant, fast paced Mexican kitchen & bar, serving up some famous margaritas that will make you want to shake your booty. I can only vouch for the margs since I have not stayed to try the grub. It is in a great location off the square to grab a few after class or work.

Pho Nam Noodle House $
Serving up authentic Vietnamese that will make your taste buds go crazy! It does not look like much from the outside of the building, but the food is something to talk about. The prices are unbeatable.
My go-to: EGG NOODLE AND WONTON SOUP WITH BBQ PORK

Finale
I hope my guide to Madison provides you with some inspiration to get out and explore the city. The summer is the best time to do so since just about everything is in walking or biking distance. Madison has Red Bikes placed around the city that you can rent for $6 dollars/day. Get out of your comfort zone and do something extraordinary. Try something new. Eat some grub that won’t make your body want to cry the next day. I promise, you won’t regret it.
If you make it out to any of these places make sure to tag #vitabenedetta and let me know how your experience went! Hopefully your experiences will be filled with good grub, aesthetic vibes, and hella Instagram photos.
Until next time, Madison. Where are some of your favorite spots in Madison? Comment below.
10 notes
·
View notes
Link
My Garlic Chicken Salad with Garlic Mayonaise.❤. View top rated Garlic mayonnaise chicken salad recipes with ratings and reviews. Use any neutral flavoured oil for this recipe, such as sunflower oil, canola oil or rice bran oil. Roasted Garlic Aioli: Roast the garlic before you mince it and add it to the aioli to also a create a softer, sweeter, more gentle flavor.

This Mediterranean salad recipe will blow your taste buds away! It's made over a bed of romaine lettuce, extra juicy and flavorful chicken breast, creamy Cesar salad dressing and ALL the veggies your heart desires! Submerge chicken in a strong garlic-olive oil infusion, then coat with Parmesan and bread crumbs for a quick and sublime baked chicken.
Hello everybody, hope you're having an amazing day today. Today, I will show you a way to make a distinctive dish, my garlic chicken salad with garlic mayonaise.❤. One of my favorites food recipes. This time, I am going to make it a bit unique. This will be really delicious.
View top rated Garlic mayonnaise chicken salad recipes with ratings and reviews. Use any neutral flavoured oil for this recipe, such as sunflower oil, canola oil or rice bran oil. Roasted Garlic Aioli: Roast the garlic before you mince it and add it to the aioli to also a create a softer, sweeter, more gentle flavor.
My Garlic Chicken Salad with Garlic Mayonaise.❤ is one of the most favored of recent trending foods in the world. It is appreciated by millions daily. It is easy, it's quick, it tastes yummy. They're fine and they look wonderful. My Garlic Chicken Salad with Garlic Mayonaise.❤ is something which I have loved my whole life.
To begin with this particular recipe, we must first prepare a few ingredients. You can cook my garlic chicken salad with garlic mayonaise.❤ using 14 ingredients and 2 steps. Here is how you can achieve that.
The ingredients needed to make My Garlic Chicken Salad with Garlic Mayonaise.❤:
{Get 1 of small chicken breast diced.
{Prepare 1 tbls of olive oil.
{Get 2 of small garlic cloves crushed.
{Get 1/2 of of a small shallot diced.
{Get of salad.
{Take 6 of mixed coloured baby tomatoes.
{Make ready 1/2 of of an Avocado.
{Get Handful of mixed lettuce.
{Make ready 8 slices of Cucumber halved.
{Get 100 g of Goats cheese cut into cubes.
{Prepare A few of olive mix.
{Prepare 1 of little Beetroot diced in squares.
{Take 1 of little sweet bell pepper diced.
{Make ready of Garlic Mayonaise for the dressing.
Try these different twists on a classic flavor combination. Baked Chicken with Onions, Potatoes, Garlic, and Thyme. In this one-pan, one-step dinner, lemon and aromatics infuse the chicken and potatoes. The famous Deli Chicken is from Real Meals.
Instructions to make My Garlic Chicken Salad with Garlic Mayonaise.❤:
In the oil fry the onions for 1 minute add the garlic fry for 30 secounds then add the Chicken cubes and fry until cooked.
Meanwhile get your salad ready. Arrange on the plate then add the cooked chicken. Then add Salt n pepper also some garlic mayo on top..
The amazing failsafe garlic mayonnaise is from Failsafe foodie and works perfectly with the eggs, using Crack an egg and pour it over the top of the chicken and choko. Garlic-Butter Baked Chicken Breasts with CheeseYummly. Crispy garlicky crust, juicy insides and a terrific buttery garlic sauce. Spread the mushrooms, garlic and thyme in the casserole or tin and place the chicken pieces on top, this time skin side up. Garlic Herb Chicken Salad - this healthy chicken salad is CREAMY and CLEAN with no mayo! like a cross between herby bruschetta and chicken salad.
So that is going to wrap this up for this special food my garlic chicken salad with garlic mayonaise.❤ recipe. Thanks so much for reading. I am confident that you can make this at home. There is gonna be more interesting food at home recipes coming up. Don't forget to save this page in your browser, and share it to your family, colleague and friends. Thank you for reading. Go on get cooking!
0 notes
Text
Veggie-stuffed zucchini boats
Last summer and fall I struggled with my zucchini plants, and if you’ve been a regular reader of the blog, you may remember that my first *perfect* zucchini was followed by months of disappointment in which none of my zucchinis grew to maturity. This year started out much better, with my zucchini plants growing happily in their raised bed home and producing an abundance of vegetables. Finally, I seem to be getting that bumper crop that I have heard so many other food growers talk about! This means that in addition to the piles of fried zucchini squash blossoms I ate last year, this year I’m able to enjoy meals made with the actual zucchini from my garden.
Growing zucchini can be a challenge because of squash vine borers, plants that only produce male OR female stems (you need both), or a lack of pollinators to help your vegetables grow and develop to maturity. Squash vine borers can be eliminated by affixing yellow sticky fly paper traps near your plants to attract them, or the surgical method: slicing your plant stem near the base and manually extracting the grubs. If you see signs of borer damage, you can also inject the stems of your plant with a solution of Bacillus Thuringiensis, or Bt (an organic pesticide), to kill these pests. Lack of adequate pollination is a major reason for fruit rotting or falling off the vine before maturity, so it’s very important that you plant flowers to attract bees to your garden, or hand pollinate your female flowers with pollen from your male flowers (the male flowers sit atop tall skinny stalks, while the female flower stems look like baby zucchinis).
Despite the challenges that are sometimes involved with successfully growing zucchini, it is one of the most popular vegetables to grow. It also grows well in pots. In a raised bed or in the ground, a single healthy zucchini plant can produce 6 to 10 pounds of zucchini, making it a prolific crop for those who have success with it.
Zucchini, also known as summer squash or courgette, is one of my favorite vegetables. It’s fairly mild-tasting, which means that you can easily add a lot of flavor to it without overwhelming the natural taste of the vegetable. Picking it while it is small (under 8 inches), especially if the flower is still attached to it, will ensure that it’s sweet tasting. While some farmers post impressive pictures of their massive zucchinis (they can grow up to 40 inches!), letting the fruit grow very large before picking will produce a vegetable that is much more fibrous.
This recipe is one of my favorite garden harvest recipes, and it’s pretty easy to make. You can make it vegan by eliminating the cheese on top.
Prep time: 15 minutes
Tools and/or vessels needed: frying pan, baking pan, (opt) melon baller
Ingredients
4 green zucchinis (courgettes), halved lengthwise
2 shallots, minced
3 cloves of garlic, crushed and chopped finely
1 tbsp fresh oregano (or 1 tsp dried oregano)
2 tsp smoked paprika
Salt and pepper to taste
1 red pepper, finely diced
2 carrots, finely diced
1 large tomato, finely diced
1 cup parmesan cheese (mozzarella, provolone, or Iberico will also work)
1 tbsp olive oil for frying
Directions
1. Heat oven to 350 degrees
2. Use a teaspoon or melon baller to carefully scoop out the insides of the zucchini, leaving about 1/8 inch of flesh (any less and you’ll tear a hole in the zucchini). Chop finely
3. Place empty zucchini halves in an oiled baking dish. Alternatively, you can line the dish with foil and brush foil with olive oil to make cleanup easier.
4. Heat ½ tbsp oil in pan, then sauté shallots for 1 minute. Add garlic, paprika, oregano, salt and pepper and sauté for 1 minute more, then add zucchini insides. Cook until zucchini is soft and mashable. Remove from pan, place into a mixing bowl, and mash lightly with a fork or potato masher
5. Add ½ tbsp oil to pan and fry diced pepper, tomato, and carrots for 5 minutes. Add to zucchini mash and mix well. (Alternatively, you can make 2 separate batches as in the picture: one with zucchini and carrots that have been sauteed together, one with zucchini, carrots, peppers, and tomatos. Just be sure to spice each batch equally, using 2x the amount of spices noted above.)
6. Scoop cooked vegetable mixture into the 8 zucchini halves, distributing evenly
7. Top with cheese (optional - for vegan recipe, skip the cheese)
8. Bake for 20-25 minutes. To create a crust on the cheese, move top oven rack to the highest shelf and broil on LOW for 2-3 minutes.
9. Remove from oven and enjoy!
0 notes
Last Seen Blogs

toki-nanase
Love Live renders

ve-luciana-blog
Veronica Luciana Amzah

beachkini-microbikinis-blog
beachkini.com microbikinis

marimariposaposa
angel

itinabe
we’re back to gay wrath y’all