#Linux System and Network Software
Explore tagged Tumblr posts
Visit Tumblr Blog
Explore Tumblr blogs with no restrictions, modern design and the best experience.
Last Seen Tumblr Blogs


Fun Fact
28.6 is the average number of monthly visits per US mobile user.
Text
Linux System and Network Software Development
The Linux System and Network Software Development course at Emblogic offers a robust training experience for individuals seeking to master Linux programming and network software development. Designed for engineering students, developers, and IT professionals, the course covers essentials like Linux system architecture, file and memory management, process control, and device driver programming.

Participants also delve into network programming, learning socket programming, TCP/IP protocols, and server-client architecture. Emblogic emphasizes hands-on projects, including client-server applications, device driver implementation, and automated system tasks, preparing students for roles like System Programmer, Network Engineer, and Embedded Systems Developer.
With guidance from industry experts and real-world lab work, Emblogic’s course bridges theory and practical application, offering a pathway to high-demand tech careers.
For more details, visit https://www.emblogic.com/372/linux-system-network-software-development #Linux System and Network Software, #build career in system programming, #career-oriented training for b tech Delhi, #build career as system software engineer.
#Linux System and Network Software#build career in system programming#career-oriented training for b tech Delhi#build career as system software engineer
0 notes
Text
me when companies try to force you to use their proprietary software

anyway
Layperson resources:
firefox is an open source browser by Mozilla that makes privacy and software independence much easier. it is very easy to transfer all your chrome data to Firefox
ublock origin is The highest quality adblock atm. it is a free browser extension, and though last i checked it is available on Chrome google is trying very hard to crack down on its use
Thunderbird mail is an open source email client also by mozilla and shares many of the same advantages as firefox (it has some other cool features as well)
libreOffice is an open source office suite similar to microsoft office or Google Suite, simple enough
Risky:
VPNs (virtual private networks) essentially do a number of things, but most commonly they are used to prevent people from tracking your IP address. i would suggest doing more research. i use proton vpn, as it has a decent free version, and the paid version is powerful
note: some applications, websites, and other entities do not tolerate the use of VPNs. you may not be able to access certain secure sites while using a VPN, and logging into your personal account with some services while using a vpn *may* get you PERMANENTLY BLACKLISTED from the service on that account, ymmv
IF YOU HAVE A DECENT VPN, ANTIVIRUS, AND ADBLOCK, you can start learning about piracy, though i will not be providing any resources, as Loose Lips Sink Ships. if you want to be very safe, start with streaming sites and never download any files, though you Can learn how to discern between safe, unsafe, and risky content.
note: DO NOT SHARE LINKS TO OR NAMES OF PIRACY SITES IN PUBLIC PLACES, ESPECIALLY SOCAL MEDIA
the only time you should share these things are either in person or in (preferably peer-to-peer encrypted) PRIVATE messages
when pirated media becomes well-known and circulated on the wider, public internet, it gets taken down, because it is illegal to distribute pirated media and software
if you need an antivirus i like bitdefender. it has a free version, and is very good, though if youre using windows, windows defender is also very good and it comes with the OS
Advanced:
linux is great if you REALLY know what you're doing. you have to know a decent amount of computer science and be comfortable using the Terminal/Command Prompt to get/use linux. "Linux" refers to a large array of related open source Operating Systems. do research and pick one that suits your needs. im still experimenting with various dispos, but im leaning towards either Ubuntu Cinnamon or Debian.
#capitalism#open source#firefox#thunderbird#mozilla#ublock origin#libreoffice#vpn#antivirus#piracy#linux
682 notes
·
View notes
Text


Decided to install Red Hat Linux 6.2 on my SPARCstation 5 tonight - and of course I network booted it. The bootloader and initial boot image was hosted on a TFTP server, with the installer and packages hosted over NFS.


Installation went off without a hitch and I'm put into a fresh KDE 1 environment.


Now, of course I have to do my signature anime girl-ification of the system.


Red Hat 6.2 (SPARCstation 5, 1994) and Red Hat 9 (Athlon 1100, 2002) side-by-side, to show the difference of four years of software and eight years of hardware.
#old tech#unix#sun microsystems#retro tech#linux#retro computing#retrocomputing#vintage computers#vintage technology#vintage tech
27 notes
·
View notes
Note
I am willing to give you or anyone else on tumblr the skills and advice the helped me get my dream job
the idea of working for TEK a few months ago would just be a fantasy
my background in education is English. I learned what I know now on my own and only by random chance.
This is why I am so critical of the linux commumity on tumblr.
They're tagging themselves as -official when they can't provide casual end user support.
They're entirely too horny to be in this sphere. Computers and linux should not be about how much you want to fuck/be fucked by X
it will deter end users
This is very cool that you will help other tumblr users with this stuff; i may actually take you up on this at some point :3
(my tone here is /g, /pos, /nm, /lh)
I do, however, kind of disagree with the other points. I think that for any other social media it's correct, twt or fb does not have the culture to make these sorts of parody accounts viable or not-counter-productive to increasing the linux market share. But I don't think that tumblr is the same.
I think that tumblr does. I think the tumblr community has always been this somewhat ephemeral yet perpetual inside joke culture where almost every user is in-the-know, and new users to the joke are able generally able to catch on quickly to it due to their general understanding of they way tumblr communities operate.
IMO, it's a somewhat quick pipeline of:
\> find first "x-official" blog -> assume it's real -> see them horny posting about xenia -> infer that RH corporate would probably not approve of such a blog
I can appreciate that it might be intimidating to seek out help as a new linux user, and especially a new linux & tumblr user, but looking through these blogs, you do see them helping out people ^^. heck, my last post was helping someone getting wayland working on an nvidia system.
The main goal of these blogs is not to be a legitimate CS service to general end-users. they aren't affiliated with the software their blog is named after, so in many cases they *cant*. The goal is instead to foster a community around linux, creating a general network of blogs of the various FOSS projects that they enjoy.
I think that final sentiment, of these blogs detering end users, is most likely counter to their actual effect on end users who are considering switching to linux.
We all know a lot of tumblr is 20 or 30 something year olds who have just stuck around since ~2012ish, and new users to tumblr join with pre-existing knowledge of the culture and platform. Almost anyone coming across these blogs are going to be people who can see the "in" joke, and acclimate. I do highly doubt that a random facebook mom who's son convinced her to install mint on her old laptop would find tumblr, find a -official blog, scroll through said blog, and be detered from using mint.
The other side of this is that any tumblr users who come across these blogs, be it with an inkling of desire to switch to linux or not, will see a vibrant and active community that fits very well into the tumblr community. They remember, or have heard of, the amtrac & OSHA blogs, and are therefore probably aware that this is a pre-existing meme on here.
In all likelyhood, this will probably further incentivize them to make the switch, as they would be more attracted to a community of their peers over a community of redditors telling them to read the arch wiki repeatedly
I can, on the other hand, definitely see that for people who have difficulties with parsing tone, and especially sarcasm, would have trouble with this. TBH, I have these difficulties (hence when I was speaking to you yesterday I used the /unjerk indicator, as I couldn't tell what the tone of the conversation was), and so it took me a little while of being in this weird "I'm 99% sure these *aren't* official, but what if?". I have been there forI think that maybe being more transparent with the fact that the blogs are parodies is probably important. I'm guilty of this, and after i post this, i'll add it to my bio.
#i use arch btw#they should switch to xenia#tux is so mid#penguins of madagascar was better#linuxposting#linux#distros#ask#mipseb
49 notes
·
View notes
Text
Basic Linux Security (Updated 2025)
Install Unattended Upgrades and enable the "unattended-upgrades" service.
Install ClamAV and enable "clamav-freshclam" service.
Install and run Lynis to audit your OS.
Use the "last -20" command to see the last 20 users that have been on the system.
Install UFW and enable the service.
Check your repo sources (eg; /etc/apt/).
Check the /etc/passwd and /etc/shadow lists for any unusual accounts.
User the finger command to check on activity summaries.
Check /var/logs for unusual activity.
Use "ps -aux | grep TERM" or "ps -ef | grep TERM" to check for suspicious ongoing processes.
Check for failed sudo attempts with "grep "NOT in sudoers" /var/log/auth.log.
Check journalctl for system messages.
Check to make sure rsyslog is running with "sudo systemctl status rsyslog" (or "sudo service rsyslog status") and if it's not enable with "sudo systemctl enable rsyslog".
Perform an nmap scan on your machine/network.
Use netstat to check for unusual network activity.
Use various security apps to test you machine and network.
Change your config files for various services (ssh, apache2, etc) to non-standard configurations.
Disabled guest accounts.
Double up on ssh security by requiring both keys and passwords.
Check your package manager for any install suspicious apps (keyloggers, cleaners, etc).
Use Rootkit Scanners (chkrootkit, rkhunter).
Double SSH Security (Key + Password).
Disabled Guest Accounts.
Enabled Software Limiters (Fail2Ban, AppArmor).
Verify System Integrity via fsck.
Utilize ngrep/other networking apps to monitor traffic.
Utilize common honeypot software (endlessh).
Create new system-launch subroutines via crontab or shell scripts.
Ensure System Backups are Enabled (rsnapshot).
Check for suspicious kernel modules with "lsmod"
#linux#security#linuxsecurity#computersecurity#networking#networksecurity#opensource#open source#linux security#network#ubuntu#kali#parrot#debian#gentoo#redhat
172 notes
·
View notes
Text
Free software recommendations for various things:
LibreOffice - A full home office suite comparable to Microsoft Office. Easy to use and you can choose the UI layout from several types; it can handle docx and other Microsoft Office document formats; it still does not include AI unless you specifically add that extension on purpose, so unlike other office suites it's not shoving AI down your throat.
Calibre - Ebook manager bundled with an ebook editor and ereader software. It can follow news feeds, downloading them into epub format. Convert ebooks from one format into (many) others. Run a server to make access your books from different computers/phones/tablets easier. And so much more... without even touching on the additional functionality that plugins can add. With plugins it can be used for DRM stripping (which can still remove DRM from even Kindle ebooks, if you have a kindle that you can download the ebook to and use to transfer to your computer). It can also handle downloading fanfics and their metadata using the FanFicFare plugin. (Which I've written tutorials about.) There are officially supported plugins (like FanFicFare) that are easy to install and unofficial plugins (like the DRM stripper) that take more work, so it's extremely customizable.
Syncthing - Want to host your own local file backup system? Have an old laptop that you can reformat with a linux distro? And maybe a spare hard drive? Perfect, you have what you need to set up a home file backup system. Reformat the computer with the new operating system, install syncthing on that computer and on the computer you want to back up files for and the two installations of the software can sync over your home network. Put it on your phone and back up your photos. The software is open source, encrypted, and you can turn it off so that your computer (or phone) is only running it on a trusted network. You control where the synced data lives, which computers on your network those synced folders are shared with (allowing for sharing between multiple computers) and even what type of file backups happen if data is, say, accidentally deleted. (File recovery!!!)
Plex or Emby - Both are free to install on any computer, point at any movie/tv show/audiobook/music files you've got sitting around, and bam you've got a home media streaming server. Both have paid tiers for more features (including tv tuner integration to act as a DVR), but what they can do for free is already impressive and well handled. Both have easy to use UI and it largely comes down to personal preference as to one is better than the other.
Notepad++ - A notepad type program that can also serve as a decent lightweight code editor. I use it for noodling around with code scripts and snippets, writing lists, and various other small tasks. It's not something I'd use for my professional code writing but it's great for just messing around with something on my own time.
14 notes
·
View notes
Text
A Beginner's Guide to Learning Cybersecurity
I created this post for the Studyblr Masterpost Jam, check out the tag for more cool masterposts from folks in the studyblr community!
(Side note: this post is aimed towards the technical side of security, rather than the governance/management side, because the tech stuff is what I'm familiar with.)
Where do I start?
Cybersecurity is a specialization of general tech & therefore builds on some concepts that you'll need to know before you can dive deep into security. It's good to have a background in and understand:
how computers & operating systems work
how to use Linux
computer networking & basic protocols
If you're serious about learning cybersecurity, it can be helpful to look at certifications. Even if you don't want to get certified or take the exam (they can get expensive), they provide you with a list of topics that you can use to guide your self-study. And if you want to find a job, a certification is practically required for getting your foot in the door.
I personally recommend the CompTIA series of certifications, because they're well-recognized and I think they expose you to a good breadth and depth of material to get you started. Start with the A+ certification if you have zero tech background. Start with the Network+ certification if you've never taken a networking course. Once you get your basic computer and networking knowledge down, then you can jump into security. The Security+ is a good starting point.
Do I need to know how to code?
No, but it would be really really helpful. You don't have to be a skilled software engineer, but understanding the basics and being able to write small scripts will give you a solid foundation.
From Daniel Miessler's post How to Build a Cybersecurity Career:
You can get a job without being a programmer. You can even get a good job. And you can even get promoted to management. But you won’t ever hit the elite levels of infosec if you cannot build things. Websites. Tools. Proofs of concept. Etc. If you can’t code, you’ll always be dependent on those who can.
How do I gain skills?
Play Capture the Flag (CTF) games.
Stay up to date with security news via an RSS reader, podcasts, or whatever works for you. Research terms that you're unfamiliar with.
Watch conference talks that get uploaded to YouTube.
Spin up a VM to practice working with tools and experiment on your own computer.
There are lots of brilliant, generous people in cybersecurity who share their knowledge and advice for free. Find their blogs, podcasts, and YouTube channels. Look for local meetups in your area.
I'm still relatively new to the field, but I have a general knowledge of lots of different things, so feel free to send me an ask and I can probably help point you to some resources. We're all in this together!
Previous Cybersecurity Masterposts
An Introduction to Cybersecurity
Cybersecurity Book Masterpost
Free Cybersecurity Learning Resources Masterpost
Masterpost of Study Tips for Cybersecurity
Cybersecurity Tools Masterpost
Thank you so much to everyone who participated in the #StudyblrMasterpostJam this week! It was wonderful to see what other studyblr folks are passionate about. The jam technically ends today but there are no official rules, so if you've been thinking about writing a masterpost, this is your sign!
30 notes
·
View notes
Text
Sometimes I kind of wonder to what extents people know, like really know-know, that smartphones are computers.
Not sorta-computers, not computer-adjacent, but actual computers.
I mean, if you have an iPhone, that's a Unix system; if you have an Android, that's straight up Linux. It's computer software running on computer hardware, and the only reason it's not immediately apparent is because they're set up to obfuscate the fact, hide away the computer-ness, blur the lines between local and remote, between offline and online, between system and network.
The only reason you have less access to the inner workings of your phone than you do that of a PC is due to software locking set up by your phone's manufacturer.
79 notes
·
View notes
Note
Please tell us how to get into IT without a degree! I have an interview for a small tech company this week and I’m going in as admin but as things expand I can bootstrap into a better role and I’d really appreciate knowing what skills are likely to be crucial for making that pivot.
Absolutely!! You'd be in a great position to switch to IT, since as an admin, you'd already have some familiarity with the systems and with the workplace in general. Moving between roles is easier in a smaller workplace, too.
So, this is a semi-brief guide to getting an entry-level position, for someone with zero IT experience. That position is almost always going to be help desk. You've probably heard a lot of shit about help desk, but I've always enjoyed it.
So, here we go! How to get into IT for beginners!
The most important thing on your resume will be
✨~🌟Certifications!!🌟~✨
Studying for certs can teach you a lot, especially if you're entirely new to the field. But they're also really important for getting interviews. Lots of jobs will require a cert or degree, and even if you have 5 years of experience doing exactly what the job description is, without one of those the ATS will shunt your resume into a black hole and neither HR or the IT manager will see it.
First, I recommend getting the CompTIA A+. This will teach you the basics of how the parts of a computer work together - hardware, software, how networking works, how operating systems work, troubleshooting skills, etc. If you don't have a specific area of IT you're interested in, this is REQUIRED. Even if you do, I suggest you get this cert just to get your foot in the door.
I recommend the CompTIA certs in general. They'll give you a good baseline and look good on your resume. I only got the A+ and the Network+, so can't speak for the other exams, but they weren't too tough.
If you're more into development or cybersecurity, check out these roadmaps. You'll still benefit from working help desk while pursuing one of those career paths.
The next most important thing is
🔥🔥Customer service & soft skills🔥🔥
Sorry about that.
I was hired for my first ever IT role on the strength of my interview. I definitely wasn't the only candidate with an A+, but I was the only one who knew how to handle customers (aka end-users). Which is, basically, be polite, make the end-user feel listened to, and don't make them feel stupid. It is ASTOUNDING how many IT people can't do that. I've worked with so many IT people who couldn't hide their scorn or impatience when dealing with non-tech-savvy coworkers.
Please note that you don't need to be a social butterfly or even that socially adept. I'm autistic and learned all my social skills by rote (I literally have flowcharts for social interactions), and I was still exceptional by IT standards.
Third thing, which is more for you than for your resume (although it helps):
🎇Do your own projects🎇
This is both the most and least important thing you can do for your IT career. Least important because this will have the smallest impact on your resume. Most important because this will help you learn (and figure out if IT is actually what you want to do).
The certs and interview might get you a job, but when it comes to doing your job well, hands-on experience is absolutely essential. Here are a few ideas for the complete beginner. Resources linked at the bottom.
Start using the command line. This is called Terminal on Mac and Linux. Use it for things as simple as navigating through file directories, opening apps, testing your connection, that kind of thing. The goal is to get used to using the command line, because you will use it professionally.
Build your own PC. This may sound really intimidating, but I swear it's easy! This is going to be cheaper than buying a prebuilt tower or gaming PC, and you'll learn a ton in the bargain.
Repair old PCs. If you don't want to or can't afford to build your own PC, look for cheap computers on Craiglist, secondhand stores, or elsewhere. I know a lot of universities will sell old technology for cheap. Try to buy a few and make a functioning computer out of parts, or just get one so you can feel comfortable working in the guts of a PC.
Learn Powershell or shell scripting. If you're comfortable with the command line already or just want to jump in the deep end, use scripts to automate tasks on your PC. I found this harder to do for myself than for work, because I mostly use my computer for web browsing. However, there are tons of projects out there for you to try!
Play around with a Raspberry Pi. These are mini-computers ranging from $15-$150+ and are great to experiment with. I've made a media server and a Pi hole (network-wide ad blocking) which were both fun and not too tough. If you're into torrenting, try making a seedbox!
Install Linux on your primary computer. I know, I know - I'm one of those people. But seriously, nothing will teach you more quickly than having to compile drivers through the command line so your Bluetooth headphones will work. Warning: this gets really annoying if you just want your computer to work. Dual-booting is advised.
If this sounds intimidating, that's totally normal. It is intimidating! You're going to have to do a ton of troubleshooting and things will almost never work properly on your first few projects. That is part of the fun!
Resources
Resources I've tried and liked are marked with an asterisk*
Professor Messor's Free A+ Training Course*
PC Building Simulator 2 (video game)
How to build a PC (video)
PC Part Picker (website)*
CompTIA A+ courses on Udemy
50 Basic Windows Commands with Examples*
Mac Terminal Commands Cheat Sheet
Powershell in a Month of Lunches (video series)
Getting Started with Linux (tutorial)* Note: this site is my favorite Linux resource, I highly recommend it.
Getting Started with Raspberry Pi
Raspberry Pi Projects for Beginners
/r/ITCareerQuestions*
Ask A Manager (advice blog on workplace etiquette and more)*
Reddit is helpful for tech questions in general. I have some other resources that involve sailing the seas; feel free to DM me or send an ask I can answer privately.
Tips
DO NOT work at an MSP. That stands for Managed Service Provider, and it's basically an IT department which companies contract to provide tech services. I recommend staying away from them. It's way better to work in an IT department where the end users are your coworkers, not your customers.
DO NOT trust remote entry-level IT jobs. At entry level, part of your job is schlepping around hardware and fixing PCs. A fully-remote position will almost definitely be a call center.
DO write a cover letter. YMMV on this, but every employer I've had has mentioned my cover letter as a reason to hire me.
DO ask your employer to pay for your certs. This applies only to people who either plan to move into IT in the same company, or are already in IT but want more certs.
DO NOT work anywhere without at least one woman in the department. My litmus test is two women, actually, but YMMV. If there is no woman in the department in 2024, and the department is more than 5 people, there is a reason why no women work there.
DO have patience with yourself and keep an open mind! Maybe this is just me, but if I can't do something right the first time, or if I don't love it right away, I get very discouraged. Remember that making mistakes is part of the process, and that IT is a huge field which ranges from UX design to hardware repair. There are tons of directions to go once you've got a little experience!
Disclaimer: this is based on my experience in my area of the US. Things may be different elsewhere, esp. outside of the US.
I hope this is helpful! Let me know if you have more questions!
46 notes
·
View notes
Text
It is easy to blame Crowdstrike as the only one at fault, much like it will be easy for them to blame some underpaid contractor. However, this misses a bigger lesson, and it is not just blaming Microsoft either.
A cascading failure of complex systems demonstrates a clear industries wide failure to implement processes to verify stuff they deploy across their various enterprises in favor of trusting random vendors to not make mistakes.
As a Linux user, it would be easy to laugh, but when the hospital can't tell me what room my son is in (he's fine) and imagining patients requiring critical care that they might not get, it is infuriating.
I'm only IT adjacent, but looking for single points of failure in systems is really something that would seem like fairly basic stuff, and it's not like many enterprises don't have internal test machines and networks. I don't even update firmware or software on things immediately sometimes, and I can assure you that software failures in film, TV, or theatre productions are not generally safety critical
10 notes
·
View notes
Text
I've been seeing a lot of posts about how there are ads literally everywhere lately and how it's only getting worse.
I agree which is why I can't recommend getting a bit invested in technical fidgety enough. There is quite a bit of open source software etc. to block ads in everything - more than an ad blocker for browsing. It has improved my quality of life so much.
There are more possibilities, but I have a raspberry pie running a pie hole at home. You can add domain lists to it, so the domains of almost everything that advertises are blocked. I see lots of empty boxes and broken images now and it's so relieving. I also use a VPN to connect to my home network, so I don't have ads when I'm not home either.
And it doesn't have to be a raspie. You can use any device for it, but it'll have to run a Linux based system. It also doesn't have to be pie hole. If you you're into smart home stuff, but dislike Alexa and so on you can install home assistant on a device and add among other things an ad blocking plugin (I haven't done this, so I'm not exactly sure how it works).
There are quite a few ways in general to block domains in your network. Some of them are easier than others. It's dystopian what's happening to the online (and offline space), but there are ways to avoid this. It just isn't advertised.
18 notes
·
View notes
Text


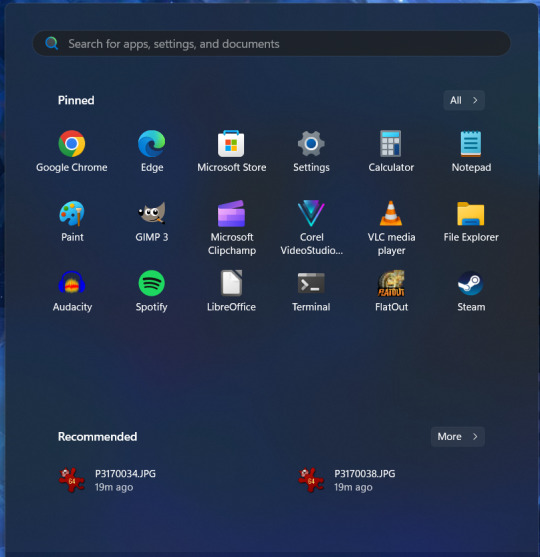


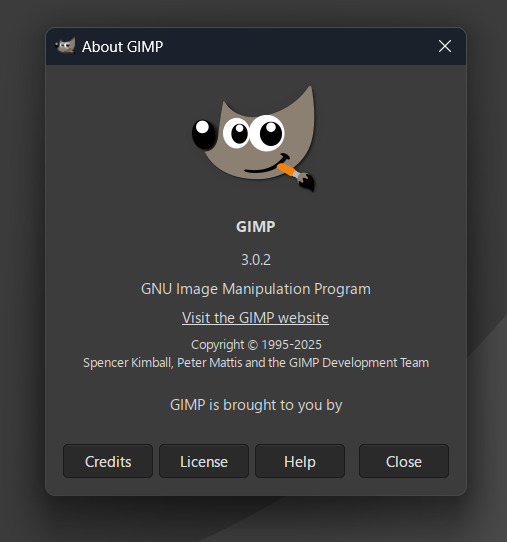

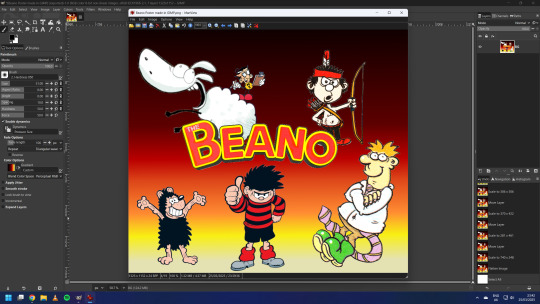

On the 19th of March 2025, I downloaded the latest version of the GNU Image Manipulation Program (GIMP). I downloaded it through the Microsoft Store.
https://www.gimp.org/news/2025/03/16/gimp-3-0-released/
GIMP is an open source image editing application for Linux, Unix, Mac and Windows. The latest version is 3.0, which was released for stable use on the 16th of March.
https://en.wikipedia.org/wiki/GIMP
GIMP 3.0 has been in development for 7 years since the previous release version which was 2.10. GIMP 3.0 celebrates a major milestone for the software, here are just a few of the notable changes:
A completed GTK3 port of the application and all of the tool sets
Non destructive editing capability
Better painting and drawing tools
Major HiDPI display scaling improvements
Faster performance boost with muti-threading
Better support for PSD (Photoshop) files
A new revamped light and dark theme set
Native 'Wayland' display server protocol support on Linux systems.
Native Microsoft Store app with auto updates
Lots and lots of bug fixes
See more here:
https://www.omgubuntu.co.uk/2025/03/gimp-3-0
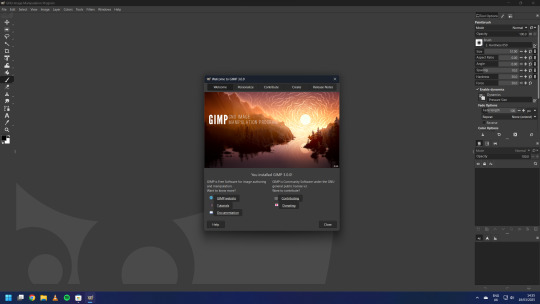
The update also features the option to merge the title bar and menu bar, which provides a minimalistic header bar style to the user interface on Windows and Linux. (see screenshot below)
The theme and icon set can be easily changed in the settings and feature a brand new set of icons that echo the older style of icons used in older versions of GIMP up to 2.8 (2012).
Read the release notes below:
https://www.gimp.org/release-notes/gimp-3.0.html
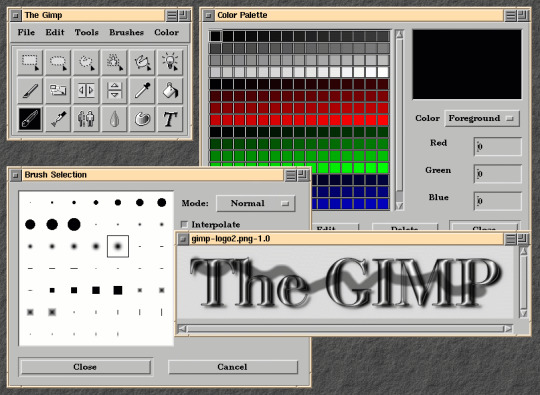
3.0 also celebrates 30 years since the original version of GIMP was released back in 1995! Its first public release was 1998.
The application features a refreshed logo as part of its release.
I created a quick mock-up of Roger the Ragdoll using the layers panel for each of the graphics.
-
GIMP got its first point release for 3.0.2, after a week of being available. This version got auto updated on the 25th March.
Underneath is a small project I did involving layers in GIMP. The Beano comic characters included are:
Derek the Sheep by Gary Northfield.
The Numskulls Brainy by Barry Glennard.
Dennis the Menace & Gnasher by Nigel Parkinson.
Colin the Vet by Duncan Scott.
Little Plum by Hunt Emerson.
A gradient effect was added behind the characters.
Each image is shown in the tabs above. I exported the image as a portable network graphic (PNG) afterwards.
This release makes GIMP feel more like a great Photoshop open source alternative. For many users there is still a steep learning curve, however the overall experience feels worth it after 7 years!
4 notes
·
View notes
Text
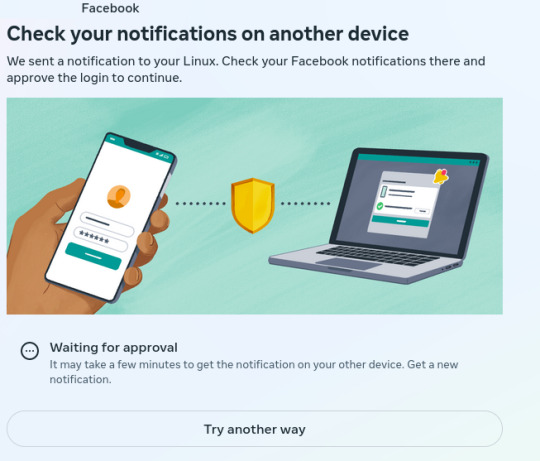
Facebook "New Rules"
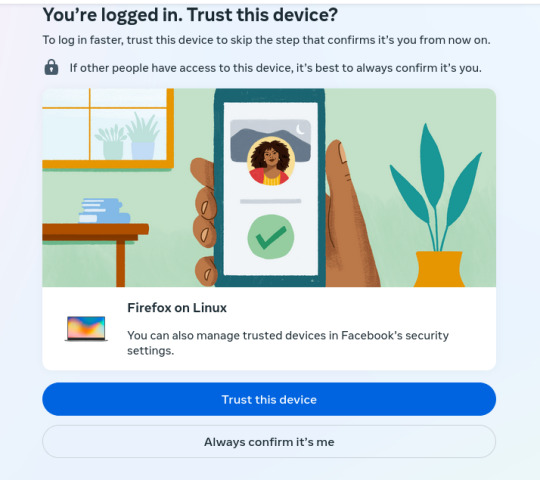
A few years ago, I decided to signup for an encrypted email service (Protonmail), to protect my emails from internet traffic Snoops. Later, I also signed up for a virtual private network service (ProtonVPN) which keeps the same internet traffic Snoops, from tracking my physical location and trying to mess with my browser's security. Since then several social media apps (for phones & laptops) have become "concerned" with security on 'their end' (so they say). But I've determined that they're LESS concerned with MY security than they are their own… So much so that they have surreptitious software installed to monitor what ALL of us do on social media. Lately, because I use a VPN service that can by my choice connect me to ANY server in the world that locks out 99% of snoops of all kinds all over the world. However, Facebook in its low-minded wisdom has become distrustful of MY logon attempts and of MY server addresses, even though ALL my credentials are in order. You may ask, "Rick are you having any mental problems?" No, not anything other than what I've always had..LOL! I just want to point out that the MORE security a user like any of us wants for their internet uses, the MORE the social media corps (and maybe the Govt) seem to "interrogate" our (my) intentions to be secure on our (my) end. Attached are 6 images that show Facebook's logon procedure because of MY security apps that are keeping me safer & more secure. And BTW..there is a false statement within the first one.. "We sent a notification to your Linux.." Linux is my operating system, the same type of technology that Windows is, but it's Not Windows and it's Not email. So it's impossible to "send a notification" to my operating system!! Trust me on this.. Anyway here are the images of the messages I get from Facebook Every Time I simply want to login to my Facebook account:
1 This is bullshit. Linux is an operating system, not an email address or a social media app:
2 It's not Google Authenticatior..LOL!
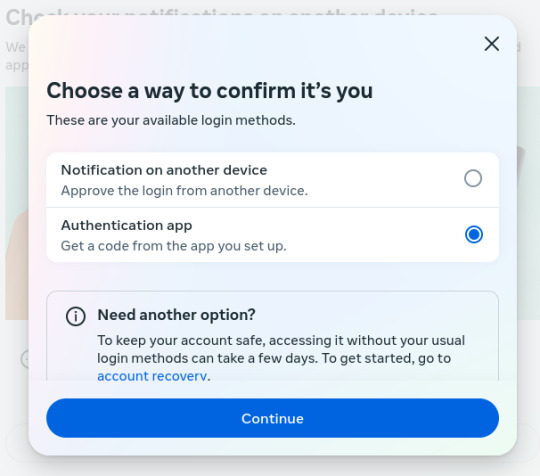
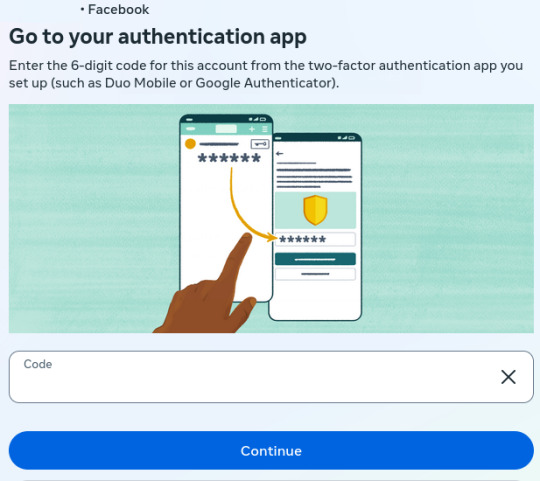
3. This should've been the 2nd question after my Password was entered! I don't need an education on authenticators or how to use them. I'm old but not stupid or naive, FFS!
4. If I'm logged in, I've already trusted this device. How moronic can you assholes be?
5. Okay Okay. I've entered all my info that's protected and now you're asking me if it's REALLY ME? Are you phucking serious right now??

6. I approved a login from Zurich, Switzerland and you're letting me know that I approved it, but your final statement is "Finish"? The people in Switzerland are not "Finish", their Swiss!! Did your AI algorithm get world geography confused with nationalities?

Facebook has a legion of phucking idiots.. Or..they have phucking idiots programming their "AI" algorithm. .... .... .... Welcome to the Machine.... tic-toc-tic-toc-tic-toc-tic-toc-tic-toc.
10 notes
·
View notes
Text
Linux Life Episode 86
Hello everyone back to my Linux Life blog. I admit it has been a while since I wrote anything here . I have continued to use EndeavourOS on my Ryzen 7 Dell laptop. If I any major incidents had came up I would have made an entry.
However nothing really exciting has transpired. I update daily and OK have had a few minor issues but nothing that couldn't be sorted easily so not worth typing up a full blog just for running a yay command which sorted things out.
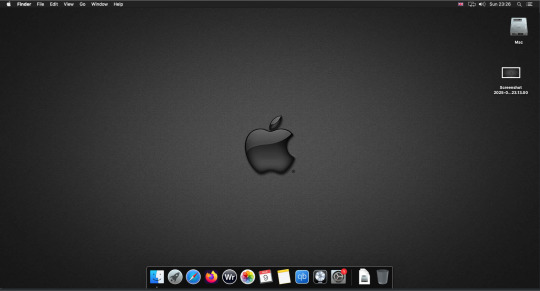
However given it's March, which some You-tubers and content creators have been running with the hashtag of #Marchintosh in which they look at old Mac stuff.
So I decided to run some older versions of Mac OS using VMWare Workstation which is now free for Windows, Mac and Linux.
For those not up with the technology of Virtual Machines basically the computer creates a sandbox container which pretends to be a certain machine so you can run things like Linux and MacOS using a software created environment.
VMWare Workstation and Oracle Virtualbox are Type 2 Hypervisors as they are known which create the whole environment using software machines which you can configure. All drivers are software based.
Microsoft Hyper-V, Xen and others such as QEMU are Type 1 Hypervisors which as well as having the various environments have software drivers some can use what they call "bare metal" which means it can see and use your actual GPU meaning you can take advantage of video acceleration. It also can give bare metal access to keyboards and mice. These take a lot more setup but work slightly quicker than Type 2 once they are done.
Type 1 systems like Qemu and Bochs may also allow access to different CPU types such as SPARC, PowerPC so you can run alternative OS like Solaris, IRIX and others.
Right now i have explained that back to the #Marchintosh project I was using VMWare Workstation and I decided to install 2 versions of Mac OS.
First I installed Mac OS Catalina (Mac OS X 10.15) now luckily a lot of the leg work had been taken out for me as someone had already created a VMDK file (aka virtual Hard drive) of Catalina with AMD drivers to download. Google is your friend I am not putting up links.
So first you have to unlock VMWare as by default the Windows and Linux versions don't list Mac OS. You do this by downloading a WMWare unlocker and then running it. It will make patch various files to allow it to now run MacOS.
So upon creating the VM and selecting Mac OS 10.15 from options you have to first setup to install the OS later and then when it asks to use a HD point it towards the Catalina AMD VDMK previously downloaded (keep existing format). Set CPUs to 2 and Cores to 4 as I can. Memory set to 8GB, Set networking to NAT and everything else as standard. Selecting Finish.
Now before powering on the VM as I have an AMD Ryzen system I had to edit the VM's VMX file using a text editor.
cpuid.0.eax = “0000:0000:0000:0000:0000:0000:0000:1011” cpuid.0.ebx = “0111:0101:0110:1110:0110:0101:0100:0111” cpuid.0.ecx = “0110:1100:0110:0101:0111:0100:0110:1110” cpuid.0.edx = “0100:1001:0110:0101:0110:1110:0110:1001” cpuid.1.eax = “0000:0000:0000:0001:0000:0110:0111:0001” cpuid.1.ebx = “0000:0010:0000:0001:0000:1000:0000:0000” cpuid.1.ecx = “1000:0010:1001:1000:0010:0010:0000:0011” cpuid.1.edx = “0000:0111:1000:1011:1111:1011:1111:1111” smbios.reflectHost = "TRUE" hw.model = "iMac19,1" board-id = "Mac-AA95B1DDAB278B95"
This is to stop the VM from locking up as it will try and run an Intel CPU setup and freeze. This is the prevention of this happening by making it think its a iMac 19,1 in this case.
Now you need to create a harddrive in the VM settings to install the OS on by editing the settings in VMWare and adding a hard drive in my case 100GB set as one file. Make sure it is set to SATA 0:2 using the Advanced button.
Now power on the VM and it will boot to a menu with four options. Select Disk Utility and format the VMware drive to APFS. Exit Disk Utility and now select Restore OS and it will install. Select newly formatted drive and Agree to license.
It will install and restart more than once but eventually it will succeed. Setup language, Don't import Mac, skip location services, skip Apple ID, create account and setup icon and password. don't send Metrics, skip accessibility.
Eventually you will get a main screen with a dock. Now you can install anything that doesn't use video acceleration. So no games or Final Cut Pro but can be used a media player for Youtube and Logic Pro and Word processing.
There is a way of getting iCloud and Apple ID working but as I don't use it I never did bother. Updates to the system are at your own risk as it can wreck the VM.
Once installed you can power down VM using the Apple menu and remove the Catalina VMDK hard drive from the settings. It provide all the fixed kexts so keyboards, mice and sound should work.
If you want video resolution you can install VMware Tools and the tools to select are the ones from the unlocker tools.
Quite a lot huh? Intel has a similar setup but you can use the ISOs and only need to set SMC.version="0" in the VMX.

For Sonoma (Mac OS 14) you need to download OpenCore which is a very complicated bootloader created by very smart indivials normally used to create Hackintosh setups.
It's incredibly complex and has various guides the most comprehensive being the Dortania Opencore guide which is extensive and extremely long.
Explore so at your own risk. As Sonoma is newer version the only way to get it running on AMD laptops or Desktops in VMWare is to use Opencore. Intel can do fixes to the VMX to get it work.
This one is similar to the previous I had to download an ISO of Sonoma. Google is your friend but here is a good one on github somewhere (hint hint). In my case I downloaded Sonoma version 14.7_21H124 (catchy I know).
I also had to download a VDMK of Opencore that allowed 4 cores to be used. I found this on AMD-OSX as can you.
The reason I chose this ISO as you can download Sequioa one. I tried Sequioa but could not get sound working.
So for this one create VM , Select Mac OS 14, install operating system later. Existing OS select Opencore VDMK (keep existing format), set CPU to 1 and cores to 4. Set Netwoking as Bridged everything else as normal. Finish
Now edit settings on VM. On CD-Rom change to image and point to downloaded Sonoma ISO. Add Second hard drive to write to once again I selected 100GB one file. Make sure it is set to SATA 0:2 using the Advanced button. Make sure Opencore is set to SATA 0:0 also using same button.
Now Power the VM. It will boot to a menu with four options. Select Disk Utility and format the VMware drive to APFS. Exit Disk Utility and now select Install OS and it will install. Select newly formatted drive and Agree to license.
The System will install and may restart several times if you get a halt then Restart Guest using the VMware buttons. It will continue until installed.
Setup as done in Catalina turning off all services and creating account. Upon starting of Mac you will have a white background.
Go to System Settings and Screen Saver and turn off Show as Wallpaper.
Now Sonoma is a lot more miserable about installing programs from the Internet and you will spend a lot of time in the System setting Privacy and Security to allow things.
I installed OpenCore Auxilary Tools and managed to install it after the security nonsense. I then turned on Hard Drives in Finder by selecting Settings.
Now open OPENCORE and open EFI folder then OC folder. Start OCAT and drag config.plist from folder to it. In my case to get sound I had to use VoodooHDA but yours may vary.
The VoodooHDA was in the Kernel tab of OCAT I enabled it and disabled AppleALC. Save and exit. Reboot VM and et voila I had sound.
Your mileage may vary and you may need different kexts depending on soundcard or MAC OS version.
Install VMTools to get better Screen resolution. Set Wallpaper to static rather than dynamic to get better speed.
Close VM edit settings and remove CD iso by unticking connected unless you have a CD drive I don't. DO NOT remove Opencore as it needs that to boot.
And we are done. What a nightmare but fascinating to me. If you got this far you deserve a medal. So ends my #Marchintosh entry.
Until next time good luck and take care
2 notes
·
View notes
Text
Setting Up Calibre + FanFicFare
I've talked before about using Calibre to download fic off of fiction archives, so that's where I decided to start with this series. If you're interested in learning more about how to download fanfic for offline reading/local archiving, then watch the #ficArchiving tag. And if you're not interested in seeing these posts then that's also the tag to block.
Edit (3/22/25) - I've updated the post due to changes in how FanFicFare works with regards to site ratings metadata - the type of column this information needs to be stored in has changed as it no longer works with selectable, pre-set options as originally outlined. Also adding note that additional plugins are required to make FanFicFare's anthology options available.
(Since this is a long post, I'm sticking it under the cut.)
First some background on what Calibre is. It's an open source eBook manager and is really quite versatile for it's usage, thanks in part to the robust library of plugins that it utilizes. The default Calibre app comes bundled not only with management software but an e-reader, server options for locally hosting your library (or libraries), and a whole host of options for managing metadata. Default metadata being tracked include title, author, series, publishing data, synopsis, and tags, but you can manually add columns for any additional data you want - which comes in handy when managing a local fanfiction archive. You can add columns for the fandom the fic is written for, the included ships, characters, completion status, whether it's a single fic or a series turned into an anthology. If the information is useful for you, then you can add a method to track it.
Now, for what Calibre does not do. Because it only runs on Windows/Mac/Linux systems - aka it only runs on a PC - you cannot install it on your phone or tablet. There's no official Calibre apps for Android or iPhones either, though there are unofficial ones that can work with Calibre in server mode. I've never tried the unofficial apps, however, as they tend to cost money that I don't really think they're worth. That's largely because in server mode you can log in to the local instance of Calibre with a regular old browser. Just book mark the page and, so long as your on a network where the local instance is running, your phone or tablet will have access to every book on your Calibre's library (or libraries, depending on how you set things up). You can then either read the eBook directly on the browser or, my preferred method, download the file and read it on the e-reader app of your choice. (You can also make the server available outside your local network, but I've never bothered to learn to set that up.)
Given everything Calibre can do, I'm not particularly bothered by the lack of official apps for phones or tablets - as far as I'm concerned it doesn't need one.
This post is going to be focused on using Calibre for fanfictions specifically, but if you want more information on the other things it can be used for, the Calibre FAQ pages are quite extensive and goes into detail about it's format support, eBook conversion abilities, device integration, news download services, library management, and more.
Alrighty, so first thing you'll want to do is download the version of Calibre that works with your computer. You can also create a portable version that runs off a USB drive if you prefer. Once you've downloaded and installed Calibre, it's time to decide where you want your fanfics to live. Do you want all your eBooks to live in one spot or do you want separate libraries for fanfiction vs original fiction? Since I like to collect more metadata for my fanfic collection than for my regular eBooks - and then completely different extra data for tracking my Star Trek books, or Doctor Who books - I like to have multiple libraries for managing my eBook files. And Calibre makes managing multiple libraries at one time very, very simple.
In Calibre's header there are going to be a lot of icons - I’ve modified the header toolbar for my Calibre instance, but most of the default options are still visible in the picture below.

Specifically you want the one that looks like four books leaning against each other on a shelf. It should have the default library name displayed there - Calibre Library.
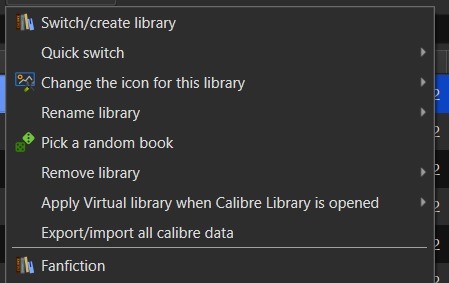
Clicking on that will open the menu used for maintaining multiple libraries. While the application only sets up one library by default, it can link to multiple libraries located anywhere on your computer's filesystem. Since I like to use Dropbox to back up my libraries, I usually locate mine in my local Dropbox folder. You can import existing libraries from one instance of Calibre to another, which makes moving from one computer to another, or maintaining the same library across multiple computers, very simple.
Let’s assume you want to have a separate library just for fanfiction. To that end, you'll want the first option on the menu - labeled "Switch/create library".
From there you'll want to select the folder - or create a new folder - with the name of the library you want to use in Calibre. I'd recommend something straightforward and call it "Fanfiction". Then you'll select the radio button labeled "Create an empty library at the new location".
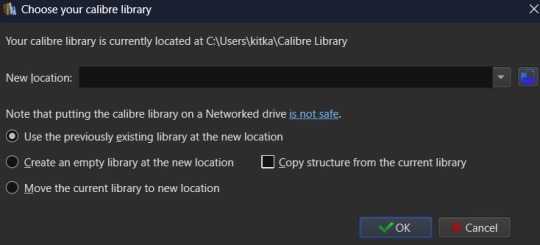
You don't need to copy the current library's structure since every library is created with Calibre's default structure and you won't have added any specialized data tracking at this point to copy over. Once you've set your library location and selected the option for creating a new library, hit the OK button. It'll create the new library and immediately change so that it's managing that library instance instead of the default Calibre Library instance.
If you aren't sure which library is currently open in the Calibre app, then the icon with the four books in the header is where you want to check. It will always be labeled with the name of the currently open library. The most recently opened libraries will be listed at the bottom of the menu opened by that icon for easy switching between libraries and the "Quick switch" option will list all the available libraries registered to your Calibre instance. The icon with the four books is the default icon for a library - if you change the icon for a library then keep in mind that the icon will change in the header when the library is the currently selected on.
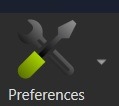
Alright, so step one is completed. You now have a dedicated Fanfiction library for maintaining any fics you choose to download. But the default metadata being tracked for the books isn't as robust as it could be. Time to bulk that information up. You'll want to look back at the header again, this time for an icon that looks like a crossed screwdriver and wrench. It's labeled Preferences. Click on that in the center of the icon to bring up the Preferences modal instead of just the menu (which you can access by clicking the associated down arrow beside the icon instead).
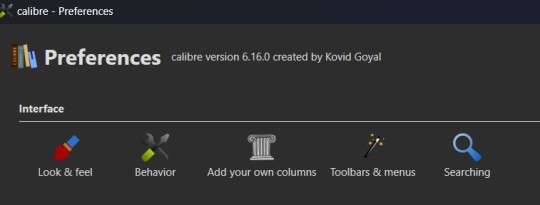
The Preferences modal is where you can access options to tweak the appearance, behavior, and various other functions of Calibre. And I certainly encourage experimenting with the application as it can be customized to your heart's desire to make it meet your accessibility needs. For now, however, we're only interested in the "Add your own columns" option on the top layer of the modal, under "Interface". The associated icon for the "Add your own columns" option is, appropriately, a small Greek column.
This will open the column maintenance modal which presents with a table listing all the existing columns - these all track some kind of metadata for the ebook - and will have checkboxes on the left most of the table indicating whether these columns are displayed on the main interface or are accessible only through the Edit Metadata modal. (We'll get to the Edit Metadata modal later.)
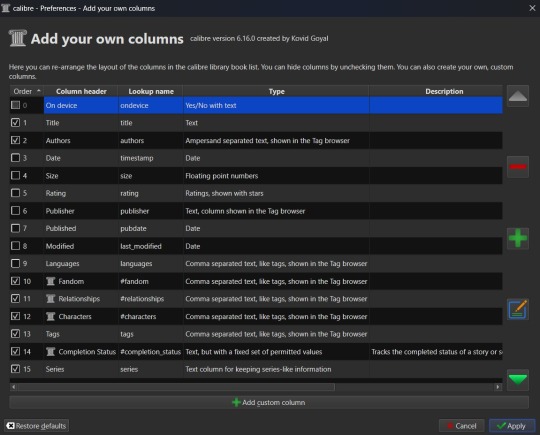
To the right of the table are options for moving a column up or down in the list order, a minus sign used for deleting unnecessary columns, a plus sign for adding new columns, and an edit option for editing existing columns. I'd recommend unchecking columns you don't want displayed in the main table, but not deleting columns. That way you can still store the metadata - and search on it - in that column, but it won't clutter up the main page.
Alright, so now it's time to add some columns. Click the plus button to bring up a custom column form.
The "Lookup name" is what Calibre uses to do searches, so it needs to be something that can be safely saved in a database. "Column heading" is the pretty name that displays either as a column heading in the main Calibre table or as the metadata entry name in the "Edit metadata" modal. "Column type" has a dropdown of the different types of metadata that can be stored in a column and has an option to show checkmarks (a checkbox) for additional true/false parsing. There are a lot of options in the dropdown for metadata types, some of which will offer up additional column creation form options, and this is something that cannot be changed once a column has been saved. If you select the wrong one and realize it later, you'll have to delete the column and create a new one to take it's place. "Description" is there to help clarify things if the "Column header" isn't descriptive enough to make clear what the metadata being tracked by the column is for. And, finally, you can use the optional "Default value" if you want that column to be auto filled with a value you can update later.
Note that the form may add further fields to it, depending on the selected “Column type”.
Since this is going to be tracking fanfiction metadata, some good ideas for creating tag-type metadata columns would be "Fandom", "Ship", and "Characters". You might also consider "Rating", "Content Warnings", “Chapters”, or other data which might be better suited for other types of metadata. We'll start with the "Fandom" column.
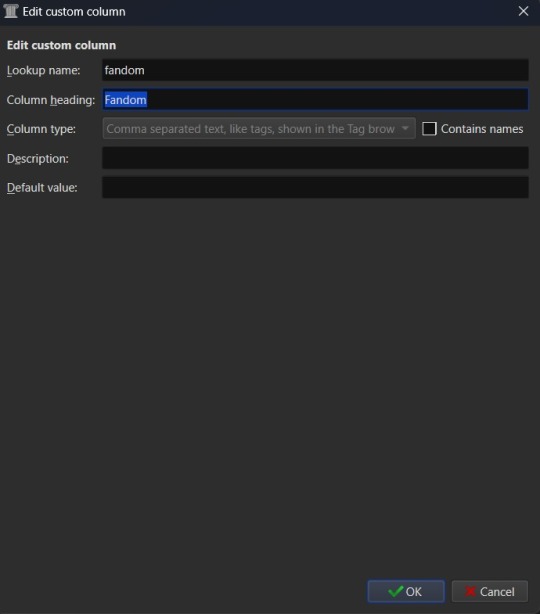
You'll want to set the "Lookup name" to "fandom" (note the lowercase here), the "Column heading" to "Fandom" (uppercase this time), and the "Column type" to "Comma separated text, like tags, shown in the Tag browser". The "Description" is optional, so add what you like (or don't) there and the same goes for "Default value", which you might want to list as "Unsorted" or simply leave blank to indicate the fandom is currently unlisted. Once you're satisfied with your selections, click "OK" and you can either then "Apply" your settings changes or continue on to add more columns.
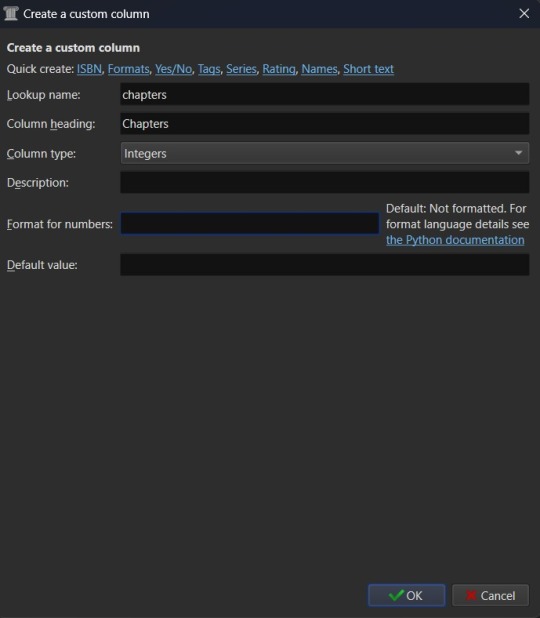
The "Ship" and "Character" data also work best as comma separated data, so I recommend making those columns in the same fashion as the "Fandom" column. “Chapters” you may want to add as an integer column, shown below.
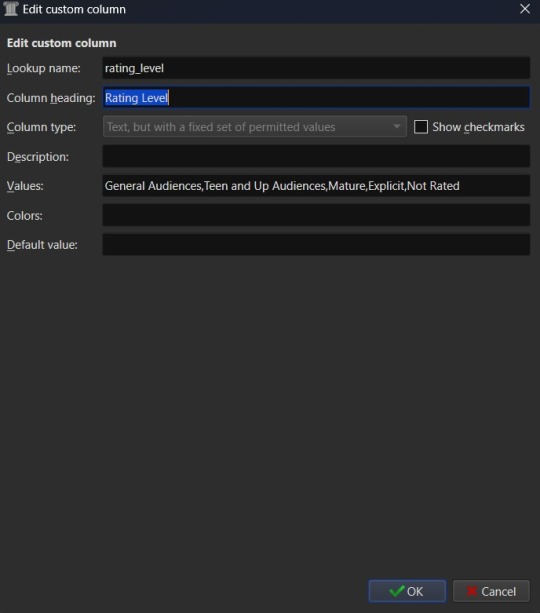
If you're wanting to add "Rating" as a column, then you might want to have specific options for rating a fic, such as limiting the options to the same ones used by Ao3. To this end, you'd fill out the form more like this. "Lookup name" as "rating_level" so as not to confuse it with the existing rating column for star ratings, "Column heading" as "Rating" or maybe "Rating Level", and "Column type" as "Text, but with a fixed set of permitted values". This "Column type" selection will bring up two more inputs on the column creation form - "Values" and "Colors". These two inputs work together and can be edited later. In the "Values" input, you can add a list of comma separated values. In this case the list for "Values" would look like "General Audiences, Teen and Up Audiences, Mature, Explicit, Not Rated". "Colors" is an optional list that will assign a different color to every option on the "Values" list that corresponds to an entry in the "Colors" list. So if you want General Audiences to be blue and no other option to have a color, you'd list "blue" for colors. Or "blue, blue, red, red, red" to have the first to options on the "Values" list as blue and the last three as red. You can play around with this more or leave it blank to have the options all be the same default colors.
Once you've finalized your selections, hit OK to create the column.
Edit (3/22/25) - FanFicFare currently no longer accurately scrapes ratings data into a column setup as "Text, but with a fixed set of permitted values". Instead you will need to use the "Comma separated text, like tags, shown in the Tag browser" option. Fixed values should still work for things like fic status, which have the Completed and In-Progress settings only, but changes either to FanFicFare or Ao3 (and thus any Ao3 clones) have made the fixed values option for ratings fail to correctly connect site tags to the preset values. The good news is that this will now set the ratings for an anthology fic made from a series page with the ratings of all fics within the series - so if some are General Audiences and others are Mature within a single anthology, that will be accurately reflected in your captured metadata after downloading a fic.
After creating all your new columns and selecting which ones you want present on the main table, hit the "Apply" button. You'll likely be prompted to restart Calibre. Do so and when the program reloads it should display the main table with all the columns exactly how you set them up. Which means step two is complete. At this point if you have any fanfiction eBooks already, you can drag and drop them into the table from folder files or use the "Add books" option at the left most side of the header toolbar to start adding those. You can manually update the metadata either by clicking on newly added book and then selecting a column or by clicking the book and then selecting the "Edit metadata" option in the header. So now it's time to take a quick look at the metadata editor modal.
By default, the metadata modal will only have one screen but, because you've added custom columns, there should be tabs at the top. One for "Basic metadata" and one for "Custom metadata". The "Basic metadata" includes options for title, title sort, author(s), author sort, series, series number, file versions (for tracking if you have epub, mobi, pdf, etc files of the same book), cover management options, the star-based rating system, tags, ids, upload date, published date, associated publisher, languages, and "Comments" which is where the story summery/synopsis should go. For regular, non-fanfiction eBooks, you might also take note of the "Download metadata" button which allows for scrapping official metadata off of sites like Barnes and Noble, Amazon, or other eBook sellers or archives.
The "Custom metadata" is where your custom column data will be found. It should be found at the top of the page and fill space downwards with however many custom columns you've added. Inputs that allow for comma separated values will still have a dropdown option associated to allow adding tags you've entered previously for other ebooks. Columns that only allow using preselected data are more likely to appear as select boxes or other form types. This is where you might notice you created a column type incorrectly, so make sure to check over all the data entry options for each metadata type you're collecting. If it doesn't look like it's set up the way you wanted it to be, you can go back to the column editing modal and try again.

The big draw of using Calibre to manage fanfiction eBooks, however, is being able to use Calibre to download the fanfictions from the web and convert them to eBook format for you. And that's where Calibre's plugin library comes in handy.
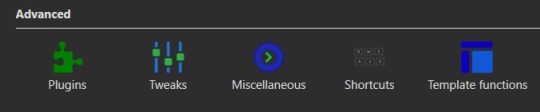
If you were making any edits to an existing eBook, save those and close the metadata editor. Head back over to the Preferences modal and check the Advanced settings options at the bottom of the modal. There should be a green puzzle piece icon labeled "Plugins" - click that to open the Plugins modal.
It will take you to a table used for monitoring and controlling existing plugins and, yes, it does already have 'plugins' installed. These are really more the application's default modules, but because of how Calibre works they can be edited and controlled in the same way that external plugins are. At the bottom of the page you'll see three buttons - "Get new plugins", "Check for updated plugins", and "Load plugin from file". These are concerned with the external plugins that you can add to Calibre. "Get new plugins" will allow you search through the official library of third party plugins available to Calibre - plugins that the Calibre team have vetted to confirm aren't actually malware. But they're by no means the only plugins you can install, as the "Load plugin from file" will allow you to load pretty much any plugin you want to. Such as a plugin for, say… stripping DRM off of purchased eBooks.

In this case, you want to select the "Get new plugins" option. This brings up a modal for User plugins and the displayed list will automatically be filtered by available plugins that have not yet been installed. You can filter this list further by typing "FanFicFare" into the "Filter by name" text input.
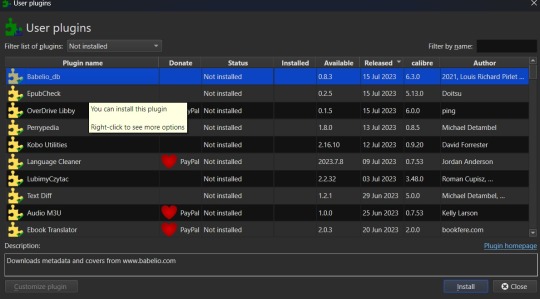
You can then select the FanFicFare plugin and install it. After installing the plugin, you should select the option to restart the application, to ensure that it installed properly. I'd also recommend adding the FanFicFare icon to the optional bottom toolbar instead of the header toolbar, since that'll make it much easier to find since, unless you add more plugins and assign them to that toolbar, it should be the only option on the bar right now.
Edit (3/22/25) - In addition to the FanFicFare plugin, you'll want to include two additional plugins so that FanFicFare can make it's anthology options available. These two plugins are EpubMerge and EpubSplit. These plugins can be used on their own to create anthologies by creating a new epub file from multiple epubs or splitting anthology books into separate epubs for each book contained within. Without these plugins FanFicFare's anthology options will be hidden, as it utilizes them for merging fics in a series together after downloading them separately.
So, full disclosure, you don't need Calibre to run FanFicFare. You could download it and run it from a command line interface instead. However, I prefer it's Calibre interface, especially since it really lets you take advantage of the best Calibre has to offer in metadata tracking, as it can be set up through Calibre to auto fill those columns I walked you through setting up earlier. But I'll get to more on that in a minute.Once Calibre has restarted, you should now have FanFicFare available on one of your toolbars. It's associated icon is a green text bubble with the letters "FF" in it pointing down at a picture of a book.
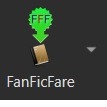
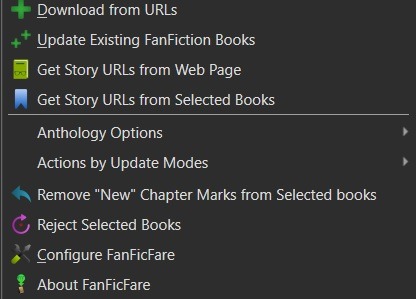
It'll have a small down arrow next to it, which you'll want to select in order to bring up FanFicFare's menu. At this point you can start downloading fics if you want - but let's do a little customizing first. Select the "Configure FanFicFare" option to bring up the configuration modal.
So this modal has a lot going on. And I do encourage doing some exploration on your own, because FanFicFare is a powerful tool made all the more powerful here in conjunction with Calibre's built in tools. Cover generation is very useful, "Reading lists" can be used to auto send new books to any devices you've linked to Calibre when they're connected to the computer, you can tie into email accounts to pull fanfics from email or pull URL links for downloading... there is just so much this plugin can do.
For now, however, we're interested in the column related options. First, check out the tab for "Standard Columns". Look over the options there carefully to make sure that the default settings are actually what you want. They're pretty straight foward - most are determining whether the metadata gets scraped and updated every time you update a fanfic eBook or if they're only scraped for new books. The rest have to do with title and author sorting, setting series related data, and setting the comment data for anthologies.
Once you've set that data how you want, head over to the "Custom Columns" tab where things get more interesting.
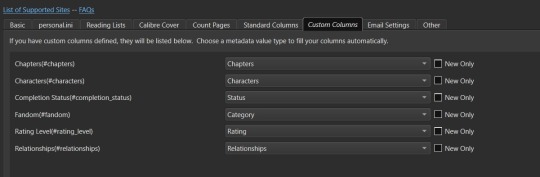
You should now be looking at a list of all those custom columns you created earlier, in alphabetical order. Each column will have a corresponding select box with nothing selected and an unchecked checkbox marked "New Only". This works in a pretty straightforward manner. Let's use "Fandom" as the example. Click the associated select box to open the dropdown and you'll see a bunch of potential metadata that FanFicFare scrapes listed there. It'll all go into the default tags column - found over in the "Standard Columns" section - but you can also parse it out to specific custom columns here. It might give you a few ideas for more columns you want to add for metadata sorting purposes. "Fandom" you'll want to link to "Category". I left "New Only" unchecked so that if I update an eBook later and it has a new fandom attached to the fic then that new metadata will be picked up and added to my Fandom tags for the fic.
Go through each custom column and set them up to be auto filled with the data you think fits it best. Select OK to save your changes and congratulations, this library has now been set up to import fanfiction.
Do keep in mind that FanFicFare's settings are on a per-library basis. So if you decide to do a separate library for different types of fanfics then you'll need to configure FanFicFare separate for every library. You may want separate libraries for different repositories, for example. Though FanFicFare is often smart enough to recognize when it already has an eBook version of a fanfiction from one repository - such as FFnet - when trying to download the same fic from another place - like Ao3.
You may need to make changes later to the personal.ini file associated with the library (which is also set up on a per-library basis) but I'll write up a separate post for that later. While sites protected by Cloud Flare more stringent protections will likely result in 403 responses and failed downloads, most fanfiction sites are going to work with the default FanFicFare settings. You could head over to, say, Archive of Our Own or Twisting the Hellmouth and grab a URL for a story from there. Or a URL for a series, which has links to multiple stories.
Now that the set up is done, it's time for the fun part. Downloading and maintaining fanfiction in your library. I'll be using a few of my fanfictions on Ao3 as example URLs. Awaken, which is already in my fanfiction library. What Balance Means, which is not already in my library. And the two series Hartmonfest 2023 and Eobard vs Eobard.
We'll start with the single URL uploads.
Click on the FanFicFare down arrow to bring up the menu and select the first option on the menu, labeled "Download from URLs". If you have a URL in your clipboard and have the option to grab URLs from the clipboard selected in the FanFicFare configuration (it's a default option, so you most likely do) then you should see that URL prepopulated in the text area when the Story URLs modal loads. You can add more URLs, one per line, to this text area and when you select OK each one will be individually downloaded as a separate epub file. For multi-chapter fics you only need to provide the url for the first chapter. FanFicFare will be able to detect the additional chapters and download them into the same epub file as the first chapter. All providing additional chapter URLs will do is lead to FanFicFare attempting to create multiple epubs of the same fanfic.
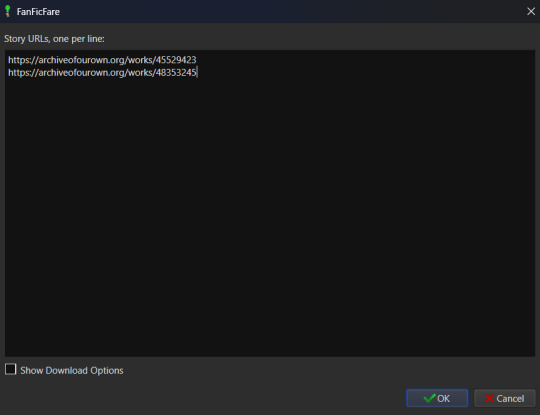
Once you've added your list of URLs to the text area, select OK. FanFicFare will do the rest, fetching metadata for the fic (or fics) and compiling the epub file(s). When it's finished compiling the data but hasn't officially saved the epubs, it will pop up a message letting you know how many "good" and "bad" entries it found.
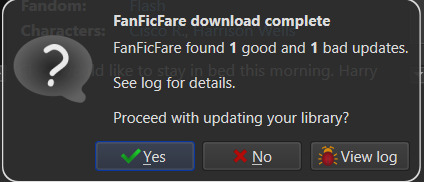
"Good" means it made an epub file and it's good to go. "Bad" could mean that you've already got the fanfic downloaded and no updates - such as new chapters - were available. Or it could mean that it failed to grab the web pages for whatever reason… like Cloud Flare blocking the download. You can go forward with the download at this point, adding the good epubs to your library. Or you could cancel the download, meaning none of the epubs are saved. Before choosing one of those options you can also choose to look at the job output, seen in the pop up as a button labeled "View log". This will display a list of every url you tried to download a fanfic for and information on either it's success or why it failed, the associated URL, and how many chapters were downloaded.
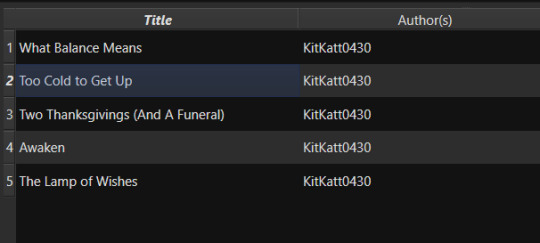
Since I already had Awaken downloaded and there have been no updates since the last time I downloaded it, that is the bad update from my list and the result I was expecting. What Balance Means hadn't been downloaded before, so it was the expected good update. Once Yes is selected in the dialog, the new fanfiction eBooks will be added to the library and will appear at the top of the main list in the application.
That's great for updating one fic at a time or copy-pasting in a list of fanfictions, but let's get ambitious. Maybe you want to import an entire page of bookmarked fanfictions at once or a series of fanfictions as individual books. Instead of copying every single URL by hand, you can take the URL for the series main page or the Bookmarks URL. With that URL copied, you can head over to the FanFicFare menu again, but this time select the option "Get Story URLs from Web Page"
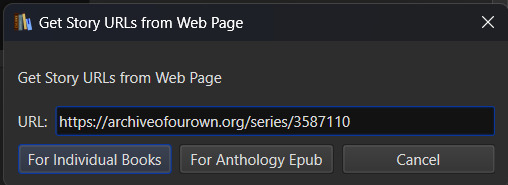
The modal that pops up only allows for inputting one URL - the URL for the page you want it to scour for fanfic URLs. Once you've inputted that URL click the button labeled "For Individual Books." It might take a bit but it's going to pull up the same Story URLs modal from before, this time prepopulated with every URL from the page you gave it. Pretty cool, right? Click OK and watch it run the job just like before.
I gave it the URL for my Hartmonfest 2023 series, which is a complete series and it downloaded all three books. Once they're populated on the list, I could scroll over to the Series column to see that they all are listed as being part of the Hartmonfest 2023 series in the same series order they're listed in on Ao3.
However, what if I'm uploading an unfinished series, like Eobard vs Eobard, and want to be able to track when it updates later on? Single books can track when new chapters are updated; is there any way to do the same thing but on a larger scale? The answer is yes, but you have to upload the series as an anthology.
Head back to the "Get Story URLs from Web Page" option on the FanFicFare menu and give it another series URL. But, this time, click the button labeled For Anthology Epub. This will trigger the Story URLs modal again once it's gathered all the story URLs, but this time it looks a little different.
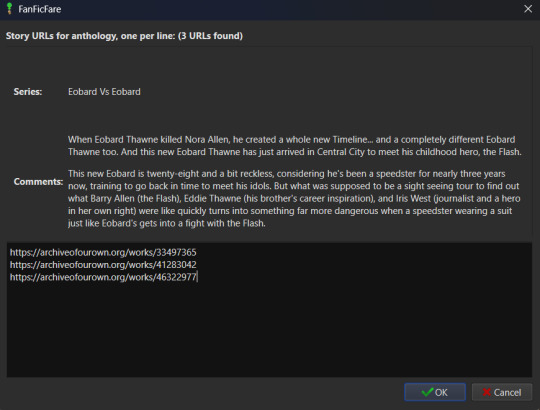
This time there will be text indicating the Series and Comments/description, the information for which will have been taken from the series metadata. The series story URLs will be present in the text area, allowing you to remove a story from the anthology if there's a fic in there you don't want included. Click OK to run the import job, which will run like normal.
When the job completes, there should be multiple good updates listed - one for every URL - but when you click yes to add the eBook to the library, you'll only see one added. It should be named following the convention "<Series Name> Anthology". So now I've got the "Eobard vs Eobard Anthology" in my library.
Last but not least, how to check for updates to incomplete fanfictions or series. It's generally pretty easy to do. Select the fanfiction(s) on the list that you want to check for updates on. If it's a single fanfiction (or several single fanfictions), you go to the FanFicFare menu and click the option "Update Existing FanFiction Books"
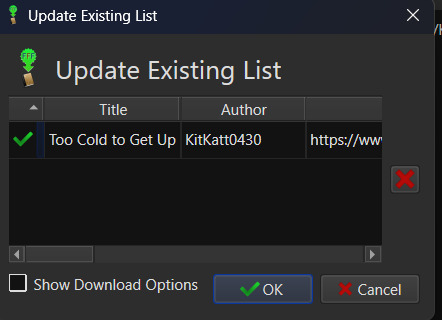
Click OK and let it run. Any fanfictions that don't have new chapters will return as bad entries. Any that have new chapters will be listed as good. Selecting Yes to add the good entries to the list will update the existing epub files with the new chapters.
However, if it's a series you want to update, I recommend doing those one at a time. Select the anthology from the eBook list and head back over to the FanFicFare menu. This time select "Anthology Options"; it'll open a fly-out menu. You want the bottom option, labeled "Update Anthology Epub". The associated URL for the series is saved as part of the eBook's metadata already, so it will pull the series metadata and associated URLs again, before returning you to that same modified Story URLs modal seen before. When you click OK, it'll pull all the fanfictions in the series - new and old - and any new chapters as well, bundling it up in a new eBook file that will replace the old one.
There's still a lot to talk about when it comes to managing fanfictions in Calibre, but I think I'll end here for now. You should be able to download, and manage, fanfiction from most websites at this point. So go back up your bookmarked fics and rest easy knowing that from this point forward a missing bookmark on your bookmarks list is no longer cause for sadness - it'll still be in your local archive to enjoy offline. Just don't go abusing this power, okay guys?
#kitkatt0430 explains#ficArchiving#calibre#fanficfare#the images all have alt text but if you find my image descriptions lacking feel free to add additional descriptions
54 notes
·
View notes
Text

Tools of the Trade for Learning Cybersecurity
I created this post for the Studyblr Masterpost Jam, check out the tag for more cool masterposts from folks in the studyblr community!
Cybersecurity professionals use a lot of different tools to get the job done. There are plenty of fancy and expensive tools that enterprise security teams use, but luckily there are also lots of brilliant people writing free and open-source software. In this post, I'm going to list some popular free tools that you can download right now to practice and learn with.
In my opinion, one of the most important tools you can learn how to use is a virtual machine. If you're not already familiar with Linux, this is a great way to learn. VMs are helpful for separating all your security tools from your everyday OS, isolating potentially malicious files, and just generally experimenting. You'll need to use something like VirtualBox or VMWare Workstation (Workstation Pro is now free for personal use, but they make you jump through hoops to download it).
Below is a list of some popular cybersecurity-focused Linux distributions that come with lots of tools pre-installed:
Kali is a popular distro that comes loaded with tools for penetration testing
REMnux is a distro built for malware analysis
honorable mention for FLARE-VM, which is not a VM on its own, but a set of scripts for setting up a malware analysis workstation & installing tools on a Windows VM.
SANS maintains several different distros that are used in their courses. You'll need to create an account to download them, but they're all free:
Slingshot is built for penetration testing
SIFT Workstation is a distro that comes with lots of tools for digital forensics
These distros can be kind of overwhelming if you don't know how to use most of the pre-installed software yet, so just starting with a regular Linux distribution and installing tools as you want to learn them is another good choice for learning.
Free Software
Wireshark: sniff packets and explore network protocols
Ghidra and the free version of IDA Pro are the top picks for reverse engineering
for digital forensics, check out Eric Zimmerman's tools - there are many different ones for exploring & analyzing different forensic artifacts
pwntools is a super useful Python library for solving binary exploitation CTF challenges
CyberChef is a tool that makes it easy to manipulate data - encryption & decryption, encoding & decoding, formatting, conversions… CyberChef gives you a lot to work with (and there's a web version - no installation required!).
Burp Suite is a handy tool for web security testing that has a free community edition
Metasploit is a popular penetration testing framework, check out Metasploitable if you want a target to practice with
SANS also has a list of free tools that's worth checking out.
Programming Languages
Knowing how to write code isn't a hard requirement for learning cybersecurity, but it's incredibly useful. Any programming language will do, especially since learning one will make it easy to pick up others, but these are some common ones that security folks use:
Python is quick to write, easy to learn, and since it's so popular, there are lots of helpful libraries out there.
PowerShell is useful for automating things in the Windows world. It's built on .NET, so you can practically dip into writing C# if you need a bit more power.
Go is a relatively new language, but it's popular and there are some security tools written in it.
Rust is another new-ish language that's designed for memory safety and it has a wonderful community. There's a bit of a steep learning curve, but learning Rust makes you understand how memory bugs work and I think that's neat.
If you want to get into reverse engineering or malware analysis, you'll want to have a good grasp of C and C++.
Other Tools for Cybersecurity
There are lots of things you'll need that aren't specific to cybersecurity, like:
a good system for taking notes, whether that's pen & paper or software-based. I recommend using something that lets you work in plain text or close to it.
general command line familiarity + basic knowledge of CLI text editors (nano is great, but what if you have to work with a system that only has vi?)
familiarity with git and docker will be helpful
There are countless scripts and programs out there, but the most important thing is understanding what your tools do and how they work. There is no magic "hack this system" or "solve this forensics case" button. Tools are great for speeding up the process, but you have to know what the process is. Definitely take some time to learn how to use them, but don't base your entire understanding of security on code that someone else wrote. That's how you end up as a "script kiddie", and your skills and knowledge will be limited.
Feel free to send me an ask if you have questions about any specific tool or something you found that I haven't listed. I have approximate knowledge of many things, and if I don't have an answer I can at least help point you in the right direction.
#studyblrmasterpostjam#studyblr#masterpost#cybersecurity#late post bc I was busy yesterday oops lol#also this post is nearly a thousand words#apparently I am incapable of being succinct lmao
22 notes
·
View notes