#Optimize Mac storage
Text
Discover why your Mac is running slower than usual and find effective solutions to speed it up. From identifying common causes like excessive background processes and storage issues to implementing practical tips for optimizing performance, this comprehensive guide will help you restore your Mac's speed and efficiency in no time.
#Mac is running slower#Why Is My Mac So Slow#why is my macbook so slow#why is my mac running slow#why is mac so slow
2 notes
·
View notes
Text
Top 100 Cloud Computing Most Asked Questions in 2023
Cloud Computing Multiple Choice Questions
Here are top 100 Most Asked in exam MCQ:
1.Full form of KMS I Microsoft KMS is _____________
Key Management Services.
Key Management Sences.
Key Management Store.
Key Managed Store.
2.What does a full template include that a basic template does not ________
Disk Layout.
MAC Address.
Installation files.
Settings.
3. Virtualization provides optimizations techniques to dever the application______
Desktop.
Application.
Server.
Network.
4.CEN NetScaler SD-WAN is a set of appliances that optimum_______ performance.
LAN
MAN
WAN
INTERNET.
5.Which of the following storage supports fast cloning of virtual machine?
FC
NFC
SAS
ISCSI (Read More)
#cloud computing#aws certified cloud practitioner exam questions 2023#aws cloud practitioner exam question answers 2023#cloud computing interview questions and answers#aws cloud practitioner exam questions#aws cloud practitioner dumps 2023#aws cloud practitioner exam questions 2022#aws cloud practitioner questions dumps#cloud computing interview questions for freshers#top 10 cloud computing certifications in 2022#cloud computing certifications in 2022#cloud computing in telugu#introduction to cloud computing#cloud computing explained#ccc questions in hindi#cloud computing basics#cloud computing tutorial#crazy questions in science#complete cloud computing tutorial#internet questions for ccc exam#top 10 highest paying jobs in 2023#top 10 certifications in the world#investing in your 20s#internet questions#how to invest in stocks#internet questions and answers#cloud training
4 notes
·
View notes
Text
Lithium-Ion Cylindrical Cell Grading Machines: A Comprehensive Guide
The lithium-ion battery manufacturing process starts with cell grading. All cell types, be it prismatic, pouch, or cylindrical, are incomplete without cell grading. As we know, all battery packs comprise small cells and battery modules. Both of them and some other parts are joined together to make a battery pack. Before packing the cells into batteries, cells are graded for their quality. It is an important process as it helps to ensure that all the cells meet specific quality standards. All types of cells are important, but cylindrical ones are more common these days. So, we will stick to them and will try to share how the lithium-ion cylindrical cell grading machine works.

Key Features and Specifications: –
Cell grading machines, also known as cylindrical cell battery testing machines, are designed with several key features that make them essential for battery production. These machines have high accuracy and use precision sensors and algorithms to measure the exact parameters of each cell. Speed is another vital feature, as these machines can grade multiple lithium-ion cells simultaneously, significantly increasing throughput. Automation reduces human error, while data logging capabilities allow for the recording and storage of test results for further analysis. Additionally, these machines often come with a user-friendly interface, making it easy to set parameters and monitor operations.
Accurate Grading and Sorting
A li-ion cylindrical cell grading machine assesses cells based on crucial factors: capacity, voltage, and temperature. It examines the cell’s charge storage efficiency, verifies voltage compliance, and monitors temperature to avert overheating. These machines can precisely sort cells into distinct performance tiers. This meticulous process guarantees that only the top-performing cells are utilized in manufacturing.
Types and Models
There are several models of lithium-ion battery testers for cylindrical cells, catering to different scales of operations. Basic models are suitable for small-scale operations and often involve more manual processes. Advanced models, designed for large-scale production, offer higher automation and faster processing speeds. Some models are customizable and tailored to meet specific manufacturing needs, including integration with existing systems.
Comparison with Other Technologies
Compared to alternative battery cell grading technologies, li-on cylindrical battery cell testing machines excel in accuracy, speed, and cost-efficiency. They offer heightened precision in measurements and faster cell processing. Additionally, they prove more economical due to their efficiency and lowered labor costs. This makes them the preferred option in the battery production industry.
Best Practices for Operation and Maintenance
To guarantee optimal performance and lifespan of li on cylindrical battery cell testers, certain best practices should be observed. Routine calibration of the machines is essential for maintaining accuracy. Regular cleaning helps prevent dust and debris from impacting sensors. Updating the software ensures functionality and proper operator training is vital for handling the machines correctly.
Improving Production Yield and Quality Control
Lithium-ion cylindrical cell grading machines greatly improve production and quality control for battery manufacturers. They ensure each cell meets precise standards, resulting in consistent quality. By segregating underperforming cells early in production, waste is minimized. The data from these machines offers valuable insights into production quality, pinpointing areas for enhancement.
Safety Considerations and Regulations
Safety is paramount when using grading machines. Adequate ventilation is crucial to avert overheating, and regular inspections help identify and address potential issues. Adhering to local and international safety standards and guidelines ensures the machines operate safely and efficiently.
Integration with Other Equipment
These grading machines are engineered to integrate seamlessly with other battery manufacturing equipment and software. They support diverse communication protocols, ensuring compatibility across machines. Data sharing capabilities enable comprehensive analysis, while integration with automation systems streamlines production.
Technological Advancements and Trends
Recent technological advancements have significantly enhanced lithium-ion cylindrical cell grading machines. AI and machine learning integration boosts accuracy and enables predictive maintenance. Improved sensors offer more precise measurements, and new models are engineered to be more energy-efficient, lowering operational costs.
Key Factors for Selection and Purchase
When selecting a lithium-ion cylindrical cell grading machine, several factors warrant consideration. Manufacturers must evaluate their capacity requirements to ensure the machine can manage the desired volume. Accuracy needs should align with the required precision level for products. Budget constraints must be balanced with desired features, and choosing reputable suppliers can provide better service and support.
Conclusion
By understanding these aspects, manufacturers can make informed decisions about using and investing in a cell grader. This ultimately improves their production processes and product quality.
#lithium-ion battery testers for cylindrical cells#cylindrical cell battery testing machines#li-ion cylindrical cell grading machine#lithium ion battery testers for cylindrical cells#li-on cylindrical battery cell testing machines#cylindrical cell grading machines
0 notes
Text
PlayStation Vita OLED Modding Guide: Unlock the Full Potential of Your Device
The PlayStation Vita OLED, with its vibrant display and robust hardware, remains a beloved handheld console for many gaming enthusiasts. Despite being discontinued, it has a thriving modding community dedicated to enhancing its capabilities. This guide will walk you through the process of modding your PlayStation Vita OLED, unlocking additional features and customization options to transform your device into a versatile gaming powerhouse.

Why Mod Your PlayStation Vita OLED?
Modding your Vita OLED opens up a world of possibilities:
Homebrew Games and Apps: Access a wide array of homebrew games and applications.
Custom Themes: Personalize your Vita with custom themes and user interfaces.
Enhanced Emulation: Play retro games from various consoles with improved emulation support.
Expanded Storage: Use microSD cards for storage, bypassing the expensive proprietary memory cards.
Performance Tweaks: Optimize system performance for a smoother gaming experience.
Getting Started: What You Need
Before you begin modding your Vita OLED, ensure you have the following:
PlayStation Vita OLED: The console itself, preferably fully charged.
Vita Memory Card: Required for installing custom firmware.
MicroSD Card and Adapter: For expanding storage.
USB Cable: For connecting your Vita to your computer.
PC or Mac: To download and transfer necessary files.
Step 1: Update Your Firmware
Make sure your Vita OLED is running firmware version 3.60 or lower. If it’s higher, you’ll need to downgrade it, which requires additional steps and caution. Firmware 3.60 is ideal for modding as it supports HENkaku, the most popular custom firmware.
Check Firmware Version: Go to [Settings] > [System] > [System Information] and check the firmware version.
Update to 3.60: If your firmware is lower than 3.60, update to this version using the official update file from Sony’s website.
Step 2: Install HENkaku
HENkaku is essential for running homebrew on your Vita. Here’s how to install it:
Open Browser: Launch the web browser on your Vita.
Visit HENkaku: Go to the URL https://henkaku.xyz/.
Activate HENkaku: Tap the “Install” button. Your Vita will download and install the HENkaku exploit.
Confirm Installation: You’ll see the molecularShell app on your home screen if the installation is successful.
Step 3: Install VitaShell
VitaShell is a powerful file manager that lets you manage files and install homebrew.
Download VitaShell: Use molecularShell to download and install VitaShell. Open molecularShell, press the "Select" button to activate the FTP server, and connect to it from your PC using an FTP client like FileZilla.
Transfer VitaShell: Transfer the VitaShell VPK file to your Vita’s memory card.
Install VitaShell: On your Vita, navigate to the transferred file and install it using molecularShell.
Step 4: Expand Storage with SD2Vita
SD2Vita allows you to use a microSD card as a memory card, greatly expanding your storage capacity.
Purchase SD2Vita Adapter: Buy an SD2Vita adapter compatible with your Vita OLED.
Prepare MicroSD Card: Format your microSD card to exFAT or FAT32 on your PC.
Install StorageMgr Plugin: Download the StorageMgr plugin and transfer it to your Vita using VitaShell.
Configure StorageMgr: Edit the storagemgr.skprx file to recognize the microSD card as UX0. Transfer the modified file back to your Vita.
Reboot and Verify: Reboot your Vita. If successful, your Vita will now recognize the microSD card as the main storage.
Step 5: Install Custom Themes and Plugins
Custom themes and plugins can enhance the user experience and add new functionalities.
Browse Themes and Plugins: Visit websites like VitaDB to browse and download themes and plugins.
Transfer Files: Use VitaShell to transfer the downloaded files to the appropriate directories on your Vita.
Activate Plugins: Edit the config.txt file in ux0:tai/ to activate the plugins. Reboot your Vita to apply changes.
Step 6: Install Emulators and Homebrew Games
With your modded Vita, you can now enjoy a plethora of emulators and homebrew games.
Download Emulators: Popular emulators like RetroArch can be found on various homebrew websites.
Transfer and Install: Use VitaShell to transfer the emulator files to your Vita and install them.
Load ROMs: Transfer game ROMs to the appropriate directories and load them via the emulator.
Conclusion
By following these steps, you can unlock the full potential of your PlayStation Vita OLED. Modding not only breathes new life into your device but also offers endless customization and functionality. Whether you’re looking to play retro games, run homebrew applications, or personalize your console, modding is the way to go.
For all your modding needs, including adapters and memory cards, check out SumoShopStore. They offer a wide range of accessories to help you enhance your gaming experience.
0 notes
Text
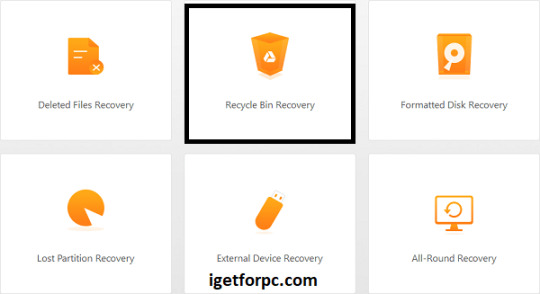
Download iMyFone AnyRecover 5.3.1.15 Full Free Activated
May 17, 2024
iMyFone AnyRecover Crack + License Key {Latest}
iMyFone AnyRecover data recovery software Full Version helps you to recover emails, videos, documents, images and a variety of other data with its clever and superficial features.it is a best and easy Software developed to help users to recover lost or deleted files from a variety of storage systems. It supports recovery from hard drives, memory cards, USB flash drives, and other digital storage mediums. AnyRecover can be particularly useful in situations where data has been lost due to accidental deletion, formatting, device corruption, or computer virus attacks.
Additionally, iMyFone AnyRecover Activation Key can recover your valuable data from Windows, Mac (M1, M2 supported), SSD, external drive, camera, drone, dashcam, camcorder, video, music player, hard drive, USB, SD cards, etc. Overall, iMyFone AnyRecover 4.5.0 cracked is aims to provide a reliable solution for data recovery needs across various operating systems, including Windows and macOS. the software supports recovery from different file systems such as FAT, exFAT, NTFS, and more.
You Can Also Download: Undelete 360
Key Features iMyFone AnyRecover:
iMyFone AnyRecover data recovery Free Download software recover delete or lost data from iOS device, iTunes, iCloud.
this software Recover any iOS data like photos, contacts, WhatsApp, call history, videos, app data, etc.
You can Save iOS data lost by accidental deletion, factory resetting etc.
Preview detailed iOS files (both deleted and existing files) before recovery.
It Support all iOS devices and iOS versions including iOS 17, iPhone 14 and iPhone 15.
Your best data recovery specialist for Windows, Mac, iOS and Android.
This software Restore deleted files from Recycle Bin, HDD, SSD, USB, SD card, etc.
Also, Recover deleted document, pictures, videos, emails and other files in 1 click.
In addition, It Can recover files from popular cloud storage services like Dropbox and Google Drive.
Allows pause, save, and resume of recovery sessions for flexible data restoration.
Recovers data from BitLocker-encrypted drives with decryption.
What’s New in Version iMyFone AnyRecover 8.5.5?
This release Comes with Optimizes the recovery quality, especially the data recovery of FAT/FAT32/NTFS
file systems, so more data can be recovered.
This new version Optimizes the scanning process and shortens the recovery time.
iMyFone AnyRecover Registration Code Supports to scan the partitioned disks.
Additionally, it now Support to recover data from BitLocker encrypted disks.
It now Support devices with APFS and HFS+ file systems.
This supports Window 12 and macOS 11.0.
iMyFone AnyRecover Supports the Following File Types:
Documents: PPT/PPTX, PDF, DOC/DOCX, XLS/XLSX, and more.
Graphics: JPG, PNG, GIF, TIFF, BMP, PSD, and various camera raw formats like CRW, CR2, NEF, ORF.
Videos: AVI, MOV, MP4, MKV, WMV, and other popular video formats.
Audio Files: MP3, WAV, WMA, AAC, M4A, and other common audio formats.
Emails: File types from various email clients, including PST, EMLX.
Archives: ZIP, RAR, ISO,
System Requirements:
For Windows:
Operating System: Windows 11,10, 8.1, 8, 7, XP
CPU/Processor: 1GHz (32 bit or 64 bit) or higher
RAM: 256 MB or more of RAM (1024MB Recommended)
Hard Disk Space: At least 200 MB of free space
For macOS:
Operating System: macOS 10.10 and later (up to the latest macOS)
CPU/Processor: 1GHz Intel or higher
RAM: 512 MB or more
Hard Disk Space: At least 200 MB of free space
How to Install iMyFone AnyRecover Crack Free Download?
Click the link below to begin the iMyFone AnyRecover Data recovery Crack Free Download. This is a complete offline installer standalone setup for the Windows Operating System. This would be compatible with both 32 and 64-bit Windows.
0 notes
Link
$148.99 $ Twelve South TW-1835 Curve Riser for iMac & Displays https://nzdepot.co.nz/product/twelve-south-tw-1835-curve-riser-for-imac-displays/?feed_id=153540&_unique_id=6645a12c4003a Features: Elevate your iMac or display with Curve Riser. Curve Riser is a premium metal stand inspired by Curve for MacBook. This sleek, fixed-height stand showcases and elevates your iMac, iMac Pro or external display to a more comfortable viewing height. The convenient storage shelf holds hard drives, hubs or personal items. The metal shelf’s ventilated design allows for optimal airflow for devices such as audio interfaces or even a Mac Mini. Elevate the look and comfort of your workspace with Curve Riser. Why use a Curve Riser stand? – Elevates your iMac or external monitor for improved ergonomics – […] #
0 notes
Text
Maximize Your Data Transfer with the USB to SD Card Reader

In the digital age, efficient data transfer is a must for professionals and hobbyists alike. A USB to SD card reader is an essential tool for anyone looking to streamline their workflow. This compact device bridges the gap between your SD card and computer, allowing for quick and easy file transfers. Here’s how you can maximize your data transfer with a USB to SD card reader.
Effortless Compatibility and Convenience
The beauty of a USB to SD card reader lies in its plug-and-play functionality. Compatible with most operating systems, it requires no additional drivers or software. Simply insert your SD card into the reader, plug it into a USB port, and you’re ready to transfer photos, videos, documents, and more with ease.
Speedy Data Transfer Rates
With a USB to SD card reader, you can enjoy transfer rates that far exceed those of direct camera-to-computer connections. Most modern readers support USB 3.0, which boasts speeds up to 5 Gbps. This means less time waiting for files to transfer and more time getting work done.
Versatile Use Cases
Whether you’re a photographer needing to quickly offload RAW images, a drone enthusiast recording 4K video, or a gamer wanting to expand storage, a USB to SD card reader is your go-to solution. It’s also invaluable for transferring data between devices that may not have SD card slots, such as smartphones and tablets.
Choosing the Right Reader for You
When selecting a USB to SD card reader, consider the following:
Transfer Speed: Look for USB 3.0 compatibility for faster speeds.
Build Quality: Durable materials ensure longevity and protect your data.
Portability: Compact designs make it easy to carry with your laptop or camera gear.
Multi-Card Support: Some readers support various types of memory cards, adding versatility.
Optimizing Your Workflow
Integrating a USB to SD card reader into your workflow can significantly enhance productivity. It’s a simple upgrade that can save you time and frustration, especially when working with large files. Plus, with the added benefit of being able to use it on multiple devices, it’s a versatile tool that adapts to your needs.
Conclusion
A USB to SD card reader is more than just an accessory; it’s a necessity for anyone who values efficiency in their digital life. By choosing the right reader and integrating it into your workflow, you’ll wonder how you ever managed without it.
Related article:
0 notes
Text
SanDisk Professional Pro-Blade Transport Review: A Smart Modular Stora - Videoguys
New Post has been published on https://thedigitalinsider.com/sandisk-professional-pro-blade-transport-review-a-smart-modular-stora-videoguys/
SanDisk Professional Pro-Blade Transport Review: A Smart Modular Stora - Videoguys
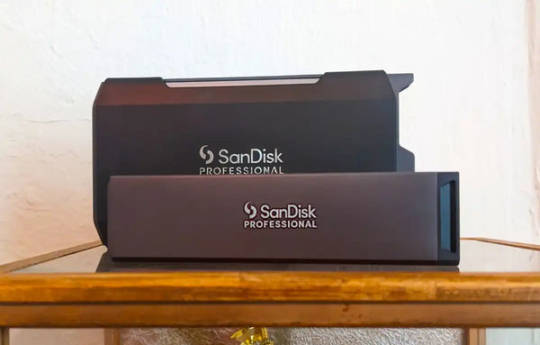
Dive into Jon Jacobi’s detailed review of the SanDisk Professional Pro-Blade Transport, a sleek modular storage system optimized for Mac users. Discover its stylish design, performance capabilities, and compatibility considerations.
Introduction: Explore the SanDisk Professional Pro-Blade Transport with Jon Jacobi’s insightful review, tailored for Mac aficionados seeking efficient storage solutions. Uncover the device’s chic design, practical features, and performance nuances, all expertly analyzed for your convenience.
Content: SanDisk Professional Pro-Blade Transport: A Sleek Modular Storage Solution for Mac Enthusiasts
Jon Jacobi’s review for MacWorld offers an in-depth examination of the SanDisk Professional Pro-Blade Transport, an innovative storage solution designed specifically for Mac users. Discover the device’s compact design, intuitive functionality, and performance characteristics, as Jacobi navigates through its various aspects.
Mac Compatibility and Transfer Speeds: Understanding the Limitations Despite its impressive capabilities, the Pro-Blade Transport encounters a notable constraint on Mac systems: limited transfer speeds capped at 10Gbps. Jacobi delves into the intricacies of this compatibility issue, shedding light on the device’s potential versus its real-world performance on macOS platforms.
Design and Construction: Aesthetics Meets Functionality Jacobi explores the sleek design and sturdy construction of the Pro-Blade Transport, highlighting its compact form factor and stylish appearance. Learn about the device’s modular architecture, featuring NVMe SSD modules known as “Mags,” and their seamless integration with the main dock.
Performance Testing: Real-World Insights Gain valuable insights from Jacobi’s performance testing, which evaluates the Pro-Blade Transport’s speed and efficiency using industry-standard benchmarking tools. Explore the device’s capabilities in handling everyday tasks and data-intensive operations, providing a nuanced perspective on its practical utility.
Speculating on Potential Enhancements Looking ahead, Jacobi speculates on potential enhancements to the Pro-Blade Transport, including the integration of USB4 support to unlock higher transfer speeds on compatible Mac systems. Stay informed about SanDisk’s strategic roadmap and its implications for future iterations of this innovative storage solution.
Making Informed Decisions In conclusion, Jacobi offers valuable insights for prospective buyers, emphasizing the importance of weighing performance considerations against aesthetic appeal and pricing. Navigate the purchasing dilemma with confidence, armed with a comprehensive understanding of the Pro-Blade Transport’s strengths and limitations.
Read the full article by Jon Jacobi for MacWorld HERE
#architecture#Article#comprehensive#construction#content#data#Design#efficiency#factor#Features#form#Full#Future#Industry#insights#integration#Learn#Light#Mac#mac users#MacOS#modular#performance#Pricing#Read#review#speed#Storage#testing#Tools
0 notes
Text
Why is Kwikpic the Best Photo Sharing app?

Intro
It’s a tricky question when the best of the best photo sharing app are accessible to you. But, whatever your needs, a photo sharing app or website is waiting for you! These websites can also help you keep track of the snapshots you take. Many have exceptional cloud storage and photo-sharing facilities if you’ve got a web connection or Bluetooth.
They’re also excellent for sharing photos with your circle of relatives and friends, and many of them include full-featured editing software. There are probably thousands of photo sharing apps and websites you’ve tried, but after a certain point, they charge you to keep your beloved memories intact, which is usually out of reach for young people, especially photo enthusiasts who take pictures every second of the day.
What makes Kwikpic the ideal photo sharing app for today’s trend? Let’s Find Out!
Kwikpic is an AI-enabled image-processing and smart community-driven AI best free photo sharing platform. It shares and receives high-quality pictures without compression, with no space issues like G-drive! Loaded with AI functions—image enhancement, geo-tagging, face recognition downloads, and proprietary optimization—it lets users share photos in high quality while ensuring fast uploads and rendering for the best user experience.
It is FREE
It is Compatible with: windows/mac/iOS/android
Features are as follows:
Kwikpic filters and marks the best quality images based on sharpness, focus, brightness and other parameters to let users quickly choose the photos they should upload on social media.
It is Ad-Free, smart & easy to share, with No Space Crunch, Face recognized downloads, Group Shares, Cool Privacy settings, and Geo-tagging
Social Media, Rewards, Social Ai – a clean social media for the photographer inside every human being where users can highlight their best clicks, and use Kwikpic Social Ai to auto-add captions, tags, credits, filters, gifs etc.
Face recognition download is the kwikpic’s standout feature among all! Instantly see your photos and the app automatically downloads just them to your phone gallery!
Let us check the features of Kwikpic.
What makes Kwikpic the best photo sharing Platform for you?
You love Huge Cloud Storage & Easy Photo Sharing:

Now instantly share photos and upload 100+ pictures at one go-
That fits you well, doesn’t it? It is a tricky deal when you have to share 30+ pictures at an interval of over 20 times, but now photo sharing has become easy and hassle-free with the new Kwikpic photo sharing app. Kwikpic’s proprietary optimization also lets users share photos in high quality while ensuring fast uploads and rendering for the best UX.
Now instantly share over 100 pictures at once, or just drop a file from your desktop or gallery; it will also automatically upload your subfolders within the main folder, and you will be good to go! You can use the huge cloud storage to keep your memories safe! Kwikpic provides over 25,000 photo storage options!
You may love to read: iCloud vs Kwikpic: Photo Sharing Platforms
You hate picture Compression: kwikpic saves the quality of your pictures from degrading:

When you share photos across messaging apps, the quality of the images degrades, and finding those photos quickly becomes difficult. Then why not use an app dedicated to your best photo sharing experience? Kwikpic does a great job of keeping your memories intact and saving you from further compression.
Kwikpic’s optimization technology retains 99.8% of the original photo quality.
You are a fan of Wireless photo sharing: over Bluetooth Or wifi

It has become so easy to now share your pictures without worrying about “where my USB cable is.” Kwikpic lets its users share pictures via Bluetooth and WiFi, wirelessly! Enjoy the speed at which you share and receive your pictures!
You may love to read :- Best Photo Sharing Apps for You
You want Compatibility: Photo Sharing over Windows/Mac/iOS/Android

Connectivity and accessibility are crucial when people use various operating systems. For instance, the photo sharing app Kwikpic is accessible on almost all platforms, whereas Airdrop is only intended for iOS and Mac users. Even if you have a different operating system than your friends, don’t be concerned about “how to get my photos!”
You want a Group Share facility with Privacy photo sharing settings
Users who define the purpose of their group have two options:
1. Personal group for family and friends
2. Public groups for a large public, for example, Business groups
You want Privacy settings in public groups (The ultimate showstopper)

The privacy settings of the Kwikpic free photo sharing app are a game changer for its users! How? You can change the settings of the group when you share pictures in a large public group. That means users in the group will only be able to see their pictures, as the Kwikpic photo-sharing app has this awesome ability for selective downloads with face recognition.
You want an Ad-Free, FREE photo sharing platform!

Nobody in their wildest dreams could have imagined that with such killer specifications and users serving the platform, any photo sharing app would be completely free with no advertisements! Hail Kwikpic, the best photo sharing app ever!
Related blog :-hacks for Hassle-free Photo sharing
Lowkey you are a Photographer: ‘Cause Kwikpic’s the Safe Haven!

he kwikpic photo-sharing platform not only serves casual users but also professional photographers. The app is dedicated to serving its clients in the best way possible. Along with that, there are some added benefits for photography business owners:
Share photos instantly with all event guests using face recognition. Maximize your customer reach and delight.
Upload, download and render Faster for the best user experience using Kwikpic’s proprietary Image Optimization.
Add your branding, personalise all galleries, and Track Analytics.
Multiple download settings – On/Off (Useful if the client has not paid/privacy issues), Web Quality/Full Quality
Auto-generated portfolio, URL consisting of your best pictures.
Thus, be it a wedding party, a casual hangout with your friends or cousins, a traveler, or a photography enthusiast, photos are common among all of them! As a result, these memory keepers are always in need of more storage space for their priceless memories!
As deemed the best photo sharing platform, what are the other advantages of Kwikpic
Do you often face these issues?
Photo sharing across messaging platforms is deteriorating photo quality.
Unwanted photos get downloaded, and the gallery gets messed up, creating storage issues.
Impossible to locate photos in a cluttered gallery.
You never receive their photos from public places and events.
Even if you do, browsing through 1k+ is a time-consuming process and leads to privacy-related issues.
Kwikpic’s Photo-Sharing Solution to these Problems
You can create a group on the Kwikpic App for every occasion. Just share all the photos, and it will intelligently detect your friends and family using face recognition.
It shares the pictures in Original quality without messing up your gallery.
The app detects and Pins the Best looking photos at the top, helping you choose the right pictures for your social media.
It only downloads photos of the people important to you, while unwanted photos remain on the server.
A clean social media for the photographer inside you Post your best clicks. Ai generated captions, gifs, memes, picture credits, and tags. With a single tap, you can share on Instagram and Facebook.
Get points and rewards for every upload.
#photo sharing app#photo sharing#photography#image sharing#photographer#wedding sharing app#wedding#image#images#image sharing sites
0 notes
Text
do norton vpn and security come together
🔒🌍✨ Get 3 Months FREE VPN - Secure & Private Internet Access Worldwide! Click Here ✨🌍🔒
do norton vpn and security come together
Norton VPN features
Norton VPN is a robust tool designed to ensure your online privacy and security. Packed with a range of features, it offers comprehensive protection for your internet activities.
One standout feature of Norton VPN is its ability to encrypt your data, keeping it safe from prying eyes. With advanced encryption protocols, including AES-256, it creates a secure tunnel for your online traffic, preventing hackers, ISPs, and other third parties from intercepting your data.
Moreover, Norton VPN offers a vast network of servers worldwide, allowing you to browse the internet anonymously from virtually anywhere. Whether you're at home, traveling, or using public Wi-Fi, you can connect to a server of your choice and enjoy unrestricted access to content while keeping your real IP address hidden.
For users concerned about streaming content from geo-restricted platforms, Norton VPN has you covered. Its servers are optimized for streaming, ensuring smooth playback of your favorite movies, TV shows, and sports events, regardless of your location. Additionally, Norton VPN bypasses censorship and firewalls, granting you access to the global internet without limitations.
Furthermore, Norton VPN prioritizes user privacy by adhering to a strict no-logs policy. This means that it doesn't track or store your online activities, ensuring that your browsing history remains private and secure.
In terms of usability, Norton VPN offers user-friendly apps for various devices, including Windows, Mac, Android, and iOS. With just a few clicks, you can connect to a server, toggle settings, and customize your VPN experience according to your preferences.
Overall, Norton VPN stands out for its robust security features, global server network, streaming capabilities, privacy protection, and user-friendly interface, making it a reliable choice for safeguarding your online presence.
Norton security integration
Norton Security Integration: Enhancing Data Security and Protection
In today's digital landscape, safeguarding sensitive data is paramount, and integrating Norton security solutions proves to be a robust defense mechanism against cyber threats. Norton, a renowned name in the cybersecurity realm, offers a suite of tools and features that fortify data security across various platforms and devices.
By integrating Norton security software, individuals and businesses benefit from real-time protection against malware, ransomware, phishing attacks, and other online risks. The seamless integration of Norton solutions ensures that all endpoints, networks, and systems are shielded from evolving cyber threats, providing users with peace of mind and a secure digital environment.
Moreover, Norton security integration extends beyond traditional antivirus protection, offering advanced features such as firewall protection, VPN services, identity theft prevention, and secure cloud storage options. These robust layers of security work in unison to create a comprehensive defense infrastructure that mitigates risks and safeguards data integrity.
Furthermore, the user-friendly interface of Norton security solutions makes integration and management hassle-free, allowing users to customize settings, perform scans, and receive real-time alerts effortlessly. Whether it's securing personal devices or fortifying an entire network, Norton's versatile security suite caters to the diverse security needs of individuals and organizations alike.
In conclusion, Norton security integration is a proactive approach towards enhancing data security and protection in an increasingly digital world. By leveraging Norton's cutting-edge technologies and comprehensive security features, users can defend against cyber threats effectively and uphold the confidentiality and integrity of their valuable data.
Unified Norton VPN and security
Title: The Integration of Norton VPN and Security: A Unified Approach to Online Protection
In an era where online security is paramount, Norton has taken a significant step forward by integrating its VPN service with its renowned security suite. This move marks a strategic shift towards offering users a unified solution for protecting their digital lives.
Norton's VPN, known for its robust encryption and secure browsing capabilities, now seamlessly integrates with its comprehensive security software. This integration not only simplifies the user experience but also enhances overall protection against cyber threats.
One of the key benefits of this unified approach is the ability to safeguard sensitive information across all online activities. Whether browsing the web, accessing public Wi-Fi networks, or conducting online transactions, users can trust that their data remains encrypted and secure.
Moreover, the integration of Norton VPN and security streamlines management for users, eliminating the need to juggle multiple applications. With a single interface for both VPN and security features, users can easily monitor and control their protection settings without any hassle.
Another advantage is the enhanced privacy offered by Norton's VPN, which masks users' IP addresses and encrypts their internet traffic. By rerouting connections through secure servers worldwide, Norton VPN ensures anonymity and protects against prying eyes.
Furthermore, Norton's comprehensive security suite provides advanced features such as antivirus protection, firewall, and identity theft prevention. By combining these capabilities with VPN functionality, users benefit from a holistic approach to online security.
In conclusion, the integration of Norton VPN and security represents a significant advancement in protecting users' online privacy and data. By offering a unified solution, Norton empowers users to navigate the digital world with confidence, knowing that their information is safe and secure.
Compatibility of Norton VPN and security
Norton VPN is a popular choice for individuals seeking enhanced online privacy and security. However, when it comes to compatibility with other security software, users may have concerns. The good news is that Norton VPN is designed to work seamlessly with various security programs, ensuring comprehensive protection for your online activities.
Norton VPN is compatible with most antivirus software, including Norton Antivirus, McAfee, AVG, and Avast, among others. This compatibility ensures that your device remains secure from various online threats while benefiting from the added layer of privacy provided by the VPN service. Additionally, Norton VPN can be used alongside firewalls and other security tools without any conflicts, allowing for a multi-layered approach to safeguarding your digital presence.
For individuals using Norton VPN on multiple devices, compatibility is essential. The service is compatible with Windows, macOS, Android, and iOS operating systems, making it a versatile choice for users across different platforms. This cross-platform compatibility ensures that you can enjoy secure and private browsing experiences on all your devices without compromising on safety.
In conclusion, Norton VPN offers robust security and privacy features while maintaining compatibility with a wide range of security software and devices. By combining the benefits of a VPN with other security tools, users can create a strong defense against online threats and enjoy peace of mind while browsing the internet.
Norton VPN and security bundle
Title: Enhancing Online Security with Norton VPN and Security Bundle
In an era where digital threats lurk around every virtual corner, safeguarding your online presence is paramount. Norton, a renowned name in cybersecurity, offers a comprehensive solution with its VPN and security bundle. By combining the power of Norton Secure VPN and Norton 360, users can enjoy enhanced protection and privacy across their digital activities.
Norton Secure VPN serves as the first line of defense by encrypting your internet connection, shielding sensitive data from prying eyes. Whether you're browsing the web, accessing public Wi-Fi, or streaming content, Norton Secure VPN establishes a secure tunnel that masks your online activities, preventing unauthorized access and potential breaches.
Complementing the VPN service is Norton 360, a robust security suite designed to combat evolving cyber threats. With features such as real-time threat protection, secure VPN, password manager, and dark web monitoring, Norton 360 offers comprehensive defense against malware, phishing attempts, and identity theft. Its intuitive interface and automatic updates ensure hassle-free security management, allowing users to stay protected without compromising usability.
Together, the Norton VPN and security bundle provide a holistic approach to online security, addressing both privacy concerns and cybersecurity threats. Whether you're a casual internet user, a remote worker, or a digital nomad, investing in reliable protection is essential to safeguarding your digital identity and sensitive information.
Moreover, Norton's commitment to innovation and continuous improvement means that users can trust their digital safety to a brand that consistently evolves to meet the challenges of an ever-changing threat landscape.
In conclusion, the Norton VPN and security bundle offer peace of mind in an increasingly digital world. By prioritizing privacy, security, and user convenience, Norton empowers individuals to navigate the online realm with confidence, knowing that their digital footprint is protected by industry-leading solutions.
0 notes
Text
does a vpn hide device id
🔒🌍✨ Get 3 Months FREE VPN - Secure & Private Internet Access Worldwide! Click Here ✨🌍🔒
does a vpn hide device id
VPN device identification
VPN Device Identification: Ensuring Secure and Anonymous Internet Browsing
In today's digital age, online privacy and security have become primary concerns for internet users worldwide. Virtual Private Networks (VPNs) have gained popularity as essential tools for safeguarding personal information and ensuring anonymous browsing. However, it is crucial to understand the importance of VPN device identification in enhancing the overall effectiveness of these services.
VPN device identification refers to the process of verifying the device used to connect to a VPN server. By accurately identifying the device, VPN providers can enhance security measures and prevent unauthorized access. This authentication process ensures that only trusted devices can establish a connection to the VPN network, adding an extra layer of protection against potential cyber threats.
Furthermore, VPN device identification plays a vital role in maintaining user anonymity. By verifying the device, VPN services can track and monitor authorized connections, ensuring that user data remains confidential and secure. This practice is especially crucial for individuals who rely on VPNs to bypass geo-restrictions and access region-blocked content while maintaining privacy.
In addition to security benefits, VPN device identification enables service providers to optimize network performance. By accurately identifying devices, VPN servers can allocate resources more efficiently, resulting in enhanced speed and reliability for users. This optimization contributes to a seamless browsing experience, allowing individuals to browse the internet securely without compromising on performance.
In conclusion, VPN device identification is a critical aspect of ensuring secure and anonymous internet browsing. By authenticating devices, VPN services can enhance security measures, protect user privacy, and optimize network performance. As online threats continue to evolve, implementing robust device identification processes is essential for maintaining a safe and reliable VPN experience.
Device ID privacy
Device ID privacy refers to the protection of individuals' personal information associated with unique identifiers assigned to their electronic devices. These identifiers, such as IMEI (International Mobile Equipment Identity) numbers for smartphones or MAC (Media Access Control) addresses for computers, are crucial for device functionality and connectivity but can also be used to track users' activities and behavior across different platforms and services.
Maintaining device ID privacy is essential for safeguarding users' sensitive data and ensuring their online security. Unauthorized access to device IDs can lead to various privacy concerns, including targeted advertising, location tracking, identity theft, and surveillance. Therefore, both users and device manufacturers must take proactive measures to mitigate these risks.
One approach to protecting device ID privacy is through anonymization techniques, where personally identifiable information is removed or encrypted from device identifiers before they are shared or stored. Additionally, users can opt-out of data collection practices by adjusting their device settings or using privacy-focused tools and applications that restrict access to their device IDs.
Regulatory frameworks such as the General Data Protection Regulation (GDPR) in the European Union and the California Consumer Privacy Act (CCPA) in the United States also play a significant role in ensuring device ID privacy. These laws impose strict requirements on companies regarding the collection, processing, and storage of personal data, including device identifiers, and empower users with greater control over their privacy preferences.
Overall, prioritizing device ID privacy is essential for fostering trust between users, device manufacturers, and service providers in the digital ecosystem. By implementing robust privacy measures and adhering to regulatory standards, stakeholders can uphold individuals' rights to privacy while promoting innovation and advancement in technology.
Anonymity with VPN
In today's digital age, where privacy concerns loom large and cyber threats are ever-present, the importance of anonymity cannot be overstated. One effective tool that individuals can utilize to safeguard their online anonymity is a Virtual Private Network (VPN).
A VPN works by encrypting the user's internet connection and routing it through a server located in a different geographic location. This process masks the user's IP address, making it appear as though they are accessing the internet from the location of the VPN server rather than their actual location. As a result, their online activities become significantly more difficult to trace back to them.
One of the key benefits of using a VPN is the ability to browse the internet anonymously. Whether you're accessing sensitive information, conducting research, or simply browsing social media, a VPN ensures that your online activities remain private and secure.
Moreover, a VPN can also help bypass geo-restrictions and censorship imposed by governments or internet service providers. By connecting to a server in a different country, users can access content and websites that may be blocked in their own region.
However, it's important to choose a reputable VPN provider that prioritizes user privacy and security. Opting for a VPN with a strict no-logs policy ensures that your online activities are not being tracked or recorded.
In conclusion, anonymity with VPN offers individuals the peace of mind and security they need to navigate the digital world with confidence. By encrypting your internet connection and masking your IP address, a VPN enables you to browse the web anonymously while safeguarding your privacy from prying eyes.
Concealing device identifier
A device identifier is a unique code assigned to a specific electronic device, such as a smartphone, tablet, or computer. It allows the device to be identified on a network and helps track its activities. However, there are situations where concealing the device identifier may be necessary for privacy and security reasons.
One of the main reasons to conceal a device identifier is to prevent tracking of online activities. Advertisers and data analytics companies often use device identifiers to monitor users' behavior and target them with personalized ads. By concealing the device identifier, users can protect their privacy and prevent their online activities from being monitored without their consent.
Concealing the device identifier can also help enhance security. Hackers and cybercriminals may target specific devices based on their identifiers, making them more vulnerable to attacks. By concealing the device identifier, users can make it harder for malicious actors to target their devices and reduce the risk of unauthorized access to their personal information.
In some cases, concealing the device identifier may be necessary to access restricted content or bypass censorship measures. Some websites and online services restrict access based on the device identifier, so concealing it can help users bypass these restrictions and access the content they need.
Overall, concealing the device identifier can help protect privacy, enhance security, and bypass restrictions online. Users should be aware of the implications of concealing their device identifier and weigh the risks and benefits based on their individual needs and preferences.
VPN and device fingerprinting
VPN (Virtual Private Network) and device fingerprinting are two interrelated concepts that play a crucial role in protecting user privacy and security online.
A VPN is a service that creates a secure and encrypted connection over the internet. It helps users to mask their IP address and encrypt their internet traffic, making it difficult for hackers, ISPs, and government agencies to monitor their online activities. By routing the internet connection through a VPN server, users can browse the web anonymously and access geographically restricted content.
However, even when using a VPN, users are not completely anonymous. Device fingerprinting is a technique used by websites and online services to identify and track users based on unique characteristics of their devices. These characteristics include browser type, operating system, screen resolution, time zone, installed plugins, and more. By analyzing these attributes, websites can create a unique fingerprint for each device and track users across different websites, even when using a VPN.
To enhance privacy and security online, users can take steps to prevent device fingerprinting. This includes using privacy-focused browsers, disabling or limiting tracking cookies, regularly clearing browser cache and cookies, and using browser extensions that block fingerprinting techniques.
In conclusion, while VPNs offer many benefits in protecting online privacy, users should also be aware of device fingerprinting and take necessary precautions to further enhance their anonymity and security while browsing the internet.
0 notes
Text
can you set up vpn for time capsule router
🔒🌍✨ Get 3 Months FREE VPN - Secure & Private Internet Access Worldwide! Click Here ✨🌍🔒
can you set up vpn for time capsule router
VPN setup Time Capsule
Setting up a VPN on your Time Capsule router is a great way to ensure online privacy and security for all devices connected to your network. By creating a secure connection to the internet through a VPN server, you can encrypt your data and hide your IP address from prying eyes.
To set up a VPN on your Time Capsule, you'll first need to choose a VPN service provider and sign up for an account. Once you have selected a suitable VPN service, you'll need to access your Time Capsule's settings through your web browser. Navigate to the network tab and locate the VPN section.
Next, you'll need to enter the VPN provider's server address, login credentials, and any other required information provided by your VPN service. Save your settings and establish a connection to the VPN server. Once connected, all internet traffic on your network will be encrypted and secure.
It's important to note that not all VPN services are compatible with all routers, so be sure to choose a VPN provider that is supported by Time Capsule. Additionally, make sure to regularly update your Time Capsule's firmware to ensure optimal performance and security.
Overall, setting up a VPN on your Time Capsule router is a straightforward process that can greatly enhance your online privacy and security. By taking these steps, you can enjoy a safer and more secure internet browsing experience for you and your connected devices.
Time Capsule router VPN configuration
A Time Capsule router is a popular networking device developed by Apple that combines the functionalities of a router and network-attached storage (NAS). Configuring a VPN on a Time Capsule router can enhance your network security and privacy by encrypting your internet connection.
To set up a VPN on your Time Capsule router, you first need to choose a VPN service provider and sign up for their subscription. Once you have your VPN credentials, access the Time Capsule router settings by typing its IP address into a web browser. Navigate to the router's configuration page and locate the VPN tab.
In the VPN tab, you will need to enter the connection details provided by your VPN service, including the server address, authentication type, username, and password. Depending on the VPN protocol supported by your provider, you may need to select between options such as PPTP, L2TP, or IKEv2.
After entering the VPN configuration details, save the settings and establish a connection to the VPN server. Your Time Capsule router is now configured to route all network traffic through the VPN, ensuring that your online activities are encrypted and secure from potential cyber threats.
It is important to regularly update your VPN configuration settings and choose a strong encryption protocol to safeguard your data. By configuring a VPN on your Time Capsule router, you can enjoy enhanced privacy and security while browsing the internet and accessing online services.
Setting up VPN on Time Capsule router
Setting up a Virtual Private Network (VPN) on your Time Capsule router can enhance your network security and privacy, ensuring safe data transmission over the internet. While Time Capsule routers primarily serve as backup devices for Mac computers, they also offer robust networking capabilities, including VPN support. Here's a comprehensive guide to setting up a VPN on your Time Capsule router:
Access Router Settings: Begin by accessing the Time Capsule's settings interface. Open the AirPort Utility on your Mac, select your Time Capsule from the list of available devices, and enter your administrator password to proceed.
Enable VPN Service: Navigate to the "Network" tab within the AirPort Utility. Here, you'll find the option to enable VPN services. Check the box labeled "Allow VPN connections" to activate this feature.
Configure VPN Settings: Next, specify the VPN protocol and authentication method you wish to use. Time Capsule routers typically support protocols like L2TP, PPTP, and IPSec. Choose the protocol that best suits your needs, and configure the necessary settings accordingly.
Create VPN Accounts: To allow devices to connect to the VPN, you'll need to create VPN accounts. In the AirPort Utility, select the "Base Station" menu and then click on "Add User" to generate VPN login credentials for each user or device.
Forward VPN Ports: If your router is behind another router or firewall, you may need to forward VPN ports to ensure proper connectivity. Refer to your router's documentation for instructions on port forwarding.
Test Connection: Once configured, test the VPN connection to ensure everything is functioning correctly. Connect a device to the VPN using the provided credentials and verify that it can access the network securely.
By following these steps, you can successfully set up a VPN on your Time Capsule router, safeguarding your online activities and data from potential threats. Remember to periodically review and update your VPN settings to maintain optimal security.
VPN setup guide for Time Capsule
Title: A Comprehensive VPN Setup Guide for Time Capsule Users
Time Capsule, Apple's renowned backup device, offers not only seamless backups but also the opportunity to enhance security through a Virtual Private Network (VPN). By integrating a VPN with your Time Capsule, you can safeguard your data transmissions and enjoy a secure online experience. Follow this comprehensive guide to set up a VPN with your Time Capsule effectively:
Choose a VPN Service: Select a reliable VPN service provider that offers compatibility with Time Capsule. Ensure the VPN provider supports the L2TP/IPSec protocol, as it's commonly supported by Apple devices.
Subscription and Setup: Subscribe to your chosen VPN service and follow their instructions to set up the VPN connection on your device. You'll typically receive configuration details such as server addresses, usernames, and passwords.
Access Time Capsule Settings: Open the AirPort Utility on your Mac or iOS device to access your Time Capsule settings. Navigate to the "Network" tab and select "Network Options."
Configure VPN Settings: In the "Network Options" menu, choose "VPN" and click on the "+" icon to add a new VPN configuration. Select "L2TP over IPSec" as the VPN Type.
Enter VPN Configuration Details: Enter the VPN configuration details provided by your VPN service, including the server address, account username, and password. Optionally, you can set the "Shared Secret" if required by your VPN provider.
Save Settings and Connect: After entering the VPN configuration details, click "Done" to save the settings. Then, click "Connect" to initiate the VPN connection. Your Time Capsule will now establish a secure VPN connection using the configured settings.
Verification and Testing: Once connected, verify the VPN connection by checking your network settings or using online tools to confirm your IP address and location. Test the connection to ensure seamless data transmission and enhanced security.
By following these steps, you can successfully set up a VPN connection on your Time Capsule, providing an additional layer of security for your data and online activities. Enjoy peace of mind knowing that your Time Capsule backups are protected by a secure VPN connection.
Time Capsule VPN setup tutorial
A Time Capsule VPN setup tutorial is an essential guide for those looking to enhance their online security and privacy. A Virtual Private Network (VPN) creates a secure connection between your device and the internet, protecting your data from potential cyber threats. Setting up a VPN on a Time Capsule router allows all devices connected to the network to benefit from this added layer of security.
To begin the Time Capsule VPN setup process, you will first need to choose a reputable VPN service provider and sign up for an account. Once you have selected a VPN service, follow the provider's instructions to configure the VPN settings on your Time Capsule router.
Access your Time Capsule router's settings by typing its IP address into a web browser. Locate the VPN section in the settings menu and enter the VPN configuration details provided by your VPN service provider. This typically includes the VPN server address, username, password, and any relevant encryption settings.
After entering the VPN configuration details, save the settings and restart your Time Capsule router to apply the changes. Once the VPN connection is established, all devices connected to the network will benefit from the added security and privacy provided by the VPN.
By following this Time Capsule VPN setup tutorial, you can ensure that your online activities remain secure and protected from potential threats, allowing you to browse the internet with peace of mind.
0 notes
Text
can you map a network drive over vpn
🔒🌍✨ Get 3 Months FREE VPN - Secure & Private Internet Access Worldwide! Click Here ✨🌍🔒
can you map a network drive over vpn
Mapping network drive
To map a network drive is to create a direct link between a computer and a shared folder on a network. This allows users to access the shared resources as if they were stored on their own local machine. Mapping a network drive can be particularly useful in a professional setting where several users need to collaborate and access the same files easily.
The process of mapping a network drive involves assigning a drive letter to the shared folder, making it easier for users to locate and access the files. This can be done by following a few simple steps, regardless of whether you are using a Windows or Mac operating system.
In Windows, you can map a network drive by opening File Explorer, selecting 'This PC' and then clicking on 'Map network drive'. You will then need to enter the network address of the shared folder and choose a drive letter before clicking 'Finish' to complete the process.
For Mac users, mapping a network drive involves opening Finder, selecting 'Go' from the menu bar, and then 'Connect to Server'. You will need to enter the server address and login credentials before choosing the shared folder you want to map.
Mapping a network drive streamlines the process of accessing shared resources and improves collaboration among users. By following the simple steps outlined above, you can easily map a network drive and enjoy seamless access to shared files and folders on your network.
VPN network drive mapping
Title: Unlocking Seamless Connectivity: A Guide to VPN Network Drive Mapping
In today's digital landscape, where remote work and data security are paramount, Virtual Private Network (VPN) network drive mapping emerges as a vital tool for seamless connectivity and protected data transmission. This innovative solution allows users to access and manage files stored on network drives from anywhere in the world, ensuring productivity and confidentiality simultaneously.
VPN network drive mapping operates by establishing a secure connection between a user's device and the corporate network through a VPN client. Once connected, users can easily map network drives to their local file system, essentially integrating remote storage into their device's file explorer. This integration facilitates effortless access to files and folders stored on the corporate network as if they were locally stored, enhancing workflow efficiency and collaboration regardless of geographical location.
The benefits of VPN network drive mapping extend beyond convenience. By encrypting data transmitted between the user's device and the network, VPNs safeguard sensitive information from potential cyber threats and unauthorized access. This encryption ensures that files remain confidential and protected, mitigating the risks associated with remote data access.
Implementing VPN network drive mapping requires careful consideration of security protocols and network configurations to guarantee optimal performance and data integrity. Additionally, users must adhere to company policies regarding data access and usage to maintain compliance and uphold cybersecurity standards.
In conclusion, VPN network drive mapping revolutionizes remote access to corporate data by combining convenience with robust security measures. By leveraging this technology, organizations can empower their workforce with the flexibility to work remotely without compromising data confidentiality. Embracing VPN network drive mapping is not just a step towards modernizing workflow practices; it's a strategic investment in safeguarding sensitive information in an increasingly interconnected world.
Establishing network drive over VPN
When it comes to establishing a network drive over a Virtual Private Network (VPN), there are several steps and considerations to keep in mind to ensure a seamless and secure connection.
First and foremost, it is important to have a reliable VPN service in place that offers encryption and secure tunneling protocols to protect the data being transmitted between the network drive and the user's device. Popular VPN protocols include OpenVPN, L2TP/IPsec, and IKEv2.
Once the VPN is set up and running on the user's device, the next step is to configure the network drive connection. This typically involves mapping the network drive to a specific drive letter on the user's computer. The user will need to know the network drive's path, which can be a URL or an IP address, as well as any required credentials to access the drive.
After entering the necessary information, the user should be able to access the network drive over the VPN connection. This allows for secure file sharing and collaboration among users who are connected to the same VPN network.
It is important to note that setting up a network drive over VPN may require some technical expertise, especially when it comes to configuring the VPN connection and mapping the network drive. Users who are unsure of how to proceed should consult with their IT department or a knowledgeable professional for assistance.
In conclusion, establishing a network drive over VPN is a helpful way to access and share files securely over a private network. By following the appropriate steps and ensuring a secure VPN connection, users can effectively utilize network drives for their file storage and sharing needs.
Connecting network drive via VPN
When working remotely or accessing files from a different location, connecting a network drive via a VPN (Virtual Private Network) is an essential process to access shared resources securely.
To connect a network drive via VPN, you first need to establish a VPN connection to the network where the drive is located. Once the VPN connection is successfully established, you can proceed to map the network drive to your computer.
Mapping a network drive involves assigning a drive letter (such as Z:, X:, or any available letter) to the shared folder or drive on the network. This allows you to access the shared files and folders just like you would with a local drive on your computer.
To map a network drive via VPN on a Windows system, you can follow these steps:
Open File Explorer and select 'This PC.'
Click on 'Computer' from the top menu and choose 'Map network drive.'
In the Drive box, select the drive letter you want to use for the network drive.
In the Folder box, enter the path to the shared folder or drive using the VPN connection (e.g., \servername\foldername).
Check the 'Reconnect at sign-in' option if you want the drive to be mapped every time you log in.
Click 'Finish' to complete the mapping process.
By connecting a network drive via VPN, you can securely access and work with files and resources located on a remote network as if they were stored locally on your computer. This method ensures data security and privacy while enabling seamless access to shared resources from anywhere with an internet connection.
Network drive access through VPN
Accessing network drives through a Virtual Private Network (VPN) provides a secure and efficient way for individuals to access files and folders remotely. By utilizing a VPN connection, users can securely connect to their organization's network drive from any location with internet access.
When connected to a VPN, all data transmitted between the user's device and the network drive is encrypted, ensuring confidentiality and protecting sensitive information from unauthorized access. This added layer of security is especially crucial when accessing confidential business files or personal data stored on a network drive.
To access a network drive through a VPN, users typically need to authenticate themselves by entering their credentials. Once authenticated, they can browse and access files on the network drive just as if they were physically connected to the organization's internal network. This seamless connectivity enables remote workers to collaborate with colleagues, access important documents, and work efficiently from anywhere in the world.
Organizations often implement VPN solutions to facilitate secure remote access to network resources, allowing employees to work remotely without compromising data security. By accessing network drives through a VPN, users can enjoy the benefits of remote work while maintaining the integrity and security of their organization's data.
In conclusion, network drive access through VPN offers a secure and convenient solution for remote file access, enabling users to stay productive and connected while safeguarding sensitive information from potential security threats.
0 notes
Link
0 notes
Text
Data Backup Services for Top Cloud Storage Options
Data backup services are essential to protect your data from loss or corruption. Backblaze is one of the best cloud backup services with a focus on simplicity, backing up all your files on hard drives, external drives, and uploading new or changed files as they appear.

In today's digital age, data is crucial for businesses and individuals alike. Losing data can cause significant financial and emotional distress. Therefore, data backup services have become a necessity to protect critical information from loss or damage. This article will discuss different types of data backup services available in the market, their benefits, and how to select the right service for your needs.
You'll also learn about the cost, security, and performance factors that you should consider when choosing a data backup service.
Top Cloud Storage Options
Looking for the best cloud backup services? Backblaze Business is a top choice with easy-to-use app that automatically backs up all your files on hard drives and external drives. Other great options include Carbonite, IDrive, and Acronis Cyber Protect Home Office.
Top Cloud Storage Options When it comes to data backup services, cloud storage is an increasingly popular choice for businesses of all sizes. More and more people are recognizing the convenience of storing data in the cloud, knowing that backups are accessible from anywhere and can be easily restored in case of data loss. In this blog post, we will highlight the top cloud storage options for businesses to consider.
Backblaze Business
Backblaze is one of the best cloud backup services with a strong focus on simplicity. Just install the app on Windows or Mac, it backs up all your files on hard drives and external drives. It then uploads new or changed files as they appear.
Google Cloud Backup
Google Cloud backup provides businesses with scalable and secure cloud storage solutions. They offer features such as data encryption, automated backups, and real-time monitoring. Google Cloud backup also integrates well with other Google services, making it an attractive choice for businesses already using the Google suite of tools.
Idrive
IDrive provides cloud backup services for PCs, Macs, and mobile devices. They offer backup and restore options for files, folders, and full system backups. IDrive also includes features such as cloud synchronization, server backups, and network backups.
Carbonite
Carbonite provides a range of cloud backup and recovery services for businesses of all sizes. They offer features such as automatic backup of data, encryption for your data in transit and at rest, and a user-friendly interface.
Crashplan
Crashplan offers cloud backup services for small businesses, large enterprises, and individuals. They provide automatic and continuous backups of all files and folders, as well as the option for selective backup. They also offer advanced security features including 256-bit AES encryption.
Microsoft Azure Backup
Microsoft Azure Backup provides cloud backup services for Microsoft applications, as well as third-party services. They offer automated backups, flexible restore options, and the ability to tailor the backup and recovery process to your specific needs.
Cohesity
Cohesity provides cloud backup and data management solutions for businesses of all sizes. They offer features such as automated data tiering, intelligent storage optimization, and advanced search capabilities to make it easy to find and recover data.
Druva
Druva provides cloud backup and data protection solutions for businesses looking for a comprehensive data backup strategy. They offer features such as continuous data protection, backup for physical and virtual environments, and integration with public clouds to provide a hybrid data protection approach. In conclusion, businesses have many cloud storage options to choose from when it comes to data backup services. Whether you're looking for a simple, user-friendly backup solution, or a comprehensive data protection strategy, there's a cloud storage provider that will fit your needs.
Cost-effective Data Backup Solutions
Looking for cost-effective data backup solutions? Look no further than our top-rated cloud backup services! With options like Backblaze, Dropbox, IDrive, and Acronis Cyber Protect Home Office, you can protect your data without breaking the bank. Choose the solution that's right for you and keep your data safe and secure.
What Is The Real Cost Of Backing Up Data?
Backing up data is not an option but a necessity, and the cost of a data loss catastrophe can be huge. The real cost of backing up data involves more than just the cost of hard drives or cloud services. It includes the time and effort that go into designing, managing, testing, and maintaining a backup system. It also involves the cost of downtime, loss of productivity, customer dissatisfaction, and potential legal fees in the event of data loss.
How Much Does Data Backup Cost For Small Business?
The cost of data backup for small businesses can vary depending on the size of the business, the amount of data that needs to be backed up, and the complexity of the backup system. Some small businesses may opt for free or low-cost backup solutions, such as cloud-based services like Google Drive, Dropbox, or OneDrive. However, these solutions may not provide the necessary data security and backup features that a small business needs. On average, a small business can expect to invest between $1,000 to $10,000 per year for a reliable backup system.
What Is The Most Cost-effective Backup Solution?
Choosing a cost-effective backup solution depends on the specific needs of the business. However, a few cost-effective backup solutions include cloud-based backup services like Backblaze, which offers unlimited backup storage at a low monthly rate, and Acronis Cyber Protect Home Office, which provides flexible and feature-rich backup solutions. Another cost-effective option is using external hard drives or network-attached storage devices, which can provide a low-cost backup solution that is easy to set up and manage. In conclusion, cost is an important factor to consider when selecting a data backup solution, but it should not be the primary focus. A reliable backup system can save a business from potential data loss catastrophes, which can equate to major losses in revenue and productivity. Therefore, investing in a robust backup system is essential to protect a business's data and ensure its continuity.
Conclusion
Data backup services are essential for any business to ensure the continuity of their data and avoid the repercussions of data loss. Choosing the best backup service can save you costs and time, and offer adequate storage for your data.
Backblaze is a cost-effective and reliable solution for small and large businesses alike, offering simple installation and automatic backups for all your files. Backing up your data is not only a wise decision but a necessary one, and with the right backup service, you can protect your data and your business.
1 note
·
View note
Text
The Importance of Durable Flooring In Warehouse Operations
Consideration of all these factors with the right balance of cost and longevity will lead to the most suitable choice of warehouse flooring.
0 notes
Last Seen Blogs

marenka18
Cosas feas

nazareth-moralsg-blog
Nazareth

strategyblog201
Untitled

sidneygale
Sidney Gale!

randymoon-blog1
A Happy Doldol Blog