#cloud computing tutorial
Explore tagged Tumblr posts
Visit Tumblr Blog
Explore Tumblr blogs with no restrictions, modern design and the best experience.
Last Seen Tumblr Blogs


Fun Fact
If you dial 1-866-584-6757, you can leave an audio post for your followers.
Text
Cloud Computing Tutorial for Newbies: Learn the Fundamentals in Easy Steps

In today's digital era, cloud computing has become an essential part of technology. But what exactly is cloud computing? Simply put, cloud computing is the delivery of computing services like storage, servers, databases, and software over the internet, commonly known as "the cloud." It allows users to access and manage data anytime and anywhere without needing physical storage devices.
Why Learn Cloud Computing?
Cloud computing is transforming how businesses operate, offering flexibility, cost savings, and scalability. For beginners, understanding cloud computing opens up opportunities in IT and beyond. Whether you're a student, a professional, or an entrepreneur, learning the basics of cloud computing can help you stay ahead in a competitive world.
Key Concepts in Cloud Computing
Types of Cloud Services: The primary services include Infrastructure as a Service (IaaS), Platform as a Service (PaaS), and Software as a Service (SaaS).
Deployment Models: Cloud computing can be public, private, or hybrid, depending on how resources are shared.
Benefits: Cloud computing reduces costs, ensures data security, supports collaboration, and offers seamless scalability.
How to Get Started
To begin your cloud computing journey, start by learning the fundamentals. Focus on understanding basic terms, benefits, and real-world applications. There are many online resources and tutorials available to guide you through this process.
For a detailed guide on cloud computing, check out this Cloud Computing Tutorial. This resource provides in-depth knowledge to help you master cloud computing step by step.
0 notes
Text

Looking to understand cloud computing? This beginner-friendly tutorial covers the basics, benefits, and essential concepts in simple terms. Perfect for learners starting their cloud journey, it provides clear guidance to build your foundational knowledge step by step.
0 notes
Text
youtube
Open Source & Private File Sync Made Simple
Syncthing Tutorial
#education#free education#technology#Syncthing Tutorial#open source#cloud storage#educate yourselves#educate yourself#cloudcomputing#Private File Sync#file management#computer tips#youtube#Syncthing#Youtube
3 notes
·
View notes
Text

TOP 10 courses that have generally been in high demand in 2024-
Data Science and Machine Learning: Skills in data analysis, machine learning, and artificial intelligence are highly sought after in various industries.
Cybersecurity: With the increasing frequency of cyber threats, cybersecurity skills are crucial to protect sensitive information.
Cloud Computing: As businesses transition to cloud-based solutions, professionals with expertise in cloud computing, like AWS or Azure, are in high demand.
Digital Marketing: In the age of online businesses, digital marketing skills, including SEO, social media marketing, and content marketing, are highly valued.
Programming and Software Development: Proficiency in programming languages and software development skills continue to be in high demand across industries.
Healthcare and Nursing: Courses related to healthcare and nursing, especially those addressing specific needs like telemedicine, have seen increased demand.
Project Management: Project management skills are crucial in various sectors, and certifications like PMP (Project Management Professional) are highly valued.
Artificial Intelligence (AI) and Robotics: AI and robotics courses are sought after as businesses explore automation and intelligent technologies.
Blockchain Technology: With applications beyond cryptocurrencies, blockchain technology courses are gaining popularity in various sectors, including finance and supply chain.
Environmental Science and Sustainability: Courses focusing on environmental sustainability and green technologies are increasingly relevant in addressing global challenges.
Join Now
learn more -

#artificial intelligence#html#coding#machine learning#python#programming#indiedev#rpg maker#devlog#linux#digital marketing#top 10 high demand course#Data Science courses#Machine Learning training#Cybersecurity certifications#Cloud Computing courses#Digital Marketing classes#Programming languages tutorials#Software Development courses#Healthcare and Nursing programs#Project Management certification#Artificial Intelligence courses#Robotics training#Blockchain Technology classes#Environmental Science education#Sustainability courses
2 notes
·
View notes
Text
Navigating the Nervous Waters of Coding
Daily writing promptWhat makes you nervous?View all responses AI-generated image. “This code is going well…a little too well.” The Code Creep: Why Every Line Can Feel Like a Tightrope Walk What makes me nervous? You might think it’s a looming deadline or a particularly gnarly algorithm. And while those definitely get the heart racing, the real source of my coding jitters? It’s the act of…
#Artificial Intelligence#best practices#c#c++#career advice#Cloud computing#coding#dailyprompt#dailyprompt-1916#data science#debugging#devops#java#javascript#machine learning#mobile development#Programming#python#software development#testing#tutorials#web development
1 note
·
View note
Text
How to Set Up AWS: A Beginner’s Guide to Cloud Computing
Learn how to set up AWS from scratch with this step-by-step beginner’s guide. Discover key AWS services, security best practices, and cost-saving tips to optimize your cloud experience. Whether you're a developer, entrepreneur, or IT enthusiast, this guide will help you navigate AWS effortlessly.
Amazon Web Services (AWS) is a leading cloud computing platform that powers businesses, startups, and developers worldwide. With AWS, you can host websites, store data, deploy applications, and scale infrastructure seamlessly. If you’re new to AWS, this guide will help you set up your account, configure security settings, and start using essential services—all step by step. Whether you’re an…
#AmazonWeb Services#AWS Tutorial#AWSForBeginners#AWSFreeTier#AWSSetup#Cloud Computing#Cloud Hosting#S3Storage#Server Hosting#TechGuide
0 notes
Text
Empower Yourself: Harness the Power of Technology with These Handy Tips and Tutorials
Introduction: In today’s digital age, technology plays a crucial role in our daily lives. From smartphones and laptops to smart home devices and wearable technology, there are countless ways to utilize technology to enhance productivity, efficiency, and overall well-being. In this article, we will explore various tips and tutorials to help you harness the power of technology and empower yourself…
#advancements in artificial intelligence#cybersecurity best practices#emerging tech innovations#future of blockchain technology#guide to cloud computing#how to choose tech solutions for businesses#how to use new tech gadgets#impact of technology on business#Latest technology trends 2024#reviews of the latest tech products#tech tips and tutorials.#technology for smart homes#technology in healthcare#top technology startups#trends in mobile technology
0 notes
Text
#Technology News#Software Reviews#Internet of Things#Artificial Intelligence#Robotics#Web Development#Tech Trends#Gadgets#Cybersecurity#Cloud Computing#Digital Marketing#SEO Strategies#Mobile Applications#Smart Devices#Programming Tutorials#AI in Business#Tech Innovations#Web Accessibility#Integrated Marketing#Payroll Budgeting.
0 notes
Video
youtube
Introduction to Linux for DevOps: Why It’s Essential
Linux serves as the backbone of most DevOps workflows and cloud infrastructures. Its open-source nature, robust performance, and extensive compatibility make it the go-to operating system for modern IT environments. Whether you're deploying applications, managing containers, or orchestrating large-scale systems, mastering Linux is non-negotiable for every DevOps professional.
Why Linux is Critical in DevOps
1. Ubiquity in Cloud Environments - Most cloud platforms, such as AWS, Azure, and Google Cloud, use Linux-based environments for their services. - Tools like Kubernetes and Docker are designed to run seamlessly on Linux systems.
2. Command-Line Mastery - Linux empowers DevOps professionals with powerful command-line tools to manage servers, automate processes, and troubleshoot issues efficiently.
3. Flexibility and Automation - The ability to script and automate tasks in Linux reduces manual effort, enabling faster and more reliable deployments.
4. Open-Source Ecosystem - Linux integrates with numerous open-source DevOps tools like Jenkins, Ansible, and Terraform, making it an essential skill for streamlined workflows.
Key Topics for Beginners
- Linux Basics - What is Linux? - Understanding Linux file structures and permissions. - Common Linux distributions (Ubuntu, CentOS, Red Hat Enterprise Linux).
- Core Linux Commands - File and directory management: `ls`, `cd`, `cp`, `mv`. - System monitoring: `top`, `df`, `free`. - Networking basics: `ping`, `ifconfig`, `netstat`.
- Scripting and Automation - Writing basic shell scripts. - Automating tasks with `cron` and `at`.
- Linux Security - Managing user permissions and roles. - Introduction to firewalls and secure file transfers.
Why You Should Learn Linux for DevOps
- Cost-Efficiency: Linux is free and open-source, making it a cost-effective solution for both enterprises and individual learners. - Career Opportunities: Proficiency in Linux is a must-have skill for DevOps roles, enhancing your employability. - Scalability: Whether managing a single server or a complex cluster, Linux provides the tools and stability to scale effortlessly.
Hands-On Learning - Set up a Linux virtual machine or cloud instance. - Practice essential commands and file operations. - Write and execute your first shell script.
Who Should Learn Linux for DevOps? - Aspiring DevOps engineers starting their career journey. - System administrators transitioning into cloud and DevOps roles. - Developers aiming to improve their understanding of server environments.
***************************** *Follow Me* https://www.facebook.com/cloudolus/ | https://www.facebook.com/groups/cloudolus | https://www.linkedin.com/groups/14347089/ | https://www.instagram.com/cloudolus/ | https://twitter.com/cloudolus | https://www.pinterest.com/cloudolus/ | https://www.youtube.com/@cloudolus | https://www.youtube.com/@ClouDolusPro | https://discord.gg/GBMt4PDK | https://www.tumblr.com/cloudolus | https://cloudolus.blogspot.com/ | https://t.me/cloudolus | https://www.whatsapp.com/channel/0029VadSJdv9hXFAu3acAu0r | https://chat.whatsapp.com/D6I4JafCUVhGihV7wpryP2 *****************************
*🔔Subscribe & Stay Updated:* Don't forget to subscribe and hit the bell icon to receive notifications and stay updated on our latest videos, tutorials & playlists! *ClouDolus:* https://www.youtube.com/@cloudolus *ClouDolus AWS DevOps:* https://www.youtube.com/@ClouDolusPro *THANKS FOR BEING A PART OF ClouDolus! 🙌✨*
#youtube#Linux Linux for DevOps Linux basics Linux commands DevOps basics DevOps skills cloud computing Linux for beginners Linux tutorial Linux for#LinuxLinux for DevOpsLinux basicslinux commandsDevOps basicsDevOps skillscloud computingLinux for beginnersLinux tutorialLinux scriptingLinu#aws course#aws devops#aws#devpos#linux
1 note
·
View note
Text
Master Google Cloud: Deploying Node JS APIs on VM
Full Video Link - https://youtu.be/gxZ-iJNCbAM Check out this new video on the CodeOneDigest YouTube channel! Learn how to create Virtual Machine in Google Cloud Platform, Setup Google Compute Engine VM & Deploy run JS APIs in VM. #codeonedigest
In this tutorial, we will create & setup Google Compute Engine Virtual Machine in Google Cloud Platform. We will be deploying & running javascript APIs in google compute engine virtual machine. We will be opening firewall port for incoming API request in VM. We will also learn how to deploy API code and run API service in google compute engine virtual machine. I will provide step by step guide to…

View On WordPress
#compute engine#deploy api for free#deploy api in google cloud#deploy node js api#deploy node js api for free#deploy node js application#deploy node js project on server#gcp compute engine interview questions#gcp google cloud platform#google cloud creating a virtual machine#google cloud platform#google cloud platform tutorial#google compute engine#virtual machine setup
0 notes
Text

🌸Photoshop Tutorial #4🌸
What is the advantage of using layers? With layers, you can freely edit and move around different components, pulling images/figures forward that need to be highlighted or hiding figures.
When you create a new layer, where does it appear in the Layers panel stack? A new layer appears above the one that’s already selected.
How can you make artwork on one layer appear in front of artwork on another layer? You can do this by rearranging layers so the layers at the top are the ones that appear in front, or you can use the “Bring Forward”, “Send Backward” functions.
How can you apply a layer style? Choose the Layer tab, then Layer Style, then the style that you want, or click the “Add a Layer Style” button.
To edit a Gradient Fill layer by dragging on-canvas controls, what two things should you make sure to do? (1) Select Gradient Fill and (2) choose the Gradient tool to have the gradient editor appear.
Where can you see detailed options for editing a Gradient Fill layer? You can find it in the Properties panel under “Gradient Controls”.
#photoshop tutorial#computer graphics#still need coffee#need sleep#adobe photoshop#adobe creative cloud
1 note
·
View note
Text
0 notes
Text
Cloud Computing Assignment Help
In order to provide faster innovation, flexible resources, and scale economies, cloud computing is the delivery of computing services over the Internet ("the cloud"), including servers, storage, databases, networking, software, analytics, and intelligence. Cloud computing is a complex and rapidly evolving field, so it is not surprising that students can face problems while completing their cloud computing assignments. Students often take online Cloud computing assignment help services to dodge these problems these writing services can provide students with expert guidance from experienced professionals who are familiar with cloud computing concepts and technologies. This can help students understand the concepts and technologies involved in their assignments and develop the skills they need to complete their assignments successfully. If you are a student who is struggling with a cloud computing assignment, our service can be a valuable resource. By providing expert guidance, timely assistance, and flexibility, cloud computing assignment helpers can help you complete your assignments successfully and improve your understanding of cloud computing concepts and technologies.
#Cloud#Cloud Computing#Assignment#Services#Cloud Tech Experts#Cloud Services Tutorial#Assignment Assistance#Cloud Computing Education
0 notes
Text
I have a lot of feelings about the use of AI in Everything These Days, but they're not particularly strong feelings, like I've got other shit going on. That said, when I use a desktop computer, every single file I use in Google Drive now has a constant irritating popup on the right-hand side asking me how Gemini AI Can Help Me. You can't, Gemini. You are in the way. I'm not even mad there's an AI there, I'm mad there's a constantly recurring popup taking up space and attention on my screen.
Here's the problem, however: even Gemini doesn't know how to disable Gemini. I did my own research and then finally, with a deep appreciation of the irony of this, I asked it how to turn it off. It said in any google drive file go to Help > Gemini and there will be an option to turn it off. Guess what isn't a menu item under Help?
I've had a look around at web tutorials for removing or blocking it, but they are either out of date or for the Gemini personal assistant, which I already don't have, and thus cannot turn off. Gemini for Drive is an integrated "service" within Google Drive, which I guess means I'm going to have to look into moving off Google Drive.
So, does anyone have references for a service as seamless and accessible as Google Drive? I need document, spreadsheet, slideshow, and storage, but I don't have any fancy widgets installed or anything. I do technically own Microsoft Office so I suppose I could use that but I've never found its cloud function to actually, uh, function. I could use OneNote for documents if things get desperate but OneNote is very limited overall. I want to be able to open and edit files, including on an Android phone, and I'd prefer if I didn't have to receive a security code in my text messages every time I log in. I also will likely need to be able to give non-users access, but I suppose I could kludge that in Drive as long as I only have to deal with it short-term.
Any thoughts, friends? If I find a good functional replacement I'm happy to post about it once I've tested it.
Also, saying this because I love you guys but if I don't spell it out I will get a bunch of comments about it: If you yourself have managed to banish Gemini from your Drive account including from popping up in individual files, I'm interested! Please share. If you have not actually implemented a solution yourself, rest assured, anything you find I have already tried and it does not work.
1K notes
·
View notes
Text
in wake of yet another wave of people being turned off by windows, here's a guide on how to dual boot windows and 🐧 linux 🐧 (useful for when you're not sure if you wanna make the switch and just wanna experiment with the OS for a bit!)
if you look up followup guides online you're gonna see that people are telling you to use ubuntu but i am gonna show you how to do this using kubuntu instead because fuck GNOME. all my homies hate GNOME.
i'm just kidding, use whatever distro you like. my favorite's kubuntu (for a beginner home environment). read up on the others if you're curious. and don't let some rando on reddit tell you that you need pop! OS for gaming. gaming on linux is possible without it.
why kubuntu?
- it's very user friendly
- it comes with applications people might already be familiar with (VLC player and firefox for example)
- libreoffice already preinstalled
- no GNOME (sorry GNOME enthusiasts, let me old man yell at the clouds) (also i'm playing this up for the laughs. wholesome kde/gnome meme at the bottom of this post.)
for people who are interested in this beyond my tl;dr: read this
(if you're a linux user, don't expect any tech wizardry here. i know there's a billion other and arguably better ways to do x y and/or z. what i'm trying to do here is to keep these instructions previous windows user friendly. point and click. no CLI bro, it'll scare the less tech savvy hoes. no vim supremacy talk (although hell yeah vim supremacy). if they like the OS they'll figure out bash all by themselves in no time.)
first of all, there'll be a GUI. you don't need to type lines of code to get this all running. we're not going for the ✨hackerman aesthetics✨ today. grab a mouse and a keyboard and you're good to go.
what you need is a computer/laptop/etc with enough disk space to install both windows and linux on it. i'm recommending to reserve at least a 100gb for the both of them. in the process of this you'll learn how to re-allocate disk space either way and you'll learn how to give and take some, we'll do a bit of disk partitioning to fit them both on a single disk.
and that's enough babbling for now, let's get to the actual tutorial:
🚨IMPORTANT. DO NOT ATTEMPT THIS ON A 32BIT SYSTEM. ONLY DO THIS IF YOU'RE WORKING WITH A 64BIT SYSTEM. 🚨 (win10 and win11: settings -> system -> about -> device specifications -> system type ) it should say 64bit operating system, x64-based processor.
step 1: install windows on your computer FIRST. my favorite way of doing this is by creating an installation media with rufus. you can either grab and prepare two usb sticks for each OS, or you can prepare them one after the other. (pro tip: get two usb sticks, that way you can label them and store them away in case you need to reinstall windows/linux or want to install it somewhere else)
in order to do this, you need to download three things:
rufus
win10 (listen. i know switching to win11 is difficult. not much of a fan of it either. but support's gonna end for good. you will run into hiccups. it'll be frustrating for everyone involved. hate to say it, but in this case i'd opt for installing its dreadful successor over there ->) or win11
kubuntu (the download at the top is always the latest, most up-to-date one)
when grabbing your windows installation of choice pick this option here, not the media creation tool option at the top of the page:

side note: there's also very legit key sellers out there who can hook you up with cheap keys. you're allowed to do that if you use those keys privately. don't do this in an enterprise environment though. and don't waste money on it if your ultimate goal is to switch to linux entirely at one point.
from here it's very easy sailing. plug your usb drive into your computer and fire up rufus (just double click it).

🚨two very important things though!!!!!!:🚨
triple check your usb device. whatever one you selected will get wiped entirely in order to make space for your installation media. if you want to be on the safe side only plug in the ONE usb stick you want to use. and back up any music, pictures or whatever else you had on there before or it'll be gone forever.
you can only install ONE OS on ONE usb drive. so you need to do this twice, once with your kubuntu iso and once with your windows iso, on a different drive each.
done. now you can dispense windows and linux left and right, whenever and wherever you feel like it. you could, for example, start with your designated dual boot device. installing windows is now as simple as plugging the usb device into your computer and booting it up. from there, click your way through the installation process and come back to this tutorial when you're ready.
step 2: preparing the disks for a dual boot setup
on your fresh install, find your disk partitions. in your search bar enter either "diskmgr" and hit enter or just type "partitions". the former opens your disk manager right away, the latter serves you up with this "create and format hard disk partitions" search result and that's what you're gonna be clicking.

you'll end up on a screen that looks more or less like in the screenshot below. depending on how many disks you've installed this might look different, but the basic gist is the same. we're going to snip a little bit off Disk 0 and make space for kubuntu on it. my screenshot isn't the best example because i'm using the whole disk and in order to practice what i preach i'd have to go against my own advice. that piece of advice is: if this screen intimidates you and you're not sure what you're doing here, hands off your (C:) drive, EFI system, and recovery partition. however, if you're feeling particularly fearless, go check out the amount of "free space" to the right. is there more than 30gb left available? if so, you're free to right click your (C:) drive and click "shrink volume"

this screen will pop up:

the minimum disk space required for kubuntu is 25gb. the recommended one is 50gb. for an installation like this, about 30gb are enough. in order to do that, simply change the value at
Enter the amount of space to shrink in MB: to 30000
and hit Shrink.
once that's done your partitions will have changed and unallocated space at about the size of 30gb should be visible under Disk 0 at the bottom like in the bottom left of this screenshot (courtesy of microsoft.com):

this is gonna be kubuntu's new home on your disk.
step 3: boot order, BIOS/UEFI changes
all you need to do now is plug the kubuntu-usb drive you prepared earlier with rufus into your computer again and reboot that bad boy.
the next step has no screenshots. we're heading into your UEFI/BIOS (by hitting a specific key (like ESC, F10, Enter) while your computer boots up) and that'll look different for everyone reading this. if this section has you completely lost, google how to do these steps for your machine.
a good search term would be: "[YOUR DEVICE (i.e Lenovo, your mainboard's name, etc.)] change boot order"
what you need to do is to tell your computer to boot your USB before it tries to boot up windows. otherwise you won't be able to install kubuntu.
this can be done by entering your BIOS/UEFI and navigating to a point called something along the lines of "boot". from "boot order" to "booting devices" to "startup configuration", it could be called anything.
what'll be a common point though is that it'll list all your bootable devices. the topmost one is usually the one that boots up first, so if your usb is anywhere below that, make sure to drag and drop or otherwise move it to the top.
when you're done navigate to Save & Exit. your computer will then boot up kubuntu's install wizard. you'll be greeted with this:

shocker, i know, but click "Install Kubuntu" on the right.
step 4: kubuntu installation
this is a guided installation. just like when you're installing windows you'll be prompted when you need to make changes. if i remember correctly it's going to ask you for your preferred keyboard layout, a network connection, additional software you might want to install, and all of that is up to you.
but once you reach the point where it asks you where you want to install kubuntu we'll have to make a couple of important choices.

🚨 another important note 🚨
do NOT pick any of the top three options. they will overwrite your already existing windows installation.
click manual instead. we're going to point it to our unallocated disk space. hit continue. you will be shown another disk partition screen.
what you're looking for are your 30gb of free space. just like with the USB drive when we were working with rufus, make sure you're picking the right one. triple check at the very least. the chosen disk will get wiped.

click it until the screen "create a new partition" pops up.
change the following settings to:
New partition size in megabytes: 512
Use as: EFI System Partition
hit OK.
click your free space again. same procedure.
change the following settings to:
New partition size in megabytes: 8000 (*this might be different in your case, read on.)
Use As: Swap Area
hit OK
click your free space a third time. we need one more partition.
change the following settings to:
don't change anything about the partition size this time. we're letting it use up the rest of the resources.
Use as: Ext4 journaling system
Mount Point: /
you're done here as well.
*about the 8000 megabytes in the second step: this is about your RAM size. if you have 4gb instead type 4000, and so on.
once you're sure your configuration is good and ready to go, hit "Install Now". up until here you can go back and make changes to your settings. once you've clicked the button, there's no going back.
finally, select your timezone and create a user account. then hit continue. the installation should finish up... and you'll be good to go.
you'll be told to remove the USB drive from your computer and reboot your machine.
now when your computer boots up, you should end up on a black screen with a little bit of text in the top left corner. ubuntu and windows boot manager should be mentioned there. naturally, when you click ubuntu you will boot into your kubuntu. likewise if you hit windows boot manager your windows login screen will come up.
and that's that folks. go ham on messing around with your linux distro. customize it to your liking. make yourself familiar with the shell (on kubuntu, when you're on your desktop, hit CTRL+ALT+T).
for starters, you could feed it the first commands i always punch into fresh Linux installs:
sudo apt-get update
sudo apt-get upgrade
sudo apt-get install vim
(you'll thank me for the vim one later)
turn your back on windows. taste freedom. nothing sexier than open source, baby.
sources (mainly for the pictures): 1, 2
further reading for the curious: 1, 2
linux basics (includes CLI commands)
kubuntu documentation (this is your new best friend. it'll tell you everything about kubuntu that you need to know.
and finally the promised kde/gnome meme:

#windows#linuxposting#had a long day at work and i had to type this twice and i'm struggling to keep my eyes open#not guaranteeing that i didn't skip a step or something in there#so if someone linux savvy spots them feel free to point them out so i can make fixes to this post accordingly#opensource posting
122 notes
·
View notes
Note
hey! been a fan of your work for quite a time, now, and was wondering what happened. i was looking foward to that skaia backgrounds tutorial planned.
sorry if its a bother, i know life can get pretty busy sometimes.
hope ur alright! :D
Thanks for the concern. I'm alright, it's just that last year my computer kept getting the BSoD, and then my apartment building burned down, and the backup drives I had were unreadable so I had to salvage what I could from whatever was backed up to the cloud and another dying hard drive.
I'm on a Linux laptop now, and while I could get by with FOSS for these tutorials, I'd like to get back on Windows to use Photoshop for consistency/accuracy's sake. Rent and bills have been buttfucking me sideways though so it's hard to save up for repairs or a new computer.
The Skaia backgrounds tutorial was gonna be about the checker pattern and a couple different ways of adding the prophetic images in the clouds, I believe. The latter is a bit more involved, but the former is dead simple to do so I could explain it here a bit:
On one layer, draw some black and white stripes.

On another layer above it, draw some white stripes.

If you set the topmost layer's blend mode to "Difference", it'll invert the colors beneath it.

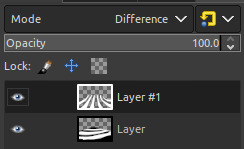
You'll want to clip the top layer to the bottom layer so it doesn't invert anything outside of the contents you intended. I'll leave that up to you as an exercise.
44 notes
·
View notes