#PowerShell 5.1
Explore tagged Tumblr posts
Visit Tumblr Blog
Explore Tumblr blogs with no restrictions, modern design and the best experience.
Last Seen Tumblr Blogs


Fun Fact
1,644 Tumblr posts in 1 second.
Text
PowerShell vs Windows PowerShell: В чем разница? Если вы работали с Windows, то наверняка сталкивались с Windows PowerShell. Этот скриптовый язык и терминал появился почти 19 лет назад и с... #PowerShell #Windows https://daboom.ru/powershell-vs-windows-powershell-v-chem-raznica/?feed_id=41774&_unique_id=67a0f80a5bf11
0 notes
Video
youtube
PowerShell 7 Crushes 5.1 in THIS Epic Showdown
#PowerShell #TechShowdown #ITSamuraiTeacher #PowerShell7 #Scripting #CyberSecurity #TechTutorial #Automation #Windows10 #Windows11 #ITPro #TechTips #CloudComputing #SysAdmin #DevOps #Coding #Terminal #CommandLine #Linux
0 notes
Photo
How to Install or Upgrade PowerShell 5.1 on Windows 7 👉 Read the article: https://bonguides.com/how-to-install-or-upgrade-powershell-5-on-windows-7/?feed_id=525&_unique_id=667149340c419
0 notes
Text
Spent an hour hunting down a version of Spotify that still works with Windows 7 and then everything I need to make Powershell 5.1 work, all so I could patch it, and the whole time I could hear my brain muttering 'this is ridiculous behaviour, you already have Winamp right there, just use that,' which yes, is true, but at this point I just wanted to make it work to prove I could.
Anyway, success. Now to recreate my main playlist.
Deezer now throws up an error and freezes every time I try to play an uploaded mp3 and it's been months now so I finally cracked and tried to duplicate my main playlist on Spotify, but I can't figure out how to upload mp3s on there at all, let alone play them (is it even possible ith a free account???), so back to Winamp I go again just so I can listen to Chromophone Band and the Simlish version of Pretty People.
ETA: I am beginning to think I need The Program, which I will not be installing until I can track down the lobotomized version again.
6 notes
·
View notes
Text
The Two Step Guide to Upgrading to PowerShell 5.1
The Two Step Guide to Upgrading to PowerShell 5.1
PowerShell 5.1 has been out now for nearly a year, but I’ve found that many companies have yet to upgrade. Perhaps the reason they haven’t updated is that they’re at PowerShell 5.0 and don’t see the need to upgrade or they’ve built code in the v2 days where they feel like something may break. If you do decide to upgrade, I’ve created a technical how-to with some scripts to automate this process…
View On WordPress
0 notes
Photo

RT @MichaelBender: Just being able to switch between #PowerShell 5.1 and PowerShell 6.x should be enough to move from ISE to @Code. And don't forget to install the PowerShell extension. #AzOps https://t.co/873YzLqstK
4 notes
·
View notes
Text
Install web management service windows server 2008 r2 無料ダウンロード.Download インターネット インフォメーション サービス (IIS) 10.0 エクスプレス from Official Microsoft Download Center
Install web management service windows server 2008 r2 無料ダウンロード.Windows PowerShell 5.1 をダウンロードしてインストールする

SQL Server 2008 R2 Express Edition のインストール.SQL Server R2 Express Edition のインストール - クリエイティブWeb
May 14, · The server must have an operating system that comes with IIS7— this means either Windows Server or Windows Server R2. Use WebPI to install Web Deploy along with its dependencies like the Web Management Service (WMSvc) Install Web Deploy by Internet Explorer 9 を始め、多くの Web ブラウザーにはダウンロード マネージャーが搭載されています。 Windows 8, Windows , Windows Server R2, Windows Server , Windows Server R2 Windows 7 Service Pack 1、Windows 、Windows 8、Windows Server R2、Windows Server 、Windows ※ R2 SP1が公開されていますので、 こちらからダウンロードしてください。なお、以下の「ダウンロードページ」は、 R2がダウンロードされますが、R2 をインストール後 Windows Update で R2 SP1 に更新することができます。
Install web management service windows server 2008 r2 無料ダウンロード.SharePointの製品準備ツールでエラーが出ており、必須コンポーネントがインストールできない。
※ R2 SP1が公開されていますので、 こちらからダウンロードしてください。なお、以下の「ダウンロードページ」は、 R2がダウンロードされますが、R2 をインストール後 Windows Update で R2 SP1 に更新することができます。 May 14, · The server must have an operating system that comes with IIS7— this means either Windows Server or Windows Server R2. Use WebPI to install Web Deploy along with its dependencies like the Web Management Service (WMSvc) Install Web Deploy by Dec 11, · Deployment Guide for Windows Server R2 with SP1 and Windows 7 with SP1 - Installing Windows Server R2 with SP1 Notable Changes in Windows 7 and Windows Server R2 Service Pack Release Notes for Windows 7 with SP1 - Release Notes for Windows Server R2 with SP1 -
Upgrade to Microsoft Edge to take advantage of the latest features, security updates, and technical support. Feedback will be sent to Microsoft: By pressing the submit button, your feedback will be used to improve Microsoft products and services.
Privacy policy. In this walkthrough, we will show steps for installing and configuring Web Deploy for administrator or non-administrator deployments. This means the steps necessary to enable a client to use Web Deploy to publish Web site content to the server, even if the client does not have administrator credentials for the server. Note: Currently Web Deploy V3 RTW is only available through direct download.
We are still working on WebPI feed. The server must have an operating system that comes with IIS7— this means either Windows Server or Windows Server R2. Install Web Deploy and dependent products using the Web Platform Installer.
Download the Web Deploy installer directly from the IIS. In the Setup wizard choose the "Complete" setup option. Note: Using the MSI directly is generally not recommended for the novice user, as recommended or required dependent products must then be installed separately.
The following limitations may create issues when using the MSI instead of WebPI to install Web Deploy on servers:. After installing Web Deploy using method 1 or 2a , described above, all server-level configuration is complete for non-administrator publishing, however additional configuration is required at a site level. This site configuration can be accomplished using methods 1 or 2 described below. Create a new site or set permissions on an existing Web site for a new or existing non-administrator user using Web Deploy PowerShell scripts as explained in the PowerShell scripts walkthrough [ link to be added ] OR.
The following UI will appear. Click Select :. Type the name of a non-administrator Windows user and click Ok. Install Web Deploy using method 1 or 2a described above. For these client or server machines the Web Management Service handler component and associated delegation rules will not be applicable.
If you are upgrading an existing installation of Web Deploy, make sure to restart the handler and agent services by running the following commands at an administrative command prompt:.
Make sure your firewall allows connections to the service you are using. By default, the Web Deployment Agent Service MsDepSvc listens on port 80, and the Web Management Service WmSvc, also called the "handler" listens on port by default. You must run MsDepSvc by using the built-in Administrator account, or from a domain account that has been added to the Administrators group.
A local administrator which is not the built-in account will not work with MsDepSvc. Skip to main content. This browser is no longer supported. Download Microsoft Edge More info. Contents Exit focus mode.
Save Edit Share Twitter LinkedIn Facebook Email. Please rate your experience Yes No. Any additional feedback? In this article.
0 notes
Text
PowerShellでWindows EventLogを出力する
OS非依存に向かってるPowerShellで、あえてWindows EventLogに出力する方法。
事前にNew-EventLogでログファイルn名とソース名を生成しておく。この時点では、宣言してるだけな感じ。
New-EventLog -LogName "My Automation" -Source "MyAutomationScript"
あとはスクリプトやコマンドレット内から、任意のタイミングでWrite-EventLogする。
Write-EventLog -LogName "My Automation" -Source "MyAutomationScript" -EventID 1000 -Message "My First EventLog"
最初にWrite-EventLogされた時点で、イベントログ上では指定したLogNameのアプリケーションログが表示される。
3 notes
·
View notes
Text
Favorite tweets
I've published my #PowerShell #FSharp Add-Type provider to the gallery! Full F# 6 language support via F# Compiler Services. PS 7.2 only for now to keep it small but certainly could be 7.0 or even 5.1 https://t.co/c1QfktMOM1
— Justin Grote (@JustinWGrote) Nov 15, 2021
from http://twitter.com/JustinWGrote via IFTTT
0 notes
Text
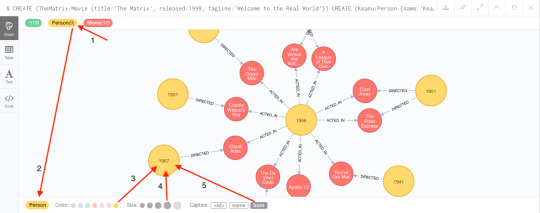
Neo4j Python
要通过python来操作Neo4j,首先需要安���py2neo,可以直接使用pip安装。 pip install py2neo 在完成安装之后,在python中调用py2neo即可,常用的有Graph,Node,Relationship。 from py2neo import Graph,Node,Relationship 连接Neo4j的方法很简单:. The Python Driver 1.7 supports older versions of python, Neo4j 4.1 will work in fallback mode with that driver. Neo4j Cypher Tutorial With Python. In this course student will learn what is graph database, how it is different from traditional relational database, why graph database is important today, what is neo4j, why neo4j is the best graph database available in the market, students will also get the idea about cypher query and uses of cypher query(all CRUD operations and complete sets of uses cases.
Neo4j Python Book
Neo4jDeveloper(s)Neo4jInitial release2007; 14 years ago(1)Stable releaseRepositoryWritten inJavaTypeGraph databaseLicense
Source code:GPLv3 and AGPLv3
Binaries:Freemiumregisterware
Websiteneo4j.com
Neo4j (Network Exploration and Optimization 4 Java) is a graph database management system developed by Neo4j, Inc. Described by its developers as an ACID-compliant transactional database with native graph storage and processing,(3) Neo4j is available in a GPL3-licensed open-source 'community edition', with online backup and high availability extensions licensed under a closed-source commercial license.(4) Neo also licenses Neo4j with these extensions under closed-source commercial terms.(5)
Neo4j is implemented in Java and accessible from software written in other languages using the Cypher query language through a transactional HTTP endpoint, or through the binary 'bolt' protocol.(6)(7)(8)(9)
History(edit)
Version 1.0 was released in February 2010.(10)
Neo4j version 2.0 was released in December 2013.(11)
Neo4j version 3.0 was released in April 2016.(12)
In November 2016 Neo4j successfully secured $36M in Series D Funding led by Greenbridge Partners Ltd.(13)
In November 2018 Neo4j successfully secured $80M in Series E Funding led by One Peak Partners and Morgan Stanley Expansion Capital, with participation from other investors including Creandum, Eight Roads and Greenbridge Partners.(14)
Release history(edit)
Release historyReleaseFirst release(15)Latest
minor version(16)
Latest release(16)End of Support Date(15)Milestones1.02010-02-23Old version, no longer maintained: 1.0N/A2011-08-23Kernel, Index, Remote-graphdb, Shell(17)1.12010-07-30Old version, no longer maintained: 1.1N/A2012-01-30Graph-algo, Online-backup(17)1.22010-12-29Old version, no longer maintained: 1.2N/A2012-06-29Server including Web Admin, High Availability, Usage Data Collection(17)1.32011-04-12Old version, no longer maintained: 1.3N/A2012-09-12Neo4j Community now licensed under GPL, 256 Billion database primitives, Gremlin 0.8(17)1.42011-07-08Old version, no longer maintained: 1.4N/A2013-01-08The first iteration of the Cypher Query Language, Experimental support for batch operations in REST1.52011-11-09Old version, no longer maintained: 1.5N/A2013-03-09Store Format Change, Added DISTINCT to all aggregate functions in Cypher,
New layout of the property store(s), Upgraded to Lucene version 3.5(17)
1.62012-01-22Old version, no longer maintained: 1.6N/A2013-07-22Cypher allShortestPaths, management bean for the diagnostics logging SPI, gremlin 1.4(17)1.72012-04-18Old version, no longer maintained: 1.7N/A2013-10-18Moved BatchInserter to a different package, lock free atomic array cache, GC monitor(17)1.82012-09-28Old version, no longer maintained: 1.8N/A2014-03-28Bidirectional traversals, Multiple start nodes(17)1.92013-05-21Old version, no longer maintained: 1.9.92014-10-132014-11-21Performance improvement on initial loading of relationship types during startup,
Pulled out Gremlin as separate plugin to support different versions(17)
2.02013-12-11Old version, no longer maintained: 2.0.42014-07-082015-06-11Extending model to “labeled” property graph and introduced visual IDE(17)(18)2.12014-05-29Old version, no longer maintained: 2.1.82015-04-012015-11-29Cypher new cost based planner, Fixes issue in ReferenceCache, potential omission, potential lock leak(17)2.22015-03-25Old version, no longer maintained: 2.2.102016-06-162016-09-25Massive Write Scalability, Massive Read Scalability, Cost-based query optimizer,
Query plan visualization(19)
2.32015-10-21Old version, no longer maintained: 2.3.122017-12-122017-04-21Break free of JVM-imposed limitations by moving the database cache off-heap,
Spring Data Neo4j 4.0, Neo4j-Docker Image, Windows Powershell Support, Mac Installer, and Launcher(20)
3.02016-04-16Old version, no longer maintained: 3.0.122017-10-032017-10-31user-defined/stored procedures called APOC (Awesome Procedures on Cypher),
Bolt binary protocol, in-house language drivers for Java, .NET, JavaScript and Python(21)(18)
3.12016-12-13Old version, no longer maintained: 3.1.92018-06-052018-06-13Causal Clustering, Enterprise-Class Security and Control, User-Defined Functions,
Neo4j IBM POWER8 CAPI Flash, User and role-based security and directory integrations(22)(18)
3.22017-05-11Old version, no longer maintained: 3.2.142019-02-262018-11-31Multi-Data Center Support, Causal Clustering API, Compiled Cypher Runtime, Node Keys,
Query Monitoring, Kerberos Encryption, Clustering on CAPI Flash, Schema constraints,
new indexes and new Cypher editor with syntax highlights and autocompletion(23)(18)
3.32017-10-24Old version, no longer maintained: 3.3.92018-11-022019-04-28Write performance is 55% faster than Neo4j 3.2, Neo4j Data Lake Integrator toolkit, Neo4j ETL(24)3.42018-05-17Old version, no longer maintained: 3.4.172019-11-192020-03-31Multi-Clustering, New Data Types for Space and Time, Performance Improvements(25)3.52018-11-29Older version, yet still maintained: 3.5.282021-04-202021-11-28Native indexing, Full-text search, The recommended index provider to use is native-btree-1.0(26)4.02020-01-15Older version, yet still maintained: 4.0.112021-01-112021-07-14Java 11 is required, Multiple databases, Internal metadata repository “system” database,
Schema-based security and Role-Based Access Control, Role and user management capabilities,
Sharding and federated access, A new neo4j:// scheme(27)(28)
4.12020-06-23Older version, yet still maintained: 4.1.82021-03-192021-12-23Graph privileges in Role-Based Access Control (RBAC) security, Database privileges for transaction management, Database management privileges, PUBLIC built-in role, Cluster Leadership Control, Cluster Leadership Balancing, Cypher Query Replanning Option, Cypher PIPELINED Runtime operators, Automatic routing of administration commands(29)4.22020-11-17Current stable version:4.2.5 2021-04-092022-05-16(Administration) ALIGNED store format, Procedures to observe the internal scheduler, Dynamic settings at startup, WAIT/NOWAIT in Database Management, Index and constraint administration commands, Filtering in SHOW commands, Backup/Restore improvements, Compress metrics on rotation, Database namespace for metrics, neo4j-admin improvements, HTTP port selective settings (Causal Cluster) Run/Pause Read Replicas, Database quarantine (Cypher) Planner improvements, Octal literals (Functions and Procedures) round() function, dbms.functions() procedure (Security) Procedures and user defined function privileges, Role-Based Access Control Default graph, PLAINTEXT and ENCRYPTED password in user creation, SHOW CURRENT USER, SHOW PRIVILEGES as commands, OCSP stapling support for Java driver(30)
Old version
Latest version
Future release
Licensing and editions(edit)
Neo4j comes in 2 editions: Community and Enterprise. It is dual-licensed: GPL v3 and a commercial license. The Community Edition is free but is limited to running on one node only due to the lack of clustering and is without hot backups.(31)
The Enterprise Edition unlocks these limitations, allowing for clustering, hot backups, and monitoring. The Enterprise Edition is available under a closed-source Commercial license.
Data structure(edit)
In Neo4j, everything is stored in the form of an edge, node, or attribute. Each node and edge can have any number of attributes. Both nodes and edges can be labelled. Labels can be used to narrow searches. As of version 2.0, indexing was added to Cypher with the introduction of schemas.(32) Previously, indexes were supported separately from Cypher.(33)
Neo4j, Inc.(edit)
Neo4j is developed by Neo4j, Inc., based in the San Francisco Bay Area, United States, and also in Malmö, Sweden. The Neo4j, Inc. board of directors consists of Michael Treskow (Eight Roads), Emmanuel Lang (Greenbridge), Christian Jepsen, Denise Persson (CMO of Snowflake), David Klein (One Peak), and Emil Eifrem (CEO of Neo4j).(34)
See also(edit)
References(edit)
^Neubauer, Peter (@peterneubauer) (17 Feb 2010). '@sarkkine #Neo4j was developed as part of a CMS SaaS 2000-2007, became released OSS 2007 when Neo Technology spun out' (Tweet) – via Twitter.
^https://neo4j.com/release-notes/neo4j-4-2-5/.
^Neo Technology. 'Neo4j Graph Database'. Retrieved 2015-11-04.
^Philip Rathle (November 15, 2018). 'Simplicity Wins: We're Shifting to an Open Core Licensing Model for Neo4j Enterprise Edition'. Retrieved 2019-01-16.
^Emil Eifrem (April 13, 2011). 'Graph Databases, Licensing and MySQL'. Archived from the original on 2011-04-26. Retrieved 2011-04-29.
^'Bolt Protocol'.
^Todd Hoff (June 13, 2009). 'Neo4j - a Graph Database that Kicks Buttox'. High Scalability. Possibility Outpost. Retrieved 2010-02-17.
^Gavin Terrill (June 5, 2008). 'Neo4j - an Embedded, Network Database'. InfoQ. C4Media Inc. Retrieved 2010-02-17.
^'5.1. Transactional Cypher HTTP endpoint'. Retrieved 2015-11-04.
^'The top 10 ways to get to know Neo4j'. Neo4j Blog. February 16, 2010. Retrieved 2010-02-17.
^'Neo4j 2.0 GA - Graphs for Everyone'. Neo4j Blog. December 11, 2013. Retrieved 2014-01-10.
^'Neo4j 3.0.0 - Neo4j Graph Database Platform'. Release Date. April 26, 2016. Retrieved 2020-04-23.
^'Neo Technology closes $36 million in funding as graph database adoption soars'. SiliconANGLE. Retrieved 2016-11-21.
^'Graph database platform Neo4j locks in $80 mln Series E'. PE Hub Wire. Archived from the original on 2019-04-26. Retrieved 2018-11-01.
^ ab'Neo4j Supported Versions'. Neo4j Graph Database Platform. Retrieved 2020-11-26.
^ ab'Release Notes Archive'. Neo4j Graph Database Platform. Retrieved 2021-04-20.
^ abcdefghijk'neo4j/neo4j'. GitHub. Retrieved 2020-01-28.
^ abcd'Neo4j Open Source Project'. Neo4j Graph Database Platform. Retrieved 2020-01-28.
^'Neo4j 2.2.0'. Neo4j Graph Database Platform. Retrieved 2020-01-28.
^'Neo4j 2.3.0'. Neo4j Graph Database Platform. Retrieved 2020-01-28.
^'Neo4j 3.0.0'. Neo4j Graph Database Platform. Retrieved 2020-01-28.
^'Neo4j 3.1.0'. Neo4j Graph Database Platform. Retrieved 2020-01-28.
^'Neo4j 3.2.0'. Neo4j Graph Database Platform. Retrieved 2020-01-28.
^'Neo4j 3.3.0'. Neo4j Graph Database Platform. Retrieved 2020-01-28.
^'Neo4j 3.4.0'. Neo4j Graph Database Platform. Retrieved 2020-01-28.
^'Neo4j 3.5.0'. Neo4j Graph Database Platform. Retrieved 2020-01-28.
^'Neo4j 4.0.0'. Neo4j Graph Database Platform. Retrieved 2020-01-28.
^'2.1. System requirements - Chapter 2. Installation'. neo4j.com. Retrieved 2020-01-28.
^'Neo4j 4.1.0'. Neo4j Graph Database Platform. Retrieved 2020-06-23.
^'Neo4j 4.2.0'. Neo4j Graph Database Platform. Retrieved 2020-11-26.
^'The Neo4j Editions'.
^'The Neo4j Manual v2.1.5'.
^'The Neo4j Manual v1.8.3'.
^Neo4j. 'Staff - Neo4j Graph Database'. Retrieved 2020-06-19.
External links(edit)
Official website
Neo4j Python Book
Retrieved from 'https://en.wikipedia.org/w/index.php?title=Neo4j&oldid=1020554218'
0 notes
Text
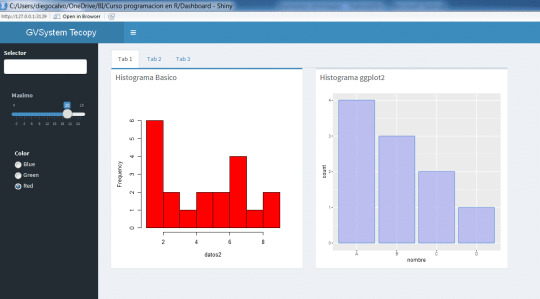
Programming and Scripting Languages DevOps Engineers Should Learn

Programming and scripting languages are vital tools for DevOps engineers. These languages enable automation, streamline workflows, and assist in managing complex infrastructure efficiently. In this article, we will explore the importance of learning programming and scripting languages in the DevOps field and highlight some popular choices that every DevOps engineer should consider. DevOps engineers are responsible for bridging the gap between development and operations teams. They play a crucial role in designing, building, and maintaining the infrastructure required for software development and deployment. Programming and scripting languages are essential skills for DevOps engineers as they enable them to automate tasks, manage configurations, and implement continuous integration and deployment pipelines. What are programming and scripting languages? Programming languages serve as a means for humans to communicate with computers. They allow developers to write instructions and commands that the computer can understand and execute. Scripting languages, on the other hand, are subsets of programming languages that are primarily used for automating tasks and writing scripts to execute specific functions. Importance of programming and scripting languages for DevOps engineers DevOps engineers rely on programming and scripting languages to streamline processes, automate repetitive tasks, and manage infrastructure efficiently. These languages empower them to leverage automation tools, develop custom scripts, and integrate various systems seamlessly. Popular programming languages for DevOps engineers 4.1 Python Python is a versatile and widely adopted programming language in the DevOps community. Its simplicity, readability, and extensive library ecosystem make it a popular choice for automation, data manipulation, and configuration management tasks. 4.2 Ruby Ruby is another language favored by DevOps engineers due to its elegant syntax and focus on readability. It excels in automating tasks, building web applications, and managing infrastructure-as-code frameworks like Chef and Puppet. 4.3 Go Go, also known as Golang, has gained popularity among DevOps engineers for its efficiency and strong concurrency features. It is particularly useful for developing microservices, building scalable applications, and managing containerized environments. 4.4 JavaScript JavaScript, primarily known for its role in front-end web development, has found its way into the DevOps landscape. With the rise of serverless architectures and the growing importance of cloud technologies, DevOps engineers often utilize JavaScript for cloud automation and provisioning tasks. 4.5 PowerShell PowerShell is a scripting language primarily used in Windows environments. It provides extensive capabilities for managing and automating Windows-based infrastructure, making it an essential tool for DevOps engineers working with Microsoft technologies. Benefits of learning programming and scripting languages for DevOps engineers 5.1 Automation and efficiency By mastering programming and scripting languages, DevOps engineers can automate repetitive tasks, save time, and improve overall efficiency. They can develop scripts and tools that handle complex workflows, reducing the chance of human error and enabling faster deployment cycles. 5.2 Better collaboration with developers Learning programming languages allows DevOps engineers to understand developers' code and collaborate effectively. They can contribute to the development process, write custom integrations, and ensure smooth interactions between development and operations teams. 5.3 Infrastructure as code (IaC) Programming and scripting languages enable DevOps engineers to define and manage infrastructure as code. They can create reusable templates, provision resources programmatically, and maintain infrastructure configurations using version control, leading to more consistent and scalable deployments. 5.4 Continuous integration and deployment (CI/CD) DevOps engineers often work on implementing CI/CD pipelines for seamless software delivery. With programming skills, they can write scripts and automate testing, build, packaging, and deployment processes, facilitating continuous integration, and deployment. 5.5 Troubleshooting and debugging When issues arise within the infrastructure, DevOps engineers with programming skills can analyze logs, write debugging scripts, and efficiently troubleshoot problems. They can identify performance bottlenecks or configuration errors, minimizing downtime and ensuring the stability of the system. How to choose the right programming and scripting languages for DevOps engineers The choice of programming and scripting languages depends on the specific needs and requirements of the DevOps engineer's role and the project at hand. Factors like the existing tech stack, team preferences, and the organization's infrastructure should be considered when selecting the languages to learn. It is essential to balance the popularity and community support of a language with its suitability for the task at hand. Conclusion In conclusion, programming and scripting languages are essential skills for DevOps engineers. By mastering these languages, DevOps professionals can automate tasks, improve collaboration with developers, implement infrastructure as code, enable continuous integration and deployment, and troubleshoot effectively. The choice of languages depends on various factors, and continuous learning and adapting to emerging languages and technologies is crucial for staying relevant in the ever-evolving DevOps field. FAQs FAQ 1: Which programming language should I learn first as a DevOps engineer? As a starting point, Python is an excellent programming language to learn for DevOps engineers. Its simplicity, readability, and versatility make it a valuable tool for automation, infrastructure management, and scripting. FAQ 2: Are programming skills necessary for DevOps engineers? Yes, programming skills are highly valued for DevOps engineers. These skills allow engineers to automate tasks, manage infrastructure efficiently, and collaborate effectively with developers. FAQ 3: Can DevOps engineers specialize in a specific language? While specializing in a specific language is possible, it is more beneficial for DevOps engineers to have a broader understanding of multiple languages. This flexibility allows them to adapt to different projects and work with diverse tech stacks. FAQ 4: Are scripting languages enough for DevOps engineers? Scripting languages are important for DevOps engineers as they provide a quick way to automate tasks and execute specific functions. However, having a good understanding of general-purpose programming languages can open up more opportunities and enable engineers to work on diverse projects. FAQ 5: How can I keep up with the evolving programming landscape as a DevOps engineer? To stay up-to-date with the latest programming trends and technologies, it is crucial to continuously learn and explore new languages and tools. Engaging in online communities, attending conferences, and following industry blogs can help you stay informed and adapt to the ever-changing programming landscape. Read the full article
0 notes
Text
Ssh 3

Provide SSH and SCP functionality for executing commands against remote hosts.
Minimum PowerShell version
5.1

This is a prerelease version of Posh-SSH.
Method 3: Use Putty Putty is a well-known and the most popular SSH client on Windows before the arrival of Windows OpenSSH client and Windows Subsystem for Linux. To use SSH with Putty, you need to download the Putty program from the official website and install it. Launch Putty from the Start menu. Most implementations of the SSH suite comprise three utilities - slogin (secure login), ssh and scp (secure copy) - that are secure versions of the earlier insecure Unix utilities: rlogin, rsh and rcp. SSH uses public key cryptography to authenticate the remote computer and enables the remote computer to authenticate the user, if necessary.
Installation Options
Copy and Paste the following command to install this package using PowerShellGet More Info
You can deploy this package directly to Azure Automation. Note that deploying packages with dependencies will deploy all the dependencies to Azure Automation. Learn More
Manually download the .nupkg file to your system's default download location. Note that the file won't be unpacked, and won't include any dependencies. Learn More
Author(s)
Carlos Perez
Copyright
(c) 2021 Carlos Perez. All rights reserved.

Package Details
Owners
Cmdlets
Functions
Dependencies
This module has no dependencies.
FileList
Posh-SSH.nuspec
PoshSSH.dll
AssemblyNewtonsoft.Json.dll
AssemblyRenci.SshNet.dll
AssemblySshNet.Security.Cryptography.dll
Version History
VersionDownloadsLast updated 3.0.0-beta1 (current version) 1,055 3/4/2021 3.0.0-alpha 449 2/1/2021 2.3.0 1,052,002 10/4/2020 2.3.0-Beta1 1,913 6/5/2020 2.2 2,275,416 5/12/2019 2.1 224,246 1/23/2019 2.0.2 700,517 10/13/2017 2.0.1 48,779 8/14/2017 2.0 1,648 8/11/2017 1.7.7 103,764 12/23/2016 1.7.6 43,525 7/29/2016 1.7.5 7,118 7/9/2016 1.7.4 28 7/9/2016 1.7.3 53,529 11/4/2015 1.7.2 687 3/26/2015 1.7 56 3/18/2015 1.6 347 8/17/2014
Ssh 3des-cbc
Show more
0 notes
Text
Azure devops copy files
Azure devops copy files
Azure devops copy files Azure devops copy files New Azure devops copy files Copy Files to Azure VM using PowerShell Remoting There are a couple of different cases you want to copy files to Azure virtual machines. To copy files to Azure VM, you can use PowerShell Remoting. This works with Windows and Linux virtual machines using Windows PowerShell 5.1 (Windows only) or PowerShell 6 (Windows and…

View On WordPress
0 notes
Text
Git Visual Studio Code

GitDuck is a video chat tool built for developers that has direct integration to the IDE so you can talk, share your code in real-time and easily collaborate with your team. It enables remote developers to work as if they were side by side. With GitDuck you can code with people using different IDEs, like VSCode or WebStorm, IntelliJ or PyCharm.
Visual Studio Connect To Git
Git For Visual Studio Code
Chapters ▾
Visual Studio Code has git support built in. You will need to have git version 2.0.0 (or newer) installed. The main features are: See the diff of the file you are editing in the gutter.
The easiest way to connect to your GitHub repositories in Visual Studio. Download GitHub Extension for Visual Studio anyway. Download Download GitHub Extension for Visual Studio. By downloading the extension you agree to the End-User License Agreement. Requires Windows and Visual Studio.
1. Getting Started
1.1 About Version Control
1.2 A Short History of Git
1.3 What is Git?
1.4 The Command Line
1.5 Installing Git
1.6 First-Time Git Setup
1.7 Getting Help
1.8 Summary
2. Git Basics
2.1 Getting a Git Repository
2.2 Recording Changes to the Repository
2.3 Viewing the Commit History
2.4 Undoing Things
2.5 Working with Remotes
2.6 Tagging
2.7 Git Aliases
2.8 Summary
3. Git Branching
3.1 Branches in a Nutshell
3.2 Basic Branching and Merging
3.3 Branch Management
3.4 Branching Workflows
3.5 Remote Branches
3.6 Rebasing
3.7 Summary
4. Git on the Server
4.1 The Protocols
4.2 Getting Git on a Server
4.3 Generating Your SSH Public Key
4.4 Setting Up the Server
4.5 Git Daemon
4.6 Smart HTTP
4.7 GitWeb
4.8 GitLab
4.9 Third Party Hosted Options
4.10 Summary
5. Distributed Git
5.1 Distributed Workflows
5.2 Contributing to a Project
5.3 Maintaining a Project
5.4 Summary
6. GitHub
6.1 Account Setup and Configuration
6.2 Contributing to a Project
6.3 Maintaining a Project
6.4 Managing an organization
6.5 Scripting GitHub
6.6 Summary
7. Git Tools
7.1 Revision Selection
7.2 Interactive Staging
7.3 Stashing and Cleaning
7.4 Signing Your Work
7.5 Searching
7.6 Rewriting History
7.7 Reset Demystified
7.8 Advanced Merging
7.9 Rerere
7.10 Debugging with Git
7.11 Submodules
7.12 Bundling
7.13 Replace
7.14 Credential Storage
7.15 Summary
8. Customizing Git
8.1 Git Configuration
8.2 Git Attributes
8.3 Git Hooks
8.4 An Example Git-Enforced Policy
8.5 Summary
9. Git and Other Systems
9.1 Git as a Client
9.2 Migrating to Git
9.3 Summary
10. Git Internals
10.1 Plumbing and Porcelain
10.2 Git Objects
10.3 Git References
10.4 Packfiles
10.5 The Refspec
10.6 Transfer Protocols
10.7 Maintenance and Data Recovery
10.8 Environment Variables
10.9 Summary
A1. Appendix A: Git in Other Environments
A1.1 Graphical Interfaces
A1.2 Git in Visual Studio
A1.3 Git in Visual Studio Code
A1.4 Git in IntelliJ / PyCharm / WebStorm / PhpStorm / RubyMine
A1.5 Git in Sublime Text
A1.6 Git in Bash
A1.7 Git in Zsh
A1.8 Git in PowerShell
A1.9 Summary
A2. Appendix B: Embedding Git in your Applications
A2.1 Command-line Git
A2.2 Libgit2
A2.3 JGit
A2.4 go-git
A2.5 Dulwich
A3. Appendix C: Git Commands
A3.1 Setup and Config
A3.2 Getting and Creating Projects
A3.3 Basic Snapshotting
A3.4 Branching and Merging
A3.5 Sharing and Updating Projects
A3.6 Inspection and Comparison
A3.7 Debugging
A3.8 Patching
A3.9 Email
A3.10 External Systems
A3.11 Administration
A3.12 Plumbing Commands
2nd Edition
Git in Visual Studio Code
Visual Studio Code has git support built in.You will need to have git version 2.0.0 (or newer) installed.
See the diff of the file you are editing in the gutter.
The Git Status Bar (lower left) shows the current branch, dirty indicators, incoming and outgoing commits.
You can do the most common git operations from within the editor:
Initialize a repository.
Clone a repository.
Create branches and tags.
Stage and commit changes.
Push/pull/sync with a remote branch.
Resolve merge conflicts.
View diffs.
With an extension, you can also handle GitHub Pull Requests:https://marketplace.visualstudio.com/items?itemName=GitHub.vscode-pull-request-github.
The official documentation can be found here: https://code.visualstudio.com/Docs/editor/versioncontrol.
Those new to Visual Studio (VS) Code might just see a code editor. The true power of VS Code lies in it’s extensions, integrated terminal and other features. In this hands-on tutorial, you’re going to learn how to use Visual Studio Code by working with a Git repo.
Related:What You Need to Know about Visual Studio Code: A Tutorial
Using built-in VS Code tooling and a few extensions, you’re going to write code and commit that code to source control using a single interface.
This blog post is a snippet of a chapter from the eBook From Admin to DevOps: The BS Way to DevOps in Azure. If you like this chapter and want to learn about doing the DevOps in Azure, check it out!
Tutorial Overview
In this tutorial, you’re going to learn how to use various VS Code features on Windows by building a project using Visual Studio Code and Git. You’ve been tasked with figuring out how to build an Azure VM with Terraform as a small proof of concept (POC) project. You have VS Code and have heard of its capability as a full IDE and want to put it to the test.
You’re going to:
Create a VS Code workspace to share with your team
Install the Terraform extension
Modify the Terraform configuration file to fit your naming convention and Azure subscription
Create a snippet for a common task you’ve found yourself typing over and over
Commit the Terraform configuration file to a Git repo
This tutorial will not be meant to show how to use Terraform to deploy Azure VMs. We already have an article on Terraform and Azure VMs for that. This tutorial will focus on learning Visual Studio Code.
Does this sound like an interesting project? If so, read on to get started!
Prerequisites
To follow along with this Visual Studio Code Git tutorial, please be sure you have the following:
VS Code – All examples will be using VS Code 1.44 although earlier versions will likely work as well.
Terraform – All examples will be using Terraform for Windows v0.12.24.
Git for Windows installed – All examples will be using v2.26. If you’d like VS Code to be Git’s default editor, be sure to select it upon installation.
Clone the Git Repo
Since this tutorial is going to be focusing on working with code in a GitHub repo, your first task is cloning that GitHub repo to your local computer.
For this project, you’ll be working from a GitHub repo called VSCodeDemo. Since VS Code has native Git integration, you can clone a Git repo with no additional configuration. To do so:
Open the command palette with Ctrl-Shift-P, type git where you will notice various options, as shown below.
2. Choose Git: Clone which VS Code will then prompt you for the repo’s URL. Here, provide the URL https://github.com/NoBSDevOps/VSCodeDemo.gitand hit Enter.
3. Choose a folder to place the cloned project files. This project will place the repo folder in the root of C:. Once you select the repository location, VS Code will invoke git.exe in the background and clone the repo to your computer.
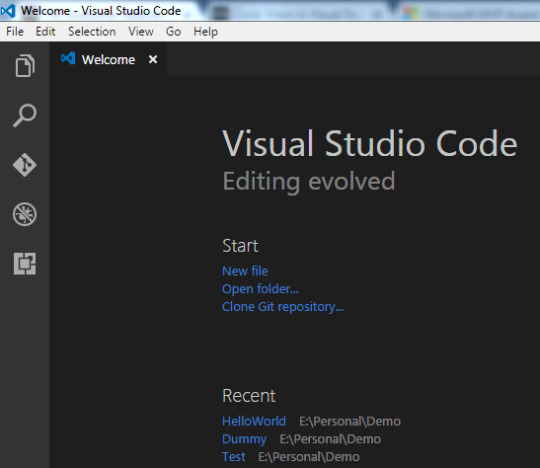
4. When it’s finished, VS Code will prompt if you would like to open the cloned repository immediately as shown below, click Open to do so.
You now have an open folder in VS Code for the Git repo. You now need to “save” this open folder and all settings you’ll be performing in a workspace.
Creating a Workspace
Now that you have a folder opened containing a Git repo, save a workspace by going up to the File menu and clicking on Save Workspace As….
Save the workspace as project in the project folder. VS Code will then create a file called project.code-workspace in the Git repo folder. This workspace now knows what folder you had opened. Now when the workspace is opened in the future, it will automatically open the C:VSCodeDemo folder.
Now, instead of a folder name, you will see the name of the workspace.
Setting up Extensions
Extensions are one of the most useful features of VS Code. Extensions allows you to bolt on functionality to help you manage many different projects. In this tutorial, you’re going to be working with Terraform.
Open up one of the Terraform configuration files in the workspace along the left sidebar. Notice how an editor tab opens up and shows the text but that’s about it. There’s no usual syntax highlighting or any other features. VS Code thinks this is a plain-text file and displays it accordingly. Let’s remedy that.
For VS Code to “understand” a Terraform configuration file, you need an extension. Extensions are a huge part of VS Code that opens up a world of new functionality. In this case, you need the Terraform extension to assist in building Terraform configuration files and deploying infrastructure with Terraform.
To install the Terraform extension, click on the extensions button on the Activity Bar and search for terraform. You’ll see multiple extensions show up but for this project, click on Install for the top result created by Mikael Olenfalk. VS Code will then install the extension.
Once installed, navigate back to the workspace and click on one of the TF files in the workspace. You’ll immediately see one of the most obvious differences when using an extension, syntax coloring.
Now you can see in the following screenshot that VS Code “knows” what a comment is (by making it green), what a string is (by making it red) and so on. It’s now much easier to read a Terraform configuration file.
There’s a lot more functionality included with Mikael’s Terrafom extension. Be sure to investigate all of the potential benefits you can get from this extension if using Terraform.
Code Editing
Chances are when you find a script or configuration file on the Internet, it’s not going to be exactly how you need it. You’re going to need to modify it in some way.
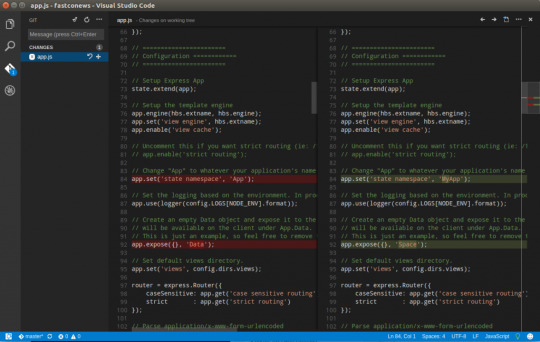
In this tutorial’s example, you’d like to change the main block label in the infrastructure-before.tf. Terraform configuration file to perhaps project. To do that, you’ll need to find and replace some text. In VS Code, there are multiple ways to do that.
One of the most common ways to find a string and replace it with another is the good ol’ find and replace functionality.
Hit Ctrl-F and you’ll see a dialog similar to the following screenshot. Here you can type in the string you’d like to find and if you click on the down arrow, it will expand and provide a spot to input a string to replace it with. In the screenshot below, you can see options like Aa and Ab| for case-sensitive searching and also regular expressions.
You can also perform a “find and replace” using Ctrl-D. Simply select the text you’d like to find and begin hitting Ctrl-D. You’ll find that VS Code will begin to highlight each instance of that string with a blinking cursor.
When you’ve selected all items, start typing and VS Code changes all instances at once just as if you had selected each one individually.
Saving Time with Snippets
Let’s say you’re really getting into Terraform and Azure and are tired of typing out the Terraform configuration file block to create a new Azure resource group in the following code snippet.
To save time creating these blocks, create a VS Code snippet.
Related:VS Code Snippets: Speed Up Coding with Shortcuts
To create a VS Code snippet:
Copy the azurerm_resource_group block from the Infrastructure-before.tf Terraform configuration file.
2. Open the command palette with Ctrl-Shift-P.
3. Type “snippets” to filter the list of options.
4. Select Preferences: Configure User Snippets. This brings up a list of all the snippet files typically separated by language.
5. Type “terraform” to filter by the Terraform snippets.
6. Select terraform (Terraform) to open the Terraform snippets file (terraform.json).
Visual Studio Connect To Git
With the Terraform snippets file open, remove all of the comments and copy/paste the following JSON element inside.
Note the use of t and the backslashes. You can’t directly place tab characters inside of a snippet. To represent a tab character, you must use t. Also, you must escape characters like double quotes, dollar signs, curly braces, and backslashes with a backslash.
8. Save the terraform.json file.
Git For Visual Studio Code
9. Go back to the Terraform configuration file and type “rg”. Notice now you see an option to expand a snippet.
10. Select the rg snippet as shown above. Notice that it now expands to the snippet you just created with three items highlighted.
VS Code highlighted each of the words to act as placeholders due to the variables defined in the terraform.json snippets file (${1:block label}).
At this point, you can hit Tab and simply type in the values you need without worrying about how to create the block itself.
For a full breakdown on snippet syntax, be sure to check out the Snippets in Visual Studio Code documentation.
Commit Code to Git
At this point, you’ve cloned a public GitHub repo that contains a couple of Terraform configuration files. You’ve edited some files and now you’re ready to get those changes back up to the GitHub repo.
To get changes back up to the GitHub repo, you must first use Visual Studio Code and Git to commit changes to your local cloned Git repo. When you cloned the GitHub repo earlier, you downloaded not only the configuration files but also a Git repo.
If you’ve been following along, you should now have the cloned Git repo open with a couple of pending changes, two to be exact. How do you know that? By noticing the number in the Activity Bar, as shown below.
When you have a Git repo opened in Visual Studio Code, you’ll get a glimpse on the number of files that you can stage and commit into a local Git repo in the Activity Bar.
Click on the Source Control item on the left and you’ll see two items; the infrastructure-before.tf Terraform configuration file and the workspace you saved earlier (project.code-workspace). The configuration file will have a red M to the right indicating it’s been modified. The workspace file will have a green U to the right of it because it’s untracked meaning it’s currently not under source control.
To ensure both of these files get back to the GitHub repo, first create a helpful commit message indicating why you’re committing these files. The message can be any descriptive summary. Once you’ve written a commit message, stage the changes. Staging changes in Visual Studio Code in Git adds the file contents to the staging area preparing for a commit to the repo.
While on the Source Control pane, click on the + icon beside each file to stage them as shown below.
Once staged, click on the check mark to commit all of the staged changed, as shown below.
You will probably receive an error message indicating you need to configure a user.name and user.email in Git.
No problem. You simply need to provide Git the information it needs. To do that, go into your VS Code integrated terminal and run the following two commands changing my email address and name for yours.
Now try to commit the files. You should now see that the files commit to the repo.
You can stage all changed files without manually clicking on the + beside each file by committing them all at once. VS Code will automatically stage all of the files for you.
If you were working on a team with a shared repo, the next step would be to push these changes back to the GitHub repo or opening a pull request.
Conclusion
VS Code is a feature-rich IDE. It can not only help you write and understand code better, it can also build and make changes to infrastructure, invoke utilities and more. VS Code provides you one place to manage all of your development efforts.
Although this tutorial only covered a portion of what VS Code can do, this IDE is capable of so much more. If you’d like to learn about what VS Code can do, check out What You Need to Know about Visual Studio Code: A Tutorial.
0 notes
Text
The 'install-module' command was found in the module ‘PowerShellGet'
The ‘install-module’ command was found in the module ‘PowerShellGet’
Receber uma mensagem de Install-module não é um comando conhecido do PowerShell, mas pode acontecer com versões anteriores do PowerShell e Windows 7 e 8. Entretanto, este erro pode ocorrer também no Windows 10 com PowerShell 5.1. Isso acontece quando o script policy é definido como restrito. Para utilizar esse Command let é necessário definir a policy para…

View On WordPress
0 notes
Text
Cisco Certified CyberOps Professional 300-215 CBRFIR Exam Questions
Conducting Forensic Analysis and Incident Response Using Cisco Technologies for CyberOps v1.0 (CBRFIR 300-215) exam is the concentration exam to achieve Cisco Certified CyberOps Professional Certification, you also need to pass the core exam 350-201 exam to get certified. PassQuestion new released Cisco Certified CyberOps Professional 300-215 CBRFIR Exam Questions which cover the real 300-215 exam topics to ensure you pass Cisco 300-215 exam successfully. It is wise to choose our PassQuestion Cisco Certified CyberOps Professional 300-215 CBRFIR Exam Questions and you will get the most satisfied product you want.
Cisco Certified CyberOps Professional Certification
Achieving the Cisco Certified CyberOps Professional certification elevates your skills and confirms your abilities as an Information Security analyst in incident response roles, cloud security, and other active defense security roles. To earn a Cisco Certified CyberOps Professional certification, you pass two exams: one that covers core technologies (350-201) and one concentration exam (300-215).
300-215 CBRFIR Exam Description - Conducting Forensic Analysis and Incident Response Using Cisco Technologies for CyberOps
Conducting Forensic Analysis and Incident Response Using Cisco Technologies for CyberOps v1.0 (CBRFIR 300-215) is a 60-minute exam that is associated with the Cisco CyberOps Professional Certification. This exam tests a candidate's knowledge of forensic analysis and incident response fundamentals, techniques, and processes.
Exam Topics
1.0 Fundamentals
1.1 Analyze the components needed for a root cause analysis report
1.2 Describe the process of performing forensics analysis of infrastructure network devices
1.3 Describe antiforensic tactics, techniques, and procedures
1.4 Recognize encoding and obfuscation techniques (such as, base 64 and hex encoding)
1.5 Describe the use and characteristics of YARA rules (basics) for malware identification, classification, and documentation
1.6 Describe the role of:
1.6.a hex editors (HxD, Hiew, and Hexfiend) in DFIR investigations
1.6.b disassemblers and debuggers (such as, Ghidra, Radare, and Evans Debugger) to perform basic malware analysis
1.6.c deobfuscation tools (such as, XORBruteForces, xortool, and unpacker)
1.7 Describe the issues related to gathering evidence from virtualized environments (major cloud vendors)
2.0 Forensics Techniques
2.1 Recognize the methods identified in the MITRE attack framework to perform fileless malware analysis
2.2 Determine the files needed and their location on the host
2.3 Evaluate output(s) to identify IOC on a host
2.3.a process analysis 2.3.b log analysis
2.4 Determine the type of code based on a provided snippet
2.5 Construct Python, PowerShell, and Bash scripts to parse and search logs or multiple data sources (such as, Cisco Umbrella, Sourcefire IPS, AMP for Endpoints, AMP for Network, and PX Grid)
2.6 Recognize purpose, use, and functionality of libraries and tools (such as, Volatility, Systernals, SIFT tools, and TCPdump)
3.0 Incident Response Techniques
3.1 Interpret alert logs (such as, IDS/IPS and syslogs)
3.2 Determine data to correlate based on incident type (host-based and network-based activities)
3.3 Determine attack vectors or attack surface and recommend mitigation in a given scenario
3.4 Recommend actions based on post-incident analysis
3.5 Recommend mitigation techniques for evaluated alerts from firewalls, intrusion prevention systems (IPS), data analysis tools (such as, Cisco Umbrella Investigate, Cisco Stealthwatch, and Cisco SecureX), and other systems to responds to cyber incidents
3.6 Recommend a response to 0 day exploitations (vulnerability management)
3.7 Recommend a response based on intelligence artifacts
3.8 Recommend the Cisco security solution for detection and prevention, given a scenario
3.9 Interpret threat intelligence data to determine IOC and IOA (internal and external sources)
3.10 Evaluate artifacts from threat intelligence to determine the threat actor profile
3.11 Describe capabilities of Cisco security solutions related to threat intelligence (such as, Cisco Umbrella, Sourcefire IPS, AMP for Endpoints, and AMP for Network)
4.0 Forensics Processes
4.1 Describe antiforensic techniques (such as, debugging, Geo location, and obfuscation)
4.2 Analyze logs from modern web applications and servers (Apache and NGINX)
4.3 Analyze network traffic associated with malicious activities using network monitoring tools (such as, NetFlow and display filtering in Wireshark)
4.4 Recommend next step(s) in the process of evaluating files based on distinguished characteristics of files in a given scenario
4.5 Interpret binaries using objdump and other CLI tools (such as, Linux, Python, and Bash)
5.0 Incident Response Processes
5.1 Describe the goals of incident response
5.2 Evaluate elements required in an incident response playbook
5.3 Evaluate the relevant components from the ThreatGrid report
5.4 Recommend next step(s) in the process of evaluating files from endpoints and performing ad-hoc scans in a given scenario
5.5 Analyze threat intelligence provided in different formats (such as, STIX and TAXII)
1 note
·
View note