#Pretty colors
Photo

#yellow#gif#art#digital art#color#colors#colorful#artists on tumblr#background#aesthetic#pretty colors#arte#stim#design#visuals#backgrounds#colores#calm#stims#pretty#YIQ#*d55#*h 109#*ky0#*pfn e0 sp1 r137#*c70.254.10.241.155.236#*mp2897.0007.0007#*tp0573.0003.0003
36 notes
·
View notes
Text

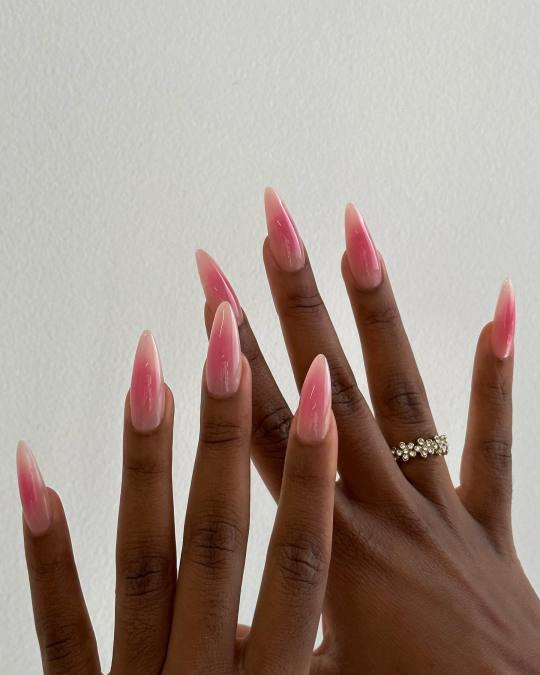
#beauty#nail blog#manicure#pretty nails#nails#mani#cute nails#nail art#nail pics#short nails#shorties#multicolor nails#multicolor#pretty colors#pretty#@traciethetech#spring 2025#spring nails#summer colors#summer 2025
4K notes
·
View notes
Text

Donnie’s Poster! (zoom for quality :3 )
Leo’s Poster
should I make these a lil series??
#evony art pieces#rottmnt#rottmnt art#rottmnt fanart#tmnt#rottmnt donnie#art#donnie#donatello#rottmnt donatello#donatello hamato#future donnie#pretty colors
2K notes
·
View notes
Text

ENTRY 4 A DTIYS ON INSTA
#rainbow#rainbow aesthetic#rainbowcore#galaxy#space#starry#stars#sparkledog#furry#fursona#pretty colors#colorful#dtiys#sparklefur#pastel#pastel art#pastel aesthetic#kawaii#art#trans artist#queer artist#trans art#queer art
459 notes
·
View notes
Text
#NYCNailRoom
#aura nails#pink nails#pink#pink aura#so cute#cute nails#cute#pretty colors#pretty nails#pretty#nails on black women#nobw#nails#beauty#mani#manicure#nail blog#middies#mid length nails
3K notes
·
View notes
Text

💙🧡 ~ Pan sludge ~ 💛💗 (DipYourCar)
(Credit if you use pls!) (ko-fi)
#stim#neon colors#stimmy#pan colors#pan flag#bright colors#paintcore#paint pouring#paint mixing#pride month#pan pride#pan colours#pride stim#pride stims#paint#paint stim#hands free#pouring stim#mixing stim#neon#neon stim#pretty colors#iridescent#multicolor#slimecore#sludge
591 notes
·
View notes
Text
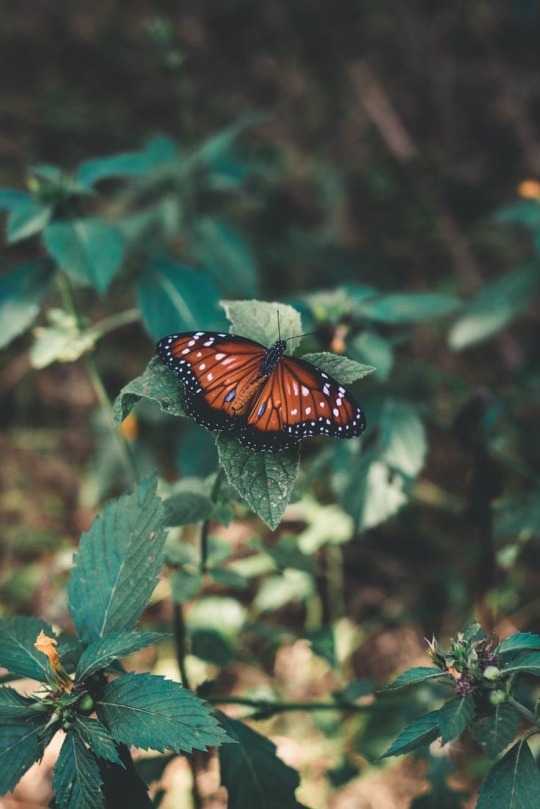
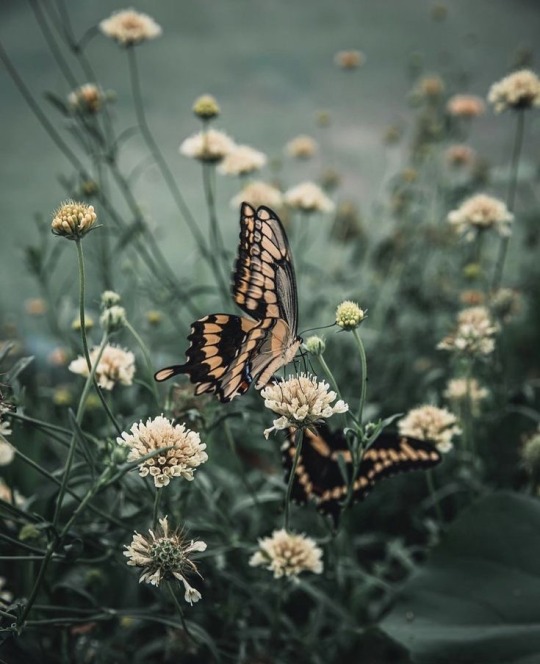
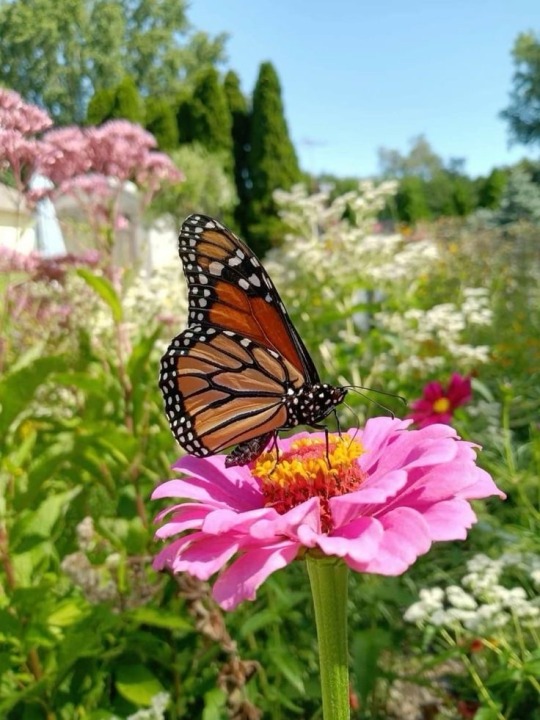
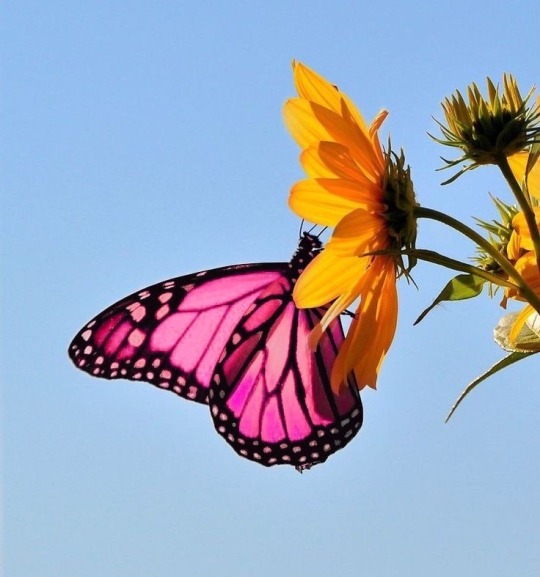

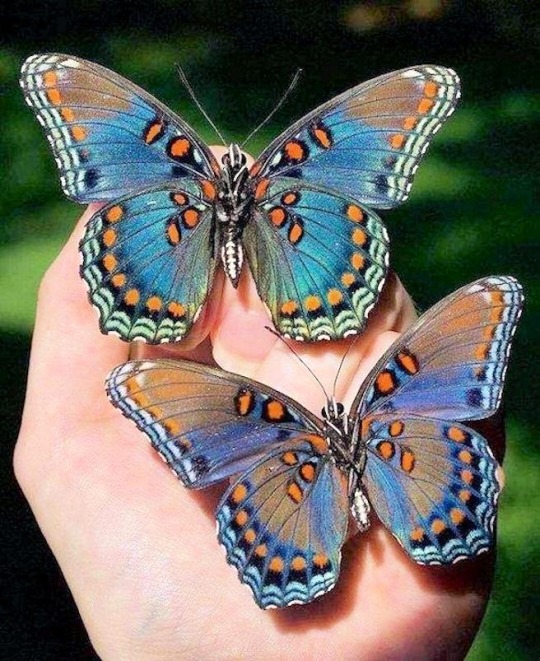
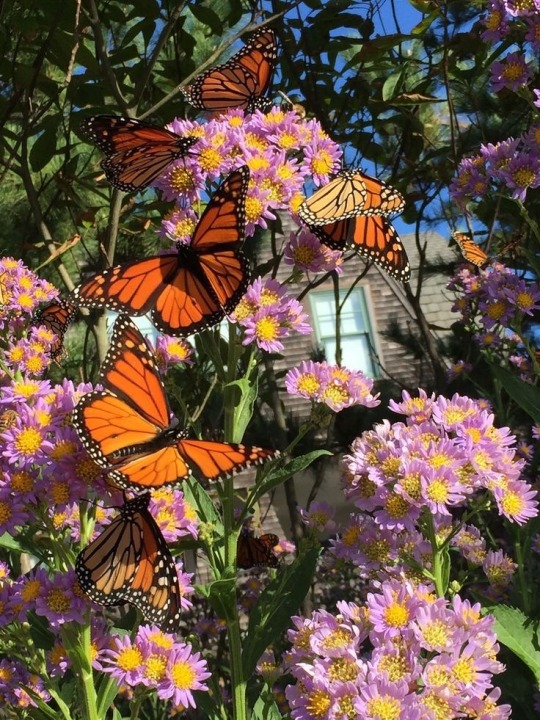
Butterflies can’t see their wings. They can’t see how truly beautiful they are, but everyone else can. People are like that as well. 🦋
#quirkysmirk#aesthetic#moodboard#beautiful photos#nature#butterfly#butterflies#nature moodboard#butterfly moodboard#creature#prettycore#pretty colors#spring vibes#pretty#spring flowers#summer#magiccore#girly tumblr#spring cottagecore#springcore#spring colors#cottagecore#cottage aesthetic#fairy cottage#naturecore#outdoors#explore#nature colors#colors of nature
453 notes
·
View notes
Text
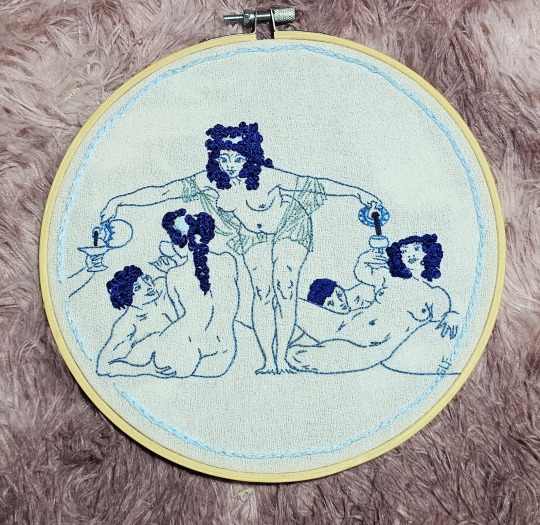
Lysistrata 💙
#embroidery#needle painting#handicrafts#handembroidery#my hoops#crafts#needlework#hand stitching#handmade#pretty colors#hand embroidery#needlecraft#lysistrata#shades of blue#norman lindsay#embroidery inspo#embroidered art
1K notes
·
View notes
Text
#animated gif#animated gifs#gif#gifs#old advertisements#old ads#retro#vhs#computers#80's#old tech#old computers#tech#UFO#UFOs#aliens and ufos#ufology#ufo sightings#extraterrestrial#aliens#MY GOD THEY'LL KILL US ALL#pretty colors
271 notes
·
View notes
Text
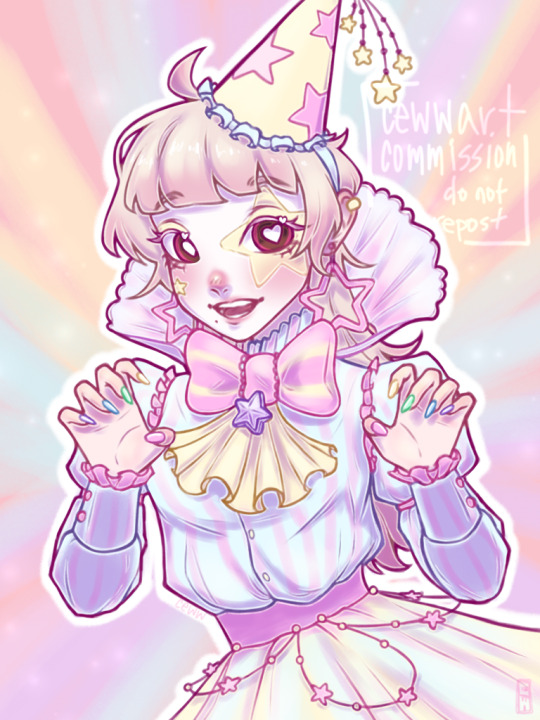
here’s a commission i did recently!!!
this was so fun!! ♡
^_−☆
#thanks so much grace!!!#commission#commissions#my commission#ko fi commission#ko fi commissions#clowncore#clown art#clown#clown oc#clown girl#oc#oc art#oc artwork#pretty colors#pastel colors#pastel#art#my art
195 notes
·
View notes
Photo

Prismatic Ascent
#Digital Illustration#illustration#furry illustration#characterillustration#abstractart#abstractdigitalart#abstract background#Stylized#cartoonstyle#Chibistyle#stylized art#bright colors#colorful#neon colors#colorful art#neon pink#neon blue#neon core#neoncore#pretty colors#blue#pink#purple#creepincrawl#character art#original drawing#art#cute character#cute aesthetic#cute art
2K notes
·
View notes
Photo

#dark#plum#red#background#digital art#calm down#artists on tumblr#peaceful#beautiful#design#colors#color#colorful#art#visual art#relaxing#gif#gifs#aes#pretty colors#HSL#*d35#*pfn e0 sp0 r57#*c46.70.0.80.90.255#*mp9000.0020.0000#*tp7000.0000.0000
145 notes
·
View notes
Text


#summer nails#summer colors#summer 2024#summer#cute nails#cute#pretty#pretty colors#nail blog#manicure#pretty nails#nails#nail pics#beauty#nail art#mani#almond nails#nail design#nail pro#mid length nails#middies#@amys.clients
2K notes
·
View notes
Text
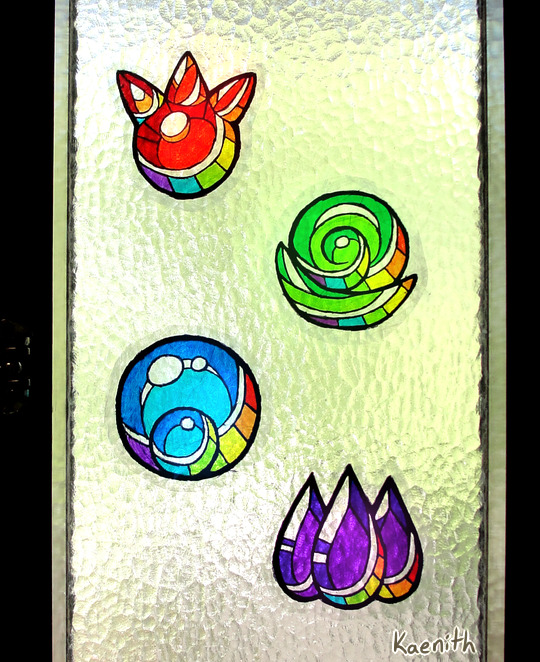
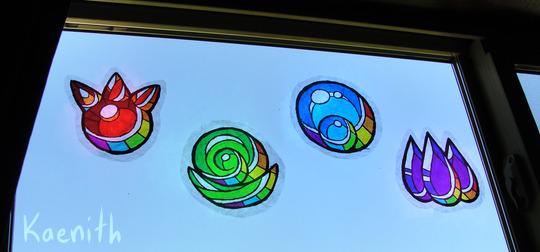
I've been making window clingies of the elemental gems from Minish Cap and Four Swords (plus rainbows because pride month) and I thought I'd put together a tutorial :)
Materials needed:
Permanent markers
Clear cellophane wrap
Scisors
Paper to sketch or print your design on
Not strictly necessary but useful:
Tape (for holding your pattern in place)
Something with a straight edge, like a ruler or bone folder (for smoothing out the plastic)
Step one:
Decide on a design. I drew mine digitally and printed it out. The printer had an issue, but eh, I can still see the lines, it's good enough ¯\_(ツ)_/¯

Step two:
Fold a sheet of cellophane wrap in half to make a double-layered sheet that is a little bigger than your intended design. Try your best not to get it too crumply and wrinkled, but in my experience a little bit of crinkling is unavoidable. Best not to get too perfectionist about it, and just embrace it as part of the stained-glass look!
Unfortunately, cellophane being clear, this step is hard to photograph ^^;;
Step three:
Lay the double-sided cellophane sheet over the top of your design. The best way I found to keep everything in place was to tape the pattern to a smooth surface and stick the plastic down around it.
Starting with the lightest colors first to avoid color bleed, start coloring your design, leaving the lineart for last.
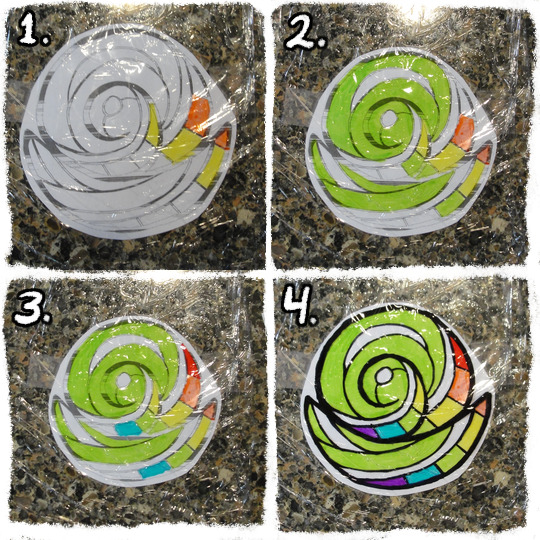
Step four:
At this point, the colors might look nice and vibrant against the white paper, but when you pick the plastic up and hold it up to the light, it will likely look washed-out and/or streaky.
To build up the colors more, fold another layer of cellophane and place it on top of the inked side of your current sheet. Then go over the colors and lines again, once again in order from lightest to darkest.
Keep adding layers until you're satisfied with the darkness of the colors. You can even get some interesting effects and shading by combining layers of different colors!

Step five:
When you're done, add one final layer of cellophane to the top to protect the inks. If you have a ruler or bone folder, I recommend using it now to smooth out the plastic and press the layers together as much as possible.
Then just trim around the edges and slap it on your window! :D
#legend of zelda#four swords#minish cap#tutorial#tutorials#craft project#craft projects#to pluralize or not? it seems I have done both in the past#pretty colors#my art#fanart
678 notes
·
View notes
Photo
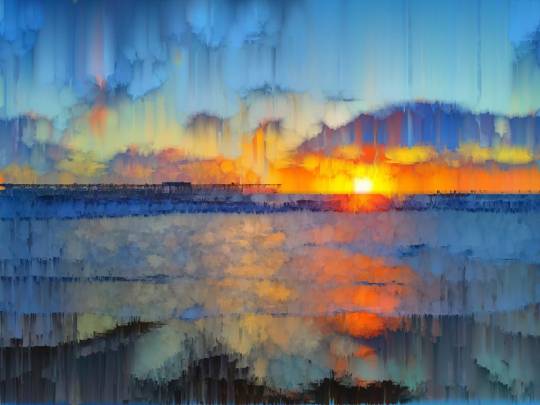
Photography and edit by WYLIE - 2023
#art#artist on tumblr#photographer#photography#photographic art#san diego#sunset#beach#ocean#sun#glow#pretty colors#blue#orange#gold#glitch#glitch art#trippy
901 notes
·
View notes


Last Seen Blogs
kirstens-fashion-dreamworld
Kirstens Fashion Dreamworld

capcom-retro
Capcom Retro

h0t-garbage
Collapse

tagerrkix
tagerrrrrr