#Protecting Raspberry Pi with UFW
Explore tagged Tumblr posts
Visit Tumblr Blog
Explore Tumblr blogs with no restrictions, modern design and the best experience.
Last Seen Tumblr Blogs


Fun Fact
130K people were victims of a chain letter scam that affected Tumblr in May 2011.
Text
Raspberry Pi Firewall Command Line Configuration Step-by-Step
Raspberry Pi Firewall Command Line Configuration Step-by-Step #homelab #selfhosted #rapsberrypi #RaspberryPifirewallguide #UFWsetuponRaspberryPi #SecureRaspberryPinetworking #RaspberryPiUFWconfigurations #TroubleshootingUFWissues #RaspberryPifirewall
Raspberry Pi OS is an extremely popular self-hosting platform many use for running services. Let’s set the tone for Raspberry Pi firewall configuration via the command line and see what we will learn. Raspberry pi os What: A step-by-step how-to guide for UFW (Uncomplicated Firewall) on your Raspberry Pi Where: You can use this on native Raspberry Pi devices or other platforms like virtual…

View On WordPress
#Easy firewall setup on Raspberry Pi OS#Essential UFW commands#Protecting Raspberry Pi with UFW#Raspberry Pi firewall best practices#Raspberry Pi firewall guide#Raspberry Pi network security tips#Raspberry Pi UFW configurations#Secure Raspberry Pi networking#Troubleshooting UFW issues#UFW setup on Raspberry Pi
0 notes
Text
Raspberry Pi Kiosk with Security and Backup

Needs on for the Computer and Raspberry Pi
-Belena Etcher - https://www.balena.io/etcher/
-Raspbian Buster Lite - https://downloads.raspberrypi.org/raspbian_lite_latest
-Micro SD Card reader/writer
-Wired keyboard
Installing OS on Micro SD card
After downloading Raspbian Lite and Belena Etcher on your Windows machine, Select the Raspbian Lite img file. If it is still in the original zip file, please make sure you unzip or extract all the files so that Etcher can access the image file.
Select the Micro SD card, and Flash the Micro SD card.
Once the flash is complete, then you will plug in the Micro SD card to the Raspberry Pi and let it boot. You should see the following screen.
You should see the default Raspberry Login:
Username: pi
Password: raspberry
Configuring the Raspberry Pi
Change the default username and password for the raspberry pi:
Type: Sudo raspi-config
Select option 2 and follow the instructions to change the password to something else for security.
Select the language/region option specifically for the keyboard. You will have to change to keyboard to be an English - US keyboard NOT English – GB (Great Britain) keyboard. If you do not set this up correctly, you will not be able to type commands properly.
We will also need updates
sudo apt-get update
sudo apt-get upgrade (This may take a while)
sudo apt-get install unattended-upgrade
Reboot the device by typing:
sudo reboot
Login to pi
Now we will plug our raspberry pi into the network and configure our localized options with:
sudo raspi-config
Go to the main screen and go to option 3 and select option 1 and select B2.
Now we will install the kiosk software:
sudo apt-get install –no-install-recommends xserver-xorg x11-xserver-utils xinit openbox
This will take 5 minutes. After it installs, then we will be using chromium browser in incognito mode to configure the webpage.

Set this for Kiosk mode:
Sudo apt-get install –no-install-recommends chromium-browser
Type y
This will take 10 minutes to install.
Now we will setup autostart.
sudo nano /etc/xdg/openbox/autostart
You will see the following:
Note: If you do not see the screen above, you may have to troubleshoot. Troubleshooting steps: run the following:
sudo apt-get clean
sudo apt-get autoremove
sudo apt-get remove --auto-remove --purge 'libx11-.*'
sudo apt-get autoremove --purge
Now, go back and re-install the kiosk software and the chromium browser.
Once, get the screen above, leave everything as is. Move to the bottom of the screen where there is no text. Type:
xset s off
xset s noblank
xset –dpms
chromium-browser --disable-infobars --kiosk --incognito ‘http://www.DavidAlanGarza.com’
Once you have that set, type Cntl-X type y Click Enter
Now to disable the mouse cursor:
Type: startx -- -nocursor -incognito
This will display the webpage or should. If it did not, you will need to see what needs correcting on the code above.
Now we will go back into
Nano .bash_profile
Now type the following very very carefully:
[[ -z $DSIPLAY && $XDG_VTNR –eq 1 ]] && startx -- -nocursor
Type CNTL-X to save and type y

Improve Security:
We will deny sshd by typing
sudo nano /etc/ssh/sshd_config
allowUsers pi
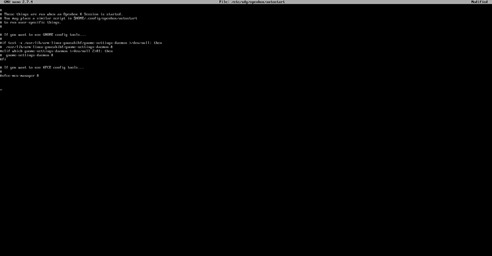
Now we will install a firewall by typing the following:
sudo apt install ufw
sudo ufw enable
Now we will install an fail2ban which scans log files (e.g. /var/log/apache/error_log) and bans IPs that show the malicious signs -- too many password failures, seeking for exploits, etc. Generally Fail2Ban is then used to update firewall rules to reject the IP addresses for a specified amount of time, although any arbitrary other action (e.g. sending an email) could also be configured. Out of the box Fail2Ban comes with filters for various services (apache, courier, ssh, etc). Fail2Ban is able to reduce the rate of incorrect authentications attempts however it cannot eliminate the risk that weak authentication presents. Configure services to use only two factor or public/private authentication mechanisms if you really want to protect services.
Type: sudo apt install fail2ban
Installing Automatic Updates:
By default your Pi won’t be rebooted if required, so if you want it to (and want to set the time) you can do that like this:
First install Unattended-upgrade
sudo apt-get install unattended-upgrade
sudo sed -i 's/^\/\/Unattended-Upgrade::Automatic-Reboot "false";/Unattended-Upgrade::Automatic-Reboot "true";/g' /etc/apt/apt.conf.d/50unattended-upgrades
sudo sed -i 's/^\/\/Unattended-Upgrade::Automatic-Reboot-Time "02:00";/Unattended-Upgrade::Automatic-Reboot-Time "02:00";/g' /etc/apt/apt.conf.d/50unattended-upgrades
And if you want unused packages to be removed (like when you run apt-get autoremove):
sudo sed -i 's/^\/\/Unattended-Upgrade::Remove-Unused-Dependencies "false";/Unattended-Upgrade::Remove-Unused-Dependencies "true";/g' /etc/apt/apt.conf.d/50unattended-upgrades
Next we must create the /etc/apt/apt.conf.d/20auto-upgrades file to instruct the updater what to do:
sudo tee /etc/apt/apt.conf.d/20auto-upgrades > /dev/null <<EOF
APT::Periodic::Update-Package-Lists "1";
APT::Periodic::Unattended-Upgrade "1";
EOF
And that’s all there is to it! Every day your Pi will now check for updates
Cloning Micro SD
Download Win32 Disk Imager onto your computer. https://sourceforge.net/projects/win32diskimager/
If you have a micro sd card you want to image, plug it into the computer.
You will see the following window:
In the image file type in where you want to save an img file. You can create an empty text file and rename it to be a .img file and write over it if you want to create an image.
Select Write to write over the image file. Select Read to erase and image the Micro SD card with whatever is on the .img file.
Last Note:
If you are noticing that something is not working right while you are building this kiosk. You may want to completely restart from scratch and re-install the OS. On of the main things about this Raspbian and these Raspberry Pi’s is that if one thing gets slightly corrupt, then the whole system can be corrupted. So with this project, be patient, and take your time. The majority of the code is Case Sensitive. It can be tedious, but I know you can do it! I hope you have fun setting up the kiosk.
Hidden Wifi:
I found out these would not connect to the hidden Wireless. It would even attempt to access.
You must open text editor to:
sudo nano /etc/wpa_supplicant/wpa_supplicant.conf
and change the following:
ctrl_interface=DIR=/var/run/wpa_supplicant GROUP=netdev update_config=1 country=US
network={ ssid="Your Hidden SSID" scan_ssid=1 key_mgmt=WPA-PSK psk="Your SSID's Password"
}
0 notes
Text
Security tips for your homemade IoT network
*Gosh, imagine the playful fun!
https://makezine.com/2018/07/26/top-tips-to-tighten-security-on-your-homebrew-iot-projects/
In that triumphant moment of getting your connected project up and running, it’s easy to forget how vulnerable IoT projects can be without taking basic security precautions. You might wonder why someone would bother taking control of you house lights, but unprotected entries to your network can provide a treasure trove of information for hackers. Protect yourself and your projects with these easy-to-implement tips.
Get this article and more in Make: Vol. 64. Subscribe now for great projects and articles all year long.
For Raspberry Pi/Linux Boards
1. Change the default user password
All Raspbian OS installs use the same password for the default pi user. Attackers will try common and default passwords to access a system before they move on to more sophisticated attacks. Stop them by using the passwd command to change yours to a new unique and strong value.
See the Raspberry Pi user documentation for details on the passwd command that changes a user’s password. Also check out advice on creating a strong password that will be very difficult for an attacker to guess or ‘brute-force’ attack.
2. Disable password login with SSH
Even a good password is still at risk for a determined attacker to guess its value and access the machine remotely with SSH. Prevent this by using security keys to login to your board instead. These keys grant access only from other allowed computers, and they use sophisticated cryptography that’s extremely difficult to guess or break. Even better, once you set up key-based login you don’t have to remember passwords!
See the Using Key-Based Authentication section of the Raspberry Pi security documentationfor more details on how to configure SSH for key-based login.
3. Keep the OS up to date
No software is perfect; inevitably, vulnerabilities or bugs will be found that could allow an attacker to access your board. Diligently use the apt-get upgrade command to keep your board’s operating system up to date with the latest security patches and fixes.
See the Raspberry Pi updating and upgrading documentation for details on how to get the latest software with the apt-get upgrade command.
4. Set up a firewall
Your IoT gadget likely doesn’t use all the services that the Pi operating system provides, such as web server, email server, and more. Use a firewall to close off access to unused services. This helps prevent an attacker from accessing your board through vulnerabilities and bugs in its services. The best approach is to turn off access to all services by default, and then only turn on services your project uses like web or other access.
See the Install a Firewall section of the Raspberry Pi security documentation for details on how to use the ufw tool to enable a firewall on your board.
5. Review Linux security best practices.
You can follow much of the same advice for securing a general Linux machine. There are great resources available like DigitalOcean’s “Introduction to Securing Your Linux VPS” and “7 Security Measures to Protect a Linux Server.” These guides explain tools like fail2ban and tripwire that go further to detect intrusions and deter attackers. The Linux security world is constantly evolving so it never hurts to periodically consult these guides for the latest tools and best practices.
For All Devices
1. Change default passwords
It bears repeating — it’s the number one vulnerability for internet-connected devices. This applies to your router, IP cameras, network printers, etc. If you can look up the password online, so can everyone else! You do not want hackers getting control of any device that’s on your internal network.
2. Keep firmware and software up to date
Stay protected from known security vulnerabilities. (((etc etc)))
0 notes