#Set Horizontal Resolution of Output Image
Explore tagged Tumblr posts
Visit Tumblr Blog
Explore Tumblr blogs with no restrictions, modern design and the best experience.
Last Seen Tumblr Blogs


Fun Fact
Celebrities use Tumblr as well.
Text
Spring Into Live Production with Videoguy's Top Products for Outdoor E - Videoguys
New Post has been published on https://thedigitalinsider.com/spring-into-live-production-with-videoguys-top-products-for-outdoor-e-videoguys/
Spring Into Live Production with Videoguy's Top Products for Outdoor E - Videoguys

Boost your outdoor event success with Videoguys’ top live production gearperfect for streaming, recording, and capturing every moment this spring. Discover reliable, high-performance tools ideal for festivals, sports, and live shows in any outdoor setting.
Watch the full video below:
youtube
LiveU Solo Pro
Rock-Solid Reliability: Up to 4 external 4G modems
Limitless Coverage: Capture footage from anywhere
Exceptional Quality: 4K video resultion
Cost-Effective Transmission: HEVC encoding
LiveU Lightweight Production Bundles
Pay as you go or Yearly plan that includes the hardware encoder, data, and access to LiveU Studios cloud-based switching platform.
LU300S or LU800 + Data Including LRT + LiveU Studio
Learn more about LiveU Lightweight Production Bundles HERE
Kiloview P3 mini
4G Wireless Bonding Encoder
Easy outdoor streaming anytime, anywhere
On-board modems included
Perfect outdoor live streaming
Kiloview P3
Up to 6-channel Connections Bonding
4Kz HDMI+3G-SDI with H.265 & H.264 Encoding
NDI | HX, RTMP, SRT, RTSP, HLS
4.3-inch Touch LCD Screen
Dual Battery Module
Pro-Level Video Processing
Reliable Recording and Streaming
KiloLink Server – Safe and flexible bonding software
Kiloview P3 + Modems Bundles Available
YoloLiv YoloBox Family
The ultimate all-in-one portable mulit-cam live streaming & streaming system to stream from anywhere to everywhere
Resolution
Up to 4K30
Up to 4K60
Brightness
1,000 nits
3 in, 1 out
4 in, 1 out
8 in, 2 out
3 in, 1 out
6 in, 2 out
ISO Recording
Up to 5 channels at 1080 60p
Up to 4 channels at 4k 30
Multi-Cam NDI Sports Live Production Bundle
Ready to take your sports productions to the next level? This powerful bundle includes everything you need from PTZOptics, NETGEAR, and YoloLiv to give you a complete NDI-ready 3-camera solution perfect for streaming and recording live sports events.
Whats Included:
1 x PTZOptics Move 4K 12x
2 x PTZOptics Studio 4K 12x
1 x PTZOptics SuperJoy
1 x YoloLiv YoloBox Ultra
($99 NDI License Available directly from YoloLiv)
1 x NETGEAR 10PT M4250-8G2XF-POE+ Managed Switch
BirdDog A300 Outdoor PTZ Camera
IP67 Extreme Weatherproof
30x Optical Zoom
Full NDI
1 / 2.8″ CMOS 2.13MP Sensor
NDI and SDI outputs
1080p60
Canon Outdoor PTZ Cameras
Optical Zoom
20x Zoom with Optical Image Stabilization
15x Zoom with Optical Image Stabilization
Resolution
4K30 and 1080p60
1/2.3″ CMOS with Hybrid Auto Focus
1″ CMOS Sensor with Dual Pixel Autofocus
6G-SDI, HDMI, and IP Video Out
12G-SDI Video Out
Outdoor Rating
Outdoor Camera with Wiper (IP65 Rated)
Outdoor Camera with Wiper (IP55 Rated)
Canon Color Science
Panasonic Connect AW-UR100 Outdoor PTZ Camera
Compatible with 4K/60p shooting
Built-in cropping function
24x optical zoom/74.1° horizontal
Three types of image stabilization, OIS, EIS, and D.I.S.S.
Durability to withstand the harshest of environments
Western Digital ArmorATD Storage
Rugged Durability For Out In the Field
Thunderbolt 3, USB 3.2 Gen 1
Throughput: 130 MB/s read transfer
Rugged: IP54 rain/dust rating with crush resistance of 1,000 lbs
Pixellot AIR NXT
Portable AI Sports Camera
Pro-Quality Streaming with 4K video and stereo audio
AI-Automated Highlights for multiple sports
Multiple Viewing Modes: broadcast, panorama, tactical
Fast Uploads via Wi-Fi or 4G/5G
13-Hour Storage with USB-C rapid charging
Lightweight & Durable for all-weather use
Atomos Monitors and Recorders
5-inch, 1000nit HDR Monitor-Recorder for DSLR and Mirrorless Cameras 5-inch, 1000nit HDR Monitor-Recorder for Mirrorless and Cinematic Cameras 7″ Monitor and Recorder 7-inch HDR Monitor-Recorder 8K RAW SUMO19SE bundle with ZATO Connect, Z-Mount, and Sunhood with over $700 worth of savings!
#000#4g#4K#5G#6G#8K#ai#air#amp#Atomos#audio#battery#board#bundle#Cameras#Canon#Capture#channel#Cloud#Color#data#DSLR#dust#easy#event#Events#festivals#focus#Full#Hardware
1 note
·
View note
Photo

Hisense 80cm (32″) LED Matrix TV Image display Active display area, horizontal dimension: 697,685 mm Active display area, vertical dimension: 392,256 mm Screen size (rounded to nearest integer): 80 cm Screen size (rounded to nearest integer): 32 inch Display technology: LCD / LED lit Backlight source: LED Matrix Resolution (Horiz x Vert): 1366 x 768 pixel Colour depth: 8bit Image refresh frequency: 60 Hz Smooth motion rate: 120 Maximum brightness of white: 300 cd/m2 Native contrast ratio: 3000 : 1 Viewing Angle (Horiz / Vert): 178 / 178 Degrees Response Time: 6,5 ms Connectivity RF – Radio frequency input: 1 AV input: 1 USB interface type 2.0 (Qty / List ….): 2 / USB 1, USB 2 Optical digital audio output (SPDIF): 1 Earphone jack: 1 HDMI ports HDMI inputs: 2 HDMI type 1.4 with HDCP version 1.4: HDMI 1, HDMI 2 ARC – Audio Return Channel: HDMI 1 CEC – Consumer Electronics Control via HDMI: Yes Digital TV reception Television system (DVB-T / DVB-T2+S2): Yes / Yes Video decoder (MPEG2 / MPEG 4): Yes / Yes AC3 Surround sound decoder: Yes Subtitles: Yes Analogue TV reception Colour-Sound systems in VHF band: PAL B Colour-Sound systems in UHF band: PAL B Stereo sound decoder A2, Nicam, ….: NICAM Subtitles: Yes Image processing Zoom function settings (4:3 / 16:9 / Auto / Zoom 1 / Zoom 2): Yes / Yes / Yes / No / No Sound Audio power output per channel: 6 Watt Number of speakers (Tweeter / Midrange / Woofer): 0 / 1 / 0 Automatic volume level (AVL): Yes Audio equalizer: Yes Dolby Digital: Yes Features: On / off timer: Yes Power off if no signal: Yes Sleep timer: Yes Program lock: Yes User interface: Linux Software version OSD indication: Yes Legal requirements: Disclaimer / Acceptance of Terms: Yes / Yes Favourite channels list: Yes USB media player Personal Video Recorder: Yes Time Shift: Yes DTV Recording (EPG scheduling / start from Standby): Yes / Yes DMP – Digital media player content (Music / Video / Photos / Text): Yes / Yes / Yes / No DMP File allocation table (FAT / FAT32 / exFAT / NTFS): Yes / Yes / No / Yes PVR File allocation table (FAT / FAT32 / exFAT / NTFS): Yes / Yes / No / Yes Hotel lock Protected Hotel lock submenu (Password / fixed code): No / Yes Sub-menu lock, including tuning lock: Yes Power on RF channel selection: Yes Power on mode (On / Standby / Last): Yes / Yes / Yes Inputs access (Enable / Disable): Yes Maximum volume lock: Yes Power on volume: Yes Power on, apply default sound / image settings: Yes Power on source selection: Yes Hardware Processor / Cores: MSD3666 Colour (Front bezel, rear, stand): Black / Black / Black Standby consumption: < 0.5W Compact packaging: Yes Supply range [Voltage / Frequency ]: 100 ~ 240V / 50, 60Hz Installation Power cord length: 155 cm Stand area (Width / Depth): 671 x 160 mm Wall mount dimensions (Horiz x Vert): 100 x 200 mm Wall mount, screw thread: M6 VESA compliance: Yes Accessories Remote controller (Technology / Part number ): IR / EN2T30H Battery (size / quantity): AAA / 2 User manual (Available online) / Quick setup guide (Print): 1 / 1 Warranty [In User manual | In separate sheet]: In separate sheet Dimensions Dimensions with stand (W x H x D): 717 x 469 x 160 mm Dimensions without stand (W x H x D): 717 x 427 x 86 mm Carton box dimensions (W x H x D): 811 x 129 x 515 mm Net weight (with stand / without stand): 3.6 / 3.7 kg Gross weight: 5,5 kg EMC – Electromagnetic Compatibility: Yes CB – Electrical safety: Yes HDMI: Yes Dolby Digital: Yes
1 note
·
View note
Text
Capturing N64 footage using the GlideN64 plugin
In this continually-updated guide, I'll document my experiences using this plugin and provide tips for using it to render the highest-quality footage possible.
Resolution and rendering scale
GlideN64 gives you the choice of a specific output resolution or a small-integer multiple of your ROM's native rendering size. If you plan on using overscan (see below), I recommend using an 8x scale. Otherwise, you can just pick your monitor's resolution.
Aspect ratio and widescreen
Your emulator (e.g. Retroarch or Project64) likely has its own aspect ratio output setting. Set this first, and then configure GlideN64 to optimally fill in that space. It provides three options: Original, Widescreen (Stretched) and Widescreen (Adjusted).
Adjusted implements a rendering hack to increase the FoV for an output appropriate to 16:9 displays. For some games, this causes culling at the left and right edges of the render, because their frustum is tuned for a 4:3 FoV. For others, it can produce very good results - check out how Adjusted compares to a dedicated widescreen patch for Wave Race 64:

I couldn't find good documentation, but ostensibly "Stretched" merely takes a 4:3 render and interpolates it horizontally to fill a 16:9 area. Stay away from this option - besides outputting a geometrically incorrect picture, I also noted poor image quality and lower-res textures while using it.
For all other cases, chose Original. Notably, this encompasses running widescreen cheats and patches for N64 ROMs, which are designed to output anamorphic widescreen. This also includes N64 games which offer widescreen support, such as Donkey Kong 64*. Just be sure to configure your emulator for a 16:9 output so it can stretch accordingly.

*although DK64's widescreen mode has some UI scaling issues. My advice: always look for a ROM patch or cheat!
Overscan
GlideN64 allows you to specify different cropping values for all four sides of the screen. This is useful for selectively zooming your render to omit unwanted letterboxing, UI elements, etc.
Keep your desired aspect ratio in mind in order to configuring proportional cropping values. For example, if you want to crop 24 total pixels from the sides of a 16:9 output, then you'll want to crop ~42px total from the top and bottom.
From what I understand, cropping this way is theoretically advantageous to cropping in post-production, because you don't lose any rendered area - provided your configured scale/resolution exceeds your display size. But I'm not actually sure when/how the plugin applies overscan cropping so it might not matter.
Texture packs
See my dedicated guide here.
0 notes
Text
VeryUtils HTMLPrint Command Line is a Windows printing utility intended for printing HTML, ASCII text documents, and image files
VeryUtils HTMLPrint Command Line is a Windows printing utility intended for printing HTML, ASCII text documents, and image files, including those with the following file extensions: .htm, .html, .txt, .png, .gif, .bmp, .jpg, .jpeg, .wmf, and .emf. HTMLPrint operates as a command-line tool designed to send HTML content to a printer, all without displaying prompts to the user. By default, it utilizes the system's default printer unless an alternative is specified in the command line.
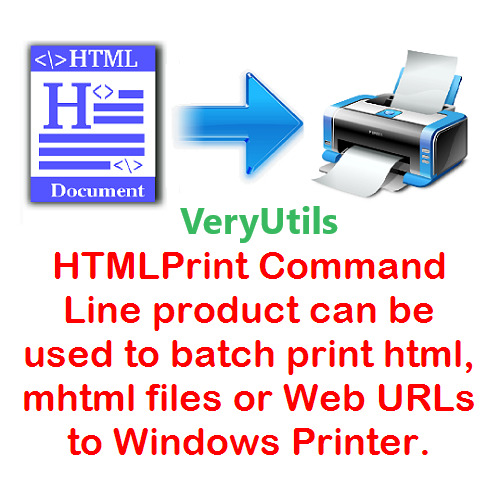
The VeryUtils HTMLPrint Command Line product serves the purpose of batch printing HTML, MHTML files, or web URLs on Windows Printers. It enables the printing of complete web page content to a Windows Printer seamlessly, eliminating the need for user interaction. Furthermore, it provides full control over the printer's capabilities through the DEVMODE structure. VeryUtils HTMLPrint Command Line relies on Microsoft Internet Explorer to render HTML pages, ensuring support for all features present in the MS Internet Explorer application.
VeryUtils HTMLPrint Command Line stands out as a handy and potent tool that excels in batch mode, enabling the printing of large volumes of HTML, MHTML files, or Web URLs in real-time. Additionally, VeryUtils HTMLPrint Command Line is developer-friendly, allowing developers to access the product via various programming or scripting languages, including but not limited to Visual Basic, C/C++, Delphi, ASP, PHP, C#, .NET, and more.
✅ VeryUtils HTMLPrint Command Line Key Features: •Print HTML to a specific printer. •Enable user prompts with a print dialog, allowing for printer setting adjustments and manual page selection. •Load/Save DEVMODE data from/to a disk file. •Set copy number, orientation (portrait/landscape), duplex (simplex/horizontal/vertical), color (monochrome/color), x-resolution, y-resolution, collate, and scale options for the printer. •Support for over 100 standard paper types (refer to Paper Definition). •Accommodate any custom paper size. •List installed printers on the system. •Display bins/trays available on a printer. •Configure the paper bin (paper tray) for a specific printer. •Restore original settings to the printer after printing. •Monitor print job status and automatically delete failed jobs if necessary. •Print background color and images in HTML pages. •Exercise control over header, footer, and margins. •Achieve printing without user interaction. •Support "postdata" when printing HTML pages. •Show or hide the print preview dialog as needed. •Output debug messages during the printing process. •Print HTML pages containing CSS, JavaScript, Java Applet, SVG, Flash, or iframe elements. •Ensure compatibility with all features supported by Microsoft Internet Explorer. •Implement a feature to force the printing of large HTML pages or exit the process if a timeout occurs. •Send HTML directly to a specified printer. •Control header, footer, and margins effectively. •Maintain a user-independent printing experience. •Retrieve HTML content from files or via command line switches.
✅ Printing Options with HTMLPrint Command Line:
VeryUtils HTMLPrint Command Line offers multiple flexible methods for printing, making it a versatile tool for various printing needs:
Batch Printing with Retainable Lists: •HTMLPrint allows you to create and manage lists of documents that can be retained for future use. •These lists can be automatically printed in a document sequence of your choosing. •This feature streamlines the printing of multiple documents, ensuring they are processed in the desired order.
Printing HTML Files via Command Line: •You can initiate HTML printing directly from the command line. •By passing the file or directory name to HTMLPrint as a command line parameter, you can print HTML files effortlessly. •HTMLPrint processes these files invisibly, without any user interaction. •For detailed instructions on using the command line, please continue reading below.
Directory Monitoring: •HTMLPrint offers a convenient feature known as Directory Monitoring. •When activated, HTMLPrint continuously watches a specified folder within the Windows Task Bar for incoming HTML or image documents. •As soon as documents are detected, HTMLPrint automatically sends them to the designated printer for hassle-free printing.
It's important to note that HTMLPrint operates as a visible application when started without any command-line arguments. It cannot function as a service.
✅ Command Line Parameters Usage:
When utilizing the command line for HTML printing, follow these guidelines: •To print an HTML file from the command line, provide the filename as a parameter. •You can enhance your printing experience by adding additional parameters to configure various printing settings to meet your specific requirements.
HTMLPrint is designed to seamlessly integrate with other software or batch files. It can be called upon by passing the HTML or TXT file names or image filenames (GIF, JPEG, BMP, PNG, WMF, or EMF) as parameters in the command line. Additionally, you have the option to pass a text file containing a list of files to be printed or a directory path, expanding the tool's flexibility.
✅ Printing Lists or Files from a Predefined Directory (Directory Monitoring):
HTMLPrint offers a valuable Directory Monitoring feature: •HTMLPrint can actively monitor one or more folders, continuously scanning for incoming HTML documents or images. •When new documents are detected, HTMLPrint swiftly sends them to the specified printer. •Alternatively, you can predefine file lists, save them, and schedule printing tasks. •This feature provides the flexibility to print files without saving them, streamlining your printing workflow.
VeryUtils HTMLPrint Command Line is a powerful and versatile tool for handling various printing tasks. Whether you need to print batches of documents, initiate HTML printing from the command line, or employ directory monitoring for automated printing, HTMLPrint has you covered. It offers user-friendly options for enhancing your printing processes and can be seamlessly integrated with other software or batch files for increased efficiency. Say goodbye to printing hassles and optimize your workflow with HTMLPrint Command Line.
0 notes
Video
youtube
YABER V9 Outdoor Projector Review – PROS & CONS Native 1080P Auto Focus Projector
Projector 4K with WiFi-6 and Bluetooth 5.2, 500 ASIN 1080P Native Portable Projector, YABER V9 Outdoor Projector Auto 6D Keystone 50% Zoom, Movie Home Projecteur for Android/iOS/TV Stick/PC/PS5
SMART AUTO FOCUS PROJECTOR+AUTO 6D KEYSTONE - Effortlessly get a clear and well-aligned image within 5S of turning on the projector! 4K projector adopts advanced SLR focusing technology, displacement gyroscope and sensor to accurately detect real-time motion, adjusting the picture accordingly to ensure it stays crystal clear. Save hassle of manually adjusting. Portable projector comes with auto-focus and 6D auto-keystone technology (±30°horizontal, vertical), easily set up for movies or games.
PROJECTOR 4K, 500ANSI & 20000:1 CONTRAST RATIO - Outdoor projector has a native 1080P resolution and supports 4K movie playback, provides a contrast ratio of 20000:1 for perfect details, boasting an impressive 500 ANSI lumens of brightness. Projector utilizes AI optical algorithm and RGB color model, which can provide up to 99% NTSC, presenting 1.8 million colors, with German optical coated glass lens, +90% brightness, +95% contrast, ensuring the most precise color reproduction possible.
Ultra-fast WiFi 6 & BLUETOOTH 5.2 & Hi-Fi SPEAKERS - Wi-Fi 6 is compatible with 2.4GHz and 5GHz networks, with the maximum rate up to 9.6G bps. Compared with the 5G network, it has three times faster speed, larger capacity for data transfer, and lower latency. Bluetooth projector built-in 12W Hi-Fi Speakers offers crisp highs and lows output to truly gives a home theatre experience. Bluetooth 5.2 chip allows the WiFi projector to stably connect to Bluetooth headsets/speakers/Airpods, etc.
FULLY-SEALED ENGINE & WIDE COMATIBILITY - V9 movie projector is designed base on fully-sealed optical concept, which means it will not easy to enter dust, effectively reducing black spots and image loss, and extending the lifespan of the projector. Equipped with AV/USB*2/HDMI*2/audio ports, it can easily connect to TV box, Fire Stick, Chromecast, Phone, PC, PS4, PS5, Switch etc. Excel / Word / PPT can be easily displayed on the projector via your USB stick. Small meetings are easily realized.
150000 HOURS LAMP LIFE & 50% ZOOM & FREE PORTABLE BAG - Portable projector uses the latest SmarEco technology to minimize lamp power consumption and extend lamp life up to 150000 hours. ±50% zoom adapts to different screen sizes without compromising image quality. Take the outdoor projector anywhere with the free bag. YABER's friendly customer support and 3-year warranty make your completely worry-free.
Yaber auto focus 4k projector utilizes latest AI optical algorithms, paired with German optical coated glass lens, boasting an impressive 500 ANSI Lumens of brightness.
WiFi 6 is not only compatible with 2.4GHz and 5GHz networks, but the maximum rate can also reach 9.6G bps.
Bluetooth 5.2 provides stable external connections without compromising audio quality.
Brand YABER Manufacturer YABER Place of Business YABER Model YABER Auto Focus Projector Model Name PRO V9 Model year 2023 Hardware interface Bluetooth Special features ⭐Auto Focus & Keystone⭐4K supported (Native 1080P)⭐WiFi 6, 5G+2.4G Dual Band Wifi⭐Bluetooth 5.2⭐ 6D Auto Keystone⭐100%-50% Zoom⭐with Hi-Fi Speakers⭐Extra Portable Bag Include⭐Customer Service: WhatsApp +8618664592344, [email protected] Mounting Hardware Remote Display Technology LCD Image brightness 500 ANSI lm Image Contrast Ratio 20000:1 Aspect Ratio 16:9 Display Resolution 1920 x 1080 Resolution 4K Supported, Native 1920x1080 Wattage 110 watts Batteries Required No Refresh rate 50 Connector Type Bluetooth, Wi-Fi, USB, HDMI Form Factor Portable Mounting type Ceiling/ Wall/ Table/ Tripod Mount Does it contain liquid? No Manufacturer YABER Item model number YABER Auto Focus Projector Product Dimensions 25.7 x 20 x 10.3 cm; 2.9 Kilograms
0 notes
Text
Custom Backdrop-digital File
This will give you a real illustration of the banner's actual measurement and the final print. Take a close look at all the pictures, pictures, and logos in your design on your pc screen to ensure you're satisfied with their decision. How long does it take to print your custom backdrops? The commonplace turnaround time for each customize backdrops our Custom Banner + Stand and Banner Only is three (3) enterprise days. However, if you need to expedite the production of your Banner Only order, you'll have the ability to shorten the printing time to 1 (1) or two (2) business days for a small charge. We are able to put your branding and identity on your custom backdrop in a selection of other ways.
PSD, PDF, and AI recordsdata ought to be in CMYK color mode to ensure correct color output. The resolution of your files must be set to 300 dpi, until acknowledged otherwise. If you require a print proof, select “I want a PDF proof” underneath Proofing Options when importing your artwork.
Custom photograph backdrops are transportable and may go anywhere you want to promote your brand. They are designed with sturdy matte vinyl so you possibly can simply fold them and take them alongside to your subsequent group event, commerce show, or evening gala. The matte finish ensures that you won’t have a glare from camera flashes when someone needs to take an image. The commonest design for a photo backdrop is a emblem repeated at regular custom printed backdrops intervals throughout the whole banner. This is often known as a “step and repeat.” You can embrace different logos as nicely, such as a sponsor for an event, a partner emblem, or an event-specific brand (like a tradeshow or awards show). Backdrops are a straightforward yet enriching method to give an expert look to your conference stands, picture cubicles, retailer window shows, and public events.
Material is thicker by laptop printed, which might be washable, If there are messes just take a humid fabric with water and/or a gentle cleaner(like soap) to wipe clear. Here are just a few of the questions people have about our banners. Lucy will contact you to rearrange customized backdrops the file switch after your purchase. That is why we already have more than 500,000 glad prospects. That means we want to divide it into two or extra items.
Only logged in customers who've purchased this product might leave a review. FINAL DIGITAL FILES After you've approved the final design you may be sent 1 PDF file inside customize backdrop 24hrs, for printing purposes. Your custom backdrop could be installed in just a few minutes. Individually printed for you, on the identical prime quality lay flat materials and hand checked by eye.
At Backdropsource our objective is to provide the best possible quality in the trade. Step 4 - Connect the horizontal poles to the vertical poles and carry the backdrop to its position. Send me exclusive presents, distinctive gift ideas custom backdrops, and personalised suggestions for buying and promoting on Etsy. Public collections may be seen by the general public, together with different buyers, and will present up in recommendations and other locations.
Since our custom backdrop size is as much as 8 ft. x 10 ft., which may match as a lot as four folks, photograph studios can organize them with out the stand to make use of as backgrounds for portrait pictures. While it's easy to get Free Digital Backdrops, get the upper hand by having your individual Personalized Digital Backdrop that suit your model or company. These digital backgrounds can be utilized for more than just conference calls because the design is up to you. So if you're a student, teacher, or digital creator with an thought, our designers will work with you on getting the best design custom tailored to you.
Unlimited design choices are available, however the most well-liked are step-and-repeat patterns and outsized logos. Team Fitz Media Backdrops are great for media classes, faculty signings, and photo backgrounds. These cloth background banners are simple to arrange, journey nicely, and retailer easily when not in use. Glowtronics, Inc., ("Glowtronics"), offers customers with a wide variety of internet and e mail printing companies, as nicely as transport of finished merchandise (collectively, the "Services").
0 notes
Note
Item #: SCP-4885
Object Class: Keter
Special Containment Procedures: Currently, it is only theorized that SCP-4885 is contained. To further elaborate, SCP-4885 is contained within an unknown Class-17 Containment Chamber in an unknown site. In the event that SCP-4885 breaches containment, Procedure Invenient Eum is to be enacted, which consists of the following procedures:
Thirty six Class-17 Containment Chambers are to be connected to an independent self-driving vehicle. At all times, 216 inactive Containment Chambers are to be readily available in case of sudden and unforeseen breach of SCP-4885's containment.
One D-Class subject of stable mental health is to be submitted into the vehicle, and driven into the system. A cryptographically secure pseudorandom number generator is to choose a random number between one and thirty-six, and the vehicle is to be transported to a Containment Chamber based on the number chosen.
Each Containment Chamber has a single digital monitor that is capable of outputting video at 720p resolution. Once a D-Class subject is transported to a random chamber, a message is to be sent to every monitor simultaneously. This message consists of the current location of SCP-4885, delivered via an implanted tracking device. The GPS is only accessible by Level 5 Personnel or SCP-4885 containment staff on a need to know basis.
After approximately two hours, each containment chamber is to be transported to a randomly designated Foundation site via self-driving trucks. The trucks are to be disguised as a packaging service in order to prevent suspicion. In the event an accident occurs during this stage, Procedure Invenient Eum is to be enacted again.
No personnel who are aware of SCP-4885's existence are to go within 100 meters of any Class-17 Containment Chamber. Several signs and warnings have been placed around each chamber, labeling it as a water treatment room, and that attempted access is punishable by immediate amnestication and loss of employment as decided by the Ethics Committee.
These warnings tell personnel to report to a nearby Automated Site Overseer of any leaks from the chamber, in which the person will be visually amnesticized by the Overseer, and Procedure Invenient Eum will be reenacted. For more information regarding the composition of Class-17 Containment Chambers, please consult Document 7631.00.
Currently, SCP-4885-1 instances that are located via far2.AIC are contained within Location i. The whereabouts of Location i is only known to far2.AIC. Currently, far2.AIC is connected to 80% of CCTV security cameras within the United States, and 40% of total CCTV security cameras on Earth.
SCP-4885-1 instances discovered by far2.AIC will have specialized Foundation carrier drones to be dispatched and attempt to grab the body, and carry it to Location i, using routes that minimize the chance of unwanted civilian interference. In the event that a civilian notices a drone and SCP-4885 breaches containment, the drone will send an "All Alert" message to SCP-4885's containment team, and Procedure Invenient Eum will be enacted.
In the event that Location i's whereabouts are discovered at large, the next personnel located within Document PAINT-THE-TOWN-YELLOW will establish the next Location i, and their immediate family will be notified of their death.
Description: SCP-4885 is an anomalous humanoid resembling the main character of the popular series of puzzle books "Where's Wally?" (known in the US as "Where's Waldo?"). This entails that SCP-4885 wears a horizontal red and white striped shirt, a red and white bobble hat, and jeans. However, a noticeable difference in appearance from the character is the entity's paler skin and the lack of eyes.
In the event that a subject knows of SCP-4885's current location at any given time1, SCP-4885 will move to the nearest wall and begin to "phase" into it. SCP-4885 will appear inside of the subject, and will reach up the esophagus and grab the subject's chin through their mouth.
SCP-4885 will then proceed to pull themselves through the subject, destroying their internal organs and their spine. Once this has occurred, a yellow liquid will exit the corpse's mouth and will cover the subject entirely, which causes it to become an SCP-4885-1 instance. SCP-4885 will remain in its current location, occasionally patrolling the area, until another person discovers its location once again.
However, if SCP-4885 is close enough to the subject when they discover its location, they will instead approach the subject, attempt to climb into the subject's mouth, enter their abdomen and exit their body through the subject's pelvis. During this time, SCP-4885 can easily dislocate/relocate any joint in its body, and its skin and muscles will gain the consistency of a malleable solid, allowing it to easily climb into and out of the subject.
SCP-4885-1 instances are anomalous corpses that were created by SCP-4885. The entire body of an SCP-4885-1 instance is covered in illustrations similar to those found in Where's Wally? books, with many different characters appearing on the instance's skin. These illustrations originate from the liquid that exits the corpses' mouth. Currently, no instances of the cartoon character "Wally" have been found on an SCP-4885-1 instance. These illustrations cannot be removed from the subject unless the skin it is placed on is removed.
If a subject knows the location of any given SCP-4885-1 instance, SCP-4885 will teleport itself to the subject and kill them in the exact same manner as if they discovered SCP-4885 itself. This will also transform them into an SCP-4885-1 instance.
SCP-4885 was discovered residing in [LOCATION REDACTED] within a small wooden house. Mobile Task Force Chi-19 ("Unrelenting Punishment") was sent to capture an entirely separate anomaly, and did not know of SCP-4885's existence.
Subjects: Amelia Merrick (M-1), James Klein (M-2), Kurt Stoll (M-3)
[BEGIN LOG]
M-1: Mic check.
M-2: Yup.
M-3: All good.
M-1: Equipment check.
M-2: Everything's working as intended.
M-3: Ditto.
M-1: Transcript number… 67. We are entering the house.
M-3: No one's talking to you Melly.
M-2: Oh, stop it. Now is not the time, Kurt.
M-3: Heh, right, sorry.
The group enters the house.
M-1: Initial descriptions of the object were a pair of black spectacles capable of killing the user, and covering their body in strange pictures from an unknown children's book.
M-3: It was obviously Where's Wa-
M-2: Kurt, stay professional.
M-3: I just want to bring some life into M-1's robotic speech.
M-1: I'm trying to keep my job, Kurt.
M-2: Ahem.
M-1: Sigh Right.
The group search the ground floor for the object, and begin to go upstairs. Scraping noises are heard below them, but the group does not notice this.
M-3: There's a picture on the wall.
M-1: Hmm?
M-3: Yeah, looks weird. Looks like crayon.
M-2: Take a picture.
M-3: Already on it.
him.png
The image taken by M-3.
M-2: Good. Think it has something to do with the anomaly?
M-3: Of course. It looks like Waldo.
M-1: Do any of you have an idea on where the object may be?
M-3: Er, I think it's in here.
M-1: Which room is this?
M-3: Um… Bathroom. There's a toilet and a… a shower, yeah. At least I think it's a shower.
The room is circular, with a normal porcelain toilet at the other side of the room. There is a small depression into the floor, leading to a small drain.
M-2: Strange… what kind of shower is this?
M-1: There is a modified sprinkler on the ceiling. There's a switch on one side of the room that, I assume, would activate the sprinkler. Seeing as this house has been abandoned for several years, I doubt it would work.
M-3 activates the switch. Water begins to come out of the sprinkler.
M-1: I stand corrected. Who is paying the water bill for this to work? Is it still hot?
M-3 touches the water, and immediately recoils in pain.
M-3: Gah… it's scalding.
M-1: Who is…
M-2: I have discovered the object. It was rested… uh, resting on the toilet.
M-2 is seen holding a pair of black circular glasses. The lens appear to be missing.
M-1: Good. You know the drill.
M-2 carefully examines the object, checking for fingerprints or any other traces of evidence. A small set of fingerprints are discovered on the temples of the glasses, which are revealed to be his own.
M-2: Yup, these are the ones. I'll put these in a baggie real quick.
M-2 produces a plastic bag from a small container around their waist, and places the glasses inside.
M-3: There's an inscription here. It's in… uh, [REDACTED].
M-1: Where?
M-3: Over here, on the wall.
The phrase "[REDACTED]" is seen on the wall in [REDACTED].
M-3: This was definitely not here when we first got here. Should we just leave it be and tell command about this, or?
M-2: It's most likely memetic. Here. let me translate it. I have training.
M-2 takes out a small Foundation-made translator, and inputs the phrase.
M-2: Huh, well never mind, doesn't appear to be memetic. It says… "The basement. The corpses from a child's book are in the basement. He is there too. Fr-. " And then it cuts off.
M-3: Hm. Take a picture and we'll send it ba-
M-2 begins to groan and hold their stomach.
M-3: Are you okay? What happened?
A set of fingers exit M-2's mouth, and grab their jaw. The hands push down, launching the jaw across the room. SCP-4885 exits M-2's body.
M-1: W-what the f-
Both M-1 and M-3 begin shooting at SCP-4885. The entity charges towards M-1 and shoves their fingers down their throat, and begin clawing into their mouth by unhinging their jaw.
M-3: Please, fuck, oh god. P-please, command. We're at [LOCATION REDACTED]. I repeat, [LOCATION REDACTED]. We need assistance, asap. Help. HE-
The audio is abruptly severed.
[END LOG]
When the transcript was received by a nearby site, the site almost immediately went into lockdown as SCP-4885 killed most of its personnel. The O5 Council enacted an emergency meeting, and Procedure Invenient Eum was created. Shortly after this, the procedure was enacted, and SCP-4885 was theorized to be contained. All information regarding SCP-4885's location of discovery was removed via an automatic algorithm, and SCP-4885's file was created.
You had this bitch on standby didn’t you
10 notes
·
View notes
Note
Hi! Can I ask how you make your gifsets? (program, process)? Hope you have an amazing day, your Daisy gifs are gorgeous btw ❤️💔
hello!! hope you also have a great day, and thank you!! and sorry this took a little longer to put together than i thought it would!!
i'll try to explain my process as best i can, and hopefully it makes sense.
program(s)
first, i use photoshop 2021 to make gifs, and i use mplayer osx extended for screencaps. also, i try to avoid using clips from YouTube because the quality usually isn't as good, but if I do have to use that I use 4k video downloader
process
first, first thing you need is the clip that you want to make gif from. the easiest way to find this (in my opinion) is just to search "[...] scene pack" or "[...] mega link." I usually try to make sure the clips i use are 1080p because anything less than that is lower in quality and the gifs aren't as sharp.
second, i open the clip in mplayer to get the screencaps ill use to make the gif. i do this by pausing the video right before the part i want to gif, then pressing and holding command+shift+s (for mac) until ive got the full scene. if you want, you can create a folder on your desktop for screencaps, but I usually just leave them there and delete them once im done.
the next step is when i actually open photoshop. to start, go to file>script>load files into stack
this is where you're going to load in the screencaps you just took. go to browse, then select the first screencap and hold down shift until you select the last screencap, then hit ok
after that i usually crop my gifs. in general, i use 540px x 400px, but that changes based on what exactly im giffing. the way i crop gifs is by clicking the crop icon on the left side, then, above the workspace, selecting W x H x Resolution > 540 px x 400 px > px/in
the next parts so the most complicated part to explain so im gonna use a picture for reference
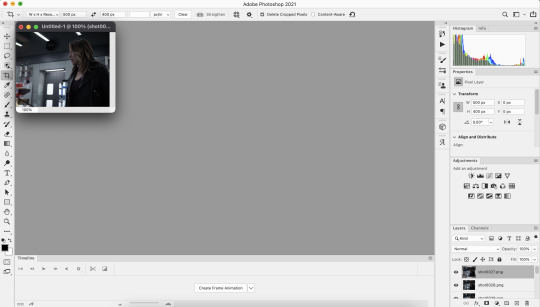
click create frame animation

next, go to the three horizontal lines across from the word “timeline” at the bottom. once that menu opens, click “make frames from layers” at this point the gif is backwards, so you’ll want to go back to that same menu and click “reverse frames.”
now that your gif’s frames in the correct order, you can set frame delay. select all the frames in the timeline, then right click so get a box that looks like this:

i almost always set frame delay to .05, but if i have less than ~20 frames ill set it to 0.06
next, click the symbol in the bottom left corner (you can see it in the photo above) to convert the frames to a video timeline
after this, on the bottom right side, select each layer of the gif under the “layers” tab. right click, then select “convert to smart object.” this will allow you to sharpen your gifs. to do that, at the top of the screen go to filter>sharpen>smart sharpen. the settings i use are 500% at 0.4px, then i sharpen again 10% at 10px
here's the gif before sharpening:

sharpened 500% at 0.4px:
sharpened 500% at 0.4px then 10% at 10px
coloring
once this parts done you can start coloring your gifs/adding adjustment layers. the main ones I typically use, in order, are curves, brightness, levels, selective color, and vibrance. the first three adjust the lighting of the gif and the last two adjust the color. other layers i use are saturation, color balance, and photo filter, which all adjust color.
to add adjustment layers, you can either 1. go to layer>add adjustment layer>select the layer type 2. pick a layer type from the icons on the right side (above the layer list)
honestly, the easiest way to do this part is to just select “auto” and photoshop will automatically adjust curves, brightness, and levels, but i usually slightly tweak it from here until im happy with it.
curves: use the white dropper to select the lightest part of the gif and the black dropper to select the darkest part. you can manually adjust the curve within the little graph too, but typically you don't need to (i only do when the actual scene the gifs from has a tint i don't like, ex. if its really green ill go to the dropbar, go to green, then adjust it until ive mostly neutralized it)
brightness/contrast: brightening too much will sometimes decrease the quality, where increasing the contrast will sometimes help increase the quality
levels: honestly you can almost always get away with not using this unless the lighting in a scene is really bad/weird. use auto then adjust as needed
this is what the gif looks like after adding adjustment layers: curves: input 85, output 92 brightness: brightness 19, contrast-32 levels: 0,1.11,255

now you can get to actually playing around with colors!
the first thing i do is add a layer of selective color, go to black, then increase black. this is one of the last ways to increase quality slightly, as it can make the gifs look a little sharper.
next i add vibrance. typically, unless the scene itself is already pretty colorful, ill increase vibrance almost fully, and slightly increase saturation. the issue with increasing saturation too much, especially when your giffing people, is the colors start to look really unnatural
for this particular gif, i added a hue/saturation layer, then decreased red and increase blue and cyan, because there was a lot of both of those colors in the background and i wanted it to stand out more. i then added another selective color layer and increased cyan for both blue and cyan.
these are the specific adjustments i made: selective color: black>black +9% vibrance: vibrance +76, saturation +10 hue/saturation: red -15 selective color: blue>cyan +75%, cyan>cyan 49% hue/saturation: blue +4, cyan +5
saving
once you're done coloring, you can save your gif. to do this, go to file>export>save for web (legacy)
these are the save settings i use:
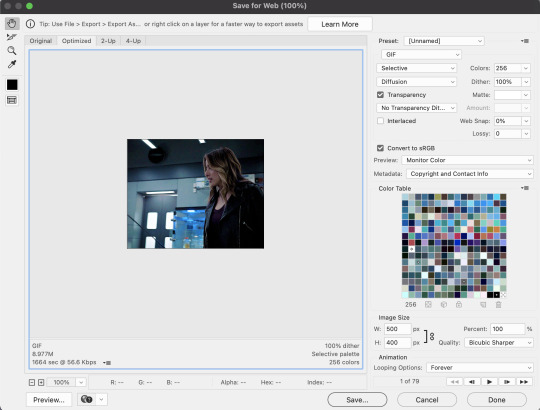
also, the gif size limit for tumblr is 10M, so make sure your gifs are all under that size. if they're too big, you can either adjust the image size on the save page (or while making the gif) or shorten the gif
and here's the final product!
i hope this was helpful :)
5 notes
·
View notes
Text
Reverse enginnering the unreleased GameBoy Printer COLOR
For a long time, when I checked out the graphics for the 64DD title Mario Artist Paint Studio, the successor to Mario Paint, I found a bunch of graphics and text that seemed to be for printing images. I was not entirely sure how that worked, how to even access it. I didn’t know enough reverse enginnering “techniques” to even bother while I was translating all the Mario Artist titles.
Fast forward to this month, and with new tools that I wrote, I started to think again about this feature, because it seemed like a full fledged working overlay code. So I went on, and tried to find the other overlays, such as Game Boy Camera menu, and see how the game loaded the overlay and access it.
After finding the LBAs for those overlays, I tried to backtrack the process of loading until I find what is seemingly a bunch of functions to load, init and access the overlay. Bingo! One of them accesses the unused printer overlay. So all I need is to force a way to access it, such as repointing a button’s purpose.
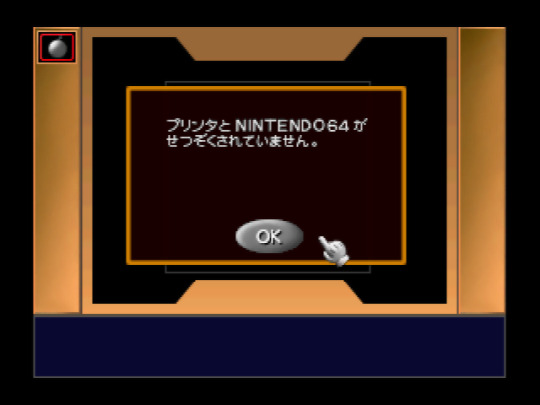
Okay, so I’m greeted with an error that the Printer is not connected. Now it was time to know what it is actually doing to detect the printer. Turns out it expects the Transfer Pak, as there are errors involving the “64GB Cable” (japanese name)? With JoyBus commands that I’ve never seen?
I eventually respond with something that it wants with a custom script, and then I see commands that are pretty much as the same as commands used for the GameBoy Printer.
Thank you Shonumi for having this great article about the technical aspects of the GameBoy Printer, else I would have never known: https://shonumi.github.io/articles/art2.html
So, okay, we need to “emulate” an unreleased Transfer Pak Link cable feature, alongside some response from the printer.
For people who wants some technical information, here’s how the Transfer Pak Link Cable feature works, this uses the JoyBus commands 0x14 to write data (0x23 bytes to send, 0x01 byte to receive), and 0x13 to read data (0x03 bytes to send, 0x21 bytes to receive). (Oddly close to the commands used for GameCube to access the GBA...)
Those commands basically constantly uses 0x20 bytes for data, and 1 byte for some kind of CRC which, sorry, I haven’t taken the time to figure out the calculation, my script just fetches the CRC output.
I plan to write more about the Transfer Pak communication aspects later, as I want to focus on the GameBoy Printer Color.
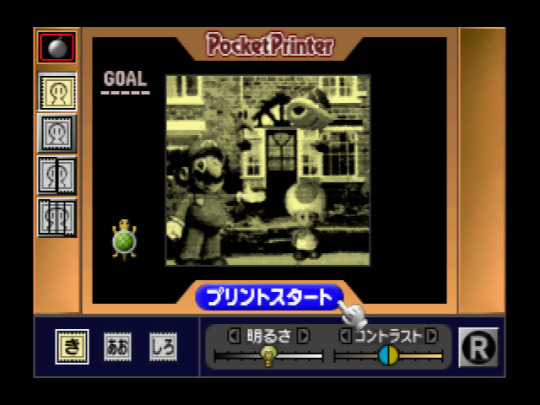
Eventually it sends GameBoy Printer commands if you “emulate” the Transfer Pak link cable, then receives the so called “keepalive” byte, usually 0x81. And sure enough, I get a Pocket Printer screen.
You get a screen like this, where you can print vertically, horizontally, or vertical strips, with a bigger resolution. You can zoom the picture a bit when you hover the pointer to the picture. You can set the paper color to get a preview of the output, set the brightness and contrast, not unlike the GameBoy Camera, and then a button to print. It is slow, but I found one undocumented command for the GameBoy Printer: Command 0x08. It seems when there’s an error, this command is sent and may interrupt what the GameBoy Printer is doing? Either way, I’m sure Shonumi would be interested to verify this command.
However, this article is about the GameBoy Printer COLOR. Turns out the game expects more than one keepalive byte, it expects 0x81... but it also expects 0x82. What happens if we use that one?
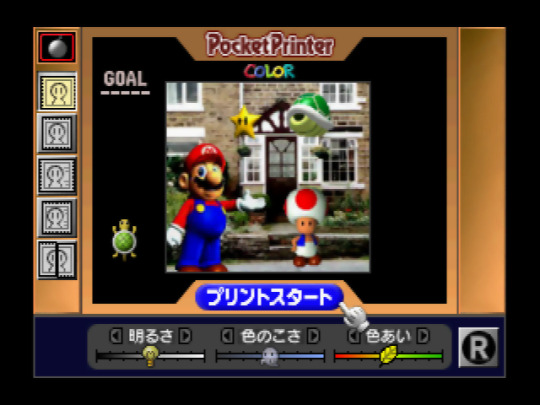
Pocket Printer Color detected, with a full color picture at the center, and more settings. This time there are 5 print settings: slow horizontal/vertical, fast horizontal/vertical (difference explained later), and vertical strips. We are also allowed to change the brightness, contrast, and hue. And of course, the print button.
This is pretty huge, because not only we get to emulate an unreleased Transfer Pak Link Cable support, but also emulating an unreleased, heck, even unannounced GameBoy Printer Color, and Paint Studio provides a fully functional menu for it.
So here’s the commands for that hardware:
0x01 - Init 0x02 - Print Settings (used before copying) 0x04 - Copy Pixel Line 0x06 - Print? (used after copying) 0x08 - Stop? 0x0F - Nop (Status)
It is pretty similar to the original Printer, but some things are performed differently. First, it uses Command 0x02, which uses 5 bytes now, which I’m not sure of the definition (magic bytes, after all), aside that it may set the horizontal resolution, which is either 320 (slow print) or 160 (fast print).
Then it uses command 0x04, which copies a full pixel line, in either resolution, and sends a linear RGBA5551 line just like the N64 format, which means the printer supports a pretty good amount of colors.
After copying all the lines, command 0x06 is used... twice. I’m not sure what it does, but the menu does ask if you want to print the image again, and if I say yes, it only sends that command again, so that means the printer has a large buffer to contain a linear 320x240 RGBA5551 image, and that this command is related to print the image.
As far as I know, the printer status byte definition is very similar, if not the same as the regular printer.
I have made a script for Project64 that “emulates” the necessary stuff so you can mess around with this feature: https://github.com/LuigiBlood/EmuScripts/blob/master/N64/Project64/DMPJ_PocketPrinter.js
You can select the Printer Type between Normal and Color, and you have to click the Save & Load button to access this feature. Disable the script to recover the use of that button. There’s also a bit of documentation inside.
It also creates a RAW file output of what’s copied, so you can take a look at the image with a proper viewer.
This is kind of an experimental blog post, as I’m not very good at writing this stuff, but I hope this gives a good view of the GameBoy Printer Color.
#N64#64DD#Mario Artist#Paint Studio#Game Boy#Printer#Color#GB#GBC#reverse engineering#emulation#Nintendo#Nintendo 64
273 notes
·
View notes
Text
RESOLUTION
Digital Camera Resolution

The amount of detail that the camera can capture is called the resolution, and it is measured in pixels. The more pixels a camera has, the more detail it can capture and the larger pictures can be without becoming blurry or "grainy."
Some typical resolutions include:
256x256 - Found on very cheap cameras, this resolution is so low that the picture quality is almost always unacceptable. This is 65,000 total pixels.
640x480 - This is the low end on most "real" cameras. This resolution is ideal for e-mailing pictures or posting pictures on a Web site.
1216x912 - This is a "megapixel" image size -- 1,109,000 total pixels -- good for printing pictures.
1600x1200 - With almost 2 million total pixels, this is "high resolution." You can print a 4x5 inch print taken at this resolution with the same quality that you would get from a photo lab.
2240x1680 - Found on 4 megapixel cameras -- the current standard -- this allows even larger printed photos, with good quality for prints up to 16x20 inches.
4064x2704 - A top-of-the-line digital camera with 11.1 megapixels takes pictures at this resolution. At this setting, you can create 13.5x9 inch prints with no loss of picture quality.
High-end consumer cameras can capture over 12 million pixels. Some professional cameras support over 16 million pixels, or 20 million pixels for large-format cameras. For comparison, Hewlett Packard estimates that the quality of 35mm film is about 20 million pixels.
Image Resolution
Image resolution is the detail an image holds. The term applies to raster digital images, film images, and other types of images. Higher resolution means more image detail.
Image resolution can be measured in various ways. Resolution quantifies how close lines can be to each other and still be visibly resolved. Resolution units can be tied to physical sizes (e.g. lines per mm, lines per inch), to the overall size of a picture (lines per picture height, also known simply as lines, TV lines, or TVL), or to angular subtense. Line pairs are often used instead of lines; a line pair comprises a dark line and an adjacent light line. A line is either a dark line or a light line. A resolution of 10 lines per millimeter means 5 dark lines alternating with 5 light lines, or 5 line pairs per millimeter (5 LP/mm). Photographic lens and film resolution are most often quoted in line pairs per millimeter.
Pixel density
Pixels per inch (ppi) and pixels per centimetre (ppcm or pixels/cm) are measurements of the pixel density of an electronic image device, such as a computer monitor or television display, or image digitizing device such as a camera or image scanner. Horizontal and vertical density are usually the same, as most devices have square pixels, but differ on devices that have non-square pixels. Note that pixel density is not the same as resolution, where the former describes the amount of detail on a physical surface or device, while the latter resolution describes the amount of pixel information regardless of its scale. Considered in another way, a pixel has no inherent size or unit (a pixel is actually a sample), but when it is printed, displayed, or scanned, then the pixel has both a physical size (dimension) and a pixel density (ppi).
Adobe Ilustration Photoshop
Basic PrinciplesEdit
Since most digital hardware devices use dots or pixels, the size of the media (in inches) and the number of pixels (or dots) are directly related by the 'pixels per inch'. The following formula gives the number of pixels, horizontally or vertically, given the physical size of a format and the pixels per inch of the output:
Number of Pixels=Size in Inches*PPI
Pixels per inch (or pixels per centimetre) describes the detail of an image file when the print size is known. For example, a 100×100 pixel image printed in a 2 inch square has a resolution of 50 pixels per inch. Used this way, the measurement is meaningful when printing an image. In many applications, such as Adobe Photoshop, the program is designed so that one creates new images by specifying the output device and PPI (pixels per inch). Thus the output target is often defined upon creating the image.
Printing on PaperEdit
Printing on paper is accomplished with different technologies. Newspapers and magazines were traditionally printed using a screen called a halftone screen , which would print dots at a given frequency called the screen frequency in lines per inch (LPI) by using a purely analog process in which a photographic print is converted into variable sized dots through interference patterns passing through a screen. Modern inkjet printers can print microscopic dots at any location, and don't require a screen grid, so they use a metric called dots per inch (DPI). These are both different from pixel density or pixels per inch (PPI) because a pixel is a single sample of any color, whereas an inkjet print can only print a dot of a specific color either on or off. Thus a printer translates the pixels into a series of dots using a process called dithering. The dot pitch, smallest size of each dot, is also determined by the type of paper the image is printed on. An absorbent paper surface, uncoated recycled paper for instance, lets ink droplets spread — so has a larger dot pitch.
Often one wishes to know the image quality in pixels per inch (PPI) that would be suitable for a given output device. If the choice is too low, then the quality will be below what the device is capable of -- loss of quality -- and if the choice is too high then pixels will be stored unnecessarily -- wasted disk space. The ideal pixel density (PPI) depends on the output format, output device, the intended use and artistic choice. For inkjet printers measured in dots per inch it is generally good practice to use half or less than the DPI to determine the PPI. For example, an image intended for a printer capable of 600 dpi could be created at 300 ppi. When using other technologies such as AM or FM screen printing, there are often published screening charts that indicate the ideal PPI for a printing method.
Using the DPI or LPI of a printer remains useful to determine PPI until one reaches larger formats, such as 36" or higher, as the factor of visual acuity then becomes more important to consider. If a print can be viewed close up, then one may choose the printer device limits. However, if a poster, banner or billboard will be viewed from far away then it is possible to use a much lower PPI.

2 notes
·
View notes
Text
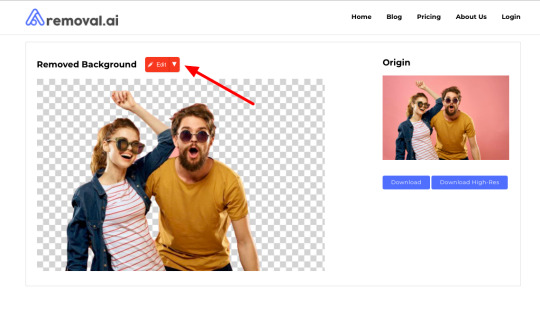
Make Cool Graphic Design using Removal.AI - Free Background Remover and Photo Editor
Trying to remove background from image seems to be a tedious job. Well, not anymore with a free background remover like Removal.AI. Whether you are a designer, photographer, advertising firm, or simply loves to enhance photos, you know that a background removal tool is such a huge help in making different creative projects that involve the use of photos.

If you are going to remove background from an image, you are opening up plenty of possibilities to improve the whole picture. With the Removal.AI tool, you can produce both professional and personal outputs in seconds.
Unlike using Photoshop and other complicated photo editors, Removal.Ai is both fast and simple to use. The process requires a few clicks of a button and would take literally just seconds to complete.
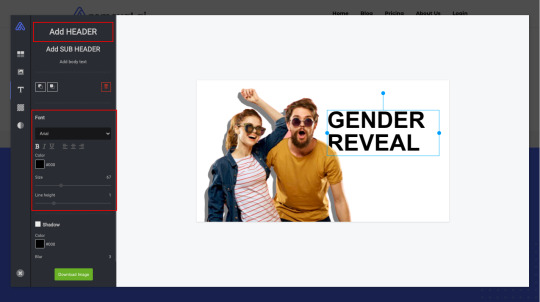
What makes Removal.AI the best tool to remove background from photos is that it is also a simple image editor. You can use different tools to manually erase unwanted parts, set the image into whatever position, flip the image vertically or horizontally, add shadow effects, enhance the photos further, and more! There is even a text editor for you to add text on the picture. Want to change the photo’s background? There are plenty of background photos that you can add on your photos to make them suited for any use. It is basically all that you need to create incredible designs!
Excited about making creative and engaging designs using this amazing tool? Here is how you can make the best designs using Removal.AI in few simple steps:
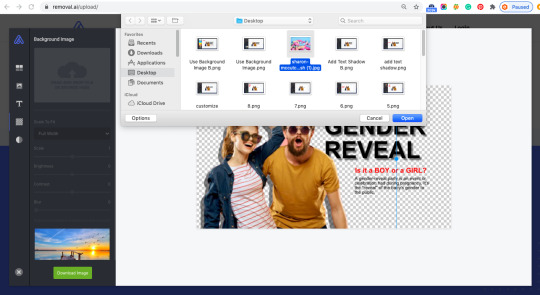
Step 1 - Upload your image
Simply drag and drop any photo from your computer or click on the Choose a Photo button to upload an image.
Step 2 - Edit using free online photo editor
Aside from magically removing the background, you have the option to use Removal.AI in transforming the photo into an attractive work of art. Just click on the Edit button and the free online photo editor will open with your image.
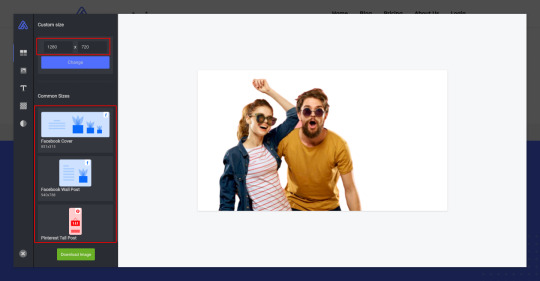
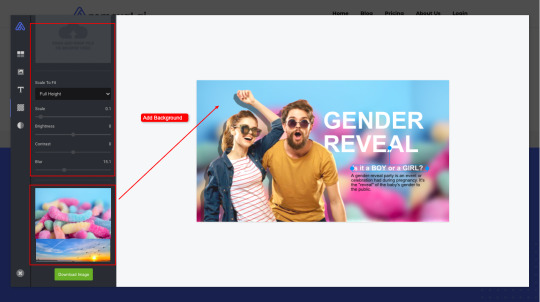
Use the different enhancement tools to change the size of the photo, customize the background, add text, etc.
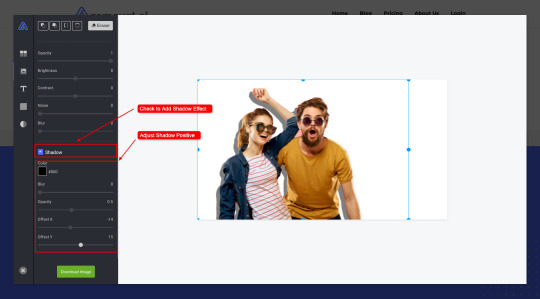
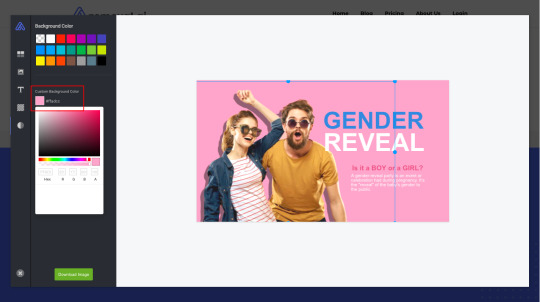
The tool works in real time so you can instantly see the changes as you work on the image. Design the photo as much as you like and unleash your creativity until you are satisfied with how the photo looks.
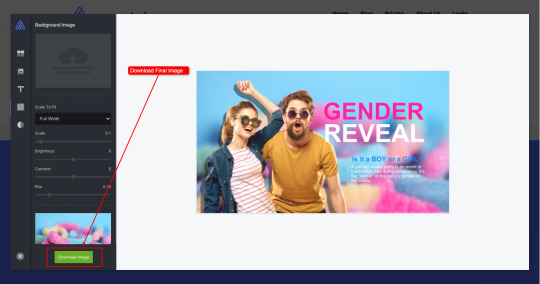
Step 3 - Download and Share
Happy with your project? Click on the Download Image button and it will be saved on your computer. You may choose to download the photo right away and for free or get full resolution images for as low as $0.03 per image, depending on the reasonably priced package that you will subscribe to.
The tool works in real time so you can instantly see the changes as you work on the image. Design the photo as much as you like and unleash your creativity until you are satisfied with how the photo looks.
Conclusion
Although you can really do wonderful projects on your own, you may also want to contact the team if you need help with bigger projects. Just click on the Contact Us button and fill out the form so the team can reach you and discuss how they can help you out.
Removal.AI is a must-have for anyone who works with photos. It is very quick to use and the results are always professional-grade. This is great for those who want to increase productivity without sacrificing quality because Removal.AI uses algorithms that have been created and tested by professional photo editors themselves.
The best thing about it is that it is free to use so you can try the tool and see how superb it really is!
1 note
·
View note
Text
5 Best projector for office use in India
A projector is a device that is used to project information or presentation that is on your computer over a much bigger screen. It is easy to use and make things more visible, and depending upon the size of the room or the hall, the features and characteristics of every projector differ.
It becomes challenging to choose the best as everyone claims their projector is best. Every manufacturer will come up with a lot of strategies to sell their products. It is understood that choosing the best projector in India is a time-consuming task, and one should do proper research to get the best one according to their needs. Here is a compiled list of projectors available in the market; you can choose the desired product that fits your requirements.
top projectors in india
ViewSonic M1 WVGA Ultra-Portable Projector with Dual Harman Kardon Speakers

ViewSonic is a famous brand in the industry, has this portable projector with a lot of new features. ViewSonic M1 WVGA Projector is an ultra-portable LED projector that provides convenient entertainment in almost every type of room. It projects up to 100-inches through its shorter throw lens.
It is easy to carry, usually small in size. It has incredible features. The audio is of high-quality with 2 Harman Kardon speakers who will deliver room-filling sound. It has simple installation and controlling functions like just plug and play. It has a long battery life, which will stand up to 6 hours, and it also gets charge very quickly.
The connectivity is very flexible, and it supports most of the media players without any hindrance. It will help all types of cables and all sorts of devices and USB ports. This LED projector delivers high-quality images in any room.
The shorter throw lens feature is ideal for use in small rooms. This projector can throw pictures on a 100-inch screen from a distance of 8 feet and 9 inches. Watching movies using this projector is a beautiful experience due to the premium-quality Dual Harman Kardon speakers. It ensures a theatre-like atmosphere in your living room.
Specifications:
Big screen projection with a shorter throw lens
Premium quality Dual Harman Kardon speakers
Easy to set up
Long battery life
Excellent connectivity options
Storage space of 16 GB
Brightness up to 360 lumens which is very fair for a portable projector
Epson EB-S41 SVGA Projector
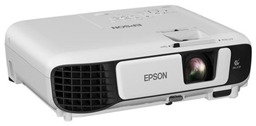
Epson EB-S41 SVGA projector is one of the latest Epson models in the market, and the Epson EB-S41 SVGA Projector is excellent. It maximizes your experience as the view widens; this multi-functional projector presents true-to-life images with outstanding features.
It supports 4K video quality, thereby making it an excellent projector for outdoor use. To ensure crystal clear images, it has the feature of color and white brightness of up to 3,300 lumens, resulting in stunning, captivating presentations.
This projector has an SVGA resolution and a high contrast ratio of 15,000:1. In Eco-mode, its lamp life is up to 10,000 hours. Hence, it is ideal for home use as well. A positive aspect of the Epson EB-S41 is the facility to connect to the internet using your mobile devices.
For natural selection, all the commonly used functions are put together by its intuitive home screen. Once a projection signal is detected via USB cable or VGA cable, the projection starts automatically with the Auto Power On function.
This projector provides you with hassle-free and accessible presentations. The screen corrections can be done accurately, quickly, and easily with the help of easy-to-use sliding Horizontal Keystone Adjuster. Such revisions are possible even in a limited space.
Specifications:
High-quality projector lamp with 3300 lumens
4K video quality
Wireless LAN
Good connectivity options
Latest technology ensures additional security features
WiFi connectivity
Lamp life of 10,000 hours
Benq MX 532P 3D XGA Projector

Benq MX 532P works on Digital Light Processing technology. DLP is more reliable than LCD. It uses micro-mirrors to project images from a monitor onto a screen. The Benq MX 532 is a 3D projector. Hence, it is a good one for use in educational institutions as well for offices. The advantage of Benq MX 532P is the excellent brightness of the projector lamp at 3300 lumens. The high contrast ratio of 15000:1 is also one of the highlights of this projector.
This projector is easy to install and use. It comes with excellent connectivity options, such as dual HDMI inputs. The 1080p high resolution ensures that it is a perfect projector to be used in offices as well. Another positive aspect of Benq projectors is that they provide a hassle-free performance of the highest quality. It is a superb projector that is ideal for use in offices and conference rooms in hotels and big halls.
Specifications:
DLP technology
Excellent brightness with 3300 lumens
High contrast ratio of 15000:1
Multiplatform digital connectivity
Easy to set up
Full 3D support
Ideal for conference room presentations
Sony MP-CD1 Compact Pocket Size Mobile Projector

Gamers, business professionals, and movie buffs would love to have this projector in their pockets. It is easy to use this projector with media-streaming dongles, smartphones, and laptops.
As it weighs 9.88 ounces, it fits perfectly inside your backpack or briefcase. This projector comes with features like wireless connectivity. Hence, you can access video sources like Netflix and YouTube to beam movies on a big screen.
It comes with a short-throw and enormous display feature, thereby making it ideal for home and office use. It comes with HDMI connectivity options. Hence, you can connect your laptops and gaming consoles.
Specifications:
Compact and super-convenient portability
Short throw-display from 11 feet on 120 inches screen
Wireless connectivity
Media streaming possible with HDMI dongle
WiFi connectivity
Supports all video formats
Bluetooth compatible
Egate i9 Miracast LED HD Projector
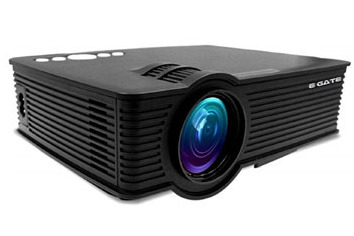
EGATE is one of the top best brands which offers the best projectors in India for various industries like business, education, and entertainment. Each model has some distinct features with tons of innovations. Egate i9 Miracast LED HD projector is superb despite being among the least expensive of all the projectors listed above. It comes with features like HD compatibility, streaming facility via Miracast, and so on. Multi-screen and streaming facility
The projector EGATE i9 LED is a full HD projector with an extreme contrast ratio for the resolution that is 1000:1. It has a 120-inch display and amid multiple interfaces, which are HDMI, VGA, USB, AV, SD card, and audio out.
This device is capable of projecting images on a 120-inch screen. It comes with excellent connectivity options to permit you to connect your various appliances like TV, computers, laptops, digital cameras, and smartphones.
This projector comes up with a 1-year warranty. It has 1500 lumens with 120 ANSI. The lamp life is 40,000 hours, and one can boast of having the best native resolution of about 800 X 480. The LCD panel gives a crystal-clear image quality and gives importance to every minute detail. Just plug in your data and start playing your video/audio.
This projector is undoubtedly the best for personal requirements. The cost is reasonable and affordable. The image quality speaks a lot, and there are a lot of reviews about the image quality. Hence, the money you pay is worth it. If the requirements are suitable, you can buy this best projector in India from any of the leading stores. The cost is reasonable and affordable.
Specifications:
The light output of 2000 lumens
Long lamp life
HD 1920X1080p support
Contrast ratio of 1000:1
Screen size 120 inches
Highly portable
Excellent sound output form 3.5mm Audio Jack
40,000+ years of lamp longevity
Supports 16k+ colors and has a quad-core CPU
1 note
·
View note
Photo
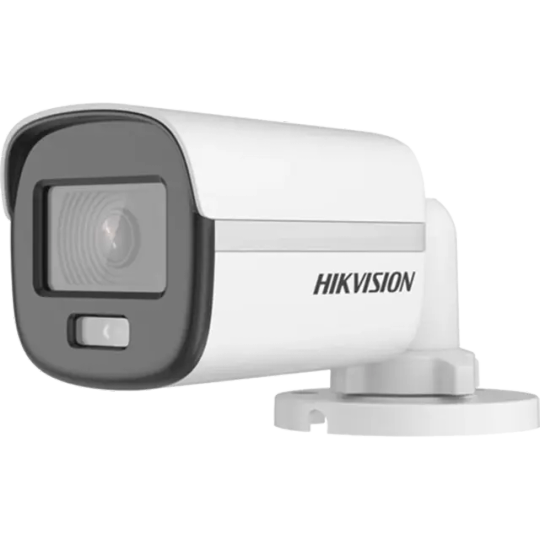
Hikvision 2MP 2.8mm ColorVu Fixed Mini Bullet Camera Camera Image Sensor: 2 MP CMOS Max. Resolution: 1920 (H) × 1080 (V) Min. Illumination: Color: 0.001 Lux @ (F1.0, AGC ON), B/W: 0 Lux with white light Shutter Time: PAL: 1/25 s to 1/50,000 s;NTSC: 1/30 s to 1/50,000 s Angle Adjustment: Pan: 0° to 360°, Tilt: 0° to 90°, Rotation: 0° to 360° Signal System: PAL/NTSC Lens Lens Type: 2.8 mm fixed focal lens Focal Length & FOV: 2.8 mm, horizontal FOV: 98°, vertical FOV: 51°, diagonal FOV: 115° Lens Mount: M12 Illuminator Supplement Light Type: White Light Supplement Light Range: White Light Distance: Up to 20 m Smart Supplement Light: Yes Image Image Parameters Switch: STD/HIGH-SAT/HIGHLIGHT Image Settings: Brightness;Mirror;Sharpness;Anti-Banding;AGC Frame Rate: TVI: 1080p@25fps/30fps CVI: 1080p@25fps/30fps AHD: 1080p@25fps/30fps CVBS: PAL/NTSC Day/Night Mode: Color Wide Dynamic Range (WDR): Digital WDR Image Enhancement: BLC;HLC;Global Noise Reduction: 3D DNR/2D DNR White Balance: Auto/Manual Interface Video Output: Switchable TVI/AHD/CVI/CVBS Alarm: Solid Light Alarm (White Light) General Power: 12 VDC ± 25% *You are recommended to use one power adapter to supply the power for one camera. Max. 2.4 W Material: Plastic Dimension: 161.1 mm × 70 mm × 70 mm (6.34" × 2.76" × 2.76") Approx. 229 g (0.50 lb) Operating Condition: -40°C to 60°C (-40°F to140°F), Humidity: 90% or less (non-condensing) Communication: HIKVISION-C Language: English Approval Protection: IP67
0 notes
Text
Set Horizontal/Vertical Resolution for Output Image & Advanced Documents Comparison Options
What's New in this Release?
Aspose development team is happy to announce the monthly release of Aspose.Words for Java & .NET 17.4.0. This month’s release contains over 80 useful new features, enhancements and bug fixes. Here is a look at just a few of the biggest features and API changes in this month’s release; CompareOptions class introduced to allow customer specify comparison settings, Custom Xml Data Properties is now supported for RTF format, Implemented support for baseline alignment in Asian text, Improved table split for vertically merged cells in combination with at-least height, Improved table grid calculation for horizontally merged cells, Improved BalanceSingleByteDoubleByteWidth handling, The horizontal and vertical resolution of output images can now be specified separately (through ImageSaveOptions.VerticalResolution and ImageSaveOptions.HorizontalResolution), Underline, strikethrough, text borders and effects are now taken into account wile rendering OfficeMath equation text, A substitution of fonts with the same name but with different suffixes now generates a proper warning, Textboxes with automatic fit is now rendered correctly inside the group shapes, Corrupted texture images do not stop the rendering procedure with an exception, a warning is sent instead now and DrawingML Charts rendering improved (rotated and scaled horizontal axis labels). It has implemented a more generic and flexible solution to format field result. It has added an interface IFieldResultFormatter in Aspose.Words 17.4 allowing to implement custom formatting of field’s result. Now, users can apply formatting to numeric and date/time field result. Previously it was one property ImageSaveOptions.Resolution that set both vertical and horizontal resolution to the same values. It has added new public properties HorizontalResolution and VerticalResolution in ImageSaveOptions class to set horizontal and vertical resolution of output image. It has introduced new class CompareOptions in Aspose.Words 17.4 to compare two documents with advanced options. Now, users can ignore document formatting and header footer content during document comparison. The list of new and improved features added in this release are given below
Compare documents with comparison setting
Convert Vml shapes to Dml upon saving to Strict Open XML Document format.
Add feature to remove spaces between sign and digits during mail merge
Add feature to set Horizontal and Vertical Resolution of output image
Consider support of conditional and browser-dependent comments
Document.Save removes {*\datastore ...} tag from Rtf
Make sure CssIdentifierValue.ToCss escapes identifier.
Import custom list markers from ::before pseudo-elements when converting from HTML to Words
x-none language is not supported for DOCX
Cell's border become visible after modifying style of Div tag in HtmlFixed
Table width is not calculated correctly during rendering to PDF
ROOT Inline Shape position is changed after conversion from Docx to Pdf
Docx to Pdf conversion issue with AltChunk (HTML file)
Restricted and Hidden styles appearing in styles pane and Quick style gallary
The font size of altChunk contents is changed after re-saving Docx
The font name of altChunk contents is changed after re-saving Docx
TextAlignment property does not take effect and leads to different output from MS Word when converting to xps
PDF Conversion Issue with Docx containing customxml
Unknown ListTrailingCharacter enum member.
Image is rendered on next page after conversion from Docx to Pdf
Document.Compare generates incorrect format revisions
Incorrect export of equation in MathML
Incorrect order of tags if they are inside of MS Word's table during Replace operation
Shape's text does not render correctly in output Pdf
Docx to Pdf conversion issue with shape's rendering
Docx to Pdf conversion issue with shape's rendering/position
Strikethrough in Equation not preserved during rendering
Textbox positions are not preserved during open/save a DOCX
Roundtrip of the DOCX document has wrong output
Word to HTML then back to Word, table has extra space between rows
PageRef is converted to hyperlink in output Pdf
Showing bullets and font substitution problems
Document's contents are lost after re-saving Docx
Saving Embedded Spreadsheet produces a different file every time
MHTML to PDF, Hebrew content in Subject is changed.
When DOCX is saved as PDF, some content overlaps the footer.
Document.UpdateFields does not update Ref field in output Docx/Pdf
Extra div elements are exported in HtmlFixed
While transforming a specific Word document to PDF, the table appears mixed up.
Word drawing diagrams are overlapped after conversion from Docx to Doc/Pdf
When DOCX is saved as PDF, the line of graph is different.
The embedded xlsm is changed to xlsx after re-saving Docx
DOCX save inserts invalid tblPrEx element to style
Different number of lines in AW pdf output because of SBCS/DBCS balancing
Stylesheet problem when saving DOC to DOC
When DOCX is saved as PDF, gradient fill is lost
Horizontal Axis of chart does not render correctly
ShapeRenderer.Save renders extra number on chart's image
Corrupted word file after save
DocumentBuilder.MoveToHeaderFooter does not move the cursor to the header of document
Trendline of chart is changed in output Pdf
Part of header image is truncated in output HtmlFixed
Docx to Pdf conversion issue with OfficeMath equations
Range.Replace finds and replaces text in the incorrect order
The Image is lost When Convert docx to docx (pdf)
Old incorrect value is rendered inside a SDT in PDF
When DOCX is saved as PDF, the comma in chart has been replaced by semi-colon in all labels.
The chart's legend entries are reversed in HtmlFixed
SEQ Ordinal not translated in Dutch
Pictures not shown or rendered incorrectly in HtmlFixed
Custom document properties are lost after conversion from Doc to Docx
Spanish labels become english
Style of text in header is changed during rendering.
Composite nodes inside paragraph not handled during TOC update.
Font name is corrupted when converting RTF to DOC
Other most recent bug fixes are also included in this release
Newly added documentation pages and articles
Some new tips and articles have now been added into Aspose.Words for .NET documentation that may guide users briefly how to use Aspose.Words for performing different tasks like the followings.
Inserting Images Dynamically
Setting Text Background Color Dynamically
Overview: Aspose.Words
Aspose.Words is a word processing component that enables .NET, Java & Android applications to read, write and modify Word documents without using Microsoft Word. Other useful features include document creation, content and formatting manipulation, mail merge abilities, reporting features, TOC updated/rebuilt, Embedded OOXML, Footnotes rendering and support of DOCX, DOC, WordprocessingML, HTML, XHTML, TXT and PDF formats (requires Aspose.Pdf). It supports both 32-bit and 64-bit operating systems. You can even use Aspose.Words for .NET to build applications with Mono.
More about Aspose.Words
Homepage Aspose.Words for .NET
Homepage of Aspose.Words for Java
Online documentation of Aspose.Words
#Custom Formatting of Field Result#Set Horizontal Resolution of Output Image#set Vertical Resolution of Output Image#Advanced Documents Comparison#.NET Word processing API#ignore Document formatting
0 notes
Text
Fantabulous guide to extra quality GIF making
I got a couple of asks about making GIFs, and I provided a number of softwares that can give good results in a short time (they’re rather straightforward to use, or you can easily google guides for them), but I found that the best way to truly get high quality results for the smallest filesize possible, especially with cartoons and other scenes with clear lines and pictures, is to use Imagemagick, a powerful image processing plugin. It might seem kinda complex at first because you need to set up some files and use command lines, but once you have everything ready you can get high quality GIFs from any video in a short time.
NOTE: Imagemagick has a lot of functions, and with the right scripts it can put effects or text on the frames, but this guide is going to deal exclusively with the base GIF making process. You can find all the functions and relative commands here.
All the steps in this guide use arbitrary folders as an example: installation files, inputs and outputs directories can be changed as one likes by modifying the script. Change all the “USER” with your PC’s user name.
Download Imagemagick (Win 64bit - Win 32bit)
Install it in any folder, making sure this installation option is checked

Download Ffmpeg (Win 64bit - Win32bit)
Open the archive and extract these files in a new folder called “Ffmpeg” in your Videos folder

Create a new folder in the same Videos folder. I’ll call it Frames and use it in the examples, but you can give it any name.

Create a new Text Document file, call it Extract Frames, open it and paste (don’t forget to change USER to fit your actual username)
cd C:\Users\USER\Videos\ffmpeg\bin ffmpeg.exe -ss 00:00:00 -t 00:00:00 -i C:\Users\USER\Videos\FILETITLE.EXTENSION -r 24 C:\Users\USER\Videos\Frames\image-%%05d.png
This script is going to extract the single frames from any video we provide, and save them in the Frames folder we created earlier. The important parameters in the line are: - ss 00:00:00 the zeroes are hours, minutes and seconds. By modifying them you’re going to tell the script from what point in the video start extracting frames. - t 00:00:00 this tells the script the length of the video it should render to frames. Hours, minutes and seconds again. - FILETITLE.EXTENSION this should be changed to fit the video you want to work with (to be put in the Videos folder, as usual you can change all the directories as you see fit by modifying the script, this is just for the sake of giving a ready-to-go example). Note: special characters and spaces can lead to issues, would be best to temporarily rename the video to something simple, just until the frames are ready. - r 24 this is the framerate. 24 is the standard value, it’s going to save 24 pictures for a second of footage. Modify it to fit the video’s framerate, or to reduce the final filesize (the less frames per second a GIF has, the smaller the filesize, but also the less smooth the animation)
Save the text file and rename it from .txt to .bat

Now create another text file, in the same Videos folder once again (we’ll name it “Gif”), and paste into it this:
cd C:\Users\USERS\Videos\Frames convert -delay 4 -loop 0 -dither FloydSteinberg -fuzz 0.75%% -layers optimize-plus -coalesce -layers optimize-transparency -resize 700 image-0*.png C:\Users\USERS\Videos\OUTPUT.gif
This script is going to use the frames in the Frames folder, and turn them into a GIF. The important parameters in the line are: • -delay 4 the duration of each frame, 4 is the default value for a 24 frames per second gif. 2 gives a GIF where frames are twice as fast, 8 twice as slow, and so on. • -dither FloydSteinberg this tells the script to generate a GIF with dithering. Changing it to +dither FloydSteinberg generates a GIF with no dithering. See the bottom of the guide to understand what dithering is and when I need or don’t need it. • -fuzz 0.8%% (yes two %%) this sets the sensibility to changes between frames. Higher values will give a smaller filesize, but after a certain amount the quality is going to decrease, and artifacts might begin to appear. Test to find the best value. 0.8 usually works in most cases, values above 2 will almost always generate artifacts. • -resize 700 the horizontal size for the GIF, in pixels. • OUTPUT.gif the filename for the resulting GIF.
Save the text file and rename it from .txt to .bat

Now by right clicking on the .bat files you can Edit them with the parameters you need.

So, to conclude: running Extract Frames.bat is going to convert the clip you set from the video you set to individual frames, and save them in the Frames folder. You can then edit them, delete them to accurately trim the scene, do anything you want - as long as you don’t change the naming structure of the files, so image-0[..].png). Then running Gif.bat is going to make a GIF using the parameters you set, and those frames.
EXAMPLE
Current situation in the Videos folder, I want to make a GIF from this file called video.mkv
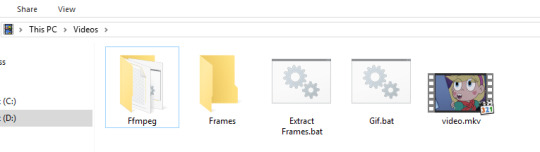
The command line for Extract Frames.bat is going to be:
cd C:\Users\USER\Videos\ffmpeg\bin ffmpeg.exe -ss 00:02:00 -t 00:00:05 -i C:\Users\USER\Videos\video.mkv -r 24 C:\Users\USER\Videos\Frames\image-%%05d.png
This means it’s going to convert 5 seconds of video (-t 00:00:05) to frames starting two minutes into the file (-ss 00:02:00), saving 24 frames per second, so the same framerate as the video (-r 24). Double click on Extract Frames.bat and wait for the Command Prompt window to close itself. You should now have all the frames in the Frames folder.

You can delete those you don’t need at this point: it’s not a problem if the numbers are not consecutive, as long as they keep the same naming structure.

Now I’m going to double click on the Gif.bat file, which is going to have this command line inside:
cd C:\Users\USERS\Videos\Frames convert -delay 4 -loop 0 -dither FloydSteinberg -fuzz 0.8%% -layers optimize-plus -coalesce -layers optimize-transparency -resize 700 image-0*.png C:\Users\USERS\Videos\output.gif
So it’s going to use the frames to make a GIF with dithering (see bottom of the guide), with a horizontal resolution of 700px (-resize 700), named “output.gif”. Run, wait, and you will have your GIF.
DITHERING
GIFs have a 256 colors limit, so they can have a hard time rendering gradients and shaded colors. This limitation can be worked around using dithering (-dither FloydSteinberg command in this specific guide), which is essentially using small dots of different colors to simulate gradients. This leads to a less clean picture, but helps reducing banding. Turning off dithering (by changing the command to +dither FloydSteinberg) can reduce the filesize, and improve the quality on perfectly flat colored surfaces, but generates banding, “blotches” of color, where gradients and shading should be.
DITHERED Gradients are well rendered, but everything has little dots/grain


NOT DITHERED Characters look cleaner, but the background and lights have heavy banding


89 notes
·
View notes
Text
Hello! I was recently asked on how I made this edit with gifs behind it, and I thought the best way would be a tutorial, since there are a lot of steps to do. Now I use Photoshop CS6 and I probably do things the hard way, but it’s the most comfortable way for me. Anyways, here it goes! (warning! A lot of text..sorry I’m just thorough I guess..)
This part is for the still image first;
Open the photo you would like to use. I’m using this one.
Select the brush tool.
Press Q
Draw over the part that you want in your edit (it should look red)
Press Q again
Select any selection tool (I usually use the Marquee Tool)
Right click on the image and hit ‘Select Inverse’
Right click again on the image, and select ‘Refine Edge.’ I use this to clean up my edges a bit, since it’s really hard for me to make it perfect with a mouse. So play around with the settings, make sure it’s on preview so you can see what it is doing with your image.
When you are happy with the settings you have, go to where it says ‘Output To:’ use the drop down menu and select ‘New Layer’ and hit ok. You should now have something that looks like this;

So that’s one part done. Onto the next one.
Create a new document, and select your size. For my edit I used 560 x 560.
Go to the crop tool, and right click and select the slicing tool.

Right click your document, and select ‘Divide Slice’
Select how many slices you want horizontally and vertically. I did 3 slices horizontally and 2 vertically, so it looks like this;

Now to get the correct size of each square is a bit of a process (well the only way I know how to do it)
Use your paint bucket tool and select any color and use it on the main image.
Select your Marquee Tool and go over one of the squares
Hit CTRL + C to copy that selected area
Go to File on the upper left hand corner of Photoshop and select ‘New’ and it should tell you the width and height of each square. You can write it down if you wish, or if you can remember lol. Mine is 280 x 187
If you want to remove the colored background you just did, just hit CTRL + Z, it removes the last step you did.
Now this is where it kind of gets tricky if you aren’t too familiar with Photoshop, but be patient! Patience is KEY!
So for the gifs part, I do gifs the hard way (OBS + KMPlayer) and i’m sure there are simpler ways to do it, but I like to make things complicated for me I guess lol. If you have an easier way to make gifs, like ezgif or something, anything that saves the gif to your computer..please do it that way lol, anyways.
On your main image, on the bottom select ‘Create Frame Animation’ (if its not there you made just have to toggle it on. Go to ‘Windows’ in Photoshop and select ‘Timeline’ and it should pop up.)
Duplicate as many frames as you like. I believe my edit had 20 frames. Be cautious, if your file is OVER 3MB, it will not move on Tumblr. So you have to make sure, when you are saving that it is NOT over the 3MB (I will show you how you can see if it is or not) So try not to do a lot of frames, 12-20 should be good for this.
Open the gif you want to use.
Select the crop tool and use the drop down menu to select W x H x Resolution and type in your square size in your main image (mine was 280 x 187) and hit enter. Your frames should now all be the exact size of your square now.

Select all your frames on your gif. You can select them all by SHIFT clicking the first and last one.
Now select the little menu at the end of the timeline (looks like three lines) and select ‘Copy Frames’

Now go back to your main image, select all frames by shift clicking the first and last one and then select the same menu button with the three lines, and select ‘Paste Frames.’
A pop up menu will come up and select ‘paste over selection.’
On the left hand side, where your layers are, shift click the first and last one so they all move at once, and move it to whatever square you want it to be.
Now keep doing this till all your gifs are where you want them on the main image.
Make sure you change the speed of each frame in your Timeline to whatever you want, mine is set to .2 secs. Also make sure to change ‘Once’ to ‘Forever’ or it will only loop once.
Now to add your ‘Still Image’. This part is pretty simple.
Select the layer with the ‘Still Image’ on it (the one with no background) and drag it to the main image. (to drag it just make the window smaller and hold left click and drag it over to the main image.)
Now make sure the ‘Still Image’ is at the very top of all your gifs, so the gifs aren’t overlapping the image.
Now here you can play around with coloring, and brightness etc. Just remember that it will affect not only your main image, but also the gifs as well. (I haven’t learned how if it affects one it won’t affect the others lol)
If you want the out line like I did with Jack, just select the ‘Still Image’ layer, right click it, go the ‘blending options’ , select ‘stroke’, make sure the color is white, select your size (usually 1-4 but see what you like), and if you want, change the opacity.
Ok now onto saving. This is where my frustration usually sets in as, more often than not, my gifs are way over the 3MB limit. If you have more that 3MB size of a file, you may need to remove some frames, or fiddle with the coloring, brightness etc (if you did that)
When you are satisfied with your finished product, go to file, and select ‘Save For Web’. Now this is where you will see how big your file size is and how your image will look on the web.

As you can see mine is way below the file limit, which is fantastic!
Also I will show you my settings I use when I’m saving a gif;

Again, make sure your looping options is set for ‘Forever’ or will it only loop once.
Uhh..ok..I think that’s it. I hope this was a little bit helpful and not at all confusing...if you have any questions, ask away and I’ll try and answer them. :)
@jacksinsanity
4 notes
·
View notes