#Vue.js tutorial plugins
Explore tagged Tumblr posts
Visit Tumblr Blog
Explore Tumblr blogs with no restrictions, modern design and the best experience.
Last Seen Tumblr Blogs


Fun Fact
Tumblr is available in 18 languages.
Text
Frontend Frameworks for Web Development

Frontend Frameworks for Web Development, creating captivating and user-friendly websites and web applications is essential for businesses to thrive. With the increasing demand for dynamic and interactive web experiences, frontend development has become more crucial than ever.
To meet these demands efficiently, developers rely on frontend frameworks, which streamline the development process and enhance productivity.
In this comprehensive guide, we'll explore the world of frontend frameworks for web development, covering everything from key factors to consider when choosing a framework to the top options available in India.
Overview of Frontend Frameworks for Web Development
Frontend frameworks are collections of pre-written code, libraries, and tools that expedite the process of building user interfaces for websites and web applications.
These frameworks provide developers with a structured approach to frontend development, offering ready-made components, templates, and utilities to streamline common tasks.
By leveraging frontend frameworks, developers can achieve consistency, maintainability, and scalability in their projects while focusing more on functionality and user experience.
These frameworks often follow the principles of modularization and component-based architecture, facilitating code reuse and making development more efficient.
Key Factors to Consider in a Frontend Frameworks for Web Development
When choosing a frontend framework for web development, several key factors should be considered:
Community Support: Opt for frameworks with active and robust communities. A strong community ensures ongoing support, frequent updates, and a wealth of resources such as documentation, tutorials, and plugins.
Performance: Evaluate the performance metrics of the framework, including page load times, rendering speed, and resource utilization. A lightweight and efficient framework can significantly impact the user experience.
Flexibility and Customization: Assess the framework's flexibility in accommodating project requirements and its customization options. Look for frameworks that allow developers to tailor components and styles to suit specific design needs.
Learning Curve: Consider the learning curve associated with the framework, especially if you're working with a team of developers with varying skill levels. Choose a framework that aligns with your team's expertise and resources.
Compatibility and Browser Support: Ensure that the framework is compatible with a wide range of browsers and devices, particularly if your target audience includes users with diverse preferences and devices.
Updates and Maintenance: Check the framework's update frequency and long-term maintenance plans. Regular updates and proactive maintenance are essential for addressing security vulnerabilities and compatibility issues.
7 Best Frontend Frameworks for Web Development in India
Now, let's explore some of the top Frontend Frameworks for Web Development widely used by developers in India:
React.js: Developed by Facebook, React.js is a popular JavaScript library for building user interfaces. It emphasizes component-based architecture and virtual DOM for efficient rendering. React's ecosystem includes tools like React Router for routing and Redux for state management.
Angular: Backed by Google, Angular is a comprehensive frontend framework for building robust web applications. It provides features such as two-way data binding, dependency injection, and modular development. Angular offers a full-fledged ecosystem with Angular CLI for project scaffolding and Angular Material for UI components.
Vue.js: Vue.js is an advanced JavaScript framework known for its simplicity and flexibility. It allows developers to incrementally adopt its features and integrate it into existing projects easily. Vue.js offers reactive data binding, virtual DOM, and a rich ecosystem of plugins and components.
Bootstrap: Bootstrap is a popular CSS framework for building responsive and mobile-first websites. It provides a grid system, pre-styled components, and responsive utilities, allowing developers to create sleek and consistent designs quickly. Bootstrap is highly customizable and offers extensive documentation and community support.
Svelte: Svelte is a relatively new frontend framework that focuses on compiling components at build time rather than runtime. This approach results in highly optimized and lightweight web applications. Svelte's simplicity and performance make it an attractive choice for developers seeking efficiency and speed.
Tailwind CSS: Tailwind CSS is a utility-first CSS framework that provides a set of low-level utility classes for building custom designs. It offers a highly customizable and expressive approach to styling, enabling developers to create unique and responsive interfaces without writing custom CSS. Tailwind CSS is gaining popularity for its developer-friendly workflow and rapid prototyping capabilities.
Foundation: Foundation is a responsive front-end framework developed by ZURB, known for its modular and customizable nature. It offers a comprehensive set of CSS and JavaScript components, as well as a robust grid system and a variety of UI elements. Foundation is well-suited for building modern and accessible web projects.
Conclusion for Web Development
Choosing the right Frontend Frameworks for Web Development is crucial to the success of your website development. Consider factors such as community support, performance, flexibility, and compatibility when evaluating different frameworks. Each framework has its strengths and weaknesses, so assess your project requirements and development preferences carefully before making a decision.
Whether you opt for React.js, Angular, Vue.js, or any other frontend framework, prioritize learning and mastering the chosen tool to maximize its potential and deliver exceptional web experiences. Keep abreast of new developments, best practices, and emerging trends in frontend development to stay ahead in this ever-evolving field.
FAQs for Web Development
Q: Which frontend framework is best for beginners?
A: Vue.js and React.js are often recommended for beginners due to their relatively gentle learning curves and extensive documentation.
Q: How do I choose between Angular and React for my project?
A: Consider factors such as project requirements, team expertise, and ecosystem preferences. Angular offers a comprehensive solution with built-in features, while React provides more flexibility and a vibrant ecosystem.
Q: Are frontend frameworks necessary for web development?
A: While not strictly necessary, frontend frameworks greatly simplify and expedite the web development process, especially for complex and dynamic projects. They provide structure, consistency, and efficiency, ultimately enhancing productivity and user experience.
Q: Can I use multiple frontend frameworks in the same project?
A: While technically possible, using multiple frontend frameworks in the same project can lead to complexity, conflicts, and maintenance challenges. It's generally advisable to stick to a single framework to maintain code consistency and streamline development.
More Details
Email: [email protected]
Website: https://censoware.com/
#web development#website development#software development#web developers#pythonprogramming#phpdeveloper#javascriptdeveloper#mern stack development#mobile app development
2 notes
·
View notes
Text
Master JavaScript: Step-by-Step Tutorial for Building Interactive Websites
JavaScript Tutorial

Master JavaScript: Step-by-Step Tutorial for Building Interactive Websites
In the evolving world of web development, JavaScript remains one of the most powerful and essential programming languages. Whether you're building simple webpages or full-fledged web applications, JavaScript gives life to your content by making it interactive and dynamic. This JavaScript Tutorial offers a beginner-friendly, step-by-step guide to help you understand core concepts and begin creating responsive and engaging websites.
What is JavaScript?
JavaScript is a lightweight, high-level scripting language primarily used to create dynamic and interactive content on the web. While HTML structures the webpage and CSS styles it, JavaScript adds interactivity—like handling clicks, updating content without refreshing, validating forms, or creating animations.
Initially developed for client-side scripting, JavaScript has evolved significantly. With the rise of environments like Node.js, it is now also used for server-side programming, making JavaScript a full-stack development language.
Why Learn JavaScript?
If you're looking to become a front-end developer or build web-based applications, JavaScript is a must-have skill. Here’s why:
It runs on all modern browsers without the need for plugins.
It’s easy to learn but incredibly powerful.
It works seamlessly with HTML and CSS.
It powers popular frameworks like React, Angular, and Vue.js.
It’s in high demand across the tech industry.
This JavaScript Tutorial is your gateway to understanding this versatile language and using it effectively in your web projects.
Getting Started: What You Need
To start coding in JavaScript, all you need is:
A modern browser (like Chrome or Firefox)
A text editor (such as Visual Studio Code or Sublime Text)
Basic knowledge of HTML and CSS
No complex setups—just open your browser and you're ready to go!
Step 1: Your First JavaScript Code
JavaScript code can be embedded directly into HTML using the <script> tag.
Example:<!DOCTYPE html> <html> <head> <title>JavaScript Demo</title> </head> <body> <h1 id="demo">Hello, World!</h1> <button onclick="changeText()">Click Me</button> <script> function changeText() { document.getElementById("demo").innerHTML = "You clicked the button!"; } </script> </body> </html>
Explanation:
The onclick event triggers the changeText() function.
document.getElementById() accesses the element with the ID demo.
.innerHTML changes the content of that element.
This simple example showcases how JavaScript can make a static HTML page interactive.
Step 2: Variables and Data Types
JavaScript uses let, const, and var to declare variables.
Example:let name = "Alice"; const age = 25; var isStudent = true;
Common data types include:
Strings
Numbers
Booleans
Arrays
Objects
Null and Undefined
Step 3: Conditional Statements
JavaScript allows decision-making using if, else, and switch.let age = 20; if (age >= 18) { console.log("You are an adult."); } else { console.log("You are a minor."); }
Step 4: Loops
Use loops to execute code repeatedly.for (let i = 0; i < 5; i++) { console.log("Iteration:", i); }
Other types include while and do...while.
Step 5: Functions
Functions are reusable blocks of code.function greet(name) { return "Hello, " + name + "!"; } console.log(greet("Alice")); // Output: Hello, Alice!
Functions can also be anonymous or arrow functions:const greet = (name) => "Hello, " + name;
Step 6: Working with the DOM
The Document Object Model (DOM) allows you to access and manipulate HTML elements using JavaScript.
Example: Change element style:document.getElementById("demo").style.color = "red";
You can add, remove, or change elements dynamically, enhancing user interaction.
Step 7: Event Handling
JavaScript can respond to user actions like clicks, keyboard input, or mouse movements.
Example:document.getElementById("myBtn").addEventListener("click", function() { alert("Button clicked!"); });
Step 8: Arrays and Objects
Arrays store multiple values:let fruits = ["Apple", "Banana", "Mango"];
Objects store key-value pairs:let person = { name: "Alice", age: 25, isStudent: true };
Real-World Applications of JavaScript
Now that you have a basic grasp, let’s explore how JavaScript is used in real-life projects. The applications of JavaScript are vast:
Interactive Websites: Menus, image sliders, form validation, and dynamic content updates.
Single-Page Applications (SPAs): Tools like React and Vue enable dynamic user experiences without page reloads.
Web Servers and APIs: Node.js allows JavaScript to run on servers and build backend services.
Game Development: Simple 2D/3D browser games using HTML5 Canvas and libraries like Phaser.js.
Mobile and Desktop Apps: Frameworks like React Native and Electron use JavaScript for cross-platform app development.
Conclusion
Through this JavaScript Tutorial, you’ve taken the first steps in learning a foundational web development language. From understanding what is javascript is now better.
As you continue, consider exploring advanced topics such as asynchronous programming (promises, async/await), APIs (AJAX, Fetch), and popular frameworks like React or Vue.
0 notes
Text
DOKANS Nulled Script 3.9.2

Unlock E-commerce Potential with DOKANS Nulled Script Are you ready to transform your online business into a fully functional multitenant e-commerce platform without spending a fortune? DOKANS Nulled Script offers an unbeatable opportunity to create a scalable, efficient, and dynamic online marketplace—absolutely free. Whether you're a budding entrepreneur or an established developer, this powerful script provides the backbone for launching your own SaaS-based multi-vendor store in no time. What Is DOKANS Nulled Script? DOKANS Nulled Script is a premium multitenancy-based e-commerce platform designed specifically for creating software-as-a-service (SaaS) marketplaces. It allows users to build independent stores under a single ecosystem, offering flexibility, scalability, and seamless customization. With this nulled version, you can enjoy all the premium features without the hefty price tag, making it ideal for developers, resellers, and digital entrepreneurs. Technical Specifications Framework: Laravel (Backend) + Vue.js (Frontend) Database: MySQL/MariaDB Server Requirements: PHP 7.4 or higher, Apache/Nginx Multitenancy: Built-in SaaS capabilities Security: Advanced user authentication and permission systems Outstanding Features and Benefits When you download the DOKANS Nulled Script, you gain access to a powerhouse of tools tailored for modern e-commerce: 1. Multitenancy Support Let your users create and manage their own e-commerce stores under a unified platform. Each store operates independently with its own admin panel and branding. 2. Drag-and-Drop Page Builder Design custom pages effortlessly with an intuitive page builder. No coding knowledge required! 3. Flexible Subscription System Create revenue streams by offering tiered subscription plans to vendors. Manage upgrades, renewals, and custom packages with ease. 4. Secure and Optimized Enjoy enterprise-level security measures, regular updates, and optimized performance to handle growing traffic and vendors without lag. 5. Rich Admin Dashboard Access detailed analytics, financial reports, and vendor performance metrics from a beautifully designed admin panel. Practical Use Cases Launch a digital marketplace for fashion, electronics, or niche products Offer SaaS-based storefronts to clients and freelancers Create white-label solutions for local businesses and communities Monetize by charging store owners subscription fees or commissions How to Install DOKANS Nulled Script Download the latest version of DOKANS Nulled Script from our website. Extract the files to your server's root directory. Set up the database and import the SQL file provided. Edit the .env file with your database and app credentials. Run the necessary Laravel commands: composer install, php artisan migrate, and php artisan serve. Access the admin panel and begin configuring your multi-vendor platform. FAQs – Your Questions Answered Is DOKANS Nulled Script safe to use? Yes, the nulled script is thoroughly tested and secure for usage. However, always use a trusted source—like our website—for downloads to avoid hidden malware or vulnerabilities. Can I use this script for commercial purposes? Absolutely. With DOKANS Nulled Script, you can launch your commercial marketplace, monetize it with subscriptions, and offer clients fully functional e-commerce solutions. Do I need to know coding to use this? No coding skills are required for basic usage. The platform is beginner-friendly with intuitive interfaces. Advanced users can easily customize the backend thanks to its Laravel-Vue architecture. Where can I find compatible plugins or themes? You can enhance your site with additional tools like elementor nulled pro for intuitive design customization. Is there support or a user community? While nulled versions don’t offer official support, you can find active user communities and tutorials online. Plus, our platform is always here to help with guides and updates. Final Thoughts If
you're looking for a high-performance SaaS e-commerce script without the high cost, DOKANS Nulled Script is the answer. It's packed with features, easy to use, and completely free—giving you the ultimate edge in launching your own online marketplace today. Don't miss out on this game-changing opportunity to build and scale your digital empire. Want to enhance your site even further? Try out Slider Revolution NULLED and unlock limitless design possibilities!
0 notes
Text
WordPress vs. Strapi: Which one you should Pick in 2025
Choosing the right content management system (CMS) for your website is very important. It can affect how easy it is to build your site, how fast it runs, and how well it grows. In 2025, two popular CMS choices are WordPress and Strapi. Both have strong features, but they are very different. This article will help you understand both so you can pick the best one for your needs. For more info you can check WordPress vs. Strapi: Which one you should Pick in 2025
What is WordPress?
WordPress is one of the most popular CMS platforms in the world. It is open-source, which means it’s free to use and many people help improve it. WordPress started as a blogging platform but now it can create many types of websites — like business sites, online stores, portfolios, and more.
Why people love WordPress:
Easy to use for beginners.
Lots of themes to change the look of your site.
Thousands of plugins to add extra features (like contact forms or SEO tools).
Works well for small and medium websites.
Large community for support and tutorials.
Example: If you want to build a blog or a small business website quickly without coding, WordPress is perfect.
What is Strapi?
Strapi is a newer CMS designed for developers who want full control over how their website works. It is called a headless CMS because it manages the content separately from how it is shown on the website.
With Strapi, you create the content in the back end, and you use modern technologies like React or Vue.js to build the front end. This makes it very flexible, but it requires coding skills.
Why developers like Strapi:
API-first design, so it works well with mobile apps and different platforms.
Supports both REST and GraphQL APIs.
Built with Node.js, so it’s very fast.
Good for complex websites or apps that need custom features.
Strong built-in security and user roles.
Advantages of WordPress
1. Easy to Use
WordPress is designed for people who don’t know coding. You can install it quickly and use drag-and-drop tools to build pages.
2. Lots of Features and Plugins
With thousands of plugins and themes, you can add almost any feature. Want an online shop? Use WooCommerce. Need an SEO tool? Use Yoast SEO.
3. Strong Community Support
Millions of users and developers share tips, tutorials, and free resources. If you have a problem, it’s easy to find help.
4. Good for SEO
WordPress has many plugins that help your site rank well on Google and other search engines.
5. Affordable Hosting Options
You can start with cheap shared hosting, which works well for small sites.
Disadvantages of WordPress
1. Performance Can Slow Down
Using too many plugins or a heavy theme can make your site slow.
2. Security Risks
Since WordPress is popular, hackers often target it. You must update plugins and themes regularly.
3. Limited Customization
If you want very unique features, WordPress can be limiting without advanced coding.
4. Can Become Complex
Managing many plugins and updates can confuse beginners.
Advantages of Strapi
1. Highly Customizable
Developers can create exactly what they want using APIs and code.
2. Modern Technology
Built on Node.js and works well with popular front-end frameworks.
3. Faster Performance
Lightweight and fast due to its API-first design.
4. Built-in Security
Role-based access control and secure APIs help protect content.
5. Flexible Content Delivery
You can deliver content to websites, mobile apps, or other platforms easily.
Disadvantages of Strapi
1. Requires Coding Knowledge
Not beginner-friendly. You need developers to build and maintain the site.
2. Smaller Community
Compared to WordPress, fewer people use Strapi, so less ready-made help is available.
3. Fewer Plugins
You often need to build features yourself, which can take more time.
4. Higher Hosting Costs
You need VPS or cloud hosting, which costs more than basic shared hosting.
When to Choose WordPress?
You are a beginner or non-technical user.
You want a simple blog, portfolio, or business website.
You want a quick setup with many ready-made themes and plugins.
You want to keep costs low with shared hosting.
You want built-in SEO tools and easy content management.
When to Choose Strapi?
You have developer skills or a developer team.
You want full control over your website and app backend.
You plan to build multi-platform apps (website + mobile).
You want fast performance and modern technologies.
You need a scalable, API-first system for complex projects.
How to Optimize WordPress for Better Speed
Use caching plugins like WP Rocket or W3 Total Cache.
Optimize images with compression tools like TinyPNG.
Use a CDN like Cloudflare or BunnyCDN.
Limit plugins to the essentials.
Upgrade to managed or VPS hosting if needed.
How to Optimize Strapi for Better Speed
Enable API caching with Redis or Memcached.
Optimize database queries.
Use GraphQL smartly to fetch only needed data.
Host on fast cloud services like AWS or DigitalOcean.
Use a headless frontend framework like Next.js for fast rendering.
FAQs
Q: Can I switch from WordPress to Strapi later? A: Yes, but it may require rebuilding your site because Strapi is a different type of CMS.
Q: Is Strapi good for SEO? A: Strapi does not have built-in SEO tools like WordPress plugins, so you need to handle SEO manually or with other tools.
Q: Which CMS is more secure? A: Strapi has better built-in security with role-based access control. WordPress depends on keeping plugins updated and using security plugins.
Q: Can I use Strapi without coding? A: No, Strapi requires programming knowledge to set up and customize.
Final Thoughts
Both WordPress and Strapi are excellent CMS options but for different users and projects. WordPress is the go-to choice for beginners and small to medium websites that need quick setups. Strapi is perfect for developers building custom, fast, and scalable applications with modern tech stacks.
If you want an easy-to-use website without coding, choose WordPress. If you want full control and flexibility and don’t mind coding, choose Strapi.
0 notes
Text
Pinia or Vuex for State Management in Modern Vue Apps

Let’s be real—building a web app with Vue.js is exciting, but it also brings up small but important decisions. One of them is: How do you keep your app’s data organized and easily shareable between different parts of your app? That’s where “state management” comes in.
If you’ve been reading or talking about Vue development, you’ve probably heard two names tossed around: Vuex and Pinia.
If you’re working on a Vue project or thinking about building one, understanding these tools can help you decide which one fits your needs best. Whether you are a beginner or looking to Hire VueJS Developers for a project, knowing the difference between Vuex and Pinia is a good start.
What Is State Management in Vue?
Before getting into Vuex or Pinia, let’s clarify what state management is. When your app grows bigger, it’s not enough to keep data only inside individual components. Different parts of your app may need to share the same data or react when something changes. This is where a state management tool steps in.
Think of it like a central storage where your app’s key data lives. This storage can be accessed and updated by any component, making it easier to keep your app consistent and organized.
Vuex: The Classic Choice for Vue Apps
Vuex has been the go-to state management library for Vue applications for many years. It was created specifically to work with Vue and became quite popular. Vuex works by having a single store that holds your app’s state. It has strict rules about how the state can be changed, which makes your data flow predictable and easier to debug.
The way Vuex handles updates is through “mutations” — these are special functions that modify the state. Then you have “actions” which can perform asynchronous tasks before calling mutations. While this sounds good for keeping things clear, many developers find Vuex a bit complex, especially when projects grow.
If you want to hire VueJS developers, you might notice that they have varying opinions on Vuex — some love its structure, while others find it a bit too heavy and verbose for small to medium projects.
Pinia: The New Contender for State Management
Pinia is a newer tool that came into the picture as a simpler and more modern alternative to Vuex. It’s designed to be easier to use and lighter while still offering powerful features for managing your app’s state.
One of the things that makes Pinia stand out is its simplicity. You don’t need to write separate mutations or actions. Instead, you define stores with state and methods directly. This feels more natural and less like a formal process compared to Vuex.
Pinia also supports better TypeScript integration and works nicely with Vue 3, making it a favorite for new projects. If you are working with a VueJS development company, you might want to ask if they recommend Pinia, especially if your app uses the latest Vue versions.
Comparing Pinia and Vuex — What Should You Choose?
Choosing between Pinia and Vuex depends on several factors. Here are some key points to think about in simple terms:
Ease of Use: Pinia is generally easier to learn and use. Vuex requires more boilerplate code, which means more writing and understanding the flow of mutations and actions.
Project Size: For small to medium projects, Pinia is often a better fit because of its simplicity. Vuex might be preferred in very large projects where strict structure helps maintain code quality.
Vue Version: Pinia is built with Vue 3 in mind and takes advantage of its features like the Composition API. Vuex works with both Vue 2 and Vue 3 but was originally designed for Vue 2.
Community and Support: Vuex has been around longer and has more tutorials, plugins, and community support. Pinia is newer but growing quickly, especially in modern Vue apps.
How This Affects Your Project and Hiring Developers
When you decide whether to use Pinia or Vuex, it’s also important to consider who will build and maintain your app. If you plan to hire VueJS developers, look for those who have experience with both tools. Developers comfortable with Pinia can quickly set up modern Vue apps, while those familiar with Vuex can bring structure to complex projects.
A reliable VueJS development company will help you pick the right tool based on your project’s needs and future plans. They can explain how each option affects development speed, maintainability, and performance.
Why Good State Management Matters for Your App
You might wonder why this decision matters so much. Good state management means your app runs smoothly and is easier to update and fix later. Without it, your data can get messy, and your app may behave unexpectedly.
Using a tool like Vuex or Pinia ensures that all parts of your app get the right data at the right time. This makes your user’s experience better and keeps your development team happy.
Wrapping Up
Both Vuex and Pinia are solid choices for state management in Vue apps. Vuex offers a tried and tested approach with strict patterns, which might be better for complex applications. Pinia brings simplicity and modern features, making it ideal for new projects built on Vue 3.
If you’re not sure which one to pick, consider reaching out to professionals who understand Vue development. Hiring experienced VueJS developers or working with a VueJS development company can save you time and help build an app that’s easy to maintain and scale.
Choosing the right state management tool will make your Vue app development smoother and more enjoyable. Whether you go with Vuex or Pinia, having a solid plan for managing your app’s data is always a smart move.
0 notes
Text
Building Cross-Platform Mobile Apps: A Complete Guide to Ionic Framework

In today’s mobile-first world, businesses are looking for ways to create mobile apps that work seamlessly across both iOS and Android platforms. This demand has given rise to hybrid app development, which allows developers to write a single codebase that can be deployed on multiple platforms, saving both time and resources. One of the most popular frameworks for building cross-platform apps is Ionic. The Ionic framework has become a go-to choice for developers who want to deliver high-quality mobile apps while maintaining a fast and efficient development process. In this guide, we will walk you through the essential features and benefits of the Ionic framework, and how it simplifies hybrid app development.
What is the Ionic Framework?
The Ionic framework is an open-source platform for building mobile applications using web technologies like HTML, CSS, and JavaScript. Unlike traditional native development, where separate codebases are created for different platforms, Ionic allows developers to write once and deploy on both Android and iOS. It provides a rich set of pre-built components and tools that make it easier to build beautiful and functional apps.
At its core, Ionic uses Angular, a popular JavaScript framework, to help developers create highly interactive and dynamic apps. The framework also integrates with other libraries like React and Vue.js, giving developers flexibility to choose the best technology for their project.
Benefits of Using Ionic for Hybrid App Development
Cross-Platform Development
The most significant advantage of using Ionic is its ability to develop cross-platform mobile apps. This means that developers can write a single codebase that will work across both iOS and Android platforms. This saves time and resources since there is no need to maintain two separate codebases for each platform. With Ionic, developers can ensure consistent functionality and user experience across devices.
Faster Development Process
Because Ionic allows developers to use a single codebase, the development process is considerably faster. In addition, the framework comes with a rich library of pre-built UI components, plugins, and tools that simplify the process of building complex apps. Developers can leverage these components to quickly assemble app interfaces, rather than building everything from scratch. This reduces development time and accelerates the release cycle.
Native-Like Experience
One of the key concerns with hybrid apps is the user experience (UX). Many developers fear that hybrid apps won’t provide the same smooth experience as native apps. However, Ionic addresses this issue by offering a set of UI components that mimic the native look and feel of iOS and Android apps. This enables developers to create apps that provide a native-like experience while still using web technologies.
Access to Native Device Features
With Ionic, developers can access native device features like the camera, GPS, and accelerometer using native device APIs. The framework provides a set of plugins that allow you to interact with the device’s hardware without having to write complex native code. This is particularly useful for building apps that require access to sensors, notifications, and other native features.
Open Source and Strong Community Support
Ionic is an open-source framework, which means that developers have access to the source code and can modify it as needed. In addition, the Ionic community is large and active, providing plenty of resources, tutorials, and plugins. Whether you’re a beginner or an experienced developer, the Ionic community is a great place to find solutions to your development challenges.
How to Build an App Using Ionic
Building an app with Ionic is a straightforward process that involves several steps. Here’s a simple overview of how to get started:
Set Up the Development Environment
The first step in building an Ionic app is to set up your development environment. You’ll need to install Node.js, npm (Node Package Manager), and the Ionic CLI (Command Line Interface). Once you have these tools installed, you can create a new Ionic project by running the ionic start command.
Create Your App’s User Interface
Ionic provides a wide range of pre-built UI components that you can use to build your app’s interface. You can choose from different layouts, buttons, forms, and menus to create an attractive and functional UI. Ionic’s UI components are responsive, meaning they will adjust automatically to different screen sizes.
Add Functionality to Your App
After setting up the user interface, you can start adding functionality to your app. You can write JavaScript code using Angular, React, or Vue.js, depending on your chosen stack. Ionic also provides a set of APIs and plugins to help you integrate native device features like camera access, geolocation, and push notifications.
Test the App
Once the app is built, it’s time to test it. Ionic has built-in support for testing your app on different devices and emulators. You can use the ionic serve command to preview your app in a browser and use the Ionic DevApp to test it on physical devices.
Build and Deploy
After thorough testing, you can build your app for production using the ionic build command. Ionic also provides tools to help you deploy your app to the App Store and Google Play Store.
Mobile App Cost Calculator: Estimate the Costs of Building an Ionic App
When planning a mobile app project, understanding the costs involved is essential for effective budgeting. A mobile app cost calculator can help you estimate the costs based on factors like the app’s features, design complexity, and the development platform. It’s important to consider the costs for both development and maintenance. While building a cross-platform app using Ionic may reduce some of the expenses associated with native development, you should still account for costs such as design, testing, and marketing.
If you're interested in exploring the benefits of hybrid app development company for your business, we encourage you to book an appointment with our team of experts. Book an Appointment
Conclusion: Partnering with a Hybrid App Development Company
Building a cross-platform app has never been easier, thanks to frameworks like Ionic. Its ability to create high-performance hybrid apps with a native-like experience makes it a top choice for businesses looking to launch apps on both iOS and Android platforms. If you're ready to build a mobile app using Ionic or need assistance with hybrid app development, partnering with a skilled hybrid app development company can ensure the success of your project. Our experienced team can help guide you through the entire development process, from planning and design to deployment and maintenance.
0 notes
Text
Creating a Custom Vue.js Plugin: A Practical Guide
Introduction Creating a custom Vue.js plugin is a powerful way to extend the functionality of your Vue.js applications. In this guide, we’ll walk you through the process of creating a custom plugin, including its importance, prerequisites, and technologies needed. By the end of this tutorial, you’ll have a working plugin that you can integrate into your Vue.js projects. What you’ll learn The…
0 notes
Text
Web Designing Course in Sonipat.
Here's a comprehensive course outline for a web design course offered by Pickles Animation. This course is designed to cater to both beginners and advanced learners, covering essential tools, techniques, and industry insights.
Course Outline for Web Design
Module 1: Introduction to Web Design
Overview of Web Design
History and evolution of web design
Key principles of web design (layout, color, typography)
Understanding the web design process
Web Technologies
Basics of HTML and CSS
Introduction to JavaScript
Understanding web browsers and how they work
Module 2: HTML and CSS Fundamentals
HTML Basics
HTML syntax and structure
Common HTML tags and attributes
Creating forms and tables
CSS Basics
CSS syntax and selectors
Styling text, colors, and backgrounds
Box model, padding, margin, and borders
Advanced HTML and CSS
Flexbox and CSS Grid layout systems
Responsive design principles and media queries
CSS transitions and animations
Module 3: JavaScript and Interactive Design
JavaScript Basics
JavaScript syntax and variables
Functions and events
DOM manipulation
Advanced JavaScript
Working with APIs and AJAX
ES6+ features
JavaScript frameworks (e.g., React, Vue.js)
Interactive Design
Enhancing user interactions with JavaScript
Introduction to jQuery
Creating interactive forms and components
Module 4: Web Design Tools and Software
Design Software
Adobe XD, Figma, or Sketch for UI design
Creating wireframes and prototypes
Collaborating and sharing designs
Development Tools
Code editors (e.g., Visual Studio Code, Sublime Text)
Version control with Git and GitHub
Browser developer tools for debugging
Module 5: Advanced Web Design Techniques
UI/UX Design Principles
User-centered design
Accessibility and inclusive design
Usability testing and feedback
Responsive and Adaptive Design
Mobile-first design approach
Progressive enhancement and graceful degradation
Testing and optimizing for various devices
Performance Optimization
Image and asset optimization
Minification and compression techniques
Lazy loading and caching strategies
Module 6: Content Management Systems (CMS)
Introduction to CMS
Understanding CMS and its benefits
Overview of popular CMS platforms (e.g., WordPress, Joomla, Drupal)
Working with WordPress
Setting up a WordPress site
Customizing themes and templates
Managing plugins and widgets
Module 7: E-commerce and Web Applications
E-commerce Fundamentals
Setting up an online store
Payment gateway integration
Product management and inventory
Web Applications
Introduction to web app development
Basics of backend development (e.g., Node.js, PHP)
Working with databases (e.g., MySQL, MongoDB)
Module 8: Portfolio Development and Career Preparation
Building a Web Design Portfolio
Selecting and showcasing your best work
Creating case studies and project descriptions
Designing a portfolio website
Career Preparation
Freelancing vs. working for an agency
Job search strategies and interview tips
Networking and professional development
Additional Features
Guest Lectures and Workshops: Sessions by industry experts on various topics.
Hands-On Projects: Real-world projects to apply learned skills.
Feedback and Critique Sessions: Regular feedback from instructors and peers.
Online Resources and Community: Access to tutorials, forums, and networking opportunities.

This course structure ensures that students gain a solid foundation in web design, practical experience with essential tools and techniques, and preparation for a successful career in the web design industry.
0 notes
Text
Best Vue.js Rich-Text Editor Ever tiptap - VueJs
Best Vue.js Rich-Text Editor Ever tiptap – VueJs
Best Vue.js Rich-Text Editor Ever tiptap – VueJs
[ad_1]
In this video I discuss tiptap a rich text editor for Vue.js. In this video I discuss all the features of tip tap and how to add it to your next project. I create a brand new Vue.js app and we create a rich text editor with strikeout, bold and italics. #vuejs
Check out my last video on a Udemy course – https://youtu.be/yl0MRLPdkT8
Check out…
View On WordPress
#Erik Hanchett#Program With Eric#Program with Erik#Vue 2019#vue js project#Vue rich-text editor#Vue.js#Vue.js 2019#Vue.js hello world#Vue.js libraries#Vue.js plugins#vue.js todo app#vue.js tutorial#Vue.js tutorial for beginners#Vue.js tutorial plugins#Vue.js tutorial tiptap#vue.js tutorial tiptap bold
0 notes
Text
Know These Things Before Hiring a Vue.js Developer for Your Next Project

Vue.js, which was initially developed as a side project, is now one of the most popular JavaScript frameworks among programmers. According to the Stack Overflow Developer Survey 2022, Vue.js received 18.82% of the votes, placing it sixth among developers.
Over time, Vue has gained substantial sponsors, contributors, and advocates, in fact, there are around 2,99,088 websites that use Vue.js.And factors that contribute to its attraction are:
Flexibility,
the ability to integrate front-end development seamlessly into large projects, and,
the ability to build reliable apps without the use of additional libraries or plugins.
Being basic sometimes makes sense in a world full of complexities and technological advancements that goes beyond your imagination. That is exactly what vue.js is designed to do.
With Vue.js, you can build bigger and better applications from the beginning, while with other frameworks, complexity is the default. If you want to learn more about how Vue.js works and its benefits for your business, continue reading. Don’t just jump into decisions, first clear your mind and then hire a Vue.js developer for your next project.
What Is Vue.js?
Vue, a JavaScript framework is used to create single-page applications and interactive user interfaces and is open-source. Vue.js’s creator, Evan, claims that it is a more adaptable and non-opinionated alternative. Because it is only an interface layer, you can use it on pages as a light feature rather than a full-fledged SPA.
Model-view-ViewModel (MVVM) is the architectural design pattern used by Vue.js.The business model can be separated from the graphical user interface, or view, thanks to the MVVM architecture. Effectively, the distinction offers a deliberately simple pattern that both front-end and back-end developers can use.
However, Vue.js’s directives are its standout feature. Directives are HTML characteristics that allow developers to expand HTML, a core component of web pages that establishes the organizational structure of their contents.
What Is Vue.js Used For?
Web interfaces and single-page applications are the main applications built with Vue.js. It is a highly favored frontend tool because it integrates an Electron framework with HTML extensions and a JS base. As a result, Vue.js can be used to create both desktop and mobile applications.
In order to view the user interface of an app or website, Vue uses the standard Model View Controller (MVC) architecture, with the core library acting as the default view layer. Its adaptability allows it to function with component-based architecture, or CBA, just like React.
Who Is Using Vue.js?
Vue.js is becoming more and more popular among businesses as a tool for creating front-end websites and user interfaces. Some of the very famous companies using Vue.js are Xiaomi, Louis Vuitton, Adobe, BMW, and Gitlab.
Even Google and Apple used VueJS to build their respective tutorial websites rather than using the native Angular framework. The ease with which developers adapt and implement basic elements required by every app or website to function as a UI makes it popular.
The learning curve for working with the VueJS framework is relatively low. And those who are familiar with the fundamentals of HTML, CSS, and JavaScript can jump right in without worrying much.
Why Does Your Business Need to Start Using Vue.js?
So now you got a little idea about Vue and want to work with it. You have multiple projects in line and would like to give Vue.js a shot.
But chances are you are unaware of where to start. So you’ll need some convincing arguments to persuade whoever is in charge of the upcoming major project.
Vue.js is easy to learn:
Vue.js goes above and beyond to be extremely user-friendly. The framework itself is fairly simple, and you can accomplish your goals with only a few lines of code.
Other JavaScript frameworks necessitate advanced knowledge of other front-end technologies such as JSX, TypeScript, and a variety of libraries. However, this is not the case with Vue.js. To get the most out of Vue, developers only need to be familiar with CSS, JavaScript, and HTML.
Vue.js can also be integrated into other frameworks, such as React. This kind of integration encourages flexibility and customization, especially for companies that use Vue.js for their existing web projects.
Wide range of tools:
The Vue.js framework includes a plethora of tools that improve its functionality. Vue CLI has a wide range of innovative features. It can be extended and shared with the community by software engineers. As a result, projects that use CLI can stay up to date in the long run. The user-friendly interface facilitates project creation, development, and management.
The command line interface is also future-proof because it enables developers to change configuration and obtain the required utilities and packages. As a result, it is able to build Vue.js components that behave like native ones and ship the code for modern browsers.
State management, routing, and animation tools are just a few of the built-in features that can save web developers time and effort. Additionally, there are tools for browser development that assist in finding and fixing errors.
Vue.js allows for simple integration:
Web engineers prefer VueJS because it makes it easier for them to integrate with current applications. This is due to the fact that it is dependent on the JavaScript structure and can be integrated into various JavaScript-based applications.
Feel free to incorporate the Vue.js CDN and start using it. With Vue.js CDN, the majority of third-party Vue components and libraries are additionally available and supported.
To use Vue.js, you don’t actually need to set up node and npm. This suggests that it is useful for developing new web applications as well as updating the existing ones.
Two-way data binding:
Due to its MVVM architecture, VueJS has a two-way binding feature. HTML attributes can be adjusted or given values with the QRR, which speeds up HTML blocks.
VueJS has a two-way communication feature. It ensures that any changes made in the UI are passed to the data and changes made in the data are reflected in the UI.
This differs from libraries such as React.js, which only support one-way communication.
Vue.js is progressive:
Whenever you need to improve your project’s performance, rewrite in the Vue.js framework. Vue.js can consistently enter the code database thanks to its progressive features, negating the need to completely rewrite the item.
Vue.js can consistently enter the code database thanks to its progressive features, negating the need to completely rewrite the item. It is feasible to work on each component individually to increase the overall flexibility of the code.
Vue.js performs extremely quick:
In addition to being one of the fastest web development frameworks, it provides flawless user interfaces and single-page applications.It can launch mobile applications faster than React.js or Angular.
Majority of customers leave websites that takes more than 3 seconds to load, which affects the website’s SEO. But due to the high speed of Vue.js businesses can easily improve their SEO.
Vue.js has comprehensive documentation:
Thorough documentation is essential when using a new framework. The extensive documentation of Vue.JS makes it easy for developers to use it and find and fix bugs. Additionally, the documentation is frequently updated to reflect recent JS changes.
Virtual DOM:
The Virtual Document Object Model (DOM), which enables access to documents and simple changes, offers several advantages to Vue.JS developers. The browser must update the data and render the updated version to the user’s screen as they interact with the web application.
This process takes time because the entire page must be refreshed just to update one element. But without re-rendering, virtual DOM boosts the application’s performance and speed.
5 Essential Skills to Look for When Hiring Vue.js Developer
The most rapidly expanding front-end framework right now is Vue. Vue is user-friendly, adaptable, and effective. Its syntax has an approachable learning curve and is surprisingly intuitive.
The following list of 5 abilities will help you choose a Vue developer for your upcoming project:
HTML & CSS:
The building blocks of the web are HTML and CSS. The language used to create web pages is called HTML. HTML not only contains information for the structure of a website, but also for its content. An HTML document’s presentation is specified by the CSS language. CSS gives things a stylish polish to improve their appearance.
The user will see the HTML that Vue has rendered from the template. Develop your HTML and CSS knowledge so you can display items on the website correctly. You ought to be comfortable creating semantic HTML tags. You can style your application using Flexbox, CSS Grid, or CSS.
Basics of JavaScript and Modern JavaScript (ES6 – ES7 – ES8):
Applications built with Vue will have dynamic data that responds to user input and interaction rather than static data that is displayed. The logic for this behaviour will be written in JavaScript and placed in your SFC.
The web is a platform that is becoming more dynamic. Every year, new JavaScript standards are now released. These standards introduce increasingly potent features. Object destructuring, template literals, new ways to declare variables, and new methods for Arrays are a few of the new features.
By using contemporary JavaScript, you can create better, more readable code while increasing the effectiveness of your development.
Git:
It is a crucial skill for software developers to know. Git is a version management tool (VCS). Git, at its most basic level, makes it easier to collaborate on files and projects with different participants. It also lets you keep track of changes in your files.
You’ll need to do two things in order to begin using Git. Installing it on your computer and store your code, register for a free account on a cloud-based platform like GitHub or GitLab.
You will save your changes in your GitHub account as you write new code or modify existing code. Via Git, other programmers can also contribute to your existing code base.
Basics of Vue:
You must be familiar with the foundations of the Vue programming language in order to be a successful Vue developer. A great place to start learning how to use Vue is the documentation.
Vue has a straightforward philosophy that makes getting started simple. Vue is a worthy choice as a first JavaScript framework to learn due to its low entry barrier.
You can use Vue in just one front-end component of an existing application. Alternately, a full application can be created entirely in Vue. Vue will scale as needed as the size of your application increases.
Vue CLI:
The Vue team has created a command-line interface (CLI) to aid in the development of Vue-based projects. The CLI gives your Vue project instant access to the best front-end development tools.
It also seamlessly integrates them with sensible defaults. At the same time, it enables simple configuration and personalization to meet your specific requirements.
A new plugin-based architecture has been adopted by Vue CLI 3. During any stage of the development lifecycle, plugins can be added. With plugins, you can spend more time creating than setting up. Developers can create their own plugins and presets thanks to the plugin architecture.
Hire a Remote Vue.js Developer for Your Next Project
Working from home is the future. A billion people will be living and working remotely as digital nomads by 2035.
But the process of hiring a remote Vue.js developer is laborious and draining. Finding the right developer is a process that, if done ineffectively, can waste time and money for you and your company.
Making a job listing, screening numerous applicants, making a ton of phone calls, learning more about each applicant, and ultimately testing them are all necessary steps. Even after you do hire a remote developer, it won’t be until they begin working that you can be certain of their suitability.
So, if you’re a hiring manager looking for a dedicated Vue.js developer to hire, this is your solution.
Begin by publishing a job posting:
An appealing job listing is where most job seekers start their job searches. It’s your responsibility to accurately communicate to a job seeker both your company’s mission and what you’re looking for.
The three fundamental elements of any respectable job listing are the job description, the job title, and the list of requirements. But avoid making it cold. Don’t forget to mention the benefits of working for you. Who can you help?
The next step is receiving and reviewing applications:
You need to go through the applications as soon as they start to arrive. Some businesses employ a hiring manager to handle some of this, but if your business is small, it makes sense if you lack the resources.
That’s not a problem. Despite the fact that you’ll undoubtedly be busy, you’ll have a chance to personally review your applicants.
Find a brilliant resume/CV and cover letter:
If you have a strong reputation and offer fair compensation, it should be simple to find a candidate with the technical skills you require.
Choose the best applicant from the bunch. But make sure their cover letter shows they have good communication skills and a hint of personality. Because these applicants will have the ability to perform better in a team environment.
Take a programming practice test:
This is yet another crucial step that many software projects use when hiring a remote team of Vue.js developers for a project. With the help of software projects, you can assess their practical coding skill in this step.
To make things simpler for your hiring process, there are some great online platforms that can assist you in taking practise coding tests using real assignments. With these tests, developers are given real-world tasks and access to a variety of environments that developers typically work in. For their coding tasks, developers have access to a variety of libraries, platforms like GitHub, different frameworks, etc.
The sample coding test is given the most weight when hiring remote Vue.js developers. It is an objective form of evaluation with no room for personal bias, can be completed using automated tools and mechanisms with the least amount of human involvement. And has been proven to be effective in weeding out applicants with problem-solving abilities.
Start interviewing the candidates:
Start conducting interviews with the candidates you’ve chosen to move forward with. When hiring a remote developer, you won’t get the chance for in-person interview. But this process can be done via video call where you can assess the candidate and her/his personality.
Employee orientation:
You are almost done and have a good idea about hiring a remote development team. However, even though the formal hiring process is over, there is still one crucial step left. Yes, training new employees is a critical task.
You must establish communication channels, a review schedule, and communication and project meetings as part of employee onboarding.
A thorough list of information about the business that the new employee needs to be aware of should also be prepared. Choosing a responsible internal employee to interact with the remote workers and respond to their questions is also crucial.
Final Words
It’s safe to say that the framework succeeded in some way based on the large number of international websites and web apps that use Vue.js today, including BMW, Netflix, and Google.
Moreover, you’ll need the appropriate developers to complete the task if you want to use Vue.js in your tech stack.
And the task of hiring becomes even more difficult when looking for remote developers. To evaluate the candidates, there are too many factors to take into account. But you can always choose a development company with solid credentials, a good reputation, and numerous successful app projects to make things somewhat easier.
Our developers at BookMyTalent undergo a rigorous screening and training process with the sole goal of producing top-notch developers to lend to companies like yours.
In order to guarantee the success of your upcoming Vue.js project, BMT can integrate skilled Vue.js developers into your company’s operations.
So, contact us and hire Vue.js developers for your next project now!
0 notes
Text
Welcome to the legitimate Shopware 6 Developer Documentation
We are aware that shopware professional is just one in all many structures that want to be adapted to your needs. That’s why some other considered one of our targets for shopware experts and the plugin device was to hold the studying curve as flat as feasible. To that end, we depend on properly-established standards. A developer who already has earlier information of Vue.Js or Symfony, as an example, can straight away start developing their personal extension without lots specialist knowledge. We use the following requirements.
Let us assist you manual through the landscape of know-how for shopware developers. This documentation is organised to be able to facilitate knowledge for exclusive products, subjects and depths of hobby.
The two important sections concepts and guides can help you navigate the documentation in step with your needs.
Whereas Concepts deliver the thoughts, internal workings and architectural issues at the back of our product, Guides provide express examples, step-with the aid-of-step tutorials that deal with specific tasks.
These sections are complemented by way of the References, which incorporate dependent code references, lists of flags, commands, endpoints which can be beneficial for development.
Visit the academy for video content material. If you have got any questions left, you can continually ask them on StackOverflow or be part of our high-quality network on Slack.
Well-Established Standards
Our goal for the shopware certified developer plugin system turned into an effort to provide the identical flexible expandability as in Shopware 5, whilst additionally making some enhancements to the plugin machine as such. The developer revel in was very vital to us right from the begin. In hire shopware developer, we offer you, the developer, equipment, and utilities that assist you to create your very own extension in just a few steps.
0 notes
Text
Building a Vue.js Mobile App with a Custom Native Plugin
Introduction Building a Vue.js Mobile App with a Custom Native Plugin is a complex task that requires a deep understanding of both Vue.js and native mobile development. In this tutorial, we will guide you through the process of creating a mobile app using Vue.js and a custom native plugin. This tutorial is designed for developers who have prior experience with Vue.js and native mobile…
0 notes
Text
Auth0: Vue & TypeScript Quickstart SDK - The Missing Docs

Authentication is hard. Even if you know the ins and outs of it, handling registration, login, email verification, forgotten password, secret rotation... and what not... is a tedious work.
For this reason, we use auth providers such as AWS Cognito or Auth0. But this comes with its own drawback, namely that you are at the provider's mercy when it comes to examples and tutorials. If a resource you need does not exist, you either need to contact support and wait for them (but nobody got time for that), or figure it out yourself by the good ol' trial and error method.
A couple of days ago, I had to use Auth0 with Vue.js and TypeScript. Now, Auth0 has an excellent tutorial for Vue.js, but I could not find any examples in TypeScript. So seeing no better option, I started annotating the code provided by the tutorial.
I finished it, and in this blogpost, I'll walk you through the details, so you don't have to repeat this chore.
We will follow the original Auth0 Vue tutorial structure which can be found here. To make it easier to compare the two, we'll use the exact same first-level headings as the original.
You can find my complete auth0 vue typescript repo on RisingStack's Github.
Configure Auth0
First, you'll need to set up your Auth0 application. That part is very well written in the original tutorial, and I would like to be neither repetitive nor plagiarize Auth0's content, so please go ahead and read the first section there, then come back.
Create a Sample Application
Now we already start to diverge from the Auth0 tutorial.
If you already have an existing app, make sure that typescript, vue-class-component, and vue-property-decorator are present in your package.json, as we'll use class components.
If you don't have one, let's create a sample app.
$ vue create auth0-ts-vue
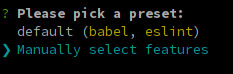
When prompted, select Manually select features.
We'll need Babel, TypeScript, and Router.
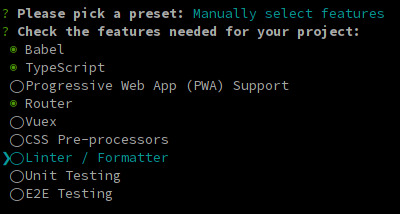
The next 3 questions are about deciding whether you want to use class-style component syntax, Babel, and history mode. Hit enter for all three to answer "Yes". You might opt-out from history mode if you really want to.

It is entirely up to you if you want to use dedicated config files or not, and if you want to save this as a preset.
Grab a beverage of your preference while the dependencies are being installed.
Install the SDK
Once it's done, we need to install our auth0 dependencies.
$ cd auth0-ts-vue-example $ npm install @auth0/auth0-spa-js
The auth0-spa-js package comes with its own type definitions, so we're all set for now.
Modify your Webpack Config
If you followed the original Auth0 tutorials configuration part, you've set up your URLs to listen at port 3000. Time to hard code this into our webpack dev-server.
Create a vue.config.js file in the root directory of your app.
const webpack = require('webpack') module.exports = { devServer: { port: 3000 } }
This way, we don't have to specify the PORT env var when we run our app. We'd need to change it in Auth0 anyway all the time, while we're developing it.
Start the application
$ npm run serve
Leave it running so we can leverage Webpack's incremental build throughout the process.
Create an Authentication Wrapper
Have you ever created a Vue.js plugin? Well, now is the time!
The easiest way to use Auth0 in your app is to make it available on this in each of your components, just as you do with $route after you've installed Vue Router.
It would be nice if this was a separate dependency, but for the sake of simplicity, let it live inside our codebase.
Create a directory called auth inside your src dir then create the following files: index.ts auth.ts, VueAuth.ts, User.ts. The original tutorial has them all in one file. Still, in my opinion, it is easier to understand what's happening if we separate the matters a bit, and it also results in nicer type definitions too.
Our index.ts will be a simple barrel file.
export * from './auth'
auth.ts is where we define the plugin. VueAuth.ts is a wrapper Vue object around auth0-spa-js, so we can leverage the observability provided by Vue, and User.ts is a class to make its type definition nicer.
Defining our User
Let's go from the inside out and take a look at User.ts
import { camelCase } from 'lodash' export class User { sub: string names: string nickname: string picture: string updatedAt: string email: string emailVerified: boolean provider?: string id?: string givenName?: string familyName?: string locale?: string [key: string]: string | boolean | undefined constructor (auth0User: { [key: string]: string | boolean | undefined }) { if (!auth0User) return for (const key in auth0User) { this[key] = auth0User[key] } this.sub = auth0User.sub as string this.provider = this.sub.split('|')[0] this.id = this.sub.split('|')[1] } }
Now, this requires a bit of explanation. The first block of fields are the one that are always present, no matter what login scheme the user used. Sub is the OpenID ID Token's Subject Identifier, which contains the authentication provider (eg. auth0 or google) and the actual user id, separated by a |. The other mandatory fields are probably self-explanatory.
Next are provider and id, which are a result of splitting sub, so they should be there, but we cannot be sure. The last are the ones that were only present when Google OAuth is used as the provider. There might be more, depending on what connections you set up and what other data you request. Or you could even code custom fields in the returned ID Token... but I digress.
Last we tell TypeScript, that we want to be able to use the bracket notation on our object by adding [key: string]: any
Our constructor takes a raw user object with similar fields but snake_cased. That's why we camelCase them and assign each of them to our User object. Once we're done, we extract the provider and the id from the subfield.
Show me the Wrapper
Time to take a look at VueAuth.ts
import { Vue, Component } from 'vue-property-decorator' import createAuth0Client, { PopupLoginOptions, Auth0Client, RedirectLoginOptions, GetIdTokenClaimsOptions, GetTokenSilentlyOptions, GetTokenWithPopupOptions, LogoutOptions } from '@auth0/auth0-spa-js' import { User } from './User' export type Auth0Options = { domain: string clientId: string audience?: string [key: string]: string | undefined } export type RedirectCallback = (appState) => void @Component({}) export class VueAuth extends Vue { loading = true isAuthenticated? = false user?: User auth0Client?: Auth0Client popupOpen = false error?: Error async getUser () { return new User(await this.auth0Client?.getUser()) } /** Authenticates the user using a popup window */ async loginWithPopup (o: PopupLoginOptions) { this.popupOpen = true try { await this.auth0Client?.loginWithPopup(o) } catch (e) { console.error(e) this.error = e } finally { this.popupOpen = false } this.user = await this.getUser() this.isAuthenticated = true } /** Authenticates the user using the redirect method */ loginWithRedirect (o: RedirectLoginOptions) { return this.auth0Client?.loginWithRedirect(o) } /** Returns all the claims present in the ID token */ getIdTokenClaims (o: GetIdTokenClaimsOptions) { return this.auth0Client?.getIdTokenClaims(o) } /** Returns the access token. If the token is invalid or missing, a new one is retrieved */ getTokenSilently (o: GetTokenSilentlyOptions) { return this.auth0Client?.getTokenSilently(o) } /** Gets the access token using a popup window */ getTokenWithPopup (o: GetTokenWithPopupOptions) { return this.auth0Client?.getTokenWithPopup(o) } /** Logs the user out and removes their session on the authorization server */ logout (o: LogoutOptions) { return this.auth0Client?.logout(o) } /** Use this lifecycle method to instantiate the SDK client */ async init (onRedirectCallback: RedirectCallback, redirectUri: string, auth0Options: Auth0Options) { // Create a new instance of the SDK client using members of the given options object this.auth0Client = await createAuth0Client({ domain: auth0Options.domain, client_id: auth0Options.clientId, // eslint-disable-line @typescript-eslint/camelcase audience: auth0Options.audience, redirect_uri: redirectUri // eslint-disable-line @typescript-eslint/camelcase }) try { // If the user is returning to the app after authentication.. if ( window.location.search.includes('error=') || (window.location.search.includes('code=') && window.location.search.includes('state=')) ) { // handle the redirect and retrieve tokens const { appState } = await this.auth0Client?.handleRedirectCallback() ?? { appState: undefined } // Notify subscribers that the redirect callback has happened, passing the appState // (useful for retrieving any pre-authentication state) onRedirectCallback(appState) } } catch (e) { console.error(e) this.error = e } finally { // Initialize our internal authentication state when the page is reloaded this.isAuthenticated = await this.auth0Client?.isAuthenticated() this.user = await this.getUser() this.loading = false } } }
It might make sense to compare this with the original tutorial.
In the original tutorial, a Vue object is created while we're creating a class to make its annotation easier. There you can find it as:
// The 'instance' is simply a Vue object instance = new Vue({ ... })
Now let's unpack it.
First, we need to import a couple of types, including our User class.
Then we create the Auth0Options and RedirectCallback type aliases for convenience.
Instead of creating a simple Vue object, we define a Class Component. The public fields are the same as the data object in the original, whereas the static ones are the parameters passed to the plugin.
We differ in two substantial way from the original tutorial:
We have one less method: handleRedirectCallback is not used anywhere in the original, so we omitted it.
Instead of setting up the Auth0 Client in the Vue object's created hook, we use a separate method called init. Aside from that, the contents of the two are identical.
The reason for using a separate method is simple: The created hook is used in place of a constructor when it comes to Class Components, as the constructor of the class is usually called by Vue.
First, a component object is created just like when using Vue({}), passing it the data, methods, watchers, paramlist, and all the things we usually define for components. When this is done, the created hook is called. Later, when the component is actually used and rendered, the params are passed to it, and mounted, or updated.
The problem with the original one is that we cannot pass parameters to the created method. Neither can we write a proper constructor. So we need to have our own method we will call right after the object is instantiated just as it's done with created by Vue.
Let's dissect init a bit.
First, we create and auth0Client.
Then, in the try-catch block, we check if the user is returning after authentication and handle it. We check if the query params contain any signs of redirection. If they do, we call auth0Client.handleRedirectCallback, which parses the URL and either rejects with an error or resolves with and appState.
Then, we pass on the appState to onRedirectCallback. This is a function we can pass to the plugin when we install it to Vue, so we can handle the app level ramifications of a login.
For the other methods, getUser is a simple wrapper around the authClient's getUser method. We pass on the resolved promise to our User's constructor to create a nicely looking User object.
Next, there is loginWithPopup, which we won't use, as popups can be blocked by browsers. So we'll go with the redirect way, where the user is redirected to Auth0, login, then the callback URL is called by Auth0 passing information to our app in the callback URL's query.
The information in the URL is parsed by auth0Client.handleRedirectCallback which will return a Promise<RedirectCallbackResult>. The Promise will be rejected if there is an error in the authentication flow.
We have a couple of simple wrappers around the auth0Client. loginWithRedirect initiates the flow I described above, logout speaks for itself.
Finally, we set up the user and check if we're authenticated.
Let's turn this into a Plugin
Now, all we need to do is create a proper plugin.
If you take a look at Vue's documentation about plugins, you'll see that we need to create an object that exposes an install method. This method will be called when we pass the object to Vue.use and it will receive the Vue constructor and optionally... options.
type Auth0PluginOptions = { onRedirectCallback: RedirectCallback, redirectUri: string, domain: string, clientId: string, audience?: string, [key: string]: string | RedirectCallback | undefined } export const Auth0Plugin = { install (Vue: VueConstructor, options: Auth0PluginOptions) { Vue.prototype.$auth = useAuth0(options) } }
In our install method, we add an $auth member to any Vue object, so the VueAuth object is available everywhere, just as vue-router is.
Let's implement the useAuth function.
/** Define a default action to perform after authentication */ const DEFAULT_REDIRECT_CALLBACK = () => window.history.replaceState({}, document.title, window.location.pathname) let instance: VueAuth /** Returns the current instance of the SDK */ export const getInstance = () => instance /** Creates an instance of the Auth0 SDK. If one has already been created, it returns that instance */ export const useAuth0 = ({ onRedirectCallback = DEFAULT_REDIRECT_CALLBACK, redirectUri = window.location.origin, ...options }) => { if (instance) return instance // The 'instance' is simply a Vue object instance = new VueAuth() instance.init(onRedirectCallback, redirectUri, options as Auth0Options) return instance }
useAuth returns a singleton VueAtuh instance, and extracts the onRedirectCallback and redirectUri from the options object. What's left is an Auth0Options type which we'll pass on straight to the auth0Client.
You can see the init method in action we created earlier. Then VueAuth is instantiated if it hasn't been already. Above that, we also expose a getInstance function, in case we need to use it outside of a Vue component.
Let's see here the whole auth.ts for your copy-pasting convenience:
import { VueConstructor } from 'vue' import { VueAuth, Auth0Options, RedirectCallback } from './VueAuth' type Auth0PluginOptions = { onRedirectCallback: RedirectCallback, domain: string, clientId: string, audience?: string, [key: string]: string | RedirectCallback | undefined } /** Define a default action to perform after authentication */ const DEFAULT_REDIRECT_CALLBACK = (appState) => window.history.replaceState({}, document.title, window.location.pathname) let instance: VueAuth /** Returns the current instance of the SDK */ export const getInstance = () => instance /** Creates an instance of the Auth0 SDK. If one has already been created, it returns that instance */ export const useAuth0 = ({ onRedirectCallback = DEFAULT_REDIRECT_CALLBACK, redirectUri = window.location.origin, ...options }) => { if (instance) return instance // The 'instance' is simply a Vue object instance = new VueAuth() instance.init(onRedirectCallback, redirectUri, options as Auth0Options) return instance } // Create a simple Vue plugin to expose the wrapper object throughout the application export const Auth0Plugin = { install (Vue: VueConstructor, options: Auth0PluginOptions) { Vue.prototype.$auth = useAuth0(options) } }
As you can see, we're extending the Vue constructor with a new instance member. If we try to access it in a component, the TypeScript compiler will start crying as it has no idea what happened. We'll fix this a bit later down the line.
Now, the Auth0Options are the ones that are needed for the client to identify your tenant. Copy the Client ID and Domain from your Auth0 applications settings and store them in a file called auth.config.json for now. It would be nicer to inject them as environment variables through webpack, but as these are not sensitive data, we'll be just fine like that as well.
With all that said, I will not include my auth.config.json in the reference repo, only an example you'll need to fill in with your data.
{ "domain": "your tenant's domain", "clientId": "your app's clientId" }
Make sure to add "resolveJsonModule": true, to your tsconfig.json.
Finally, we're ready to create our main.ts.
import Vue from 'vue' import App from './App.vue' import router from './router' import { Auth0Plugin } from './auth' import { domain, clientId } from '../auth.config.json' Vue.use(Auth0Plugin, { domain, clientId, onRedirectCallback: (appState) => { router.push( appState && appState.targetUrl ? appState.targetUrl : window.location.pathname ) } }) Vue.config.productionTip = false new Vue({ router, render: h => h(App) }).$mount('#app')
The onRedirectCallback redirects the user to a protected route after they have authenticated. We'll cover this a bit later when we create an actual protected route.
Log in to the App
Time to put the authentication logic to use.
First, we'll add a Login / Logout button to Home.vue
<template> <div class="home"> <img alt="Vue logo" src="../assets/logo.png" /> <HelloWorld msg="Welcome to Your Vue.js App" /> <!-- Check that the SDK client is not currently loading before accessing is methods --> <div v-if="!$auth.loading"> <!-- show login when not authenticated --> <button v-if="!$auth.isAuthenticated" @click="login">Log in</button> <!-- show logout when authenticated --> <button v-if="$auth.isAuthenticated" @click="logout">Log out</button> </div> </div> </template>
We'll also need to update the logic in the script tag of Home
<script lang="ts"> import { Component, Vue } from 'vue-property-decorator' import HelloWorld from '@/components/HelloWorld.vue' @Component({ components: { HelloWorld } }) export default class Home extends Vue { login () { this.$auth.loginWithRedirect({}) } // Log the user out logout () { this.$auth.logout({ returnTo: window.location.origin }) } } </script>
First, we turn the original example component into a Class Component. Second, the methods simply call the methods of VueAuth exposed by our Auth0Plugin.
But what's that? this.$auth is probably underlined in your IDE. Or if you try to compile the code you'll get the following error:
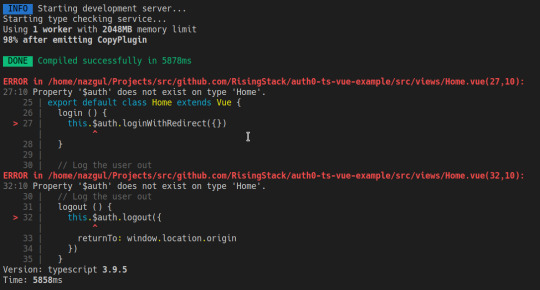
Of course, we still have to tell the compiler that we have augmented the Vue constructor with our $auth member.
Let's create a shims-auth0.d.ts file in our src directory. If you're using VSCode, you might need to reload the window to make the error go away.
import { VueAuth } from './auth/VueAuth' declare module 'vue/types/vue' { interface Vue { $auth: VueAuth } }
Checkpoint
Now, let's try to compile our code. If you have configured your Auth0 credentials correctly, you should be redirected to the Auth0 Universal Login page when you click Login, and back to your app against once you have logged in.
Then, you should be able to click Log out and have the application log you out.
Display the User's Profile
So far so good, but let's try to create a protected route. Displaying the user's profile seems like a prime target for that.
Let's create a file called Profile.vue in src/views.
<template> <div> <div> <img :src="$auth.user.picture"> <h2></h2> <p></p> </div> <div> <pre></pre> </div> </div> </template>
That's it. We read all the information we need from $auth.user we've already set up in VueAuth.ts.
Add a route to the Profile component
Let's update the app's routing configuration, so the users can access their profile.
Open up src/router/index.ts and add the following to the routes array.
//.. other imports // NEW - Import the profile component import Profile from "../views/Profile.vue"; Vue.use(VueRouter) const routes: Array<RouteConfig> = [ routes: [ // .. other routes and pages .. // NEW - add the route to the /profile component { path: "/profile", name: "profile", component: Profile } ] }); export default router
Now we need to update the navigation bar in App.vue
<template> <div id="app"> <div id="nav"> <router-link to="/">Home</router-link> | <router-link to="/about">About</router-link> <span v-if="$auth.isAuthenticated"> | <router-link to="/profile">Profile</router-link> </span> </div> <router-view/> </div> </template>
Checkpoint
The code should compile, so let's check if we can navigate to the Profile page and see the data. For added profit, try logging in with both Google and register a username and password. Take note of the data you get.
Secure the Profile Page
We have the route, time to make it protected. Let's create a new file in src/auth called authGaurd.ts.
import { getInstance } from './auth' import { NavigationGuard } from 'vue-router' export const authGuard: NavigationGuard = (to, from, next) => { const authService = getInstance() const fn = () => { // Unwatch loading unwatch && unwatch() // If the user is authenticated, continue with the route if (authService.isAuthenticated) { return next() } // Otherwise, log in authService.loginWithRedirect({ appState: { targetUrl: to.fullPath } }) } // If loading has already finished, check our auth state using `fn()` if (!authService.loading) { return fn() } // Watch for the loading property to change before we check isAuthenticated const unwatch = authService.$watch('loading', (loading: boolean) => { if (loading === false) { return fn() } }) }
First, we put auth.ts's getInstance to use. Then we create a function that checks if the user is authenticated. If they are, we call next, otherwise redirect them to login.
However, we should only call this function, if the authService is not loading, as otherwise, we still don't have any settled information about the login process.
If it is still loading, we set up a watcher for authService.loading, so when it turns true, we call our guard function. Also, please notice that we use the unwatch function returned by $watch to clean up after ourselves in fn.
I personally prefer giving descriptive names to my functions, but I only wanted to change things for the sake of either type annotation, or stability, so forgive me for keeping fn as it is to maintain parity with the JS tutorial.
Guidance with Auth0, Vue & TypeScript
Auth0 and all other authentication providers relieve us from the tedious job of handling user management ourselves. Auth0 itself excels in having a lot of educational resources for their users. The original Vue tutorial was really helpful, but seeing that TypeScript is becoming the industry standard when it comes to writing anything that should be run by JavaScript runtimes, it would be nice to see more TypeScript tutorials.
I hope this article manages to fill in a bit of this gap. If you liked what you just read, please share it with those who might need guidance with Auth0, Vue & TypeScript!
Happy authenticating!
Auth0: Vue & TypeScript Quickstart SDK - The Missing Docs published first on https://koresolpage.tumblr.com/
0 notes
Text
Beyond the Homepage: Unveiling Advanced Website Development for Students

In this fast-paced digital era, creating a website is no longer just about a captivating homepage. Students exploring the realm of web development are in for an exciting journey that goes far beyond the surface. Delving into the depths of web development frameworks and website customization opens up a world of possibilities, enabling them to craft innovative and sophisticated online platforms.
Understanding Web Development Frameworks
Web development frameworks are the backbone of modern website creation. They provide a structured approach and a collection of tools, libraries, and best practices to streamline the development process. For students stepping into this realm, familiarizing themselves with popular frameworks such as React, Angular, and Vue.js is a pivotal starting point.
Each framework comes with its unique set of features and advantages. React, known for its component-based architecture, empowers developers to build interactive user interfaces efficiently. Angular, backed by Google, offers a comprehensive ecosystem and robust support for creating single-page applications. Vue.js, recognized for its simplicity and flexibility, provides an excellent learning curve for beginners.
Diving into these frameworks not only enhances a student's technical prowess but also equips them with sought-after skills in the ever-evolving landscape of web development.
The Art of Website Customization
A website's uniqueness often lies in its customization. Students keen on creating standout online experiences should explore the intricacies of website customization. This involves tweaking the layout, design elements, functionalities, and user experience to align with specific goals and preferences.
CSS (Cascading Style Sheets) mastery is crucial for achieving personalized website designs. Understanding CSS frameworks like Bootstrap or Tailwind CSS can significantly expedite the customization process, offering pre-built components and responsive design capabilities. Furthermore, proficiency in JavaScript allows for dynamic alterations and interactivity, elevating the overall user experience.
Students can also explore Content Management Systems (CMS) like WordPress or Drupal, which provide a robust foundation for website creation along with extensive customization options through themes and plugins.
Putting Knowledge into Practice
Theoretical knowledge alone does not suffice in the world of web development. Practical application through projects and hands-on experience is the key to mastering advanced website development. Students can undertake personal projects, participate in hackathons, or collaborate on real-world assignments to apply their skills and gain invaluable experience.
Online resources, tutorials, and community forums serve as invaluable companions in this journey. Platforms like GitHub, Stack Overflow, and Codecademy offer a wealth of resources, enabling students to learn, seek guidance, and contribute to the developer community.
Conclusion
As students embark on the path of web development, understanding web development frameworks and honing website customization skills are pivotal steps towards becoming proficient developers. The journey from creating a simple homepage to crafting sophisticated and impactful websites requires dedication, continuous learning, and practical application.
By exploring these advanced aspects of web development, students not only expand their technical repertoire but also position themselves as adept problem-solvers in an increasingly digital world. With determination and a thirst for knowledge, the possibilities in the realm of web development are limitless.
0 notes
Text
How To Setup Your Vue.js Style Guide And Code Like A Pro With Vue 2 and Vue 3!! Vue 3 ESLint Guide
How To Setup Your Vue.js Style Guide And Code Like A Pro With Vue 2 and Vue 3!! Vue 3 ESLint Guide
Vue.js Style Guide is important. How should you create your Vue.js app and what are the best practices? In this tutorial we’ll look at adding ESLint Style’s to your Vue.js app! Using the eslint-plugin-vue. And we’ll look at Vue 3 style guide! #vuejs #vuejs3 Check now if your .TECH is available! Link – https://go.tech/erik Use Code erik.tech at Checkout for a special 80% OFF on 1 & 5 Year .TECH…

View On WordPress
#Erik Hanchett#eslint prettier vscode#eslint setup#eslint vscode#eslint vscode setup#Program With Eric#Program With Erik#VSCode setup eslint#Vue 3 style guide#Vue essentials#vue js 3#vue js tutorial#vue js tutorial for beginners#vue-eslint prettier vscode#Vue.js 3 tutorial#vue.js documentary#Vue.js ESLint#Vue.js eslint tutorial#Vue.js Style Eslint#Vue.js style essentials#Vue.js Style Guide#vuejs
0 notes
Text
Reactを使ったモダンなフロントエンド開発の環境構築 - Qiita

はじめに
Reactを中心としたフロントエンド開発において、以下のような構成を見かけることが多いと思います。
UIライブラリとしてReact
型のある言語としてTypeScript
スタイル定義としてstyled-components
コンポーネントの開発環境としてStorybook
LinterとしてESLint
FormatterとしてPrettier
この記事では、各種ライブラリについて紹介したのち、それらを使う場合の環境構築についてハンズオン形式で説明します。
各種ライブラリの紹介
まず、各ライブラリがどのようなものなのかを簡単に紹介します。
ライブラリの使い方などは公式ドキュメントなどを参照するようにしてください。
React
ドキュメント
ReactはUI(ボタンやフォームなど)コンポーネントを作成するためのJavaScriptライブラリです。 似た立ち位置として、Vue.jsが上げられることも多いと思います。
公式ドキュメントが非常に充実しているので、初めての方は、Tutorialをやってみるのが良さそうです。
TypeScript
ドキュメント
TypeScriptは型を持ったJavaScriptのスーパーセットとして人気なプログラミング言語です。 コンパイルすると、JavaScriptのソースコードになります。
公式ドキュメント以外に、TypeScript Deep Diveが情報量が多く、分かりやすいと思います。
styled-components
ドキュメント
styled-componentsは、 CSSとほぼ同様のシンタックスを使ってスタイリングされたReactコンポーネントを作成できるライブラリです。 .cssファイルにCSSを書くのではなく、.jsや.tsxファイル内でCSSを書くようなイメージです。
公式ドキュメントを参照しながら、使ってみるのが良いと思います。
Storybook
ドキュメント
Storybookは、UIコンポーネントをアプリケーションとは独立した環境で開発できるツールです。 静的サイトとしてビルドすることで、コンポーネントのカタログとしても利用できます。
React用のチュートリアルも用意されています。
ESLint
ドキュメント
ESLintはJavaScriptのLinterです。 Linterを使うことで、コードの一貫性を高め、バグを未然に防げる可能性が高まります。
@typescript-eslint/eslint-pluginを使うことで、TypeScriptでも利用可能です。
Prettier
ドキュメント
Prettierはフロントエンド開発において人気なコードフォーマッターです。 JavaScriptをはじめとした複数の言語をサポートしています。
Prettierを使うことで、コードのフォーマットを意識することなく統一することができます。
環境構築
GitHubでリポジトリの作成から各種ライブラリのインストール、設定ファイルの作成などを行います。
最終的に、以下の事ができたらOKです。
npm run storybook: Storybookを起動して、React+TypeScript+styled-componentsで作成したコンポーネントが表示できる
npm run lint: ESLint + Prettierを使��てコードのチェックが行える
npm run tsc: TypeScriptのコードに対してコンパイルチェックが行える
Step0 事前準備
npm/Node.js/gitがインストールされていることを確認してください。
$ git --version git version 2.20.1 (Apple Git-117) $ node -v v12.4.0 $ npm -v 6.9.0
バージョンを揃える必要はありませんが、必要に応じてLTSまたは最新版を利用するようにしましょう。
Step1 リポジトリの作成/git clone/gitignore
GitHubで今回作業をするリポジトリを作成しましょう。
新しいリポジトリを作成
リポジトリを作成後は、そのリポジトリをクローンしておいてください。
また、好きなgitignoreをリポジトリに配置しておきます。
例) Node.gitignoreを利用する場合
$ wget https://raw.githubusercontent.com/github/gitignore/master/Node.gitignore $ mv Node.gitignore .gitignore
これでリポジトリの準備は整いました!
Step2 package.jsonを作成する
npmのinitコマンドを使って、package.jsonの雛形を作成しましょう。
$ npm init -y
Wrote to /dev/github.com/toshi-toma/todo-app-react/package.json:
{ "name": "todo-app-react", "version": "1.0.0", "description": "A Todo Application built with React, styled-components, TypeScript, E SLint, Prettier, and Storybook", "main": "index.js", "scripts": { "test": "echo \"Error: no test specified\" && exit 1" }, "repository": { "type": "git", "url": "git+ssh://[email protected]/toshi-toma/todo-app-react.git" }, "keywords": [], "author": "", "license": "ISC", "bugs": { "url": "https://github.com/toshi-toma/todo-app-react/issues" }, "homepage": "https://github.com/toshi-toma/todo-app-react#readme" }
npmのCLIには便利なコマンドがたくさん用意されています。ドキュメントをさっと見るだけでも面白いと思います。
Step3 Reactでコンポーネントを作成して、Storybookに表示する
Reactでコンポーネントを作成して、そのコンポーネントをStorybookに表示して動作や見た目を確認していくとスムーズな開発が行えます。
まずはReactとstyled-componentsでシンプルなコンポーネントを作成してみましょう。
必要なライブラリをインストールします。
$ npm i react react-dom styled-components ... + [email protected] + [email protected] + [email protected] added 11 packages from 12 contributors, updated 2 packages and audited 31753 packages in 5.34s
Reactとstyled-componentsでシンプルなボタンを作成してみましょう。
src/index.js
import React from "react"; import styled from "styled-components";
const Button = styled.button` background-color: #454545; color: #fff; `;
const SimpleButton = () => <Button>button</Button>; // 省略可能
export default SimpleButton;
次に、作成したボタンをStorybookで表示しましょう。
Googleで「Storybook React」と検索するとStorybook for Reactというタイトルの公式ドキュメントが出てくると思います。
Storybook for React
ドキュメントを読むと、Automatic setupコマンドが用意されているようです。
実行してみましょう。
$ npx -p @storybook/cli sb init --type react
...
+ @storybook/[email protected] + @storybook/[email protected] + @babel/[email protected] + [email protected] + @storybook/[email protected] + @storybook/[email protected] added 1147 packages from 843 contributors and audited 31533 packages in 41.347s
...
• Installing dependencies. ✓
To run your storybook, type:
npm run storybook
For more information visit: https://storybook.js.org
これでStorybookの環境構築及びReactコンポーネントを表示する準備が整いました!簡単ですね。
npm run storybookを実行するとStorybookが表示されると思います。
あとは、先程作成したボタンをStorybookに表示しましょう。
stories/index.stories.js
import React from 'react';
import { storiesOf } from '@storybook/react'; import { action } from '@storybook/addon-actions';
import Button from '../src/index';
storiesOf('Button', module) .add('with text', () => <Button onClick={action('clicked')}>Hello Button</Button>);
無事にReactとstyled-componentsで作成したコンポーネントをStorybookに表示することができました🎉
Step4 TypeScriptでコンポーネントを作成して、Storybookに表示する
次はReactとstyled-componentsに加えてTypeScriptを使ってコンポーネントを作成して、そのコンポーネントをStorybookに表示します。
まずはStep3で作成したコンポーネントをTypeScript化しましょう。
必要なライブラリをインストールします。 TypeScriptに加えて、型情報もインストールします。
$ npm i -D typescript $ npm i -D @types/{react,react-dom,styled-components}
TypeScriptの設定ファイルの雛形をtscコマンドで作成します。
$ npx tsc --init message TS6071: Successfully created a tsconfig.json file.
tsconfig.jsonというファイルが作成されたので、React用に編集します。
tsconfig.json
{ "compilerOptions": { "target": "es5", "module": "commonjs", "lib": ["es2018", "dom"], "jsx": "react", "strict": true, "rootDirs": [ "src" ], "types": [ "react" ], "esModuleInterop": true }, "include": [ "./src/**/*" ], "exclode": [ "node_modules/" ] }
これでTypeScriptを使う準備が整ったので、コンポーネントをTypeScriptで書き換えてみます。
ReactとTypeScriptを使う場合のコンポーネントファイルの拡張子は.tsxになります。
mv src/index.js src/index.tsx
src/index.tsx
import React, { FC } from "react"; import styled from "styled-components";
const Button = styled.button` background-color: #454545; color: #fff; `;
interface Props { onClick: () => void; }
const SimpleButton: FC<Props> = () => <Button>Done</Button>;
export default SimpleButton;
最後に書き換えたコンポーネントをStorybookで表示します。
TypeScriptを使う場合、別途Storybookの設定が必要です。
必要な設定については、公式ドキュメントが用意されています。
ドキュメントを読むと、必要な設定が@storybook/preset-typescriptとして用意されているので、これを利用します。
必要なライブラリをインストールしましょう。
$ npm i -D @storybook/preset-typescript react-docgen-typescript-loader ts-loader $ npm i -D @types/{storybook__addon-actions,storybook__react}
...
...
+ @types/[email protected] + @types/[email protected]
npm i -D xxxを実行したログに以下のようなWarningが表示されていると思います。
...
npm WARN @storybook/[email protected] requires a peer of @types/webpack@* but none is installed. You must install peer dependencies yourself
...
@storybook/[email protected]は@types/webpack@*をpeer dependencyとしているようです。
@storybook/preset-typescriptのリポジトリを開いて、package.jsonを見てみましょう。
preset-typescript/package.json
... "peerDependencies": { "@types/webpack": "*", "react-docgen-typescript-loader": "*", "ts-loader": "*" }
peerDependenciesとして@types/webpackが指定されているので、インストールしておきましょう。
$ npm i -D @types/webpack + @types/[email protected]
あとは.storybook/presets.jsを作成して、.storybook/presets.jsと.storybook/config.jsを以下のように編集するだけです。
presets.js
module.exports = ["@storybook/preset-typescript"];
config.js
import { configure } from '@storybook/react'; // automatically import all files ending in *.stories.js - const req = require.context('../stories', true, /\.stories\.js$/); + const req = require.context('../src', true, /\.stories\.tsx$/); function loadStories() { req.keys().forEach(filename => req(filename)); }
configure(loadStories, module);
storiesファイルの拡張子も.jsから.tsxに変更しましょう。
$ mkdir src/stories $ mv stories/index.stories.js src/stories/index.stories.tsx $ rm -rf stories
npm run storybookでコンポーネントが表示されたら成功です🎉
また、TypeScriptで書いたコードはコンパイルを実行することで静的型付けによる型チェックを行えます。
型チェックを行なうnpm scriptsを追加しておきましょう。
package.json
"scripts": { ... + "tsc": "tsc --noEmit",
ここまでの作業によるpackage.jsonの差分を出しておきます。
...
"description": "A Todo Application built with React, styled-components, TypeScript, ESLint, Prettier, and Storybook", "main": "index.js", "scripts": { - "test": "echo \"Error: no test specified\" && exit 1" + "test": "echo \"Error: no test specified\" && exit 1", + "tsc": "tsc --noEmit", + "storybook": "start-storybook -p 6006", + "build-storybook": "build-storybook" }, "repository": { "type": "git", @@ -16,5 +18,28 @@ "bugs": { "url": "https://github.com/toshi-toma/todo-app-react/issues" }, - "homepage": "https://github.com/toshi-toma/todo-app-react#readme" + "homepage": "https://github.com/toshi-toma/todo-app-react#readme", + "dependencies": { + "react": "^16.9.0", + "react-dom": "^16.9.0", + "styled-components": "^4.3.2" + }, + "devDependencies": { + "@babel/core": "^7.5.5", + "@storybook/addon-actions": "^5.1.10", + "@storybook/addon-links": "^5.1.10", + "@storybook/addons": "^5.1.10", + "@storybook/preset-typescript": "^1.1.0", + "@storybook/react": "^5.1.10", + "@types/react": "^16.9.1", + "@types/react-dom": "^16.8.5", + "@types/storybook__addon-actions": "^3.4.3", + "@types/storybook__react": "^4.0.2", + "@types/styled-components": "^4.1.18", + "@types/webpack": "^4.32.1", + "babel-loader": "^8.0.6", + "react-docgen-typescript-loader": "^3.1.1", + "ts-loader": "^6.0.4", + "typescript": "^3.5.3" + } }
Step5 ESLintとPrettierでLintとFormatを導入する
TypeScriptのコードをESLintでLint、PrettierでFormatできるようにしましょう。
今回は手順をいくつか省略できるように、npmで公開されているeslint-configを利用します。 ここで利用するルールは自分の好みに応じてカスタマイズしてOKです。
npmの検索窓で「eslint typescript prettier」と検索してみましょう。
以下の手順では、airbnbが提供しているeslint-config-airbnbとTypeScript、Prettierのサポートが入ったeslint-config-airbnb-typescript-prettierを利用します。
eslint-config-airbnb-typescript-prettier
パッケージのページに書いてある説明を参考に、必要なライブラリをインストールします。
$ npm i -D eslint@^5.3.0 prettier@^1.18.2 eslint-config-airbnb-typescript-prettier + [email protected] + [email protected] + [email protected] added 106 packages from 69 contributors and audited 32518 packages in 10.364s
次にESLintの設定ファイルである.eslintrc.jsを作成して、以下のように設定を書きます。
.eslintrc.js
module.exports = { extends: "airbnb-typescript-prettier" };
ESLintの設定が終わったら、npm scriptsを追加しておきましょう。
package.json
"scripts": { + "lint": "eslint --ext .ts,.tsx src/", + "lint:fix": "eslint --ext .ts,.tsx src/ --fix",
これで次からnpm run lintを実行することで、srcディレクトリ以下のTypeScriptファイルに対してLintとFormatチェックが実行されます。
$ npm run lint
> eslint --ext .ts,.tsx src/
/dev/github.com/toshi-toma/todo-app-react/src/index.tsx 15:23 error Insert `⏎` prettier/prettier
/dev/github.com/toshi-toma/todo-app-react/src/stories/index.stories.tsx 1:19 error Replace `'react'` with `"react"` prettier/prettier 3:1 error '@storybook/react' should be listed in the project's dependencies, not devDependencies import/no-extraneous-dependencies
....
✖ 8 problems (8 errors, 0 warnings) 6 errors and 0 warnings potentially fixable with the `--fix` option.
FormatやいくつかのLintエラーは自動で修正が可能です。
npm run lint:fixを実行してみましょう。
$ npm run lint:fix
> [email protected] lint:fix /dev/github.com/toshi-toma/todo-app-react > eslint --ext .ts,.tsx src/ --fix
/dev/github.com/toshi-toma/todo-app-react/src/stories/index.stories.tsx 3:1 error '@storybook/react' should be listed in the project's dependencies, not devDependencies import/no-extraneous-dependencies 4:1 error '@storybook/addon-actions' should be listed in the project's dependencies, not devDependencies import/no-extraneous-dependencies
✖ 2 problems (2 errors, 0 warnings)
自動で修正されました🎉
... should be listed in the project's dependencies, not devDependencies import/no-extraneous-dependenciesとエラーがでています。
ESLintの設定は必要に応じて調整しましょう。
以下のように設定を変更することで、エラーが直るはずです。
.eslintrc.js
module.exports = { extends: "airbnb-typescript-prettier", rules: { "import/no-extraneous-dependencies": ["error", { devDependencies: ["**/*.stories.tsx"], peerDependencies: false }] } };
Step6 VSCodeでファイル保存時に自動でフォーマットする
最後に、エディタにVSCodeを利用している人を想定して、ファイル保存時にフォーマットエラーなどの自動修正を行えるようにします。
まず、VSCodeのExtensionsでVSCode ESLintをインストールしておきましょう。
あとは、以下のように.vscode/settings.jsonを修正します。
{ "eslint.autoFixOnSave": true, "eslint.validate": [ "javascript", "javascriptreact", { "language": "typescript", "autoFix": true }, { "language": "typescriptreact", "autoFix": true } ] }
さいごに
これで
React+styled-components+TypeScriptでコンポーネントを開発
作成したコンポーネントはStorybookで動作確認
適宜ESLintやPrettierを利用してコーディングを行い、ファイル保存時に自動で修正
が行えるようになり、環境構築終了です🎉
実際にWebアプリを開発する場合、webpackやwebpack-dev-serverなどをインストールして、設定をする必要があります。それについては余裕があれば別途追記します🙏
0 notes