#WordPress Carousel Plugins
Explore tagged Tumblr posts
Visit Tumblr Blog
Explore Tumblr blogs with no restrictions, modern design and the best experience.
Last Seen Tumblr Blogs


Fun Fact
In 2020, 27% of US Tumblr users had an annual household income of over $100,000.
Text
The Ultimate Guide to WordPress Carousel Plugins with Rocketpress
Introduction
In today’s visually-driven web environment, having an engaging website is crucial for capturing visitor attention. One of the most effective ways to present images, videos, testimonials, or products is by using a WordPress Carousel Plugin. At Rocketpress, we understand the importance of dynamic content presentation, which is why this comprehensive guide will explore the benefits of carousel plugins, highlight popular options, and provide practical tips for effective implementation. Whether you’re a beginner or an experienced developer, mastering carousel plugins can significantly enhance your WordPress site’s functionality and user experience.
What is a WordPress Carousel Plugin?
A WordPress Carousel Plugin allows you to display a series of images, videos, or other content types in a rotating or sliding format. These plugins can be used to showcase galleries, testimonials, featured products, or blog posts. By incorporating a carousel, you can present content in a visually appealing and organized manner, encouraging user engagement and interaction with your site.
Benefits of Using a Carousel Plugin
1. Enhanced Visual Appeal
A well-designed carousel enhances your website’s aesthetic by showcasing high-quality images and videos in an engaging format. This visual dynamism can captivate visitors and encourage them to explore more of your site.
2. Space Efficiency
Carousels effectively save screen space by consolidating multiple items into a single area. This is especially useful for mobile users, allowing them to access a larger amount of content without feeling overwhelmed.
3. Improved User Experience
Carousels can enhance user experience by simplifying navigation. Visitors can effortlessly scroll through items, making it easier for them to find the content they’re interested in.
4. Increased Engagement
Interactive carousels encourage visitors to stay longer on your site, leading to higher engagement rates. Whether showcasing products or testimonials, this can result in increased conversions.
5. Customization Options
Most carousel plugins, including those recommended by Rocketpress, offer extensive customization options. You can tailor the appearance and functionality to align with your brand, adjusting settings like speed, transition effects, and navigation controls.
Types of WordPress Carousel Plugins
1. Image Carousel Plugins
These plugins focus on displaying images in a rotating format. They are ideal for photographers, artists, and businesses looking to showcase their visual work.
2. Video Carousel Plugins
Video carousels allow for the dynamic display of multiple video pieces. This format is perfect for businesses using video marketing or showcasing client testimonials.
3. Testimonial Carousel Plugins
These specialized plugins enable you to present customer feedback attractively, helping to build trust and credibility for your brand.
4. Product Carousel Plugins
E-commerce sites often utilize product carousels to highlight featured items, sales, or new arrivals, encouraging visitors to make purchases.
How to Choose the Right Carousel Plugin
When selecting a WordPress carousel plugin, consider the following factors:
1. Compatibility
Ensure that the plugin is compatible with your current WordPress theme and other plugins. This will help prevent conflicts and ensure smooth functionality.
2. Features
Look for plugins that offer the features you need, such as responsive design, customization options, and various content types.
3. User Reviews
Check user reviews and ratings to assess the reliability and performance of the plugin. Positive feedback usually indicates a better user experience.
4. Support and Documentation
Good support and comprehensive documentation can save you time and frustration. Opt for plugins that offer thorough guides and responsive customer service.
5. Price
Consider your budget when selecting a carousel plugin. While many free options are available, premium plugins may offer more advanced features and better support.
Popular WordPress Carousel Plugins
1. RocketPress
RocketPress is one of the most widely used carousel plugins. It allows you to create responsive slideshows with various content types, including images and videos. Key features include:
– Multiple slideshow types (FlexSlider, Nivo Slider, etc.)
– SEO-friendly options
– Easy integration with WordPress
2. Soliloquy
Soliloquy is a user-friendly carousel plugin known for its drag-and-drop interface. It offers high performance and various customization options, making it ideal for both beginners and advanced users.
3. Smart Slider 3
Smart Slider 3 provides a robust set of features, allowing you to create stunning slideshows with ease. It includes a visual editor, making it simple to customize every aspect of your carousel.
4. Slider Revolution
Slider Revolution is a powerful plugin that offers advanced features, including animations and transitions. While it’s more complex, its versatility allows for highly customized presentations.
How to Implement a Carousel Plugin
Step 1: Install the Plugin
To get started, navigate to the WordPress dashboard, click on “Plugins,” and then “Add New.” Search for your chosen carousel plugin, click “Install,” and then activate it.
Step 2: Configure Plugin Settings
Once activated, you’ll typically find a new menu item in your dashboard. Click on it to access the settings and configuration options. Customize the carousel according to your preferences.
Step 3: Create Your Carousel
Follow the plugin’s instructions to create your carousel. This usually involves selecting images or videos, adjusting layout settings, and customizing transition effects.
Step 4: Embed the Carousel
After creating your carousel, you’ll receive a shortcode or block that you can insert into your posts or pages. Simply copy and paste it where you want the carousel to appear.
Step 5: Preview and Publish
Before finalizing, preview your carousel to ensure it displays correctly. Once satisfied, publish your changes and check how it appears on your live site.
Best Practices for Using Carousel Plugins
1. Limit the Number of Slides
While carousels can display multiple items, it’s best to limit the number of slides to avoid overwhelming visitors. Aim for 3-5 key items to keep it focused and engaging.
2. Use High-Quality Images
Always use high-quality images and videos to enhance the visual appeal of your carousel. Poor-quality visuals can detract from the overall experience.
3. Optimize for Mobile
Ensure your carousel is responsive and looks great on mobile devices. Most modern plugins, including those recommended by Rocketpress, offer responsive designs by default.
4. Include Clear Navigation
Make it easy for users to navigate through your carousel. Incorporate clear navigation arrows and indicators to enhance usability.
5. Test Performance
Regularly test your carousel’s performance to ensure it loads quickly and functions correctly. A slow-loading carousel can negatively impact user experience and SEO.
Conclusion
Utilizing a WordPress Carousel Plugin is a powerful way to enhance your website’s visual appeal and user engagement. With options like MetaSlider, Soliloquy, and Smart Slider 3, Rocketpress can help you find the perfect solution for your needs. By following best practices and choosing the right plugin, you can create dynamic, engaging content that captivates your visitors and keeps them coming back for more.
Take the next step in improving your WordPress site—explore the carousel plugins available and see how they can transform your content presentation today!
0 notes
Text
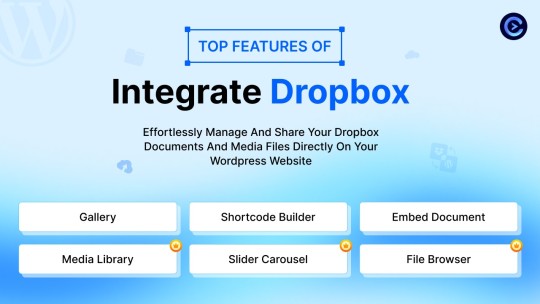
How to Enable Auto-Sync Photos from Dropbox to WordPress?
Managing media files and keeping them organized on your WordPress website can be a daunting task. Dropbox users can now simplify this process with the powerful File Manager for Dropbox (Integrate Dropbox plugin), which allows seamless auto-synchronization of your Dropbox folders with your WordPress site. Whether you're uploading photos, videos, or documents, this plugin ensures your content is always up-to-date and easily accessible. Here’s how you can get started:
What is Integrate Dropbox?
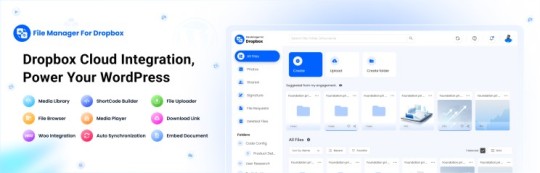
File Manager for Dropbox (Integrate Dropbox) is a WordPress plugin designed to sync your Dropbox content directly to your WordPress pages, posts, or media library. This plugin makes it easy to:
Upload images, videos, or files from Dropbox to your WordPress site.
Auto-sync shared folders for real-time updates.
Showcase Dropbox content on your website without the hassle of manual uploads.
By automating the synchronization process, Integrate Dropbox saves time and improves efficiency for bloggers, photographers, businesses, and anyone managing a WordPress site.
Who Benefits from the Integrate Dropbox Plugin?
Photographers: Automatically sync and display photo albums on your portfolio site.
Content Creators: Keep your website updated with the latest files, presentations, or videos.
Businesses: Share brochures, product catalogs, and documents seamlessly with your clients.
Using the Integrate Dropbox Plugin, you can seamlessly upload photos to your website in real time by creating a Dropbox folder and embedding it on your site using a shortcode. This functionality is perfect for events like photo booths at Christmas or New Year’s parties, where you want the latest uploads to be visible instantly.
How to Auto-Sync Photos from Dropbox to WordPress
youtube
Step 1: Install and Activate the Integrate Dropbox Plugin
Download and install the Integrate Dropbox Plugin from the WordPress Plugin Directory.
Activate the plugin from the Plugins section of your WordPress Dashboard.
youtube
Step 2: Connect Your Dropbox Account
Go to Settings > Integrate Dropbox in your WordPress admin panel.
Click Connect Dropbox Account.
Authorize the connection by logging in to Dropbox and allowing the app access.
Step 3: Create a Dropbox Folder for Uploads
Log in to your Dropbox account.
Create a new folder named, for example, Event Photos.
Share the folder with your event team or photographers, allowing them to upload photos in real time.
Step 4: Sync the Dropbox Folder with Your Website
In your WordPress dashboard, navigate to the Integrate Dropbox section.
Click Shortcode Builder and select Gallery or Slider Carousel module.
Choose the Dropbox folder (Event Photos) you created earlier.
Customize display settings like layout, style, and auto-refresh interval.
Copy the generated shortcode.
Why Use the File Manager for Dropbox Plugin?
Here are a few reasons why Dropbox users find this plugin invaluable
Effortless Media Management: Say goodbye to manually downloading files from Dropbox and re-uploading them to WordPress. With auto-sync, your Dropbox content is always mirrored on your site.
Real-Time Updates: Any changes made in your Dropbox folder are automatically reflected on your WordPress site. This feature is particularly useful for shared folders, ensuring collaboration is seamless.
Streamlined Image and Photo Uploads: Photographers and content creators can easily showcase their work by syncing their image folders directly to WordPress. No need for duplicate uploads or tedious file management.
Embed Dropbox Content: Display Dropbox files in a visually appealing format on your WordPress posts and pages, perfect for portfolios, galleries, or downloadable resources.
Customizable Settings: Configure folder synchronization, access permissions, and display preferences to meet your specific needs.
Wrapping Up
File Manager for Dropbox plugin simplifies your workflow and eliminates the hassle of manual uploads, making it the perfect solution for Dropbox users who rely on WordPress. To learn more about this plugin and its features, visit the plugin directory or explore the settings after installation.
Start syncing your Dropbox folders today and elevate your WordPress site to the next level!
5 notes
·
View notes
Text
Create Stunning Sliders Without Coding
Transform your website with Slider Revolution! This powerful WordPress plugin lets you create stunning sliders, carousels, and dynamic hero sections—all without coding. Choose from 250+ templates and easily customize them with a drag-and-drop editor.
In the fast-paced digital world, your website’s visual appeal plays a crucial role in engaging visitors and boosting conversions. Slider Revolution is the most advanced WordPress plugin. It empowers you to design responsive sliders, carousels, and hero sections. You can even create full one-page websites without writing a single line of code. With its intuitive drag-and-drop interface, even…
#Digital Marketing#Drag-and-Drop Editor#Dynamic Content#Interactive Sliders#Responsive Design#SEO Optimization#Slider Revolution#User Engagement#Web Design Tools#Web Development#Website Design#WordPress Plugin
2 notes
·
View notes
Text
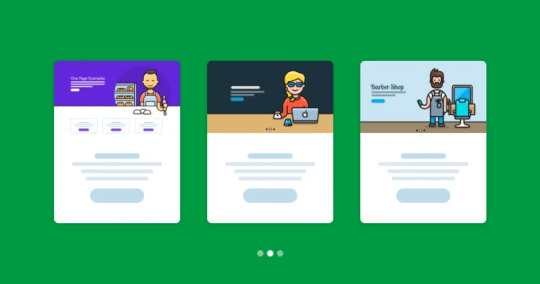
7+ Best Art Portfolio Website WordPress Premium Theme

Art Portfolio Website WordPress Premium Theme
Creating an art portfolio website is essential for artists, designers, and creatives to showcase their work and attract potential clients. Let’s explore some of the best WordPress premium themes specifically designed for art portfolio websites:
1. Dabble – Creative Agency & Portfolio WordPress Theme:

A sophisticated and stylish theme with multiple menu layouts, sliders, and preset blog post styles.
Features a portfolio system using a custom post type, allowing you to display your projects effectively.
Available in both free and premium versions, with advanced controls in the premium version.
2. Rubrash – Personal Portfolio WordPress Theme:

Known for its rock-solid coding and fantastic support.
Offers full-width portfolio layouts, including checkerboard style and carousel options.
Utilize the drag-and-drop Elementor Builder to create stunning pages for each portfolio entry.
3. Swipy – Creative Agency WordPress Theme:

A flexible and feature-rich theme powered by the Elementor page builder plugin.
Suitable for various types of websites, including art portfolio website.
Explore its extensive library of over 300 templates for startups, freelancers, and personal sites.
4. Kulluu – Creative Agency WordPress Theme:
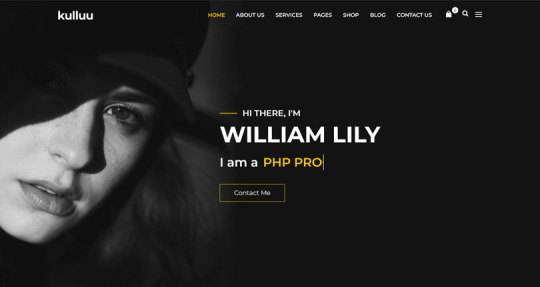
A minimalist freelancer and agency portfolio theme.
Ideal for showcasing your work with a clean and modern design.
5. Bionic- Personal Portfolio WordPress Theme:

Another portfolio WordPress theme that emphasizes simplicity.
Perfect for artists, photographers, and creative professionals.
6. Cretic – Creative Agency WordPress Theme:

A multi-concept artist and creative agency theme.
Offers versatility and a variety of options for different types of art portfolio website.
7. Mifo – Creative Minimal Portfolio WordPress Theme:

A clean and minimal multipurpose theme suitable for art portfolio website.
Focuses on elegant design and typography.
Remember to choose a theme that aligns with your artistic style, provides an excellent user experience, and effectively showcases your work. Happy creating! 🎨🖌️
For more options, you can explore other themes from ThemeForest. Each of these themes has unique features and customization options to suit your specific needs.
#premium wordpress themes#premium wordpress theme#app landing wordpress theme#wordpress premium themes#education wordpress theme#education & online course wordpress theme#paid wordpress themes#consulting business wordpress theme#online learning wordpress theme#wordpress plugins#art portfolio website#Art Portfolio Website WordPress Premium Theme#Creating an art portfolio website is essential for artists#designers#1. Dabble – Creative Agency & Portfolio WordPress Theme:#A sophisticated and stylish theme with multiple menu layouts#sliders#and preset blog post styles.#Features a portfolio system using a custom post type#allowing you to display your projects effectively.#Available in both free and premium versions#with advanced controls in the premium version.#2. Rubrash – Personal Portfolio WordPress Theme:#rubash#Known for its rock-solid coding and fantastic support.#Offers full-width portfolio layouts#including checkerboard style and carousel options.#Utilize the drag-and-drop Elementor Builder to create stunning pages for each portfolio entry.#3. Swipy – Creative Agency WordPress Theme:#swipy
4 notes
·
View notes
Text
The Ultimate Checklist for Starting Your SEO Blog in 2025

1. Define Your Niche & Goals
Pick a niche that combines your expertise, interest, and audience demand.
Define clear goals: traffic, affiliate income, leads, thought leadership, etc.
Conduct market research using tools like Google Trends, Ahrefs, or Exploding Topics.
2. Keyword Research (With 2025 Tools in Mind)
Use modern keyword tools:
Ahrefs, SEMrush, LowFruits, Keyword Insights AI
ChatGPT Plugins or Google Gemini for semantic keyword ideas
Focus on long-tail & low-competition keywords.
Map keyword intent (informational, transactional, navigational).
3. Competitive Analysis Identify top competitors using Ahrefs or SEMrush.
Analyze content gaps, backlink profiles, and traffic sources.
Use tools like SurferSEO or Frase to benchmark top-ranking content.
4. Pick Your Blogging Platform & Hosting
Choose a scalable platform:
WordPress (best for SEO control)
Webflow, Ghost, or Medium (easier but limited flexibility)
Select a fast, secure host (e.g., Cloudways, SiteGround, Kinsta).
5. Optimize Site Architecture
Use a logical structure: Homepage → Categories → Posts.
Keep URLs short, keyword-rich, and descriptive.
Create and submit an XML sitemap.
6. Technical SEO Setup
Install essential plugins (for WordPress):
Rank Math / Yoast
WP Rocket (for speed)
Redirection
Schema Markup plugin
Ensure mobile-first design (Core Web Vitals optimized).
⚡ Use fast-loading themes and lazy-loading for images.
7. Create Foundational Content
Start with pillar content (ultimate guides, how-tos).
Interlink posts strategically to build topical authority.
Make a content calendar for consistency.

8. On-Page SEO Best Practices
Use clear, engaging headings with proper hierarchy (H1-H3).
Add optimized images (alt text, compression).
Write compelling meta titles and descriptions.
Use NLP-based optimization tools (Surfer, NeuronWriter, ChatGPT SEO plugins).
9. Build an Email List Early
Use ConvertKit, Beehiiv, or MailerLite.
Offer lead magnets: checklists, mini-courses, free tools.
Start segmenting subscribers based on interest/intent.
10. Promote Your Blog Strategically
Share on Reddit, Quora, Medium, and niche forums.
Use HARO or Help a B2B Writer for backlinks.
Post regularly on LinkedIn, Twitter, Threads, and TikTok (short-form SEO tips).
Repurpose blog content into carousels, videos, or podcasts.
11. Monitor & Iterate
Use Google Search Console and GA4 to track performance.
Run A/B tests on headlines and CTAs.
Regularly update old posts for freshness and accuracy.
12. Monetize (Optional but Strategic)
Use affiliate programs (Amazon, ShareASale, niche-specific).
Offer consulting, products, or digital downloads.
Use programmatic ads via Ezoic, Raptive, or Mediavine (after you hit traffic thresholds).
Bonus 2025-Specific Tips
Consider AI-assisted content (responsibly edited for originality).
Use structured data and answer-engine content (for Google's AI Overviews).
Prioritize privacy and accessibility compliance (GDPR, ADA).
Start building author E-E-A-T (use bios, credentials, links to social proof).
0 notes
Text
How to Increase Traffic on Your Blog: A Complete Guide
Creating a blog is easy—getting people to read it is where the real challenge lies. With over 600 million blogs in the world and millions of posts published every day, standing out requires more than just great content. You need a traffic generation strategy that combines content creation, SEO, social media, email marketing, and more.
In this comprehensive guide, we’ll dive into proven strategies to increase traffic to your blog and grow a loyal readership. Whether you're just starting or have been blogging for years, these techniques will help you drive consistent and sustainable traffic.
1. Understand Your Audience
Before you can attract readers, you need to know who you’re writing for. Define your target audience by creating reader personas:
Demographics: Age, gender, education, location
Psychographics: Interests, values, pain points
Behavior: What blogs do they read? What keywords do they search for?
Use tools like Google Analytics, Hotjar, and Surveys to gather insights. Once you understand your audience, you can create content that directly appeals to their needs and interests.
2. Do Comprehensive Keyword Research
Search engine optimization (SEO) is still the #1 strategy to bring long-term traffic to your blog. At the heart of SEO is keyword research.
Tools to Use:
Google Keyword Planner
Getthit
Ubersuggest
Ahrefs
SEMrush
Answer the Public
How to Do It:
Start with a seed keyword relevant to your blog.
Find long-tail keyword variations that have high search intent and low competition.
Focus on informational keywords (e.g., "how to bake sourdough") for blog content.
Use keywords in titles, subheadings, meta descriptions, URLs, and throughout the content.
Avoid keyword stuffing—Google rewards valuable content that’s written for humans.
3. Create High-Quality, Evergreen Content
Google favors valuable, relevant, and original content. Write posts that solve real problems, answer common questions, and add something new to the conversation.
Types of Content That Attract Traffic:
How-to guides
Listicles (Top 10, etc.)
Case studies
Product reviews
Ultimate resource guides
Opinion pieces
Tips for Quality:
Write in-depth posts (1500+ words for most topics)
Use clear subheadings and bullet points for readability
Add images, infographics, and videos to enrich your post
Ensure zero grammar or spelling errors
Consistency is also key—aim to publish regularly so your readers and search engines know you're active.
4. Optimize On-Page SEO
Even if your content is amazing, it won’t rank unless it’s properly optimized.
Checklist:
Title Tag: Include your primary keyword within the first 60 characters.
Meta Description: Summarize the post and add keywords; keep it under 160 characters.
Headings (H1, H2, H3): Structure your content with relevant subheadings.
Image Alt Text: Describe images using relevant keywords.
Internal Linking: Link to other relevant posts on your blog.
External Links: Link to authoritative sources to back up your information.
Use an SEO plugin like Yoast SEO (WordPress) or Rank Math to help with optimization.
5. Promote Your Blog on Social Media
Social media can significantly boost your blog traffic—especially in the short term.
Top Platforms:
Twitter (X): Great for short links, industry discussions
Facebook: Use groups and pages to share your blog
LinkedIn: Perfect for B2B and professional content
Pinterest: Ideal for lifestyle, food, DIY, and fashion bloggers
Instagram & TikTok: Use stories and videos to tease blog content
Social Tips:
Create custom graphics for each platform
Use hashtags strategically
Collaborate with influencers or peers
Repurpose blog content into reels, stories, and carousel posts
A strong social media presence builds awareness and can create viral traffic spikes.
6. Build an Email List Early
Email marketing is one of the highest ROI channels for bloggers. People on your list are already interested in your content and more likely to engage with future posts.
How to Grow Your List:
Offer a lead magnet (e.g., eBook, checklist, resource library)
Use popups, slide-ins, and inline forms
Promote your list on social media
Email Tips:
Send a weekly newsletter with new blog posts
Use personalization and segmentation
Offer exclusive content for subscribers
Tools like ConvertKit, Mailchimp, and MailerLite are great for beginners.
7. Utilize Guest Posting and Collaborations
Writing for other blogs in your niche helps you reach new audiences and build backlinks (great for SEO).
How to Start:
Identify blogs with a similar target audience
Pitch relevant and unique article ideas
Include a link back to your blog in your author bio
You can also collaborate through:
Podcast interviews
Webinars
Roundup posts
Link exchanges (done ethically)
The more you’re seen across the web, the more people will visit your blog.
8. Refresh and Update Old Content
Google values freshness. Instead of only creating new posts, revisit your old ones.
What to Do:
Update facts, stats, and links
Add new content or FAQs
Improve formatting and readability
Optimize for new keywords
Use Google Search Console to find declining posts and revamp them.
9. Analyze and Improve User Experience (UX)
A poor experience can turn visitors away quickly. A fast, user-friendly blog keeps readers engaged and reduces bounce rate.
Improve UX by:
Using fast hosting (e.g., SiteGround, Cloudways)
Installing a responsive theme
Compressing images for faster loading
Avoiding intrusive ads and popups
Ensuring easy navigation and mobile-friendliness
Use tools like PageSpeed Insights, GTmetrix, and Crazy Egg to audit your blog’s UX.
10. Participate in Online Communities
Being active in niche-specific communities can drive targeted traffic to your blog.
Where to Engage:
Reddit (find subreddits related to your niche)
Quora (answer questions with blog links)
Facebook Groups
Discord communities
Industry forums
Contribute value first—don’t just spam links. Become a recognized expert and people will naturally follow your blog.
11. Implement Schema Markup
Schema (or structured data) helps search engines understand your content better and display rich snippets in search results.
Examples:
FAQ schema
Recipe schema
Review schema
Article schema
These enhance your appearance in search results, increasing click-through rates (CTR). Use Google’s Structured Data Markup Helper or plugins like Schema Pro.
12. Use Analytics to Measure What Works
What gets measured, gets managed. Track your performance and double down on what brings results.
Key Metrics:
Pageviews
Traffic sources
Bounce rate
Average time on page
Conversion rates (email signups, sales, etc.)
Tools:
Google Analytics
Google Search Console
Hotjar (for heatmaps)
Matomo (alternative to GA)
Use these insights to fine-tune your content strategy and promotional tactics.
13. Monetize Strategically to Reinforce Value
People are more likely to return to blogs that offer tangible value—and monetization can reinforce this if done right.
Ideas:
Create and sell eBooks or courses
Offer consulting or coaching services
Run an affiliate marketing blog with product guides
Host webinars or workshops
Each monetization method gives readers a reason to engage deeper, share more, and return regularly.
Final Thoughts: Consistency + Strategy = Traffic
Blogging success doesn’t happen overnight. But with consistent content, smart promotion, and ongoing optimization, you can steadily grow your blog traffic.
To summarize, here’s a checklist to follow:
✅ Understand your audience ✅ Conduct keyword research ✅ Create long-form, evergreen content ✅ Optimize for on-page SEO ✅ Promote posts on social media ✅ Build an email list ✅ Guest post and collaborate ✅ Update old content ✅ Improve user experience ✅ Engage in online communities ✅ Implement schema markup ✅ Track analytics and refine ✅ Monetize strategically
If you treat your blog like a business, you’ll get business-like results.
Need More Help?
If you're struggling to grow your blog, consider investing in a blogging course, hiring an SEO expert, or joining mastermind groups to stay accountable and get feedback.
The digital world is overflowing with content—but with the right approach, your blog can become a go-to destination in your niche.
0 notes
Text
WooCommerce Instagram nulled plugin 4.7.0

Unlock the Power of Social Selling with WooCommerce Instagram Nulled Plugin Looking to elevate your WooCommerce store with seamless social media integration? The WooCommerce Instagram nulled plugin offers the ultimate solution for turning your Instagram feed into a shoppable experience. With this powerful tool, you can display stunning Instagram images directly on your product pages, boost engagement, and increase conversions—all without spending a dime. What Is the WooCommerce Instagram Nulled Plugin? The WooCommerce Instagram nulled plugin is a modified version of the premium WooCommerce Instagram extension. It allows online store owners to integrate their Instagram account with their WooCommerce store, showcasing Instagram images tagged with specific hashtags and turning them into clickable product showcases. Downloading the nulled version from our website provides you with full access to the plugin’s premium features, completely free. Technical Specifications Plugin Type: WooCommerce Extension Version: Latest Stable Release Compatibility: WooCommerce 6.x and WordPress 6.x+ Languages Supported: Multilingual (WPML compatible) License: GPL (Nulled, No Activation Required) Features and Benefits of WooCommerce Instagram Nulled Plugin This feature-rich plugin offers everything you need to supercharge your WooCommerce store’s visual appeal and functionality: Instagram Feed Integration: Connect your Instagram profile and showcase stunning images in real-time. Hashtag Product Linking: Automatically link your Instagram images to products using hashtags. Customizable Layouts: Display feeds in grid, carousel, or collage format to match your site’s aesthetics. Enhanced User Engagement: Encourage visitors to explore and buy products through visually appealing posts. SEO and Performance Optimized: Lightweight coding ensures your site stays fast and search engine friendly. Why Choose the Nulled Version? By downloading the WooCommerce Instagram nulled plugin from our site, you gain unrestricted access to all features without worrying about licensing or fees. Unlike demo versions or limited free trials, the nulled version offers complete freedom with regular updates and zero limitations. Best Use Cases for WooCommerce Instagram Nulled Plugin Fashion Stores: Showcase influencer outfits and user-generated content tagged with product-specific hashtags. Home Decor Shops: Display styled product images straight from Instagram to inspire buyers. Beauty Brands: Highlight tutorials and before/after images from your community feed. Travel Gear Stores: Promote user adventures featuring your products in exotic locations. How to Install the Plugin Download the WooCommerce Instagram nulled plugin ZIP file from our website. Log in to your WordPress admin panel and go to Plugins > Add New. Click on Upload Plugin and select the ZIP file you downloaded. Install and activate the plugin. Connect your Instagram account via the plugin settings and start tagging products. Frequently Asked Questions (FAQs) Is the nulled version safe to use? Yes, we ensure all our nulled plugins are tested, malware-free, and safe to use on your WordPress site. Will I get access to updates? Absolutely. We regularly upload updated versions of the WooCommerce Instagram nulled plugin so you stay current with all new features and fixes. Can I use this plugin on multiple sites? Yes, the nulled version is not restricted by domain or license, allowing you to use it on as many websites as you like. How does this compare to the official plugin? Functionality-wise, there is no difference. The nulled version provides the same features and performance as the official release. Get Started Today Don’t miss the opportunity to enhance your WooCommerce store with the dynamic power of Instagram. Download the WooCommerce Instagram today and watch your visual commerce strategy come to life. Looking for a stunning theme to pair with this plugin? Check out Porto
NULLED—a powerful, fast-loading WooCommerce theme that complements your Instagram integration perfectly. Prefer something even more flexible? Explore betheme nulled for a multi-purpose design solution trusted by thousands of developers worldwide.
0 notes
Text
6 Best Custom Gutenberg Blocks Plugins for WordPress — Speckyboy
New Post has been published on https://thedigitalinsider.com/6-best-custom-gutenberg-blocks-plugins-for-wordpress-speckyboy/
6 Best Custom Gutenberg Blocks Plugins for WordPress — Speckyboy
One of the most promising aspects of the Gutenberg block editor is the ability to add your own custom blocks. They can consist of just about any type of formatted content or functionality you can imagine.
And while you can certainly build your own custom blocks, sometimes that’s a bit like reinventing the wheel. This is especially the case when you want to add a common element such as a testimonial, post listing, or timeline. Most likely, these blocks already exist and can be easily added to your website.
Since Gutenberg’s inclusion in WordPress core, the developer community has released a number of different block plugins. Most tend to include a collection of blocks that could come in handy while building your site.
Today, we’ll introduce you to some of the top custom block collections available for WordPress. Let’s get started!
WordPress.com vs. WordPress.org – What’s the difference?
We get this question all the time, and we’re happy to help.
WordPress.org is the most powerful website building software on the web. You will need to find a hosting provider if you want that site online.
WordPress.com is our preferred hosting provider for medium-large traffic websites.
If you want to know why WordPress.com is our preferred host for ambitious passion projects and large website projects, read our review:
Ultimate Addons for Gutenberg includes 20+ custom blocks that cover a wide range of use cases. When it comes to layout, the Advanced Columns block lets you create a highly customized multicolumn row.
There are also blocks for adding Google Maps, icons, CTAs, post carousels, and more. That’s just scratching the surface of what this free plugin can do.
Backed by GoDaddy, CoBlocks is a free WordPress plugin that supercharges Gutenberg. While it offers a number of handy custom blocks (accordion, alert, hero, logos, masonry gallery, pricing table, etc.), its big selling point is in page layout.
Offering a more page builder-like experience, rows, and columns can be dragged to size and customized for responsive layouts. Typography is also highly-tweakable as well.
EditorsKit is a bit different than the other plugins in this collection, as it’s more about extending the blocks already included in Gutenberg. The rich text formatting features allow you to further style your content or wipe out all custom styles with a single click. You can also control the visibility of blocks based on device, login state, or even custom field values.
In addition, there are a ton of productivity tweaks, like support for markdown, code editor syntax highlighting, and the ability to import or export specific blocks. With so many goodies, it may just make Gutenberg feel like a completely different experience.
Kadence Blocks offers a dozen custom blocks that cover common needs. Included are row layouts, advanced galleries, tabs, info boxes, and testimonials – among others.
It also aims to solve one of the more frustrating issues with Gutenberg – the editor’s width on the back end. The plugin contains preset widths that enable content creators to get a better representation of what pages will look like on the front end.
With an aim to both speed up content creation and add different content types, Gutenberg Blocks and Template Library is a compelling option. Much like Atomic Blocks above, the included Section block offers a number of pre-designed templates and layouts.
There are also several customizable elements such as Google Maps, post grids, author info, and a block for Font Awesome icons.
Sure, Advanced Gutenberg comes packed with several custom blocks (post sliders, WooCommerce products, advanced tables, advanced lists, etc.). Those are all nice and handy. But the really interesting feature here is the ability to create “edition” profiles, which allow you to turn blocks on or off for specific users or user roles.
For example, if you only want administrators to have access to the Column Manager block, you can easily set it up. This helps to ensure that lower-level users don’t wreak havoc on your designs.
Get Some New Building Blocks
The default blocks that come with Gutenberg are useful and are constantly being refined. But to create a true page-building experience, you’ll want to add some custom elements.
That’s where the plugins above can help take your website to greater heights. Not only can you add different types of functionality and content, but you can also take greater charge of the editor as a whole.
The bottom line is that if you’re going to use Gutenberg for complex page layouts, you might as well go all in. These plugins will help you do just that.
Related Articles
Related Topics
Written by Eric Karkovack
Eric Karkovack is a web designer and WordPress expert with over two decades of experience. You can visit his business site here. He recently started a writing service for WordPress products: WP Product Writeup. He also has an opinion on just about every subject. You can follow his rants on Bluesky @karks.com.
Read more articles by Eric Karkovack
#ADD#Articles#atomic#author#Building#Business#code#Code Editor#Collections#columns#Community#content#content creation#creators#custom elements#Design#Developer#Features#Google#google maps#grids#gutenberg#Hosting#hosting provider#icons#inclusion#issues#it#layout#lists
1 note
·
View note
Text
Smart Post Show Pro nulled plugin 3.0.1

Smart Post Show Pro is a nulled WordPress plugin that allows users to create stunning layouts that filter and show articles, pages, taxonomy, custom taxonomy, and custom fields. It is SEO-friendly and fully responsive, allowing users to adjust the number of slides shown on desktop, tablet, and mobile devices. Smart Post Show is user-friendly and requires no coding, making it suitable for both programmers and non-programmers. The plugin is performance-optimized and compatible with any WordPress theme, including Genesis, Divi, Avada, WooThemes, and ThemeForest. It is also RTL compliant and translation ready, allowing users to translate Smart Post Show into their native language using.po &.mo files. Smart Post Show Pro offers over 8 clever layout options, including carousel, grid, list, isotope, timeline, zigzag, accordion, and large w/small. It allows users to filter and show posts, pages, taxonomy, custom fields, and custom taxonomy in stunning layouts. The plugin also offers drag & drop to select which content fields to display, allowing users to choose their display order. Users can also customize content fields, such as thumbnails, title, meta fields, content, social share, and custom fields, and display them in one, two, or more ways. Smart Post Show Pro also offers customizable ajax number, load more, scroll infinite, and standard pagination, as well as control fields on detail pages, single and multiple popups with previews. It also allows users to design beyond boundaries without using CSS, offering a wide range of colors, hover colors, and 950+ Google fonts.
0 notes
Text
How to Make a Movie Website: A Step-by-Step Guide
In today’s digital world, a movie website is essential for filmmakers, critics, and movie enthusiasts. Whether you are creating a site to showcase your own films, provide movie reviews, or list upcoming releases, having a professional website can enhance visibility and credibility. This guide will walk you through everything you need to know about how to make movie website that is engaging, functional, and optimized for search engines.
1. Define Your Website’s Purpose
Before diving into website development, define the primary goal of your movie website. Some common purposes include:
Movie streaming website – Showcasing your own or licensed films.
Film blog and reviews – Writing and sharing movie critiques and ratings.
Portfolio for filmmakers – Showcasing your projects and industry experience.
Movie news and updates – Providing the latest updates about upcoming films, trailers, and industry news.
Knowing your focus will help you choose the right design, features, and content strategy.
2. Choose the Right Domain Name
Your domain name is your website’s identity. Choose something relevant, memorable, and easy to spell. Consider the following tips:
Keep it short and simple (e.g., Movieworld.com, CineSpotlight.com).
Use keywords related to your niche (e.g., MovieReviewsHub.com).
Choose a .com domain for credibility.
Avoid numbers and hyphens, as they can confuse users.
3. Select a Reliable Web Hosting Provider
A fast and reliable web hosting service is crucial for website performance. Some popular hosting providers for movie websites include:
Bluehost – Affordable and beginner-friendly.
SiteGround – Excellent speed and customer support.
Hostinger – Budget-friendly and feature-packed.
Cloudways – Best for high-performance hosting.
Ensure the hosting provider supports high-bandwidth streaming if you plan to host video content.
4. Pick the Right Website Platform
The right CMS (Content Management System) or website builder makes development easier. Some great options include:
WordPress – Highly customizable with themes and plugins.
Wix – Drag-and-drop builder for easy design.
Squarespace – Elegant templates and built-in hosting.
Custom Development – Using HTML, CSS, and JavaScript for complete control.
For a movie website, WordPress is often the best choice due to its flexibility and SEO capabilities.
5. Design Your Website for a Cinematic Experience
Your website’s design should reflect the film industry’s aesthetic appeal. Follow these tips:
Use dark mode or a sleek, modern theme for a cinematic feel.
Incorporate high-quality visuals and trailers.
Add a carousel slider to showcase featured movies or reviews.
Use easy navigation with categories like “Latest Releases,” “Reviews,” and “Upcoming Films.”
Ensure a mobile-friendly design since most users browse on their phones.
6. Essential Features for a Movie Website
To make your movie website functional and engaging, include these key features:
Search bar – Helps users find specific movies or articles.
Video embedding – Showcase trailers and clips.
Comment section – Allow user interaction and discussions.
Social media integration – Boost engagement by sharing content.
Newsletter signup – Keep visitors updated on new content.
SEO-optimized blog – Improves website ranking and engagement.
7. Add Movie Content and Reviews
Content is king! Whether you’re showcasing your own films or reviewing others, make sure your content is original, engaging, and SEO-friendly.
Write detailed movie reviews with summaries, critiques, and star ratings.
Use bold keywords to improve search rankings.
Create engaging listicles like “Top 10 Must-Watch Movies.”
Update frequently with fresh content to keep users coming back.
8. Optimize Your Website for SEO
To rank higher on search engines, follow these SEO best practices:
Use targeted keywords in titles, meta descriptions, and content.
Optimize image alt text for better visibility.
Improve website speed using caching plugins.
Build backlinks from reputable film blogs and websites.
Regularly update content to stay relevant.
9. Monetize Your Movie Website
If you want to earn from your movie website, consider these monetization options:
Google AdSense – Display ads and earn from impressions/clicks.
Affiliate marketing – Promote movie merchandise, DVDs, or streaming platforms.
Premium memberships – Offer exclusive content for paying users.
Sponsored content – Collaborate with film studios for promotions.
10. Promote Your Website and Grow Your Audience
Building a website is just the first step; marketing it effectively is essential.
Share content on social media platforms like Instagram, Facebook, and Twitter.
Engage with the film community through forums and discussions.
Use email marketing to notify subscribers about new content.
Consider YouTube and TikTok for visual content promotion.
Leverage influencer marketing by collaborating with film bloggers.
Conclusion
Creating a successful movie website requires careful planning, the right tools, and continuous updates. Whether you’re a film reviewer, a filmmaker, or simply a movie enthusiast, a well-optimized website can boost your online presence and engage your audience effectively. Start today by choosing a platform, designing your site, and publishing high-quality content to attract movie lovers from around the world!

0 notes
Text
Master the Art of Building Efficient WordPress Websites
Creating a fast, user-friendly WordPress site doesn’t have to be complicated. With the right tools, strategies, and a little planning, you can build websites that look great and perform even better! Swipe through this carousel to learn:👉 How to start with a strong foundation👉 The secrets to plugin efficiency👉 Speed optimization tips that work👉 UX strategies to keep visitors engagedLet’s unlock…
0 notes
Text

Work Smarter, Not Harder Use Dropbox As WordPress Hosting
Running a WordPress site often means juggling increasing hosting costs as your content grows. Many website owners find themselves paying premium prices for storage space, especially when their sites become media-heavy with images, videos, and documents.
Maximize Efficiency and Minimize Hosting Costs with Our Integrate Dropbox Plugin for WordPress
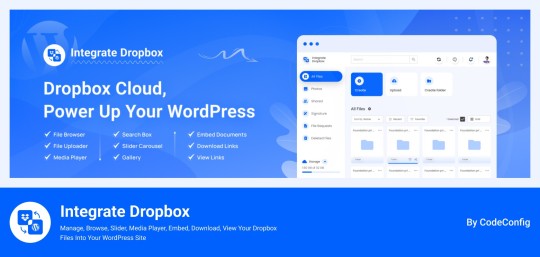
Integrate Dropbox best plugin for WordPress. Our Dropbox integration plugin reimagines how WordPress handles media storage. Instead of relying solely on your hosting server's storage, your media library seamlessly connects with Dropbox's robust infrastructure.
In the digital age, managing media files and optimizing website performance are top priorities for businesses and content creators. The balance between delivering rich media content and maintaining hosting efficiency can be challenging. That’s where Dropbox Integration Plugin comes in, providing a seamless bridge between Dropbox and WordPress to help you streamline file management, save on hosting costs, and enhance your user experience—all without coding hassles.
Why Hosting Optimization Matters
Every media file, video, or high-quality image hosted directly on your WordPress site consumes hosting resources. For companies scaling their content, this can quickly lead to higher hosting costs, slower load times, and potential website downtime. By integrating Dropbox with WordPress, CodeConfig’s plugin allows users to manage, display, and play Dropbox-hosted files directly on their site, significantly reducing the hosting load.
Integrate Dropbox Key Features To Solve Real Problems
Our plugin is packed with features designed to make Dropbox integration simple, secure, and efficient:
Media Library Integration Directly access Dropbox files from your WordPress Media Library. Upload files, use high-quality images for featured posts, and seamlessly add media to your content without overloading your hosting.
Elementor and Gutenberg Integration Designed to work with popular page builders, our plugin offers 7 customizable blocks for Gutenberg and over 7 Elementor widgets. Effortlessly add Dropbox-hosted media, galleries, sliders, and file browsers to your pages without coding.
WooCommerce Compatibility For e-commerce sites, our plugin provides a unique solution for downloadable products. Upload product files to Dropbox and offer them as downloadable products in WooCommerce. This ensures smooth delivery and saves precious server space.
Dynamic File Browser, Gallery, and Media Player Add Dropbox files as interactive elements, such as galleries or media players, directly into your content. This feature is ideal for course creators and content-heavy websites. Our Slider Carousel and Media Player are customizable to fit your brand’s aesthetic, offering both style and function.
Shortcode Builder and Custom Embeds With our intuitive Shortcode Builder, users can quickly generate and customize modules like media players, sliders, and file browsers. Embed files, set view-only permissions, and create download links—all with simple shortcodes. This means less reliance on heavy plugins and more control over your content display.
Saving Costs Without Sacrificing Quality
Using CodeConfig’s Dropbox Integration Plugin not only reduces hosting expenses but also delivers a faster, more reliable user experience. By offloading storage to Dropbox, your website can handle more traffic and richer content without performance dips.
Our responsive design ensures that these features look great on both desktop and mobile, providing a seamless experience across devices.
Lightning-Fast Media Management
WordPress users can now upload media directly through the familiar WordPress interface while the plugin automatically syncs it to Dropbox. No need to learn new tools or change your workflow - everything happens behind the scenes.
Enhanced Website Performance
By offloading media storage to Dropbox, your WordPress site becomes significantly lighter and faster. Your server resources focus on running core WordPress functions rather than handling heavy media requests.
4 notes
·
View notes
Text
Learn How to Create Campaigns, Pixel Setup, Facebook Retargeting, Custom Audience Targeting, A/B Testing
Running successful Facebook ad campaigns requires mastering various strategies that optimize ad performance and reach the right audience. Whether you're an experienced marketer or just getting started, understanding Facebook's ad platform features like campaign creation, pixel setup, retargeting, custom audience targeting, and A/B testing can greatly enhance your ability to generate results. This guide will walk you through these key strategies step-by-step, helping you achieve better campaign performance and ultimately increase your ROI.
1. Introduction: The Importance of Facebook Ads
Facebook Ads are one of the most powerful tools for digital marketing. With over 2.8 billion monthly active users, Facebook offers businesses unparalleled access to target specific audiences based on interests, behaviors, and demographics. To get the most out of Facebook Ads, you need to understand how to properly set up campaigns, track results, and optimize your approach.
2. How to Create Facebook Ad Campaigns
Creating a Facebook ad campaign involves several steps. Let’s break them down.
Step 1: Choose Your Campaign Objective
When creating a campaign, the first thing you need to do is define your objective. Facebook offers various campaign objectives, each serving different goals. These include:
Awareness: Reach a broad audience to create awareness for your product or service.
Consideration: Engage users and encourage them to learn more, download, or visit your website.
Conversion: Drive sales, leads, or specific actions on your website or app.
Step 2: Set Your Budget and Bidding Strategy
Decide on a daily budget or a lifetime budget for your campaign. A daily budget limits how much you spend each day, while a lifetime budget allows Facebook to optimize your budget across the duration of your campaign. You’ll also need to choose a bidding strategy that aligns with your campaign objective (e.g., cost per click or cost per impression).
Step 3: Define Your Audience
Targeting the right audience is critical for the success of your campaign. Facebook allows you to target based on:
Demographics: Age, gender, education, job title, etc.
Interests: Hobbies, lifestyle choices, and pages people follow.
Behaviors: Purchase behavior, device usage, etc.
Step 4: Create Your Ad
Choose your ad format—carousel, single image, video, collection, etc.—and add engaging visuals, compelling text, and a strong call to action (CTA). The CTA should align with your campaign objective (e.g., "Shop Now" for a conversion campaign).
Step 5: Review and Launch
Before launching, double-check your ad creative, budget settings, and audience to ensure everything is in order. Once you're satisfied, launch your campaign.
3. Facebook Pixel Setup: Tracking and Optimizing Conversions
The Facebook Pixel is a small piece of code that you add to your website. It tracks user interactions on your website, providing valuable insights into how visitors are engaging with your content.
Step 1: Create a Facebook Pixel
To create a pixel, go to the Events Manager in Facebook Ads Manager. Select Pixels under Data Sources, then click Create a Pixel. Give it a name and link it to your ad account.
Step 2: Add the Pixel Code to Your Website
You can install the pixel code on your website manually, or use a tag manager if you're using platforms like Shopify or WordPress. If you're using WordPress, there are plugins like PixelYourSite that simplify the process.
Step 3: Verify Pixel Installation
Once installed, test your pixel to ensure it’s working properly using Facebook's Pixel Helper Chrome extension. This tool will notify you if the pixel is firing correctly.
Step 4: Use the Pixel for Retargeting
The pixel allows you to track specific actions such as page views, add-to-carts, and purchases. This information is essential for retargeting users who have already interacted with your website or product.
4. Facebook Retargeting: Re-engage Interested Users
Retargeting is one of the most effective strategies for boosting conversion rates. By showing ads to people who have already interacted with your website, you increase the chances of them completing the desired action.
How to Set Up Retargeting Campaigns:
Create a Custom Audience: Use your pixel data to create a Custom Audience based on actions people have taken on your website. For example, you could retarget users who visited a product page but didn’t make a purchase.
Design Retargeting Ads: Create ads specifically aimed at people who have already interacted with your website. For instance, show an ad offering a discount for users who added items to their cart but didn’t check out.
Set Frequency Caps: Avoid bombarding users with the same ad repeatedly. Facebook allows you to set frequency caps, limiting the number of times a person sees your ad.
5. Custom Audience Targeting: Reaching the Right People
Custom Audiences allow you to target users based on their specific actions or demographics.
Types of Custom Audiences:
Website Traffic: Retarget users who have visited your website or specific pages.
Engagement: Target people who have interacted with your Facebook or Instagram posts, videos, or ads.
Customer List: Upload your email list to Facebook and target users who have already shown interest in your product or service.
How to Create Custom Audiences:
Go to Audiences in Ads Manager.
Click on Create Audience and select Custom Audience.
Choose your audience source (e.g., website traffic, customer list, engagement, etc.).
Define your audience’s parameters (e.g., people who visited your website in the past 30 days).
Save and use this audience in your ad campaign targeting.
6. A/B Testing: Optimize Your Ads for Better Results
A/B testing, also known as split testing, allows you to test different versions of your ad to see which one performs best.
How to Set Up A/B Testing:
Create Multiple Ad Variants: Create two or more versions of an ad. You can test different headlines, images, CTA buttons, or audience segments.
Set Up the Test in Ads Manager: When creating your ad, select the A/B Test option. Facebook will automatically split your audience and show different ad variations.
Analyze the Results: After the test has run for a few days, check the results to determine which ad variant performed the best. You can then scale the winning version for better results.
Best Practices for A/B Testing:
Test one variable at a time (e.g., only test the headline or only the image) to get clear insights.
Run tests for a sufficient duration to gather enough data.
Continuously optimize based on test results to improve campaign performance over time.
7. Conclusion: Mastering Facebook Ads for Consistent Results
Creating effective Facebook ad campaigns involves multiple layers of strategy and optimization. By mastering key elements like campaign creation, pixel setup, retargeting, custom audience targeting, and A/B testing, you can significantly improve your ad performance and generate a consistent return on investment. Keep experimenting, analyze your results, and refine your approach as you gain more experience.
FAQs
What is the Facebook Pixel and why is it important?
The Facebook Pixel is a tool that helps track website activity, enabling retargeting and better ad optimization based on user actions.
How do I know which audience to target in my Facebook ad campaigns?
Use Facebook’s audience targeting options such as demographics, interests, behaviors, or even Custom Audiences based on website visits or engagement.
How long should I run A/B tests for Facebook Ads?
Run A/B tests for at least 3–5 days to gather enough data for meaningful results, depending on your ad spend and audience size.
What is the difference between a Custom Audience and a Lookalike Audience?
A Custom Audience targets people who have interacted with your brand, while a Lookalike Audience targets new users who resemble your existing customers.
Can I retarget users who have abandoned their cart?
Yes, you can set up retargeting ads for people who visited your cart page but didn’t complete the purchase.
0 notes
Text
5 Important WordPress Website Development Tools
When it comes to developing a WordPress website, having the right tools can make all the difference. Here, we explore five essential tools that can help you build and manage a professional, visually appealing, and functional website.
1. Ultimate Coming Soon & Maintenance Plugin
Starting a new website or making significant changes? The Ultimate Coming Soon & Maintenance Plugin is a must-have tool. This plugin allows you to create a stunning "Coming Soon" or "Maintenance Mode" page, ensuring visitors know something exciting is in the works. With customizable templates, social media integration, and subscriber forms, you can start building an audience even before your website goes live. It's perfect for maintaining a professional appearance during site development or updates.
2. Ultimate Team Showcase Plugin
Showcasing your team effectively can build trust and credibility with your audience. The Ultimate Team Showcase Plugin offers over 85+ unique layouts to present your team members in the best light. Whether you're displaying profiles, skills, or social media links, this plugin provides a polished and professional look. It's ideal for businesses, agencies, and organizations looking to highlight their team members' expertise and roles.
3. RS Logo Showcase Plugin
Your brand's logo is a crucial element of your website's identity. The RS Logo Showcase Plugin allows you to display logos in various stylish ways, including grids, carousels, and sliders. Whether you want to showcase client logos, partner logos, or sponsor logos, this plugin provides flexible options to suit your website's design. It's an excellent tool for enhancing brand recognition and adding a professional touch to your site.
4. Fancy Post Grid – Ultimate Post Grid Builder Plugin
Organizing and presenting your blog posts or portfolio items attractively is essential for user engagement. The Fancy Post Grid Plugin offers 13+ free unique and modern styles, with additional premium options. This plugin lets you create visually appealing grids, sliders, lists, and filter layouts to display your content. With customizable options, you can tailor the grids to match your website's design, ensuring a seamless and engaging user experience.
5. Premium Theme Collections
Choosing the right theme sets the foundation for your website's look and functionality. Many Premium Theme Collections companies offer various high-quality, responsive themes designed for different niches and purposes. These themes come with advanced customization options, ensuring you can create a unique and professional website. Whether you're building a corporate site, a blog, an e-commerce store, or a portfolio, premium themes provide the flexibility and features you need to succeed.
Conclusion
Developing a WordPress website involves more than just choosing a theme. The right plugins can enhance functionality, improve user experience, and add a professional touch to your site. The Ultimate Coming Soon & Maintenance Plugin, Ultimate Team Showcase Plugin, RS Logo Showcase Plugin, Fancy Post Grid Plugin, and Premium Theme Collections are essential tools for any WordPress developer. By incorporating these tools into your website development process, you can create a site that is not only visually appealing but also highly functional and user-friendly. Happy website building!
#premium wordpress theme#education & online course wordpress theme#wordpress premium themes#paid wordpress themes#online learning wordpress theme#wordpress plugins#education wordpress theme#app landing wordpress theme#consulting business wordpress theme#premium wordpress themes
0 notes
Text
Divi Supreme Pro v4.9.97.19 Plugin
https://themesfores.com/product/divi-supreme-pro-wp-plugin/ Divi Supreme Pro v4.9.97.19 Plugin Divi Supreme Pro WordPress Plugin enhances the experience and features found on Divi and extends with 41 and counting custom Divi creative modules and 5 Divi extensions to help you build amazing websites. Divi Supreme Pro Divi Supreme Pro Download Today we have shared GPL Divi Supreme Pro WordPress Addone Plugin. The shared file is not Divi Supreme Pro nulled or cracked. it’s a 100% genuine GPL file, and you can use this Divi Supreme Pro Plugin GPL file on unlimited websites. Features of Divi Supreme Pro WordPress Plugin Gradient Text Facebook Like Button Contact Form 7 Menu Image Hover Reveal Tilt Image Caldera Forms Glitch Text Image Text Reveal Price List Facebook Feed Embed Google Map Icon Divider Typing Effect Shuffle Letters Icon List Mask Text Shapes More coming soon! Text Divider Facebook Comments Text Badges Business Hours Animated Gradient Text Card Carousel Text Rotator Flipbox Floating Multi Images Star Rating Image Carousel Dual Heading Scroll Image Supreme Button Supreme Image Facebook Embed Twitter Timelines Image Hotspots Card Divi Supreme Pro WordPress Plugin Changelog Fixed: Cannot modify header information – headers already sent by message in some cases when end user is trying to activate/deactivate license key. Removed: One JS script enqueued in Visual Builder (Improve speed load). Fixed: Unit in Divi Shuffle Text Module. Enhanced: Divi Block Reveal Image Module Animation in Visual Builder. Enhanced: Divi Block Reveal Text Module Animation in Visual Builder. Added: Dynamic Link in Divi Icon List Module. Zoom on Hover in Divi Masonry Module. For License Key: themesfores.com products are functional without entering a product license code. We are unable to provide a license code for you, and it’s because we already obtained the Plugin/Theme from the original developer. The use of a license code usually is for automatic updates and premium support from the original developer. Besides, we guarantee you to deliver a free manual update and minor assistance for your convenience in using the product. https://themesfores.com/product/divi-supreme-pro-wp-plugin/ #Addon #WordpressPlugins
0 notes
Text
Creative Post Carousel Addon for Elementor
The Creative Post Carousel Addon for Elementor is a dynamic and stylish plugin designed to showcase your posts in a visually appealing carousel format. Ideal for bloggers, content creators, and businesses, this addon integrates seamlessly with Elementor to provide a modern and engaging way to display posts. With its customizable options and smooth transitions, it’s perfect for enhancing user…

View On WordPress
0 notes