#WordPress JSON plugin
Explore tagged Tumblr posts
Visit Tumblr Blog
Explore Tumblr blogs with no restrictions, modern design and the best experience.
Last Seen Tumblr Blogs


Fun Fact
Tumblr has 4 main sources of revenue.
Text
Unlocking the Power of WP REST API: A Comprehensive Guide
Why Should You Use the WP REST API? The WP REST API is a powerful tool that allows you to interact with your WordPress site’s data and functionality using the JSON format. Whether you’re a developer, designer, or site owner, understanding and utilizing the capabilities of the WP REST API can greatly enhance your WordPress experience. Here are some key reasons why you should consider using the WP…
#API Integration#development#JSON#plugins#REST API#website development#WordPress#WordPress Development#WordPress REST API
0 notes
Text
REST API for Perfex Customers Nulled Script 1.0.0

Unlock Premium Access with the REST API for Perfex Customers Nulled Script If you're looking to supercharge your customer management system with powerful API connectivity, the REST API for Perfex Customers Nulled Script is exactly what you need. This game-changing module is now available for free download, giving you seamless control over your Perfex CRM customers—without the usual premium price tag. What Is the REST API for Perfex Customers Nulled Script? The REST API for Perfex Customers Nulled Script is an advanced add-on that integrates directly with the Perfex CRM, allowing developers and administrators to manage customer data effortlessly through RESTful API endpoints. Designed with flexibility and scalability in mind, this script offers full control over customer interactions, making data synchronization and external system integrations easier than ever. Technical Specifications Compatibility: Fully compatible with Perfex CRM version 3.0 and above API Type: RESTful Authentication: Token-based secure authentication Supported Methods: GET, POST, PUT, DELETE Data Format: JSON Top Features and Benefits Real-Time Access: Fetch and manage customer records in real-time with minimal latency. Secure Integration: Built with robust token-based authentication to ensure secure data transactions. Flexible API Endpoints: Customize API interactions based on your workflow and system design. Developer Friendly: Clean documentation and sample code snippets make integration straightforward for developers. Boost Automation: Perfect for automating repetitive customer management tasks. Why Choose the Nulled Version? By opting for the REST API for Perfex Customers you gain unrestricted access to premium features without any licensing limitations. It's a smart solution for developers and businesses looking to test, develop, or deploy customer-focused features efficiently. Our nulled plugins collection includes this script and many more, all verified and ready for use. Ideal Use Cases Third-party Integrations: Sync customer data with eCommerce platforms, CRMs, or accounting systems. Mobile App Development: Pull customer data into Android or iOS apps using the RESTful interface. Customer Portals: Create dynamic user dashboards that interact directly with your Perfex CRM database. Easy Installation and Setup Installing the REST API for Perfex Customers Nulled Script is quick and simple. Just follow these steps: Download the script from our website. Upload it to your Perfex CRM modules directory. Activate the module from the admin panel. Generate your API token and start integrating! There’s no complicated configuration required. The module is designed to work right out of the box, ensuring you get up and running within minutes. Frequently Asked Questions (FAQs) Is the nulled version safe to use? Yes, our team carefully tests each script to ensure it's clean, safe, and functional. However, we recommend using it in a staging or development environment first. Can I use this for commercial projects? Absolutely. The REST API for Perfex Customers Nulled Script is ideal for freelancers, agencies, and businesses seeking cost-effective solutions for their clients. Will I get updates with this version? Nulled scripts typically do not come with automatic updates. However, we regularly post updated versions on our platform. Is support included? Since this is a nulled version, official support from the original developer is not included. That said, our community forum is a great place to get help and share knowledge. Download Your Free Copy Today Don't miss out on the opportunity to transform your customer data management. The REST API for Perfex Customers is available for free download and ready to integrate with your Perfex CRM installation today. For additional design resources, be sure to explore the best nulled themes available for WordPress users. Streamline your operations, enhance customer experiences, and stay ahead of the competition—without breaking the bank.
0 notes
Text
6 Schema Markup Mistakes Hurting Your Local SEO (And How to Fix Them)
If you’re running a local business in Singapore: be it a hipster café in Tiong Bahru, a dental clinic in Bedok or a law firm in Raffles Place, your digital visibility isn’t just about having a website. It’s about getting found. That’s where Schema Markup (or structured data) becomes your secret SEO weapon.
But here’s the kicker: most SMEs in Singapore either don't use schema at all or they unknowingly implement it incorrectly. This means wasted SEO opportunities, less visibility on Google SERPs (Search Engine Results Pages) and ultimately, fewer customers walking through your doors.
Let’s break down the six most common schema markup mistakes that might be quietly sabotaging your local SEO in Singapore and how you can fix them fast.
1. Not Implementing Local Business Schema at All
This one’s a bit passe, but it happens more than you think.
Local Business schema tells Google key info about your business- name, address, phone number, opening hours and more. If you haven’t implemented it, you're essentially not telling Google who you are and what you do. That's a tall order SEO blunder in a local context like Singapore, where Google prioritises relevance and proximity.
Pro-Tip:
Use Google’s Structured Data Markup Helper to generate basic schema in JSON-LD format. Plug it into your <header> section or via Google Tag Manager.
2. Using the Wrong Schema Type
A local bubble tea shop using "Corporation" instead of "Local Business"? That's like listing your hawker stall as a multinational conglomerate- a major mismatch.
Singapore's business landscape is diverse. There are over 280 types of schema available. Choosing the wrong one affects how Google interprets your business and can hurt how you appear in relevant searches.
Here's a Quick Fact:
According to Moz, businesses that use specific schema types see up to 30% more rich results in SERPs compared to those using generic ones.
So here's what you need to do. Head over to schema.org and find the most accurate business type. Not sure which one to use? Go for “Local Business” and nest a more specific subtype inside.
3. Missing Key Fields in Your Schema
Many Singapore businesses include only the basics: Name, Address, Phone number (commonly called NAP). But to truly optimize for rich snippets, you need to flesh it out. Here's what we are talking about:
Opening hours
Service area
Ratings and reviews (even if you’ve just a few 4-star ones)
Geo coordinates (lat-long helps Google Maps)
Here's a key industry insight:

4. Inconsistent NAP Across Web and Schema
For instance, in Singapore, unit numbers and postal codes matter a lot. A missing "#05-12" or an outdated postal code can throw Google off.
If your schema says you're at “Orchard Road #03-09,” but your Facebook page says “Orchard Road #03-12,” Google flags it as inconsistent. This hurts your local rankings and confuses potential customers.
Here's how to fix it:
Ensure the NAP format is identical across your website, Google Business Profile and third-party listings like Street directory or SG YellowPages.
Use Singapore's standard address format, i.e. Block Number, Street Name, Unit Number, Postal Code.
5. Not Validating Your Schema Regularly
Even seasoned SEO specialists sometimes forget this: just because your schema is there, doesn’t mean it’s working.
In fact, your Schema can break during one or more of these instances:
CMS updates (hello, WordPress plugins!)
Theme changes
Manual edits to code
How to Fix It Like a Pro:
Validate your schema using Google’s Rich Results Test or Schema.org Validator. Set a monthly reminder to check it; it’s quick and prevents long-term damage.
6. Forgetting About Review Markup
Reviews are gold in Singapore’s kiasu culture. We all check Google ratings before buying or booking anything. Yet, many local businesses fail to add Review or Aggregate Rating Schema. This means they miss out on the juicy stars that appear in search results, which boosts CTR by up to 35%, according to Search Engine Journal.
Even if you only have a handful of legit reviews, it’s better than none. Embed them properly in your Schema using JSON-LD format. Avoid fake or auto-generated reviews, Google is smarter than that.
Technical Deep Dive: Implementing & Validating Local Business Schema in JSON-LD
If you're aiming to boost your local SEO performance in Singapore, correctly implementing Local Business Schema using JSON-LD is essential. Below is a ready-to-use example tailored for a digital marketing or SEO consultancy like Katalysts.
Step 1: Use the Right Schema Type
For Katalysts, the most suitable type is ProfessionalService under LocalBusiness.
{
"@context": "https://schema.org",
"@type": "ProfessionalService",
"name": "Katalysts",
"image": "https://www.katalysts.net/assets/logo.png",
"address": {
"@type": "PostalAddress",
"streetAddress": "329 River Valley Road",
"addressLocality": "Singapore",
"postalCode": "238361",
"addressCountry": "SG"
},
"geo": {
"@type": "GeoCoordinates",
"latitude": 1.2966,
"longitude": 103.8396
},
"url": "https://www.katalysts.net/",
"telephone": "+65 8096 3700",
"openingHours": "Mo-Fr 09:00-18:00",
"priceRange": "$$$",
"aggregateRating": {
"@type": "AggregateRating",
"ratingValue": "4.9",
"reviewCount": "102"
}
Step 2: Add JSON-LD to Your Website
Option 1: Insert directly into your site’s <head> section Option 2: Use Google Tag Manager for easier deployment and updates Option 3: If on WordPress, use a plugin like Rank Math or Yoast SEO Pro for built-in schema support.
Step 3: Validate Your Schema Markup
Use these free tools to test for errors or warnings:
Google Rich Results Test
Schema.org Validator
Merkle Schema Generator
Pro-Tip: Set a monthly reminder to revalidate your schema—especially after any CMS or plugin update.
Step 4: Keep Schema Up to Date
Schema isn’t static. Google's guidelines and search features evolve. Keep an eye on:
Google’s Structured Data Guidelines
Schema.org updates
Bonus: Schema isn’t a “Set and Forget”
Schema isn’t a one-time project; it’s like your kopi order and must be customized and adjusted over time.
Google updates its guidelines, new schema types get introduced, and your business evolves. Make schema audits part of your quarterly SEO housekeeping, just like checking your Google Analytics or updating product pages.
Here’s a quick relook at your Schema checklist:
Implement Local Business schema
Use the right schema type
Fill in all relevant fields
Ensure consistent NAP details
Validate schema regularly
Include reviews to earn those gold stars
Getting your structured data right isn’t just good SEO, it’s smart business. And in Singapore’s competitive local scene, it might be the difference between showing up first or getting buried under your competitors.
Want to optimize your schema for better local rankings?
Katalysts helps Singapore businesses unlock higher visibility with smart, structured data strategies. Reach out for a quick audit or consultation.
Source: This blog is first published on Katalysts.net
0 notes
Text
Unlocking Seamless Integrations: A Comprehensive Guide to the 'Contact Form to Any API' WordPress Plugin
In today's digital landscape, integrating your website's contact forms with various APIs is crucial for streamlined operations and enhanced user experiences. The Contact Form to Any API WordPress plugin stands out as a versatile tool, enabling seamless connections between your contact forms and a multitude of third-party services. This comprehensive guide delves into the features, benefits, and practical applications of this powerful plugin.

Understanding the Need for API Integration
Before exploring the plugin's capabilities, it's essential to grasp the significance of API integrations:
Enhanced Efficiency: Automating data transfer between your website and external platforms reduces manual tasks.
Improved Data Accuracy: Direct integrations minimize errors associated with manual data entry.
Real-Time Updates: Immediate data synchronization ensures up-to-date information across platforms.
Scalability: As your business grows, integrated systems can handle increased data flow without additional overhead.
Introducing 'Contact Form to Any API'
Developed by IT Path Solutions, 'Contact Form to Any API' is designed to bridge the gap between your WordPress contact forms and external APIs. Whether you're using Contact Form 7 or WPForms, this plugin facilitates the transmission of form data to various services, including CRMs, marketing platforms, and custom APIs.
Key Features
1. Broad API Compatibility
Supports Over 150 APIs: Seamlessly connect with platforms like Mailchimp, HubSpot, Zapier, Odoo CRM, and more.
Custom API Integration: Configure connections with virtually any REST API, providing unparalleled flexibility.
2. Flexible Data Transmission
Multiple HTTP Methods: Choose between POST and GET requests based on your API's requirements.
JSON Formatting: Send data in simple or nested JSON structures, accommodating complex API schemas.
Header Customization: Set custom headers, including Authorization tokens, to meet specific API authentication needs.
3. File Handling Capabilities
File Upload Support: Enable users to upload files through your forms.
Base64 Encoding: Automatically convert uploaded files to Base64 format for API compatibility.
4. Data Management and Export
Database Storage: Store form submissions within your WordPress database for easy access.
Export Options: Download submission data in CSV, Excel, or PDF formats for reporting and analysis.
5. Conditional Data Sending
Timing Control: Decide whether to send data to the API before or after the form's email notification is dispatched.
6. Authentication Support
Multiple Authentication Methods: Utilize Basic Auth, Bearer Tokens, or custom headers to authenticate API requests.
Pro Version Enhancements
Upgrading to the Pro version unlocks additional features:
Multi-API Support: Send form data to multiple APIs simultaneously.
Advanced JSON Structures: Handle multi-level JSON formats for complex integrations.
Priority Support: Receive expedited assistance from the development team.
OAuth 2.0 and JWT Integration: Facilitate secure connections with APIs requiring advanced authentication protocols.
Real-World Applications
The versatility of 'Contact Form to Any API' opens doors to numerous practical applications:
CRM Integration: Automatically add new leads to your CRM system upon form submission.
Email Marketing: Subscribe users to your mailing list in platforms like Mailchimp or Sendinblue.
Support Ticketing: Create support tickets in systems like Zendesk or Freshdesk directly from contact forms.
Project Management: Generate tasks in tools like Trello or Asana based on form inputs.
User Testimonials
The plugin has garnered positive feedback from the WordPress community:
"Does exactly what is needed – connects your contact form to API. Works great out of the box, and amazing support." — Olay
"I used the free plugin for a while already, recently stepped over to the pro and I must say the pro and agency version come with amazing new features and the support is quick and always there to help you with any questions!" — Samuellegrand
Getting Started: Installation and Configuration
Step 1: Installation
Navigate to your WordPress dashboard.
Go to Plugins > Add New.
Search for "Contact Form to Any API."
Click "Install Now" and then "Activate."
Step 2: Configuration
Access the plugin settings via the WordPress dashboard.
Choose the form (Contact Form 7 or WPForms) you wish to integrate.
Enter the API endpoint URL.
Configure the request method (POST or GET).
Set up headers and authentication details as required.
Map form fields to the corresponding API parameters.
Save your settings and test the integration.
Best Practices for Optimal Integration
Test Thoroughly: Use tools like Postman to test API endpoints before full integration.
Secure Sensitive Data: Ensure that authentication tokens and sensitive information are stored securely.
Monitor Logs: Regularly check logs for any errors or issues in data transmission.
Stay Updated: Keep the plugin and WordPress core updated to benefit from the latest features and security patches.
Conclusion
'Contact Form to Any API' stands as a robust solution for WordPress users seeking seamless integration between their contact forms and external services. Its flexibility, extensive feature set, and user-friendly interface make it an invaluable tool for enhancing website functionality and streamlining workflows.
Whether you're aiming to automate lead generation, enhance customer support, or synchronize data across platforms, this plugin offers the capabilities to achieve your goals efficiently.
0 notes
Text
Hướng dẫn fix tự động tạo schema dạng NewsArticle như trên cho bài viết WordPress
🌿💡 Nếu bạn muốn tự động tạo schema dạng NewsArticle như trên cho bài viết WordPress, bạn có thể dùng plugin sau: ✅ 🎯 Rank Math SEO (Miễn phí + Pro) 📌 Hỗ trợ đầy đủ Schema Markup, bao gồm: NewsArticle, Article, BlogPosting Tự động chèn JSON-LD Tùy chỉnh headline, author, datePublished… 🔧 Cách bật NewsArticle Schema: Vào Rank Math > Titles & Meta > Post Types > Bài viết Ở mục Schema Type, chọn:…
0 notes
Text
The Role of Schema Markup in Enhancing SEO

If you've ever wondered how search engines understand the content of your website, schema markup is a tool that can make a significant difference. It’s a way to help search engines better interpret your site’s information, leading to improved search visibility and richer search results.
What is Schema Markup?
Schema markup is a type of microdata that you can add to your website’s HTML. It creates an enhanced description, or "rich snippet," that appears in search results. Schema tells search engines what your data means, not just what it says. For instance, if you have a product page, schema markup can help search engines understand that the page contains product information, including price, availability, and reviews.
How Does Schema Markup Help SEO?
Improved Click-Through Rates (CTR): Rich snippets provide additional information directly on the search results page, which can make your listing more appealing to users. Higher CTRs can lead to more traffic to your website.
Better Search Rankings: While schema markup itself isn't a direct ranking factor, the improved user engagement and CTR from rich snippets can positively influence your site's overall search engine rankings.
Enhanced User Experience: By providing more context about your content directly in search results, schema markup helps users quickly find what they're looking for, leading to a better user experience.
Common Types of Schema Markup
Article: Used for blog posts and news articles to help search engines understand the content.
Local Business: Helps to provide details about your business, including location, hours, and contact information.
Product: Used on eCommerce sites to give information about products, including prices, ratings, and availability.
Event: Ideal for promoting events, helping search engines display key event details like date, location, and ticket prices.
How to Implement Schema Markup
Implementing schema markup can be done in several ways:
Manual Coding: You can add the necessary microdata directly into your site's HTML code. This requires some knowledge of HTML and schema.org vocabulary.
Plugins and Tools: If you use a content management system (CMS) like WordPress, there are plugins available that can help you implement schema markup without needing to code.
Google’s Structured Data Markup Helper: This tool guides you through adding schema markup to your website, even if you don’t have extensive coding skills.
Example of Schema Markup
Here’s a simple example of schema markup for a local business:
html
CopyEdit
<script type="application/ld+json"> { "@context": "https://schema.org", "@type": "LocalBusiness", "name": "Best SEO Agency in Bhubaneswar", "address": { "@type": "PostalAddress", "streetAddress": "123 SEO Street", "addressLocality": "Bhubaneswar", "addressRegion": "OD", "postalCode": "751001", "addressCountry": "IN" }, "telephone": "+91-1234567890" } </script>
This code tells search engines about the business’s name, address, and phone number, helping it appear in local search results more effectively.
Why the Best SEO Agency in Bhubaneswar Uses Schema Markup
The best SEO agency in Bhubaneswar knows the value of schema markup in boosting their clients' visibility. By implementing schema, they ensure that their clients’ websites are well-understood by search engines, leading to better rankings and more traffic. They also stay updated on the latest schema types and best practices to offer the most effective SEO strategies.
Conclusion
Schema markup is a powerful tool in the world of SEO. By providing search engines with more context about your content, you can improve your site's visibility, attract more clicks, and enhance the overall user experience. Whether you're a business owner or a digital marketer, learning and applying schema markup can give your website an edge in the competitive online landscape. So, take the time to implement schema markup on your site and see the difference it makes in your search engine performance.
#digital marketing and advertising agency#best web dvelopment company in odisha#best SEO agency in bhubaneswar#ecommerce website development companies in bhubaneswar#website development companies in bhubaneswar#best digital marketing company in bhubaneswar
0 notes
Text
A Comprehensive Guide to WordPress Development with Examples

WordPress is the most popular content management system (CMS) globally, powering over 40% of websites on the internet. Whether you’re a beginner or a seasoned developer, WordPress offers unparalleled flexibility and scalability, making it the go-to platform for websites ranging from personal blogs to large-scale e-commerce stores. This blog will guide you through the fundamentals of WordPress development with practical examples.
Why Choose WordPress for Web Development?

WordPress is an excellent choice for web development due to its versatility, user-friendliness, and extensive ecosystem. Here are key reasons to choose WordPress:
Ease of Use: The intuitive interface makes it accessible for users with no coding experience.

Customizability: Thousands of themes and plugins allow developers to create unique, feature-rich websites.

SEO-Friendly: Built-in SEO tools and plugins like Yoast SEO ensure higher search engine rankings.

Community Support: A vast community of developers and users provides extensive documentation and troubleshooting help.
Cost-Effective: It’s open-source, reducing upfront costs, and many plugins and themes are free or affordable.
Scalability: Suitable for all project sizes, from small blogs to enterprise-level applications.
Most Common and Popular Uses of WordPress Development
WordPress is a versatile platform that supports a wide range of applications:
Blogs and Personal Websites: Ideal for bloggers and content creators to share ideas and stories.
E-Commerce Websites: Plugins like WooCommerce transform WordPress into a robust online store.
Business Websites: Professional websites for showcasing services, portfolios, and client testimonials.
Educational Platforms: Create e-learning websites with plugins like LearnDash or Tutor LMS.
Membership Sites: Restrict access to exclusive content using membership plugins.
News Portals and Magazines: Build dynamic websites with features like category filtering and custom layouts.
Portfolio Websites: Showcase creative work with visually appealing themes tailored for portfolios.
Click Here To Explore Your Knowledge About Wordpress Development
Key Components of WordPress Development
Themes:
Control the appearance and layout of a WordPress site.
2. Plugins:
Extend the functionality of WordPress.
3. Widgets and Shortcodes:
Widgets enhance the sidebar or footer.
Shortcodes embed custom functionality directly into posts or pages.
4. APIs:
WordPress REST API allows developers to interact with WordPress using JSON.
Benefits of WordPress Development

Flexibility: WordPress can support any type of website, from a simple blog to a full-fledged e-commerce site.
2. Extensive Plugin Ecosystem: With over 50,000 plugins, developers can add virtually any feature to a site.
3. Mobile-Responsive: Most WordPress themes are mobile-friendly, ensuring a seamless experience across devices.
4. Easy Maintenance: Regular updates to themes, plugins, and the core WordPress software ensure stability and security.
5. Large Community: Access to thousands of tutorials, forums, and resources for problem-solving and inspiration.
6. Integration Capabilities: Easily integrate with social media platforms, email marketing tools, and payment gateways.
Steps to Start WordPress Development
Set Up a Local Development Environment:
Use tools like XAMPP, MAMP, or Local by Flywheel.
Install WordPress locally and configure your database.
2. Learn the Basics of PHP, HTML, CSS, and JavaScript:
WordPress is built on PHP, with front-end elements using HTML, CSS, and JavaScript.
3. Understand WordPress Hierarchy:
Learn how templates like header.php, footer.php, and single.php work.
4. Work with the WordPress Codex:
The Codex provides extensive documentation for developers.
5. Experiment with Themes and Plugins:
Start by customizing existing themes and writing simple plugins.
Tips for Successful WordPress Development
Follow Best Practices: Use coding standards to ensure maintainable and secure code.
Leverage Child Themes: Avoid directly modifying core themes by using child themes.
Optimize Performance: Use caching plugins and optimize images for faster load times.
Secure Your Website: Implement SSL, regular updates, and strong authentication measures.
Conclusion
WordPress development offers endless possibilities for creating dynamic, feature-rich websites. By mastering its core components, leveraging its powerful APIs, and experimenting with customizations, you can develop applications tailored to diverse business needs. Start small, build your expertise, and soon you’ll be crafting WordPress solutions that stand out in today’s competitive digital landscape.
0 notes
Text
6 Amazing Tips for Headless WordPress Development | Island Wizards

Headless WordPress development is a new and exciting way to create flexible, fast, and modern websites. By separating WordPress as a content management system (CMS) from the front-end display, you can have total freedom to use powerful frameworks like React, Vue.js, or Next.js. But how do you get the most out of this setup? Here are six amazing tips from Island Wizards to help you succeed!
1. Choose the Right API for Your Needs
Explanation: In headless WordPress, communication happens through APIs. You can use either the REST API or GraphQL to connect your content to the front end.
Tip: GraphQL can be more flexible, allowing you to fetch only the data you need, making your site faster. At Island Wizards, we often use GraphQL for projects with complex data requirements to keep things simple and efficient.
2. Focus on Performance Optimization
Explanation: The speed of your site matters—a lot. Since headless sites depend on API calls, making them fast is crucial.
Tip: Reduce data transfer by optimizing API requests and using caching. Island Wizards recommends static site generation (SSG) whenever possible, which makes pages load lightning-fast by pre-generating content.
3. Structure Your Content Wisely
Explanation: Good content structure is the backbone of headless WordPress development. Think about how your content types, taxonomies, and fields are set up.
Tip: Use plugins like Advanced Custom Fields (ACF) to create flexible data models. This makes it easier to pull the right content for your front end. Island Wizards always starts projects by carefully planning how content should be organized.
4. Use a Reliable Front-End Framework
Explanation: Choosing the right front-end framework can make all the difference. Popular options include React, Vue.js, and Next.js.
Tip: Consider using Next.js for its server-side rendering (SSR) and static generation capabilities, which make your site faster and improve SEO. Island Wizards uses these frameworks to create responsive and user-friendly experiences.
5. Prioritize Security
Explanation: Headless WordPress setups have unique security challenges since the front end and backend are separate.
Tip: Secure API endpoints with robust authentication methods like JSON Web Tokens (JWT). Island Wizards takes security seriously, ensuring every endpoint is protected and regularly tested to prevent breaches.
6. Test and Optimize Your APIs
Explanation: Regular testing ensures that your API calls work smoothly. Slow or broken APIs can frustrate users and hurt your site's performance.
Tip: Use tools like Postman for testing API calls and integrate automated testing into your workflow. Island Wizards suggests continuous testing to catch issues early and keep everything running smoothly.
Why Island Wizards for Your Headless WordPress Development?
At Island Wizards, we specialize in creating modern, high-performance headless WordPress websites. Island Wizards team blends innovative front-end solutions with powerful WordPress backends to deliver unmatched speed, flexibility, and security. By choosing Island Wizards, you can transform your web presence and stand out from the competition.
Explore more about our service… https://islandwizards.com/blogs/difference-between-webflow-and-wordpre.. https://islandwizards.com/blogs/how-shopify-sections-can-help-you-boos..
#white label agency solution#best white label agency in uk#headless wordpress solution#best it company#shopify#wordpress#island wizards#headless wordpress development services#seo#island wizards uk'#shopify partner program#wizards island#white label agency
1 note
·
View note
Text
Schema Markup for Beginners: A Simple Guide to Boosting Your Website's SEO
Schema markup is an essential tool in SEO (Search Engine Optimization), but it often gets overlooked by beginners. Understanding schema markup can make a significant difference if you're new to website optimization and want to increase your visibility in search engine results. This beginner’s guide will explain what schema markup is, why it’s important, and how you can implement it on your website to improve your SEO performance.
What is Schema Markup?
Schema markup, also known as structured data, is a code (usually in the form of JSON-LD, Microdata, or RDFa) that you can add to your website’s HTML. It helps search engines like Google, Bing, and Yahoo better understand the content on your site.
When search engines understand your content more clearly, they can display it more accurately in search results. This often results in rich snippets, such as star ratings for reviews, event times, product prices, and more. These rich snippets make your website stand out in search results, potentially driving more traffic.
Why Schema Markup is Important for SEO
Schema markup is a powerful SEO tool, especially if you’re competing for visibility in search results. Here’s why:
Better Visibility in Search Results: Sites with schema markup are more likely to appear in rich results, which are more eye-catching and engaging than standard search listings.
Improved Click-Through Rates (CTR): The extra information displayed in rich snippets gives users more context about your content before they click, which can increase your CTR.
Search Engine Understanding: Schema markup helps search engines understand the purpose of your page, which can help your content rank better for relevant queries.
Voice Search Optimization: As voice search continues to grow in popularity, schema markup plays a vital role in helping virtual assistants (like Alexa and Google Assistant) pull relevant information from your website.
Types of Schema Markup
There are hundreds of different schema types, but some are more commonly used than others. Here are a few that might be particularly helpful for beginners:
Article Schema: This is great for blog posts or news articles. It tells search engines that your page is an article and includes information like the headline, date published, and author.
Local Business Schema: If you run a local business, this markup can help you show up in local search results. It includes details like your business name, address, phone number, and opening hours.
Product Schema: If you sell products, this schema will highlight key information about your product like price, availability, and reviews.
Review Schema: If you publish reviews, this schema can display star ratings and other review details directly in the search results.
FAQ Schema: Adding FAQ schema to your page allows commonly asked questions and answers to be displayed directly in search results.
Event Schema: If you’re promoting an event, this schema will help display the event's name, date, and location in search results.
How to Implement Schema Markup
Implementing schema markup on your website might sound technical, but it’s easier than you think. Here’s a simple, step-by-step process to get started:
1. Choose the Right Schema
First, decide which type of schema markup makes the most sense for your page.
2. Generate the Markup Code
If you’re not familiar with coding, some tools can generate schema markup for you. Google's Structured Data Markup Helper is a great place to start. This tool allows you to tag elements on your web page and then generate the appropriate schema code.
3. Add the Schema Code to Your Website
Once you've generated the code, you’ll need to add it to your website. The easiest way to do this is by inserting it into your page's HTML. If you’re using a CMS like WordPress, you can use plugins like Schema Pro to add the code without having to touch the HTML directly.
4. Test Your Schema Markup
Before you publish, it’s important to test your schema markup to ensure it’s working properly. Google's Rich Results Test will analyze your page and let you know if your structured data is set up correctly.
Best Practices for Using Schema Markup
Here are some tips to ensure that you get the most out of your schema markup:
Be Specific: Use the most specific schema type for your content. The more detailed you are, the better search engines can interpret your data.
Avoid Overuse: While schema markup can improve your visibility, don’t try to add markup to everything. Focus on key content types that are relevant to your site.
Keep It Updated: Ensure that your schema markup is always accurate and up-to-date. Outdated schema, like incorrect business hours or product prices, can confuse users and hurt your credibility.
Monitor Performance: Keep an eye on your website's performance using tools like Google Search Console to see how schema markup affects your rankings and click-through rates.
0 notes
Text
How We Resolved the Indexing Issue for GreenTech
GreenTech website owner approached our SEO agency to fix indexing issue. We spend 2-3 weeks and tried different things like manually requested indexing in search console. We also checked and maintain the frequency of content publishing.
After a week we found that posts started getting indexed but pages with service category didn’t. We analyzed the competitor and following them removed the service category in urls. This also didn’t work.
Finally, we tried setting up auto indexing plugin in WordPress. To do so, we follow the below steps·
. Open Google Cloud API Library·
. Add a project Create Service Account, select your project·
. Provide details and Select “owner”·
. Go to “Manage Key”, select “create New Key”·
. Select “JSON” file for key type and hit “create”·
. Save file. Go to Details Copy Email Address·
. Go to Google Search Console and add email address·
. Make sure permission is set to “Owner”·
. Go back to Google Cloud API Library·
. Search indexing API, press enter·
. Select Web Search Indexing API and “Enable” it·
. Now Open WordPress, and add plugin “instant indexing”·
. Install it and activate it·
. Go to Setting -> instant indexing -> Open Google API setting·
. Now upload file that I saved earlier, select post and pages·
. Finally press save changes
After this, within 24 hours all pages indexed. And till now pages are indexing automatically. This is how we resolved indexing issue for our client.
1 note
·
View note
Text
WooCommerce Customer / Order / Coupon Export nulled plugin 26 شهریور 1403

Download WooCommerce Customer / Order / Coupon Export Nulled Plugin for Free Are you looking for a seamless way to manage your WooCommerce data with just a few clicks? Look no further. The WooCommerce Customer / Order / Coupon Export nulled plugin is the ultimate solution for store owners who need flexibility, speed, and precision in handling essential store data. Whether you're exporting customer lists, order details, or coupon codes, this powerful plugin simplifies the entire process—completely free from our platform. What is WooCommerce Customer / Order / Coupon Export Nulled Plugin? The WooCommerce Customer / Order / Coupon Export nulled plugin is a premium WordPress plugin designed to help WooCommerce store owners export detailed reports of customers, orders, and coupons effortlessly. Now available as a nulled version, this plugin enables users to enjoy all the premium features without spending a dime. Unlike standard export tools, this plugin is optimized for high-performance stores. With advanced filtering options and customizable export formats, it's tailored for WooCommerce-powered businesses of all sizes. Technical Specifications Plugin Name: WooCommerce Customer / Order / Coupon Export Compatibility: WordPress 5.0+ and WooCommerce 4.0+ File Format Support: CSV, XLS, JSON Data Filters: Date range, customer roles, order statuses, coupon types Scheduled Exports: Available with cron jobs Features and Benefits 1. Advanced Filtering Options Easily filter data based on specific date ranges, order statuses, or customer roles. This feature saves time by letting you target exactly the data you need. 2. Multiple Export Formats Export your WooCommerce data in popular formats like CSV, XLS, or JSON, making it simple to integrate with third-party applications or internal systems. 3. Scheduled and Automated Exports Set up cron jobs to automate data exports on a daily, weekly, or monthly basis. Let the plugin work behind the scenes while you focus on running your business. 4. Customizable Export Layouts Choose what columns and fields to include in each export file. Build customized layouts that fit your business analytics or reporting needs. 5. Easy Integration Whether you’re syncing with a CRM, email platform, or analytics tool, this plugin makes integration straightforward with standardized formats and API compatibility. Use Cases Data Backup: Regularly back up customer and order data for safety and compliance. Marketing Campaigns: Export segmented lists of customers to use in email campaigns. Accounting & Finance: Share detailed order summaries with your accounting team. Customer Service: Quickly retrieve past orders to resolve customer queries more efficiently. How to Install and Use Download the WooCommerce Customer / Order / Coupon Export nulled plugin from our website. Log in to your WordPress dashboard and go to Plugins → Add New. Click Upload Plugin and select the downloaded ZIP file. Install and activate the plugin. Navigate to WooCommerce → Export to start configuring your exports. Frequently Asked Questions (FAQs) Is the plugin safe to use? Yes, we provide a clean, malware-free version of the WooCommerce Customer / Order / Coupon Export . However, we recommend using it in a staging environment first. Will I receive plugin updates? As this is a nulled version, you will not receive automatic updates. You can manually check our website for the latest versions and download them for free. Can I use it on multiple websites? Absolutely. The nulled version does not restrict the number of installations, giving you full freedom to use it on as many WooCommerce stores as you like. Do I need coding skills to use this plugin? No coding required. The plugin comes with a user-friendly interface that even beginners can easily navigate. Why Choose Us? We specialize in providing high-quality, tested nulled plugins for WordPress users who want to save time and money. Our team ensures every download is secure and functional, offering a premium experience without the price tag.
Looking for a beautifully crafted WordPress theme to complement your plugin? Download kallyas NULLED for a fully responsive, feature-rich theme that’s perfect for WooCommerce stores. Don't miss this opportunity to upgrade your WooCommerce management toolkit. Download the WooCommerce Customer / Order / Coupon Export today and take full control of your online store’s data—free and without restrictions.
0 notes
Text
What are the benefits of using schema markup for SEO?
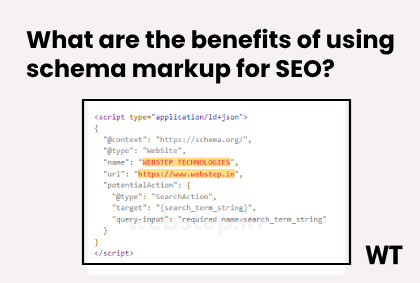
Schema markup is a powerful tool in the world of digital marketing, yet many website owners are still unfamiliar with its benefits. Understanding and implementing schema markup can significantly enhance your site’s performance in search engine results. How does schema affect SEO? Here’s why it’s essential and how it can benefit your SEO efforts.
What is Schema Markup
Schema markup is a form of microdata that you add to your website’s HTML. It helps search engines understand the content on your site more effectively. When search engines like Google understand your content better, they can display it in more useful and attractive ways in search results.
Benefits of Using Schema Markup
Enhanced Search Engine Visibility
Schema markup helps your content stand out in search results. It can transform a standard search result into a rich snippet, featuring additional information like ratings, reviews, images, and event dates. These rich snippets are more eye-catching, which can lead to higher click-through rates.
Improved Click-Through Rates (CTR)
With more informative and appealing search results, users are more likely to click on your link. Studies have shown that rich snippets can increase CTR by up to 30%. This means more traffic to your site without any additional changes to your content or website structure.
Better User Experience
Schema markup provides users with more information upfront, which can help them make informed decisions about clicking through to your site. For instance, a recipe with ratings, cooking time, and calorie count displayed directly in the search results saves users time and enhances their experience.
Voice Search Optimization
As voice search becomes more prevalent, schema markup plays a crucial role in optimizing for it. Voice search queries are often more conversational and specific. Schema markup helps search engines provide precise answers, increasing the likelihood that your content will be used in voice search results.
Local SEO Benefits
For businesses with a local presence, schema markup can significantly boost local SEO. By using LocalBusiness schema, you can provide search engines with detailed information about your business, such as address, phone number, and opening hours. This helps improve your visibility in local search results and on Google Maps.
Enhanced Content Understanding
Search engines strive to understand and interpret the content as accurately as possible. Schema markup offers a standardized way to provide search engines with detailed context about your content, improving their ability to match it with relevant search queries.
Increased Chances of Featured Snippets
Featured snippets are the boxed information that appears at the top of search results, often referred to as “position zero.” Using schema markup increases your chances of being featured in these snippets, driving more traffic to your site.
How to Implement Schema Markup
Use Google’s Structured Data Markup Helper Google provides a user-friendly tool called the Structured Data Markup Helper. It guides you through adding schema markup to your site.
Choose the Right Schema Types Depending on your content, select appropriate schema types. Common types include Article, Product, Recipe, and Event. You can find a comprehensive list on schema.org.
Add Schema Markup to Your HTML You can add schema markup directly to your HTML or use a plugin if you’re using a CMS like WordPress. JSON-LD is a popular format that is easy to implement and favored by Google.
Test Your Markup After adding schema markup, use Google’s Rich Results Test tool to ensure everything is working correctly. This tool helps you identify and fix any errors.
Monitor Your Results Keep an eye on your performance in search results. Use tools like Google Search Console to track how your rich snippets are performing and make adjustments as needed.
Conclusion
Schema markup is a valuable addition to any SEO strategy. By helping search engines understand your content better, you can improve your visibility, increase click-through rates, and enhance the overall user experience. Start leveraging schema markup today to give your website the competitive edge it needs in search engine rankings.
0 notes
Text
How to Handle File Uploads with Contact Form to Any API
Handling file uploads from Contact Form 7 can be tricky, especially when you want those files sent directly to another platform. Fortunately, the Contact Form to Any API plugin makes this process seamless by allowing file attachments to be transferred alongside form data to any external API.
Step 1: Set Up Your Contact Form 7 with File Upload Field
Begin by adding a file upload field to your Contact Form 7 form. Use the [file] tag, like so:
[file your-file limit:10mb filetypes:pdf|doc|docx|jpg|png]
This allows users to upload files up to 10MB with accepted formats like PDFs, Word documents, and images.
Step 2: Install and Configure Contact Form to Any API
If you haven’t already, install the Contact Form to Any API plugin. Once installed:
Go to your WordPress dashboard.
Navigate to Contact > Contact to API.
Choose the form you want to connect.
Enter the endpoint of the API you want to send data to (e.g., a CRM, file management service, or email API).
Step 3: Enable File Upload Handling
In the API setup section:
Make sure your external API accepts file uploads.
For the file field, use a key that matches what the API expects (e.g., file, attachment, etc.).
Reference the form file field by name (e.g., your-file).
Example JSON Body (if using multipart/form-data):
{
"name": "[your-name]",
"email": "[your-email]",
"file": "[your-file]"
}
If the API expects a base64 string, the Pro version supports converting the file content before sending.
Step 4: Test Your Integration
Submit a test form with a sample file. Check the external API or platform to ensure the file was received successfully. Look at the plugin’s log viewer to debug any issues—it will show the full request payload and response from the API.
Pro Tips for Better File Handling
Limit file sizes to ensure smooth uploads.
Restrict file types for security.
Use secure endpoints (HTTPS) to protect file data.
Consider file storage APIs like Dropbox, Google Drive, or AWS S3 if your primary platform doesn’t handle file uploads natively.
Final Thoughts
The ability to handle file uploads through Contact Form 7 and pass them directly to external APIs opens up a wide range of automation possibilities—from submitting resumes to syncing contracts and more.
With Contact Form to Any API, you can make file uploads part of a fully automated, secure, and professional workflow.
0 notes
Text
Hướng dẫn fix API Endpoint của plugin Jetpack trên nền tảng WordPress.
Link bạn cung cấp có dạng: https://viendongmobile.com/wp-json/jetpack/v4/sync/spawn-sync?request_lock_id=1743764908.391&time=1743764908 🌟 Giải thích về link trên: Định dạng URL: Đây là một API Endpoint của plugin Jetpack trên nền tảng WordPress. Cấu trúc URL chứa các thành phần: wp-json/jetpack/v4/sync/spawn-sync: Đư��ng dẫn API của Jetpack dùng để đồng bộ dữ liệu. request_lock_id: Một mã định…
0 notes
Text
WordPress Multi-Multisite: A Case Study
New Post has been published on https://thedigitalinsider.com/wordpress-multi-multisite-a-case-study/
WordPress Multi-Multisite: A Case Study
The mission: Provide a dashboard within the WordPress admin area for browsing Google Analytics data for all your blogs.
The catch? You’ve got about 900 live blogs, spread across about 25 WordPress multisite instances. Some instances have just one blog, others have as many as 250. In other words, what you need is to compress a data set that normally takes a very long time to compile into a single user-friendly screen.
The implementation details are entirely up to you, but the final result should look like this Figma comp:
Design courtesy of the incomparable Brian Biddle.
I want to walk you through my approach and some of the interesting challenges I faced coming up with it, as well as the occasional nitty-gritty detail in between. I’ll cover topics like the WordPress REST API, choosing between a JavaScript or PHP approach, rate/time limits in production web environments, security, custom database design — and even a touch of AI. But first, a little orientation.
Let’s define some terms
We’re about to cover a lot of ground, so it’s worth spending a couple of moments reviewing some key terms we’ll be using throughout this post.
What is WordPress multisite?
WordPress Multisite is a feature of WordPress core — no plugins required — whereby you can run multiple blogs (or websites, or stores, or what have you) from a single WordPress installation. All the blogs share the same WordPress core files, wp-content folder, and MySQL database. However, each blog gets its own folder within wp-content/uploads for its uploaded media, and its own set of database tables for its posts, categories, options, etc. Users can be members of some or all blogs within the multisite installation.
What is WordPress multi-multisite?
It’s just a nickname for managing multiple instances of WordPress multisite. It can get messy to have different customers share one multisite instance, so I prefer to break it up so that each customer has their own multisite, but they can have many blogs within their multisite.
So that’s different from a “Network of Networks”?
It’s apparently possible to run multiple instances of WordPress multisite against the same WordPress core installation. I’ve never looked into this, but I recall hearing about it over the years. I’ve heard the term “Network of Networks” and I like it, but that is not the scenario I’m covering in this article.
Why do you keep saying “blogs”? Do people still blog?
You betcha! And people read them, too. You’re reading one right now. Hence, the need for a robust analytics solution. But this article could just as easily be about any sort of WordPress site. I happen to be dealing with blogs, and the word “blog” is a concise way to express “a subsite within a WordPress multisite instance”.
One more thing: In this article, I’ll use the term dashboard site to refer to the site from which I observe the compiled analytics data. I’ll use the term client sites to refer to the 25 multisites I pull data from.
My implementation
My strategy was to write one WordPress plugin that is installed on all 25 client sites, as well as on the dashboard site. The plugin serves two purposes:
Expose data at API endpoints of the client sites
Scrape the data from the client sites from the dashboard site, cache it in the database, and display it in a dashboard.
The WordPress REST API is the Backbone
The WordPress REST API is my favorite part of WordPress. Out of the box, WordPress exposes default WordPress stuff like posts, authors, comments, media files, etc., via the WordPress REST API. You can see an example of this by navigating to /wp-json from any WordPress site, including CSS-Tricks. Here’s the REST API root for the WordPress Developer Resources site:
The root URL for the WordPress REST API exposes structured JSON data, such as this example from the WordPress Developer Resources website.
What’s so great about this? WordPress ships with everything developers need to extend the WordPress REST API and publish custom endpoints. Exposing data via an API endpoint is a fantastic way to share it with other websites that need to consume it, and that’s exactly what I did:
Open the code
<?php [...] function register(WP_REST_Server $server) $endpoints = $this->get(); foreach ($endpoints as $endpoint_slug => $endpoint) register_rest_route( $endpoint['namespace'], $endpoint['route'], $endpoint['args'] ); function get() $version = 'v1'; return array( 'empty_db' => array( 'namespace' => 'LXB_DBA/' . $version, 'route' => '/empty_db', 'args' => array( 'methods' => array( 'DELETE' ), 'callback' => array($this, 'empty_db_cb'), 'permission_callback' => array( $this, 'is_admin' ), ), ), 'get_blogs' => array( 'namespace' => 'LXB_DBA/' . $version, 'route' => '/get_blogs', 'args' => array( 'methods' => array('GET', 'OPTIONS'), 'callback' => array($this, 'get_blogs_cb'), 'permission_callback' => array($this, 'is_dba'), ), ), 'insert_blogs' => array( 'namespace' => 'LXB_DBA/' . $version, 'route' => '/insert_blogs', 'args' => array( 'methods' => array( 'POST' ), 'callback' => array($this, 'insert_blogs_cb'), 'permission_callback' => array( $this, 'is_admin' ), ), ), 'get_blogs_from_db' => array( 'namespace' => 'LXB_DBA/' . $version, 'route' => '/get_blogs_from_db', 'args' => array( 'methods' => array( 'GET' ), 'callback' => array($this, 'get_blogs_from_db_cb'), 'permission_callback' => array($this, 'is_admin'), ), ), 'get_blog_details' => array( 'namespace' => 'LXB_DBA/' . $version, 'route' => '/get_blog_details', 'args' => array( 'methods' => array( 'GET' ), 'callback' => array($this, 'get_blog_details_cb'), 'permission_callback' => array($this, 'is_dba'), ), ), 'update_blogs' => array( 'namespace' => 'LXB_DBA/' . $version, 'route' => '/update_blogs', 'args' => array( 'methods' => array( 'PATCH' ), 'callback' => array($this, 'update_blogs_cb'), 'permission_callback' => array($this, 'is_admin'), ), ), );
We don’t need to get into every endpoint’s details, but I want to highlight one thing. First, I provided a function that returns all my endpoints in an array. Next, I wrote a function to loop through the array and register each array member as a WordPress REST API endpoint. Rather than doing both steps in one function, this decoupling allows me to easily retrieve the array of endpoints in other parts of my plugin to do other interesting things with them, such as exposing them to JavaScript. More on that shortly.
Once registered, the custom API endpoints are observable in an ordinary web browser like in the example above, or via purpose-built tools for API work, such as Postman:
PHP vs. JavaScript
I tend to prefer writing applications in PHP whenever possible, as opposed to JavaScript, and executing logic on the server, as nature intended, rather than in the browser. So, what would that look like on this project?
On the dashboard site, upon some event, such as the user clicking a “refresh data” button or perhaps a cron job, the server would make an HTTP request to each of the 25 multisite installs.
Each multisite install would query all of its blogs and consolidate its analytics data into one response per multisite.
Unfortunately, this strategy falls apart for a couple of reasons:
PHP operates synchronously, meaning you wait for one line of code to execute before moving to the next. This means that we’d be waiting for all 25 multisites to respond in series. That’s sub-optimal.
My production environment has a max execution limit of 60 seconds, and some of my multisites contain hundreds of blogs. Querying their analytics data takes a second or two per blog.
Damn. I had no choice but to swallow hard and commit to writing the application logic in JavaScript. Not my favorite, but an eerily elegant solution for this case:
Due to the asynchronous nature of JavaScript, it pings all 25 Multisites at once.
The endpoint on each Multisite returns a list of all the blogs on that Multisite.
The JavaScript compiles that list of blogs and (sort of) pings all 900 at once.
All 900 blogs take about one-to-two seconds to respond concurrently.
Holy cow, it just went from this:
( 1 second per Multisite * 25 installs ) + ( 1 second per blog * 900 blogs ) = roughly 925 seconds to scrape all the data.
To this:
1 second for all the Multisites at once + 1 second for all 900 blogs at once = roughly 2 seconds to scrape all the data.
That is, in theory. In practice, two factors enforce a delay:
Browsers have a limit as to how many concurrent HTTP requests they will allow, both per domain and regardless of domain. I’m having trouble finding documentation on what those limits are. Based on observing the network panel in Chrome while working on this, I’d say it’s about 50-100.
Web hosts have a limit on how many requests they can handle within a given period, both per IP address and overall. I was frequently getting a “429; Too Many Requests” response from my production environment, so I introduced a delay of 150 milliseconds between requests. They still operate concurrently, it’s just that they’re forced to wait 150ms per blog. Maybe “stagger” is a better word than “wait” in this context:
Open the code
async function getBlogsDetails(blogs) let promises = []; // Iterate and set timeouts to stagger requests by 100ms each blogs.forEach((blog, index) => if (typeof blog.url === 'undefined') return; let id = blog.id; const url = blog.url + '/' + blogDetailsEnpointPath + '?uncache=' + getRandomInt(); // Create a promise that resolves after 150ms delay per blog index const delayedPromise = new Promise(resolve => setTimeout(async () => try const blogResult = await fetchBlogDetails(url, id); if( typeof blogResult.urls == 'undefined' ) console.error( url, id, blogResult ); else if( ! blogResult.urls ) console.error( blogResult ); else if( blogResult.urls.length == 0 ) console.error( blogResult ); else console.log( blogResult ); resolve(blogResult); catch (error) console.error(`Error fetching details for blog ID $id:`, error); resolve(null); // Resolve with null to handle errors gracefully , index * 150); // Offset each request by 100ms ); promises.push(delayedPromise); ); // Wait for all requests to complete const blogsResults = await Promise.all(promises); // Filter out any null results in case of caught errors return blogsResults.filter(result => result !== null);
With these limitations factored in, I found that it takes about 170 seconds to scrape all 900 blogs. This is acceptable because I cache the results, meaning the user only has to wait once at the start of each work session.
The result of all this madness — this incredible barrage of Ajax calls, is just plain fun to watch:
PHP and JavaScript: Connecting the dots
I registered my endpoints in PHP and called them in JavaScript. Merging these two worlds is often an annoying and bug-prone part of any project. To make it as easy as possible, I use wp_localize_script():
<?php [...] class Enqueue function __construct() add_action( 'admin_enqueue_scripts', array( $this, 'lexblog_network_analytics_script' ), 10 ); add_action( 'admin_enqueue_scripts', array( $this, 'lexblog_network_analytics_localize' ), 11 ); function lexblog_network_analytics_script() wp_register_script( 'lexblog_network_analytics_script', LXB_DBA_URL . '/js/lexblog_network_analytics.js', array( 'jquery', 'jquery-ui-autocomplete' ), false, false ); function lexblog_network_analytics_localize() $a = new LexblogNetworkAnalytics; $data = $a -> get_localization_data(); $slug = $a -> get_slug(); wp_localize_script( 'lexblog_network_analytics_script', $slug, $data ); // etc.
In that script, I’m telling WordPress two things:
Load my JavaScript file.
When you do, take my endpoint URLs, bundle them up as JSON, and inject them into the HTML document as a global variable for my JavaScript to read. This is leveraging the point I noted earlier where I took care to provide a convenient function for defining the endpoint URLs, which other functions can then invoke without fear of causing any side effects.
Here’s how that ended up looking:
The JSON and its associated JavaScript file, where I pass information from PHP to JavaScript using wp_localize_script().
Auth: Fort Knox or Sandbox?
We need to talk about authentication. To what degree do these endpoints need to be protected by server-side logic? Although exposing analytics data is not nearly as sensitive as, say, user passwords, I’d prefer to keep things reasonably locked up. Also, since some of these endpoints perform a lot of database queries and Google Analytics API calls, it’d be weird to sit here and be vulnerable to weirdos who might want to overload my database or Google Analytics rate limits.
That’s why I registered an application password on each of the 25 client sites. Using an app password in php is quite simple. You can authenticate the HTTP requests just like any basic authentication scheme.
I’m using JavaScript, so I had to localize them first, as described in the previous section. With that in place, I was able to append these credentials when making an Ajax call:
async function fetchBlogsOfInstall(url, id) let install = lexblog_network_analytics.installs[id]; let pw = install.pw; let user = install.user; // Create a Basic Auth token let token = btoa(`$user:$pw`); let auth = 'Authorization': `Basic $token` ; try let data = await $.ajax( url: url, method: 'GET', dataType: 'json', headers: auth ); return data; catch (error) console.error('Request failed:', error); return [];
That file uses this cool function called btoa() for turning the raw username and password combo into basic authentication.
The part where we say, “Oh Right, CORS.”
Whenever I have a project where Ajax calls are flying around all over the place, working reasonably well in my local environment, I always have a brief moment of panic when I try it on a real website, only to get errors like this:
Oh. Right. CORS. Most reasonably secure websites do not allow other websites to make arbitrary Ajax requests. In this project, I absolutely do need the Dashboard Site to make many Ajax calls to the 25 client sites, so I have to tell the client sites to allow CORS:
<?php // ... function __construct() add_action( 'rest_api_init', array( $this, 'maybe_add_cors_headers' ), 10 ); function maybe_add_cors_headers() // Only allow CORS for the endpoints that pertain to this plugin. if( $this->is_dba() ) add_filter( 'rest_pre_serve_request', array( $this, 'send_cors_headers' ), 10, 2 ); function is_dba() $url = $this->get_current_url(); $ep_urls = $this->get_endpoint_urls(); $out = in_array( $url, $ep_urls ); return $out; function send_cors_headers( $served, $result ) // Only allow CORS from the dashboard site. $dashboard_site_url = $this->get_dashboard_site_url(); header( "Access-Control-Allow-Origin: $dashboard_site_url" ); header( 'Access-Control-Allow-Headers: Origin, X-Requested-With, Content-Type, Accept, Authorization' ); header( 'Access-Control-Allow-Methods: GET, OPTIONS' ); return $served; [...] }
You’ll note that I’m following the principle of least privilege by taking steps to only allow CORS where it’s necessary.
Auth, Part 2: I’ve been known to auth myself
I authenticated an Ajax call from the dashboard site to the client sites. I registered some logic on all the client sites to allow the request to pass CORS. But then, back on the dashboard site, I had to get that response from the browser to the server.
The answer, again, was to make an Ajax call to the WordPress REST API endpoint for storing the data. But since this was an actual database write, not merely a read, it was more important than ever to authenticate. I did this by requiring that the current user be logged into WordPress and possess sufficient privileges. But how would the browser know about this?
In PHP, when registering our endpoints, we provide a permissions callback to make sure the current user is an admin:
<?php // ... function get() $version = 'v1'; return array( 'update_blogs' => array( 'namespace' => 'LXB_DBA/' . $version, 'route' => '/update_blogs', 'args' => array( 'methods' => array( 'PATCH' ), 'callback' => array( $this, 'update_blogs_cb' ), 'permission_callback' => array( $this, 'is_admin' ), ), ), // ... ); function is_admin() $out = current_user_can( 'update_core' ); return $out;
JavaScript can use this — it’s able to identify the current user — because, once again, that data is localized. The current user is represented by their nonce:
async function insertBlog( data ) let url = lexblog_network_analytics.endpoint_urls.insert_blog; try await $.ajax( url: url, method: 'POST', dataType: 'json', data: data, headers: 'X-WP-Nonce': getNonce() ); catch (error) console.error('Failed to store blogs:', error); function getNonce() if( typeof wpApiSettings.nonce == 'undefined' ) return false; return wpApiSettings.nonce;
The wpApiSettings.nonce global variable is automatically present in all WordPress admin screens. I didn’t have to localize that. WordPress core did it for me.
Cache is King
Compressing the Google Analytics data from 900 domains into a three-minute loading .gif is decent, but it would be totally unacceptable to have to wait for that long multiple times per work session. Therefore I cache the results of all 25 client sites in the database of the dashboard site.
I’ve written before about using the WordPress Transients API for caching data, and I could have used it on this project. However, something about the tremendous volume of data and the complexity implied within the Figma design made me consider a different approach. I like the saying, “The wider the base, the higher the peak,” and it applies here. Given that the user needs to query and sort the data by date, author, and metadata, I think stashing everything into a single database cell — which is what a transient is — would feel a little claustrophobic. Instead, I dialed up E.F. Codd and used a relational database model via custom tables:
In the Dashboard Site, I created seven custom database tables, including one relational table, to cache the data from the 25 client sites, as shown in the image.
It’s been years since I’ve paged through Larry Ullman’s career-defining (as in, my career) books on database design, but I came into this project with a general idea of what a good architecture would look like. As for the specific details — things like column types — I foresaw a lot of Stack Overflow time in my future. Fortunately, LLMs love MySQL and I was able to scaffold out my requirements using DocBlocks and let Sam Altman fill in the blanks:
Open the code
<?php /** * Provides the SQL code for creating the Blogs table. It has columns for: * - ID: The ID for the blog. This should just autoincrement and is the primary key. * - name: The name of the blog. Required. * - slug: A machine-friendly version of the blog name. Required. * - url: The url of the blog. Required. * - mapped_domain: The vanity domain name of the blog. Optional. * - install: The name of the Multisite install where this blog was scraped from. Required. * - registered: The date on which this blog began publishing posts. Optional. * - firm_id: The ID of the firm that publishes this blog. This will be used as a foreign key to relate to the Firms table. Optional. * - practice_area_id: The ID of the firm that publishes this blog. This will be used as a foreign key to relate to the PracticeAreas table. Optional. * - amlaw: Either a 0 or a 1, to indicate if the blog comes from an AmLaw firm. Required. * - subscriber_count: The number of email subscribers for this blog. Optional. * - day_view_count: The number of views for this blog today. Optional. * - week_view_count: The number of views for this blog this week. Optional. * - month_view_count: The number of views for this blog this month. Optional. * - year_view_count: The number of views for this blog this year. Optional. * * @return string The SQL for generating the blogs table. */ function get_blogs_table_sql() $slug = 'blogs'; $out = "CREATE TABLE $this->get_prefix()_$slug ( id BIGINT NOT NULL AUTO_INCREMENT, slug VARCHAR(255) NOT NULL, name VARCHAR(255) NOT NULL, url VARCHAR(255) NOT NULL UNIQUE, /* adding unique constraint */ mapped_domain VARCHAR(255) UNIQUE, install VARCHAR(255) NOT NULL, registered DATE DEFAULT NULL, firm_id BIGINT, practice_area_id BIGINT, amlaw TINYINT NOT NULL, subscriber_count BIGINT, day_view_count BIGINT, week_view_count BIGINT, month_view_count BIGINT, year_view_count BIGINT, PRIMARY KEY (id), FOREIGN KEY (firm_id) REFERENCES $this->get_prefix()_firms(id), FOREIGN KEY (practice_area_id) REFERENCES $this->get_prefix()_practice_areas(id) ) DEFAULT CHARSET=utf8mb4;"; return $out;
In that file, I quickly wrote a DocBlock for each function, and let the OpenAI playground spit out the SQL. I tested the result and suggested some rigorous type-checking for values that should always be formatted as numbers or dates, but that was the only adjustment I had to make. I think that’s the correct use of AI at this moment: You come in with a strong idea of what the result should be, AI fills in the details, and you debate with it until the details reflect what you mostly already knew.
How it’s going
I’ve implemented most of the user stories now. Certainly enough to release an MVP and begin gathering whatever insights this data might have for us:
It’s working!
One interesting data point thus far: Although all the blogs are on the topic of legal matters (they are lawyer blogs, after all), blogs that cover topics with a more general appeal seem to drive more traffic. Blogs about the law as it pertains to food, cruise ships, germs, and cannabis, for example. Furthermore, the largest law firms on our network don’t seem to have much of a foothold there. Smaller firms are doing a better job of connecting with a wider audience. I’m positive that other insights will emerge as we work more deeply with this.
Regrets? I’ve had a few.
This project probably would have been a nice opportunity to apply a modern JavaScript framework, or just no framework at all. I like React and I can imagine how cool it would be to have this application be driven by the various changes in state rather than… drumroll… a couple thousand lines of jQuery!
I like jQuery’s ajax() method, and I like the jQueryUI autocomplete component. Also, there’s less of a performance concern here than on a public-facing front-end. Since this screen is in the WordPress admin area, I’m not concerned about Google admonishing me for using an extra library. And I’m just faster with jQuery. Use whatever you want.
I also think it would be interesting to put AWS to work here and see what could be done through Lambda functions. Maybe I could get Lambda to make all 25 plus 900 requests concurrently with no worries about browser limitations. Heck, maybe I could get it to cycle through IP addresses and sidestep the 429 rate limit as well.
And what about cron? Cron could do a lot of work for us here. It could compile the data on each of the 25 client sites ahead of time, meaning that the initial three-minute refresh time goes away. Writing an application in cron, initially, I think is fine. Coming back six months later to debug something is another matter. Not my favorite. I might revisit this later on, but for now, the cron-free implementation meets the MVP goal.
I have not provided a line-by-line tutorial here, or even a working repo for you to download, and that level of detail was never my intention. I wanted to share high-level strategy decisions that might be of interest to fellow Multi-Multisite people. Have you faced a similar challenge? I’d love to hear about it in the comments!
#250#admin#ai#Analytics#API#app#applications#approach#architecture#Article#Articles#authentication#author#autocomplete#AWS#Blog#Books#box#browser#bug#bundle#cache#cannabis#career#cell#challenge#chrome#code#columns#complexity
0 notes