#Xpath for text after element
Explore tagged Tumblr posts
Visit Tumblr Blog
Explore Tumblr blogs with no restrictions, modern design and the best experience.
Last Seen Tumblr Blogs


Fun Fact
Tumblr posted its first advertisements in May 2012 and subsequently earned $13M in revenue.
Text
Selenium Training with Certification: Become a Test Automation Expert
In today’s fast-paced software development world, automation testing has become a vital component of the software lifecycle. Selenium is one of the most popular and widely used frameworks for automating web applications, enabling businesses to speed up testing processes, reduce human error, and ensure software quality. For those looking to enhance their career in software testing, enrolling in a Selenium Training course can be a game-changer. This guide will provide detailed insights into why Selenium is an essential skill, what to expect from Selenium certification training, and how becoming a Selenium expert can propel your career forward.
Introduction: Why Selenium is the Future of Automation Testing
The demand for automation in software testing has increased dramatically. Selenium stands out as one of the most powerful open-source tools available today, with its ability to automate web browsers across different platforms and programming languages. Whether you're looking to pursue a career as a Test Automation Engineer, Quality Analyst, or Selenium Developer, mastering Selenium is an investment in your future.
With its growing adoption in industries like e-commerce, banking, healthcare, and more, the need for professionals who understand Selenium automation testing is at an all-time high. Selenium certification offers tangible proof of your skills and can make your resume stand out in a competitive job market.
What is Selenium and Why Should You Learn It?
Selenium is an open-source tool that provides a suite of software designed for automating web browsers. It supports multiple programming languages, including Java, Python, C#, Ruby, and JavaScript, allowing testers to write tests in the language they are most comfortable with.
Benefits of Selenium Automation Testing
Cross-browser Testing: Selenium supports various browsers such as Chrome, Firefox, and Safari, ensuring your applications perform consistently across different platforms.
Support for Multiple Programming Languages: Unlike many other testing tools, Selenium allows testers to write scripts in different programming languages, making it flexible for developers from various backgrounds.
Open-source and Free: Since Selenium is open-source, it significantly reduces the cost of testing and provides businesses with a cost-effective solution.
Scalability: Selenium can handle large-scale test suites and is easily integrated with other tools like Jenkins, Docker, and TestNG, allowing for continuous integration and continuous delivery (CI/CD).
By becoming proficient in Selenium testing, you gain a highly sought-after skill that boosts your career prospects in the software development and quality assurance sectors.
What to Expect from a Selenium Training Course
A comprehensive Selenium course online can equip you with the knowledge and skills needed to become an expert in Selenium automation. Here’s what you can expect from a Selenium certification course:
1. Introduction to Selenium
The course will begin with a solid introduction to the Selenium framework, its components, and how it integrates into the software development lifecycle. You'll learn about:
Selenium WebDriver
Selenium IDE (Integrated Development Environment)
Selenium Grid for parallel execution
2. Writing Basic Selenium Scripts
You'll start writing basic automation scripts using Selenium WebDriver. This involves understanding the core concepts such as locating web elements using locators (ID, class name, XPath, CSS selectors) and interacting with them (clicking buttons, entering text, etc.).
3. Advanced Selenium Techniques
As you progress, you will dive into advanced topics like:
Handling dynamic web elements
Automating forms and data-driven tests
Working with different browsers and platforms using Selenium Grid
Implementing synchronization techniques to manage waiting conditions in tests
4. Integrating Selenium with Other Tools
A strong emphasis will be placed on integrating Selenium with other tools for improved test automation. You'll learn how to use frameworks like TestNG or JUnit for test execution, and how to integrate Selenium with Jenkins for continuous integration (CI). You’ll also explore how to work with tools like Maven and Ant for managing dependencies.
5. Reporting and Test Execution Management
You'll also learn how to generate test reports, track test results, and manage test execution in real-time using third-party libraries like ExtentReports.
Hands-On Learning: Real-World Applications
Selenium is all about practice. The best way to master it is through hands-on projects and real-world examples. A Selenium course training will guide you through practical scenarios where you can automate the testing of real websites and web applications.
For example, you might be tasked with writing a script that logs into a demo e-commerce site, searches for a product, adds it to the cart, and checks out. These exercises help you apply your knowledge to actual web automation tasks, making the learning process more engaging and relevant.
How Selenium Certification Can Benefit Your Career
A Selenium certification serves as proof of your expertise in test automation and enhances your credibility as a skilled professional in the field. Here’s how it can benefit you:
Better Career Opportunities: Selenium skills are in high demand across industries. Having a certification makes you an attractive candidate for roles like Test Automation Engineer, QA Engineer, and more.
Increased Earning Potential: Certified professionals typically earn more than their non-certified counterparts. With the rise of automation in software testing, Selenium-certified individuals can command higher salaries.
Industry Recognition: A certification from a recognized training provider serves as an official acknowledgment of your skills and knowledge, which is respected by employers globally.
Up-to-Date with Industry Standards: The certification ensures you’re up-to-date with the latest trends and best practices in test automation, keeping you competitive in the fast-evolving tech industry.
How to Get Certified in Selenium?
To earn your Selenium certification, you must complete a training program that offers a comprehensive curriculum and hands-on experience. Here are the steps:
Choose the Right Selenium Training Course: Look for a course that covers all aspects of Selenium, from basics to advanced topics. Ensure that it includes practical exercises, quizzes, and projects to test your skills.
Complete the Course: Dedicate time to learn the material thoroughly. Engage with the content and practice writing test scripts.
Take the Certification Exam: After completing the course, you’ll likely need to take a certification exam. This will test your understanding of Selenium concepts and your ability to apply them in real-world scenarios.
Earn Your Certification: Once you pass the exam, you’ll receive your Selenium certification, proving your expertise and enhancing your career prospects.
Conclusion: Start Your Selenium Journey Today
Selenium is an essential tool for anyone pursuing a career in test automation. It not only saves time and resources but also ensures higher accuracy in testing. Enrolling in a Selenium course training and obtaining Selenium certification can propel your career, offering you hands-on skills, industry knowledge, and credibility.
By mastering Selenium, you position yourself as an expert in the field of selenium automation testing and selenium software testing, making you an asset to any organization.
Key Takeaways
Selenium is a powerful tool for automating web applications and a must-have skill for test automation professionals.
A Selenium certification course equips you with the practical skills required to excel in software testing.
Earning Selenium certification boosts your career prospects, making you more competitive in the job market.
Start your learning journey today, and unlock opportunities in the booming field of automation testing!
#Selenium Training#Selenium Training online#Selenium certification#Selenium certification training#Selenium certification course#Selenium course#Selenium course online#Selenium course training#selenium automation testing#selenium software testing#azure devops training
0 notes
Text
What is a Selenium Testing Course?
A Selenium testing course is a structured educational program designed to teach individuals how to use Selenium, an open-source tool for automating web browsers. Selenium is widely used for automating web applications for testing purposes but can also be used for web scraping and automating repetitive web-based tasks. A typical Selenium testing course covers various aspects of Selenium, including its components, functionalities, and practical applications in test automation.
Key Components of a Selenium Testing Course
Introduction to Selenium:
Overview: Understanding what Selenium is, its history, and its role in web automation.
Components: Detailed exploration of Selenium WebDriver, Selenium IDE, Selenium Grid, and Selenium RC.
Setting Up the Environment:
Installation: Step-by-step instructions on installing Selenium WebDriver and other necessary tools.
Configuration: Setting up the development environment with Integrated Development Environments (IDEs) like Eclipse or IntelliJ IDEA.
Browser Drivers: Downloading and configuring browser drivers for Chrome, Firefox, Safari, and others.
Basic Concepts of Automation Testing:
Test Automation: Understanding the fundamentals of test automation and its benefits.
Writing Test Scripts: Learning how to write basic test scripts using programming languages like Java, Python, or C#.
Locators: Identifying web elements using locators such as ID, name, class, XPath, and CSS selectors.
Advanced Selenium Features:
WebDriver API: In-depth study of WebDriver API commands and their usage.
Synchronization: Managing synchronization issues with waits (implicit, explicit, and fluent waits).
Handling Web Elements: Interacting with various web elements like buttons, text boxes, dropdowns, and checkboxes.
Frames and Windows: Handling multiple windows, frames, and alerts in web applications.
Test Frameworks and Design Patterns:
TestNG/JUnit: Implementing and using testing frameworks such as TestNG or JUnit for structuring and running test cases.
Page Object Model (POM): Introduction to design patterns like Page Object Model to enhance test maintenance and readability.
Data-Driven Testing: Implementing data-driven tests using Excel, CSV, or databases.
Selenium Grid:
Parallel Testing: Setting up Selenium Grid for running tests in parallel across different browsers and platforms.
Configuration: Detailed configuration of the Selenium Grid hub and nodes.
Continuous Integration and Continuous Testing:
CI Tools: Integrating Selenium tests with continuous integration tools like Jenkins.
Automation Pipelines: Creating and managing automation pipelines for continuous testing.
Best Practices and Troubleshooting:
Code Quality: Writing clean, maintainable, and efficient test scripts.
Debugging: Techniques for debugging and troubleshooting common issues in Selenium tests.
Reporting: Generating and interpreting test reports for better insights into test results.
Real-world Projects and Case Studies:
Hands-on Projects: Working on real-world projects to apply learned skills.
Case Studies: Analyzing case studies to understand best practices and strategies in test automation.
Who Should Enroll in a Selenium Testing Course?
Manual Testers: Manual testers looking to transition into automation testing.
Software Developers: Developers interested in automating web application testing.
QA Engineers: Quality assurance professionals seeking to enhance their automation skills.
Students and Graduates: Individuals aiming to build a career in software testing and automation.
Benefits of Completing a Selenium Testing Course
Skill Enhancement: Gain practical skills in web automation, improving job prospects and career growth.
Industry Demand: Selenium is widely used in the industry, making these skills highly sought after.
Certification: Many courses offer certification, which can be a valuable addition to your professional portfolio.
Efficiency: Automating tests can save significant time and effort, increasing overall productivity in software development.
A Selenium testing course provides comprehensive knowledge and practical experience, equipping individuals with the necessary skills to excel in the field of test automation. Whether you are a beginner or an experienced professional, a well-structured Selenium testing course can be a stepping stone to advancing your career in automation testing.
0 notes
Text
How Chrome Extensions Can Scrape Hidden Information From Network Requests By Overriding XMLHttpRequest

Chrome extensions offer a versatile way to enhance browsing experiences by adding extra functionality to the Chrome browser. They serve various purposes, like augmenting product pages with additional information on e-commerce sites, scraping data from social media platforms such as LinkedIn or Twitter for analysis or future use, and even facilitating content scraping services for retrieving specific data from websites.
Scraping data from web pages typically involves injecting a content script to parse HTML or traverse the DOM tree using CSS selectors and XPaths. However, modern web applications built with frameworks like React or Vue pose challenges to this traditional scraping method due to their reactive nature.
When visiting a tweet on Twitter, essential details like author information, likes, retweets, and replies aren't readily available in the DOM. However, by inspecting the network tab, one can find API calls containing this hidden data, inaccessible through traditional DOM scraping. It's indeed possible to scrape this information from API calls, bypassing the limitations posed by the DOM.
A secondary method for scraping data involves intercepting API calls by overriding XMLHttpRequest. This entails replacing the native definition of XMLHttpRequest with a modified version via a content script injection. By doing so, developers gain the ability to monitor events within their modified XMLHttpRequest object while still maintaining the functionality of the original XMLHttpRequest object, allowing for seamless traffic monitoring without disrupting the user experience on third-party websites.
Step-by-Step Guide to Overriding XMLHttpRequest
Create a Script.js
This is an immediately invoked function expression (IIFE). It creates a private scope for the code inside, preventing variables from polluting the global scope.
XHR Prototype Modification: These lines save references to the original send and open methods of the XMLHttpRequest prototype.
Override Open Method: This code overrides the open method of XMLHttpRequest. When we create an XMLHttpRequest, this modification stores the request URL in the URL property of the XHR object.
Override Send Method: This code overrides the send method of XMLHttpRequest. It adds an event listener for the 'load' event. If the URL contains the specified string ("UserByScreenName"), it executes code to handle the response. After that, it calls the original send method.
Handling the Response: If the URL includes "UserByScreenName," it creates a new div element, sets its innerText to the intercepted response, and appends it to the document body.
Let's explore how we can override XMLHttpRequest!
Creating a Script Element: This code creates a new script element, sets its type to "text/javascript," specifies the source URL using Chrome.runtime.getURL("script.js"), and then appends it to the head of the document since it is a common way to inject a script into a web page.
Checking for DOM Elements: The checkForDOM function checks if the document's body and head elements are present. If they are, it calls the interceptData function. If not, it schedules another call to checkForDOM using requestIdleCallback to ensure the script waits until the necessary DOM elements are available.
Scraping Data from Profile: The scrapeDataProfile function looks for an element with the ID "__interceptedData." If found, it parses the JSON content of that element and logs it to the console as the API response. If not found, it schedules another call to scrapeDataProfile using requestIdleCallback.
Initiating the Process: These lines initiate the process by calling requestIdleCallback on checkForDOM and scrapeDataProfile. This ensures that the script begins by checking for the existence of the necessary DOM elements and then proceeds to scrape data when the "__interceptedData" element is available.
Pros
You can obtain substantial information from the server response and store details not in the user interface.
Cons
The server response may change after a certain period.
Here's a valuable tip
By simulating Twitter's internal API calls, you can retrieve additional information that wouldn't typically be displayed. For instance, you can access user details who liked tweets by invoking the API responsible for fetching this data, which is triggered when viewing the list of users who liked a tweet. However, it's important to keep these API calls straightforward, as overly frequent or unusual calls may trigger bot protection measures. This caution is crucial, as platforms like LinkedIn often use such strategies to detect scrapers, potentially leading to account restrictions or bans.
Conclusion
To conclude the entire situation, one must grasp the specific use case. Sometimes, extracting data from the user interface can be challenging due to its scattered placement. Therefore, opting to listen to API calls and retrieve data in a unified manner is more straightforward, especially for a browser extension development company aiming to streamline data extraction processes. Many websites utilize APIs to fetch collections of entities from the backend, subsequently binding them to the UI; this is precisely why intercepting API calls becomes essential.
#Content Scraping Services#Innovative Scrapping Techniques#Advanced Information Scraping Methods#browser extension development services
0 notes
Text
Mastering Xpath in Selenium: All Tactics and Examples

Mastering Xpath in Selenium: All Tactics and Examples
Are you looking to level up your Selenium Automation Python skills? Understanding XPath is crucial for locating elements on a web page, especially when other locating strategies fall short. In this comprehensive guide, we'll dive deep into XPath in Selenium Automation with Python , exploring various tactics and providing examples to help you master this powerful tool.
Table of Contents
Sr#
Headings
1
What is XPath?
2
Why Use XPath in Selenium?
3
Basic XPath Expressions
4
Using XPath Axes
5
XPath Functions
6
Combining XPath Expressions
7
Handling Dynamic Elements
8
Best Practices for Using XPath in Selenium
9
Examples of XPath in Selenium
10
Conclusion
What is XPath?
XPath (XML Path Language) is a query language used for selecting nodes from an XML document. In the context of python selenium tutorial , XPath is used to locate elements on a web page based on their attributes, such as id, class, name, etc. It provides a powerful way to navigate the HTML structure of a web page and interact with elements.
Why Use XPath in Selenium?
XPath is particularly useful in Selenium when other locating strategies, such as id or class name, are not available or reliable. It allows you to locate elements based on their position in the HTML structure, making it a versatile tool for python automation testing .
Basic XPath Expressions
XPath expressions can be used to locate elements based on various criteria, such as attributes, text content, and position in the HTML structure. Here are some basic XPath expressions:
//tagname: Selects all elements with the specified tag name.
//*[@attribute='value']: Selects all elements with the specified attribute and value.
//tagname[@attribute='value']: Selects elements with the specified tag name, attribute, and value.
Using XPath Axes
XPath axes allow you to navigate the HTML structure relative to a selected node. Some common axes include:
ancestor: Selects all ancestors of the current node.
descendant: Selects all descendants of the current node.
parent: Selects the parent of the current node.
following-sibling: Selects all siblings after the current node.
XPath Functions
XPath provides several functions that can be used to manipulate strings, numbers, and other data types. Some common functions include:
contains(): Checks if a string contains a specified substring.
text(): Selects the text content of a node.
count(): Counts the number of nodes selected by an XPath expression.
Combining XPath Expressions
XPath expressions can be combined using logical operators such as and, or, and not to create more complex selectors. This allows you to target specific elements based on multiple criteria.
Handling Dynamic Elements
XPath can be used to handle dynamic elements, such as those generated by JavaScript or AJAX. By using XPath expressions that are based on the structure of the page rather than specific attributes, you can locate and interact with these elements reliably.
Best Practices for Using XPath in Selenium
Use the shortest XPath expression possible to avoid brittle tests.
Use relative XPath expressions whenever possible to make your tests more robust.
Use the // shortcut sparingly, as it can lead to slow XPath queries.
Examples of XPath in Selenium
Let's look at some examples of using XPath in Selenium to locate elements on a web page:
Locating an element by id: //*[@id='elementId']
Locating an element by class name: //*[contains(@class,'className')]
Locating an element by text content: //*[text()='some text']
Conclusion
XPath is a powerful tool for locating elements on a web page in python for automation testing . By understanding the basics of XPath expressions, axes, functions, and best practices, you can improve the reliability and maintainability of your automation tests. Start mastering XPath today and take your Selenium skills to the next level!
Frequently Asked Questions
What is XPath in Selenium?
XPath in Selenium automation testing in python is a query language used to locate elements on a web page based on their attributes, such as id, class, name, etc. It provides a powerful way to navigate the HTML structure of a web page and interact with elements.
Why should I use XPath in Selenium?
XPath is particularly useful in Selenium when other locating strategies, such as id or class name, are not available or reliable. It allows you to locate elements based on their position in the HTML structure, making it a versatile tool for Automation Testing with Python .
How do I use XPath in Selenium?
XPath expressions can be used to locate elements based on various criteria, such as attributes, text content, and position in the HTML structure. You can use XPath axes, functions, and logical operators to create complex selectors.
What are some best practices for using XPath in Selenium?
Some best practices for using XPath in Selenium include using the shortest XPath expression possible, using relative XPath expressions whenever possible, and avoiding the // shortcut to improve query performance.
Can XPath be used to handle dynamic elements in Selenium?
Yes, XPath can be used to handle dynamic elements, such as those generated by JavaScript or AJAX. By using XPath expressions that are based on the structure of the page rather than specific attributes, you can locate and interact with these elements reliably.
0 notes
Text
Xpath for text after element

#Xpath for text after element how to
#Xpath for text after element driver
After you have installed selenium and checked out – Navigating links using get method, you might want to play more with Selenium Python. Selenium Python bindings provides a simple API to write functional/acceptance tests using Selenium WebDriver. Selenium’s Python Module is built to perform automated testing with Python. Python program to convert a list to string.
#Xpath for text after element how to
How to get column names in Pandas dataframe.Adding new column to existing DataFrame in Pandas.MoviePy Composite Video – Setting starting time of single clip.Navigating links using get method – Selenium Python.Selenium Python Introduction and Installation.Selenium Basics – Components, Features, Uses and Limitations.Locating multiple elements in Selenium Python.Locating single elements in Selenium Python.Interacting with Webpage – Selenium Python.
#Xpath for text after element driver
find_elements_by_xpath() driver method – Selenium Python.
find_element_by_xpath() driver method – Selenium Python.
find_elements_by_css_selector() driver method – Selenium Python.
find_element_by_css_selector() driver method – Selenium Python.
find_element_by_class_name() driver method – Selenium Python.
Python – find_element_by_id() method in Selenium.
ISRO CS Syllabus for Scientist/Engineer Exam.
ISRO CS Original Papers and Official Keys.
GATE CS Original Papers and Official Keys.
Some times we may need to work with URLs with href attributes. In Css we rewrite them as css=a:contains('Forgot'), which will find the first anchor that contains 'Forgot'. We can also specify the partial text of the link as //a. We can just use as 'link=Forgot your password?', using xpath we should use as //a Links have anchor tags, we can apply the same as we applied for 'Text', the only difference here is we should add anchor tag. But If you want to match exactly to the text then we should have something like css=a or a The above can be done using css as css=div:contains('Demo Website!'). We find element by using xpath as //div or //div If the HTML is as below: Check Our Demo Website! We can use like this //button as Xpath to find out element containing exactly 'Log In'. As name describes, 'Exactly' will try to find the exact match and Contains looks for multiple matches. When working with text, we will have two scenarios, one is 'Exactly' and other one is 'Contains'. Now lets us look at the examples for 'Text'. How to match on text using CSS locators and Xpath Example css for child / sub child as div a In css this is very simple by using whitespace. In such cases, we can use two slashes to match any subnode for xpath. Css examples of a link inside of a div tag can be identified as div > aĪnd sometimes, if the element is not direct child, may be the element is inside another element. In CSS the child is indicated with a " >". How to access Child elements using css selectors Example XPATH for child elements : //div/a How to access direct child elements using xpathĪ child in XPATH is represented with a "/". We can also define xpath with 'Style' attribute xpath transparent '] Using xpath : - or here first it will check for the id and then it will check for the second.īased on index also, we can define the path as can also define by the using the value attribute or Phone'] Here using xpath / Css, we can combine two locators when ever required, lets see how we can achieve. Identify element using multiple attributes We can directly use them by using id or name locators. With Name - css=input or css=Īll the above syntax are simple. With ID - css=input#email or css=#emailĢ. With ID : - or we can also use as With Name - or we can also use as css we can use as below :ġ. Let us look for xpath examples to use ID and Name effectively with combinationsġ. Though we have some browser plug-ins to generate xpath or css selector, but they are not much useful in real time applications. In many cases like these, we depend locating elements by CSS or by XPath. It is always very important to make test scripts robust with reliable locators that do not break until changes made. You don't need to search for any other locator if there is ID or unique name present in your application.īut with the applications designed using modern JavaScript Frameworks like Angular, React and Vue.js have no proper web elements in DOM. As we know it is always better to use ID and Name to locate the elements which will work for sure. It is very simple to locate elements if the HTML DOM has 'id' or 'name' and they are the safest locators to use. In order to perform any operation on the element like click or type into an element, we need to locate that element.
0 notes
Text
Advance Java Courses in Pune

Advance courses help in gaining some extra skill sets and discover new things in any particular domain. NIIT helps students in developing such skills and making them industrial ready. NIIT offers some of thebest Advance Java courses in Pune. Some of which are mentioned below.
Advanced Java Course in Pune
Java, a standout amongst the most prevalent programming being used, especially for customer server web applications, with an announced 9 million engineers. Propelled Java modules are the most utilized instruments to advertising today. They are generally utilized as a part of the industry and consequently, information of these modules enable the possibility to discover steady employment in the showcase. Propelled Java modules are exceptionally looked for after ability as these aptitudes are difficult to discover among general applicants.
Advanced Java Course Covers
HTML, CSS & Javascript Overview
HTML Basics Information
HTML Elements
CSS Introduction
CSS Syntax & Selectors
JavaScript Overview
Bootstrap Overview
Java MVC Architecture
Three-tier architecture
Introduction to MVC
MVC Architecture
Advantages of MVC
Building pages with MVC
Servlets
What is a web application?
What is a Servlet?
Advantages of Servlet
Servlet Class
Servlet Lifecycle
Servlet Context Interface
Advantages of Servlet Context
Session management
Session Tracking Techniques ◦Cookies
Hidden field
URL Rewriting
HTTPSession
Building the first Servlet
Deploying the Servlet
Servlet examples
JSP
Introduction of JSP
JSP Architecture
JSP Processing
JSP Tag library
Core Tags
JSP Standard Tags
JSP Page Life Cycle
Creating the first Dynamic web page using JSP
Hibernate
Introduction to Hibernate
Hibernate v/s JDBC
what is Object Relational Mapping
Hibernate Features
Application Architecture
Persistent Classes
Object States ◦Transient State
Persistent State
Detached State
Rules of Persistent Classes
Mapping Collections
Hibernate Mapping File Elements
Types of Mapping ◦One-to-one
One-to-many mapping
Many – one mapping
Many – to – many mapping
Hibernate Query Language
Basic HQL Operations
Advantages of HQL
Caching and Transactions
Types Of Cache
Hibernate Transaction Management
Transaction Interface In Hibernate
Hibernate with Web Applications
Advanced Selenium course in Pune
Selenium robotizes programs. Principally, it is for mechanizing web applications for testing purposes, yet is surely not constrained to only that. Online organization assignments can likewise be robotized. Selenium has the help of a portion of the biggest merchants who have found a way to make Selenium a local piece of their program. It is additionally the centre innovation in endless other program mechanization instruments, APIs and structures.
Selenium has turned out to be exceptionally prevalent as an Automation device in the IT business as it is a freeware and extremely convenient. Its prominence has developed monstrously in the most recent couple of years. This course additionally acquaints understudies with Cucumber – a conduct was driven improvement instrument that is quickly increasing colossal notoriety among the testing network. We prescribe this course to everybody in the product testing vertical.
Selenium Course Covers
Introduction
Overview of Selenium
Advantages of Selenium
The Selenium Suite
Inroduction to Selenium IDE
Selenium Remote Control
Selenium Grid
Architecture of Selenium Grid
the Hub & the Nodes
Basics of Web Driver
Setting up the environment
Configure Fire Bug & Fire Path
Advanced Selenium Web-driver
TestNG
Automation Framework
Advanced Automation Framework
Core Java Overview
Why Java for Selenium
First Java program
Datatypes in Java
Variables & Constants
Control-flow statements
Operators
Arrays
Loops
Classes and Objects
Class Constructors
Class program in Java
Inheritance & Polymorphic
Introduction to Interface
Collection hierarchy
Selenium IDE
Introduction to Selenium IDE
Features of Selenium IDE
Installing Selenium IDE
IDE Options
Building test cases
Running Test Cases
IDE Script Debugging
Writing a Test Suite
Using Locators in Selenium
Verification points in IDE
Working with regular expressions
User extensions
Execute scripts across browsers
Selenium Web Driver
Introduction
How Selenium Web Driver Works
Configuring Selenium Web Driver With Eclipse
Selenium RC vs Web Driver
Set Up Web Driver Client
Programming your tests in Web Driver
Debugging Web Driver test cases
Troubleshooting
Testing HTTPS and Security Pop-ups
Running Test on GeckoDriver
Executing and Debugging tests in browsers ◦IE
Chrome
Firefox
Desired Capabilities in Selenium WebDriver
Session Handling
Handle Alerts and Multiple Windows using WebDriver
Uploading & Downloading using WebDriver
Accessing Forms & GUI Objects
Text box interaction
Radio button interaction
Handling Check boxes with Web Driver API
Handling static drop downs
Handling dynamic drop downs
Drag & Drop
Keyboard Interaction
Mouse Interaction
Multi select
Selenese Commands
Actions
Accessors
Assertions
Using Locators in Selenium ◦Locating by ID
Locating by Name & using filters
Locating by Link Text
Locating by CSS Selector
Locating by DOM
Synchronization in WebDriver
What is an implicit wait?
What is an explicit wait?
AJAX Calls in Selenium ◦ What is AJAX
Handling AJAX Calls
Challenges
Accessing Web Tables
what is a Web Table?
Static Tables
Dynamic Tables
Locating Web Table elements
Fetching number of rows and columns
Fetching cell value
TestNG Framework
Introduction
TestNG Features
Install and set up TestNG environment
First Test Case with TestNG
TestNG annotations
Junit vs TestNG
TestNG Test Suite
Annotations, Groups & DependOn
TestNG – Ignore Test
Group Test in TestNG ◦Metagroups
Exclusion Groups
Exception Test
Dependency Test
TestNG Parameters & Data Provider
TestNG Reporters & Asserts
Test Cases Prioritizing & Sequencing
TestNG DataProvider with Excel
Multi Browser & Parallel Testing
Test Design Techniques
Page Object Model ◦Why POM?
What is POM?
POM Benefits
Parameterizing using Excel
Log4j Logging
Exception Handling
Capture Screenshots
Cookie Handling in Selenium
Why handle cookies
Retrieving, adding and deleting cookies
Storing a cookie
Using stored cookie
Debugging
what are Breakpoints
Implementation of Breakpoints
what is a Start point
Implementation of Startpoints
Xpath Functions
Contains
Sibling
Ancestor
Selenium Frameworks
Data-Driven Test Framework
Keyword Driven Test Framework
Hybrid Test Framework
These advanced courses provide you with some extra knowledge of different things around which can guarantee you a great success. These advanced courses cover many important things and help in developing extra skills. NIIT provides the best Java training and advanced Java training courses in Punewith the help of trained staff and professionals.
Visit us at : NIIT Pune
6 notes
·
View notes
Text
How to extract amazon results with python and selenium?

In this assignment, we will try at the pagination having Selenium for a cycle using pages of Amazon results pages as well as save data in a json file.
What is Selenium?

Selenium is an open-source automation tool for browsing, mainly used for testing web applications. This can mimic a user’s inputs including mouse movements, key presses, and page navigation. In addition, there are a lot of methods, which permit element’s selection on the page. The main workhorse after the library is called Webdriver, which makes the browser automation jobs very easy to do.
Essential Package Installation
For the assignment here, we would need installing Selenium together with a few other packages.
Reminder: For this development, we would utilize a Mac.
To install Selenium, you just require to type the following in a terminal:
pip install selenium
To manage a webdriver, we will use a webdriver-manager. Also, you might use Selenium to control the most renowned web browsers including Chrome, Opera, Internet Explorer, Safari, and Firefox. We will use Chrome.
pip install webdriver-manager
Then, we would need Selectorlib for downloading and parsing HTML pages that we route for:
pip install selectorlib
Setting an Environment
After doing that, create a new folder on desktop and add some files.
$ cd Desktop
$ mkdir amazon_scraper
$ cd amazon_scraper/
$ touch amazon_results_scraper.py
$ touch search_results_urls.txt
$ touch search_results_output.jsonl
You may also need to position the file named “search_results.yml” in the project directory. A file might be used later to grab data for all products on the page using CSS selectors. You can get the file here.
Then, open a code editor and import the following in a file called amazon_results_scraper.py.
from selenium import webdriver
from webdriver_manager.chrome import ChromeDriverManager
from selenium.common.exceptions import NoSuchElementException
from selectorlib import Extractor
import requests
import json
import time
After that, run the function called search_amazon that take the string for different items we require to search on Amazon similar to an input:
def search_amazon(item):
#we will put our code here.
Using webdriver-manager, you can easily install the right version of a ChromeDriver:
def search_amazon(item):
driver = webdriver.Chrome(ChromeDriverManager().install())
How to Load a Page as well as Select Elements?
Selenium gives many methods for selecting page elements. We might select elements by ID, XPath, name, link text, class name, CSS Selector, and tag name. In addition, you can use competent locators to target page elements associated to other fundamentals. For diverse objectives, we would use ID, class name, and XPath. Let’s load the Amazon homepage. Here is a driver element and type the following:
After that, you need to open Chrome browser and navigate to the Amazon’s homepage, we need to have locations of the page elements necessary to deal with. For various objectives, we require to:
Response name of the item(s), which we want to search in the search bar.
After that, click on the search button.
Search through the result page for different item(s).
Repeat it with resulting pages.
After that, just right click on the search bar and from the dropdown menu, just click on the inspect button. This will redirect you to a section named browser developer tools. Then, click on the icon:

After that, hover on the search bar as well as click on search bar to locate different elements in the DOM:

This search bar is an ‘input’ element getting ID of “twotabssearchtextbox”. We might interact with these items with Selenium using find_element_by_id() method and then send text inputs in it using binding .send_keys(‘text, which we want in the search box’) comprising:
search_box = driver.find_element_by_id('twotabsearchtextbox').send_keys(item)
After that, it’s time to repeat related steps we had taken to have the location of search boxes using the glass search button:

To click on items using Selenium, we primarily need to select an item as well as chain .click() for the end of the statement:
search_button = driver.find_element_by_id("nav-search-submit-text").click()
When we click on search, we require to wait for the website for loading the preliminary page of results or we might get errors. You could use:
import time
time.sleep(5)
Although, selenium is having a built-in method to tell the driver to await for any specific amount of time:
driver.implicitly_wait(5)
When the hard section comes, we want to find out how many outcome pages we have and repeat that through each page. A lot of smart ways are there for doing that, although, we would apply a fast solution. We would locate the item on any page that shows complete results as well as select that with XPath.
Now, we can witness that complete result pages are given in the 6th list elements
· (tag) about a list getting the class “a-pagination”. To make it in a fun way, we would position two choices within try or exclude block: getting one for the “a-pagination” tag and in case, for whatever reason that fails, we might select an element below that with the class named “a-last”.
Whereas using Selenium, a common error available is the NoSuchElementExcemtion, which is thrown whereas Selenium only cannot have the portion on a page. It might take place if an element hasn’t overloaded or if the elements’ location on the page’s changes. We might catch the error and also try and select something else if our preliminary option fails as we use the try-except:
The time has come now to make a driver wait for a few seconds:
driver.implicitly_wait(3)
We have selected an element on the page that shows complete result pages and we want to repeat via every page, collecting present URL for a list that we might later feed to an additional script. The time has come to utilize num_page, have text from that element, cast it like the integer and put it in ‘a’ for getting a loop:
Integrate an Amazon Search Results Pages Scraper within the Script.
Just because we’ve recorded our function to search our items and also repeat via results pages, we want to grab and also save data. To do so, we would use an Amazon search results pages’ scraper from a xbyte.io-code.
The scrape function might utilize URL’s in a text file to download HTML, extract relevant data including name, pricing, and product URLs. Then, position it in ‘search_results.yml’ files. Under a search_amazon() function, place the following things:

search_amazon('phones')
To end with, we would position the driver code to scrape(url) purpose afterwards we utilize search_amazon() functions:
And that’s it! After running a code, a search_results_output.jsonl file might hold data for all the items scraped from a search.
Here is a completed script:
from selenium import webdriver
from webdriver_manager.chrome import ChromeDriverManager
from selenium.common.exceptions import NoSuchElementException
from selectorlib import Extractor
import requests
import json
import time
def search_amazon(item):
driver = webdriver.Chrome(ChromeDriverManager().install())
driver.get('https://www.amazon.com')
search_box = driver.find_element_by_id('twotabsearchtextbox').send_keys(item)
search_button = driver.find_element_by_id("nav-search-submit-text").click()
driver.implicitly_wait(5)
try:
num_page = driver.find_element_by_xpath('//*[@class="a-pagination"]/li[6]')
except NoSuchElementException:
num_page = driver.find_element_by_class_name('a-last').click()
driver.implicitly_wait(3)
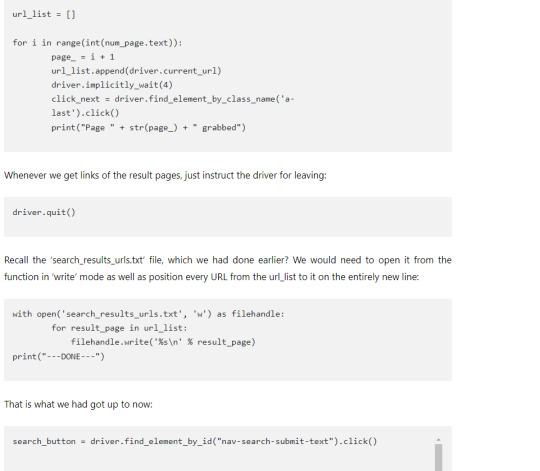
url_list = []
for i in range(int(num_page.text)):
page_ = i + 1
url_list.append(driver.current_url)
driver.implicitly_wait(4)
click_next = driver.find_element_by_class_name('a-last').click()
print("Page " + str(page_) + " grabbed")
driver.quit()
with open('search_results_urls.txt', 'w') as filehandle:
for result_page in url_list:
filehandle.write('%s\n' % result_page)
print("---DONE---")
def scrape(url):
headers = {
'dnt': '1',
'upgrade-insecure-requests': '1',
'user-agent': 'Mozilla/5.0 (Macintosh; Intel Mac OS X 10_15_4) AppleWebKit/537.36 (KHTML, like Gecko) Chrome/83.0.4103.61 Safari/537.36',
'accept': 'text/html,application/xhtml+xml,application/xml;q=0.9,image/webp,image/apng,*/*;q=0.8,application/signed-exchange;v=b3;q=0.9',
'sec-fetch-site': 'same-origin',
'sec-fetch-mode': 'navigate',
'sec-fetch-user': '?1',
'sec-fetch-dest': 'document',
'referer': 'https://www.amazon.com/',
'accept-language': 'en-GB,en-US;q=0.9,en;q=0.8',
}
# Download the page using requests
print("Downloading %s"%url)
r = requests.get(url, headers=headers)
# Simple check to check if page was blocked (Usually 503)
if r.status_code > 500:
if "To discuss automated access to Amazon data please contact" in r.text:
print("Page %s was blocked by Amazon. Please try using better proxies\n"%url)
else:
print("Page %s must have been blocked by Amazon as the status code was %d"%(url,r.status_code))
return None
# Pass the HTML of the page and create
return e.extract(r.text)
search_amazon('Macbook Pro') # <------ search query goes here.
# Create an Extractor by reading from the YAML file
e = Extractor.from_yaml_file('search_results.yml')
# product_data = []
with open("search_results_urls.txt",'r') as urllist, open('search_results_output.jsonl','w') as outfile:
for url in urllist.read().splitlines():
data = scrape(url)
if data:
for product in data['products']:
product['search_url'] = url
print("Saving Product: %s"%product['title'].encode('utf8'))
json.dump(product,outfile)
outfile.write("\n")
# sleep(5)
Constraints
The script works extremely well on broad searches, although would fail with particular searches with items that return below 5 pages of the results. We might work to improve that in future for scrape amazon product data.
Disclaimer
Just because Amazon won’t need auto extraction of the site and you require to consult.robots file whereas doing the big-scale collection of data. The assignment was helpful as well as made to learn objectives. So, in case, you are being blocked, you would have been warned!
For more details, contact X-Byte Enterprise Crawling or ask for a free quote!
For more visit: https://www.xbyte.io/how-to-extract-amazon-results-with-python-and-selenium.php
0 notes
Text
How to Extract Coupon Details from the Walmart Store using LXML and Python?

This tutorial blog will help you know how to scrape coupon details from Walmart.
We’ll scrape the following data from every coupon listed in the store:
Discounted Pricing
Category
Brand
Activation Date
Expiry Date
Product Description
URL
From, below screenshot you can see how data is getting extracted.

You can extract or go further with different coupons created on different brand & filters. But as of now, you need to keep it simple.
Finding the Data
Use any browser or choice a store URL.
https://www.walmart.com/store/5941/washington-dc.
Click the option Coupon on left-hand side and you will able to see list of all the coupons which are offered for Walmart store 5941.

You need to Right-click on the given link on page and select – Inspect Element. The browser will help you to open toolbar and will display HTML Content of the Website, organized nicely. Click on the Network panel so that you can clear all requirements from the Demand table.
Click on this request – ?pid=19521&nid=10&zid=vz89&storezip=20001
You can see this Request URL – https://www.coupons.com/coupons/?pid=19251&nid=10&zid=vz89&storezip=20001
After that, you need to recognize the parameters values- nid, pid, as well as storezip. Check the variables in a page source - https://www.walmart.com/store/5941/washington-dc
Here, you can observe different variables are allocated to the javascript variable _wml.config. You can use variables from different source, page and make the URL of coupons endpoint – https://www.coupons.com/coupons/?pid=19251&nid=10&zid=vz89&storezip=20001
Recover the HTML coupon from URL and you will see how data can be extract from javascript variable APP_COUPONSINC. You can copy data into JSON parser to display data in a structured format.
You can see data fields for the coupons with each coupon ID.
Building the Scraper
Utilize Python 3 in this tutorial. This code is not going to work if you use Python 2.7. You require a computer to start PIP and Python 3 fixed in it.
Many UNIX OS like Mac OS and Linux come with pre-installed Python. However, not each Linux OS ships by default with Python 3.
Let’s check Python version. Exposed the terminal (in Mac OS and Linux) or Facility Prompt (with Windows) and kind
-- python version
and click enter. In case, the outputs look like Python 3.x.x, then you need to install Python 3. If you say Python 2.x.x then you are using Python 2. If error comes, that means you don’t have installed Python. If Python 3 is not install then, install that first.
Installing Python 3 as well as Pip
You can go through the guide of installing Python 3 with Linux – http://docs.python-guide.org/en/latest/starting/install3/linux/
The Mac Users may also follow the guide – http://docs.python-guide.org/en/latest/starting/install3/osx/
Installing Packages
Python requirements, for making requests as well as downloading HTML content about various pages (http://docs.python-requests.org/en/master/user/install/).
You can use Python LXML to analyze HTML Tree Assembly through Xpaths (Find out how to install it there – http://lxml.de/installation.html)
UnicodeCSV to handle Unicode typescripts in output folder. Install that using pip install unicodecsv.
The Code
from lxml import htmlimport csvimport requestsimport reimport jsonimport argparseimport tracebackdef parse(store_id):"""Function to retrieve coupons in a particular walmart store:param store_id: walmart store id, you can get this id from the output of walmart store location script#sending request to get coupon related meta detailsurl = "https://www.walmart.com/store/%s/coupons"%store_idheaders = {"accept":"text/html,application/xhtml+xml,application/xml;q=0.9,image/webp,image/apng,*/*;q=0.8","accept-encoding":"gzip, deflate, br","accept-language":"en-GB,en;q=0.9,en-US;q=0.8,ml;q=0.7","referer":"https://www.walmart.com/store/finder","upgrade-insecure-requests":"1","user-agent":"Mozilla/5.0 (X11; Linux x86_64) AppleWebKit/537.36 (KHTML, like Gecko) Chrome/64.0.3282.186 Safari/537.36" }#adding retryfor retry in range(5):try:response = requests.get(url, headers=headers)raw_coupon_url_details = re.findall('"couponsData":({.*?})',response.text)if raw_coupon_url_details:coupons_details_url_info_dict = json.loads(raw_coupon_url_details[0])#these variables are used to create coupon page urlpid = coupons_details_url_info_dict.get('pid')nid = coupons_details_url_info_dict.get('nid')zid = coupons_details_url_info_dict.get('zid')#coupons details are rendering from the following url#example link:https://www.coupons.com/coupons/?pid=19251&nid=10&zid=vz89&storezip=20001coupons_details_url ="https://www.coupons.com/coupons/?pid={0}&nid={1}&zid={2}".format(pid,nid,zid)print("retrieving coupon page")coupon_headers ={"Accept":"text/html,application/xhtml+xml,application/xml;q=0.9,image/webp,image/apng,*/*;q=0.8","Accept-Encoding":"gzip, deflate, br","Accept-Language":"en-GB,en;q=0.9,en-US;q=0.8,ml;q=0.7","Host":"www.coupons.com","Upgrade-Insecure-Requests":"1","User-Agent":"Mozilla/5.0 (X11; Linux x86_64) AppleWebKit/537.36 (KHTML, like Gecko) Chrome/64.0.3282.186 Safari/537.36"}response = requests.get(coupons_details_url,headers=coupon_headers) coupon_raw_json = re.findall("APP_COUPONSINC\s?=\s?({.*});",response.text) print("processing coupons data")if coupon_raw_json:data = []coupon_json_data = json.loads(coupon_raw_json[0])
Perform the code using script name trailed by a store ID:
python3 walmart_coupon_retreiver.py store_id
For example, get the coupon information from store 3305, we can run a script like that:
python3 walmart_coupon_retreiver.py 3305
Also, you will get file name 3305_coupons.csv which will remain in the similar folder as a script. The result file will appearance similar.

Identified Limitations
The given code works for extract eCommerce Data Scraping coupons information of Walmart stores for store IDs obtainable on Walmart.com. In case, you wish to extract data of millions of pages you need to go through more sources.
If you are looking for the professional with scraping complex website, then you can contact RetailGators for all your queries.
Source:- https://www.retailgators.com/how-to-extract-coupon-details-from-the-walmart-store-using-lxml-and-python.php
0 notes
Text
Rundown of Selenium and BeautifulSoup (BS4)
Hi everyone. For the first post here I am going to cover a topic that I've seen people ask about in online Python communities such as r/learnpython. This is a quick rundown of how to use Selenium and BeautifulSoup to interact with websites and parse html. Now, these concepts can be applied to do anything from scrape the web to automate processes and make bots.
Honestly, this first post is all the info you need to begin effectively working with these modules.
Let's start with
SELENIUM
Selenium is a web testing module that can be used to interact with web elements, which has applications such as the ones mentioned above.
To import selenium, I like to do the following:
from selenium import webdriver from selenium.webdriver.common.by import By from selenium.webdriver.support.ui import WebDriverWait from selenium.webdriver.common.keys import Keys from selenium.webdriver.support import expected_conditions as EC from selenium.common.exceptions import TimeoutException, NoSuchElementException, UnexpectedAlertPresentException, WebDriverException from selenium.webdriver.chrome.options import Options
It doesn't add much load to import all of these, and you'll end up using most (probably all) if you are working with Selenium in any substantial way.
The last one is only necessary if you're using Chromedriver, not Firefox. I would reccomend chromedriver as it seems a bit faster and cleaner to me.
Next, we need to initailize our WebDriver object:
opts = Options() opts.add_argument("user-agent='your-user-agent") driver = webdriver.Chrome('/path/to/chromedriver', chrome_options = opts) driver.wait = WebDriverWait(driver, 15)
A few things here. One, where it says 'your-user-agent,' you should put your user agent (shocker). This isn't strictly necessary, but often the default python requests user agent will get blocked/rate limited by sites as everyone using python at a given moment without specifying their user agent is telegraphing that user agent.
To get your user agent, google 'what is my user agent.'
If you're using chromedriver, you need to put the path to where chromedriver executable is on your machine.
Otherwise, for Firefox:
profile = webdriver.FirefoxProfile() profile.set_preference('general.useragent.override','your-user-agent') driver = webdriver.Firefox(profile) driver.wait = WebDriverWait(driver, 15)
The driver.wait line sets the implicit wait for the WebDriver object. I'll get to that in a second.
So, now we've got the driver initialized, so let's interact with some web elements.
driver.get(url)
This opens url in our webdriver.
Interacting with web sites via Selenium/bs4 is, like much of programming, consists largely of telling python what things are and then what to do to them.
To use Selenium (and bs4) you must use the Web Inspector to analyze your webpage and find out how to identify web elements. I reccomend using the web inspector in either Safari or Chrome, as these browsers offer the handy 'copy xpath' functionality.
We can identify web elements in a number of ways. We can use HTML tag attributes such as name, id, class name, tag name. We can use XPATH or CSS Selector. There are other options too, all listed here.
Tag names look like this:
<a href='https://www.reddit.com' class= 'title may-blank outbound' title= efwefwerfwf>... </a>
The 'a' is the tag name. The thing after class is the class. All other tag attrs (name, id etc) work like that. They're in orange/yellow in the safari web inspector.
CSS Selectors look like this:
a.title.may-blank.outbound
XPATHs look like this:
//*[@id="new_post_buttons"]/div[4]/div[2]/div/div[5]/div[1]/div/div[3]/div/div/button
You can get CSS selectors by mousing over elements in the Web Inspector. You can get xpath by selecting an element (click the target thing in Safari or the arrow thing in Chrome, and then click the desired element) and then right clicking the corresponding html (it will become highlighted) and clicking 'copy xpath.'
The syntax to find elements is as follows:
This returns the first matched web element (going down the source HTML):
link = driver.find_elements_by_xpath(’this-xpath’)
And this returns a list of all matched elements:
links = driver.find_elements_by_tag_name('a')
Detailed syntax, showing similar underscore syntax ways to find by the aforementioned parameters, can be found at the docs link from earlier.
This approach, using find_elements_by_xyz, uses an implicit wait (remember that from before?)
When the driver is told to find an element, it must first wait for the element to be loaded. Using an implicit wait means it will wait up to n seconds specified in
driver.wait=WebDriverWait(driver, n)
before throwing a TimeoutException.
This is NOT THE BEST PRACTICE. I really only use implicit waits when I need a list of all the matched elements:
time.sleep(5)
my_xyzs = driver.find_elements_by_xyz(’my-xyz’)
my_fav_xyz = my_xyzs[9]
Technically, you shouldn't need the time.sleep(5)... but implicit waits can be inconsistent, so I throw it in there to make sure the page has loaded by the time Selenium looks to construct the list of matching elements.
So, most of the time, you should use explicit waits. Instead of finding elements via the find_element(s) commands, use:
elem = driver.wait.until(EC.element_to_be_clickable( (By.XPATH, 'my-xpath')))
Again, full syntax available which details all possible excepted conditions (the EC). This means that you can wait for the element in question to be clickable, visible, present, stale..you have a lot of options. Similarly, elements can be designated for waits By.XPATH, tag name, class name, css selector, and more.
But what if the element we need is only differentiated by an esoteric html tag attribute, I hear you lament.
Not to worry. We can use XPATH to designate a web element by ANY tag attribute.
elem = driver.wait.until(EC.visibility_of_element_located( (By.XPATH, '//[@attr="value"]')))
The above code designates elem as the web element on that page with tag attribute attr equal to 'value'. You can put a tag name in between the // and [ to specify further:
'//div[@attr='value']'
This finds only div tags with attr='value'.
Once we have identified our web element by an HTML attribute, xpath, or css selector, and defined it in Python using selenium syntax, we can do many things to it:
elem.click() #clicks elem elem.send_keys('abc') #types 'abc' into elem elem.get_attribute('href') # gets the 'href' attr of elem elem.send_keys(Keys.COMMAND, 'v') #pastes -- all keyboard shortcuts are similarly available
One caveat on shortcuts: ChromeDriver on OS X does not support most keyboard shortcuts. If you have to paste on os x with chromedriver, the following will get the job done:
elem.send_keys(Keys.SHIFT, Keys. INSERT)
It doesn't matter if your Mac doesn't have an insert key-- windows shortcuts seem to work on mac selenium. I imagine other shortcuts can be used on chromedriver using this workaround.
To get the html of a page loaded in the driver:
driver.page_source
Other commands I use relatively often:
driver.back() #goes back driver.quit() #quits
----THAT'S IT!
I mean, there's more to Selenium, but that's more than enough info for you to discover the rest on your own.
BeautifulSoup
A lot of the HTML stuff from up there will translate well to bs4 as well. bs4 is used to parse HTML. If you want to scrape info from a website, or whatever, bs4 is going to help you do it. The syntax is VERY straightforward-- gotta love Python.
Like any great chef (and the bs4 docs) will tell you, first we need to make the soup.
from bs4 import BeautifulSoup as bs4 driver.get('https://www.reddit.com') soup = bs4(driver.page_source, 'html.parser')
So what's going on here? First, we import bs4. Then we use Selenium to open a URL. We then create our soup object. First argument is driver.page_source, meaning we want to parse the source html of the current driver page. Then, 'html.parser' specifies which parser we want to use. You can use lxml if you want. I have no idea what the difference is. If one isn't working, try switching-- this has never been a problem for me.
Go ahead and print
(soup.prettify())
to see what's what here-- it'll be a bunch of HTML. You can print (soup.text()) to get just the text.
Ok, so how do we actually parse the HTML? We use the find() and find_all() methods.
links = soup.find_all('a')
Both find and find_all accept a tag name as the first argument. The second argument is class_ (underscore to differentiate from Python classes).
account_links = soup.find_all('a', class_='account')
The difference between find() and find_all() is that find() returns the first match and find_all() returns a list of matches.
As before, we can find()/find_all() by ANY tag attr, this time by passing a dict:
names = soup.find_all('a', attrs={'id':'name'})
I find that SO nice. Hope you do too.
Now, these methods return tag(s). Meaning
soup.find('div')
will find the first 'div' tag in the HTML, and return everything between its beginnning <div> and its end </div>
I find that we rarely want the whole content of the tag haha. So, to grab just the TEXT in this tag, we can do:
soup.find('div').text
Or, to get the value of any tag attribute:
soup.find('a')['href'] #replace 'href' with whatver tag 'attr' you want to get the value of
FINALLY, a helpful tactic in web scraping: narrow your search!
If you want to go down LinkedIn Recruiter search results and grab everyone's name, first make a list of all the profile cards, and then look in each one for the name. That way you decrease the amount of 'p' tags (or whatever) in your search area and make it easier to grab the right ones.
e.g.:
cards = soup.find_all('div',class_='profile_card') for card in cards: name = card.find('p')
And, actually, a helpful tactic in building bots/automating processes: you can use bs4 to scrape a website and make the bots job easier. If how to interact with the web elements to get your desired outcome is not immediately clear, pull up the web inspector and see if the link (or whatever, ember perhaps) you need is stored in the HTML somewhere! Then you can just pull
driver.page_source
with bs4 and parse out what you need. Often, link 'suffixes' such as '/post/comments/12314141/this-is-a-great-post-man' will be stored in the 'href' attrs of HTML tags. You can parse that out and store it in link, and then do
driver.get(url+link)
to save you some hassle. Just a thought.
Anyway, I hope you got some value from this. If so, LMK! I might make videos doing some examples or respond to specific questions or just otherwise maintain some sort of presence in this line of content.
1 note
·
View note
Text
Selenium Webdriver Tutorial – Step By Step Lessons - Selenium Training
Selenium Webdriver Tutorial -- Step By Step Classes
First of All, Welcome to the
Selenium Webdriver Is predominantly the first choice of any trainee for automating web applications. The most notable feature of this testing instrument is its ability to incorporate with many programming languages. That is why it's able to draw a lot of attention from the developers. Selenium Webdriver is your best testing tool for both the applications tester and a coder.
Learn More- TestNG Tutorial
selenium automation testing
With Selenium Webdriver, it is possible to integrate many tools like JUnit, TestNG, AutoIT, and Jenkins. In TechBeamers, you'll come across no. Of Selenium Webdriver tutorials covering the fundamentals of Selenium Webdriver, Selenium RC, Selenium IDE, and Selenium Webdriver commands. Time to time, we also post advanced Selenium Webdriver tutorials about this blog. In virtually all of the tutorials, we provide working examples of real problems. Here, we have gathered a list of finest Selenium Webdriver tutorials for you.
Selenium Webdriver Tutorial.
We have started this collection of Tutorials to help QA and Test Automation Programmers.
Period 1: Learn Selenium Webdriver Basics.
Tutorial, you'll get the study material to learn the fundamental concepts.
learn selenium online
1.3- What are the resources Selenium supports?
1.3.1- What's Selenium RC?
1.3.2- What's Selenium IDE?
1.3.3- What is Selenium Webdriver?
1.3.4- What is Selenium Grid?
1.4- What is the gap between Selenium IDE, Selenium RC, and Selenium Grid?
Tutorial 2: How To Establish a Selenium Webdriver Project.
2- Let us learn how to utilize
facebook
2.1- Install Eclipse IDE
2.2- Develop a Job in Eclipse
2.3- Download Selenium Webdriver Jar documents
2.4- Include Jar files in Your Job and Construct
Tutorial 3: Understand Selenium Locators And Master CSS/XPath.
3- During this Selenium Webdriver Tutorial, we'll try to educate you about Selenium locators.
3.1- What is an XPath expression?
3.2- What's FireBug Add-on and why is it used?
3.3- What is FirePath Add-on and how to use it?
3.4- The best way to install FireBug and FirePath?
3.5- How can the FireBug differ in the FirePath?
3.6- What exactly are Selenium locators and how many types of locators are there?
3.6.2- Name.
3.6.3- Link Text.
3.6.7- CSS Selector.
3.7- How to choose that Selenium locators is ideal for you?
3.8- How to inspect locators with FireBug/FirePath?
3.9- What is XPath and how many types of XPath are there, and how to make an XPath?
3.9.1- What's absolute XPath, explain with an example?
3.9.2- What's Relative XPath, clarify with an example?
Tutorial 4: Selenium Webdriver Commands And Examples.
Tutorial concentrates on important commands and will probably help all readers.
4.1.2- Get Commands.
4.2.1- The gap between findElement and findElements methods.
4.2.2- Learn the best way to access locators using findElement method?
4.2.5- By.className().
4.2.7- By.link() and By.partialLinkText().
4.2.8- By.cssSelector().
4.2.9- By.xpath().
Tutorial 5: Learn To Handle Internet Elements In Selenium Webdriver.
5- We recommend that you should read and practice a lot to get most of this chapter.
5.1- Operations on CheckBox and Radio Button.
5.2- Different procedures to select a checkbox and radio button.
5.2.1- Use ID for Selecting Checkbox/Radio button.
5.2.2- Use IsSelected Method to Check the State of Checkbox/Radio button.
5.2.3- Use Element Worth for Selecting Checkbox/Radio button.
5.2.4- Use CssSelector for Selecting Checkbox/Radio button.
5.3- HTML form and example code for hands-on practice.
Period 6: Find Out About How To Utilize The Select Class In Webdriver?
6- This Tutorial is quite useful as you're working on travel websites.
6.1- How to work on DropDowns and Multiple picks?
6.2- Select Class at Selenium Webdriver.
6.3- Distinct Select Methods with Html sample and Webdriver instance.
6.3.1- selectByVisibleText Method.
6.3.2- selectByIndex technique.
6.3.3- selectByValue technique.
6.4- De-Select Procedures encouraged with Html sample and Webdriver example.
6.4.1- deselectByIndex Method.
6.4.2- deselectByValue Method.
6.4.3- deselectByVisibleText Method.
6.4.4- deselectAll Method.
6.5- Live animated GIF to demonstrate de-select/multi-select actions.
Finally, We have now come to the conclusion of the article. And it is our desire that you probably get The anticipated benefit after studying the above Selenium Webdriver tutorial. Furthermore, we are always working on incorporating more Selenium Webdriver Tutorial (s) which will be slightly advanced level. And we'll keep posting Them often to help you incrementally
0 notes
Text
Prototyping automated product feeds for retailers
I was recently faced with the problem of creating a series of automated product feeds for a retail client.
The requirement – deliver a feed in .csv format that contains updated stock and pricing information from 3rd party sites. In this case, from a group of supplier websites for items that aren’t held in the retailer’s stock. Thus, leaving critical information about availability missing from inventory management.
This initially cool problem quickly became a daunting one as there was almost no budget available. I would add that none of the suppliers involved would supply (or would develop) a feed; which had they been willing, would have saved me an awful lot of work.
Scraping product pages is difficult, and it’s different every time
Scraping websites with variable products (drop-down selectors, checkboxes, radio buttons) that use a random variety of XHR POST and GET requests to update information such as availability and pricing in Javascript is difficult.
Every website you tackle is almost a completely new challenge as they’re all so different. Websites with variable options doubly so.
So this article shares my methods and an approach for a number of different circumstances that I’ve encountered along the way. Some of this is of course very niche, like using SEO Tools for Excel to make POST requests to an API endpoint.
It’s niche, but technical and therefore very interesting.
The main problem is this:
How do you build a product feed on a website that has variable options?
It’s actually quite difficult because most retailers have products with variations and variation-specific data isn’t forthcoming until you (as a user) have physically selected the correct options.
Once options on the product page are selected, what happens next depends on the platform.
Requests tend to be made via XHR / Ajax request, either using a Javascript library unique to the platform or something more common like jQuery. Parameters describing the product variations are added to a request URL ready for a GET request, but sometimes those parameters are sent in the form data via a POST.
The results are received as a text, JSON or CSV response (usually JSON but often some random format) and the page is updated appropriately. Sometimes all the data is already available in JSON embedded somewhere in the page source, and the JavaScript is simply updating the DOM based on what’s already there.
So there’s an awful lot of nuance in deciphering how a retail CMS updates product pages, and if you want to grab a retailer’s data, it’s an equally nuanced procedure.
Before you do anything then, you need to start by gathering some information.
Information gathering
I always start by collecting notes.
What technology platform is this? Are there any useful clues in the robots.txt file? Is there a decent sitemap.xml file?
Where is the API documentation? A surprising number of sites just leave their API exposed by complete accident.
I’ll poke around in Chrome Dev Tools, heading straight to “Network > XHR”, and select an option on the page to see what happens. This action usually exposes how data is supplied to update the page. I also check for the HTTP method used.
GET is the typical method although you do come across POST which is a different ballgame to work with. If POST is the method, this approach will expose the endpoint to which POST requests are made and responses received.
I’ll make notes about the drop-down selectors too; the value and ID attributes in the form input element are usually the parameters needed to pre-select the options via a URL GET request.
Often there’s evidence that a product URL will accept parameters to pre-select product variations. A Google Shopping result might give up some information, or a technical question on a forum. As there are only so many CMS platforms, the chances are, after a while you’ll have worked with them all.
Take a look at this example, a set of size selectors using (styled) radio buttons:
In this particular case, everything I’m going to need is contained in the label element in the for="" attribute. Collecting this data may well be important, so it’s useful to know the XPath to these snippets of data.
In our example about, the XPath: //label/@for extracts the parameters group[5][2083].
Usefully, these parameters can be added to the end of the URL to pre-select the relevant options. For example:
Request URL (GET) /product-page.html?group%5B5%5D=2082
So I hope you can see where a process might be forming! Generally, the goal of the information gathering phase is to answer questions like:
1) Can a page be loaded with options pre-selected or is there a URL that supplies the information I’m looking for?
2) Can those option values be extracted from the product page on a first pass scrape?
3) Can I concatenate these as parameterised request URLs ready for scraping?
4) What’s the best way to schedule a scraper?
Keeping notes along the way pays dividends down the road.
URL concatenation for parameterised GET requests
Once you’ve done your research and you know what you’re aiming for, it’s time to start gathering the actual data. I like to be able to build text lists of URLs that feature the data I need so that I can scrape them one by one.
To be able to build such a list, the process looks like this:
Fetch all form values for each product URL
Concatenate URLs with each combination of values added as parameter
Save as a .txt file
Fetch all form values for each product URL
The example below is a website that displays delivery time (10 work days!) and the SKU number when one of these boxes are clicked. They’re actually styled radio buttons, but that makes no difference.
What’s important, is what happens when a radio button is selected:
This is where my XPath example from earlier comes into play. We want to collect all of the parameters, of which there may be as many as 10 per page.
I end up with something along these lines:
I’m a big fan of the custom extraction tool in Screaming Frog.
It features a proper XPath parser, which includes being able to chain XPath rules with OR operators. For my use case, this feature makes it easy to chain rules together to catch different types of pages with different selectors (dropdowns, for example).
So, I collect the values for the form inputs and the names (for example, size, colour and so on).
PS: for a general introduction on how I use Screaming Frog for content research using simple XPath examples, read this article, and more recently, Dave’s article on scraping “People Also Ask” boxes.
Concatenate URLs with each combination of values added as parameter
Whenever Screaming Frog matches more than 1 result with an XPath query, it creates multiple columns in an export like this:
Concatenating each of these parameters into actual URLs is relatively straightforward:
Although you end up with a table of URLs that can have upwards of 18 columns! This requires some thought to transpose to a list:
Here’s that formula, which requires the source to be a range (Excel Tables don’t work as a source for this part of the process).
=INDEX(transpose_master,1+INT((ROW(‘Request URL Builder’!A91:R91)-1)/COLUMNS(transpose_master)),MOD(ROW(‘Request URL Builder’!A91:R91)-1+COLUMNS(transpose_master),COLUMNS(transpose_master))+1)
=INDEX(transpose_master,1+INT((ROW(‘Request URL Builder’!A91:R91)–1)/COLUMNS(transpose_master)),MOD(ROW(‘Request URL Builder’!A91:R91)–1+COLUMNS(transpose_master),COLUMNS(transpose_master))+1)
Where ‘Request URL Builder’ is the range and ‘transpose_master’ is the target table.
The result of all of this is a source list of URLs to be saved as a .txt file for a crawler to work though to collect our data.
Making POST requests
During this project, I came across a project built with OpenCart – a lesser known open source retail CMS. It doesn’t natively support variable products of any sort, so you have to install a premium plugin called OpenStock. This enables variable options to be selected on the product page.
There is almost no useful documentation for this plugin. But, after following my investigative process, it became clear the plugin wouldn’t accept URL / parameterised GET requests.
Instead, all the parameters are sent in form data via POST – see below:
(Follow along on this site’s product page for an Industry Nine Rear Hub)
Navigating to Network > XHR > Headers reveals the POST request. Scrolling down the header information reveals the form data:
And the response, in JSON format looks like this:
When you’re trying to build a feed, discovering how this data is fetched from the server is most of the battle won.
The next challenge is to mimic the request yourself to get to the same result. For that, I use API Tester. It features a very clean and simple UI and therefore getting started is easy.
In the case of the OpenCart site, we’re actually talking about a total of 100 products, perhaps 20 of them are variation products like the one above. Given there’s no budget and consequently, no developer, I had to get creative about how to solve this problem.
Enter my old friend, SEO Tools for Excel.
SEO Tools for Excel
Now, a lot of you remember how much I used to love writing Excel posts that inevitably referred to SEO Tools for Excel from my friend, Niels Bosma. It’s €99 well spent in my opinion as it helps you solve all sorts of problems very quickly. It’s useful for prototyping things that might go on to be formally developed or just as a platform to build one-off solutions.
It’s also significantly more powerful than it used to be as the latest versions run multi-threaded requests so you can switch between tabs and keep working while it’s running a bunch of HTTP requests. Honestly if you don’t have this tool, trial it and get a licence.
Making POST requests with SEO tools for Excel
As I’ve often built prototype scrapers in Excel for a quick solution or a one-off bit of research, I’m pretty used to the =XPathOnURL() and other HTTP functions included.
This is the Global HTTP Settings dialogue inside the tool:
Clearly, there’s functionality available for POST requests in the master HTTP Settings dialogue. Similarly, the =HttpSettings() function allows for POST to be set as the request method.
Unfortunately, the HTTP Settings function doesn’t have support for a POST body. I’m hopeful that might change one day as it’ll open up a whole new world of coolness. However, when I reached out to the team, I got a really helpful response from Victor Sandberg who put together a connector to make this possible.
Connectors are relatively simple XML files that configure how SEO Tools for Excel connects to, authenticates with and parses the responses from API endpoints. There’s tremendous power in them, and for the most part, you can learn how they work from viewing the XML. Here’s the full collection from Niel’s Github.
Here’s the connector to make POST requests to an endpoint with two attributes submitted in the post body. The parser settings will extract SKU, Price and a number of other objects. You should be able to see how this works from the XML. The formula in SEO Tools for Excel looks like this:
=Dump(Connector(“Baxter.Baxter”,C2,B2,”product_option_variant_id,sku,stock,active,subtract,price,image,weight,pop,nostock”,TRUE))
=Dump(Connector(“Baxter.Baxter”,C2,B2,“product_option_variant_id,sku,stock,active,subtract,price,image,weight,pop,nostock”,TRUE))
And here’s how that looks in a table:
Fortunately, this is quite an edge case, although I’m grateful for the help from the SEO Tools for Excel team, and delighted that I’ve unlocked this skill. If you want to learn more about making connectors for SEO Tools for Excel, try this helpful Wiki page.
Briefing a developer to formalise this procedure would be an absolute walk in the park.
Now, to finish with the automation challenge.
Scheduled scrapers from URL lists
I strongly recommend Scrapinghub, a recommendation my friend David Sottimano made a few months back.
It has a visual scraping editor called Portia, while Scrapy Cloud is more intended for people who can write code. Either way, it’s inexpensive, powerful and well worth learning.
My setup runs from a .txt file list of URLs to scrape, approximately 20,000. It runs weekly and uploads a .csv file via SFTP to our server. From there, stock levels are updated to schedule as intended! Writing about this setup is very much a blog post to itself, so watch this space or have an explore for yourself.
Summary
What started as an initially quick job in Screaming Frog turned into weeks of data work.
Sometimes you find yourself in a position where you have to solve a problem that isn’t well documented or hasn’t really been tackled in this way before.
You might be asking yourself why not code your way out of the problem? That’s not the point here – before you build anything in code you really need to understand the dynamics of the problem you’re trying to solve. That’s the point of prototyping, and I’m very comfortable with using the best tools around me to get to a solution.
Scraping can get costly, fast. You can quickly get into a position where weeks of development work and server time is escalating costs beyond the economic scope of the project.
I really relish problems like this as personally, I think understanding how websites work is the most important skill we can have. Have fun testing this very niche technical process!
First Found Here
from https://www.imapplied.co.za/seo/prototyping-automated-product-feeds-for-retailers/
0 notes
Photo

Parsing HTML With PHP Using DiDOM
Every now and then developers need to scrape webpages to get some information from a website. For example, let's say you are working on a personal project where you have to get geographical information about the capitals of different countries from Wikipedia. Entering this manually would take a lot of time. However, you can do it very quickly by scraping the Wikipedia page with the help of PHP. You will also be able to automatically parse the HTML to get specific information instead of going through the whole markup manually.
In this tutorial, we will learn about an easy to use and fast HTML parser called DiDOM. We will begin with the installation process and then learn how to extract information from different elements on a webpage using different kinds of selectors like tags, classes etc.
Installation and Usage
You can easily install DiDOM in your project directory by running the following command:
composer require imangazaliev/didom
Once you have run the above command, you will be able to load HTML from a string, a local file or a webpage. Here is an example:
require_once('vendor/autoload.php'); use DiDom\Document; $document = new Document($washington_dc_html_string); $document = new Document('washington_dc.html', true); $url = 'https://en.wikipedia.org/wiki/Washington,_D.C.'; $document = new Document($url, true);
When you decide to parse HTML from a document, it could already be loaded and stored in a variable. In such cases, you can simply pass that variable to Document() and DiDOM will prepare the string for parsing.
If the HTML has to be loaded from a file or a URL, you can pass that as the first parameter to Document() and set the second parameter to true.
You can also create a new Document object by using new Document() without any parameters. In this case, you can call the method loadHtml() to load HTML from a string and loadHtmlFile() to load HTML from a file or webpage.
Finding HTML Elements
The first thing that you have to do before getting the HTML or text from an element is find the element itself. The easiest way to do that is to simply use the find() method and pass the CSS selector for your intended element as the first parameter.
You can also pass the XPath for an element as the first parameter of the find() method. However, this requires you to pass Query::TYPE_XPATH as the second parameter.
If you only want to use XPath values for finding an HTML element, you can simply use the xpath() method instead of passing Query::TYPE_XPATH as second parameter to find() every time.
If DiDOM can find elements which match the passed CSS selector or XPATH expression, it will return an array of instances of DiDom\Element. If no such elements are found, it will return an empty array.
Since these methods return an array, you can directly access the nth matching element by using find()[n-1].
An Example
In the following example, we will be getting the inner HTML from all the first and second level headings in the Wikipedia article about Washington, D.C..
require_once('vendor/autoload.php'); use DiDom\Document; $document = new Document('https://en.wikipedia.org/wiki/Washington,_D.C.', true); $main_heading = $document->find('h1.firstHeading')[0]; echo $main_heading->html(); $sub_headings = $document->find('h2'); foreach($sub_headings as $sub_heading) { if($sub_heading->text() !== 'See also') { echo $sub_heading->html(); } else { break; } }
We begin by creating a new Document object by passing the URL of the Wikipedia article about Washington, D.C.. After that, we get the main heading element using the find() method and store it inside a variable called $main_heading. We will now be able to call different methods on this element like text(), innerHtml() and html() etc.
For the main heading, we just call html() method which returns the HTML of whole heading element. Similarly, we can get the HTML inside a particular element by using the innerHtml() method. Sometimes, you will be more interested in the plain text content of an element instead of its HTML. In such cases, you can simply use the text() method an be done with it.
The level two headings divide our Wikipedia page in well defined sections. However, you might want to get rid of some of those subheadings like "See also", "Notes" etc.
One way to do so would be to loop through all the level two headings and check the value returned by the text() method. We break out of the loop if the returned heading text is "See also".
You could directly get to the 4th or 6th level two heading by using $document->find('h2')[3] and $document->find('h2')[5] respectively.
Traversing Up and Down the DOM
Once you have access to a particular element, the library allows you to traverse up and down the DOM tree to access other elements with ease.
You can go to the parent of an HTML element using the parent() method. Similarly, you can get to the next or previous sibling of an element using the nextSibling() and previousSibling() methods.
There are a lot of methods available to get access to the children of a DOM element as well. For instance, you can get to a particular child element using the child(n) method. Similarly, you can get access to the first or last child of a particular element using the firstChild() and lastChild() methods. You can loop over all the children of a particular DOM element using the children() method.
Once you get to a particular element, you will be able to access its HTML etc. using the html(), innerHtml() and text() methods.
In the following example, we start with level two heading elements and keep checking if the next sibling element contains some text. As soon as we find a sibling element with some text, we output it to the browser.
require_once('vendor/autoload.php'); use DiDom\Document; $document = new Document('https://en.wikipedia.org/wiki/Washington,_D.C.', true); $sub_headings = $document->find('h2'); for($i = 1; $i < count($sub_headings); $i++) { if($sub_headings[$i]->text() !== 'See also') { $next_sibling = $sub_headings[$i]->nextSibling(); while(!$next_elem->html()) { $next_sibling = $next_sibling->nextSibling(); } echo $next_elem->html()."<br>"; } else { break; } }
You can use a similar technique to loop through all the sibling elements and only output the text if it contains a particular string or if the sibling element is a paragraph tag etc. Once you know the basics, finding the right information is easy.
Manipulating Element Attributes
The ability to get or set the attribute value for different elements can prove very useful in certain situations. For example, we can get the value of src attribute for all the img tags in our Wikipedia article by using $image_elem->attr('src'). In a similar manner, you can get the value of href attributes for all the a tags in a document.
There are three way for getting the value of a given attribute for an HTML element. You can use the getAttribute('attrName') method and pass the name of attribute you are interested in as a parameter. You can also use the attr('attrName') method which works just like getAttribute(). Finally, the library also allows you to directly get the attribute value using $elem->attrName. This means that you can get the value of src attribute for an image element directly by using $imageElem->src.
require_once('vendor/autoload.php'); use DiDom\Document; $document = new Document('https://en.wikipedia.org/wiki/Washington,_D.C.', true); $images = $document->find('img'); foreach($images as $image) { echo $image->src."<br>"; }
Once you have access to the src attributes, you can write the code to automatically download all the image files. This way you will be able to save a lot of time.
You can also set the value of a given attribute using three different techniques. First, you can use the setAttribute('attrName', 'attrValue') method to set the attribute value. You can also use the attr('attrName', 'attrValue') method to set the attribute value. Finally, you can set the attribute value for a given element using $Elem->attrName = 'attrValue'.
Adding, Removing and Replacing Elements
You can also make changes to the loaded HTML document using different methods provided by the library. For example, you can add, replace or remove elements from the DOM tree using the appendChild(), replace() and remove() methods.
The library also allows you to create your own HTML elements in order to append them to the original HTML document. You can create a new Element object by using new Element('tagName', 'tagContent').
Keep in mind that you will get a Uncaught Error: Class 'Element' not found error if your program does not contain the line use DiDom\Element before instantiating the element object.
Once you have the element, you can either append it to other elements in the DOM using the appendChild() method or you can use the replace() method to use the newly instantiated element as a replacement for some old HTML element in the document. The following example should help in further clarifying this concept.
require_once('vendor/autoload.php'); use DiDom\Document; use DiDom\Element; $document = new Document('https://en.wikipedia.org/wiki/Washington,_D.C.', true); // This will result in error. echo $document->find('h2.test-heading')[0]->html()."\n"; $test_heading = new Element('h2', 'This is test heading.'); $test_heading->class = 'test-heading'; $document->find('h1')[0]->replace($test_heading); echo $document->find('h2.test-heading')[0]->html()."\n";
Initially, there is no h2 element in our document with the class test-heading. Therefore, we will keep getting an error if we try to access such an element.
After verifying that there is no such element, we create a new h2 element and change the value of its class attribute to test-heading.
After that, we replace the first h1 element in the document with our newly created h2 element. Using the find() method on our document again to find the h2 heading with class test-heading will return an element now.
Final Thoughts
This tutorial covered the basics of PHP DiDOM HTML parser. We began with the installation and then learned how to load HTML from a string, file or URL. After that, we discussed how to find a particular element based on its CSS selector or XPath. We also learned how to get the siblings, parent or children of an element. The rest of the sections covered how we can manipulate the attributes of a particular element or add, remove and replace elements in an HTML document.
If there is anything that you would like me to clarify in the tutorial, feel free to let me know in the comments.
by Monty Shokeen via Envato Tuts+ Code https://ift.tt/2zbffkC
0 notes
Text
Picking A Name For Your Kid Is No Easy Job.
There is a developing physical body from research proposing happier folks work more difficult A lively work environment assists pull brand new skill, eliminate anxiety, rise inspiration, and also create connections along with colleagues Moreover, as our connections inside and outside of the workplace become progressively resolved by tools, they can be without the trace social elements that create rapport and also friendship in the office with time - eye connect with, body language, as well as calm talk. Image: (1-color in SIMI only) Olympic body skating me dalist Scott Hamilton techniques at the Easy Road Arena in Simi. The perk of this is actually less wasted time coding and also easier growth, as while writing 1 - 5 in the console is easy good enough, 1 - THOUSAND is less thus, but with loops is incredibly very easy. You never believed that thinking about a label for your company would certainly be this opportunity yet a problem you can not think of just about anything. Sitecore Fast Inquiry is similar to XPath as well as Sitecore Query statements in lots dietperfect.info of techniques. Find out more about the most effective useful crawlers for organic insect management and also you could have a well-balanced, efficient natural backyard patch that is actually additionally spider helpful. I couldn't acquire the data manager procedure to work so i ultimately resorted to saving the stand out file as a csv; opening it in note pad; altering the industry label; saving the documents; as well as resuming that is excel. However this is actually the regulation, and even the storyteller's daddy is actually not over this. His action is actually to choose a title that has notable definition. Can you make a peom for my name 'Veronica' and one for my pals 'Maddy' Thanks. Marley, 50, has supervised of the under-19 edge and also will definitely now assist the staff for a pleasant versus France next month as well as 2 Nov residence ladies's Planet Mug qualifiers against Bosnia & Herzegovina and Kazakhstan. Then there are actually the Irish Manning, Burke, Connelly etc and a Scots label Stevenson. The festivity received its own title coming from the Sanskrit term Karwa" that implies a pot made from clay along with a spout, Chauth" works with the fourth day of the month. Or if you intend to be a quick typer, don't constantly practice on keying the exact same text message all around as well as over once more make an effort various other messages too. Her label is Priscilla; her odyssey coming from enslavement to possible freedom is actually a story deserving of memorial. You will not earn money for your job interview, yet your provider title will be publicized completely free to 1000s of potential consumers. Rich, hearty, filling up as well as super nourishing, this simple three bean and also beef chili is actually easy to intermingle. The Blue Water Design label tags have actually rounded corners and also a centered blue history that appears like mineral water. Such a basic factor as label tags, nonetheless, is probably to assist the planners from a huge occasion or an owner from a large service to earn communications in between individuals so much more efficient. Her title is Beth, as well as she cheered a corporate setting at a major company instruction institution. It doesn't have to be your name, it simply needs to sound like maybe a genuine person, along with a first name and also a surname. This could especially appear great if you're securing the name of one's cherished engraved as each the soul design and also label tattoo design are actually the symbols from adore. You could possibly utilize that term as a title or also as a phrase if you acknowledge after a word that determines your team effectively. When cultivating a brand name, there are actually particular factors that should be looked at to make certain a reliable trademark name is made.
0 notes
Text
Full-Text RSS 3.8
Full-Text RSS 3.8 is now available. Full-Text RSS is used by software developers and news enthusiasts to extract article content from news sites and blogs, and to convert RSS feeds that contain only extracts of stories to full-text feeds. This is mostly a maintenance release, with a few new additions. Existing customers can download the latest version through our customer login.
New site config options
Site config files are used if additional rules are required to extract a site's content properly. Here's an example.
This update adds two new directives that can be used in these files:
strip_attr: XPath
Remove attributes from elements. Example:
strip: //img/@srcset
insert_detected_image: yes|no
If the extracted content contains no images, we'll look for the og:image element and insert that image into the content block. This is on by default. On sites where this image is not useful (not related to the content), this directive can be used to turn off the feature. Example:
insert_detected_image: no
PHP compatibility
This version has been tested with PHP 7.2 RC1. The minimum version of PHP required is now 5.4.
Full changelog
New site config directive: strip_attr: XPath attribute selector (e.g. //img/@srcset) - remove attribute from element
New site config directive: insert_detected_image: yes/no (default yes) - places image in og:image in the body if no other images extracted
Bug fix: Better handling of Internationalized Domain Names (IDNs)
Bug fix: Relative base URLs (<base>) now resolved against page URL
Bug fix: Wrong site config file chosen in certain cases (when wildcard and exact subdomain files available and cached in APCu)
Bug fix: ' HTML entities not converted correctly when parsing with Gumbo PHP
Remove srcset (+ sizes) attributes on img elements if it looks like they only contain relative URLs (browser will use src attribute value instead)
https:// URLs now re-written to sec:// before being submitted to avoid overzealous security software blocking request on some servers - no redirect, only affects newly submitted URLs on index.php
HTML5-PHP library updated
Language Detect library updated
Site config files updated for better extraction
Minimum PHP version is now 5.4. If you must use PHP 5.3, please stick with Full-Text RSS 3.7
Tested with PHP 7.2
Other fixes/improvements
Available to try and buy
Full-Text RSS 3.8 is now available to buy. If you’re an existing customer, you can download the latest version from our member page or upgrade at a discount.
You can also test the software before buying. This test copy will only be up until 10 October 2017. After that you can test using our free, hosted version (some features disabled) or contact us to get access to a regular installation of the software.
0 notes
Text
How Long Should a Blog Post Be in 2018
What You’ll Learn in this Post:
Why you should still consider blog post length in 2018 How to find the optimal word count for your content
Finding the Optimal Word Count for SEO
SEOs and content marketers are always trying to figure out what it takes to drive their content to the top of search results. One frequently talked about attribute of content is word count. People want to know, what length gives their content the best odds of reaching the top of the organic search results?
You usually get an answer like this:
Which is true. Always focus on quality over quantity. A lot of words is not going to make up for a crappy post.
However, if you’re already in the practice of producing what you might consider to be “high quality” content, is there a certain word count threshold that drives incremental organic traffic?
The question of optimal content length – be it for SEO, social media, earning backlinks, etc. – has been researched and answered, one way or another, time and time again. In 2012, 2013, 2014, 2015, 2016 and 2017. These are just a few examples, but there’s no doubt that you can find dozens of pieces of content on the subject each year as long as SEO has been around.
But as search engine algorithms change year-to-year, you can expect that the “ideal” word count for SEO does too. That’s why we’re rehashing this topic yet again to figure out exactly how long a blog post should be as we approach 2018. Two Ways to Answer this Question Most studies into this topic of word count and SEO take one of two approaches. They either analyze the ranking content for a broad set of keywords across many websites or industries. Or, they look at a single website (perhaps their own) to understand optimal post length for a more limited content set.
Although I enjoy combing through the big analyses, I’m a fan of the latter approach for two reasons:
The ideal length of content is going to vary by industry and region. You probably aren’t competing against Wikipedia’s content, which can be monstrously long. So their content should factor into your analysis. Instead, you’re more likely to reach a valuable conclusion for your business if you’re looking at performance of your content by word count. It’s easier for me to do.
For example, I conducted this analysis for TimBDesign.com. I found that when they produce content of over 1,200 words, it performed significantly better, on average, at driving organic traffic.
However, the same may not be true for your website or industry. In this post, I’ll walk you through the steps I took to arrive at these findings and show you how you can analyze the performance of your content to find the optimal word count for SEO. How to Analyze Your Content for Optimal SEO Word Count At this point, you may be thinking, “I don’t have enough content or organic traffic to my site worth analyzing.” That’s ok. I’ll also be showing you how you can analyze a competitor’s content with this method. Either way, you’ll come away with insights on the best post length for SEO.
First, we’re going to need to gather some data. Specifically, we want to know: Organic traffic by post Word count by post Publish date by post (we’ll use this to exclude recently-published content that hasn’t yet had time to earn organic rankings)
Here are the tools we’ll need: Screaming Frog Google Analytics SEMrush or Ahrefs (if you’re analyzing a competitor’s website)
Now that we have everything, let’s get started. Follow along as I analyze TimBDesign.com. 1- Connect Screaming Frog to the Google Analytics API This will speed up our analysis. If you’re analyzing a competitor’s website, then skip to the next section.
Open Screaming Frog. Navigate to Configuration > API Access > Google Analytics. Then, get your GA account added:
As you see above, make sure that you change the Segment to Organic Traffic.
Next, we need to expand the default date range to one year. Do that on by clicking on the Date Range tab.
When you’re done. Click OK.
2- Set Up Screaming Frog to Capture Publish Date As I mentioned earlier, we need to snag each post’s publish date. Why? We want to exclude recent posts from our analysis. We shouldn’t expect a post published last week to have already reached its organic traffic potential no matter how many words it has.
If the site you’re analyzing is like TimBDesign.com, then somewhere on a blog post you’ll find its publish date. For example, see the highlighted region below:
Screaming Frog allows us to easily grab this information using custom extraction rules. Navigate to Configuration > Custom > Extraction.
The extraction method we’ll be using is XPath. If you want to what XPath is or how you can use it, then I suggest you check out Distilled’s guide on the subject. Name your custom extraction rule “Publish Date”.
Now we need to fill in the XPath query. Here’s the simplest way to do so.
Using Google Chrome. Go to a blog post on the website you’re analyzing. Find the post’s date, and right-click on it. Choose Inspect. You’ll shown the HTML / CSS code that renders the publish date.
In the Inspect window, right-click on the HTML element containing the publish date. Then choose Copy > XPath.
Go back to Screaming Frog and paste the copied XPath into the custom extraction field. Your XPath will be different, but it should resemble something like this:
Change the last drop-down on the right to Extract Text. Then click OK.
3- Run the Screaming Frog Crawl Enter the full URL of the site you’d like to crawl at the top and hit Start.
Make sure that Screaming Frog is successfully pulling organic traffic from Google Analytics and extracting the publish date for each post.
Navigate to the Analytics tab. You should see GA data feeding into the appropriate tabs, like so:
Navigate to the Custom tab. Change the Filter to Extraction. Check to see that there are publish dates for each post.
Don’t worry if you also see text being pulled in. We’ll extract the date in a moment. 4- Export the Crawl, Import into Google Sheets for Analysis Once your crawl is finished, export all the data to a CSV.
In Screaming Frog, navigate to the Internal tab. Change the Filter to HTML. Click Export.
Now, bring that CSV into a Google Sheet. If you prefer Excel, then go right ahead. However, I’ll be using Google Sheets in this example. If You’re Analyzing a Competitor’s Site, Pull in SEMrush or Ahrefs Data Obviously, if you’re analyzing a competitor’s website, you don’t have access to Google Analytics data. However if you have access to either SEMrush or Ahrefs, you can use their reports as a proxy for organic traffic.
Ahrefs: Organic Search > Top Pages report
SEMrush: Organic Research > Pages report
After you’ve exported either of these reports, use the VLOOKUP function to associate it with your Screaming Frog data. 5- Prepare Your Data for Analysis With your data in a Google Sheet, we need to prepare a few things. Plus, you’ll likely want to do a bit of cleanup before jumping into the analysis.
Here’s how I built out my spreadsheet. I recommend taking a look so that you can replicate it for your analysis: http://ift.tt/2ga62zH Clean Up the Spreadsheet At this point, we’re interested in just a few columns of our data; Address, Word Count, GA Sessions, and Publish Date.
Since we’re only looking at blog posts, you can delete any rows that don’t have a Publish Date.
In the case of our analysis for TimBDesign.com, we need to remove the text from the Publish Date cells so that we have a date format that we can work with. I used Data > Split text to columns… to remove all the extraneous text.
Remove Recently-Published Posts I chose to remove any posts published within the last six months. You can decide what works best for your analysis.
Find the True Word Count of Each Post Screaming Frog’s Word Count metric includes all words on a given web page – not just the body content – like words in the header and footer navigations.
Since we’re most interested in analyzing our post’s body content, we’ll need to do our best to remove these extra words from our count.
To do this, follow these instructions:
Navigate to a random post. Copy all of the body content and paste into a Google Doc (use Paste without formatting). In the Google Doc, go to Tools > Word Count
Find the difference between the word count in the Google Doc, and what Screaming Frog reported. For example, the post I chose has 2,902 word according to the Google Doc. Screaming Frog reported 3,249 words – a difference of 347 words. In the case of TimBDesign.com, there are roughly 347 words in the header, footer and sidebar of our posts.
Subtract all of your posts by the number you found in the previous step to arrive at each post’s true word count.
Create Groupings to Make Your Analysis Easier This one is more of a personal preference, but I find it effective to create groupings for Word Count and Publish Date. For example, used IF() / THEN() functions to group posts by word count into these categories so they included a roughly equal number of posts:
< 600 words 600 – 800 words 800 – 1200 words 1200+ words
I took the same approach to group posts by their age:
6 – 12 months 12 – 18 months 18 – 24 months 24+ months Remove Outliers So as not to skew your averages, it’s best to remove any posts that are on the extreme ends of your word count range.
For example, TimBDesign.com has a post that includes a podcast transcript, making it over 8,300 words in length. That’s nearly 4,000 more words than the next closest post. 6- Analyze Data, Find Your Optimal Post Length Pivot tables are your friend as you transform your spreadsheet into helpful charts for visualizing the data.
Here are several ways you should consider visualizing the data:
Organic Sessions by Word Count Scatterplot Viewing the data in this way might confirm what many SEOs experience: some posts blow up and other don’t, you can’t always determine why.
There are more than a few low word count posts that do a great job at driving traffic. When we start to look at the averages, however, the picture becomes a bit more clear. Average Organic Sessions by Post Length Use your post length groupings to see which length of content performs best at driving organic traffic. For this site, that answer is posts over 1,200 words.
Average Organic Sessions by Post Age Use your post age groupings to see how older content compares to newer content at driving organic traffic. You’ll notice that for TimBDesign.com, posts between 18-24 months old are performing the best.
When you look at the next chart, you’ll understand why. During that time frame, TimBDesign.com was, on average, producing higher word count content than the other time periods analyzed.
Average Word Count by Post Age Using post age groupings we can view how the length of the content we’ve produced has changed over time. The average word count of a post was nearly 1,100 for content published between 18 and 24 months ago. Perhaps not coincidentally, the posts that fall in this date range do the best at driving organic traffic.
I’m certainly no statistical analysis expert, so I’m curious to see what you all do with the data. You can, of course, replace organic traffic with any metric you’d like – social shares, email clicks, backlinks acquired… You can use the steps in this post all the same.
Now go out there and discover what makes your content successful.
Griffin Roer is the founder of Uproer, a digital marketing agency based in St Paul, MN. Reach out to Griffin to discuss how Uproer’s SEO services can drive real business growth for your company.
The post How Long Should a Blog Post Be in 2018 appeared first on Tim B Design.
from How Long Should a Blog Post Be in 2018
0 notes
Photo

New Post has been published on http://automated-360.com/qtpuft/automate-angular-applications/
How to automate Angular applications with UFT?
(adsbygoogle = window.adsbygoogle || []).push();
Recently software industry has shifted drastically in terms of adopting the refined and improved approaches like Waterfall model to DevOps model or from traditional testing to being involved into early phase of development(shift left). With all these approaches application development technologies has also been changed rapidly. AngularJS is one of the rapidly adopting framework which provides faster development with rich user experience. Now here is the challenge for automation tools to be on top of supporting these changes and have automation tools filled with arsenal to easily take down and automate the tests. It has been observed that automation engineers are moving out from automation tools like Unified Functional testing TestComplete as these tools lag to provide limited support to these rapid changes and every time we see a new tool/framework coming and capture the arena.
What is Protractor?
Protractor is an end-to-end test framework for Angular and AngularJS applications. Protractor runs tests against your application running in a real browser interacting with it as a user would.
see more @ protractortest.org
Protractor is most recommended framework for AngularJS applicationsbut this also comes with limitation and many of the times its bit irritating. Debugging is a great challenge in Protractor for testing of particular module in Protractor you need to run your complete suite again & again. So I thought to move out from the league and try UFT. Check out the all new UFT 14.0. It has been improved a lot and if you leave cost it has all the features that an automation engineer desires. So I tried and can very much say that we can automate angularjs application with UFT.
Before we go in detail to understand how UFT started supporting Angular Based Application the first question that will come is “what add in you will need to select to ensure that Angular JS feature is enabled?“
The answer is no complex: “You need to just select .Net Add in for this.There is no dedicated Add in created for this support.”
Let’s See How to Automate Angular applications
To extend the support for Angular JS support HPE has added few more locator to identify the web objects in it list.These are xpath and css properties which are considered as backbone of Selenium protractor tools.To utilize these properties follow the below steps :
Launch the application in chrome.
Right click on the element for which you need to see the property of the webpage and select the inspect option
After identify the unique property of the element you can try the expath or css in the console. Step 4.After cross checking the xpath or css in the console you can use them in your script as below :
Browser(browsername).Page(PageName).TypeOfObject("css:="&expression) or Browser(browser name).Page(Page Name).TypeOfObject("xpath:="&expression).
To explain the above steps lets take the example of Upworkcom which has the Angular JS components like the “Search the Jobs” text-box.
Before we go ahead the first question most of you is how to confirm the application has angular component or not.For this just right click on the object and check if the element tag has property starting with the keyword “ng”.In the below snapshot you can see that the input tag has an property name as ng-model which tells us that the application is AngularJS application.
Step #1
Launch the application in Chrome.We are going to see how we are going to insert the value in “Find Freelancers” text box highlighted in Red in below picture
Step #2
Right click on the “Find Freelancers” textbox and click on Inspect option which will open the below window panel highlighting the object.
(adsbygoogle = window.adsbygoogle || []).push();
Step #3
For the “Search Freelancers” text box now analyse the blue highlighted part in above picture.We see it has nameid ng-model property.Generally id is unique property for each element.So lets try id to find the element. Below snapshot give the side by side way to writing the xpath and css in console.
xpath : $x(“//input[@id=’q’]”)
css: $x(“input[id=’q’]”)
Step #4
Use the xpath or css in your script as below :
In case of CSS:
objCSSLocator="input[id='q']" Browser("browser").Page("Page").WebEdit("css:="&objCSSLocator).Set "Automated360"
In case of xpath:
objCSSLocator="//button[@id='search-box-el']" Browser("browser").Page("Page").WebEdit("xpath:="&objCSSLocator).Set "Automated360"
In case above two methods don’t work don’t feel left out as UFT has added flexibility for you to fire Javascript directly using the RunScript method.
Browser("browser").Page("Page").RunScript("document.getElementById("btnSecurity").Click();")
The above link will click directly on the web button with id given as ‘btnSecurity’ . GetElementsByID is just one of the way.There are multiple other methods on which object identification take place. For more details refer to w3 schools javascript tutorial
I have tried various permutation and combination and these 3 ways has helped me to overcome all the challenges of automation of angular JS application via UFT.
Try this approach and in case of any issue feel free to contact us. Let us know your views on this. Do you have any other idea or tool which you feel would be easy please comment.
Till then Happy Learning !!!
0 notes