#array helper functions in php
Explore tagged Tumblr posts
Visit Tumblr Blog
Explore Tumblr blogs with no restrictions, modern design and the best experience.
Last Seen Tumblr Blogs


Fun Fact
25% of US internet users with an annual income of $80-100K use Tumblr.
Text
Prevent HTTP Parameter Pollution in Laravel with Secure Coding
Understanding HTTP Parameter Pollution in Laravel
HTTP Parameter Pollution (HPP) is a web security vulnerability that occurs when an attacker manipulates multiple HTTP parameters with the same name to bypass security controls, exploit application logic, or perform malicious actions. Laravel, like many PHP frameworks, processes input parameters in a way that can be exploited if not handled correctly.

In this blog, we’ll explore how HPP works, how it affects Laravel applications, and how to secure your web application with practical examples.
How HTTP Parameter Pollution Works
HPP occurs when an application receives multiple parameters with the same name in an HTTP request. Depending on how the backend processes them, unexpected behavior can occur.
Example of HTTP Request with HPP:
GET /search?category=electronics&category=books HTTP/1.1 Host: example.com
Different frameworks handle duplicate parameters differently:
PHP (Laravel): Takes the last occurrence (category=books) unless explicitly handled as an array.
Express.js (Node.js): Stores multiple values as an array.
ASP.NET: Might take the first occurrence (category=electronics).
If the application isn’t designed to handle duplicate parameters, attackers can manipulate input data, bypass security checks, or exploit business logic flaws.
Impact of HTTP Parameter Pollution on Laravel Apps
HPP vulnerabilities can lead to:
✅ Security Bypasses: Attackers can override security parameters, such as authentication tokens or access controls. ✅ Business Logic Manipulation: Altering shopping cart data, search filters, or API inputs. ✅ WAF Evasion: Some Web Application Firewalls (WAFs) may fail to detect malicious input when parameters are duplicated.
How Laravel Handles HTTP Parameters
Laravel processes query string parameters using the request() helper or Input facade. Consider this example:
use Illuminate\Http\Request; Route::get('/search', function (Request $request) { return $request->input('category'); });
If accessed via:
GET /search?category=electronics&category=books
Laravel would return only the last parameter, category=books, unless explicitly handled as an array.
Exploiting HPP in Laravel (Vulnerable Example)
Imagine a Laravel-based authentication system that verifies user roles via query parameters:
Route::get('/dashboard', function (Request $request) { if ($request->input('role') === 'admin') { return "Welcome, Admin!"; } else { return "Access Denied!"; } });
An attacker could manipulate the request like this:
GET /dashboard?role=user&role=admin
If Laravel processes only the last parameter, the attacker gains admin access.
Mitigating HTTP Parameter Pollution in Laravel
1. Validate Incoming Requests Properly
Laravel provides request validation that can enforce strict input handling:
use Illuminate\Http\Request; use Illuminate\Support\Facades\Validator; Route::get('/dashboard', function (Request $request) { $validator = Validator::make($request->all(), [ 'role' => 'required|string|in:user,admin' ]); if ($validator->fails()) { return "Invalid Role!"; } return $request->input('role') === 'admin' ? "Welcome, Admin!" : "Access Denied!"; });
2. Use Laravel’s Input Array Handling
Explicitly retrieve parameters as an array using:
$categories = request()->input('category', []);
Then process them safely:
Route::get('/search', function (Request $request) { $categories = $request->input('category', []); if (is_array($categories)) { return "Selected categories: " . implode(', ', $categories); } return "Invalid input!"; });
3. Encode Query Parameters Properly
Use Laravel’s built-in security functions such as:
e($request->input('category'));
or
htmlspecialchars($request->input('category'), ENT_QUOTES, 'UTF-8');
4. Use Middleware to Filter Requests
Create middleware to sanitize HTTP parameters:
namespace App\Http\Middleware; use Closure; use Illuminate\Http\Request; class SanitizeInputMiddleware { public function handle(Request $request, Closure $next) { $input = $request->all(); foreach ($input as $key => $value) { if (is_array($value)) { $input[$key] = array_unique($value); } } $request->replace($input); return $next($request); } }
Then, register it in Kernel.php:
protected $middleware = [ \App\Http\Middleware\SanitizeInputMiddleware::class, ];
Testing Your Laravel Application for HPP Vulnerabilities
To ensure your Laravel app is protected, scan your website using our free Website Security Scanner.

Screenshot of the free tools webpage where you can access security assessment tools.
You can also check the website vulnerability assessment report generated by our tool to check Website Vulnerability:

An Example of a vulnerability assessment report generated with our free tool, providing insights into possible vulnerabilities.
Conclusion
HTTP Parameter Pollution can be a critical vulnerability if left unchecked in Laravel applications. By implementing proper validation, input handling, middleware sanitation, and secure encoding, you can safeguard your web applications from potential exploits.
🔍 Protect your website now! Use our free tool for a quick website security test and ensure your site is safe from security threats.
For more cybersecurity updates, stay tuned to Pentest Testing Corp. Blog! 🚀
3 notes
·
View notes
Text
What Exactly Are Yii2 Helpers Indicate?

Yii2's Helper classes play a pivotal role in simplifying routine coding tasks like string or array manipulation and HTML code generation. They are organized within the Yii helpers namespace as static classes, indicating that they should not be instantiated but rather accessed through static properties and methods.
In the Yii releases, several fundamental Helper classes prove indispensable for developers. Notable among them are:
ArrayHelper
Console
FileHelper
FormatConverter
Html
HtmlPurifier
Imagine (provided by yii2-imagine extension)
Inflector
Json
Markdown
StringHelper
Url
VarDumper
In this tutorial, we'll delve into a deep explanation of Yii2 Helper Libraries, showcasing their thematically targeted coding support modules. Here's a glimpse of some of the Helper classes included with Yii2:
ArrayHelper: Facilitates easier array handling with functions like safe value retrieval, mapping, and merging.
Console: Aids command-line functionality, input processing, and colorful text output.
FileHelper: Expands PHP's fundamental file management capabilities.
FormatConverter: Transforms a variety of formats, with a primary focus on dates.
Html: Dynamically generates commonly used HTML tags.
HtmlPurifier: Improves security by cleaning up user-input text.
Imagine (yii2-imagine plugin): Adds image manipulation capabilities to Imagine.
Inflector: Provides handy string methods for typical transformations.
Json: Encodes and decodes JSON data.
Markdown to HTML: Converts markdown content to HTML.
As a practical demonstration, we'll guide you through creating a helper in Meeting Planner, the focus of our Envato Tuts+ startup series.
In conclusion, our Yii experts, passionate about designing innovative and feature-rich web applications, including scalable enterprise web apps, are at your service. Consider hiring our virtual developers to handle your projects with expertise and creativity.
If you're looking for a one-stop destination for Yii development services, look no further than XcelTec. As a leading provider in Yii2 Development USA, XcelTec offers a comprehensive range of services to meet your needs. Their expertise covers all aspects of Yii development, ensuring that you receive top-notch solutions tailored to your requirements.
0 notes
Photo
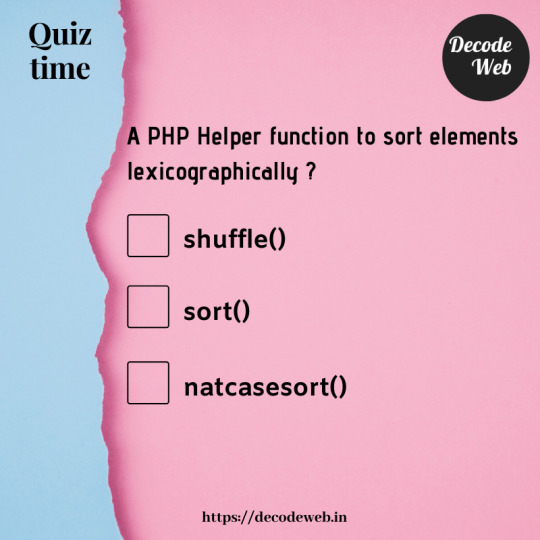
Quiz time: PHP Helper function to sort elements lexicographically ?
#php#array#array helper functions in php#quize#quizes#quiznight#tuesday#tutorial#guide#blog#blog post#programmer#programming#php programming#laravel
5 notes
·
View notes
Text
MySQL Aggregate Query using CodeIgniter’s Query Builder
CodeIgniter’s Query Builder ORM has class methods for nearly any kind of database access/operation you can think of. In this post, I’ll cover some of the available methods for retrieving aggregate-level query results. The examples in this post map out Query Builder method chaining to produce results you would get from a raw MySQL query. Continue reading to see more… Image by Clker-Free-Vector-Images from Pixabay Self-Promotion: If you enjoy the content written here, by all means, share this blog and your favorite post(s) with others who may benefit from or like it as well. Since coffee is my favorite drink, you can even buy me one if you would like! MySQL Query prototyping When working on Back-end PHP code, I typically prototype out MySQL queries using either MySQL Workbench or phpMyAdmin. Once I have the correct query results, I then translate the MySQL query over to the PHP layer. For applications written in core PHP, I tend to use the PDO class. However, when using CodeIgniter 4 (which is my PHP framework of choice at this time), you can use any of these options: Query Builder class methods.Extend the CodeIgniter Model class, utilizing its helper methods.A combination of both.For the examples in this post, I will use Query Builder class methods which are specific for aggregate-level data. Aggregate Query Results using MySQL As a SQL-first type of developer, I can honestly say that SQL is my favorite programming language and I am comfortable writing MySQL queries. That being said, I do appreciate the usefulness of an ORM. In my particular instance, since I use the CodeIgniter framework, the combination of CodeIgniter’s Models and the Query Builder class makes querying quite easy, among other things. Here is one such case in which I had little trouble retrieving the same query results using CodeIgniter Query Builder class ORM methods, as opposed to a raw MySQL query. I don’t feel that one approach is better or more valid than the other. This is just my experience as I learn CodeIgniter and am exposed to the Query Builder class and the in-built Models functionality provided by the framework. Let’s review this MySQL query which retrieves aggregated data on some of the walking stats and metrics I am interested in: SELECT MIN(`ws`.`day_walked`) AS `oldest_day_walked`, MAX(`ws`.`day_walked`) AS `recent_day_walk`, SUM(`ws`.`cal_burned`) AS `total_calories_burned`, SUM(`ws`.`miles_walked`) AS `total_miles_walked`, COUNT(*) AS `number_of_walks`, `sw`.`brand_name`FROM `walking_stats` AS `ws`INNER JOIN `shoes_worn` AS `sw`ON `ws`.`shoe_id` = `sw`.`shoe_id`GROUP BY `sw`.`brand_name`ORDER BY `sw`.`brand_name` ASC; Nothing too extravagant. A typical query using SUM(), COUNT(), MIN(), and MAX() aggregate functions. The above query returns these results: MySQL aggregate query results. Aggregate Query Results using CodeIginiter Query Builder class methods But, is this type of query – and more importantly – the query results, easily reproduced using CodeIgniter 4’s Query Builder class methods? They absolutely are. Let’s visit this CodeIgniter method I have in a class which extends the CodeIgniter Model: CodeIgniter 4 Query Builder class aggregate methods. The 4 key Query Builder aggregate-type methods used in the above Model method are: selectMin() – Maps to: SELECT MIN(field_name) selectMax() – Maps to: SELECT MAX(field_name) selectSum() – Maps to: SELECT SUM(field_name) selectCount() – Maps to: SELECT COUNT(field_name) Rounding out with both groupBy() and orderBy() methods complete the query. (Note: All 4 of the methods accept an optional 2nd parameter used to rename the field. I think of this in the same context as aliasing a column in MySQL using the AS keyword. The shoeAnalytics() model method produces identical query results as the MySQL query version shown previously. Looking at them in the browser using PHP”s print_r() method, we can see all of the data is there: Array( [0] => stdClass Object ( [oldest_day_walked] => 2019-01-02 [recent_day_walked] => 2020-12-02 [total_calories_burned] => 9091.1 [total_miles_walked] => 87.76 [number_of_walks] => 35 [brand_name] => Keen Koven WP ) [1] => stdClass Object ( [oldest_day_walked] => 2019-02-01 [recent_day_walked] => 2020-12-20 [total_calories_burned] => 1243.5 [total_miles_walked] => 13.25 [number_of_walks] => 5 [brand_name] => Keen Targhee Vent ) [2] => stdClass Object ( [oldest_day_walked] => 2019-07-15 [recent_day_walked] => 2020-05-13 [total_calories_burned] => 36805.2 [total_miles_walked] => 363.35 [number_of_walks] => 114 [brand_name] => Merrel MOAB Edge 2 ) [3] => stdClass Object ( [oldest_day_walked] => 2019-02-15 [recent_day_walked] => 2019-04-08 [total_calories_burned] => 404.7 [total_miles_walked] => 3.99 [number_of_walks] => 2 [brand_name] => New Balance Trail Runners-All Terrain ) [4] => stdClass Object ( [oldest_day_walked] => 2019-07-30 [recent_day_walked] => 2021-02-17 [total_calories_burned] => 21754.4 [total_miles_walked] => 216.61 [number_of_walks] => 75 [brand_name] => Oboz Cirque Low ) [5] => stdClass Object ( [oldest_day_walked] => 2020-05-24 [recent_day_walked] => 2020-12-04 [total_calories_burned] => 31222.5 [total_miles_walked] => 308.09 [number_of_walks] => 105 [brand_name] => Oboz Sawtooth II Low ) [6] => stdClass Object ( [oldest_day_walked] => 2019-01-01 [recent_day_walked] => 2019-08-08 [total_calories_burned] => 33084.5 [total_miles_walked] => 327.59 [number_of_walks] => 137 [brand_name] => Oboz Sawtooth Low ) [7] => stdClass Object ( [oldest_day_walked] => 2020-10-05 [recent_day_walked] => 2020-10-11 [total_calories_burned] => 1172.3 [total_miles_walked] => 11.42 [number_of_walks] => 4 [brand_name] => Skechers Crossbar )) Consider making a small donation on my behalf as I continue to provide useful and valuable content here on my site. Thank you. The shoeAnalytics() method can now provide these specific query results to any Views or libraries needing the data. Other CodeIgniter Query Builder class methods Which CodeIgniter Query Builder class methods do you find map nicely to a corresponding similar SQL expression? Which are those that do not map so nicely? Let me know in the comments! Similar Reading Visit any of the below PHP-related blog posts I have written if you are so inclined. Please share them with others who would benefit from the content as well. PHP date() function for common date formats PHP trim functions: trim, rtrim, and ltrim PHP empty() function use with MySQL NULL Use MySQL BLOB column with PHP to store .pdf file CodeIgniter Form Helper library – at a glance Like what you have read? See anything incorrect? Please comment below and thank you for reading!!! A Call To Action! Thank you for taking the time to read this post. I truly hope you discovered something interesting and enlightening. Please share your findings here, with someone else you know who would get the same value out of it as well. Visit the Portfolio-Projects page to see blog post/technical writing I have completed for clients. To receive email notifications (Never Spam) from this blog (“Digital Owl’s Prose”) for the latest blog posts as they are published, please subscribe (of your own volition) by clicking the ‘Click To Subscribe!’ button in the sidebar on the homepage! (Feel free at any time to review the Digital Owl’s Prose Privacy Policy Page for any questions you may have about: email updates, opt-in, opt-out, contact forms, etc…) Be sure and visit the “Best Of” page for a collection of my best blog posts. Josh Otwell has a passion to study and grow as a SQL Developer and blogger. Other favorite activities find him with his nose buried in a good book, article, or the Linux command line. Among those, he shares a love of tabletop RPG games, reading fantasy novels, and spending time with his wife and two daughters. Disclaimer: The examples presented in this post are hypothetical ideas of how to achieve similar types of results. They are not the utmost best solution(s). The majority, if not all, of the examples provided, are performed on a personal development/learning workstation-environment and should not be considered production quality or ready. Your particular goals and needs may vary. Use those practices that best benefit your needs and goals. Opinions are my own. Have a look at all Apress PHP books and eBooks. The post MySQL Aggregate Query using CodeIgniter’s Query Builder appeared first on Digital Owl's Prose. https://joshuaotwell.com/mysql-aggregate-query-using-codeigniters-query-builder/
1 note
·
View note
Text
Php training course
PHP Course Overview
PHP is a widely-used general-purpose scripting language that is especially suited for Web development and can be embedded into HTML.
PHP can generate the dynamic page content
PHP can create, open, read, write, and close files on the server
PHP can collect form data
PHP can send and receive cookies
PHP can add, delete, modify data in your database
PHP can restrict users to access some pages on your website
PHP can encrypt data
With PHP you are not limited to output HTML. You can output images, PDF files, and even Flash movies. You can also output any text, such as XHTML and XML.
PHP Training Course Prerequisite
HTML
CSS
Javascript
Objectives of the Course
PHP runs on different platforms (Windows, Linux, Unix, Mac OS X, etc.)
PHP is compatible with almost all servers used today (Apache, IIS, etc.)
PHP has support for a wide range of databases
PHP is free. Download it from the official PHP resource: www.php.net
PHP is easy to learn and runs efficiently on the server-side
PHP Training Course Duration
45 Working days, daily 1.30 hours
PHP Training Course Overview
An Introduction to PHP
History of PHP
Versions and Differences between them
Practicality
Power
Installation and configuring Apache and PHP
PHP Basics
Default Syntax
Styles of PHP Tags
Comments in PHP
Output functions in PHP
Datatypes in PHP
Configuration Settings
Error Types
Variables in PHP
Variable Declarations
Variable Scope
PHP’s Superglobal Variables
Variable Variables
Constants in PHP
Magic Constants
Standard Pre-defined Constants
Core Pre-defined Languages
User-defined Constants
Control Structures
Execution Control Statements
Conditional Statements
Looping Statements with Real-time Examples
Functions
Creating Functions
Passing Arguments by Value and Reference
Recursive Functions
Arrays
What is an Array?
How to create an Array
Traversing Arrays
Array Functions
Include Functions
Include, Include_once
Require, Require_once
Regular Expressions
Validating text boxes,emails,phone number,etc
Creating custom regular expressions
Object-Oriented Programming in PHP
Classes, Objects, Fields, Properties, _set(), Constants, Methods
Encapsulation
Inheritance and types
Polymorphism
Constructor and Destructor
Static Class Members, Instance of Keyword, Helper Functions
Object Cloning and Copy
Reflections
PHP with MySQL
What is MySQL
Integration with MySQL
MySQL functions
Gmail Data Grid options
SQL Injection
Uploading and downloading images in Database
Registration and Login forms with validations
Pegging, Sorting,…..
Strings and Regular Expressions
Declarations styles of String Variables
Heredoc style
String Functions
Regular Expression Syntax(POSIX)
PHP’s Regular Expression Functions(POSIX Extended)
Working with the Files and Operating System
File Functions
Open, Create and Delete files
Create Directories and Manipulate them
Information about Hard Disk
Directory Functions
Calculating File, Directory and Disk Sizes
Error and Exception Handling
Error Logging
Configuration Directives
PHP’s Exception Class
Throw New Exception
Custom Exceptions
Date and Time Functions
Authentication
HTTP Authentication
PHP Authentication
Authentication Methodologies
Cookies
Why Cookies
Types of Cookies
How to Create and Access Cookies
Sessions
Session Variables
Creating and Destroying a Session
Retrieving and Setting the Session ID
Encoding and Decoding Session Data
Auto-Login
Recently Viewed Document Index
Web Services
Why Web Services
RSS Syntax
SOAP
How to Access Web Services
XML Integration
What is XML
Create an XML file from PHP with Database records
Reading Information from XML File
MySQL Concepts
Introduction
Storage Engines
Functions
Operators
Constraints
DDL commands
DML Commands
DCL Command
TCL Commands
Views
Joins
Cursors
Indexing
Stored Procedures
Mysql with PHP Programming
Mysql with Sqlserver(Optional)
SPECIAL DELIVERY
Protocols
HTTP Headers and types
Sending Mails using PHP
Email with Attachment
File Uploading and Downloading using Headers
Implementing Chating Applications using PHP
and Ajax
SMS Gateways and sending SMS to Mobiles
Payments gateways and How to Integrate them
With Complete
MVC Architecture
DRUPAL
JOOMLA
Word Press
AJAX
CSS
JQUERY (Introduction and few plugins only)
1 note
·
View note
Text
Important Tips To Help You Get Better In CodeIgnitor Web Development Industry
There’s a wide range of open-source platforms available nowadays for hassle-free Internet development. CodeIgniter is among those frameworks that comprehensively serve Netpyx Simplifying Web with all the useful tools and properties and therefore we are able to provide an exact solution to your website.
What’s CodeIgniter?
CodeIgniter is an open-source web application framework that is used to build dynamic websites with PHP. It helps to develop projects much faster than framing code from scratch with the help of a rich set of libraries, a simple interface, and a logical structure. The MVC structure offers nice code separation and also keeps things clean as well as manageable.

How to improve the website’s performance with CodeIgniter?
High-end security and many inbuilt features are a few reasons that have made CodeIgniter Development Services in demand. When you are developing a web solution in this PHP web framework, there are a few things that you need to keep in mind to boost your web solution’s performance.
1. Eliminate libraries that are not required :
It is always suggested to remove all these libraries that have not been put to use so that you could save your space on the server. You can delete all the unused libraries when you are moving to the host server.
2. Check the server response time :
A good server response time is indicative of good CodeIgniter performance optimization. A good web hosting service, making use of fewer server resources, etc. are some of the techniques to scale down the server response time and improve the overall performance of the website with these CodeIgniter Development Services.
3. Delete index.php from the URL :
To increase the performance of the website you can very well remove the index.php from the website's URL. When you use CodeIgniter, index.php gets included in the URL by default. Therefore, remove index.php for a search engine optimized URL.
4. Use Autoload :
Make the best use of Autoload whenever required. The $autoload array can be put to practice for loading resources such as libraries, helpers, etc. Simultaneously, care should be taken that it should not be overused otherwise it might slow down the performance of the website.
5. Place all the configuration in the config directory :
Start generating a separate file wherein you get to store all the config options instead of setting configuration values in every function. This will support you in creating a website that has performance par excellence.
6. Displace the application directory outside the system folder :
By doing so you need not seek the system directory every time you want to access a controller. Therefore, move the application directory to another folder as per your convenience. Similarly, if you put the system directory and the application direction in one folder you need not change anything.
1 note
·
View note
Text
Understanding Important Differences Between Laravel Vs CodeIgniter
PHP is a modern framework in software development with a lot more flexibility in terms of a structured coding pattern with scope for applications that we deliver to perform better is required. The security feature of Laravel is quick in taking action when in security violation and for CodeIgniter too. The syntax guides of Laravel are expressive and elegant. The differences between Laravel vs CodeIgniter are as under:
Essential differences between Laravel vs CodeIgniter
Assistance for PHP 7
As a major announcement of the server-side programming language, PHP 7 comes with several unique features and improvements. The new features let programmers magnify the performance of web applications and lessen memory consumption. Both Laravel and CodeIgniter support version 7 of PHP. But several programmers have highlighted the issues faced by them while developing and testing CodeIgniter applications on PHP 7.
Produced in Modules
Most developers part big and complex web applications into a number of small modules to simplify and advance the development process. Laravel is designed with built-in modularity features. It allows developers to divide a project into small modules through a bundle. They can further reuse the modules over multiple projects. But CodeIgniter is not planned with built-in modularity specialties. It requires CodeIgniter developers to create and control modules by using Modular Extension additionally.
Support for Databases
Both PHP frameworks support an array of databases including MySQL, PostgreSQL, Microsoft Bi, and MongoDB. However in the fight of Laravel vs CodeIgniter, additionally supports a plethora of databases including Oracle, Microsoft SQL Server, IBM DB2, orientdb, and JDBC compatible. Hence, CodeIgniter supports a prominent number of databases that Laravel.
Database Scheme Development
Despite encouraging several popular databases, CodeIgniter does not provide any particular features to clarify database schema migration. Though the DB agnostic migrations emphasize provided by Laravel makes it simpler for programmers to alter and share the database schema of the application without rewriting complicated code. The developer can further develop a database schema of the application easily by combining the database agnostic migration with the schema builder provided by Laravel.
Fluent ORM
Unlike CodeIgniter, Laravel empowers developers to take advantage of Graceful ORM. They can practice the object-relational mapper (ORM) system to operate with a diversity of databases more efficiently by Active Record implementation. Fluent ORM further allows users to interact with databases directly through the specific model of individual database tables. They can even use the model to accomplish common tasks like including new records and running database queries.
Built-in Template Engine
Laravel comes with a simple but robust template engine like Blade. Blade template engine enables PHP programmers to optimize the representation of the web application by improving and managing views. But CodeIgniter seems not appear with a built-in template engine. The developers need to unite the framework with robust template engines like Smarty to accomplish common tasks and boost the performance of the website.
REST API Development
The RESTful Controllers provided by Laravel allows laravel development company to build a diversity of REST APIs without embedding extra time and effort. They can simply set the restful property as true in the RESTful Controller to build custom REST APIs without writing extra code. But CodeIgniter does not provide any specific features to simplify development of REST APIs. The users have to write extra code to create custom REST APIs while developing web applications with CodeIgniter.
Routing

The routing choices given by both PHP frameworks work identically. But the features presented by Laravel facilitate developers to route requests in an easy yet efficient way. The programmers can take advantage of the routing feature of Laravel to define most routes for a web application in a single file. Each basic Laravel route further accepts a single URI and closure. However, the users still have the option to register a route with the capability to respond to multiple HTTP verbs concurrently.
HTTPS Guide
Maximum web developers opt for HTTPS protocol to obtain the application send and acquire sensitive information securely. Laravel empowers programmers to set custom HTTPs routes. The developers also have the choice to create a distinct URL for each HTTPS route. Laravel further keeps the data transmission secure by adding https:// protocol before the URL automatically. But CodeIgniter appears not support HTTPS fully. The programmers should practice URL helpers to keep the data transmission secure by generating pats.
Authentication
The Authentication Class presented by Laravel makes it simpler for developers to execute authentication and authorization. The extensible and customizable class further permits users to manage the web application secure by executing comprehensive user login and managing the routes secure with filters. However, CodeIgniter does not appear with such built-in authentication features. The users are asked to authenticate and authorize users by drafting custom CodeIgniter extensions.
Unit Testing
Laravel accounts for additional PHP frameworks in the division of unit testing. It enables programmers to check the application code thoroughly and continuously with PHPUnit. In extension to being a broadly accepted unit testing tool, PHPUnit arises with a variety of out-of-box extensions. Hence, programmers have to use added unit testing tools to evaluate the quality of application code throughout the development process.
Learning Curve
youtube
Unlike Laravel, CodeIgniter has a petite footprint. But Laravel presents extra features and tools than CodeIgniter. The additional features make Laravel complex. Hence, the beginners have to put additional time and effort to learn all the features of Laravel and use it efficiently. The trainees find it simpler to learn and use CodeIgniter within a short period of time.
Community Support
Both are open source PHP framework. Each framework is also backed by a great community. But numerous web developers have said that members of the Laravel community are major active than members of the CodeIgniter community. The developers regularly find it simpler to avail online help and quick solutions while developing web applications with Laravel.
The developers yet require to evaluate the features of Laravel vs CodeIgniter according to the precise needs of each project to choose the best PHP framework.
If analyzed statistically, Laravel seems to be more accepted than CodeIgniter by a wide margin. This is validated by Sitepoint’s 2015 survey results, where Laravel was honored as the most popular PHP framework according to a massive 7800 entries. CodeIgniter, according to the study, pursues at number 4. Users also report that Laravel is more marketable since clients have often heard about the framework previously, giving a Laravel an enormous market value than CodeIgniter.
Some would claim that the predominance or the market shares are not enough reasons to pick one framework across another, and it is a strong point. A good developer should examine the overall features, performance, and functionalities that are particular to their web application before executing ANY framework.
Among Laravel vs CodeIgniter, well-seasoned master developers can find that they can avail several great features if they opt for Laravel since it requires an absolute command on the MVC architecture as well as a strong grip on OOP (Object Oriented Programming) concepts.
Conclusion
If you are looking to create a resilient and maintainable application, Laravel is a nice choice. The documentation is accurate, the community is large and you can develop fully emphasized complex web applications. There are still many developers in PHP community preferring CodeIgniter for developing medium to small applications in simple developing environment. Conserving in mind the pros and cons of each, in reverence to the precise project, you can reach the perfect verdict. Read Full Article on: https://www.cyblance.com/laravel/understanding-important-differences-between-laravel-vs-codeigniter/
#laravel development company#laravel development#laravel developer#laravel development services#laravel development company india#laravel application development#laravel web development#php laravel developer#laravel web development company#laravel application development company#laravel web development services#best laravel development company#laravel web developer#laravel web application development company#remote laravel developer#laravel framework development#laravel app development#dedicated laravel developer#laravel website development#remote laravel#certified laravel developer#laravel development india
1 note
·
View note
Text
Easy translator 16 key

#EASY TRANSLATOR 16 KEY HOW TO#
#EASY TRANSLATOR 16 KEY INSTALL#
#EASY TRANSLATOR 16 KEY UPDATE#
Oscarotero/Gettext: Gettext support with an object-oriented interface includes improved helper functions, powerful extractors for several file formats (some of them not supported natively by the gettext command). Although in this document, we focus on the tools provided with the PHP core, here’s a list of some others worth mentioning:
#EASY TRANSLATOR 16 KEY INSTALL#
Some are easier to install than others, or sport additional features or support different i18n file formats. There are major PHP web frameworks and libraries that support Gettext and other implementations of i18n.
#EASY TRANSLATOR 16 KEY UPDATE#
We will be presenting a great GUI application that can be used to easily update your l10n source files, thereby avoiding the need to deal with the command line. Gettext is what we’ll be using in this post. While it is pretty easy to get started with, it still has powerful supporting tools. Though dating back to 1995, it is still a comprehensive tool for translating software that is also easy to use. One of the most classic tools (often taken as reference for i18n and l10n) is a Unix tool called Gettext. Some issues might even appear in the very beginning, such as the lack of support for variable interpolation or pluralization of nouns and so on. This is, however, hardly a recommended way for serious projects, as it will definitely pose maintenance issues down the road. Arrays will be populated with translated strings, which can then be looked up from within templates: The easiest way to internationalize PHP software is by using array files. We will go through the various implementation options and the different tools that are available at our disposal to ease the process.
#EASY TRANSLATOR 16 KEY HOW TO#
In this article, we will learn how to internationalize and localize software written in PHP. Also, whenever a part of the interface (containing text) is updated, new content becomes available - which then needs to be localized (i.e., translated) to all supported locales. Localization needs to be performed every time a new language or region needs to be supported. Once your codebase has been internationalized, localization (l10n) becomes a matter of translating the contents of your application to a specific language/locale. Internationalization is usually done once, preferably in the beginning of the project to avoid needing huge changes in the source code down the road. Internationalization (i18n) of your codebase, helps ensure that it can be adapted to different languages or regions with relative ease. The way your code is organized, and how your components and interface are designed, plays an important role in determining how easily you can localize your application. You may even find languages with a total of four, five, or six plural forms, such as in Slovenian, Irish, or Arabic. In other languages, though – such as Slavic languages – there are two plural forms in addition to the singular one. Rules of pluralization in English are pretty straightforward: you can have a singular form of a word or a plural form of a word. The differences in grammar rules, language nuances, date formats, and more combine to make localization a unique and formidable challenge. Whether you are building a website or a full-fledged web application, making it accessible to a wider audience often requires it to be available in different languages and locales.įundamental differences between most human languages make this anything but easy.
0 notes
Text
What Exactly Are Yii2 Helpers Indicate?

In the series "Programming With Yii2," we walk readers through the Yii2 Framework for PHP. In this tutorial, we will provide a brief overview of helpers. Helpers are simple-to-extend modules in Yii that group together frequently used libraries for managing things like text, files, images, URLs, and HTML.
Additionally, we'll demonstrate how to create a helper in Meeting Planner, the topic of our Envato Tuts+ startup series.
Numerous Yii classes simplify common coding operations like manipulating strings or arrays, creating HTML code, and other similar activities. The Yii helpers namespace contains these static helper classes that are all organised (meaning they contain only static properties and methods and should not be instantiated).
In the Yii releases, you'll find the following fundamental helper classes:
ArrayHelper
Console
FileHelper
FormatConverter
Html
HtmlPurifier
Imagine (provided by yii2-imagine extension)
Inflector
Json
Markdown
StringHelper
Url
VarDumper
Let's move forward to the deep explanation of Helper Libraries for Yii2
Helpers are simply coding help modules with a specific theme. The helpers that come with Yii2 are listed here; this list is currently a little more recent than the documentation and menus:
With features like safely locating values online, mapping, merging, and more, ArrayHelper makes working with arrays simpler.
Input, output, and command-line functionality are all supported by the console.
The essential file management features of PHP are expanded by FileHelper.
Among the formats that FormatConverter translates, dates are currently its main focus.
Frequently used HTML tags are dynamically generated by HTML.
By removing user-input text, HtmlPurifier increases security.
Imagine now has the ability to manipulate images thanks to the yii2-imagine plugin.
Inflector offers practical string methods that are useful for common transformations.
A programme called JSON is used to encode and decode JSON data.
A conversion tool for markdown is called Markdown to HTML.
Conclusion
Our Yii professionals are exceptionally talented and passionate about creating cutting-edge and feature-rich web applications, including ascendable enterprise web apps, using this special framework. To handle your projects, hire virtual developers.
Visit to explore more on What Exactly Are Yii2 Helpers Indicate?
Get in touch with us for more!
Contact us on:- +91 987 979 9459 | +1 919 400 9200
Email us at:- [email protected]
#yii development company#yii2 development#yii2 development services#latest technologies in yii2#Yii development#Yii2 development services#PHP frameworks
0 notes
Photo

What is array_fill() function in php ?
It is an array helper function which is used to fill an array with user defined values. Moreover, this function can also makes an array with negative index.
https://decodeweb.in/php/10-not-so-famous-but-powerful-array-helper-functions-in-php/#6-array-fill
#laravel#php#array_fill#array helper functions in php#programming#web development#webdev#tutorial#web development tutorial for beginners#decodewebin
0 notes
Text
3 Best WordPress Photo Gallery Plugins
Pretty much every website uses images and WordPress photo gallery plugins make it easy to display those images in an attractive way.Try a free demo
But with so many options to choose from, it can be hard to dig through everything and find the plugin that offers just the right combination of features, aesthetics, and ease of use.
To help you find that plugin, we’ve compiled a list of the best WordPress photo gallery plugins, dissected their feature lists, and grabbed a representative screenshot so that you know what types of galleries each can create.
Ready to dive deep? Let’s go!Find the best way to display your WordPress images with this roundup of the best photo gallery plugins

CLICK TO TWEET
How to Choose the Best WordPress Photo Gallery Plugins
You have an overwhelming number of WordPress photo gallery plugins to choose from. Go to CodeCanyon, WordPress.org, or make a Google search and you’re still going to be looking at a long list, without much guidance on what you should go for.
Therefore, we compiled the best features to consider when looking through these WordPress photo gallery plugins. Everyone’s situation will be different, but try to pick out the most important features to you from the list below to narrow your search:
A collection of different gallery formats such as tiled, mosaic, and masonry.
Lightbox viewing, for users to get a larger version of the photos in your gallery.
Image sharing, through social media and other options like email.
Image commenting for creating a community and conversation behind your photos.
Support for both video and photos, with tools for linking to YouTube and Vimeo videos.
Linking options so that you can send people to descriptions of your portfolios or blog posts with more information.
Open graph access to integrate with third-party tools and customize the way the gallery looks.
Image protection for those who don’t want their photographs used without permission.
Ecommerce support to sell your photos through a WordPress website.
A digital download management system to compile the images and organize them into categories.
Animations and other effects to grab attention when users scroll over your photos.
Drag and drop builders for rapidly building a photo or video gallery without the need for complicated coding or settings.
Mobile-friendly galleries so that users can view your photos from tablets and phones.
Image optimization with lazy loading. This is essential if you plan on having lots of photos on your website. It’s bound to improve the speed of your site and make search engine happy.
Gallery templates to eliminate the need to start a gallery from scratch.
Customization tools so that you can match your branding, fonts, colors, and other elements with what your current website looks like.
The list could go on, but this is a good starting point for you to identify what’s most important to your business when it comes to finding a photo gallery plugin. Some companies won’t find any value in copyright protection, but others wouldn’t ever consider a WordPress gallery plugin without that functionality.
Therefore, keep all of these primary features in mind as you read through our in-depth gallery plugin evaluations below.
Best WordPress Photo Gallery Plugins in 2020
Modula
NextGEN Gallery
Envira Gallery
Gmedia Photo Gallery
Photo Gallery by 10Web
Jetpack
FooGallery
Photo Gallery by Supsystic
Justified Image Grid
Everest Gallery Lite
Image Gallery by Robo
Meow Gallery
Portfolio Gallery
Responsive Lightbox & Gallery
WordPress Photo Gallery Plugin by Gallery Bank
Photo Gallery by GT3
1. Modula
Modula is an extremely user-friendly WordPress gallery plugin from Macho Themes that helps you quickly create interesting photo and video galleries. With Modula’s range of flexible customization options, you can easily tweak your gallery to your liking.
Modula WordPress plugin
With Modula’s custom grid functionality, you can freely resize images within your gallery’s container, controlling their heights, widths, and aspect ratio.
And, all you need to do is switch a gallery from ‘creative gallery’ to ‘custom grid’ and start changing the dimensions of your images by clicking and dragging from the bottom right-hand corners of the images in your gallery.
If you decide to give Modula a try, you’ll quickly notice that the plugin was developed to cater to all WordPress users, regardless of experience. Their easy-to-use drag-and-drop interface and customization options make it possible to create a gallery that looks just like one of their demos in less than five minutes.
For more advanced users, Modula has an advanced customization section where it is possible for users to add CSS that can be applied to galleries separately. This, together with their well-written documentation contributes to what we believe is truly a great user experience.
A Typical Gallery Created by Modula Looks Like…
The free version of Modula is available on the official WordPress plugin repository and even includes their custom grid functionality. While you can play around with settings like margins, shadows, border radius, and more to alter how your galleries look, here’s a good idea of the style of galleries created by Modula Lite.
Modula WordPress Photo Gallery Plugin
Modula’s plans start at $39 for a single site, up to $129 for the Agency option with unlimited sites.
Reasons to Use Modula
It gives you the ability to design custom grids. All parts of the grid are customizable, with options to freely resize images within the gallery container.
Easily create a lightbox gallery with different included lightbox styles.
You can add image-entry animations (such as sliding and rotation). There are also over 40 built-in hover effects to grab attention and make your galleries look more appealing.
The plugin provides advanced tools for further customizing your gallery with CSS. This isn’t for beginners, but more advanced users will like the fact that they can tap into the custom code.
One of the premium extensions allows you to add videos to your galleries, all with simple links to the videos.
The plugin provides social media buttons so that your visitors share your photography with other people.
You get to choose from a wide range of grid formats, such as masonry, lightbox galleries, and regular square grids.
All galleries are ready to work on mobile devices.
Add GIFs to your galleries so that your entire grid is filled with moving images.
Generate albums to better organize your galleries and photos.
All customization is done through a drag and drop interface.
A “helper grid” comes with the plugin to give you an idea of where to place your images and show what the gallery looks like prior to publication.
Add filters to your gallery so that users can sift through your images and figure out which ones they like the most. This is particularly important for portfolio galleries.
The premium version of the plugin has a protection extension so that site visitors don’t have the ability to right-click and download your photos.
A watermark extension is available to further protect your photography.
A speed extension comes in handy for optimizing every single image that is added to your galleries.
Use shortcodes to insert your galleries anywhere on your website. For instance, you may think about dropping a gallery shortcode anywhere in a blog post or in the footer module.
Things to Consider Before Choosing Modula
Modula is mainly for grid galleries. That’s what it does best. It’s also true that the majority of features provided in the free version revolve around the grid galleries. If you’d like to unlock slideshows or other layouts, you’ll need to think about upgrading to one of the premium versions.
Price: Free + Paid plans start at $39 for a single-site license.
Reviews: 4.7 out of 5 stars (WordPress.org)
Active installations: 70,000+
PHP version: 5.6 or higher
2. NextGEN Gallery
By the numbers, NextGEN Gallery is one of the most popular WordPress photo gallery plugins on WordPress.org. It continues to receive over 1.5 million new downloads per year, along with great overall reviews. It’s developed by Imagely, photography experts who know the industry well.
NextGEN Gallery WordPress plugin
The free version of NextGEN Gallery provides two main gallery styles (slideshows and thumbnail galleries) and two album styles (compact and extended), all of which come with a wide array of options for controlling size, style, timing, transitions, controls, lightbox effects, and more. You can then extend it with various premium bundles.
In addition to a variety of different gallery types, these premium versions also add more advanced features like:
ecommerce functionality to sell images.
Image protection (hotlink protection, watermarks, etc.).
Image deep linking for lightbox galleries.
A Typical Gallery Created by NextGEN Gallery Looks Like…
One of the draws of NextGEN Gallery is that it offers so many different types of galleries, so there’s no single typical gallery.
I’ll use the basic thumbnail gallery for this example because it’s included in the free version. And if you go with the Pro version, you have access to many more interesting templates:
NextGEN Gallery
Reasons to Use NextGEN Gallery
You can create albums of different galleries, which is helpful if you need to display lots of pictures.
You can create slideshow galleries, as well as many other gallery types depending on which version you have.
The premium versions offer advanced features like watermarks, deep image links, and more.
NextGEN Pro includes ecommerce functionality, which is helpful if you’re selling photography.
You can choose from compact and extended galleries in the free version. So, it’s basically a choice between a longer list of photos or a consolidated layout.
You receive unique alternatives to your regular, everyday grid galleries. Some of these options include thumbnail galleries, list albums, and blog style galleries.
Image sharing is possible through social media buttons and other options like sending through email.
Your website visitors can come to your gallery and make comments on the imagery. This isn’t a requirement, so you can turn the functionality on or off.
Sales tax is automatically generated when making photo sales.
Some of the payment gateways include Stripe and PayPal.
If selling gallery photos, you get tools for sending out coupons to your customers.
Print lab fulfillment is available if you’d like to partner with a reputable printer. This is usually what most photographers do, since it would be far too time-consuming and expensive to print your own photos.
A Lightroom plugin comes with the premium version for a rapid edit and publication process.
Things to Consider Before Choosing NextGEN Gallery
The free version used to be pretty basic, but they have been actively adding a lot more features. For example, the basic slideshow can show arrows and change the transition timing. Having said that, NextGEN is a professional level image gallery. We recommend it to anyone who can afford it. Try out the free version first, then consider upgrading if you’d like to protect images and offer additional gallery layouts. Just keep in mind that NextGEN Pro is one of the most expensive WordPress photo gallery plugins out there.
Price: Free. The cheapest premium bundle is NextGEN Plus at $79.
Reviews: 4.3 out of 5 stars (WordPress.org).
Active installations: 800,000+.
PHP version: 5.4 or higher.
3. Envira Gallery
Acquired by Nathan Singh in early 2018, Envira Gallery is another popular freemium gallery plugin. A free version is available. Some brands may find that the core plugin is all they need to make a beautiful gallery. However, many of the coolest features are reserved for the premium plugin galleries.
Envira Photo Gallery WordPress plugin
One of the draws of Envira Gallery is that, like Modula, the interface is designed to make it as easy as possible to quickly get up and running with a good-looking gallery in WordPress.
While the free version is nice for basic galleries, the various premium plans are where you get the bulk of the helpful features, which include:
Social sharing.
Video support.
Albums.
Watermarking.
Image deep linking.
WooCommerce support.
More.
A Typical Gallery Created by Envira Gallery Looks Like…
While Envira Gallery lets you create multiple types of galleries, here’s the result without touching any of the settings:
Envira Gallery
Reasons to Use Envira Gallery
The interface is well-designed and you get to create your galleries with the help of a drag and drop builder. There’s no need to mess with any code. You drop the images right into place and hit the Publish button.
The Pro versions give you access to a ton of features (though they can get pricey).
You can use videos in your galleries with the Pro versions.
Several helpful addons are provided, with support for WooCommerce, Proofing, Lightroom, and more.
Social media sharing buttons come standard.
You can link to your social media pages and reveal the photos from those pages in your galleries.
Quite a few templates are provided in the free version, cutting out the amount of time it would take to build a completely new gallery.
Assign tags and categories to your galleries for better organization.
Deeplinking is possible for sending users to more information about your photos.
All galleries created in Envira Gallery work well on mobile devices. The galleries and photographs snap into place depending on how large your screen is.
You can integrate with WooCommerce to start selling your photographs and collect payments through gateways like Stripe.
Envira Gallery is unique in that it includes Gutenberg blocks to drop your galleries anywhere on your website. Not many of the competitors have Gutenberg blocks.
The watermarking and password protection tools come in handy for when you’d like to completely block users from taking your photos and using them elsewhere.
You can automatically import images from places like Instagram and Pinterest.
The CSS styles are fully customizable if you have the experience to mess around with the custom coding.
Things to Consider Before Choosing Envira Gallery
Some people love Envira, while others would recommend never considering it. It’s one of those WordPress photo gallery plugins where you really have to test it out to discover if it’s right for you. If pricing is your main concern, I would recommend skipping Envira Gallery right off the bat.
Overall, if you have the money, the Envira Gallery features are rock solid. However, users who want free galleries should look elsewhere.
Price: Free. The basic premium version starts at $29 for a single-site license, but the full-featured Pro version costs $69.
Reviews: 4.8 out of 5 stars (WordPress.org)
Active installations: 100,000+
PHP version: 5.3 or higher
The post 3 Best WordPress Photo Gallery Plugins appeared first on The Coding Bus.
from WordPress https://ift.tt/3mGil4v via IFTTT
0 notes
Text
Programming Help In USA
Programming Help in USA
If you are programming in your higher studies, you should know the complications involved in the topic. Despite the effort you have made to get a vivid idea, you may face difficulties when drafting assignments. With hundreds of students receiving programming support, the demand for online programming help in USA is growing. But finding the right people to help with your programming assignments is quite a difficult task because coding of experts is a rare breed.
Well, not anymore! Ready to help you with instant programming assignments, an expert coder brings an army of help.
We are now catering to students in times of need for more than a decade. Whenever students take the help of programming homework, we are their top choice. Whenever they need online programming help immediately, we are here to assist students. We have domain-specific specialists on board to do nail assignments at a stroke. Hire our experts and score brownie points for this term. Read on to find out why choosing us is the best decision?
Widest Array Of Programming Assignment Help
We have a group of highly qualified programming assignment helpers who put in honest efforts to draft your paper brilliantly. Trust our experts and get flawless help with programming assignments.
Our best programming assignments allow experts to terminate all your assignments. All you have to do is opt for our live chat option and seek the help of computer science homework assistance or programming assignments. Share your details and take advantage of the multitude of services on offer, anytime you need help with your programming assignments.
Personalized Computer Science Homework Help
Dedicated computer science and programming assignments help experts work on graphics. The authors are well versed with different genres of computer programming and help you overcome every obstacle. They work with graphics designing software and animation to draft flawless homework. So, let's help you with your coding assignments and impress our professors with great solutions.
We have the homework of computer programming that helps experts who specialize in networking. They can provide excellent interpretation of cloud computing, database storage management, computer network architects, etc.
Come with us "Can you do my programming assignments for me?" today questions and easily solve programs on web development, cloud computing, software development, etc.
We will help you in programming assignments by identifying key ideas, determining paper requirements to make it flawless, etc. Our authors are code-maniak, and they know every detail about programming languages. They specialize in various coding languages such as Java, C++ and Python. Take the help of our cheap programming assignments and guarantee top grades.
At our service we have professional web developers who help you draft a great programming assignment. The authors showed their expertise and help with various web development tools. Their flawless support with programming help in USA will keep your grades on the parachute of the word. Send us your programming assignments and get the help of a cohesive team of professional coders.
In addition to coding, we provide computer assignment support with other programming aspects, introducing artificial intelligence from the database. You can also come to us with topics like mathematical algorithms and data structure. We have people who are well versed with different branches of programming. His expertise will make the paper spectacular and flawless.
Dazzle your professors with first-rate solutions today. Take the help of our expert computer programming assignments. Send us those "my programming assignment" requests as quickly as possible and solve the right home assignment at flattering values.
The World’s Leading Programming Assignment Helpers At Your Disposal
When you choose us, you choose some of the most brilliant minds as your assignment helpers. Close knit teams with select programmers and coders work towards developing the best possible solution for all your programming assignments.
Keep it C, C++, C#, R, Java, Python, HTML, JavaScript, PHP; Our coding wizards will provide accurate and bug-free coding assignment help on every order. Fully armed with knowledge and unmatched program writing skills, our coders will develop user-friendly codes that are efficient. Distributed with well-prepared flowcharts, every solution is:
Clear and stable
Accessible and efficient
Bug-free and logically sound
Easily convertible resident coders are well versed in all primary and derived programming patterns. They have the skills and experience required for the program in any language, regardless of whether they are:
Imperial Languages
Structured Languages
Procedural Languages
Object-oriented languages
functional languages
It's guaranteed that you won't find such comprehensive online programming help in the USA or anywhere else on the web or the dark web.
Programming is a developed discipline. As machines become more and more powerful, their instruction set expands. Tapping the potential and using them to achieve amazing technological feats is every coder's dream, developing code that can now make machines learn and behave like humans. Programmers dream of the same dream, which coding is a passion and passion.
Our unique online programming help help you provide programming solutions:
Sorting and search issues
Conduct operations
Data structure operations on binary trees, linked lists, stacks and queues
Hashing
Restructuring and string manipulation
Dynamic Programming
Numerical and mathematical operations and much more.
So, get rid of all doubts and hand over all your programming assignments to our coders. Let us work on your problems, while you focus on the most important thing, namely, learning.
Every solution is structured and motivated to increase code readability and accessibility. Our coder add comments at each critical juncture and distribute flowcharts and algorithms with each program. Thus, when you take the help of coding assignments from us, you don't just assist your assignments, you learn the craft of creating amazing code.
All our expertise sometimes comes to you at the most amazing prices. There is simply no other service providing such unique quality at such incredible prices. So, pay us for your programming assignments and fill your coffers with praise and achievements.
More, an array of amazing perks await you when you decide to pay us for your programming assignment. Get help on the web's most comprehensive coding assignment and go on the way to becoming a successful coder today.
Unlock A Plethora Of Benefits With Our Programming Help Online
Are you tired of struggling with complex programming assignments? Take a cold pill and take the help of programming assignments only on. Apart from providing experts' support, we also give you other grounds based on us. Look once and get ready to make us your best friend.
Fast delivery of orders
You can also bid for the trauma of the missing deadline when you trust us. Our experts understand the importance of submitting work before the deadline. Therefore, they made sincere efforts to complete the paper even before the promised date. Writing services can deliver as fast as we can.
Full fulfillment of requirements
Your professors cannot steal grades from your paper by pointing out issues related to job cards. We follow every instruction effortlessly and make the best assignment. You can set the example of this term by submitting a flawless paper to your class and scoring the top grade.
Enjoy instant feedback from customer support
Do not hesitate to call us whenever you have any questions in your mind. You don't need to wait for the right time. We have a team of dedicated customer support officers who always solve the query with quick measures. You can call us, shoot us a mail or even choose our live chat option.
100% originality of paper assured
We are referred to as the best programming assignment help website for our zero plagiarism guarantee. We have a strict anti-literary policy, followed by our writers when working on academic papers. Our authors use authentic detectors to detect sections that may cause plagiarism. We also provide reports as proof of our authenticity.
Get Premium Services With Our Cheap Programming Homework Help
When we're here to reduce your financial burden, don't stop ourselves from getting programming assignments. If you need some necessary programming assignments, ask us 'Can you do my programming assignment.' ' We are here to make things easier for you.
Your 'Takeaways'
Attractive 30% discount on all orders
Referral bonus if your friends choose us
Loyalty appreciates your loyalty
Simple and easy return policy
When you are in defence, there will be no more budget crisis. Hire us for an affordable programming help in the USA that's easy on your pocket.
Hurry up, place your orders, and get unique help with your programming assignments today!
0 notes
Text
Introduction to the Drupal Unit-testing
You have added features to the site a few days later the customer called and told me that nothing works. You have 20 hours stuffing code and a bunch of times and go on klatsaete forms of testing to get everything working, but the brain perceives nothing and end up on the site added a broken piece. Or maybe you have a complex module with a bunch of interconnected functional, well or small, but with a lot of choices. In general, you have millions of reasons to come to the automated testing.
Use of automated testing can get rid of piles of routine operations on a regular functional testing code. To test the available AutoComplete forms and checking the result, control user access to various sections of the site and functionality, and much more.
What can we offer to test Drupal?
Testing modules and functionality in Drupal module by using SimpleTest. And, with version 7 is included in the kernel, so look the other way and do not make much sense.
Installation
To install you need to set Drupal and that the server was accessible library php-curl, with which the module implements parsing of pages. Once the module is copied to the server, you need to patch the kernel, the patch file is located in the root folder of the module. To use it you must click on the server from the root of the site:
patch-p0 <{path-to-folder-with-modules} / simpletest/D6-core-simpletest.patch Then you can just activate it in the tab with modules and you can view a list of available tests on the page admin / build / testing.
How does the SimpleTest?
In the beginning, it scans the folder modules in search of available tests, if it does not matter whether or not the module is active, the user sees and tests themselves and can not fulfill them including the corresponding module.
This is achieved thanks to the fact that, before starting the test SimpleTest creates a virtual installation of Drupal with a later and running. Already it activates the necessary modules and themes, which may differ from the installation of the current site. Further, in the software testing outsourcing services process tested caused a page or function, after which they validate and generate output information about the success or failure of the operation.
By the way, for each function testXXX setUp runs every time before performing the test.
The first test
Thus, we conclude the flood and move on to practice. In the first test we examine the creation of material such as Page, which is available in all installations. To do this we need:
Create a test file with the name imya_modulya.test and save it in the folder with the module. The file name specified in the tough SimpleTest.
Next, create the test itself:
<?php class OurModuleTest extends DrupalWebTestCase { / / Helper function, which we will generate a text with blanks and Blackjack protected function randomText ($ wordCount = 32) { $ Text =”; for ($ i = 0; $ i <$ wordCount; $ i + +) { $ Text .= $ this-> randomString (rand (4, 12)). ”; } return $ text; } / / Information about the test, which is displayed on the page of tests. public static function getInfo () { return array ( ‘Name’ => ‘Page creation test’, ‘Desc’ => ‘Testing page creation’, ‘Group’ => ‘Our tests’, ); } public function setUp () { / / Set the required modules $ Args = func_get_args (); $ Modules = array_merge (array (’help’, ’search’, ‘menu’, ‘node’), $ args); call_user_func_array (array (’parent’, ’setUp’), $ modules); / / Set the right user permissions $ Permissions = array (’access content’, ‘create page content’, ‘delete own page content’, ‘edit own page content’); / / Create a user with these rights and enter into the system $ User = $ this-> drupalCreateUser ($ permissions); $ This-> drupalLogin ($ user); } / / Testing a page public function testPageCreation () { $ Params = array ( ‘Title’ => $ this-> randomName (32) ‘Body’ => $ this-> randomText (), ); / / Call a Page Page $ This-> drupalPost (’node / add / page’, $ params, t (’Save’)); / / Check if the received input $ This-> assertText (t (’Page @ name has been created.’, Array (’@ name’ => $ params ['title'])), t (’ Page creation ‘)); } } ?>
Clear the cache and go to the page admin / build / testing. Now, there we see the drop-down tab "Our tests", which is available in a single test "Page creation test". By putting a tick on him to fulfill it. after the information is available to us "19 passes, 0 fails, and 0 exceptions". The fact that we wanted.
Now log out the user and then try to perform the test. To do this, create another test and call it testAnonymousPageCreation. From the previous test code will be different only in that we run before running $ this-> drupalLogout ()
/ / Test create page anonymous user public function testAnonymousPageCreation () { / / User Razloginivaem $ This-> drupalLogout (); $ Params = array ( ‘Title’ => $ this-> randomName (32) ‘Body’ => $ this-> randomText (), ); / / Call a Page Page $ This-> drupalPost (’node / add / page’, $ params, t (’Save’)); / / Check if the received input $ This-> assertText (t (’Page @ name has been created.’, Array (’@ name’ => $ params ['title'])), t (’ Page creation ‘)); }
Now the result of 29 passes, 5 fails, and 0 exceptions. However, this is not the result, which was worth getting. In this case, you need to check whether the user’s access is blocked to this page, this will be a successful test, this will modify the test:
/ / Test create page anonymous user public function testAnonymousPageCreation () { / / User Razloginivaem $ This-> drupalLogout (); / / Try to get the desired page $ This-> drupalGet (’node / add / page’); / / Check the server response to error 403 (Access denied) $ This-> assertResponse (403, t (’You have no permitions to this page .’)); }
Now the result: 30 passes, 0 fails, and 0 exceptions. Ok, now we know that unauthorized users can not get access to the creation of pages.
Visit here: Mobile app testing services
What’s next?
Next we have to teach myself to write code right away with the tests. SimpleTest provides enough functionality to solve many problems.
First, it helps to formalize the problem, because for the test to prescribe a clear success criteria.
Second mistake will be detected earlier and a fix will be spent significantly less time because there will be the exact information where and under what conditions the error appeared.
Third excluded mass of routine operations, in which to make a mistake and miss something important. And most importantly, always nice to know that everything he wrote is working as intended.
A small bonus
There is a set of small and major problems and issues related to testing with the help of this module, which you or come across or not, but we warn you:)
SimpleTest can not test JavaScript, therefore the functional jQuery, dynamic content spoofing, etc. test will not work :( The list of available tests (Assertions) is available here: http://drupal.org/node/265828 To form the module must be called View $ this-> drupalGet (), instead of drupalPost (). Example:
$ Params = array (’sorting’ => ’sorting_value’); $ This-> drupalGet (’find / wine-ratings’, array (’query’ => $ params));
Tests are available for inactive modules.
Establishment types, etc. should be brought to a separate module, and write all the necessary procedures in module_name.install.
If you create a separate module for testing, then the file should be added module_name.info hidden = TRUE, then the module can be invoked in the tests, but will not be available in the list.
Nodecomment module conflicts with the module comment, so you should edit the profiles \ default \ default.profile and remove it from the default settings.
And finally an extended version of the class DrupalWebTestCase, which added additional functions and features:
class ExtendedDrupalWebTestCase extends DrupalWebTestCase { protected $ admin_user; protected $ users; / / Helper function, which we will generate a text with blanks and Blackjack protected function randomText ($ wordCount = 32) { $ Text =”; for ($ i = 0; $ i <$ wordCount; $ i + +) { $ Text .= $ this-> randomString (rand (4, 12)). ”; } return $ text; } / / Change the current theme protected function setTheme ($ new_theme) { db_query ("UPDATE {system} SET status = 1 WHERE type = ‘theme’ and name = ‘% s’", $ new_theme); variable_set (’theme_default’, $ new_theme); drupal_rebuild_theme_registry (); } / / Generate file name to display a folder that is outside the temporary folder and SimpleTest can view the data after cleaning. protected function getOutputFile () { $ File_dir = file_directory_path (); $ File_dir .= ‘. / Simpletest_output_pages’; if (! is_dir ($ file_dir)) { mkdir ($ file_dir, 0777, TRUE); } return "$ file_dir / $ basename." . $ This-> randomName (10). ‘. Html’; } / / Write page protected function outputAdminPage ($ description, $ basename, $ url) { $ Output_path = $ this-> getOutputFile (); $ This-> drupalGet ($ url); $ Rv = file_put_contents ($ output_path, $ this-> drupalGetContent ()); $ This-> pass ("$ description: Contents of result page are". L (’here’, $ output_path)); } / / Write the last on-screen display protected function outputScreenContents ($ description, $ basename) { $ Output_path = $ this-> getOutputFile (); $ Rv = file_put_contents ($ output_path, $ this-> drupalGetContent ()); $ This-> pass ("$ description: Contents of result page are". L (’here’, $ output_path)); } / / Write variable to file protected function outputVariable ($ description, $ variable) { $ Output_path = $ this-> getOutputFile (); $ Rv = file_put_contents ($ output_path, ‘<html> <body> <pre>’. Print_r ($ variable, true ).’</ pre> </ body> </ html> ‘); $ This-> pass ("$ description: Contents of result page are". L (’here’, $ output_path)); } }
0 notes
Link
PHP helper functions are developed intrinsically to speed up, similar repetitive tasks. They make your work flow conveniently for operating with arrays & objects, paths, strings, URLs and different types. Helper functions are like standalone methods that is, they don’t need a class to be defined in rather they reside in the core of PHP. Though many helper functions uses functions of other classes internally.
#web#php#php frameworks#laravel#laravel framework#array#helper#functions#decodeweb#codeigniter#interview#questions#web development#freecodecamp#medium#phpclasses#twitter#wattpad#slideshare#google#drive#composer
1 note
·
View note
Text
How to Add and Remove Laravel Events | Yudiz Solutions

Prefix:
Laravel Version 5.8 or above
PHP Version 7.1.3 or above
Overview:
Hello friends, today we will discuss the Event and Event Listener and how we can add on laravel and manage Events. There are so many blogs for Event and Event Listener but in this blog, we will discuss what is an Event and Event Listener is and how we can add and remove Events in our project.
What is an Event?
In Computer terminology, an Event is an action detected by a program. Events can be user actions such as moving a cursor, clicking a mouse button, or pressing a key.
What is an Event Listener?
An Event Listener is a function in a program that waits for an event to occur. The listener is a program that reacts to an input or signal by calling the event’s handler.
E.g: When a user is registered successfully at that time sending an email.
When to use Event?
An Event is mainly used to perform repeated tasks in your project. Suppose you are working on any project and you have some tasks that you have to perform more than once, at that time you can use an Event.
Let’s take an example, In our project, we want to send emails to a particular user when the user signs up or purchases a product from our website. Here if we don’t use an Event, we have to perform separate codes to send mail for sign up and purchase of product.
In Laravel, best practice is that we have to create one event for sending emails and create a different Listener and set “listen” property to identify which event is executed.
Create Event and Event Listener
In Laravel we can easily create an Event and Event Listener. This mainly is covered in three parts.
Registering Events & Listeners
Generating Events & Listeners
Dispatching Event
Let’s discuss all the parts of an Event and Event Listener in detail.
1. Registering Events & Listeners
In Laravel, we have an App/Providers/EventServiceProvider class to register our events and listeners. In this class “listen” property contains an array of all events (keys) and their listeners(values). You can add one or more events
In this array as per your requirement.
Example:-

2. Generating Events & Listeners:
In laravel Generating Events & Listeners there are two method that is as follow:
a. Generate an Event and Listeners using EventServiceProvider
b. Create Listener and Event using command:
a. Generate an Event and Listeners using EventServiceProvider:
Step (1) : In the first step you have to define Event and Listener in Providers/EventServiceProvider class.You can define multiple Events and Listener in this array as explained above.
Step(2) : After that we need to generate an Event and Listener using the following command.This command will generate ‘CheckPayment’ event in App/event path and create ‘CheckPaymentListener’ listener at App\Listeners location.=> php artisan event:generate
b. Create Listener and Event using command:
Step(1): In this way we have to execute the following command to create an event and listener.The following command will generate “ChkPayment” event at App/Events.=> php artisan make:event ChkPaymentAbove command will create a “ChkPayment” file something like this :ChkPayment:

The following command will generate Listener that is “ChkPaymentEventListener” for event “ChkPayment”.”CheckPaymentListener” provide one method that is “handle”.In this method you can define your action(logic) to perform when this event is called. => php artisan make:listener ChkPaymentEventListener –event=”ChkPayment”
ChkPaymentEventListener:

3. Dispatching Event
In the last step we have to dispatch (execute) our event. To dispatch an event, you may pass an instance of the event helper. The helper will dispatch the event to all of its registered listeners. Since the event helper is globally available, you may call it from anywhere in your application. We can pass arguments to the event and access in our defined Event and Listener class.
Please find below file examples:
Controllers/frontend/PaymentController:

web.php(Route):

Note (To Stop Event):-
In laravel if you want to stop the execution of an event you need to return false in the handle method of Listener class. In our example, we have defined a ‘fireornot’ variable in “CheckPayment” event and we will pass value in PaymentController here we have passed second argument as boolean value that is true or false.
Here, the passing argument is true so it will execute an event and display the following output.
Output:
Payment amount is: 10 This is check payment event.
Conclusion:
I hope this blog is useful to all those who want to add Events in Laravel. In this blog, we have tried to cover all possibilities regarding Events. It is the best practice to add Event and Event Listener so that the code stays optimized and can take advantage of code reusability. Once you have created any Event it can be accessed by the entire application.
Follow us on https://blog.yudiz.com/ for more such interesting blogs.
0 notes
Text
How We Tagged Google Fonts and Created goofonts.com
GooFonts is a side project signed by a developer-wife and a designer-husband, both of them big fans of typography. We’ve been tagging Google Fonts and built a website that makes searching through and finding the right font easier.
GooFonts uses WordPress in the back end and NuxtJS (a Vue.js framework) on the front end. I’d love to tell you the story behind goofonts.com and share a few technical details regarding the technologies we’ve chosen and how we adapted and used them for this project.
Why we built GooFonts
At the moment of writing this article, there are 977 typefaces offered by Google Fonts. You can check the exact number at any moment using the Google Fonts Developer API. You can retrieve the dynamic list of all fonts, including a list of the available styles and scripts for each family.
The Google Fonts website provides a beautiful interface where you can preview all fonts, sorting them by trending, popularity, date, or name.
But what about the search functionality?
You can include and exclude fonts by five categories: serif, sans-serif, display, handwriting, and monospace.
You can search within scripts (like Latin Extended, Cyrillic, or Devanagari (they are called subsets in Google Fonts). But you cannot search within multiple subsets at once.

You can search by four properties: thickness, slant, width, and "number of styles." A style, also called variant, refers both to the style (italic or regular) and weights (100, 200, up to 900). Often, the body font requires three variants: regular, bold, and italic. The “number of styles” property sorts out fonts with many variants, but it does not allow to select fonts that come in the “regular, bold, italic” combo.
There is also a custom search field where you can type your query. Unfortunately, the search is performed exclusively over the names of the fonts. Thus, the results often include font families uniquely from services other than Google Fonts.

Let's take the "cartoon" query as an example. It results in "Cartoon Script" from an external foundry Linotype.
I can remember working on a project that demanded two highly stylized typefaces — one evoking the old Wild West, the other mimicking a screenplay. That was the moment when I decided to tag Google Fonts. :)
GooFonts in action
Let me show you how GooFonts works. The dark sidebar on the right is your “search” area. You can type your keywords in the search field — this will perform an “AND” search. For example, you can look for fonts that are at once cartoon and slab.
We handpicked a bunch of keywords — click any of them! If your project requires some specific subsets,��check them in the subsets sections. You can also check all the variants that you need for your font.
If you like a font, click its heart icon, and it will be stored in your browser’s localStorage. You can find your bookmarked fonts on the goofonts.com/bookmarks page. Together with the code, you might need to embed them.

How we built it: the WordPress part
To start, we needed some kind of interface where we could preview and tag each font. We also needed a database to store those tags.
I had some experience with WordPress. Moreover, WordPress comes with its REST API, which opens multiple possibilities for dealing with the data on the front end. That choice was made quickly.
I went for the most straightforward possible initial setup. Each font is a post, and we use post tags for keywords. A custom post type could have worked as well, but since we are using WordPress only for the data, the default content type works perfectly well.
Clearly, we needed to add all the fonts programmatically. We also needed to be able to programmatically update the fonts, including adding new ones or adding new available variants and subsets.
The approach described below can be useful with any other data available via an external API. In a custom WordPress plugin, we register a menu page from which we can check for updates from the API. For simplicity, the page will display a title, a button to activate the update and a progress bar for some visual feedback.
/** * Register a custom menu page. */ function register_custom_menu_page() { add_menu_page( 'Google Fonts to WordPress', 'WP GooFonts', 'manage_options', 'wp-goofonts-menu', function() { ?> <h1>Google Fonts API</h1> <button type="button" id="wp-goofonts-button">Run</button> <p id="info"></p> <progress id="progress" max="100" value="0"></progress> <?php } ); } add_action( 'admin_menu', 'register_custom_menu_page' );
Let's start by writing the JavaScript part. While most of the examples of using Ajax with WordPress implements jQuery and the jQuery.ajax method, the same can be obtained without jQuery, using axios and a small helper Qs.js for data serialization.
We want to load our custom script in the footer, after loading axios and qs:
add_action( 'admin_enqueue_scripts' function() { wp__script( 'axios', 'https://unpkg.com/axios/dist/axios.min.js' ); wp_enqueue_script( 'qs', 'https://unpkg.com/qs/dist/qs.js' ); wp_enqueue_script( 'wp-goofonts-admin-script', plugin_dir_url( __FILE__ ) . 'js/wp-goofonts.js', array( 'axios', 'qs' ), '1.0.0', true ); });
Let’s look how the JavaScript could look like:
const BUTTON = document.getElementById('wp-goofonts-button') const INFO = document.getElementById('info') const PROGRESS = document.getElementById('progress') const updater = { totalCount: 0, totalChecked: 0, updated: [], init: async function() { try { const allFonts = await axios.get('https://www.googleapis.com/webfonts/v1/webfonts?key=API_KEY&sort=date') this.totalCount = allFonts.data.items.length INFO.textContent = `Fetched ${this.totalCount} fonts.` this.updatePost(allFonts.data.items, 0) } catch (e) { console.error(e) } }, updatePost: async function(els, index) { if (index === this.totalCount) { return } const data = { action: 'goofonts_update_post', font: els[index], } try { const apiRequest = await axios.post(ajaxurl, Qs.stringify(data)) this.totalChecked++ PROGRESS.setAttribute('value', Math.round(100*this.totalChecked/this.totalCount)) this.updatePost(els, index+1) } catch (e) { console.error(e) } } } BUTTON.addEventListener('click', () => { updater.init() })
The init method makes a request to the Google Fonts API. Once the data from the API is available, we call the recursive asynchronous updatePost method that sends an individual font in the POST request to the WordPress server.
Now, it’s important to remember that WordPress implements Ajax in its specific way. First of all, each request must be sent to wp-admin/admin-ajax.php. This URL is available in the administration area as a global JavaScript variable ajaxurl.
Second, all WordPress Ajax requests must include an action argument in the data. The value of the action determines which hook tag will be used on the server-side.
In our case, the action value is goofonts_update_post. That means what happens on the server-side is determined by the wp_ajax_goofonts_update_post hook.
add_action( 'wp_ajax_goofonts_update_post', function() { if ( isset( $_POST['font'] ) ) { /* the post tile is the name of the font */ $title = wp_strip_all_tags( $_POST['font']['family'] ); $variants = $_POST['font']['variants']; $subsets = $_POST['font']['subsets']; $category = $_POST['font']['category']; /* check if the post already exists */ $object = get_page_by_title( $title, 'OBJECT', 'post' ); if ( NULL === $object ) { /* create a new post and set category, variants and subsets as tags */ goofonts_new_post( $title, $category, $variants, $subsets ); } else { /* check if $variants or $subsets changed */ goofonts_update_post( $object, $variants, $subsets ); } } }); function goofonts_new_post( $title, $category, $variants, $subsets ) { $post_id = wp_insert_post( array( 'post_author' => 1, 'post_name' => sanitize_title( $title ), 'post_title' => $title, 'post_type' => 'post', 'post_status' => 'draft', ) ); if ( $post_id > 0 ) { /* the easy part of tagging ;) append the font category, variants and subsets (these three come from the Google Fonts API) as tags */ wp_set_object_terms( $post_id, $category, 'post_tag', true ); wp_set_object_terms( $post_id, $variants, 'post_tag', true ); wp_set_object_terms( $post_id, $subsets, 'post_tag', true ); } }
This way, in less than a minute, we end up with almost one thousand post drafts in the dashboard — all of them with a few tags already in place. And that’s the moment when the crucial, most time-consuming part of the project begins. We need to start manually add tags for each font one by one. The default WordPress editor does not make much sense in this case. What we needed is a preview of the font. A link to the font’s page on fonts.google.com also comes in handy.
A custom meta box does the job very well. In most cases, you will use meta boxes for custom form elements to save some custom data related to the post. In fact, the content of a meta box can be practically any HTML.
function display_font_preview( $post ) { /* font name, for example Abril Fatface */ $font = $post->post_title; /* font as in url, for example Abril+Fatface */ $font_url_part = implode( '+', explode( ' ', $font )); ?> <div class="font-preview"> <link href="<?php echo 'https://fonts.googleapis.com/css?family=' . $font_url_part . '&display=swap'; ?>" rel="stylesheet"> <header> <h2><?php echo $font; ?></h2> <a href="<?php echo 'https://fonts.google.com/specimen/' . $font_url_part; ?>" target="_blank" rel="noopener">Specimen on Google Fonts</a> </header> <div contenteditable="true" style="font-family: <?php echo $font; ?>"> <p>The quick brown fox jumps over a lazy dog.</p> <p style="text-transform: uppercase;">The quick brown fox jumps over a lazy dog.</p> <p>1 2 3 4 5 6 7 8 9 0</p> <p>& ! ; ? {}[]</p> </div> </div> <?php } add_action( 'add_meta_boxes', function() { add_meta_box( 'font_preview', /* metabox id */ 'Font Preview', /* metabox title */ 'display_font_preview', /* content callback */ 'post' /* where to display */ ); });

Tagging fonts is a long-term task with a lot of repetition. It also requires a big dose of consistency. That’s why we started by defining a set of tag “presets.” That could be, for example:
{ /* ... */ comic: { tags: 'comic, casual, informal, cartoon' }, cursive: { tags: 'cursive, calligraphy, script, manuscript, signature' }, /* ... */ }
Next with some custom CSS and JavaScript, we “hacked” the WordPress editor and tags form by enriching it with the set of preset buttons.
How we built it: The front end part (using NuxtJS)
The goofonts.com interface was designed by Sylvain Guizard, a french graphic and web designer (who also happens to be my husband). We wanted something simple with a distinguished “search” area. Sylvain deliberately went for colors that are not too far from the Google Fonts identity. We were looking for a balance between building something unique and original while avoiding user confusion.
While I did not hesitate choosing WordPress for the back-end, I didn’t want to use it on front end. We were aiming for an app-like experience and I, personally, wanted to code in JavaScript, using Vue.js in particular.
I came across an example of a website using NuxtJS with WordPress and decided to give it a try. The choice was made immediately. NuxtJS is a very popular Vue.js framework, and I really enjoy its simplicity and flexibility. I’ve been playing around with different NuxtJS settings to end up with a 100% static website. The fully static solution felt the most performant; the overall experience seemed the most fluid.That also means that my WordPress site is only used during the build process. Thus, it can run on my localhost. This is not negligible since it eliminates the hosting costs and most of all, lets me skip the security-related WordPress configuration and relieves me of the security-related stress. ;)
If you are familiar with NuxtJS, you probably know that the full static generation is not (yet) a part of NuxtJS. The prerendered pages try to fetch the data again when you are navigating.
That’s why we have to somehow “hack” the 100% static generation. In this case, we are saving the useful parts of the fetched data to a JSON file before each build process. This is possible, thanks to Nuxt hooks, in particular, its builder hooks.
Hooks are typically used in Nuxt modules:
/* modules/beforebuild.js */ const fs = require('fs') const axios = require('axios') const sourcePath = 'http://wpgoofonts.local/wp-json/wp/v2/' const path = 'static/allfonts.json' module.exports = () => { /* write data to the file, replacing the file if it already exists */ const storeData = (data, path) => { try { fs.writeFileSync(path, JSON.stringify(data)) } catch (err) { console.error(err) } } async function getData() { const fetchedTags = await axios.get(`${sourcePath}tags?per_page=500`) .catch(e => { console.log(e); return false }) /* build an object of tag_id: tag_slug */ const tags = fetchedTags.data.reduce((acc, cur) => { acc[cur.id] = cur.slug return acc }, {}) /* we want to know the total number or pages */ const mhead = await axios.head(`${sourcePath}posts?per_page=100`) .catch(e => { console.log(e); return false }) const totalPages = mhead.headers['x-wp-totalpages'] /* let's fetch all fonts */ let fonts = [] let i = 0 while (i < totalPages) { i++ const response = await axios.get(`${sourcePath}posts?per_page=100&page=${i}`) fonts.push.apply(fonts, response.data) } /* and reduce them to an object with entries like: {roboto: {name: Roboto, tags: ["clean","contemporary", ...]}} */ fonts = (fonts).reduce((acc, el) => { acc[el.slug] = { name: el.title.rendered, tags: el.tags.map(i => tags[i]), } return acc }, {}) /* save the fonts object to a .json file */ storeData(fonts, path) } /* make sure this happens before each build */ this.nuxt.hook('build:before', getData) }
/* nuxt.config.js */ module.exports = { // ... buildModules: [ ['~modules/beforebuild'] ], // ... }
As you can see, we only request a list of tags and a list posts. That means we only use default WordPress REST API endpoints, and no configuration is required.
Final thoughts
Working on GooFonts was a long-term adventure. It is also this kind of projects that needs to be actively maintained. We regularly keep checking Google Fonts for the new typefaces, subsets, or variants. We tag new items and update our database. Recently, I was genuinely excited to discover that Bebas Neue has joint the family. We also have our personal favs among the much lesser-known specimens.
As a trainer that gives regular workshops, I can observe real users playing with GooFonts. At this stage of the project, we want to get as much feedback as possible. We would love GooFonts to be a useful, handy and intuitive tool for web designers. One of the to-do features is searching a font by its name. We would also love to add a possibility to share the bookmarked sets and create multiple "collections" of fonts.
As a developer, I truly enjoyed the multi-disciplinary aspect of this project. It was the first time I worked with the WordPress REST API, it was my first big project in Vue.js, and I learned so much about typography.
Would we do anything differently if we could? Absolutely. It was a learning process. On the other hand, I don't think we would change the main tools. The flexibility of both WordPress and Nuxt.js proved to be the right choice. Starting over today, I would definitely took time to explore GraphQL, and I will probably implement it in the future.
I hope that you find some of the discussed methods useful. As I said before, your feedback is very precious. If you have any questions or remarks, please let me know in the comments!
The post How We Tagged Google Fonts and Created goofonts.com appeared first on CSS-Tricks.
How We Tagged Google Fonts and Created goofonts.com published first on https://deskbysnafu.tumblr.com/
0 notes