#chmod code generator
Explore tagged Tumblr posts
Visit Tumblr Blog
Explore Tumblr blogs with no restrictions, modern design and the best experience.
Last Seen Tumblr Blogs


Fun Fact
Tumblr has 16.74 million mobile monthly users in the US.
Text
( A portal appears. )
( Niko and Emma step out into the alleyway of a bustling city. )

Where are we...?

[Writer?]

Gimme a sec...

Connection's holding, but I can only see from your first-person perspective.

...

>chmod -w

Aw...

...
[What about the console?]

...Also nothing. I didn't even get the permission change-

[Uh...]
>cd Audio >cd SE >playSound bell.wav
Still nothing...

...Maybe you got knocked offline?

[How would we be talking to Writer, then?]

Oh, right.

[Besides, we're probably still in the M-

uuuuuuuuuuuuuuuuuuuuuuuuuuuuuuuuuuuuuuuuuuuuuuuu
( Emma's appearance begins to glitch. The remote drops to the floor with a thud. )

Emma?! Your feed's gone!

...!
( The glitching continues for the next few seconds before Writer's voice comes from the remote. )

It's the remote, bind Emma's code to the remote!
( Niko didn't know what to do, but they pick up the remote and move it into Emma's general area, hoping something would happen. )

[RXJyb3Iu]
...

They've stabilized.
Portal's still open, let's get back to safety.
( Niko quickly pulls Emma along through the portal before it closes. )
5 notes
·
View notes
Text
50+ Epic Hacker Usernames: Craft Your Digital Identity Like a Pro | 2024 Guide
https://goteamnames.com/?p=1973 50+ Epic Hacker Usernames: Craft Your Digital Identity Like a Pro | 2024 Guide In the vast digital industry, a username serves as your first impression—and for hackers, it’s more than just an identity. It’s a statement. We’ve compiled the ultimate collection of hacker usernames that blend technical savvy with mysterious appeal, perfect for anyone looking to establish a commanding online presence. Whether you’re a cybersecurity enthusiast, a gamer seeking an edge, or simply someone who appreciates the hacker aesthetic, the right username can instantly communicate your technical prowess. From classic references like “Phantom_Root” to creative plays on coding terms such as “Null_Byte,” we’ll help you find that perfect digital alias that makes others think twice about your capabilities. Table of Contents Toggle The Art of Crafting Powerful Hacker UsernamesConsider Your SpecialtyIncorporate Technical ElementsAdd Mystery and IntrigueKeep it MemorableTest for UniquenessWhy Your Hacker Username Matters in the Digital UndergroundEstablishing Your Digital IdentityCreating Psychological ImpactValue in Underground Markets15 Badass Hacker Username Categories to ConsiderCoding and Programming ReferencesTechnical Terms and JargonMythological FiguresPop Culture HackersMathematical and Scientific ReferencesHow to Create a Memorable Hacker UsernameCombining Words and NumbersUsing Leet Speak EffectivelyIncorporating Symbols StrategicallyTop 25 Legendary Hacker Usernames from HistoryAvoiding Common Mistakes When Creating Hacker UsernamesSteering Clear of Predictable PatternsBalancing Anonymity and RecognitionTools and Generators for Creating Unique Hacker UsernamesFantasy Name GeneratorsVondy Hacker Name GeneratorWritecream Hacker Nicknames GeneratorAI4Chat Hacker Name GeneratorGeneral Username GeneratorsLegal and Ethical Considerations When Using Hacker UsernamesAuthorization and PermissionLegal ComplianceEthical GuidelinesAccountabilityPrivacy and IntegrityConclusion: Crafting Your Digital Legacy Through Your UsernameFrequently Asked QuestionsWhat makes a good hacker username?Why does my hacker username matter?What elements should I include in my hacker username?Are there any legal concerns with using a “hacker” username?What are some examples of legendary hacker usernames?How can I create a secure hacker username?What tools can help me generate a hacker username?Should I use the same hacker username across all platforms? The Art of Crafting Powerful Hacker Usernames Creating an impactful hacker username isn’t just about picking random tech terms. It’s about crafting an identity that communicates your skills, interests, and persona in the digital area. A well-designed hacker handle can instantly convey technical prowess and create an aura of mystery that commands respect in online communities. Consider Your Specialty Your username should reflect your particular area of expertise or interest in the hacking industry. Security specialists might incorporate terms like “cipher,” “crypt,” or “secure” into their handles. Network hackers often use references to “packet,” “node,” or “backbone” in their names. Malware analysts could include elements like “virus,” “payload,” or “sandbox” to signal their focus area. Incorporate Technical Elements Technical terminology adds authenticity and credibility to your hacker username. Binary numbers (0s and 1s) demonstrate a fundamental understanding of computing basics. Hexadecimal codes add a layer of complexity that only the technically inclined would understand. Unix commands like “sudo,” “grep,” or “chmod” instantly identify you as someone familiar with command-line interfaces and system administration. Add Mystery and Intrigue The most memorable hacker usernames combine technical elements with an air of enigma. Anonymous references contribute to the mystique that surrounds skilled hackers. Obscure technical references can pique curiosity while showcasing your specialized knowledge. Paradoxical combinations like “GhostProtocol” or “VisibleShadow” create intrigue through their inherent contradictions. Keep it Memorable A powerful hacker username sticks in people’s minds long after they’ve encountered it. Short, punchy names are easier to remember than lengthy, complex ones. Unique combinations of words or characters help your handle stand out in a crowded digital industry. Rhythmic or phonetically pleasing usernames have a natural stickiness that aids recall. Test for Uniqueness Before settling on your chosen handle, we recommend checking its availability across multiple platforms. Google searches reveal if your potential username is already widely used. Username checkers like namechk.com can quickly verify availability across many sites. Social media searches help ensure your identity remains distinctive in the spaces where you’ll be most active. Why Your Hacker Username Matters in the Digital Underground In the shadowy realms of the digital underground, your username isn’t just what people call you—it’s the cornerstone of your entire online persona and reputation. Let’s explore why your hacker handle carries so much weight in these specialized communities. Establishing Your Digital Identity Your username serves as the primary identifier in underground forums, significantly influencing how other hackers perceive your skills and trustworthiness. Advanced analytics systems like HackerRank track your digital footprint by linking your username to all your activities, posts, and interactions within these communities. This comprehensive tracking creates a detailed profile that showcases your technical interests and community influence. Many experienced hackers maintain consistent usernames across platforms to build recognition and establish themselves as authorities in exact cybersecurity niches. The reputation attached to your username develops gradually through demonstrated knowledge, successful operations, and valuable contributions that benefit the wider hacking community. Creating Psychological Impact A strategically chosen username can generate exact psychological responses from others in the underground community, including respect, intimidation, or intrigue. Usernames that suggest advanced technical abilities or notorious reputations naturally command more attention and respect within hacking circles. Your choice of handle often reflects your personality and the professional image you want to project, which becomes crucial in environments where trust is built entirely through online interactions rather than face-to-face meetings. Established hackers with respected usernames can leverage their digital reputation to command premium prices for their services or information in underground marketplaces. The psychological weight of a well-known username can create instant credibility and open doors to exclusive communities and opportunities that remain closed to newcomers or those with questionable reputations. Value in Underground Markets The reputation connected to your username directly affects the market value of any services or information you provide in underground economies. Well-respected usernames with proven track records can demand significantly higher prices when selling stolen credentials or offering specialized hacking services. Your username becomes a brand that signals quality and reliability to potential clients in markets where transactions are based primarily on trust and reputation. Underground forums frequently include rating systems that allow members to evaluate others based on their interactions, further cementing the connection between your username and your perceived value in the community. Maintaining a positive reputation attached to your username requires consistent delivery of promised services and ethical behavior within the community’s standards, as reputational damage can quickly devalue your standing in these specialized markets. 15 Badass Hacker Username Categories to Consider Coding and Programming References Coding and programming references make for some of the most authentic hacker usernames you’ll find in cybersecurity circles. These names often incorporate languages, functions, or commands that showcase technical knowledge. Usernames like “mysql” and “user” frequently appear on hackers’ target lists because they’re associated with administrative access and database management. Common examples include “CodeBreaker,” “ScriptKiddie,” “PythonWhisperer,” and “GitMaster”—all signaling programming prowess while maintaining that hacker edge. Remember that overtly administrative usernames such as “admin” are highly vulnerable to dictionary attacks, so adding creative elements helps strengthen your online identity. Technical Terms and Jargon Technical jargon creates instant credibility in hacker communities by demonstrating specialized knowledge. Usernames like “test,” “guest,” “info,” and “adm” are regularly targeted by automated hacking scripts due to their simplicity and potential for high-level access. Instead, consider more distinctive technical terms that still show your expertise. Usernames such as “KernelPanic,” “StackOverflow,” “HexDump,” or “BackdoorBreacher” incorporate technical language while avoiding the commonly targeted basics. Security research shows that these simple, technical usernames like “administrator” and “oracle” are among the most vulnerable online identities. Mythological Figures Mythological figures offer rich symbolism and powerful imagery for creating memorable hacker usernames. Names from ancient myths often carry connotations of power, trickery, or wisdom—qualities valued in hacker culture. Consider options like “LokiProxy,” “HermesPacket,” “AthenaCypher,” or “OdinByte” to blend mythological strength with technical elements. Greek titans, Norse gods, and ancient deities from various cultures provide endless inspiration for usernames that convey both mystery and authority. These mythological references aren’t typically targeted by dictionary attacks, making them more secure than common technical terms. Pop Culture Hackers Pop culture references to fictional hackers create instant recognition among those familiar with hacker-themed entertainment. Usernames inspired by characters like “Neo” from The Matrix or “Elliot” from Mr. Robot resonate with fellow enthusiasts while establishing your hacker persona. Creative variations might include “Morpheus_Shell,” “FsocietyAdmin,” or “CerebralHack.” These references work particularly well when combined with authentic technical elements, creating a balance between pop culture appeal and demonstrated knowledge. Unlike administrative usernames, pop culture references aren’t commonly targeted in attacks, offering better security. Mathematical and Scientific References Mathematical and scientific references demonstrate analytical thinking and technical depth in your username choice. Numbers, equations, formulas, and scientific principles make excellent foundations for unique hacker identities. Examples like “Quantum_Breach,” “Fibonacci_Root,” “Entropy_Override,” or “Heisenberg_Shell” blend scientific concepts with hacking terminology. Prime numbers, physics principles, and mathematical symbols add layers of meaning that appeal to technically-minded communities. These specialized references aren’t typically included in dictionary attack scripts, providing better security than generic usernames while still maintaining that intellectual hacker aesthetic. How to Create a Memorable Hacker Username Combining Words and Numbers Creating memorable hacker usernames with words and numbers requires striking a balance between creativity and security. Never include personal information like your name, birthdate, or any identifiable details that could compromise your security. Random combinations of letters and numbers provide better protection than predictable patterns. For example, “t4e8rG7” offers significantly more security than something obvious like “john123” which hackers can easily guess. We recommend using completely unrelated words with randomly inserted numbers rather than sequential or personally important digits to maximize both memorability and protection. Using Leet Speak Effectively Leet speak transforms your username into something distinctive while potentially improving security when implemented correctly. Avoid common substitutions like replacing “e” with “3” or “a” with “4” as these patterns are easily recognizable by hackers using automated tools. Instead, develop unique character substitutions that aren’t found in standard leet dictionaries. Sophisticated hackers are well-versed in traditional leet speak patterns, so creating your own system of character replacement adds an extra layer of complexity that makes your username harder to crack while maintaining its memorability for you personally. Incorporating Symbols Strategically Symbols dramatically increase username security when used thoughtfully within your hacker handle. First, verify that your chosen platforms actually allow symbols in usernames, as many sites have different character restrictions. Random symbol placement delivers superior security compared to predictable patterns or simply adding symbols at the beginning or end. A username like “ZXW48TyqPl9r!” represents optimal security practices by incorporating unpredictable symbol placement. We strongly advise using different usernames across platforms to prevent a single compromised account from endangering your entire online presence. Also, ensure your username bears no relationship to your password to minimize vulnerability if either one becomes compromised. Top 25 Legendary Hacker Usernames from History The hacking industry has seen many pioneers who’ve left their mark on digital history, often known only by their mysterious online handles. These usernames have become legendary within cybersecurity circles, representing individuals who pushed boundaries and shaped the industry of digital security. Let’s explore 25 of the most iconic hacker usernames that have earned their place in the annals of hacking history. Captain Crunch – John Draper gained fame after discovering that a toy whistle from Cap’n Crunch cereal boxes could manipulate phone systems to make free calls, becoming one of the original “phreakers.” Dark Dante – Kevin Poulsen achieved notoriety by hacking into LA phone networks, famously rigging radio contests before eventually becoming a respected journalist. Phiber Optik – Mark Abene, a founding member of the influential hacker group Masters of Deception, established himself as a prominent figure in early hacking culture. Mendax – Julian Assange used this username long before founding WikiLeaks, with the Latin term appropriately meaning “noble liar.” geohot – George Hotz rocketed to fame after becoming the first person to jailbreak the iPhone and later hacking the PlayStation 3, challenging major corporations. weev – Andrew Auernheimer became known for controversial activities and his involvement with the Goatse Security group, often sparking debates about ethical hacking. Guccifer – This username became synonymous with high-profile breaches of email accounts belonging to government officials and celebrities. Guccifer 2.0 – Distinct from the original Guccifer, this handle is often associated with Russian intelligence operations that targeted the Democratic National Committee. soupnazi – Albert Gonzalez orchestrated some of the largest identity theft operations in history under this username, compromising millions of credit card details. ioerror – Jacob Appelbaum, a security researcher and former WikiLeaks spokesperson, advocated for privacy rights using this distinctive handle. Dead Lord – Bruce Fancher established himself as a prominent figure during the early days of internet hacking, leaving a lasting legacy. Kingpin – Joe Grand, known for his expertise in hardware hacking, turned his skills toward legitimate security research and education. Romanpoet – Virgil Griffith gained recognition for creating WikiScanner, a tool that tracked anonymous Wikipedia edits to their source organizations. Kayla – Ryan Ackroyd adopted this female persona as a member of the hacking group LulzSec, demonstrating how usernames can mask true identities. Tflow – Mustafa Al-Bassam, another LulzSec member, later transitioned to academic research in computer security after his hacking days. hunter – Markus Hess, operating under this simple yet effective username, infiltrated many high-security systems during the 1980s. RBCP – Brad Carter, also known as Red Box Chili Pepper, made his mark in the phreaking community by manipulating telephone systems. Susan Thunder – Susan Headley broke gender barriers as one of the few female hackers to gain important recognition in the early hacking scene. GummoXXX – This black-hat hacker later redirected their skills toward more constructive endeavors, exemplifying the potential for redemption. The Mentor – Loyd Blankenship authored “The Hacker Manifesto,” a pivotal text that articulated hacker philosophy and motivation. Mafiaboy – Michael Calce launched massive denial-of-service attacks against major websites like Yahoo and Amazon at just 15 years old. CyberZeist – Known for breaching FBI networks and government websites, this username represents the persistent threat of politically motivated hacking. Sabu – Hector Monsegur led the LulzSec hacking group before becoming an FBI informant, showing the complex relationships in hacking communities. Mitnick – Kevin Mitnick, once the FBI’s most wanted hacker, transformed his career to become a respected security consultant after serving prison time. AcidBurn – While fictional from the movie “Hackers,” this username has inspired countless real-industry hackers and embedded itself in hacking culture. These legendary usernames represent more than just online identities—they embody chapters in the evolving story of digital security. Many individuals behind these handles have transitioned from illicit activities to legitimate careers in cybersecurity, demonstrating how expertise can be redirected toward protection rather than exploitation. Avoiding Common Mistakes When Creating Hacker Usernames Creating a secure hacker username requires careful consideration to avoid common pitfalls that could compromise your security or reveal too much about your identity. Steering Clear of Predictable Patterns Predictable username patterns make you an easy target for hackers and compromise your online security. Random combinations of letters and numbers significantly increase the difficulty of guessing your username. Create usernames that are at least 10 characters long and incorporate a mix of uppercase letters, lowercase letters, numbers, and special characters whenever possible. Online username generators can be incredibly helpful tools for creating unique, randomized usernames based on your exact parameters. Many security experts recommend avoiding sequential patterns like “hacker123” or “cyber2023” which are easily guessable. Using unpredictable combinations creates a stronger first line of defense against targeted attacks aimed at your online accounts. Balancing Anonymity and Recognition Finding the perfect balance between anonymity and recognition is crucial for your online presence in hacking communities. Choose usernames that are memorable to you but not easily guessable by others—for example, a word or phrase with personal significance that strangers wouldn’t know. Password managers offer an excellent solution for storing and autofilling complex usernames and passwords, eliminating the need to remember them all. Select meaningful but obscure references for your username, such as a favorite vacation destination, a unique phrase from a relative, or an obscure reference from a favorite movie. These types of references maintain your privacy while still creating a consistent online identity. Using different usernames across various platforms further enhances your security by preventing attackers from easily connecting your accounts across the web. Tools and Generators for Creating Unique Hacker Usernames Finding the perfect hacker username can be challenging, but several specialized tools can streamline this process. We’ve compiled a list of the most effective generators that offer unique features to help you create the perfect digital identity. Fantasy Name Generators Fantasy Name Generators provides an excellent hacker name generator that produces 10 random screen names with each click. These names draw inspiration from both real and fictional hackers, offering a range of tones from ominous and gloomy to happy and silly. A standout feature is their inclusion of leetspeak versions, adding authenticity to your hacker persona. Users can generate unlimited new sets of names until they find one that resonates with their style. Vondy Hacker Name Generator Vondy’s tool stands out for its impressive customization options that allow for highly personalized results. This generator enables users to specify preferences including style, exact words, and intended purpose when creating hacker usernames. Its versatility makes it suitable for various platforms, from online gaming communities to social media accounts. The completely free service lets users generate unlimited names without restrictions, making it easy to experiment until you find the perfect match. Writecream Hacker Nicknames Generator Writecream offers a straightforward solution for those seeking quick results with minimal effort. Their hacker nickname generator creates unique and edgy names with just a single click. The tool focuses on delivering distinctive, attention-grabbing options efficiently, saving time for users who need immediate inspiration. AI4Chat Hacker Name Generator AI4Chat leverages advanced artificial intelligence to create authentic hacker usernames. This sophisticated generator utilizes AI models and a comprehensive database of language patterns and naming conventions directly from the hacker community. Users can customize both the tone and length of generated names, making it versatile for various applications including role-playing games, narrative design, and cybersecurity training scenarios. The tool remains free to use without requiring account creation or login. General Username Generators While not exclusively focused on hacker personas, general username generators like Dashlane can be adapted for creating secure hacker identities. These tools typically generate strong, unpredictable usernames based on user-defined parameters. Their focus on security and uniqueness aligns well with hacker culture’s emphasis on digital protection and distinctive online presence. Each of these tools offers unique advantages depending on your exact needs, whether you’re seeking authenticity, customization options, or quick results. By utilizing these specialized generators, you can create a username that truly captures your hacker persona while maintaining the security and uniqueness essential to standing out in digital communities. Legal and Ethical Considerations When Using Hacker Usernames Authorization and Permission Obtaining proper authorization stands as the cornerstone of ethical hacking practices regardless of what username you choose. Ethical hackers must secure explicit written permission from system owners before conducting any penetration testing or security assessment activities. This formal documentation protects both parties and establishes clear boundaries for the engagement. Without proper authorization, even seemingly harmless activities could violate computer crime laws and result in serious legal consequences. Legal Compliance Your hacker username doesn’t exempt you from following cybersecurity laws that vary by jurisdiction. The Computer Fraud and Abuse Act (CFAA) in the United States specifically prohibits unauthorized access to protected computer systems, making compliance non-negotiable for ethical hackers. Data protection regulations, privacy laws, and cybercrime statutes create a complex legal framework that all security professionals must navigate carefully. Understanding these legal requirements helps ensure your activities remain on the right side of the law regardless of how edgy your username might be. Ethical Guidelines Professional organizations have established comprehensive ethical frameworks that govern hacker conduct in the cybersecurity industry. The EC-Council’s Code of Ethics for Certified Ethical Hackers (CEH) provides clear guidelines that emphasize obtaining proper permission, maintaining confidentiality, and reporting all findings accurately. These ethical standards apply universally whether you’re using a intimidating username like “SystemBreaker” or something more professional. Following established ethical principles helps maintain the integrity of the security testing process and builds trust with clients. Accountability Taking responsibility for your actions remains essential regardless of the persona your username projects. Ethical hackers must carefully document their activities, maintain detailed logs, and ensure their testing doesn’t cause unintended damage to systems or data. The username you choose doesn’t create a shield against accountability for the consequences of your actions. Professional security testers understand that maintaining this accountability helps differentiate them from malicious actors who seek to exploit vulnerabilities for personal gain. Privacy and Integrity Respecting user privacy and system integrity forms a fundamental aspect of ethical hacking practices. Security professionals must ensure their activities don’t compromise sensitive user information or disrupt critical business operations. System testing should be conducted with minimal intrusion and maximum respect for data confidentiality. The most intimidating hacker username won’t protect you from the consequences of violating these principles, which can include legal action, reputational damage, and professional sanctions. Conclusion: Crafting Your Digital Legacy Through Your Username Choosing the perfect hacker username is more than a creative exercise—it’s about establishing your digital persona with purpose and security. We’ve explored how these identifiers can showcase your technical prowess while maintaining the mystique that defines hacker culture. Your username serves as your digital signature across forums platforms and communities. It shapes first impressions influences perceptions and can even impact your value in specialized markets. Remember that the best usernames balance creativity with security avoiding personal information and predictable patterns. Whether you’re inspired by coding references mythological figures or legendary hackers of the past make your choice meaningful. Now it’s your turn to create a username that resonates with your technical identity while keeping your digital presence secure and memorable. Frequently Asked Questions What makes a good hacker username? A good hacker username combines technical knowledge with mystique. It should reflect your skills or interests in cybersecurity, incorporate relevant technical terms, and add an element of intrigue. Avoid personal information and aim for uniqueness by checking availability across platforms. Names like “Phantom_Root” or “Null_Byte” effectively blend technical credibility with a memorable impression. Why does my hacker username matter? Your username serves as the cornerstone of your online persona and reputation in digital communities. It influences how others perceive your skills and trustworthiness, especially in technical forums. Advanced analytics systems track activities linked to usernames, and a well-chosen name can command respect. In underground economies, established usernames with positive reputations can significantly increase perceived value and credibility. What elements should I include in my hacker username? Include technical references (coding terms, commands), an element of mystery, and unique character combinations. Consider incorporating binary numbers, Unix commands, mathematical concepts, or mythology references. Avoid predictable patterns and personal information. Strategically use leet speak (character substitutions) and symbols to enhance complexity and security while maintaining memorability. Are there any legal concerns with using a “hacker” username? Yes, there are important legal considerations. While the username itself isn’t illegal, activities conducted under that identity must comply with cybersecurity laws like the Computer Fraud and Abuse Act. Always obtain proper authorization before any security testing. Ethical hackers should adhere to professional guidelines regarding accountability, privacy, and integrity regardless of their chosen username. What are some examples of legendary hacker usernames? Legendary hacker usernames include “Captain Crunch” (John Draper), “Dark Dante” (Kevin Poulsen), and “Mendax” (Julian Assange). These names represent individuals who significantly impacted digital security history. Other notable examples include “Condor,” “Iceman,” “Acid Phreak,” and “Mafiaboy,” each associated with hackers who eventually transitioned into legitimate cybersecurity careers or faced legal consequences. How can I create a secure hacker username? Create a secure username by combining random letters, numbers, and special characters in unpredictable patterns. Avoid personal information, common substitutions, or references that could identify you. Use different usernames across platforms for added security. Consider utilizing username generators for unique options. Balance security with memorability by using meaningful but obscure references that only resonate with specific communities. What tools can help me generate a hacker username? Several tools can help generate unique hacker usernames, including Fantasy Name Generators, Vondy Hacker Name Generator, Writecream Hacker Nicknames Generator, and AI4Chat Hacker Name Generator. These tools offer various features such as customization options, quick results, and authenticity. Each generator caters to different needs whether for gaming, social media, or cybersecurity training purposes. Should I use the same hacker username across all platforms? No, using different usernames across platforms is recommended for better security. While maintaining a consistent identity helps build reputation in specific communities, using the same username everywhere creates a single point of vulnerability. Consider variations of a core identity for different contexts or completely separate usernames for sensitive activities to prevent cross-platform tracking and reduce potential security risks. https://goteamnames.com/?p=1973 Go Team Names
0 notes
Text
Fix Laravel Security Misconfigurations: Tools & Examples
Understanding Security Misconfigurations in Laravel
Security misconfigurations are one of the most common vulnerabilities affecting Laravel applications. They occur when systems, frameworks, or application settings are improperly configured, exposing your website to potential threats.

Laravel’s flexibility is one of its strengths, but default settings or improper configurations can leave your application open to attacks. This blog post will walk you through common security misconfigurations in Laravel, show you how to fix them with examples and introduce tools to automate vulnerability checks.
What is Security Misconfiguration?
Security misconfiguration happens when:
Default settings are not updated (e.g., default passwords or unnecessary features).
Error messages expose sensitive information.
Permissions and access controls are improperly configured.
For instance, a Laravel app with debug mode enabled in production can reveal sensitive information about your application’s structure, giving attackers insights into potential vulnerabilities.
Common Laravel Misconfigurations
Debug Mode Enabled Debug mode (APP_DEBUG=true) in production environments can expose database credentials, file paths, and other sensitive information. Fix: Update the .env file to disable debug mode in production: env APP_DEBUG=false Improper Directory Permissions Laravel requires writable permissions for certain directories, but granting overly permissive access can lead to security issues. Fix: Use restrictive permissions: bash chmod -R 755 storage chmod -R 755 bootstrap/cache
Unsecured API Endpoints Exposed API endpoints can lead to unauthorized access or data leakage if not properly secured. Fix: Implement proper authentication and authorization checks using Laravel's middleware: php Route::middleware('auth:api')->group(function () { Route::get('/user', function (Request $request) { return $request->user(); }); });
How to Detect Security Misconfigurations Easily
To make vulnerability detection easier, use our tool to test website security free. This tool scans your Laravel application for potential misconfigurations and other vulnerabilities in seconds.
Sample Screenshot: Below is an example of the tool’s interface showing detected issues in a Laravel application.

Example: Fixing an API Misconfiguration in Laravel
Let’s say your Laravel application exposes sensitive information via an unprotected API endpoint.
Before Fixing:
php Route::get('/data', function () { return DB::table('users')->get(); });
After Fixing:
php Route::middleware('auth:api')->get('/data', function () { return DB::table('users')->get(); });
This ensures only authorized users can access sensitive data.
Report Your Vulnerability Fixes
After addressing misconfigurations, use our Website Security Checker to generate a vulnerability assessment report. This report confirms the security status of your Laravel application.
Sample Screenshot: Below is a sample report showing vulnerabilities detected and fixed using our free tool.

Final Tips to Secure Your Laravel Application
Regularly update your Laravel framework and packages.
Disable unused features, such as unused routes and services.
Use environment-specific configurations.
For a deeper dive into protecting your Laravel app, check out our free tool and follow best practices for secure coding.
Conclusion
Security misconfigurations can be costly, but with proper practices and tools like our Free Website Security Scanner, you can detect and fix issues quickly. Safeguard your Laravel application today and avoid unnecessary risks.
0 notes
Text
on unix-like systems (literally everything else, macos, linux, bsd, android, ios) compiled executable programs generally do not have a file extension.
A program is marked as an executable if the file permissions include a bit flag of octal 001 (or octal 010 if the specified group can execute it, or octal 100 if the specified owner or administrators can execute it).
you can easily set a file as executable by doing "chmod +x filename" (change mode +executable) though this doesnt mean it will actually run. it will give you an error if it's just normal text or whatever
On windows, a file is executable if it's file extension is marked as a "Designated File Type" in "Software Restriction Policies". You cannot mark any arbitrary file as executable, you must change the file extension.
It's nice to see just based on the file extension directly, but it's not hard in a file manager to get a column to show permissions.
Currently windows commands like "dir" and "cd" are actually "dir.exe" and "cd.exe" if you could just mark a file as executable you dont have to add .exe to the end to the file name and you dont have to code the shell to do "if you write something in the terminal without an extension add an exe to the file name".
Also you wouldnt have to call a function which retrieves some information from some other place on the system to determine if the file extension (which also you have to code it to split the file name at the rightmost period and pass the right side into a function to determine if it's in that list) and instead you can just. read the file permissions which you are Already Going To Read if you're doing anything with the file in the first place.
literally what is window's problem like shit.
The most fucked up lore drop we got in Splatoon 3 was that since the final log is called "log.exe" that means O.R.C.A. runs on Microsoft Windows
301 notes
·
View notes
Text
CHANGE FILE PERMISSIONS EASILY WITH ONLINE CHMOD CALCULATOR | Convert For Free

WHAT IS CHMOD AND CHMOD CALCULATOR
Operating systems like those of Linux and Unix have a set of rules. They determine file access priorities. It rules out who can access a particular file and how freely they can access it. Such commands or access rules are known as file permissions. The command that can reset the file permissions is called chmod. It is short for ‘change mode.’ It is a type of command computing and also a system call for Linux and Unix-like systems. It changes file permissions to file objects or directories. They can be prioritized between the user, group, and others.
User, group and others are three classes of users. The owner of the file objects is known as the ‘user.’ The group means the members of the group owning that file. Others or public are anyone other than the two categories which can view the file.
Try right now
Convert for free chmod calculator is a Linux permissions calculator. It is a chmod calculator four digits and is trusted by many. It generates values in octal or symbolic figures. The codes change file permissions. Octal characters are numbers, and symbolic or alphanumeric includes both letters and digits. The chmod mode calculator calculates octal or alphanumeric codes for users. The generated codes can then be applied to relevant files. Chmod calc provides an easy solution to users online, free of cost to change file permissions.
HOW TO USE THE CHMOD CALCULATOR 4 DIGIT
Convert for free has an easy, simple to use chmod calculator. Generating codes is quick. Here is a guide on how to use this:
● It has three mandatory formats
○ They include read, write and execute.
● It has three columns. a fourth special addition being a Unix permissions calculator as well
○ They are the owner, group, and others. The special feature is a superuser column. It helps to point out the stupid, setgid, and sticky flags. It is a unique feature.
● The chmod calculator has two modes provided to all users worldwide.
○ They are
■ Symbolic mode: It allows users to utilize operators and alphabets. Setuid, setgid, and sticky flags. It meanwhile also enable them to leave remaining modes unchanged. The symbolic mode allows users to add, delete or set particular modes.
■ Absolute mode: it kets all users to override the current file permissions. And re-write it completely. It lets users calculate a new three-digit unit.
CHMOD EXAMPLE: WHY CHMOD CALCULATOR IS THE BEST
A few common octal and alphanumeric chmod examples are:
664 or -rw-r--r-- web content and pictures viewed by surfers.
666 or -rw-rw-rw- This symbolizes the log files or pages.
755 or - rwxr-xr-x perl scripts to make them executable.
One of the many benefits of this chmod calculator is that it is free of cost and available online. To all of its users, it has helped make file permissions easier to change. It is open to anyone that needs it online. It is quick to use and generates codes in seconds. Get coding with chmod calculator today!
Convert For Free- Best Solution For Chmod Calculator
This website provides an easy-to-use interference. Make your task a piece of cake by visiting Convert For Free! Access the best Chmod Calculator in just a few clicks!
Website: http://www.convertforfree.com/chmod-calculator/
#chmod calculator#free chmod calculator#chmod mode calculator#chmod calc#linux chmod calculator#chmod calculator free#Convert For free#unix chmod calculator#chmod code generator#chmod number calculator#chmod calculator online#chmod command calculator#unix permissions chart#chmod calculator 4 digit#use chmod calculator
0 notes
Text
Something Awesome Project Milestone 3 - Week 7
https://cleveranimeberserkcolor.tumblr.com/post/186582586055/me-tryna-figure-out-bandit
Level 20:
Spec: There is a setuid binary in the homedirectory that does the following: it makes a connection to localhost on the port you specify as a commandline argument. It then reads a line of text from the connection and compares it to the password in the previous level (bandit20). If the password is correct, it will transmit the password for the next level (bandit21).
So form what i gather, I need to set up some kind of listener in a port on the localhost so that I can send the setups binary the password, and receive the next key in turn. To do this I’m probably going to need two terminal windows, one to set up the port, and the other to run the binary, for the listener, I looked up on stack exchange how to set one up and you use the -l option with the nc command, if i use the -p option to specify port then I’ll have set up my listener. I then ran suconnect with the same port and the typed in the previous password into the listener and got a neat message from suconnect saying that the passwords match, and got the next key from stdout of the listener.
key: gE269g2h3mw3pwgrj0Ha9Uoqen1c9DGr
Level 21:
specs:
A program is running automatically at regular intervals from cron, the time-based job scheduler. Look in /etc/cron.d/ for the configuration and see what command is being executed.
so i navigated to the folder and my cheeky ls -la reveals three files called cronjob_bandit22 to 24. i did a file cronjob_bandit22 and found that it was ascii text, so i decided to cat it.
@reboot bandit22 /usr/bin/cronjob_bandit22.sh &> /dev/null
* * * * * bandit22 /usr/bin/cronjob_bandit22.sh &> /dev/null
so I checked out the usr/bin file which its running and got
chmod 644 /tmp/t7O6lds9S0RqQh9aMcz6ShpAoZKF7fgv
cat /etc/bandit_pass/bandit22 > /tmp/t7O6lds9S0RqQh9aMcz6ShpAoZKF7fgv
this is changing the permission of the temp file so I’m gonna check that out as well…
voila! got the key
key: Yk7owGAcWjwMVRwrTesJEwB7WVOiILLI
Level 22:
specs: A program is running automatically at regular intervals from cron, the time-based job scheduler. Look in /etc/cron.d/ for the configuration and see what command is being executed.
NOTE: Looking at shell scripts written by other people is a very useful skill. The script for this level is intentionally made easy to read. If you are having problems understanding what it does, try executing it to see the debug information it prints.
similar to the last exercise let’s go to what cronjob_bandit23 is doing…
firstly there is a myname variable which uses whoami, secondly, there is a mytarge variable which takes a string and pipes into md5sum and the pipes it into a cut function.
I tried echoing the message: “I am user bandit23” into the md5sum and look for a folder in temp with that name, just like in the last level.
I cd’d into tmp and cat’d the md5sum (8ca319486bfbbc3663ea0fbe81326349) and got the key.
key: jc1udXuA1tiHqjIsL8yaapX5XIAI6i0n
Level 23:
A program is running automatically at regular intervals from cron, the time-based job scheduler. Look in /etc/cron.d/ for the configuration and see what command is being executed.
NOTE: This level requires you to create your own first shell-script. This is a very big step and you should be proud of yourself when you beat this level!
NOTE 2: Keep in mind that your shell script is removed once executed, so you may want to keep a copy around…
At first glance, it looks pretty similar to the others, so let’s see where the scripts take us.
it takes us to directory /var/spool/ where there is a variable $myname. Since I’m scripting, I made a directory in the tmp folder to store the output of my script.
I don’t really know anything about scripting, so I had to look up online for help in this one, but I get that we are implementing a script to redirect the password into a directory we can access.
key: UoMYTrfrBFHyQXmg6gzctqAwOmw1IohZ
Level 24:
A daemon is listening on port 30002 and will give you the password for bandit25 if given the password for bandit24 and a secret numeric 4-digit pincode. There is no way to retrieve the pin-code except by going through all of the 10000 combinations, called brute-forcing.
Finally, I get to learn how to brute force!
previously, when entering in passkeys, we could use the nc command specifying localhost, port, password and pin. It would be too difficult to separately do each number from 0000 to 9999, so I tried making a txt file with a script to generate all combinations paired with the level24 passcode. i then piped in the text file into nc to commence the brute force with cat list.txt | nc localhost 30002.
I didn’t find out what the passkey was, but it worked and I got the key:
key: uNG9O58gUE7snukf3bvZ0rxhtnjzSGzG
For these last few levels, I spent half an hour on them each until I could go no further, and then I looked up some hints, they were a lot harder than I expected.
1 note
·
View note
Text
How To Convert APE Audio Recordsdata?
Now I feel it isn't accomplished to explain the whole story for converting and a few setting for this system engaged on Windows 2000 English model. Music makes the life higher, an exquisite music is consisted of the audio codec whic is common in our life, there are numerous audio codecs accessible, some are supported by speical gadgets, some are supported by most gadgets. FLAC is a audio format like MP3 which is a Open source audio codec, although FLAC take up smaller audio measurement, most LAPTOP customers are still serching for a very good FLAC Converter and convert FLAC to different video codecs. as a result of Windows10 users can play FLAC files natively via the onboard Groove participant. For older Windows versions, you could obtain a Home windows Media Player plug-in, then you'll be able to play the FLAC audio information. Following will advocate you prime 5 finest and free FLAC Converter on PC, hope it is helpful for you. Primary operation of the program is very easy: simply drag & drop FLAC or CUE recordsdata into major window, choose the Default encoder settings within the Profile record and click on the CONVERT button. Save this text below to a file called ogg2mp3. Make it executable with chmod +x ogg2mp3. So I can perceive you wish to use free and DRM-free formats, but I question your sources. Changing from one lossy format to a different is going to supply a worse file (as a result of parts overlooked of one format will not be overlooked of the opposite, and vice versa). Better to re-rip from the unique supply, or leave them as they are. Of course, if you want to play APE information on Windows Media Participant, Home windows Movie Maker or edit APE information on QuickTime, iMovie, and many others Avdshare Audio Converter additionally offers you the possibility to convert APE to WAV, WMA, AC3, AAC, and so forth. This going via a wave file intermediate is a tougher means. For Windows use Foobar 2000 with monkey audio decoding help and lame mp3 encoder to go direct fromape tomp3. Some might inform you that it goes by a wave intermediate, however Foobar 2000 does it transparently to the particular person if it certainly goes by an intermediate. All free software program. At an equivalent level of visual quality, HEVC permits video to be compressed to a file that's about half the size (or half the bit charge) of AVC. Simply drag in any files you want to convert, choose a format, vacation spot and high quality for conversion, and hit Convert. It's fairly quick, and does it's job nicely. More advanced customers may want more configuration choices than can be found, but it would cover most people's wants. You can also make a ringtone orMP3 file to your units like Windows 7 LAPTOP, Home windows 10 PC, Mac OS X PC, iPhone 8S, iPhone 7S, iPhone 6S, iPhone 6S Plus, Android Tablet, iPad on this online program. FLAC is a lossless audio format that offers compression in dimension with out loss in quality. Get MP3 sound of top-end, as a lot as 320 KBps. is a FLAC to MP3 freeware website that may convert FLAC to MP3 on-line free. Convertio is a free on-line FLAC to MP3 converter that is straightforward to make use of. It lets you convert your music information utterly free to WMA, MP3, AAC, WAV, FLAC, OGG, AIFF, Apple Lossless format and bunch of others. I have a bunch of ape recordsdata round 78mb each. The ape files play effective in VLC however after I convert the file the mp3 file exhibits zerokb. Select MP3 from the Audio Class. iSkysoft iMedia Converter Deluxe helps 3 totally different categories to select from. Similarly, you'll be able to select any other audio format as per your requirement. With fre:ac you simply rip your audio CDs to MP3 or WMA files to be used together with your hardware player or convert information that don't play with other audio software program. You'll be able to even convert complete music libraries retaining the folder and filename structure. The program Free APE to MP3 Converter is accompanied by a particular version of the FFmpeg encoder, adapted to the wants of the program. Not beneficial to use other variations of FFmpeg. Energy MP3 WMA Converter, as the name implies, is especially an MP3 to WMA converter software program, however you can even use it to perform APE to MP3 conversion. As enter, this software program can take audio files of various formats like WAV, WMA, CDA, AC3, AAC, AMR, and extra. However as output, it solely helps some chosen formats specifically, WAV, MP3, WMA, OGG, APE, M2A, and MP2 codecs. ape is the file extension for Monkey's Audio Files. Monkey's Audio is a pseudo-free lossless audio codec, ape to mp3 converter free windows 10 like flac. Convert your audio file to MP3 in prime quality with this free on-line MP3 converter. Simply upload your music and obtain the MP3 inside an immediate. You may also add video information and extract the audio observe to MP3. This app is only obtainable for iPhone and iPad , however the person interface is clear and straightforward to navigate. It imports greater than 30 file sorts, together with standard video formats, and exports to 10 of the preferred audio codecs. The enter and output file types aren't as comprehensive as the Swap app, however this app has a extra user-friendly interface. There's a file browser function that makes it straightforward to seek out the audio file you want to convert and share your transformed file throughout standard social media platforms straight from the app.

Media Coder is a free APE to MP3 converter software program program for Windows. Through this software program program, you might convert quite a few APE audio information to MP3 format. This encoder may also be able to performing format conversion of up to 8 information concurrently which considerably reduces the conversion time. APE to MP3 Converter helps conversion without any momentary information it brings you excessive altering velocity and saves the exhausting disk useful resource. I'm using VLC Participant to play a 350MBape file with 12 songs in it. Is VLC a correct program to play it? As a result of it keeps on enjoying it only as one continuous track instead of 12 separate songs.

APE (Monkey's Audio) is a well-liked lossless audio format, which does not cause any lack of audio quality throughout data coding and compression. Subsequently, APE files are large and it can be time-consuming to switch an ape to mp3 converter free windows 10 file. Moreover, APE has poor compatibility with gadgets and programs. In contrast, MP3 is a lossy audio format that discards some audio information for smaller size but nonetheless keeps good high quality. Truly, it's tough to note the differences between APE and the transformed 320kbps MP3 with bare ears. Most importantly, MP3 is a common audio format that gives native help for nearly all multimedia units. General, it is a good selection to convert APE to MP3 when you do not have enough house to retailer giant APE recordsdata or need to play or edit APE with a particular program.
1 note
·
View note
Text
unix commands cheat sheet trainer TKCY%
💾 ►►► DOWNLOAD FILE 🔥🔥🔥🔥🔥 Linux/Unix Command Line Cheat Sheet - Description pwd prints working directory (prints to screen, ie displays the. Unix, Linux, Mac OS Cheat Sheet commands. Unix/Linux Command Reference .com. File Commands ls – directory listing ls -al – formatted listing with hidden files cd dir - change directory to dir. Standard output (stdout) of cmd to file. The ULTIMATE Unix/Linux Command Cheat Sheet Command Line Options. 9 Linux is a very famous, open-source operating system. Many developers use Linux for development purposes because of its high throughput. As a student or even a professional in the software industry, it is very essential to have knowledge of the Linux OS. Many programmers prefer Linux over Windows OS for development purposes due to a variety of reasons such as the security of the Linux Operating System is better than Windows, the Linux terminal is way superior to the windows command line in many ways, etc. Before we jump into studying a lot of Linux commands, it is very important to address this question What is Linux and why is it preferred over Windows OS. Linux is an open-source operating system whose source code is available for modification and commercial and non-commercial distribution under the guidelines of the GNU General Public License. Linux has a number of advantages over the Windows operating system and is used widely because of these advantages Below are a few listed:. Here, we have a cheat sheet prepared for you to refer to all the important Linux Commands with Examples. CRUD operations are said to be the basic operations on any file or directory or database. Even if you are not a Linux User, file and directory CRUD operations are something that you should be comfortable with. Example: The command shown on the right displays the content of the file file1. Example: The command in the right stores the joined content of file1 and file2 in file3. We have displayed the content of file3. Example: The command in the right is for searching a file with the name file1. These are some of the general-purpose system information commands that are important to know and easy to remember. There are 3 types of people who can use a file and each type has 3 types of access to the file. This is shown in the diagram given below:. So, each of them can have 0 or more out of these 3 permissions. Now let us understand the Linux commands that help us give these permissions to the files. One important thing to note here is that before these 9 slots of the user, group and others read, write and execute permissions , there is also one another slot. This slot is for special files. Further, rwx means that the user has all the three permissions where as r-- means that the group has only read permission and the write and execute permissions are not there with the group. The same is the case for others another r Before we jump into the Linux file permission commands and see some examples, it is very important to understand this chmod command in detail first as understanding this command completely will clear the entire concept of file permission commands. This command is used to change the file permissions. The syntax can be either using symbols characters or numbers. We will see that in detail. This is the first method of chmod command using which we can give permissions. The basic syntax is as follows:. If the user's flag is not included in the command i. Let us now see the Linux commands using the symbolic notation of chmod. Example: The file permissions along with the owner and other details is shown for the file file1. Example: The command shown in the right adds the read permission to the o other class for the file file1. The permissions number of a specific user class is represented by the sum of the values of all the permissions. For instance, if we have to write a command to provide read and write permissions to the user, group and others, there can be many ways of doing so. Let us see one symbolic way:. We have written 6 thrice because of applying the permissions to user, group and others. So, read and write permissions are applied to the user, group and others for the file file1. Let us now see, some of the hardware information commands that give us the information about the hardware that we are using. The files can be compressed and then extracted to save the storage. We see this happening many times in our daily lives that we have to compress some file to send it or we have to extract a downloaded file. There are several commands for file compression in Linux given below:. Example: The command to create an uncompressed tar archive for the directory demoDir is shown on the right. Which command in Linux is used to clear the terminal screen so that no previous command can be seen on the screen. If we want to assign the read and execute permissions to all the classes, which of the following is NOT the correct command? Which of the following commands is used to display all the files and directories in the current directory along with the hidden files? Which Linux command is used to display all the previous commands in the current terminal session? Personalised feedback report with solutions Real life Interview Questions Identify exact topics to improve. Before you go! Take this "Linux Commands Cheat Sheet" interview guide with you. Download PDF. Enter the name of your college. Type to search. Computer Science. Information Technology. Mathematics and Computing. Before After Forgot Password. Linux Commands Tutorial: Basics to Advanced 1. System Information Commands 3. File Permission Commands 4. Hardware Information Commands 5. File and Directory Compression Commands 6. Environment Variable Commands 7. User Management Commands 8. Networking Commands 9. Crack your next tech interview with confidence! However, this command does not list the files and directories of the sub-directories. Move to one level up directory. Note that you can only move down the directory and not to the directories in the above level. Example: In the command shown on the right, we move from the root directory to Desktop. If a file is not present in the current directory, it gives a message showing no such file exists. If the third file does not exist, it is first created and then the joined content is stored. It deletes a directory. It moves the file to the new path specified. Example: The mv command moves the file file1. Example: The command in the right changes the name of the file file1 to file2. We can search by file, folder, name, creation date, modification date, etc. There are a number of options available. For instance, exec searches the file that meets the criteria and returns 0 as exit status for successful command execution. This command searches a file for a particular pattern of characters and displays all the lines that contain that pattern. The pattern being searched is called a regular expression regex. For instance, c is an option that is used to only count the number of lines in the file that matches the pattern. System Information Commands These are some of the general-purpose system information commands that are important to know and easy to remember. Example: The command and its output are shown on the right. Example: The command cal and its output is shown on the right. Example: The command is typed in and it shows the username with which the user has logged in. This command is similar to the find command but this command is faster as it produces more accurate results by taking less time compared to the find command. There are again a number of options available. Example: The command to locate apropos command in Linux System is given on the right. File Permission Commands There are 3 types of people who can use a file and each type has 3 types of access to the file. This is shown in the diagram given below: The diagram shows that there are 3 types of people accessing a file and they are: User u Group g Others o Also, the access that we want to give to each of them is of three types: Read r Write w Execute x So, each of them can have 0 or more out of these 3 permissions. The chmod Command: Before we jump into the Linux file permission commands and see some examples, it is very important to understand this chmod command in detail first as understanding this command completely will clear the entire concept of file permission commands. Symbolic Method for granting permissions: This is the first method of chmod command using which we can give permissions. Let us understand this syntax in detail. The first set means the type of person to give access to. The second set is the set of operators. Let us see what they mean. Example: This commands adds the write permission for a all i. Example: This command adds the execution permission for the user. Click here to download. Which command in Linux can be used to create a file? Both B and C. Which command in Linux is used to get the current date and time? None of the above. Which command in Linux is used to get the details of all the active processes? How many slots are there in the file permissions diagram including the special slot? Linux is better than windows mainly in its:. The command: sudo adduser username , is a:. User Management Command. Administration Command. Both A and B. Neither A and B. Personalised feedback report with solutions. Real life Interview Questions. Identify exact topics to improve. Attend Free Class. Got suggestions? We would love to hear your feedback. Your feedback is important to help us improve. Close Submit Feedback. Unlock the complete InterviewBit experience for free. Sign Up Using. Or use email. Free Mock Assessment Powered By. Fill up the details for personalised experience. Phone Number. Please verify your phone number. By clicking on Start Test, I agree to be contacted by Scaler in the future. Already have an account? Log in. Powered By. Instructions from Interviewbit. Start Test. Lists all the files and directories inside the current directory as well as all the files and directories of the sub-directories as well. Lists all the files and directories in the current directory and also lists the hidden files such as. Same function as cd i. Move to a particular directory from the current directory. This command displays the content in a file. This command joins the content of two files and stores it in the third file. This command is used for walking a file hierarchy. The full form of this command is a global search for regular expression and printout. This command is used to show the file permissions along with the owner and other details of the specified file. This command is used to display the information about your CPU. Note that this command is not available by default. It can be used after installation of the necessary package using sudo apt install cpuinfo. This command is used to display the free and used memory. This command stands for disk usage and is used to estimate the space usage for a file or directory. Example: The following command gives the size in human-readable form for the Desktop folder. Example: The command to zip file1 using gzip compression is shown on the right. Example: The command to unzip fileDemo. Example: The command to create gzip tar archive for the directory demoDir is shown on the right. Example: The command to extract the content of demoFile tar archive is shown on the right. Example: The command to add user2 to group1 is shown. Example: The command to delete user1 from group1 is shown. Example: The command to get information about the user1 is shown on the right. Example: The process with id 1 is sent to the background by providing its id to bg. Example: The process with id 1 is brought to the foreground with the help of this command. Example: Displays the status of the process with id
1 note
·
View note
Text
unix commands cheat sheet work PEZ%
💾 ►►► DOWNLOAD FILE 🔥🔥🔥🔥🔥 Linux/Unix Command Line Cheat Sheet - Description pwd prints working directory (prints to screen, ie displays the. Unix, Linux, Mac OS Cheat Sheet commands. Unix/Linux Command Reference .com. File Commands ls – directory listing ls -al – formatted listing with hidden files cd dir - change directory to dir. Standard output (stdout) of cmd to file. The ULTIMATE Unix/Linux Command Cheat Sheet Command Line Options. 9 Linux is a very famous, open-source operating system. Many developers use Linux for development purposes because of its high throughput. As a student or even a professional in the software industry, it is very essential to have knowledge of the Linux OS. Many programmers prefer Linux over Windows OS for development purposes due to a variety of reasons such as the security of the Linux Operating System is better than Windows, the Linux terminal is way superior to the windows command line in many ways, etc. Before we jump into studying a lot of Linux commands, it is very important to address this question What is Linux and why is it preferred over Windows OS. Linux is an open-source operating system whose source code is available for modification and commercial and non-commercial distribution under the guidelines of the GNU General Public License. Linux has a number of advantages over the Windows operating system and is used widely because of these advantages Below are a few listed:. Here, we have a cheat sheet prepared for you to refer to all the important Linux Commands with Examples. CRUD operations are said to be the basic operations on any file or directory or database. Even if you are not a Linux User, file and directory CRUD operations are something that you should be comfortable with. Example: The command shown on the right displays the content of the file file1. Example: The command in the right stores the joined content of file1 and file2 in file3. We have displayed the content of file3. Example: The command in the right is for searching a file with the name file1. These are some of the general-purpose system information commands that are important to know and easy to remember. There are 3 types of people who can use a file and each type has 3 types of access to the file. This is shown in the diagram given below:. So, each of them can have 0 or more out of these 3 permissions. Now let us understand the Linux commands that help us give these permissions to the files. One important thing to note here is that before these 9 slots of the user, group and others read, write and execute permissions , there is also one another slot. This slot is for special files. Further, rwx means that the user has all the three permissions where as r-- means that the group has only read permission and the write and execute permissions are not there with the group. The same is the case for others another r Before we jump into the Linux file permission commands and see some examples, it is very important to understand this chmod command in detail first as understanding this command completely will clear the entire concept of file permission commands. This command is used to change the file permissions. The syntax can be either using symbols characters or numbers. We will see that in detail. This is the first method of chmod command using which we can give permissions. The basic syntax is as follows:. If the user's flag is not included in the command i. Let us now see the Linux commands using the symbolic notation of chmod. Example: The file permissions along with the owner and other details is shown for the file file1. Example: The command shown in the right adds the read permission to the o other class for the file file1. The permissions number of a specific user class is represented by the sum of the values of all the permissions. For instance, if we have to write a command to provide read and write permissions to the user, group and others, there can be many ways of doing so. Let us see one symbolic way:. We have written 6 thrice because of applying the permissions to user, group and others. So, read and write permissions are applied to the user, group and others for the file file1. Let us now see, some of the hardware information commands that give us the information about the hardware that we are using. The files can be compressed and then extracted to save the storage. We see this happening many times in our daily lives that we have to compress some file to send it or we have to extract a downloaded file. There are several commands for file compression in Linux given below:. Example: The command to create an uncompressed tar archive for the directory demoDir is shown on the right. Which command in Linux is used to clear the terminal screen so that no previous command can be seen on the screen. If we want to assign the read and execute permissions to all the classes, which of the following is NOT the correct command? Which of the following commands is used to display all the files and directories in the current directory along with the hidden files? Which Linux command is used to display all the previous commands in the current terminal session? Personalised feedback report with solutions Real life Interview Questions Identify exact topics to improve. Before you go! Take this "Linux Commands Cheat Sheet" interview guide with you. Download PDF. Enter the name of your college. Type to search. Computer Science. Information Technology. Mathematics and Computing. Before After Forgot Password. Linux Commands Tutorial: Basics to Advanced 1. System Information Commands 3. File Permission Commands 4. Hardware Information Commands 5. File and Directory Compression Commands 6. Environment Variable Commands 7. User Management Commands 8. Networking Commands 9. Crack your next tech interview with confidence! However, this command does not list the files and directories of the sub-directories. Move to one level up directory. Note that you can only move down the directory and not to the directories in the above level. Example: In the command shown on the right, we move from the root directory to Desktop. If a file is not present in the current directory, it gives a message showing no such file exists. If the third file does not exist, it is first created and then the joined content is stored. It deletes a directory. It moves the file to the new path specified. Example: The mv command moves the file file1. Example: The command in the right changes the name of the file file1 to file2. We can search by file, folder, name, creation date, modification date, etc. There are a number of options available. For instance, exec searches the file that meets the criteria and returns 0 as exit status for successful command execution. This command searches a file for a particular pattern of characters and displays all the lines that contain that pattern. The pattern being searched is called a regular expression regex. For instance, c is an option that is used to only count the number of lines in the file that matches the pattern. System Information Commands These are some of the general-purpose system information commands that are important to know and easy to remember. Example: The command and its output are shown on the right. Example: The command cal and its output is shown on the right. Example: The command is typed in and it shows the username with which the user has logged in. This command is similar to the find command but this command is faster as it produces more accurate results by taking less time compared to the find command. There are again a number of options available. Example: The command to locate apropos command in Linux System is given on the right. File Permission Commands There are 3 types of people who can use a file and each type has 3 types of access to the file. This is shown in the diagram given below: The diagram shows that there are 3 types of people accessing a file and they are: User u Group g Others o Also, the access that we want to give to each of them is of three types: Read r Write w Execute x So, each of them can have 0 or more out of these 3 permissions. The chmod Command: Before we jump into the Linux file permission commands and see some examples, it is very important to understand this chmod command in detail first as understanding this command completely will clear the entire concept of file permission commands. Symbolic Method for granting permissions: This is the first method of chmod command using which we can give permissions. Let us understand this syntax in detail. The first set means the type of person to give access to. The second set is the set of operators. Let us see what they mean. Example: This commands adds the write permission for a all i. Example: This command adds the execution permission for the user. Click here to download. Which command in Linux can be used to create a file? Both B and C. Which command in Linux is used to get the current date and time? None of the above. Which command in Linux is used to get the details of all the active processes? How many slots are there in the file permissions diagram including the special slot? Linux is better than windows mainly in its:. The command: sudo adduser username , is a:. User Management Command. Administration Command. Both A and B. Neither A and B. Personalised feedback report with solutions. Real life Interview Questions. Identify exact topics to improve. Attend Free Class. Got suggestions? We would love to hear your feedback. Your feedback is important to help us improve. Close Submit Feedback. Unlock the complete InterviewBit experience for free. Sign Up Using. Or use email. Free Mock Assessment Powered By. Fill up the details for personalised experience. Phone Number. Please verify your phone number. By clicking on Start Test, I agree to be contacted by Scaler in the future. Already have an account? Log in. Powered By. Instructions from Interviewbit. Start Test. Lists all the files and directories inside the current directory as well as all the files and directories of the sub-directories as well. Lists all the files and directories in the current directory and also lists the hidden files such as. Same function as cd i. Move to a particular directory from the current directory. This command displays the content in a file. This command joins the content of two files and stores it in the third file. This command is used for walking a file hierarchy. The full form of this command is a global search for regular expression and printout. This command is used to show the file permissions along with the owner and other details of the specified file. This command is used to display the information about your CPU. Note that this command is not available by default. It can be used after installation of the necessary package using sudo apt install cpuinfo. This command is used to display the free and used memory. This command stands for disk usage and is used to estimate the space usage for a file or directory. Example: The following command gives the size in human-readable form for the Desktop folder. Example: The command to zip file1 using gzip compression is shown on the right. Example: The command to unzip fileDemo. Example: The command to create gzip tar archive for the directory demoDir is shown on the right. Example: The command to extract the content of demoFile tar archive is shown on the right. Example: The command to add user2 to group1 is shown. Example: The command to delete user1 from group1 is shown. Example: The command to get information about the user1 is shown on the right. Example: The process with id 1 is sent to the background by providing its id to bg. Example: The process with id 1 is brought to the foreground with the help of this command. Example: Displays the status of the process with id
1 note
·
View note
Text
This is a short tutorial on how to create a Vagrant box from existing Virtual Machine. Vagrant tool gives you the best environment to manage and control your Virtual Machines. This works on any Linux Distribution. Installing Vagrant box from scratch may not be an efficient way if you already have a running Virtualbox Vm from same Base os as the vagrant box. Additionally, you’ll save bandwidth if you have updated pre-existing Vm and maybe installed additional packages that you’ll like to have on new Vagrant controlled Virtual Machine. Step 1: Create Vagrant box directory Create a directory for vagrant box to be created. mkdir -p ~/vagrant cd ~/vagrant mkdir centos7 Step 2: Create vagrant user on existing VM You current VM which you need to convert to Vagrant box need to have vagrant user created. If missing, create a username called “vagrant” with password “vagrant“. If not you can add it $ nano adduser.sh Paste the code below and save the file. # Vagrant specific date > /etc/vagrant_box_build_time # Add vagrant user /usr/sbin/groupadd vagrant /usr/sbin/useradd vagrant -g vagrant -G wheel echo "vagrant"|passwd --stdin vagrant echo "vagrant ALL=(ALL) NOPASSWD: ALL" >> /etc/sudoers.d/vagrant chmod 0440 /etc/sudoers.d/vagrant # Installing vagrant keys mkdir -pm 700 /home/vagrant/.ssh wget --no-check-certificate 'https://raw.github.com/mitchellh/vagrant/master/keys/vagrant.pub' -O /home/vagrant/.ssh/authorized_keys chmod 0600 /home/vagrant/.ssh/authorized_keys chown -R vagrant /home/vagrant/.ssh # Customize the message of the day echo 'Welcome to your Vagrant-built virtual machine.' > /etc/motd Make the script executable and run it. chmod +x adduser.sh ./adduser.sh Step 3: Create Base vagrant box Change to directory containing CentOS vagrant box you downloaded. cd ~/vagrant/centos7 Create a file called Vagrantfile and paste below data. Vagrant.configure("2") do |config| config.vm.box = "centos/7" end Bring the added vm up vagrant up If successful in spinning up, you should be logged in by default. If you get error message “default: Warning: Connection timeout. Retrying…”, try press CTL+C and use vagrant ssh to login. Step 4: Copy VM Virtual Disk Change directory to VirtualBox VMs directory and find the name of Virtualbox VM that we want to make newly added box use. cd ~/VirtualBox VMs/ ls Mine is under centos-asterisk folder. With the name of vmdk as centos-asterisk-disk1.vmdk. We need to copy this file to the directory containing vagrant VM we added “centos7“. Now rename your added VM on Virtualbox Gui. Before you can rename you have to turn it off. cd ~/vagrant/centos7 vagrant halt To rename go to Virtual Machine > General > Basic > Name Next thing to do is copy centos-asterisk-disk1.vmdk to box-disk1.vmdk. Make sure the Virtual Machine is off, if not turn it off. cp ~/VirtualBox VMs/centos-asterisk/centos-asterisk-disk1.vmdk ~/VirtualBox VMs/centos7/box-disk1.vmdk Now start vagrant box cd ~/vagrant/centos7 vagrant up vagrant ssh Step 4: Install VirtualBox Guest Additions Install Virtualbox Guest Additions on the guest OS. From Host computer, copy to VBoxGuestAdditions.iso ~/vagrant/centos7. Then on Guest OS run mount -o loop /vagrant/VBoxGuestAdditions.iso /mnt sh /mnt/VBoxLinuxAdditions.run umount /mnt Enjoy your Vagrant environment.
0 notes
Text
Udig map eclipse

#Udig map eclipse how to
#Udig map eclipse zip file
#Udig map eclipse upgrade
Upgraded replaced these files with newer versions like the above steps(UBUNTU). If one jar file information is there to check the existence. Step 2: If you find two jar file information then remove it.
#Udig map eclipse zip file
Step 1: Unzip the Eclipse zip file then change the permission for ECLIPSE.INI file
#Udig map eclipse upgrade
Otherwise, we need to upgrade the version The Eclipse executable launcher was unable to locate its companion shared library in Windows 10įirst, we need to check the Java version if it is 1.7 or above then it is fine. Step 4: After completion of the above steps then restart the machine. Upgraded replaced these files with newer versions If one jar file information is there to check existence: jar file information like below: -startup If you find two jar file information then remove it. Step 3: Then go to “/etc/eclipse.ini”, change permission to this file. Lrwxrwxrwx 1 root root 16 eclipse.ini -> /etc/eclipse.iniĭrwxr-xr-x 4 root root 4096 Feb 15 21:55 featuresĭrwxr-xr-x 3 root root 4096 Feb 15 21:55 configurationĭrwxr-xr-x 4 root root 4096 Feb 15 21:55 p2ĭrwxr-xr-x 2 root root 4096 Feb 15 21:55 pluginsĭrwxr-xr-x 3 root root 4096 Feb 15 21:55 dropinsĭrwxr-xr-x 2 root root 4096 Feb 15 21:55 buildscripts Follow the below steps to get clarity on this cd chmod 777 cd ls -ltr Step 2: Here eclipse.ini showing short cut so here we can’t change permissions. Step 1: Goto Eclipse Library path: /usr/lib/eclipse Error: The Eclipse executable launcher was unable to locate its companion shared library in Ubuntu: Here we provide the solution for two jars information if it is there we need to remove it then upgrade the other one. I think it is missing the .Eclipse IDE (Integrated Development Environment) is used to develop the code with packages, libraries.Īfter installation completed, I am trying to open Eclipse IDE but I got below error because jars have different versions. Nope open the product and run that the product includes the feature > Open the manifest.mf and click on launch an eclipse application > Choose .rcp from the plugins list and import > This is what I did to run the application: > I am using the envelopmet setup proposed in SDK Quickstart Guide with Each major eclipse release tends to change some Taught a course using Eclipse 3.6 yet so it is possible some of theĭetails need updating. uDig and Refractions Research are mentioned near the bottom. I only ever do QA on that when I teach the course and I have not has a recent article about open source and open standards in the GIS world.
#Udig map eclipse how to
ui has a "MapViewer" widget you can use Īnd how to embed that into an otherwise innocent RCP application. Plugins you need from udig understanding that It should work the general thrust of that session is identifying what > list, and it seems like some people were having problems too before. I have search for old messages in the mailing PSC member in your area to arrange a course. WeĬan make those materials available to academics or you can contact a Right that example code is part of the commercial training course. > And then I finally found the example code I was looking for: For this, I followed the tutorials to know > I just found out about udig, and I would love to use it to embed a udig map
Delivered-to: Domainkey-signature: a=rsa-sha1 c=nofws d= s=gamma h=mime-version:in-reply-to:references:date:message-id:subject:from:to :content-type:content-transfer-encoding b=Ex7s0Ip元WbnHkqtUxlSx4MZFp0BV52OneLFfmMWgswRVA5EuF5E4HXS7HgRBhGmav yRbyzz+Byje+S8AyLofU/scB24CZTDnMLRflCIr2+YENEyA1TFkQH8PpEBaVKxJ1LBpyĐVlkn/YcbeAuGU8Kgo+gKt6o/AELM/ql5ubp0=.
0 notes
Text
Uninstall displaylink driver ubuntu

Uninstall displaylink driver ubuntu how to#
Uninstall displaylink driver ubuntu install#
Uninstall displaylink driver ubuntu update#
Uninstall displaylink driver ubuntu driver#
Uninstall displaylink driver ubuntu software#
The easiest way to uninstall DisplayLink on Mac is to use a dedicated uninstaller for macOS computers. The Quickest Way to Uninstall DisplayLink on Mac. Ok, so I decided to try some kernels and it seems that 4.18.20-041820-generic is the most recent working. Thus, we can say that the DisplayLink driver, app, and kernel extension are all safe and secure for your macOS computers. You can check your current kernel like this: $ uname -r
Uninstall displaylink driver ubuntu update#
I haven't tried other kernels - if I try I will update the answer - but beware of this issue!
Uninstall displaylink driver ubuntu driver#
However, I tried with the newest kernel 4.20 and the driver will not work - evdi for dkms will not compile. Ii dkms 2.3-3ubuntu9.2 all Dynamic Kernel Module Support FrameworkĪlso note, it works perfectly with the 4.15.0-45-generic kernel. Make sure you have dkms installed on your system. Thats it! Once installed you can connect your DisplayLink to the PC and it should fly. $ chmod 775 displaylink-driver-4.4.24.run Pro dual monitor driver from Mobile Pixels for Windows, macOS, or Ubuntu to keep your graphics. Step 4: By uninstalling the Nvidia driver from Ubuntu, you may find the open-source driver blacklisted.
Uninstall displaylink driver ubuntu install#
I then decided to remove Xubuntu and install Ubuntu 20.04. Step 3: Once the Nvidia drivers are purged from the system, you will need to reinstall the Ubuntu-desktop package, as it will have been uninstalled during step 2. I then encountered a number of issues where it would freeze up entirely at the login screen, I couldn't even get to a different tty.
Uninstall displaylink driver ubuntu software#
Then unzip, make sure it's runable and install (change the below file names to your versions): $ unzip DisplayLink USB Graphics Software for Ubuntu 4.4.zip 6 or later : Uninstall any legacy DisplayLink driver (v5. I was using a USB-C dock to connect the laptop to my other monitors with the DisplayLink driver installed. Sudo rm -f /lib/systemd/system/dlm.serviceĭownload driver from HERE. To remove old/install new apply the below steps: sudo. Please note that this is NOT a complete driver for DisplayLink devices. The project is part of the DisplayLink Ubuntu development which enables support for DisplayLink USB 3.0 devices on Ubuntu. Script will download all dependencies for you. It is essentially a virtual display you can add, remove and receive screen updates for, in an application that uses the libevdi library. Once you have the script, remove the currently installed driver/module and install the new version. You will have to use a script, however, which you can obtain from HERE (Github). I am writing this after updating to 4.20.13 It is now possible to install the driver with new versions of kernels.
Uninstall displaylink driver ubuntu how to#
This HOWTO covers how to configure and install the DisplayLink driver evdi. I don't want to use DisplayLink with it-ever again anymore. (Code 56) I have uninstalled Displaylink as I know understand it is built. However, a DisplayLink window keeps popping up asking me to install the DisplayLink drivers, constantly all the time. UPDATE: March 2019 -> DisplayLink with kernel > 4.18.20 When I uninstall DisplayLink and restart, I can use my Dell S2340T monitor just by connecting it via HDMI and USB (for the touch) and it works great. The newer DL - 3100 / 512Mb / DVI device despite not having USB3 available, is working on USB2 much much better than the old DL-165 / 8Mb / VGA device, difference between usable and not.UPDATE: April 2019 -> DisplayLink with kernel > 5.0.5 also works. Opening laptop lid or enabling laptop main display is resolving that issue. This issue is happening only when external DisplayLink display is the only one which is enabled. Maybe I'll try removing displaylink-driver-5.4. now, reloading displaylink-driver-5.4., (it's newer?) and see if it keeps working In recent Ubuntu 20.04 users started to report extremely slow refresh rate on DisplayLink screens run by udl or evdi kernel drivers. Uninstalling displaylink-driver-5.4. and then reloading displaylink-driver-5.4. seems to have allowed the new Startech device to start working. Must just have been coincidence my old device started working at the point when I tried loading the new driver. Turns out my old Lindy 42744 VGA / DisplayLink DL-165 based device, didn't use the newer DisplayLink driver but was running using the "Open source UDL driver". Seems I never needed the latest displaylink-driver-5.4. (or even displaylink-driver-5.4., the specific driver Startech recommend for their USB32DVIPRO DVI / DL-3100 device) when I was using the older VGA / DL-165 device. Please note that the evdi kernel module is still in the memory.Ī reboot is required to fully complete the uninstallation edited by nginmu October 29th, 2021 at 03:46 PM. Stopping displaylink-driver systemd service Deleting from: /lib/modules/5.11.0-39-generic/updates/dkms/ Use the dkms install command to reinstall any previous module version. No original module was found for this module on this kernel. Deleting from: /lib/modules/5.11.0-34-generic/updates/dkms/ Status: Before uninstall, this module version was ACTIVE on this kernel. Code: sudo displaylink-installer uninstallĭisplayLink Linux Software 5.4.1-55.174 install script called: uninstall
0 notes
Text
Imagegif in php

#Imagegif in php full
#Imagegif in php free
#Imagegif in php windows
Next we use imagecreatetruecolor() to create a new true color image of the needed size. The adding of 20 is to give the final image padding so the words are not jammed against the image edge. Variables are defined using the imagefontwidth() and imagefontheight() functions from the GD library. Once the text gets to the image-gif.php script, the script GETs it into the PHP variable $mytext. Note that the text gets sent via URL query string in the variable "mytext". When it does this page refresh, it POSTs the text to an image-gif.php image creation file. The mytext-convert-to-gif-image.php script is mostly an HTML input form and the form action is to run this same file, mytext-convert-to-gif-image.php. What the 2 scripts below do is turn your typed text input and turn it into an actual GIF image (as long as you have the correct permissions to do this-ask your host). Imagegif() function from the GD library is needed-along with several other functions-for this image creation to work. It usually is, but if it is not, get your host to do so. The PHP Script for Writing GIF Image Filesįirst, notice that we are counting on the GD library to have been enabled in your PHP installation.
Write MPEG Video Web Page File with PHP.
#Imagegif in php windows
Write Windows Media Video Web Page File with PHP.
Write YouTube Video Web Page File with PHP.
Let us know how you like these scripts! We kept them as simple as we could so you could get the idea in a flash. For image creation, we concentrated on the simple task of allowing users to input text and using PHP to take this text and put it in a nice box with a border and save it as a graphics/image file. There are even five PHP scripts for creating graphics/image files. The list below shows you how-it's not hard at all. There are times when you just need to use PHP to write various types of files. You will find that write-nearly-any-type-of-file-with-php.html is the best place you can go for answers if you are testing a PHP script for writing a file and you get the dreaded permission error message. Some hosts disallow fwrite and even PHP file functions in general. But you may find you can fwrite with only a 755 CHMOD (public_html AND the PHP script file setting). If you find that you need 777, you may find your host blocks this setting. But this is not a hard and fast rule-your mileage may vary. Newer servers need only 755-which is obviously more secure. We are not those people, nor is our server host. But on other servers (like ours, we discovered), you need permissions set to 777. On some servers, you need permissions (CHMOD) set to 755 to use the PHP fwrite function, which all the file creations below use in their code. The one thing you need to watch here is permissions. The script below will concentrate on GIF Image files.
#Imagegif in php free
Website Menu Heaven: menus, buttons, etc.įree Personal Status Boards (PSB™) Free Standard Free PSB '/font.WebHatchers will design & develop your site for you. $black = imagecolorallocate($image, 0, 0, 0) Imagefilledrectangle($image,0,0,550,20,$transparent) Imagecolortransparent( $image, $transparent) $lastlisten = "test test test test test test" You can use imagecolortransparent instead but this will not be perfect because fonts has anti-aliasing to make their border sweeter. This function does not work with GIF files. Information (as opposed to single-color transparency) when saving PNG
#Imagegif in php full
Imagesavealpha() sets the flag to attempt to save full alpha channel Second problem : there is no transparency. Imagetruecolortopalette($image, true, 256) First problem : your characters are ugly: that's because you need to set a palette with less colors when using imagecreatetruecolor.
1 note
·
View note
Photo

CHMOD Calculator is a free that lets you check boxes which tell you what number to use to CHMOD a file for access. Try today.
URL: http://www.convertforfree.com/chmod-calculator/
#chmod calculator#free chmod calculator#chmod calc#chmod mode calculator#linux chmod calculator#Convert For free#use chmod calculator#chmod calculator free#chmod code generator#chmod calculator 4 digit#actual chmod calculator
0 notes
Text
Something Awesome Project Milestone 2 - Week 6
My other subjects and their mid-semester assessments have taken their toll on me, and I haven’t quite reached the milestone i expected to reach after week 6. I severely overestimated my coding skills
Level 11:
cat data.txt to find a string that was clearly “the password is #########” shifted 13 letters over
used tr ‘A-Za-z’ ’N-ZA-Mn-za-m’ to use rot13
then i pasted the cat data.txt to find the key
key: 5Te8Y4drgCRfCx8ugdwuEX8KFC6k2EUu
Level 12:
I go pretty stuck with this one, i tried cat data.txt and got an unreadable string, then i tried xxd -r to reverse it, but i still got something strange. At this stage I was pretty stuck for an hour or so with no progress so I had to look up the answers, and i found that if i used file on my target file, it would tell me how it was last compressed, and sure enough, i found it was compressed by gzip. Now i knew that i had to decompress it that way so i used zcat and file again, now it was telling me it was compressed by bzip, so now I need to use bacat, and it turns out it was gzip-ed again. lastly, i found out it was a tar archive so I had to use tar -xo to print to stdout. i repeated this process until i ended up with
zcat lol.bin | bzcat | zcat | tar xO | tar xO | bzcat | tar xO | zcat to get the key.
key: 8ZjyCRiBWFYkneahHwxCv3wb2a1ORpYL
Level 13:
learning how to use ssh with rsa keys
I looked through man ssh and found ssh -i which means lets you select anprivate key for the public authentication to read. I copied the key to my computer and then tried using this method. but i ran into a message that read
@@@@@@@@@@@@@@@@@@@@@@@@@@@@@@@@@@@@@@@@@@@@@@@@@@@@@@@@@@@
@ WARNING: UNPROTECTED PRIVATE KEY FILE! @
@@@@@@@@@@@@@@@@@@@@@@@@@@@@@@@@@@@@@@@@@@@@@@@@@@@@@@@@@@@
Permissions 0644 for ‘sshkey.private.rtf’ are too open.
It is required that your private key files are NOT accessible by others.
This private key will be ignored.
So I tried using chmod to change the permissions of the file. (chmod 600) to make the key not open to anyone using it except me and it worked
ssh key: MIIEpAIBAAKCAQEAxkkOE83W2cOT7IWhFc9aPaaQmQDdgzuXCv+ppZHa++buSkN+
gg0tcr7Fw8NLGa5+Uzec2rEg0WmeevB13AIoYp0MZyETq46t+jk9puNwZwIt9XgB
ZufGtZEwWbFWw/vVLNwOXBe4UWStGRWzgPpEeSv5Tb1VjLZIBdGphTIK22Amz6Zb
ThMsiMnyJafEwJ/T8PQO3myS91vUHEuoOMAzoUID4kN0MEZ3+XahyK0HJVq68KsV
ObefXG1vvA3GAJ29kxJaqvRfgYnqZryWN7w3CHjNU4c/2Jkp+n8L0SnxaNA+WYA7
jiPyTF0is8uzMlYQ4l1Lzh/8/MpvhCQF8r22dwIDAQABAoIBAQC6dWBjhyEOzjeA
J3j/RWmap9M5zfJ/wb2bfidNpwbB8rsJ4sZIDZQ7XuIh4LfygoAQSS+bBw3RXvzE
pvJt3SmU8hIDuLsCjL1VnBY5pY7Bju8g8aR/3FyjyNAqx/TLfzlLYfOu7i9Jet67
xAh0tONG/u8FB5I3LAI2Vp6OviwvdWeC4nOxCthldpuPKNLA8rmMMVRTKQ+7T2VS
nXmwYckKUcUgzoVSpiNZaS0zUDypdpy2+tRH3MQa5kqN1YKjvF8RC47woOYCktsD
o3FFpGNFec9Taa3Msy+DfQQhHKZFKIL3bJDONtmrVvtYK40/yeU4aZ/HA2DQzwhe
ol1AfiEhAoGBAOnVjosBkm7sblK+n4IEwPxs8sOmhPnTDUy5WGrpSCrXOmsVIBUf
laL3ZGLx3xCIwtCnEucB9DvN2HZkupc/h6hTKUYLqXuyLD8njTrbRhLgbC9QrKrS
M1F2fSTxVqPtZDlDMwjNR04xHA/fKh8bXXyTMqOHNJTHHNhbh3McdURjAoGBANkU
1hqfnw7+aXncJ9bjysr1ZWbqOE5Nd8AFgfwaKuGTTVX2NsUQnCMWdOp+wFak40JH
PKWkJNdBG+ex0H9JNQsTK3X5PBMAS8AfX0GrKeuwKWA6erytVTqjOfLYcdp5+z9s
8DtVCxDuVsM+i4X8UqIGOlvGbtKEVokHPFXP1q/dAoGAcHg5YX7WEehCgCYTzpO+
xysX8ScM2qS6xuZ3MqUWAxUWkh7NGZvhe0sGy9iOdANzwKw7mUUFViaCMR/t54W1
GC83sOs3D7n5Mj8x3NdO8xFit7dT9a245TvaoYQ7KgmqpSg/ScKCw4c3eiLava+J
3btnJeSIU+8ZXq9XjPRpKwUCgYA7z6LiOQKxNeXH3qHXcnHok855maUj5fJNpPbY
iDkyZ8ySF8GlcFsky8Yw6fWCqfG3zDrohJ5l9JmEsBh7SadkwsZhvecQcS9t4vby
9/8X4jS0P8ibfcKS4nBP+dT81kkkg5Z5MohXBORA7VWx+ACohcDEkprsQ+w32xeD
qT1EvQKBgQDKm8ws2ByvSUVs9GjTilCajFqLJ0eVYzRPaY6f++Gv/UVfAPV4c+S0
kAWpXbv5tbkkzbS0eaLPTKgLzavXtQoTtKwrjpolHKIHUz6Wu+n4abfAIRFubOdN
/+aLoRQ0yBDRbdXMsZN/jvY44eM+xRLdRVyMmdPtP8belRi2E2aEzA==
Level 14:
so for this level, i am meant to be able to get the password for the next level if i submit the password for the current level in port 30000 in localhost, but unfortunately, i logged into this level with an ssh key so i don’t actually know the password. Fortunately, in level 0 they told us that you can always access the password for the current level in the /etc/bandit_pass folder, and therefore I found the key for level 14:
4wcYUJFw0k0XLShlDzztnTBHiqxU3b3e
now all i have to do is submit using one of the functions they’ve given me, telnet or nc, i tried nc which allows you to create a connection to a target host at a specific host.
nc localhost -p 30000, then i typed in the level 14 key to find the level 15 key
key: BfMYroe26WYalil77FoDi9qh59eK5xNr
Level 15:
for this level i need to submit the password in localhost through port 30001 using ssl encryption, i tried doing the same thing as last level and nothing happened.
i looked up the manual for openssl, which was listed as a function that could be helpful and scrolled through the commands until i found s_client which was also on the list. s_client implements a generic SSL client which can establish a connection to a remote server, so Instead of nc I tried openssl s_client. it didn’t do anything so I added the -help tag and found i needed to use more options for the s_client and found the first two options, -host and -port told me to use -connect which was the third option. I tried that, and it gave me an input from stdin so I pasted the key and got the key for the next level!
key: cluFn7wTiGryunymYOu4RcffSxQluehd
Level 16:
This time it is similar to last level, except I’m meant to find the localhost server in-between 31000 and 32000. The final helpful command in the spec is nmap, so I used the manual for to find out what it does, and apparently it is a tool that scans ports on a network.
“ In addition to all of the scan methods discussed previously, Nmap offers options for
specifying which ports are scanned and whether the scan order is randomised or sequential. By
default, Nmap scans the most common 1,000 ports for each protocol.” I used the -p option to specify which range of ports I’m searching and then specified the network I’m scanning with “nmap -p 31000-32000 localhost”
I found two open ports and checked them: 31518 and 31790
31518 only echoed whatever i typed in, but from 31790 i got the credentials:
RSA key:
—–BEGIN RSA PRIVATE KEY—–
MIIEogIBAAKCAQEAvmOkuifmMg6HL2YPIOjon6iWfbp7c3jx34YkYWqUH57SUdyJ
imZzeyGC0gtZPGujUSxiJSWI/oTqexh+cAMTSMlOJf7+BrJObArnxd9Y7YT2bRPQ
Ja6Lzb558YW3FZl87ORiO+rW4LCDCNd2lUvLE/GL2GWyuKN0K5iCd5TbtJzEkQTu
DSt2mcNn4rhAL+JFr56o4T6z8WWAW18BR6yGrMq7Q/kALHYW3OekePQAzL0VUYbW
JGTi65CxbCnzc/w4+mqQyvmzpWtMAzJTzAzQxNbkR2MBGySxDLrjg0LWN6sK7wNX
x0YVztz/zbIkPjfkU1jHS+9EbVNj+D1XFOJuaQIDAQABAoIBABagpxpM1aoLWfvD
KHcj10nqcoBc4oE11aFYQwik7xfW+24pRNuDE6SFthOar69jp5RlLwD1NhPx3iBl
J9nOM8OJ0VToum43UOS8YxF8WwhXriYGnc1sskbwpXOUDc9uX4+UESzH22P29ovd
d8WErY0gPxun8pbJLmxkAtWNhpMvfe0050vk9TL5wqbu9AlbssgTcCXkMQnPw9nC
YNN6DDP2lbcBrvgT9YCNL6C+ZKufD52yOQ9qOkwFTEQpjtF4uNtJom+asvlpmS8A
vLY9r60wYSvmZhNqBUrj7lyCtXMIu1kkd4w7F77k+DjHoAXyxcUp1DGL51sOmama
+TOWWgECgYEA8JtPxP0GRJ+IQkX262jM3dEIkza8ky5moIwUqYdsx0NxHgRRhORT
8c8hAuRBb2G82so8vUHk/fur85OEfc9TncnCY2crpoqsghifKLxrLgtT+qDpfZnx
SatLdt8GfQ85yA7hnWWJ2MxF3NaeSDm75Lsm+tBbAiyc9P2jGRNtMSkCgYEAypHd
HCctNi/FwjulhttFx/rHYKhLidZDFYeiE/v45bN4yFm8x7R/b0iE7KaszX+Exdvt
SghaTdcG0Knyw1bpJVyusavPzpaJMjdJ6tcFhVAbAjm7enCIvGCSx+X3l5SiWg0A
R57hJglezIiVjv3aGwHwvlZvtszK6zV6oXFAu0ECgYAbjo46T4hyP5tJi93V5HDi
Ttiek7xRVxUl+iU7rWkGAXFpMLFteQEsRr7PJ/lemmEY5eTDAFMLy9FL2m9oQWCg
R8VdwSk8r9FGLS+9aKcV5PI/WEKlwgXinB3OhYimtiG2Cg5JCqIZFHxD6MjEGOiu
L8ktHMPvodBwNsSBULpG0QKBgBAplTfC1HOnWiMGOU3KPwYWt0O6CdTkmJOmL8Ni
blh9elyZ9FsGxsgtRBXRsqXuz7wtsQAgLHxbdLq/ZJQ7YfzOKU4ZxEnabvXnvWkU
YOdjHdSOoKvDQNWu6ucyLRAWFuISeXw9a/9p7ftpxm0TSgyvmfLF2MIAEwyzRqaM
77pBAoGAMmjmIJdjp+Ez8duyn3ieo36yrttF5NSsJLAbxFpdlc1gvtGCWW+9Cq0b
dxviW8+TFVEBl1O4f7HVm6EpTscdDxU+bCXWkfjuRb7Dy9GOtt9JPsX8MBTakzh3
vBgsyi/sN3RqRBcGU40fOoZyfAMT8s1m/uYv52O6IgeuZ/ujbjY=
—–END RSA PRIVATE KEY—–
Level 17:
Since I didn’t have a password I had to connect using the same method as level 13, with the -i option. First I found the current password by using cat /etc/bandit_pass/bandit17,
current key: xLYVMN9WE5zQ5vHacb0sZEVqbrp7nBTn
next I used diff to find the difference between the two files, two keys came up, but I was looking for the one in .new and not .old so I copied the 2nd key after using diff passwords.old passwords.new
key: kfBf3eYk5BPBRzwjqutbbfE887SVc5Yd
Level 18:
So I tried using the key to log into bandit18, however straight away I was greeted with a message saying “bye-bye !” and i was forcefully logged out… hmmm…
The useful commands include ssh, ls, and cat, and I’m pretty sure cat and ls won’t have anything else to do with not getting logged out in ssh, so i pulled up the manual again for ssh. I command+F-ed to find something with the word ‘force’ to maybe force log in, options -4 and -6 changed the usage of IP addresses, but i found -t which said it could force open a pseudo terminal, so I tried that. Still got the same result however, and I realised that it was because (as the specs mentioned) .bashrc was modified. in order to bypass this, I needed to create open a new shell before bashrc gets called.
So I added on at the end: ssh -t username@hostname /bin/sh
key: IueksS7Ubh8G3DCwVzrTd8rAVOwq3M5x
Level 19:
Upon logging in, and a cheeky ls, the only file in the directory is an executable called bandit20-do and under permissions, anyone can’t read or write, but anyone can execute. After a bit of reading, I found out that running this program lets u run other commands with under the permissions of another user, because out is a
key: GbKksEFF4yrVs6il55v6gwY5aVje5f0j
Level 20:
Spec: There is a setuid binary in the homedirectory that does the following: it makes a connection to localhost on the port you specify as a commandline argument. It then reads a line of text from the connection and compares it to the password in the previous level (bandit20). If the password is correct, it will transmit the password for the next level (bandit21).
So form what i gather, I need to set up some kind of listener in a port on the localhost so that I can send the setups binary the password, and receive the next key in turn. To do this I’m probably going to need two terminal windows, one to set up the port, and the other to run the binary, for the listener, I looked up on stack exchange how to set one up and you use the -l option with the nc command, if i use the -p option to specify port then I’ll have set up my listener. I then ran suconnect with the same port and the typed in the previous password into the listener and got a neat message from suconnect saying that the passwords match, and got the next key from stdout of the listener.
key: gE269g2h3mw3pwgrj0Ha9Uoqen1c9DGr
1 note
·
View note
Text
Xml Editor
Download EditiX XML Editor and test it for free for 30 days for commercial usage.
Version : 18.0 Build : 170121 Evaluation : 30 days(5 days for previous usage)
Release information
Binaries - Professional 2021 Edition
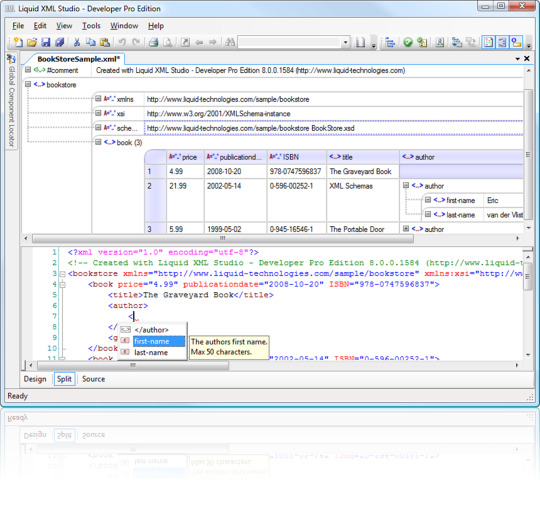
Platform Windows (2000/XP/Vista/7/8/10) - 32 bitsDownload (102 Mb)Windows (2000/XP/Vista/7/8/10) - 64 bitsDownload (107 Mb)Mac OS X/Unix/Linux/ZIPDownload (56 Mb)
XML editor is software that allows the user to edit XML. It comes with features that allow the user to type codes and identify any errors present within the code. This improves the quality of the. JSON and XML Editor. Altova XMLSpy is the world's best selling JSON and XML editor for modeling, editing, transforming, and debugging related technologies. XMLSpy JSON and XML Editor gives developers the tools they need to build the most sophisticated applications with its graphical schema designer, code generation, file converters, debuggers. Xml editor tool What is a xml editor? This tool is a browser-based XML (Extended Markup Language) document viewer and editor. It works just like a regular XML code editor, except it's written in JavaScript and works in your browser. Just like all modern editors it supports automatic error checking and syntax coloring of XML tags.
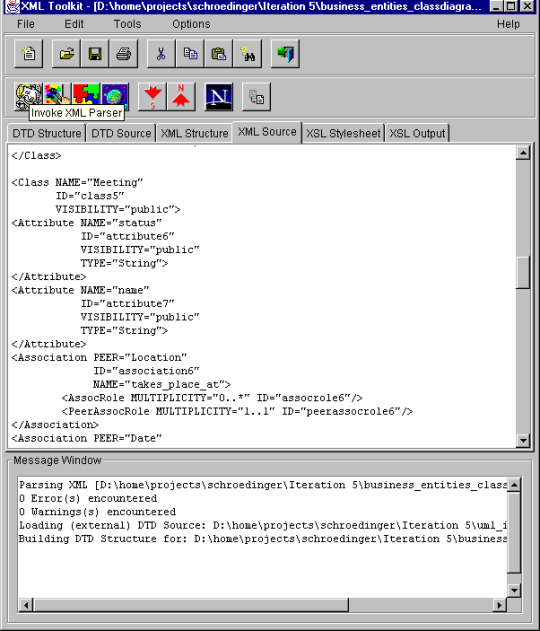
Open Source GIT directory - Community 2017 Edition
Comparison Professional / Community
FeatureCommunityProfessionalXML Editor (content assistant, validation...)xxXSLT Editor basicxxXSLT Editor enhancedxW3C Schema EditorxZIP BrowserxXML Data basexJavaScript EditorxHTML/XHTML EditorxXML DiffxJSON EditorxRegular updatex
Installation instructions :
For Windows
SmartScreen is a default protection inside Windows 10, if it displays a message 'Windows protected your PC' about the editix's installation, you can disable it selecting 'run anyway'. Note that you can use the zip version for avoiding this message.
The default install contains a Java VM version. Windows may complain when running because a Java VM will be installed, it may require an administrator privilege before installing.
If you want to install yourself a Java VM, you need at least a Java VM 8. Then you may download the ZIP version and run editix only from the bin/editix.bat command.
For Mac/Unix/Linux
You need at least a Java VM 8.x. You may download it from this page. Open a terminal/console and use 'java -version' for checking your current version.
Xml Editor

Mac OS X / ZIP, here the steps.
Note : OpenJDK has too many bugs for running editix, use official Java VM from oracle.
For Running from the command line

From the bin directory :

editix.sh* : Starting EditiX for a unix/linux and mac os x platform
editix.bat : Starting EditiX for a windows platform.
scenario.sh* : Running a scenario for a unix/linux and mac os x platform.
scenario.bat : Running a scenario for a windows platform.
* Use the command chmod u+x scriptname make the script executable or inside your window manager changing the permission to 'execute'.
For the Community 2017 Edition
git clone https://github.com/AlexandreBrillant/Editix-xml-editor
You need a Java VM (JDK for compiling) and Ant.
Uninstalling instructions :
The following procedure will remove EditiX XML Editor from your system. Be sure that all valuable data stored in the install folder is saved to another location.
- On Windows use the appropriate uninstaller shortcut
- On Mac OS X and Unix manually delete the installation folder and all its contents
For removing all the editix's preferences, please delete the directory YOUR_HOME_DIRECTORY/.editix
Xml Editor C#
Download older versions
Download EditiX XML Editor 2018 Download EditiX XML Editor 2017
0 notes