#codepen examples
Explore tagged Tumblr posts
Visit Tumblr Blog
Explore Tumblr blogs with no restrictions, modern design and the best experience.
Last Seen Tumblr Blogs


Fun Fact
1,644 Tumblr posts in 1 second.
Text

Hover Effects inspiration
#css hover effects#html css#codingflicks#learn to code#code#frontend#html#css#css3#frontenddevelopment#codepen inspiration#codepen animation#codepen examples
0 notes
Text
Go to the link (click it)
Press the little round white button
Like it? Learn how to code it using this pen
0 notes
Note
hi! do you have any tips on learning to program or resources that helped you along the way? so far all i know is html css and a little bit of js but i want to work my way up to the c languages someday and its kinda daunting as a goal without going to uni v": thank you in advance for any advice!
You know more than I do!! I bet some of my followers are programmers tho, pls help this person out with resources c:
i do have the codepen site saved in my bookmarks, maybe it'll be useful to you? ive found some of the examples there helpful in the past!
70 notes
·
View notes
Note
how did you learn coding?
I am pretty much entirely self taught as far as front end goes!
I started messing around with HTML and CSS with tumblr themes back in 2016-ish.
For javascript I looked at https://developer.mozilla.org/en-US/ for a lot of documentation + examples. And also used codepen a lot to kinda reverse engineer existing snippets of code.
I also read a lot of https://css-tricks.com/
And for flexbox + css grid there's these:
After I got a good foundation of vanilla JS, I learned Vue for a little while and then moved on to React. The new react documentation is really good in my opinion so I definitely recommend reading that if you're interested in learning.
Most of my learning came from trial and error and working on projects that I was really excited about. I used to be so proud of findtags (the original version) which was in jquery...
The react version is miles ahead of it. And even then, the theme builder is also way ahead of findtags. I learned way more between those two projects than reading documentation alone!
191 notes
·
View notes
Note

Hey there! 👋 I'm new to posting in archive of our own, so what does this "skin" mean? I didn't go through it as I feared it might change the story formatting or worse delete it lol.
Sorry if it's a lame question
I can answer that. Let's thank Grad School for teaching me the basics of how-to code.
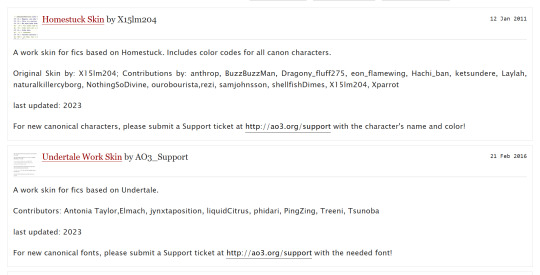
So, when they ask you what kind of "skin" you would like, it’s typically for aesthetic reasons. So, the selections they have offered you have been coded to achieve a certain aesthetic. If you click here, you can see they explain how the work skins are intended for. In the case of the two they offered they were intended for writers to utilize in those fandoms.

Skins are not just for works on AO3; they can be used for the site to change how it looks for you. For example, the screen shot I’m showed above is one of the pre-made site skins that changes the site to a bluer based theme. To can access this skin and more over here.
Now how do I use skins myself. I explained that I coded right. I have bad eyesight so I coded a site skin for myself that allows the text on AO3 bigger, so I am able to read. Yes that’s the great thing about coding you can do something as simple as that if you have the skills to do it.

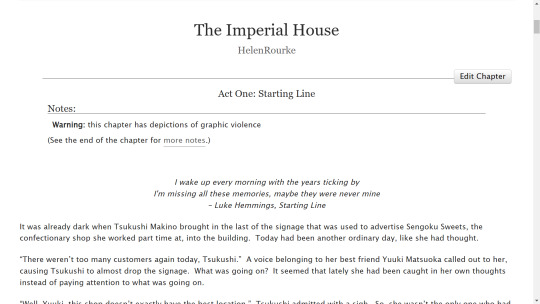
Also did you know I use custom work skins in some of my works. I used a tutorial by C Ryan Smith (AiedailEclipsed) here to give my fic The Imperial House custom title chapters. That is how my fic has the Act One chapter title over Chapter One like most AO3 fics. Again, this wasn't too hard for me to do because I was taught basic coding skills in Grad School, and I've been taught how to code by my friends who are in field of web development and graphic design. I even have a codepen where they would teach me how to learn certain skills, but I haven't touched it in over a year.
Anyway, this was a bit of a rant, and I wouldn't call myself an expert in coding by any means. When I have issues I text my friend Luna lol Also I apologize if this doesn't make too much sense, I’m currently in home in bed because I’m feeling under the weather.
#ask#hana-yori-dango-forever#ao3#coding#skins#i am not an expert#however i have a bit of knowledge#i was planning on taking a more advanced coding class in grad school for my elective#however it didn't work out
4 notes
·
View notes
Text
hello! so another tutorial - this time on grid and auto resizing images inside it with an emphasis on responsiveness and making that easier on you. basically, this tutorial should be named team no math, but we're call this the grid images tutorial.
here is the codepen you can work off of for this one. here is a link to the generator i was playing with. here is credit for the images i grabbed to show this with.
i did have someone message that i don't speak very eloquently and i want to apologize. i try to explain in a way that anyone can understand and i also speak in a train of consciousness, unprepared way so please don't think i am uncaring in that, i'm just trying to show some small tips and tricks in a straightforward, won't take up much time way. i will try to speak with a little more thought and less filler words, but i can't promise to be perfect in that since this is over video versus text.
anyway, the template i'm using as an example is free to use as a base, without credit, same with all the others in my tutorials so far, so long as you are using it to actually make your own. i would like to say with this one please don't use it with no significant changes and try to claim it as your own. throw some credit in your guidebook or something, i don't mind, just throw a bone on that one because at that point it is solely my template. but even then, you're free to use it with credit.
anyway, go wild, i hope this helps you learn, adds a new trick to your repertoire, or just overall helps alleviate some of the pressures of coding off of someone. have a great day, rpc!
#coding#how to#how tos#guide#guides#tutorials#tutorial#jcink coding#jcink rp#grid#image resizing#mine
19 notes
·
View notes
Text
good websites to practice CSS
Here are a few good websites to practice CSS:
CSS Diner (https://flukeout.github.io/) - Interactive game that teaches CSS selectors in a fun way.
CSS Grid Garden (https://cssgridgarden.com/) - Game for learning CSS grid layout.
Flexbox Froggy (https://flexboxfroggy.com/) - Game for learning flexbox.
CSS Battle (https://cssbattle.dev/) - Challenge to recreate small layouts using CSS.
CodePen (https://codepen.io/) - Frontend web dev playground where you can create pens and practice CSS.
FreeCodeCamp (https://www.freecodecamp.org/learn/) - Interactive coding challenges including CSS sections.
CSS Tricks (https://css-tricks.com/) - Blog with CSS tutorials and examples.
Scrimba (https://scrimba.com/) - Interactive screencasts for learning web development including CSS courses.
I'd recommend starting with CSS Diner, Grid Garden and Flexbox Froggy as they provide a very hands-on way to get familiar with CSS selectors and layout concepts. CodePen is also great for quickly testing out CSS ideas. FreeCodeCamp, CSS Tricks and Scrimba offer more in-depth learning content and challenges.
12 notes
·
View notes
Text
Discover 5+ CSS Calculators
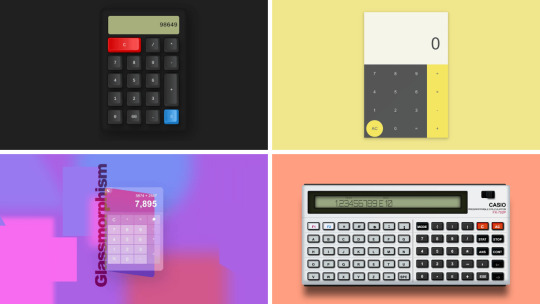
Welcome to CSS Monster, your premier destination for exploring our latest collection of CSS calculators, meticulously curated for February 2022. This collection represents a carefully hand-picked assortment of free HTML and CSS calculator code examples, thoughtfully sourced from reputable platforms such as CodePen, GitHub, and various other resources. In this month's update, we've introduced four new items, ensuring you stay at the forefront with the most innovative and functional calculator designs. CSS calculators, interactive elements crafted using HTML and CSS, can seamlessly integrate into your website or application. They provide a user-friendly interface for performing calculations and can be customized to suit a variety of needs, from basic arithmetic to complex scientific calculations. Uncover the advantages of CSS calculators: Customizability: HTML and CSS empower you to create a calculator tailored to your specific requirements, ensuring seamless integration into your project's design. Interactivity: CSS calculators introduce an interactive element to your website or application, enhancing user engagement and providing a dynamic user experience. Versatility: From simple addition and subtraction to more intricate scientific calculations, CSS calculators can be tailored to a wide range of uses, making them a versatile tool for developers. Our collection boasts a diverse array of styles and designs, guaranteeing a suitable match for every project. Whether you seek the simplicity of a basic arithmetic calculator or the complexity of a scientific calculator, our collection has you covered. Each calculator is accompanied by its own HTML and CSS code example, streamlining the implementation process into your projects. We trust that this collection will serve as a valuable resource, providing inspiration and practical solutions for your projects. Enjoy the journey of exploration and innovation with CSS Monster!
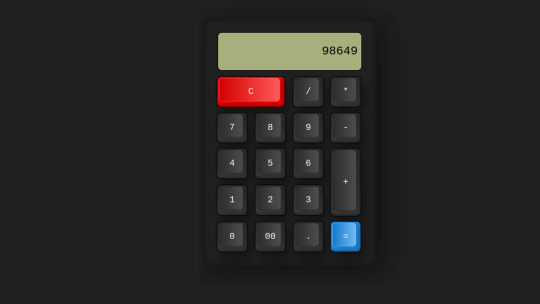
Author gambhirsharma January 20, 2022 Links Just Get The Demo Link How To Download - Article How To Download - Video Made with HTML / CSS About a code PURE CSS CALCULATOR Compatible browsers:Chrome, Edge, Firefox, Opera, Safari Responsive:no Dependencies:-

Author Tirso Lecointere July 29, 2021 Links Just Get The Demo Link How To Download - Article How To Download - Video Made with HTML / CSS (SCSS) / JS About a code GLASSMORPHISM CALCULATOR UI Compatible browsers:Chrome, Edge, Firefox, Opera, Safari Responsive:no Dependencies:-

Author vrugtehagel July 12, 2020 Links Just Get The Demo Link How To Download - Article How To Download - Video Made with HTML / CSS About a code PURE CSS CALCULATOR Compatible browsers:Chrome, Edge, Firefox, Opera, Safari Responsive:yes Dependencies:-
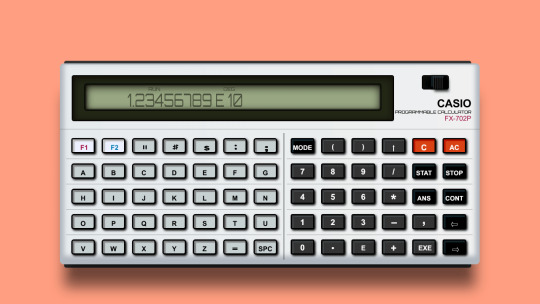
Author William Jawad June 13, 2020 Links Just Get The Demo Link How To Download - Article How To Download - Video Made with HTML / CSS About a code CASIO FX-702P Compatible browsers:Chrome, Edge, Firefox, Opera, Safari Responsive:no Dependencies:-
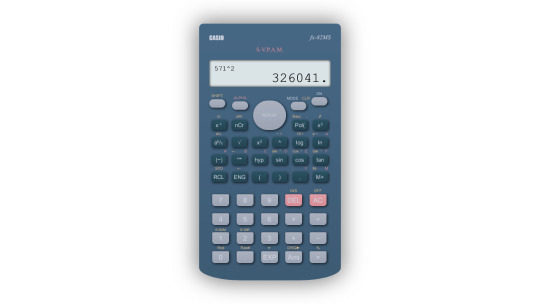
Author shreyasminocha June 3, 2018 Links Just Get The Demo Link How To Download - Article How To Download - Video Made with HTML / CSS About a code FX-82MS SCIENTIFIC CALCULATOR Compatible browsers:Chrome, Edge, Firefox, Opera, Safari Responsive:no Dependencies:-

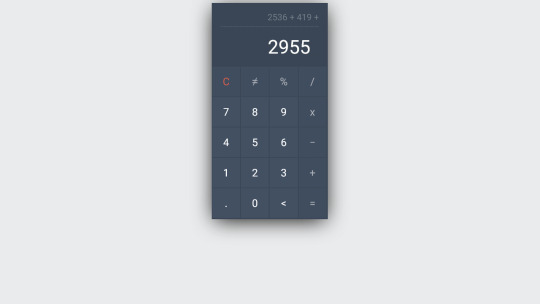
Author Varun A P February 2, 2018 Links Just Get The Demo Link How To Download - Article How To Download - Video Made with HTML / CSS (SCSS) About a code CALCULATOR Compatible browsers:Chrome, Edge, Firefox, Opera, Safari Responsive:no Dependencies:-
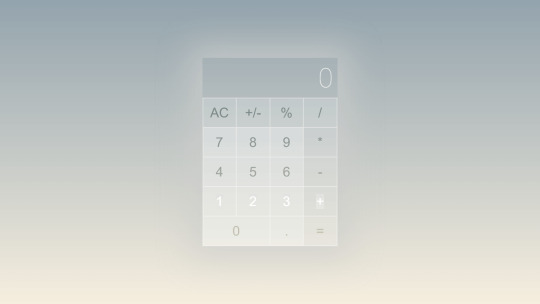
Author magnificode February 25, 2016 Links Just Get The Demo Link How To Download - Article How To Download - Video Made with HTML / CSS (SCSS) About a code CALCULATOR Compatible browsers:Chrome, Edge, Firefox, Opera, Safari Responsive:no Dependencies:-
Author Kalpesh Singh February 13, 2016 Links Just Get The Demo Link How To Download - Article How To Download - Video Made with HTML / CSS / JS About a code PURECALC Compatible browsers:Chrome, Edge, Firefox, Opera, Safari Responsive:no Dependencies:-
Frequently Asked Questions
1. What sets CSS Monster's CSS calculator collection apart? CSS Monster's calculator collection is distinctive with a curated selection, featuring four new additions in the February 2022 update. Each calculator is hand-picked from reputable sources like CodePen and GitHub, ensuring diversity and innovation. 2. How often does CSS Monster update its CSS calculator collection? The CSS calculator collection is regularly updated to stay current with design trends. The February 2022 update introduces four new calculators, showcasing a commitment to providing fresh and innovative content. 3. Can I use the showcased CSS calculators for commercial projects? Certainly! All calculators featured on CSS Monster are crafted using HTML and CSS and come with permissive licenses, making them suitable for both personal and commercial projects. Always check the licensing information for specific details. 4. What advantages do CSS calculators offer for web development? CSS calculators offer customizability, allowing you to create calculators tailored to your specific needs. They introduce interactivity, enhancing user engagement, and are versatile, catering to a wide range of applications. 5. How can I integrate the showcased CSS calculators into my projects? Integration is seamless. Each calculator in the collection comes with its own HTML and CSS code example, facilitating easy implementation into your projects. Simply copy and paste the code, making any necessary adjustments. 6. Are CSS calculators suitable for complex scientific calculations? Absolutely! CSS calculators in the collection span from basic arithmetic to complex scientific calculations, showcasing their versatility and suitability for various applications. 7. Can I customize the showcased CSS calculators to match my project's design? Indeed! HTML and CSS provide the flexibility to customize calculators to align with your project's aesthetic. Feel free to modify the code to suit your specific design preferences.
Conclusion:
In conclusion, CSS Monster is not just a collection of CSS calculators; it's a dynamic platform designed to inspire and empower web developers. Whether you're an experienced developer seeking fresh ideas or a beginner eager to explore CSS design, our collection caters to all. Dive into the world of CSS calculators on CSS Monster and enhance your web development projects with creativity and efficiency! Read the full article
4 notes
·
View notes
Text
Unleashing Creativity: Teaching Web Development Basics
Gaining a foundational understanding of web development is becoming just as important for students as traditional education in this age of digital innovation. Students’ creativity is stimulated and they are prepared for a world in which having an online presence is crucial by being introduced to HTML, CSS, and fundamental web design concepts.

Here are some methods teachers can use:
Project-Based Learning: Plan experiential learning opportunities that walk students through building a simple website. Introduce CSS for styling gradually after starting with basic HTML structures.
Platform: Use online platforms like CodePen, Glitch, or Repl.it to provide a real-time coding environment. These platforms allow students to see instant visual results as they code.
Interactive Tutorials: Introduce interactive tutorials that guide students through the basics of HTML and CSS. Platforms like Codecademy or freeCodeCamp offer step-by-step lessons with immediate feedback.
Platform: Codecademy, freeCodeCamp, and Khan Academy are excellent platforms for interactive tutorials, allowing students to learn at their own pace.
Collaborative Coding: Encourage your students to collaborate on projects during collaborative coding sessions. This encourages collaboration and facilitates peer learning among students.
Platform: Utilize version control systems like GitHub, GitLab, or Bitbucket. These platforms enable students to collaborate on code, manage versions, and receive feedback from peers and teachers.
Web Development Bootcamps: Introduce mini “BOOTCAMP” sessions where students immerse themselves in intensive, focused learning for a short period. Cover key HTML and CSS concepts during these sessions.
Platform: Platforms like Udacity, Coursera, or edX offer short-term courses and bootcamps on web development that can be adapted for classroom use.
Showcasing Web Design Principles: Teach not just the coding but also the principles of good web design. Discuss topics like user experience (UX) and user interface (UI) design.

Throughout your classes, provide fascinating information about web development. For example, did you know that the very first website ever made is still up and running? Being able to share these trivia not only makes learning more enjoyable but also piques students’ interests.
For kids, adding a foundational understanding of web programming to upper-grade courses opens up a world of opportunities. Makers’ Muse Ed-Tech provides the materials and tools required to make learning successful and interesting. Teachers may spark students’ interest in technology and equip them to become the next generation of digital landscape creators by teaching HTML, CSS, and fundamental web design principles. Together with Makers’ Muse, let’s educators take our students on this fascinating adventure that will cultivate their creativity and provide them with the tools they need to succeed in the rapidly changing field of web development.
#html#css#web development#web design#web developers#artificial intelligence#coding#education#coding for kids#future#innovation#tech#coding course#programming#digital world#tumbler#tumblog
2 notes
·
View notes
Text
Hello, I've been thinking about code and selling code and sharing code in the rpc because someone posed the question to me of what I'd want to happen if someone was heavily editing a skin I sold, and to be honest, my first instinct was 'take my name off it'. That was met with some surprise, but let me explain why.
Code, to me, is a largely democratic landscape. If you want to learn, hundreds of thousands of people and websites have come together to teach you. Masses of people share open source work on codepen, stack overflow etc. Code as a skill is like assembling an especially abstract puzzle where you can only think about the pieces, not really see them. But most puzzles have similar strategies to solve- start with the corner pieces, then the edges, then the most recognizable patterns etc etc etc working your way down to the more and more difficult details. Most of code- most of my job writing code- involves minimizing the amount of time working on those shared strategies so we can have more time to work on the the interesting bits, the hard bits. the bits that make the site we're working on unique and useful. Frankly, jcink is the easy part of code, by and large. Your data is already structured and provided to you in a very particular way. It is inefficiently, but largely documented. Many other people have solved all the problems you are likely to have trying to build a skin. Skinning is html and css for the vast majority of items. It is the easy stuff. If I sell code, that code is now the property of the person I sold it to. It is not shareable or redistributable. You can't take my code and resell it as your own, but as far as I'm concerned you can do whatever you want with it. If I solved problems that might otherwise feel difficult (accessibility and responsiveness come to mind) cool. You can solve the easy ones, like styling and colors and fonts you like. You can add or subtract things that vibe with what you want that code to do. Once it is sold, it is yours to do with what you like when it comes to personal use. This is true of almost all coding contracts that exist in the entire world. If it weren't, no one would ever hire external contractors to do any work for their company, and I can tell you now, even companies which could fully afford to do all their tech in house absolutely do not in 99% of cases if their business isn't selling their own tech. The rule is generally- you may do anything you like with this, except resell it to someone else. So why take my name off it? I don't endorse how other people code. Even in my professional life, I've taken projects off my portfolio because the client took a project I worked on and broke it (imo), often with other professional developers doing the breaking. If a prospective employer were to go look at it, I'd be embarrassed by what it looks like today. Tell me why I (and my team) created a website that was fully responsive, and they went back to make it adaptive in the year of our lord 2022 because they preferred to have pixel perfect views at 3 specific breakpoints rather than a responsive site. I don't know, it's infuriating. I can't cite that project as an example of my work anymore, because it isn't. I would never leave a site in that state.
So, my first instinct with the idea of people using a skin i sell them as a base is 'take my name off it.' I don't want to be associated if responsive/accessible features are lost due to others working on a skin I wrote. But at the same time, where is the line between using something as a base, and editing a few small features? I certainly don't want to be an arbiter of that, or have to field questions or navigate feelings about it. In fact, personally I would not feel upset at all if someone used a paid for skin as a base, and inviting that kind of discussion is the only way I possibly could get upset since people have weird attitudes about a lot of this stuff. So I think the more practical standard is just to put credit, but make it explicit that the work has been heavily altered. Don't resell or redistribute, and you're golden, imo. Anyway, those are my feelings as someone who writes code for a living. I'm interested to hear counterpoints - constructively of course.
#jcink coding#coding meta#meta#tfw you find out days after posting this take that the original question was asked because of tattler shenanigans lol help me i'm in danger#from a resource server mutual for shame!#i joke but fr tho#I have no interest in The Discourse guys#i mean i have my takes but i don't care if people have different ones#at least not when it comes to code#standard disclaimer about basic decency yadda yadda#pls don't involve me in tattler fights tho it's not my vibe#i don't wanna be positioned as an authority aside from what my own opinions are#i'm just over here playing with my lore and scripts#and i prefer things to stay that way#not deleting because i do think it's a relevant question but adding the tags for posterity lololol#if it is tattler discourse pls just lemme know and if it's an interesting question on it's own terms like this one is I'll answer it in lik#a month or two on the blog#happy to chat in dms as long as we all respect the space I'd wanna take from that messiness lol#no worries tho#i understand why it was asked but rpc catfighting is SO not my special interest it's hard to overstate#okay thank you#and goodnight :)
3 notes
·
View notes
Text
8 CSS & JavaScript Snippets for Creating Sticky Elements — Speckyboy
New Post has been published on https://thedigitalinsider.com/8-css-javascript-snippets-for-creating-sticky-elements-speckyboy/
8 CSS & JavaScript Snippets for Creating Sticky Elements — Speckyboy

Modern websites often feature extensive scrolling. Long pages are common on desktop devices, but are even more frequent on mobile screens. The practice creates usability challenges for tasks like navigation and referencing important information.
That’s where “sticky” design elements come in handy. They allow users to scroll without losing access to your site’s menu. You can also use them to keep ads in view, attach social media sharing buttons to the viewport, or create fun special effects.
Implementing a sticky element can be simple, as CSS has a dedicated position property for this function. JavaScript can be used for building more robust features. As usual, there are several methods to achieve your goals.
We searched the CodePen archives to find interesting examples of sticky elements in use. Below, you’ll find various options that enhance the user experience. So, get stuck in your easy chair and be inspired by these code snippets!
Pure CSS Header Animation to Sticky Navigation
Created by Amit
Sticky headers are among the most popular use cases. On Chromium browsers, this snippet uses CSS to transform a tall and narrow header into a full-screen bar upon scrolling. Unsupported browsers receive a narrower, taller, sticky header. Keyframe animation is used to create smooth transitions. The feature is useful, lightweight, and attractive.
See the Pen Pure CSS header animation to sticky nav by Amit
Sticky Responsive Sidebar Navigation
Created by Areal Alien
Sidebar navigation can also take advantage of staying put during scrolling. Hovering over the sidebar expands the navigation to include text labels – it works on mobile too. However, you might also reserve this concept for large screens and use the traditional “hamburger” menu for mobile.
See the Pen Sticky responsive sidenav by Areal Alien
CSS Sticky Table Header & Column
Created by Mike Golus
Long HTML tables can be a pain to read. You have to memorize the column headers to understand the context. Sticky headers make even the busiest tables easier to read. Using position:sticky (and a few other tricks) on the first row and column enables scrolling without losing sight of key information. The examples in this Pen demonstrate how it’s done.
See the Pen CSS Sticky Table Header and Column by Mike Golus
Long Scroll Sticky Sections
Created by Burmese Potato
Here’s a unique way to denote the various sections of a long page. Scroll down the page, and the episode number (displayed in the left column) sticks until you reach the end of the section. The snippet combines sticky positioning with the calc() property on the container’s height to keep the number in view. This little bit of CSS adds a nice touch to the user experience.
See the Pen Pretty Sticky by Burmese Potato
Just Another Sticky Section Layout
Created by Misala
Sticky design elements can also be used to show off product features. Scroll down this page and watch as featured text and videos change. The layout occupies the entire screen viewport and is responsive for mobile devices. It’s a high-end feature sure to capture a user’s attention.
See the Pen just another sticky section layout by misala
Multi-Navigation Sticky Bars & Layout
Created by Den
This snippet asks the question: What if you have more than one navigation bar? The first bar is sticky by default. Scroll past a few sections, and a second sub-navigation bar lines up underneath. That second bar also features a neat frosted glass look as content scrolls underneath.
See the Pen Sticky layout + filters #2024 by Den
Sticky Video with CSS @container scroll-state()
Created by Jhey
We’re seeing more websites implement sticky videos, where the presentation sticks to the bottom corner upon scrolling. It allows users to view the rest of your content without losing sight of the video. Here, CSS container queries are used to reposition the video player. Use the included config panel to see how different settings impact the animation effects.
See the Pen CSS @container scroll-state() faux PiP video by Jhey
Dynamic Sticky Sidebar Component
Created by Ryan Mulligan
Features like shopping carts are a perfect fit for sticky sidebars. The UI makes it easier for shoppers to keep track of their cart and, most importantly, finish their purchase. This sidebar widget keeps track of cart contents and sticks to the screen while you scroll in the page content area.
See the Pen Dynamic Sticky Sidebar Component by Ryan Mulligan
Stick With What Works in Your Designs
We may think of sticky elements as being used for site headers and navigation. However, the examples above show that they can do much more. There are so many creative possibilities for informing and entertaining users.
What’s more, CSS can do a lot of the heavy lifting for you. Several snippets in this collection don’t require a single line of JavaScript. Still, it’s nice to know you can add some DOM manipulation when needed.
We hope this collection sparked your imagination! Check out our CodePen collection for even more sticky snippets.
Related Topics
Written by Eric Karkovack
Eric Karkovack is a web designer and WordPress expert with over two decades of experience. You can visit his business site here. He recently started a writing service for WordPress products: WP Product Writeup. He also has an opinion on just about every subject. You can follow his rants on Bluesky @karks.com.
Read more articles by Eric Karkovack
#2024#ADD#alien#amp#animation#Articles#attention#Building#Business#buttons#Capture#change#chromium#code#container#content#CSS#CSS Layout Snippets#CSS Snippets#Design#desktop#devices#easy#effects#Featured#Features#Filters#Full#glass#hamburger
0 notes
Note
not sure if this is helpful but re: your headmates webpage, i did something similar on my site by making each about page a separate html file and using an <iframe> with the chosen page. there's a little bit of javascript to load a page in the iframe when a link or the next/previous arrows are clicked and that's it
we are actually using the isotope javascript library, which is theoretically capable of everything we want it to do and has a lot of nice out-of-box options, but unfortunately all the examples of "everything we want it to do" (filter by dropdown select, because we have way too many potential categories for buttons to look dignified (see below), combine this filter with quicksearch, sort functionality) are distinctly not combined in the various example codepens we have been shamelessly ransacking code from. so far we have successfully gotten the sort buttons and quicksearch to work at the same time but OH BOY does it not like when we try to add the filter select into the mix. this is probably not very hard to solve overall but considering we dont know how to do javascript basically at all it kind of has made us insane
this is completely dogshit on mobile, like don't-even-bother dogshit we havent made it responsive yet, but here is the headmates page as it currently exists-- it's got some neat functionality even though none of the links actually work lol. every time we try to add the <select> code it busts the entire thing so bad that it makes us, well, give up to go play sims
1 note
·
View note
Link
[ad_1] This article covers tips and tricks on effectively utilizing the CSS backdrop-filter property to style contemporary user interfaces. You’ll learn how to layer backdrop filters among multiple elements, and integrate them with other CSS graphical effects to create elaborate designs. Below is a hodgepodge sample of what you can build based on everything we’ll cover in this article. More examples are coming up. CodePen Embed Fallback The blurry, frosted glass effect is popular with developers and designers these days — maybe because Josh Comeau wrote a deep-dive about it somewhat recently — so that is what I will base my examples on. However, you can apply everything you learn here to any relevant filter. I’ll also be touching upon a few of them in my examples. What’s essential in a backdrop filter? If you’re familiar with CSS filter functions like blur() and brightness(), then you’re also familiar with backdrop filter functions. They’re the same. You can find a complete list of supported filter functions here at CSS-Tricks as well as over at MDN. The difference between the CSS filter and backdrop-filter properties is the affected part of an element. Backdrop filter affects the backdrop of an element, and it requires a transparent or translucent background in the element for its effect to be visible. It’s important to remember these fundamentals when using a backdrop filter, for these reasons: to decide on the aesthetics, to be able to layer the filters among multiple elements, and to combine filters with other CSS effects. The backdrop Design is subjective, but a little guidance can be helpful. If you’ve applied a blur filter to a plain background and felt the result was unsatisfactory, it could be that it needed a few embellishments, like shadows, or more often than not, it’s because the backdrop is too plain. Plain backdrops can be enhanced with filters like brightness(), contrast(), and invert(). Such filters play with the luminosity and hue of an element’s backdrop, creating interesting designs. Textured backdrops complement distorting filters like blur() and opacity(). Cloudy with a chance of meatballs. Ramenstorms at 3PM that will last for ten minutes. main background: center/cover url("image.jpg"); box-shadow: 0 0 10px rgba(154 201 255 / 0.6); /* etc. */ div backdrop-filter: blur(10px); color: white; /* etc. */ CodePen Embed Fallback Layering elements with backdrop filters As we just discussed, backdrop filters require an element with a transparent or translucent background so that everything behind it, with the filters applied, is visible. If you’re applying backdrop filters on multiple elements that are layered above one another, set a translucent (not transparent) background to all elements except the bottommost one, which can be transparent or translucent, provided it has a backdrop. Otherwise, you won’t see the desired filter buildup. Cloudy with a chance of meatballs. Ramenstorms at 3PM that will last for ten minutes. view details main background: center/cover url("image.jpg"); box-shadow: 0 0 10px rgba(154 201 255 / 0.6); /* etc. */ div background: rgb(255 255 255 / .1); backdrop-filter: blur(10px); /* etc. */ p backdrop-filter: brightness(0) contrast(10); /* etc. */ CodePen Embed Fallback Combining backdrop filters with other CSS effects When an element meets a certain criterion, it gets a backdrop root (not yet a standardized name). One criterion is when an element has a filter effect (from filter and background-filter). I believe backdrop filters can work well with other CSS effects that also use a backdrop root because they all affect the same backdrop. Of those effects, I find two interesting: mask and mix-blend-mode. Combining backdrop-filter with mask resulted in the most reliable outcome across the major browsers in my testing. When it’s done with mix-blend-mode, the blur backdrop filter gets lost, so I won’t use it in my examples. However, I do recommend exploring mix-blend-mode with backdrop-filter. Backdrop filter with mask Unlike backdrop-filter, CSS mask affects the background and foreground (made of descendants) of an element. We can use that to our advantage and work around it when it’s not desired. Cloudy with a chance of meatballs. Ramenstorms at 3PM that will last for ten minutes. main background: center/cover url("image.jpg"); box-shadow: 0 0 10px rgba(154 201 255 / 0.6); /* etc. */ > div .bg backdrop-filter: blur(10px); mask-image: repeating-linear-gradient(90deg, transparent, transparent 2px, white 2px, white 10px); /* etc. */ /* etc. */ CodePen Embed Fallback Backdrop filter for the foreground We have the filter property to apply graphical effects to an element, including its foreground, so we don’t need backdrop filters for such instances. However, if you want to apply a filter to a foreground element and introduce elements within it that shouldn’t be affected by the filter, use a backdrop filter instead. .photo background: center/cover url("photo.jpg"); .filter backdrop-filter: blur(10px) brightness(110%); mask-image: radial-gradient(white 5px, transparent 6px); mask-size: 10px 10px; transition: backdrop-filter .3s linear; /* etc.*/ &:hover .filter backdrop-filter: none; mask-image: none; In the example below, hover over the blurred photo. CodePen Embed Fallback There are plenty of ways to play with the effects of the CSS backdrop-filter. If you want to layer the filters across stacked elements then ensure the elements on top are translucent. You can also combine the filters with other CSS standards that affect an element’s backdrop. Once again, here’s the set of UI designs I showed at the beginning of the article, that might give you some ideas on crafting your own. CodePen Embed Fallback References [ad_2] Source link
0 notes
Text
Top 10 Free Coding Tools for Beginners in 2025

Are you entering the coding world in 2025? At TCCI - Tririd Computer Coaching Institute, we believe that choosing the right tools shall make learning fun, smooth, and successful. Whether it is Python, JavaScript, or C++, these free coding tools stand to help you write, test, and debug code like a pro.
👉 Check out TCCI's beginner programming courses here to start learning the smart way.
Let us now plunge into the free-to-use top 10 coding tools for beginners, and they are simply awesome!
1. Visual Studio Code (VS Code)
VS Code is undoubtedly one of the best code editors in the world out there. Being lightweight, fast, and smartly featured, it offers everything a beginner would appreciate-thousands of extensions for any language, a simple user interface, and Git integration out of the box.
2. Replit
Do you want a code-sharing platform that lets you code online without having to install anything? Being browser-based, Replit lets you write and run code in more than 50 languages. It is great for a quick run-through or learning while on the move.
3. GitHub
Not a place for merely sharing code-it is truly a powerful Git-based version control system. Beginners can keep track of their projects, work with others, and browse through open sources.
4. CodePen
If you're learning HTML, CSS, or JavaScript, then CodePen is an amazing fishing pond for you. Build, test, and share your frontend projects from anywhere in the browser.
5. Scratch
Scratch, developed by MIT, is more appropriate for kids and complete novices. The visual blocks guide in learning programming logic without actually having to write code.
6. W3Schools Online Editor
W3Schools Try-It Editor is great for learning Web development-the editor lets you try out code in HTML, CSS, and JavaScript examples all in your browser.
7. Thonny
An easy-to-use IDE built only for Python, Thonny makes it simple to view how Python code actually runs. It comes with a debugger and a simplistic UI.
8. Codecademy (Free)
Codecademy offers a free version, and users can access interactive lessons on programming. It's an excellent platform for structured learning paths for multiple languages.
Also Read: What Is the Future of Coding Jobs in India?
9. JSFiddle
JSFiddle is an online editor for web languages that is fast and lightweight. JSFiddle lets developers quickly test and share small pieces of code in HTML, CSS, and JavaScript.
10. Notepad++
For newbies needing something very simple, Notepad++ is a great lightweight code editor on Windows. It has syntax highlighting support for many languages and ease of use.
Final Thoughts
At TCCI - Tririd Computer Coaching Institute, we always recommend using the right tools to make learning enjoyable and fruitful. These top 10 free coding tools of 2025 will be the best companions to your programming journey. So explore and experiment, and have fun coding without barriers!
At TCCI, we don't just teach computers — we build careers. Join us and take the first step toward a brighter future.
Location: Bopal & Iskcon-Ambli in Ahmedabad, Gujarat
Call now on +91 9825618292
Visit Our Website: http://tccicomputercoaching.com/
Note: This Post was originally published on https://tccicomputercoaching.wordpress.com/2025/05/07/top-10-free-coding-tools-for-beginners-in-2025/ and is shared here for educational purposes.
0 notes
Text
here's another for my little tutorial section, this time sans video. basically, there's some simple coding tips you can use to set a default photo. for the main uploaded avatar, use the default avatar macro for jcink, but anywhere else you can use one of these.
for background images, make a default by putting it literally right behind the one you want. you can see an example of this in the css section of the naked codepen i'm linking below. (btw this was kept naked so it would be easier to just get to coding, instead of sorting through me making it 'pretty' so to speak. i only put the length of this text there so there was something that populated.)
for img src, i use a pretty simple script. now, the caveat here is there are two versions, depending on if you're in an area where jcink auto puts "no information" or not. these are below. these scripts are in the js section of the codepen. there are two, so make sure you scroll down for the not no information version.
anyway! this is just a really easy way to do things. there are others, but it's a simple way to get your default image to show up where you want them replaced with a custom profile field.
as always, this is a tutorial, so be wild and free, do what you like with them. you don't have to credit me. i'm just trying to help us all learn a few neat tricks that make the editing and creation process of jcink skins a little easier, and replenish some of the resources we've lost lately.
i hope it helps! if you use it, i'd love a like just because i love seeing that people actually utilize these, but it's not a requirement by any means. have a great day, rpc!
codepen
12 notes
·
View notes
Text
Getting Started with Interactive Programming

Interactive programming brings your code to life by enabling users to engage with it in real-time. Whether it’s a game, a web app, or a visualization, interactive programs provide an engaging user experience. In this post, we’ll explore what interactive programming is, why it's useful, and how you can start building your own interactive applications.
What is Interactive Programming?
Interactive programming refers to writing software that reacts to user inputs or events while it's running. It can range from graphical applications and games to websites, simulations, or command-line tools that prompt user feedback.
Why Learn Interactive Programming?
Enhances User Experience: Real-time feedback makes applications dynamic and engaging.
Foundation for Games and UI: Essential for developing games, web UIs, and mobile apps.
Boosts Problem-Solving: Helps you think logically and event-driven.
Fun and Motivating: It’s exciting to see your code respond to your actions instantly.
Where to Start?
There are several beginner-friendly platforms and languages perfect for learning interactive programming:
JavaScript + HTML/CSS: Build interactive web pages with event listeners and animations.
Python with Turtle or Pygame: Great for visual learning and making simple games.
Scratch: Drag-and-drop interface for learning logic and interaction basics (perfect for kids and absolute beginners).
Processing (Java-based): A creative coding environment for art and interactive visualizations.
Example: JavaScript Button Interaction
<button onclick="sayHello()">Click Me!</button> <script> function sayHello() { alert('Hello there!'); } </script>
This simple code responds to a user clicking the button by showing a message. That’s interactivity in action!
Key Concepts to Learn
Event Handling: Responding to user actions like clicks, keypresses, and gestures.
DOM Manipulation (Web): Changing what users see on a webpage using code.
State Management: Tracking changes and conditions in your app.
Animation & Timing: Creating smooth transitions and effects over time.
Tools & Platforms
Replit – Online IDE to run interactive code instantly
CodePen – Great for experimenting with HTML/CSS/JS
p5.js – JavaScript framework for creative interactive coding
Scratch – A visual coding platform ideal for interactive storytelling
Project Ideas to Practice
Build a quiz app with score tracking
Make a to-do list with live updates
Create a drawing app with mouse input
Develop a simple game (e.g., pong, tic-tac-toe)
Design a responsive calculator
Conclusion
Interactive programming is one of the most rewarding ways to develop your coding skills. It not only improves your logic and design thinking but also brings your ideas to life in exciting ways. Start small, experiment freely, and have fun creating programs that respond to the world around them!
0 notes