#crystal adjustable
Explore tagged Tumblr posts
Visit Tumblr Blog
Explore Tumblr blogs with no restrictions, modern design and the best experience.
Last Seen Tumblr Blogs


Fun Fact
12.7% of mobile users access Tumblr.
Note
Let try something to make you lock in
Can I pretty please request a reference sheet for band AU Amy and Blaze 👉👈


I DID IT YES FINALLY
#adjusted the blaze ref a little bc i didn't like how it looked#anyways !! i did it !!#now to put her on artfight..........#also yeah i'm falling for the teal eyes amy propaganda#amy rose#blaze the cat#burning the crystals au#popstar amy#bassist blaze#blazamy#sort of just crossing my fingers and hoping artfight counts these as au versions#they're basically the same as the skins just with minor differences? and alt outfits n stuff#ravioliart#raviolisketches#oh yeah um. amy's not having the best time in this au </3
64 notes
·
View notes
Text
P.I.X.A.L.: According to their website, they are on backorder.
Lloyd: Aw man. I was really looking forward to pizza night.
P.I.X.A.L.: Would you like pepperonis or bacon?
Lloyd: Wait, I thought you said they were on backorder.
P.I.X.A.L.: They are. I found a way to circumvent their website restrictions. Would you like pepperonis or bacon? Or both?
Lloyd: P.I.X.A.L., it’s a pizza.
#I headcanon that P.I.X.A.L. is an incredible hacker#She easily slips into government files to get/ change information#Like adjusting Lloyd's birth certificate so it matches the age he looks physically#or erasing the ninja's criminal record from Crystallized#as well as all footage of the event#or even changing traffic light signals during intense car chases#only... she sometimes uses her skills for more mundane activities#like order pizza#ninjago#ninjago pixal#pixal borg#pixal headcanons#ninjago headcanons#ninjago incorrect quotes#ninjago lloyd#ninjago Lloyd garmadon#lloyd garmadon#Lloyd Montgomery garmadon
87 notes
·
View notes
Text
first two artfight attacks! (o゜▽゜)o☆


these are for @cabbitcleaver and @/guroharpy !!
#artfight#artfight 2025#art fight#art fight 2025#artfight team crystals#art fight team crystals#kandi bracelet#kandi#PLUR#probably should've adjusted the colors i swear those orange stars are much brighter irl
3 notes
·
View notes
Text
to borrow a phrase: Oh we're so back
#viola of allag#alliance raid roulette dropped me into Syrcus Tower so I had to take her and penumbra for a spin-#ffxiv gpose#at first I thought the chest was set to large (no its still medium)#somehow in these intervening weeks I became unacustomed to how ridiculous YAB sizing is akdfkaslkafjkld#also the CRYSTAL is SO PRETTY Syrcus Tower glow up!#though I do need to adjust my reshade presets for the new lighting
9 notes
·
View notes
Text
@bunheadusako liked for a starter
Peace was such a fragile, ephemeral thing.
It was bound to happen. It was destined to happen. Chibi-Usa - Small Lady - had made it clear that the Silver Millennium knew nothing but peace in the 30th century. Those who lived under the reign of Neo-Queen Serenity had been blessed, both with life that seemed near-everlasting as well as with lives that would never know the touch of darkness. At least, according to the stories. The stories that Chibi-Usa had been told.
It really had been too much to actually hope for peace to come that easily.
The Moon Kingdom had been restored over a century prior, back when they still had been simple middle-schoolers struggling with their new identities, but restoration didn't mean it was inhabitable. That had only happened within the past... twenty years? And the construction of Crystal Tokyo, the grand kingdom that Neo-Queen Serenity was going to rule over, was still a work in progress.
Though technically a Princess, Minako had never felt comfortable retiring her senshi duties. The uniform of Sailor Venus felt more a part of her than her identity as the Princess Venus, or even as being Minako Aino. What mattered most was protecting her Princess and ensuring that no evil was ever able to get to her.
She was on the outskirts of what would eventually be where the new castle would stand. The forces of chaos were still weak, but it wasn't unheard of for a sliver of darkness to give form before trying to slither in, only to be halted by a sword stabbing through their head. It was grim, but it kept her busy - which was why she was so surprised to see a familiar silhouette approaching.
"Princess?" Her eyes widened for a moment with a touch of alarm before her brow knit. "Nothing's happened, has it?"
#ic ; in character#bunheadusako#building crystal tokyo ; post series#[[ what's stuck in my brain is sailor cosmos making it clear that the tragedies of chaos will continue to repeat ]]#[[ anyways welcome to my first attempt at writing minako there will be an adjustment period ]]
5 notes
·
View notes
Text


Crystal adjustable fidget rings from Rubyz Gemz
#wishlist#personal#etsy#rubyz gemz#rings#adjustable rings#jewelry#crystal jewelry#crystal rings#fidget jewelry#fidget rings
1 note
·
View note
Note
Hi can I please have Terry Bogard stimboard w Red, Video/ Arcade games and Wolves? TY!


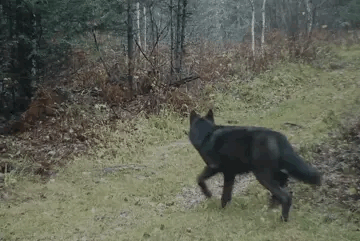
terry bogard stimboard with red, arcade/games and wolves for @elwoowoopostings
x x x / x - x / x x x
#💭 struggled a bit with this one but i hope i managed to reach what you were hoping for! (-ω-、)#💭 as always feel free to request again and i'll adjust :)#stim#stimboard#*mine#requests#elwoowoopostings#terry bogard#hands#crystals#slime#wolves#arcades#red#green
5 notes
·
View notes
Text
My last post about the progress on my Batuu vest left off with me contemplating exterior pockets, looking to Bix Caleen as an example of a fitted vest in the Star Wars universe. I ended up talking myself out of any visible exterior pockets, with or without flaps, after looking at all those pictures of Bix. I've got enough other bits of visual interest going on with my outfit that I felt like exterior pockets just cluttered up the look.
Once I had decided against adding additional pockets, I was able to move on to the next step: finishing all the edges and attaching the lining to the exterior in preparation for getting the zipper in place. I turned under the armscyes of the lining and the exterior separately, both using a blue lace hem tape that I originally bought to go with this fabric back in 2016. Eventually I'll top-stitch them together with the hem tape sandwiched invisibly between the exterior and the lining, but for now they're finished enough to allow me to try the vest on without fraying the armscyes.
It took me awhile to think through all the steps for attaching the zipper, with all the asymmetry and overlapping and exterior and lining, while also not wanting the zipper to show from the outside at all. Eventually I figured out that I would need the underlap (left front) to be completely sewn together with the edges finished before I could attach the zipper to that side -- but I would need the overlap (right front) to not be sewn together yet, so that I could attach the zipper just to the lining.
With that finally figured out, I put the lining and the exterior together with right/finished sides together, lined up all the seams and notches carefully, then pinned the edges together from the left (underlap side) shoulder, down the center front of the underlap, and around the lower edge of the vest all the way around to the bottom corner of the center front on the overlapping right side of the vest.
After a lot of ironing to get all of that to lay flat when right side out, I was able to trim the center front edge of the overlap to be nice and clean and straight again. When I drafted the center front panels, I modified that right side to have an additional ~2" of width past where I wanted the zipper to be, specifically so there would be a built-in flap to cover over the zipper. Remember: no visible zippers in Star Wars!
Once I had the overlap panels of both the lining and the exterior all trued up, I marked the center front line on the lining side (in the below pic, the angled line going from lower left to upper right), laid half of the separating zipper onto the fabric so that the teeth were lined up with where the center front line met the lower edge of the vest, then measured from the outside edge of the zipper ribbon to the cut edge of the overlap panel. It was just about 7cm away from that edge, so I measured that distance all the way up (past the dashed line that marked the underbust elevation) and drew a nice crisp line with my chalk pen.

That gave me an easy line to follow when sewing the zipper to the inside/lining of the overlapping flap. Since I hadn't sewn the edge of that panel together yet, I was able to move the exterior layer out of the way and sew the zipper only to the lining, for now. I sewed one line of stitching just slightly in from the outside edge of the zipper ribbon, then did a second pass about halfway between the edge and the zipper teeth. It's on there nice and secure, but has a bit of room to separate from the fabric while it's being zipped, so it doesn't get fiddly.
After that, it was just a matter of pinning the other side of the zipper to the lower front corner of the underlap (this time on the exterior side of the fabric, where it faces the lining of the overlap), then try it on with the rest of my Batuu Bounding outfit and pin the underlap side of the zipper until I had the fit I wanted.
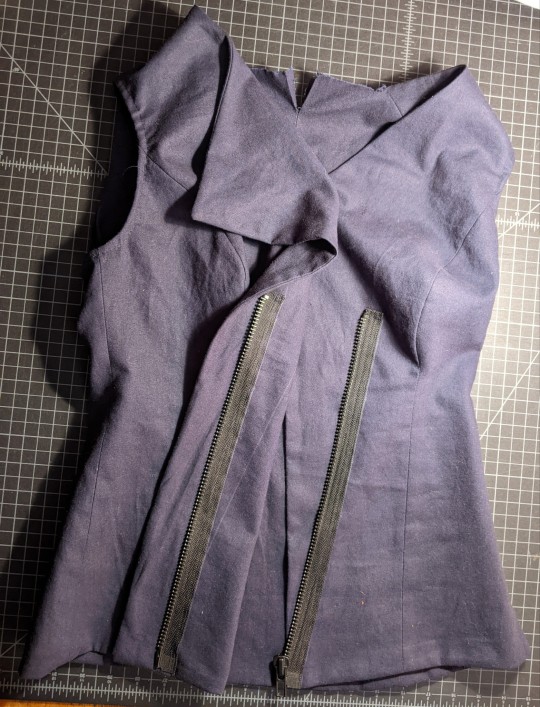
I sewed down that side to match the overlap panel side of the zipper, then tried everything on again to double-check the fit. It was a bit weird with the exterior of the overlap flap still unattached, but it fit well enough that I decided to sew the edges of that overlap flap from the lower corner up to the shoulder seam. The back of the neckline is still open, and the armscyes have been turned under but not attached to each other yet, so I can turn the whole thing right side out by pulling it through the back of the neck. With all that ironed and the zipper zipped up, the vest looks like this currently:
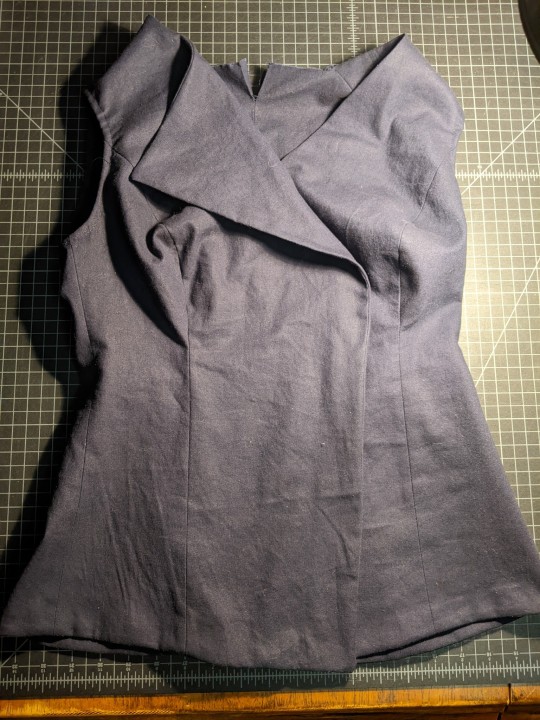
Folding back the outer edge of the overlap reveals the zipper. Because of all the overlapping and underlapping, the zipper is just top-stitched in place. It was way more mind-bending to figure out where everything needed to be placed to get this look, but way easier to actually sew on than, say, an invisible zipper set into a seam.

At this point I was able to try on the vest (with my Jyn Erso sweatshirt) and get a pretty good idea of the overall look. I still want to do a bunch of top-stitching both for accent and to help everything lay flat, but even with that I think I'm going to need something to keep the flap over the zipper from coming open.
I looked at a bunch of options for Star Wars-y looking buckles, settled on one I liked the best, then cut the basic size of them out of paper and taped five of them to the outside of the overlap just to get a basic idea of how it would look. I got Jack to weigh in on it too, and we both felt that the buckles were reducing the sleekness of the vest, and weirdly pushing it more towards an Imperial/First Order sort of look. My character isn't an out-and-out rebel, but she doesn't side with the First Order either. I pulled the taped on paper off again, and both Jack and I felt that that was the significantly better look.
But since I knew I still wanted some sort of closures to keep the flap down -- including one at the top left shoulder, that will hang open most of the time, along the lines of Han Solo's and Cassian Andor's shirts (and a bunch of others, this sort of overlap detail shows up frequently all throughout the franchise) and thus be visible where it hangs open.
I ended up finding these slightly unusual looking hooks-and-eyes that I think will provide a nice, nearly invisible look through the torso of the vest, but not look totally out of place on the flap edge that's hanging open. Bix's fitted coat has a similar closure of just barely visible, just slightly odd hooks and eyes, so I feel like I'm in good company there. They should arrive tomorrow, giving me enough time to hopefully get some of the top-stitching done before then.
That top-stitching is the next step, and one of the last things I need to do for this vest project. I want to top-stitch just inside all the finished edges, including the armscyes, and on each side of each of the seams, probably 2-3mm away from the edge and the seamline. That's going to involve getting everything lined up correctly and all the seam allowances lying flat inside the space between the exterior and the lining, but I think the effect will be totally worth it, both for the smoother fit and the subtle visual interest.
After that, I'll have some handsewing to do to invisibly anchor the zipper to the exterior of the overlap panel and to attach the hooks and eyes, once they arrive. The very last thing I'll do on this project is decide if I want a little stand-up half collar that ends somewhere on top of the shoulder, a bit like the one on Jyn Erso's vest.
I'm pretty sure I want a collar like that, the question is just if I need to lower the neckline in the back first, and then how far forward on the shoulder I should bring the collar. Once I've decided on that, I'll cut it out in two layers, lining and exterior, and sew the outside edges together. Then I'll be able to sew the lower edge of the exterior to the back of the neckline, and hand-sew the lining lower edge to fully encase all the raw edges. I did something similar with the Moment vest, and it comes together pretty quickly. I think I should be able to have the vest completely done by this time next week without much trouble. Hopefully.
Alongside working on my vest, I've been continuing to hand-sew the pleated panels onto Jack's jacket. In the tags on my last sewing update, I mentioned that I had about 5" still to go on the first panel. I was in the really annoying section in the middle of the sleeve where I really had to put my whole arm into the sleeve just to pass the needle through, and it was slow-going. I had to make myself push through that annoying section, rather than continue to put it off.
Eventually I worked my way all the way down to the cuff, cut off the excess from the pleated panel, turn under the edges of the lowest pleat, and hand-sew that into place. I am so pleased with how it turned out, but to keep Jack from making jokes about only having one sleeve done (and so that I wouldn't find myself with time to hand-sew and nothing ready to sew), I quickly pushed on to getting the second pleated strip started. I took a bunch of measurements from the finished sleeve and transferred them to the second sleeve, pinned the pleated panel into place, and had Jack try it on just to double-check the placement.
I was able to tear through the upper section of that second panel, between my increased speed and confidence in my method of hand-sewing this, the easy access through the neck side of the jacket, and a couple of long-ass work meetings where I was basically just there to listen in and take notes every now and then. As of posting this, I'm about halfway through with the second panel, and starting to get into that annoying section of the sleeve again.

The effect of the pleated panels on both sleeves is just so cool that I will definitely be getting photos of the jacket on Jack at some point, either on our Disneyland day or during a try-on before that. He's somewhat allergic to photos, but damn it I'm proud of how this looks, and I want to show it off. I've been calling it a 'sewist flex' from the very beginning -- look at what I can do, look at how cool and Star Wars-y it is -- and I'm really looking forward to sending this beauty out into the world in all its epicness.
And I think Jack feels similarly, based on how he's been talking about wearing this jacket all the time once it's done. His whole outfit together (this jacket, cream colored henley shirt with the buttons and bottonholes removed, mustard-y tan moto jeans, hiking boots) looks wonderfully casual Batuu Bound. The effect of the whole thing is Star Wars, but none of the individual pieces feel weird or costume-y. He might not wear those pieces together for anything other than going to Batuu, but each piece paired with something else looks pretty normal. So if Jack is able to get a lot of wear out of this modified jacket, all the better. I know I'll get that burst of sewist pride every time I see him wear it, lol.
#my sewing#Batuu Bounding#Batuu vest#Jack's jacket project#2024 mood#long post#10 days to go and I'm using all my excitement to keep making progress on sewing#also I've started rewatching The Mandalorian if only as a way to take a break from all the Star Wars YouTube videos I've been watching lol#there are still a couple of other tiny details I would like to do if I get time for them. in particular:#finding a way to cover the laces of my Doc Martens and the buckle on my belt#adding a place or two for 'code cylinders' on both my outfit and Jack's (especially since we don't have any other greebles)#breaking out the needle-nose pliers to adjust the length of some earrings that look cool with my outfit but hang just a bit too low#and finally gluing down the wraps on my kyber crystal necklace so I can be confident that the crystal won't fall out at some point at DL#the necklace is really the only one that MUST be done. the rest are entirely nice-to-have but I'm hoping I'll have time#and on that note I should get back to sewing lol
5 notes
·
View notes
Text
Mind control weapons based upon projected space-warp
Using Foldspace or Paraphasic transporter-like effects to essentially reorient, or more simply stated, 'print' matter
Using space-warp technology to enable starships for self-propelled faster-than-light travel
Self forming and reorganizing logic pathways such as based upon electrical potentials or resistances
5d memory crystal adjusting processors or logic circuits
reblog if your name isn't Amanda.
2,121,566 people are not Amanda and counting!
We’ll find you Amanda.
#Mind control weapons based upon projected space-warp#Using space-warp technology to enable starships for self-propelled faster-than-light travel#Self forming and reorganizing logic pathways such as based upon electrical potentials or resistances#5d memory crystal adjusting processors or logic circuits#Using Foldspace or Paraphasic transporter-like effects to essentially reorient or more simply stated 'print' matter
11M notes
·
View notes
Text
Natural Stone Ring
#drdesigns#wedding#engagement ring#gemstones beaded#dreiddesigns#crystal adjustable#natural stone energy#chakra healing birth#dreid#spiritual fashion#jewelry natural#d_reiddesigns#fashion
0 notes
Text
Gothic Necklaces


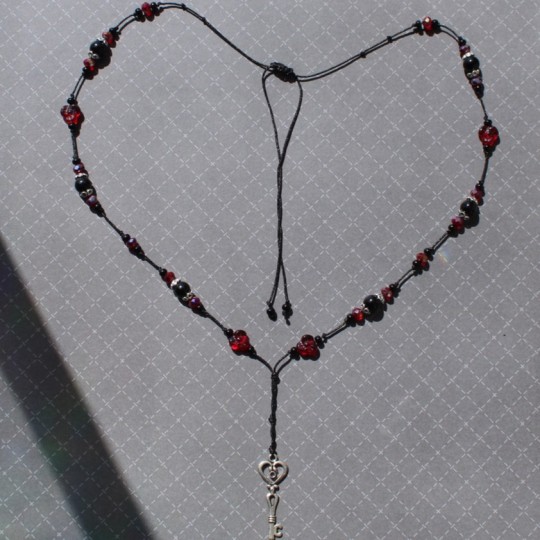

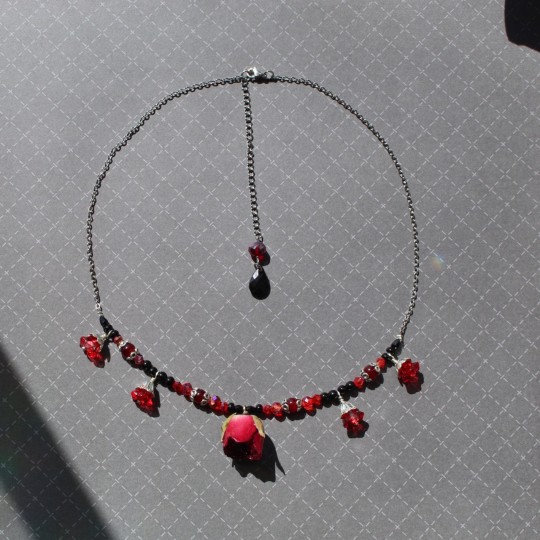
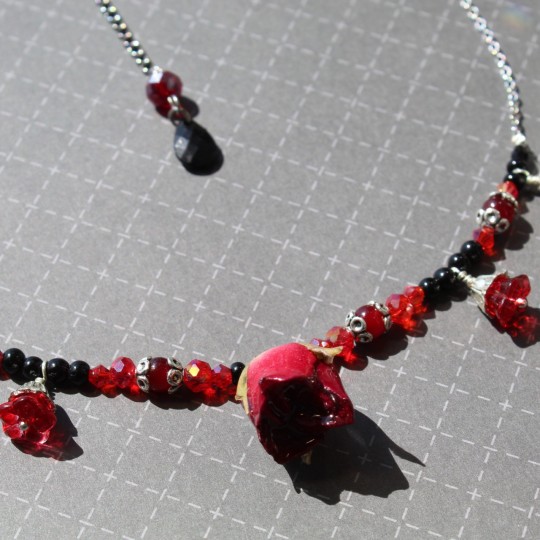
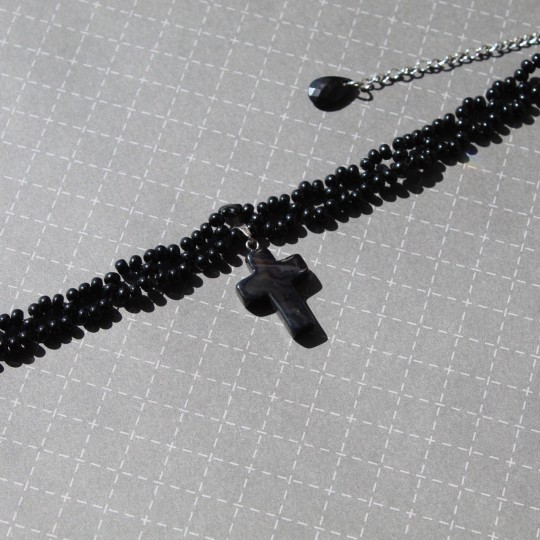
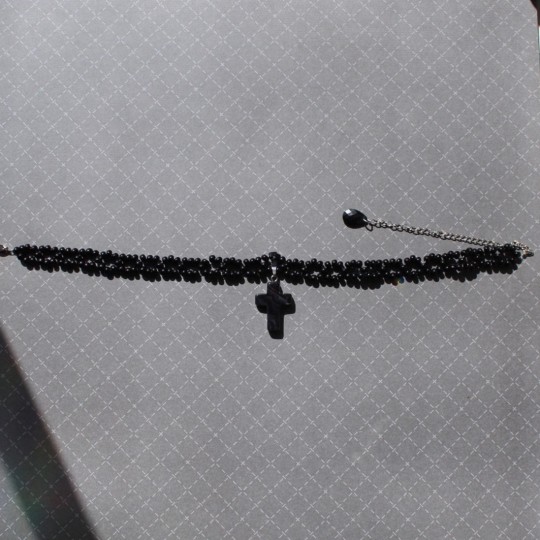
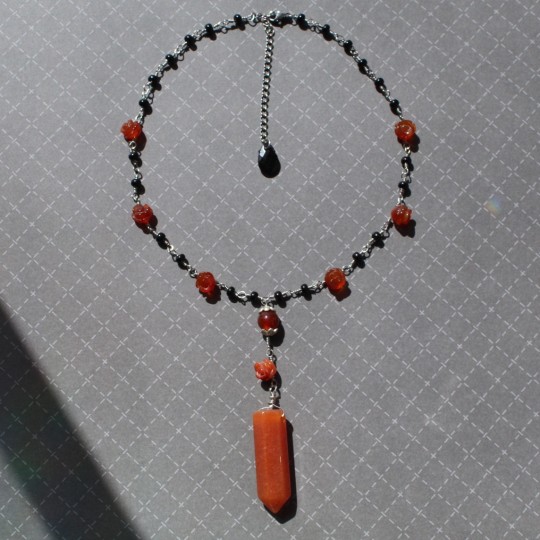
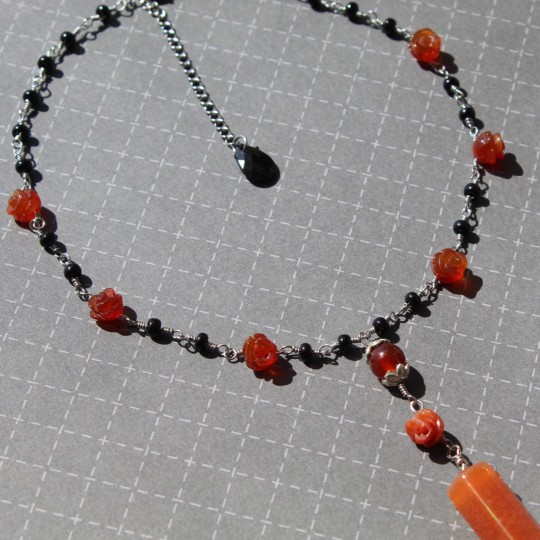
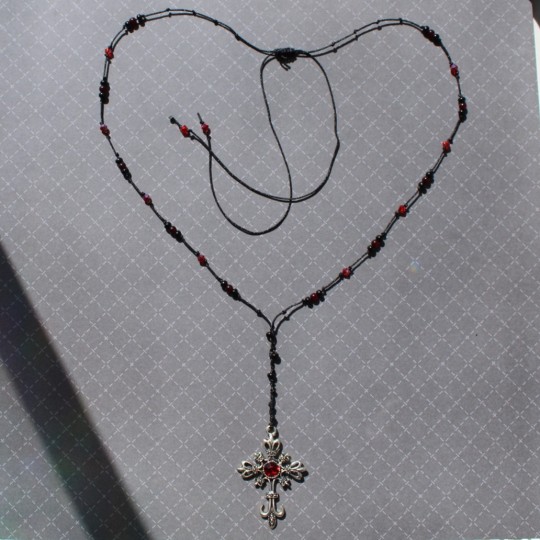
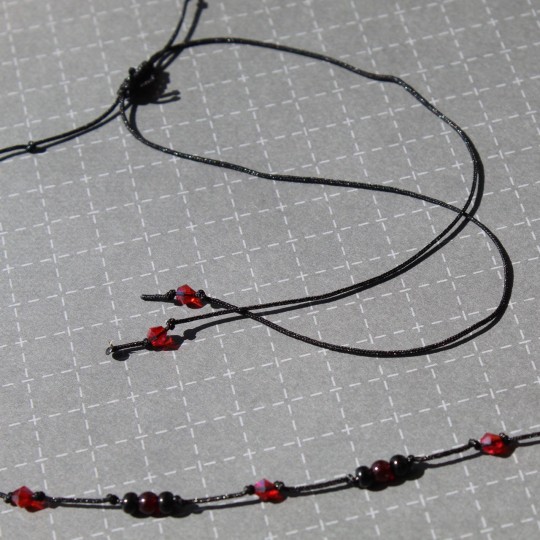
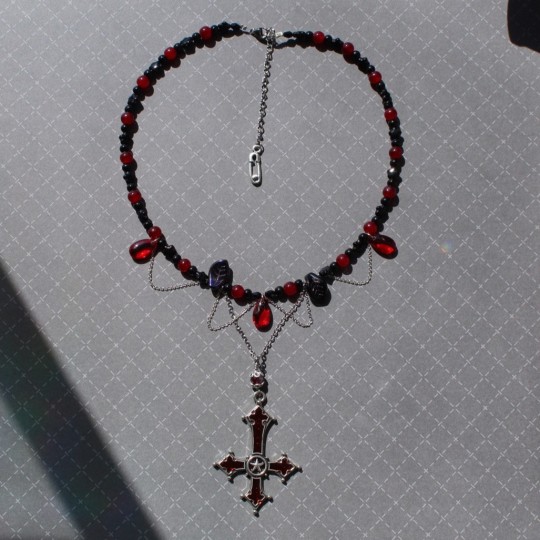
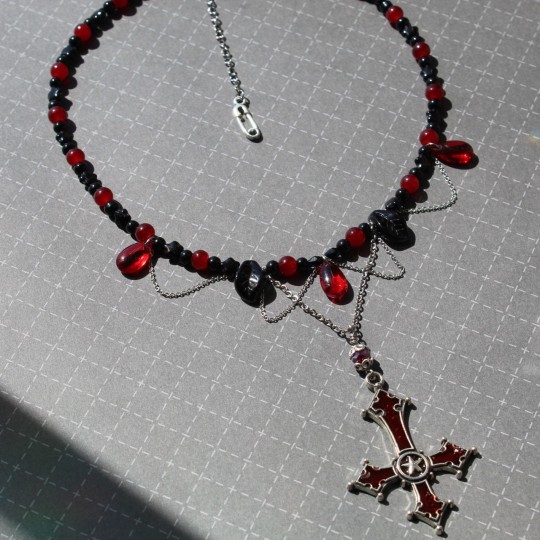
Releasing tonight at 12am on Etsy (@strawberrynida).
One of ones, handmade, evil.
pssstttt, use code "TUMBLR" for a discount!
#OMG I LOVE THE BLOOD DROP ONE#It took me a year to figure out how i can make that design my own#I also made knotted necklaces for the first time!#and they're adjustable#and the crystal necklaces has crystal roses in it!#get it haha#rose-ary#i also have a necklace with a REAL rose!!!#I know the first rosaries were made of roses so this is my interpretation of it#i also made a heart key rosary-style necklaces for people who don't feel comfortable wearing crosses#rosary#cross#catholic#crucifix#gothic#goth aesthetic#emo#halloween#spooky#spooky season#spooky vibes#necklace#whimsygoth#whimsycore#dark acadamia aesthetic#dark aesthetic#dark art#witch#witchcraft#witchblr
3 notes
·
View notes
Text

Dual Flowers Bracelet/Anklet $20
Here in Labradorite
Made to order with your choice of stone or crystal beads (35 types). I have phased out the lava bead and replaced it with a fifth bead of that choice. Please allow for variation from picture.
If you would like to mix and match your beads, simply request it in the personalization box.
Each bracelet/anklet is made with 8mm beads, steel findings, and a zinc alloy charm.
https://thewaywardabbeystore.etsy.com/listing/1640449879/dual-flowers-braceletanklet-choice-of
Labradorite is available in nearly all my jewelry.
I post regularly on Bluesky, Facebook, Instagram, Pinterest, Threads, TikTok, and Tumblr!
~Blessings~Courtney
#flowers#floral#flower jewelry#beaded bracelet#bracelet#charm bracelet#handmade bracelets#anklet#beaded jewelry#customization#handmade jewelry#handmade#pretty jewelry#adjustable bracelet#bracelets#bracelets for women#bracelet for women#floral jewelry#jewelry#jewellery#jewelry for sale#gems#crystal gems#gemstone jewelry#crystals#crystal jewelry#labradorite
0 notes
Text


https://artsystudiofinds.etsy.com/listing/1832223006
Genuine Moldavite Silver Adjustable Bracelet:
Genuine Moldavite silver bracelet, carefully crafted to bring the cosmic energies of Moldavite to your daily life.
Unique Features:
· Authentic Moldavite: Genuine Moldavite gemstone, renowned for its transformative energy. · Adjustable Design: Easily adjust the bracelet to fit your wrist size. · Cosmic Energies: Harness the powerful, cosmic vibrations of Moldavite.
Friendship Bracelet:
· Symbol of Connection: Wear this bracelet as a reminder of your connection to the universe and its energies. · Meaningful Gift: Share this unique piece with friends and loved ones.
Wear Your Intention:
This authentic Moldavite silver bracelet serves as a powerful reminder of your intentions and spiritual aspirations. Wear it as a symbol of your commitment to personal growth and transformation.
For more information, please follow the link!
Jewels by @artsystudiofinds
#shop now#energy healing#chakra healing#spiritual healing#crystal healing#healing bracelet#etsystarseller#spiritual gifts#moldavite#silver#silver bracelets#handmade bracelet#adjustable bracelet#etsysmallbusiness#support small business#friendshipbracelet#artsystudiofinds#meteorite#czech#usa#freeshipping#etsy#etsyfinds#gifts for dad#fathers day gift#unique gift ideas#outer space#rare collectibles#raregemstones#green
1 note
·
View note
Text
5d memory crystal adjusting processors or logic circuits
0 notes
Text
Handmade Amethyst Bracelet: Beauty and Meaning with February Birthstones and Steel
#Adjustable Gemstone Bracelet#Amethyst Jewelry for Women#Custom Handmade Jewelry#Durable Stainless Steel Bracelet#Eco-Friendly Handmade Bracelet#February Birthstone Bracelet#Gemstone Bracelet for Gifts#Gift Ideas for Women#Handmade Amethyst Bracelet#Healing Crystal Bracelet#Minimalist Amethyst Jewelry#Natural Amethyst Jewelry#Spiritual Gemstone Bracelet#Stainless Steel Jewelry Handmade#Unique Birthstone Bracelet
0 notes
Text
got xmas gifts for my baby cousins and my mommy hehe i hope they turn out good
#got the girls nail polish bcus theyre both sub 10yrs and nail polish is fun#and just placed an order for a custom crystal ziggy photo engraved in a heart pendant for my mom <3#i rly hope the glass turns out good im so nervous#i went and edited the ziggy photo to b&w to adjust the contrast etc myself
1 note
·
View note