#done with my macbook pro trackpad
Text

miku in kidpix ✧˖°.
#hatsune miku#vocaloid#my art#miku#done with my macbook pro trackpad#my finger hurts#miku fanart#miku vocaloid#kidpix#webcore
35 notes
·
View notes
Text
What’s better, a desktop or laptop for programming? Why? 🖥️💻⬇️⬇️
Both are better and both are worse.
instagram
I own both a desktop and I have a laptop. My desktop is connected to a 32″ monitor, gaming keyboard and a mouse. To say that it is awesome is an understatement. My laptop is a 15″ Macbook pro (2014), i5 with 16GB memory and 512GB disk. My desktop has 32 GB memory, much faster i5, and has as many disks and disk space as I want to put into it.
👩🏻💻But back to programming, coding and hacking. Which is better ? 🤔
💻I would say, the laptop, but that is cheating, because over 90% of the time I use it, I have it connected to a 27″ display, Mx Keys keyboard and Mx Master 3s. So it is pretty much a smaller version of my desktop computer pretty much. 😍
😱If I needed to get rid of one of them, it would be the desktop one. I can take my laptop and have it on my lap in front of the TV, in my bed, on a plane, in different countries and so forth, if I needed to. I have taken it to hold lectures, tutorials, code reviews and many other things, which frankly, I would not even try to do on my desktop. 😌
🫣Before you ask, why do I have both ? I am hard pressed at answering it differently than, because I can :) I play games on my desktop one, editing movies, keep my photo library and many other things. 📽️👾
💯In a perfect world, I would have my desktop on and a smaller laptop.
🛻So, space and transportation. If you need to take it out of the house once in a while, then it is the laptop. If you ever want to meet at someones house and do a quick hackathon, then the laptop. 🤩
😇Laptops are seriously fast, with an ssd disk, you never have to wait for anything, even laptops you might consider being slow, like i3 and i5 laptops. With enough ram and fast disk, you never have to wait for anything. If you are doing web programming, then you can even get a cheaper one. All computers are very fast, the fastest ones are just crazy fast. 🏎️
❗A quick pros and cons (not a complete list, but gets the job done) :
📍Laptop pros
🔖portability
📍Laptop cons
🔖disk space
🔖memory
🔖not being able to tinker and update (most of them, many do allow for it)
🔖not ideal for storing a lot of photos
🔖expensive
📍desktop pros
🔖expandability
🔖put in as much disks as you want
🔖usually can do 32GB memory or even more
🔖Can have the latest and greatest graphic cards
🔖Does not get warm in your lap
🔖Allows for much better keyboards, mice and trackpads
🔖cheaper
🔖assemble one yourself, and no part will break that costs a lot to replace
📍cons
🔖no cons really, except for portability perhaps
I like my machines, but my laptop much more.
2 notes
·
View notes
Text
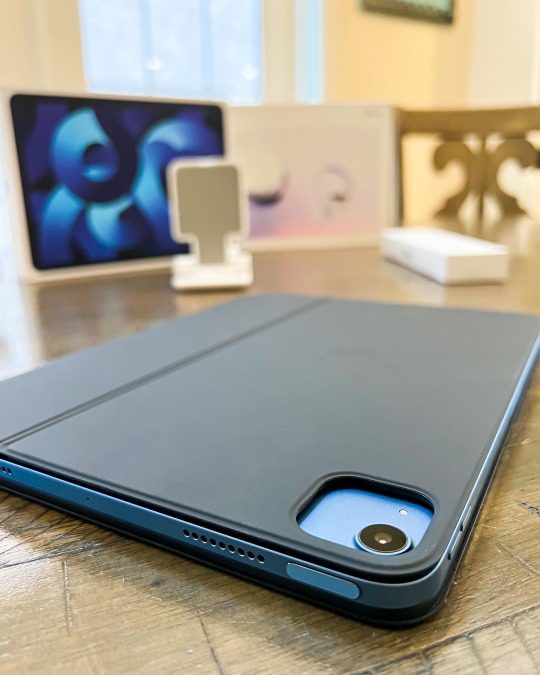
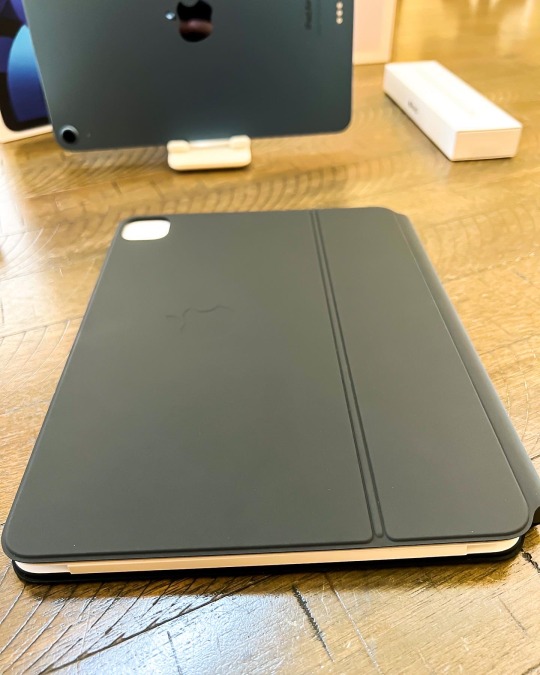
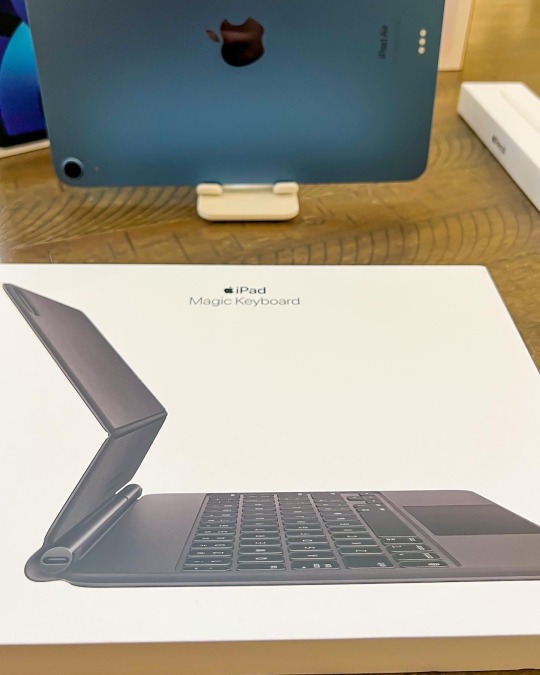
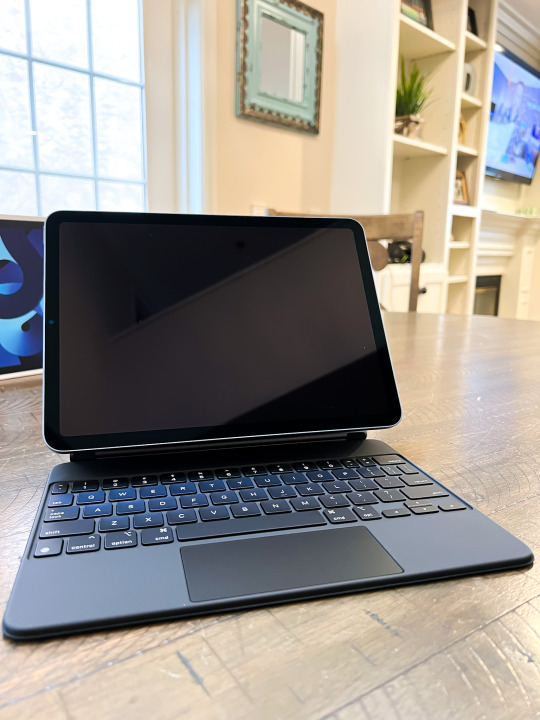
Magic Keyboard...
.
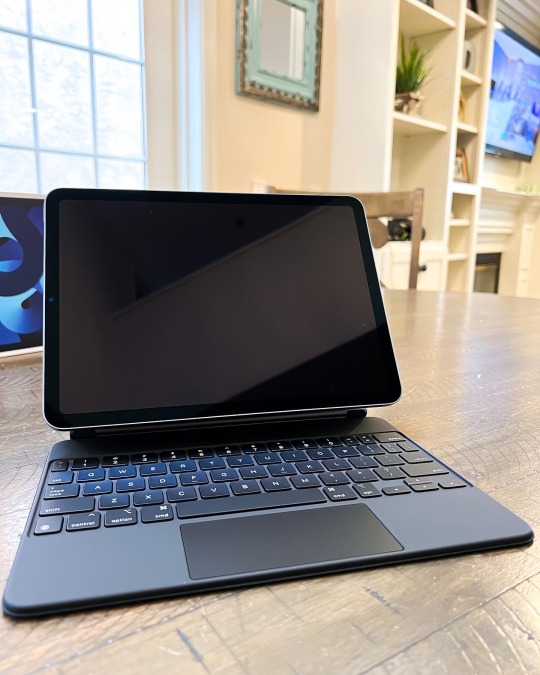
It’s the perfect name because it’s magic all you get from this beautiful, well-designed, functional keyboard for my new iPad Air.
.
Let me tell you WHY...
.
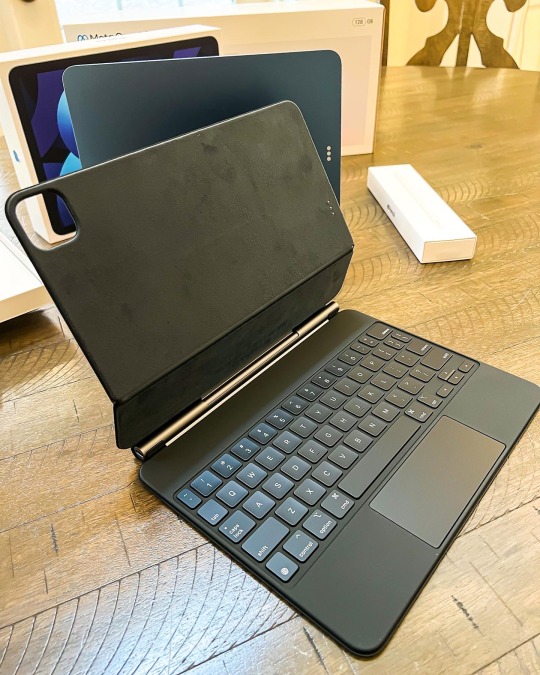
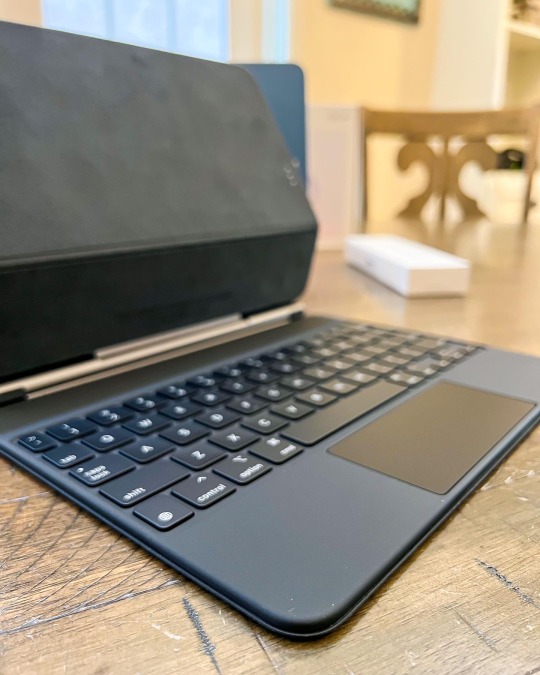
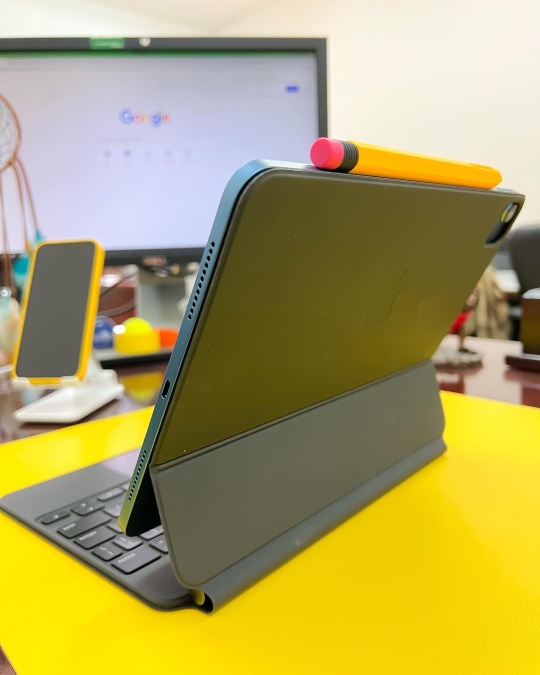
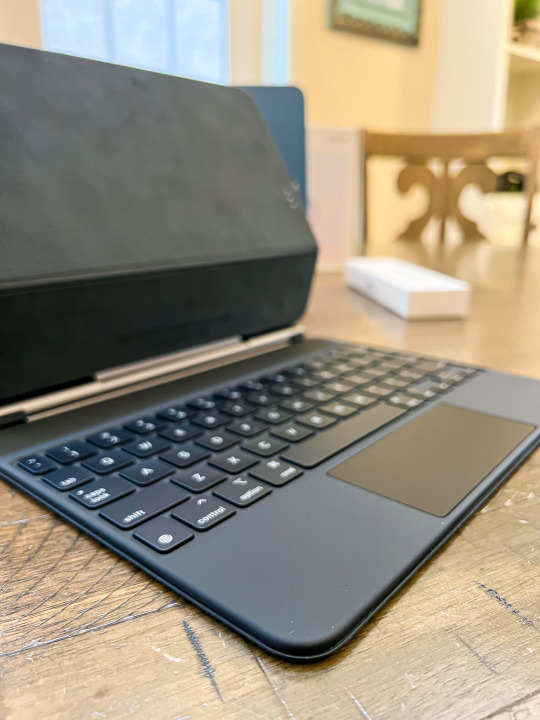
I’ve had various styles and sizes when it comes to keyboards, (See bio link) but this unique keyboard made my iPad so much more functional. It’s not sure a keyboard: it’s a Case/trackpad/Pass-through charging unit, and a keyboard.
.
.
Having all those functional add-ons to my new iPad has managed to replace my 6year old MacBook Pro. I managed to get all my personal, and work-related work on the iPad without the need for having to carry my Laptop with me. That brings me to my last remark, I waited six months to post this review, to just make sure can I really managed to not reach over my laptop, or can the iPad get all my things done. In this case, the answer is Yes and a big YES.
.
.
I know the price tag is $299 but honestly, you can’t think of only a “keyboard” as it offers so much more than a typing tool.
.
.---
• #️⃣Use #itweetmagazines for a repost 🤓
• ➡️Follow @itweetmagazines for more! ✈️
• 👨🏻💻Or DM your pic directly 📚 🎧. 💻 
.
#iPhone13ProMax #MagicKeyboard #Apple #iOS #iPhone12 #iPhone14 #Macbook #Keyboard #Yellow #Charger #BestBuy #iPad2022 #iPad

0 notes
Text
Gta 5 the professional


Low resolutions make the game look really blurry and thus it’s not recommended. Change resolution only as the last resort. If you want to really lower it then 1280*720 is the lowest you should go. So I recommend using the same resolution as your Monitor for the Best Gaming Experience. You can play for longer durations and also it’s less straining to your eyes. Using a high resolution for gaming is good for your eyes. Resolution: Same as your Monitor Resolution If later GTA starts support for DirectX 12 switch to it. Unless your graphic card is older than 5 years I recommend using Directx 11. Go with the highest version of DirectX 11 your graphics card supports. You can use enable this option only if you have a high-end system. This option if enabled tends to cause heating issues in some systems and laptops. I recommend you keep this setting off especially if you are using a laptop or a low-end system. Graphics settings: Ignore suggested Limits: off So without further ado lets begin: Best Graphics settings for GTA V: If you have bought the game from steam then you can also use the steam launch settings for GTA V. You can edit the graphics, advanced graphics, and Display Settings in GTA V. Must read: How to get GTA V free on epic games High Detail streaming while flying: off.These are meant for high-end systems only. For low-end systems simply disable all the advanced settings.Refresh rate: Same as monitor refresh rate.Resolution: Same as your Monitor Resolution.If there is anything you want to know, just ask - although I've only done the first couple missions so far.Īlso, sorry for the bad gameplay, I'm not used to playing with WASD and a trackpad while trying to keep the camera steady.Įdit: Title should read 'How GTA 5 runs on Retina Macbook Pro', or something like that.Įdit2: Updated video with different graphics settings and FRAPS. For those of you who are on the fence about this game and have a similar spec Macbook, I hope the video is informative for you and sets your expectations. So far, It is running better than expected, looks good enough and performs well enough as you can see. I have not messed around with the graphics settings to see how much I can push the graphics while still having it perform well enough. The game is running at 1400 x 900 on a Windows 7 Bootcamp partition from an external USB 3 HDD. There is no sound as I was wearing headphones (kids are asleep!).Įverything is on the default 'medium' setting (the lowest) apart from textures which are on 'high'. The video should be 1080p 60fps as I recorded on my iPhone. 2.6GHz Intel Core i5 / 8GB Ram / Intel Iris 5100 1536MB GFX.I am currently playing GTA 5 on my Retina Macbook Pro What does the update to macOS Catalina mean for games?Ī short selection of great, free-to-play games that are available on MacĪdditional resources: News, stores and platforms, deals, related subreddits, forumsĮverything you need to know about Apple Arcade Approved posters can arrange for more daily posts by contacting the moderators. It is also required to properly format posts. When self-promoting content, please provide as much meaningful information as possible, such as a detailed description, trailers, or screenshots. Read the FAQ, and refer users to it if applicable. The simplest is About This Mac, available by choosing About This Mac from the Apple menu in the upper-left corner of your screen. Your Mac provides several tools to help you identify it. If you are asking for advice on games or your system, post the specs of your Mac such as model name, CPU, and GPU. Before asking for help, or installing a game, please visit r/macgaming/wiki/catalina, and check both the compatibility test chart provided by our community and the list of unsupported 32-bit Mac games by Mac Gamer HQ. Please make use of the search and read the FAQ before asking questions, many have been answered already and it will save you time!Ĭan my Mac run it? The MacGameStore App, or Mac Gamer HQ's extensive list of performance results and benchmarks are good ways to check if your Mac will run a certain game.Ĭan macOS Catalina run it? Games that are 32-bit only will no longer run on macOS Catalina. The home for gaming on Mac machines! Here you will find resources, information, and a great community of gamers.
0 notes
Text
Magic trackpad gestures mac

#MAGIC TRACKPAD GESTURES MAC SOFTWARE#
#MAGIC TRACKPAD GESTURES MAC MAC#
#MAGIC TRACKPAD GESTURES MAC SOFTWARE#
While software troubleshooting will cost you nothing, the hardware repair costs may vary. If your MacBook trackpad is not working, there are generally two reasons why: What to do when the trackpad on a MacBook stops working In this post, we will highlight possible reasons why the trackpad is not working and suggest solutions for each scenario. However, you may experience MacBook trackpad issues, such as when it does not click or respond.
#MAGIC TRACKPAD GESTURES MAC MAC#
You can use the Mac trackpad gestures to click, tap, swipe, slide, open Notification Center, and more. I’ve lost none of the multi-button powers of my mouse, and the added gesture-specific features of the Magic Trackpad let me do even more with it than I could with my mouse.The trackpad on a MacBook is basically an internal mouse with extended functions. My wrist is much happier now that it doesn’t have to flick a mouse across my three connected displays. The tricked-out trackpadįor my needs, I’ve found that this combination of the Magic TrackPad, BetterTouchTool, and some utilities is the perfect mouse replacement. This composite image shows the five tasks assigned to the virtual buttons on my Magic Trackpad. Help Finally, I use the top-right corner to bring up an application’s Help menu-this is done by simply mapping the nearly-universal Help shortcut (Shift-Command-/) to that tap location. This, too, is done via a Butler shortcut that’s mapped into BetterTouchTool. I used Many Tricks’ utility Butler ( ) to define this action and give it a keyboard shortcut, which I then mapped in BetterTouchTool.Ī Google search window A bottom-right tap displays a Google Web search window, so I can submit Google searches without first switching to my browser. Often-used folders A bottom-left tap brings up a hierarchical menu containing my often-used folders, so I can quickly drill down and open any of my most-used files. This (along with my existing utilities) would allow me to replicate the functionality of my multi-button mouse while gaining the gesture features of the Magic Trackpad. For me, the key feature was the ability to assign actions to newly-available gestures. It even lets you assign various actions to keyboard shortcuts. In addition to its not-yet-final support for the Magic Trackpad, BetterTouchTool works with many third-party trackpads and Apple’s Magic Mouse. The BetterTouchTool utility allows you to define your own gestures and actions. (Haven’t seen gestures before? Check out this video demonstrating them on a MacBook trackpad.)īut then I stumbled across Andreas Hegenberg’s BetterTouchTool (donation requested). Giving all that up, to simply gain gesture support on a slick-looking input device just wasn’t worth it in my book. With those buttons, and some help from various utilities, my mouse handled a variety of tasks, including drilling down into Finder folders, searching the Web, displaying a program’s menus at the mouse location, and switching between all my open windows. While gesture support seemed useful on my desktop Mac Pro, I wasn’t willing to give up on my mouse (a Razer DeathAdder) and its five customized buttons. When Apple first released the Magic Trackpad($69 ), my initial response was something of a yawn.
0 notes
Text
Mission control mac not working

#Mission control mac not working pro
#Mission control mac not working software
#Mission control mac not working mac
On the external USB Apple keyboard everything works correct. I’ve tried activating and deactivating “Use F1, F2…” and also disabled “Show desktop/dashboard” for and while the latter two were never activated by myself. button working since double press opens the “dictation” pop-up and all F1-12 work correct wile the default functions like brightness and volume are gone.
#Mission control mac not working software
Hardware and software that used to be “it just works” -which lead me to replace my families entire eco system several years ago and contiously adding new Apple products- seem to be dropping like flies and is nowhere near anymore. Has it really been that long since the late S.J. Two days ago after connecting to my Apple TB monitor at home with and Apple USB keyboard (and BT trackpad) connected I experienced the same malfunction of the volume keys as stated above in one of our families MBA and I’m pretty sure it’s due to really unstable OSX nowadays. I’ve experienced this on two MBP and am pretty fed up with it since the battery and whatever damage it makes isn’t covered by warranty and Apple doesn’t take responsibility for faulty design. The trackpad was probably damaged by a bulging battery pushing and breaking the trackpad due to poor design. It is difficult to believe that the repair may have caused this because all the buttons do work properly, but does other things. I didnt have this problem before the repair. Notice that all the keys do work and nothing is damaged on the hardware, because when I press them they do work but in other ways. I have tried PRAM and these kind of things without any luck. Still! I can't manage to get the factory commands back. Unchecking the F1, F2 as standard keys etc. I have been into the whole keyboard options and have done almost everything like ticking off the mission control settings. Instead my volume button takes me to the dashboard with a whole new commands for these buttons. When I press them they do work correctly, but they don't do the stock commands like turning the volume up, down, brightness, next song etc.
#Mission control mac not working mac
After I turned on my Mac everything was working perfectly including my new trackpad.īut! Then I found out that my Function keys don't work properly.
#Mission control mac not working pro
It will obviously cut down on clutter, but might be harder to pick out a specific window unless you select the application and find it (you can use the keyboard shortcut Command+~ to sort through multiple windows in the same application).So yesterday I successfully changed my Macbook Pro Early 2015 trackpad.Īll the parts were put on right places and nothing left wrong. In this screenshot, we see how it looks when an application is grouped. Each application window gets its own thumbnail. In the following screenshot, we see how it looks when things aren’t grouped by application. Control Left or Right Arrow: Switch between desktops. Control Down Arrow: Leave Mission Control. “Group Windows by Application” is best shown with pictures. Here are a few you might like: Control Up Arrow: Invoke Mission Control. In order to open a new Safari window on Desktop 4, you need to turn this option off. When you switch back to Safari, the desktops will scroll back to Desktop 2. Let’s say you have Safari open on Desktop 2 and you’re on Desktop 4 using Calendar. The next option is for those who use Spaces regularly. If you ever been using your Mac and tried to switch between desktops, only to discover they’re not in the order you thought they were, this is probably why. The first option allows Mission Control to automatically rearrange Spaces based on most recent use.
0 notes
Text
I saved almost $4K on a laptop by fixing it up myself instead of buying the new MacBook Pro. My laptop screen was still under warenty from a faulty screen coating that had come off so I went in to get that fixed for free. This got me an entirely new top. At the same time I asked to get my battery replaced, I got this for free as well because I was getting something else done at the same time that was under warrenty. When replacing the battery they also replace the keyboard and trackpad for free. (Pro tip if you need a new keyboard or trackpad it will cost you $500aud but if you get your battery replaced it will cost you $250aud and they replace it for free) Then I ordered a 500gb hardrive online for $400 and replaced my 126gb hardrive and essentially got a new laptop! Fight the system y’all by diy’ing yourself a new skill set!!
39 notes
·
View notes
Text
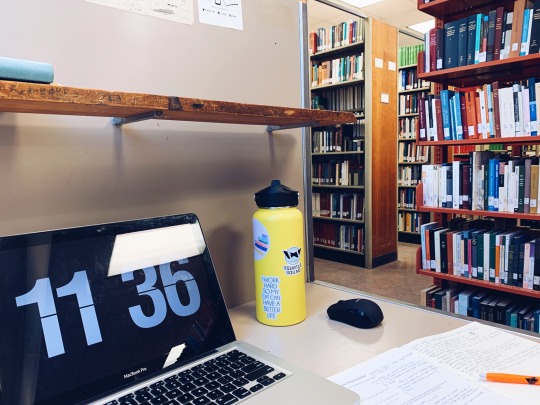

17/11/19 • minimalist studyblr challenge day 2 of week 1 // my study essentials - under 5 items.
my laptop (macbook pro mid-2012, i lol when people call their macbooks from 2015 old. it’s really really heavy and doesn’t have a great battery life, but i really don’t want to get rid of this bc i managed to get photoshop and lightroom for free way back when. recently adobe has really cracked down on that shit so i don’t think i’d be able to do it again and ya girl cannot pay a monthly subscription fee for that)
water bottle (32oz hydroflask with some stickers! all i ever drink is water and the occasional alcoholic beverage so i am never not without my water bottle. my friend once told me if he’s looking for me he’ll just look for the bright yellow water bottle lol)
planner (passion planner that i won in a giveaway, super happy to have the smol size back and in my favorite color blue too! writing all my to do’s down and tracking what i have done is really helpful for managing my workload and my anxiety, bc if i don’t then i just feel frazzled)
mouse (i lowkey think i’m getting carpal tunnel or arthritis or something like that and i’m gonna make a doctor’s appointment to get it checked out tmrw. honestly i’ve gone to my doctor before but i have a tendency to underrepresent the pain/problems i feel and just say it’s ok bc i don’t want to be a bother... anyway i think a mouse is a lil easier on ye olde handes instead of my laptop trackpad)
and earphones (not pictured bc were in my ears at the time of this photo. i took this a couple days ago in the library and i had a killer headache so i was probably listening to a binaural beats playlist on spotify, that stuff really does help with relieving headaches)
10 notes
·
View notes
Photo
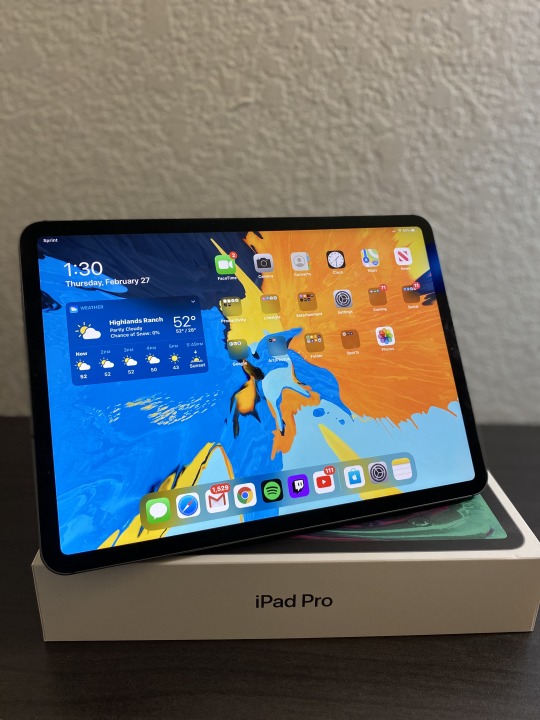
iPad Pro 2018 (11in) Review
The iPad Pro at first glance is an upgrade in every way. So, is it a solid replacement for your daily driver laptop? The answer is, it depends.
Any person can use any device they want as their daily driver. It really just depends on what you’re using your tech for. The 2018 iPad Pro brings a lot to the table as far as capability, and more than meets requirements for just entertainment purposes. This doesn’t really answer the question though.
With the introduction of iPadOS, a gap is bridged in the world of mobile device to PC capabilities. Being able to use my iPad to enter the desktop version of a website is really just the start of long list of improvements in Apple’s new iPad software. External hard drives, multiple displays, improved multitasking, the list goes on. With iPadOS, your basket is definitely full. File sharing, conversions and overall work convenience seems to be the name of the game in the companies latest updates.
We’re working with 4GB RAM, 120hz refresh rate and a 29.37 watt-hour battery, these are some of the hard specs on the device. Beating that in a tablet is hard to do, and chances are, unless you spent more than $1,000 on your laptop, you’re still not beating it. Plus, it comes in an LTE enabled version. Meaning no connecting to hotspots, no searching for unsecured public wifi, just getting work done when it needs to be done. Or play. Which by the way is incredibly attainable with all day battery. Not to mention, the portability of a device such as this for as powerful as it is untouched by any other device, including Apple’s lineup of MacBooks.
Now as far as the cons… Let’s just say there aren’t many, but it varies from person to person as to what they were expecting to buy. Limited mouse support, loosely fitting type cover keyboards without trackpads, and impossible lap placement. These are the issues you will encounter if you buy and iPad Pro with the intent of replacing your laptop. Now, as far as value goes, I think keep a few things in mind. At the time this was written, what you’re looking at is $799 for the 11in version that is WiFi only enabled, and if you’re looking for LTE enabled, tac on another few bucks to bring it to $949. Aside from the pricy accessories you will need to complete a mobile workhorse, such as your Folio Keyboard, and maybe a mouse, this to me is a reasonable price considering a few things. The first being that this is Apple we’re talking about. Their products sell themselves, and within reason, at any price that they want to. Second, this is the iPad reinvented. New OS which yes is available on all iPads, though you can utilize is most with this model. The performance of this device than what your average consumer needs typically, and I don’t think it can be beat for the price. So value, depending on your needs, could be a pro, or a con.
Though the iPad is years ahead of its time at this point, Apple has made it clear that it sells tablets, laptops, desktops, and phones. Not one size fits all, generic devices. For me, that is perfectly fine for the time being.
To wrap it all up, you absolutely can replace your laptop with an iPad Pro, you just need to be expecting the right things. If you’re looking for great portability, above average performance for daily tasks and entertainment, and flawless software within its bounds, then look no further. On the other hand, if you’re looking for a program intensive, Final Cut Pro handling, color accurate beast…maybe try again in a few years. The iPad Pro for now is a day to day productivity and entertainment pro, and I think that for now, that’s all I can ask for it to be for such a reasonable price.
~If you took the time to read my review on the iPad Pro and liked what you read, please give me a follow to see more content like this in the near future! Thank you so much!~
1 note
·
View note
Text
Clean MacBook Pro Keyboard
Clean MacBook Pro Keyboard If only one key is exchanged, people (especially those who don't concern it) prefer to have the entire book exchanged. With these devices, Apple is also targeting real “pro” users, ie users who have really high demands on performance, function and quality. Apple has been using a new keyboard in its MacBook Pro models since 2015, and user reports of defective keys have increased since the switch. The 2017 model of the MacBook Pro also uses the new butterfly mechanism, but has been slightly adapted. If you are dependent on a device, it is imperative to secure yourself beforehand in the form of maintenance contracts and replacement devices. That goes without saying in the IT world. So I've never had any problems and use the keyboard for several hours a day, four days a week. I also don't know anyone who has this problem dust cleaning mud reviews a > I hate. What I meant by the impending additional costs are cases in which you bought a used Macbook with a butterfly keyboard.
Now we come to the fans of the MacBook.
Exactly from a tech journalist who gets such products cheaper and usually writes very good reports, I actually expect that he will buy such a thing and test it extensively.
I was able to sell my old MB (15 ", 6 years old) on Ricardo for 600.-, for this reason alone I will remain loyal to Apple.
In addition, individual keys can sometimes not be repaired at all - the entire keyboard including trackpad and housing must be replaced.
However, you have to be very careful here, because the fan is a complex component with filigree blades.
First the two clips at the top have to be released, then in the second step the button at the bottom can be carefully removed from the hook. First one side, then the second. You already have the button cap in your hand. Reports on the Internet describe that the butterfly keyboards of the MacBooks cannot be repaired and the entire keyboard has to be replaced. In practice, I can't really get used to the "hard" attack. Despite long typing attempts, the strange typing feel does not go away and I lack the smooth precision of the conventional keyboard. Indeed, they offer that. He also came the first two times, but if he can't solve the problem, the on-site service unfortunately doesn't do much. The most important problem is not even mentioned. It locks the Mac keyboard and rejects all inputs (apart from the quit command) so that when you swipe you can press as many keys as necessary and clean the keyboard. Once you're done, exit the app. Simple.
1 note
·
View note
Text
How to clean your MacBook or MacBook Pro keyboard
How to clean your MacBook or MacBook Pro keyboard Not a brittle theory, but done several times! Employees can buy the old model for 120 at the end of the 3-year guarantee and then do what we want with it. 3 times you can guess what most employees choose. Apple confirmed to Joanna Stern from the Wall Street Journal that the third generation of the butterfly keyboard is also affected by the problems. However, according to the company spokesman, there are only a small number of user complaints for which Apple apologizes. But had problems with other keys that were blocked by small crumbs. Air pressure helped. The Slimbook should be interesting for you - a variant was developed in cooperation with the KDE project. At least the shift key seems to be broken, if not there is probably a "PICNIC". If you don't have the problem yourself, you are quickly ready to "trivialize" it, that's my experience. In addition, individual keys can sometimes no longer be repaired - the entire keyboard, including trackpad and housing, must be replaced. I myself and many other users did not get them running at the time so that "cleaning" was not necessary in ever shorter cycles. It was just a hardware component whose reliability nobody would bet on, so it is quite comparable to the current MacBook keyboards. My 2016 keyboard had to be replaced twice - the last time for the 2017 model.
I still have a Late 2013 and actually wanted to buy a 2018, but since I am working on the notebook keyboard, this is a no-go for me.
With a microfiber cloth and glass cleaner you should be very careful with the keyboards.
A technical error occurred while trying to complete your entry.
Apple has been using a new keyboard in its MacBook Pro models since 2015, and user reports of defective keys have increased since the switch.
Apple initially advised users to remove the dust with compressed air, which can work in some cases.
We are already working on it and will be back as soon as possible dust cleaning mud reviews be there for you. Please check back later. It locks the Mac keyboard and rejects all inputs (apart from the quit command) so that when you swipe you can press as many keys as necessary and clean the keyboard. Once you're done, exit the app. Simple. Therefore, it should become a habit for users to close the laptop when it is not in use. Nice outside, but ugly inside?
1 note
·
View note
Photo

MacBook Pro Keyboard Failures: Why Apples dust excuse is bullshit! [Teardown + Explanations]
Original source: https://www.reddit.com/r/apple/comments/bjtyaw/macbook_pro_keyboard_failures_why_apples_dust/
Today we will be tearing down a MacBook Pro keyboard to try and figure out some possible causes for all the failures that these keyboards get. Settle down, because this will be a bit of a long post. Hopefully you'll at least learn something from this.
My Background:
I've worked as an Apple Authorized Service Provider (AASP) Technician for the last 3 years.
Before that, I use to work as a 3rd party Technician at an Apple-focused repair shop.
Because of this experience, I stand in an interesting position where I use to see all the shit Apple pulls in order to make 3rd party and DIY repair difficult, and now I sit in a position where I can see exactly how Apple deals with these issues and get a more-representative ideas of how the machine fails, how many fail, and exactly what the most common failures are.
History:
Apple originally released the Butterfly-style keyboard back in 2015 with the release of the 12" Macbook. Afterwards in 2016, this keyboard design was expanded to all Macbook Pros. The butterfly keyboard is different from a conventional rubber-dome keyboard that was used for 20+ years before that. It uses a metal dome that buckles under enough stress and makes contact between 2 metal terminals, and the keycap itself is held up with a butterfly-style henge rather than a traditional scissor hinge. Both are pictured further down.
This entire experiment began with a thought: How could something as simple as dust kill the keyboard switch?
My old 3rd party tech instincts say that this should not be possible, since there are billions of smartphones that use metal-dome style buttons that do not experience failures like this.
Apples official stance is that dust manages to somehow enter the keyboard and cause the issues. This can cause things like:
Keyboard keys feel sticky, crunchy, or are physically jammed.
Keyboard does not input even though you pressed the key.
Keyboard inputs the same character 2+ times even though you only pressed the button once. https://www.apple.com/support/keyboard-service-program-for-macbook-and-macbook-pro/
Their official documentation also states that you can "fix" the issue by using compressed air to blow out the keys. https://support.apple.com/en-ca/HT205662
When it comes to failures, there's 3 schools of thought about how the switches fail:
"Dust" Theory. This generally takes apples words at face value and don't go deep into it.
"Heat" Theory. This assumes that Dust Theory is bullshit and assumes that overheating causes the material to expand and warp enough to render the buttons inoperable (2018 TouchBar models in particular).
"Shit Design" Theory. This assumes and accepts that it's just awful design.
You may have also seen articles like https://www.digitaltrends.com/computing/macbook-pro-keyboard-failure-rate-double-older-models/ that say that keyboard failure is in the low 10% range, but these should not be accepted at all since they do not take into account a number of things that critically invalidate these statistics as a whole:
They come directly from apple, which is a huge conflict of interest considering they have to sell these machines to make money.
They do not take into account the number of repairs that were turned down due to the cost of the repair itself, which is around 500USD before the keyboard replacement program came into effect.
They do not take into account the number of people that don't want to go to apple or cannot go to apple due to time constraints, especially since most countries do not offer over-the-phone mail-in repairs on Macs.
They do not take into account the number of people who just avoid apple stores and AASP in general and instead go to local 3rd party repair stores.
The keyboard program was introduced June 22, 2018, meaning that anyone before that date who does not have warranty was forced to pay 500USD for the replacement part, and most likely falls into the above. Notice how conveniently these statistics don't include numbers for 2018?
From my experience as an Apple Technician, here are the most commonly reported problems at my store, in order of most to least common:
No-input, particularly from all vowel keys, most commonly used consonants, spacebar, enter, and shift.
Multi-input, particularly from all vowel keys, most commonly used consonants, spacebar, enter, and shift.
Sticky/Crunchy/Stuck keys.
As for demographic, the most common folks we see with these issues are:
Writers or any kind (blog, scripts, office workers, etc).
Students of all kinds.
Programmers.
With that said, here are a few things that were floating around in my head:
The first red flag about the dust hypothesis should be the failure types. Only 1/3 are related to physical objects actually preventing the keys from working. The other 2/3 are related to electricity, specifically whether the circuit in the switch itself is "closed" or "open". Open circuit means that the positive and negative terminals are not connected, which is the equivalent of a keyboard button that is not pressed. Closed circuit is the opposite.
Second red flag is that human dust and household dust is classified as non-conductive. By itself, it does not have enough conductivity to meaningfully carry electricity, so the multi-input style failure should not be possible at all. The No-input failure can somewhat be explained with dust, since it can at as an insulator between 2 metal terminals, but keep reading and you'll see why this isn't the case.
Third red flag should be specifically which keys fail. Spacebar, enter, shift, vowels, and the most common consonants are the most commonly pressed buttons whenever anyone types on their keyboard. Coincidentally, these buttons are the ones that are reported to fail the most.
Finally, the last red flag is the demographic. All of these are people who type a lot on the machines. While this one is highly anecdotal, most of my customers fall within this demographic.
Enough rambling, on with the teardown!
https://i.imgur.com/5MRswJ6.jpg
In front of me, I have what's referred to as a Top Case assembly. Its essentially the metal frame, battery, keyboard and trackpad, all shipped and prepared as one piece for Apple techs to swap out. This particular one came from a 2017 model MacBook Pro 13", which rocks the 2nd generation of the Butterfly keyboard. This specific top case came from a machine that was "liquid damaged by my drunk roommate" so I have no issues tearing it apart for the greater good.
https://i.imgur.com/dnwTzDO.jpg
After removing the keycaps, here's what the keys actually look like underneath. Theres a few main parts here:
The silver metal dome. Thats what actually teams the machine that a key is pressed. It makes contact between metal pads when it is pressed.
Clear Plastic Housing around metal done. Its there to make sure the dome doesn't go anywhere and keeps it safe.
Butterfly Mechanism. This is the white part all around the perimeter of the clear plastic body.
I included both larger and smaller sized keys just for demonstration purposes.
https://i.imgur.com/VoRDuhG.mp4
Butterfly Mechanism in action. This is actually a genius idea, since it eliminates individual moving parts in favour of a single Large one. Youtube creator Veritasium made a video talking about how flexible moving pieces have a lot more advantages over multi-piece hinges (https://www.youtube.com/watch?v=97t7Xj_iBv0).
https://i.imgur.com/8zsuDFg.mp4
Metal dome in action. This is what happens to the dome and butterfly mechanism when the key is pressed.
https://i.imgur.com/SROBJRq.jpg
Here's an example of something that can cause the "Sticky, Crunchy, or Stuck Keys" problem. Having crumbs, or sticky liquids, or other gunk will cause your keys to feel weird, or to stop working. These are genuinely caused by crap getting stuck between the mechanism. Enough of these can definitely jam a key. The 3rd generation keyboards help negate this problem by adding a rubber piece around the perimeter of the butterfly mechanism in order to reduce ingress of larger bits into the mechanism.
https://i.imgur.com/fauw47h.mp4
Example of how a key can get jammed. That single large piece prevents the mechanism and switch from pressing down al the way.
https://i.imgur.com/SogaaLg.mp4
Upon further inspection, we run into another blockade in the Dust theory, a see-through plastic barrier that encloses the entire switch.
The purpose of this barrier is both ingress-protection and to make sure the metal dome stays in its proper place, as you'll see later.
https://i.imgur.com/N2YxJhs.mp4
There is also this black tape-like material covering the top portion. After peeling it off, I discovered that this is where there is a little lip that overhangs the plastic housing. Most likely this is so that the domes can be replaced by the companies that refurbish all the old parts/devices apple sends to them.
https://i.imgur.com/1KDJK2n.mp4
It wasn't very hard to peel it off, but the plastic film was adhered to the plastic frame. Again, a huge dead-end forest theory since it physically cannot get in through this area.
https://i.imgur.com/GqsUHrz.jpg
A close-up of the film and the metal dome itself.
https://i.imgur.com/6zVVFuY.mp4
After examining the dome, I discovered that it is not at all soldered down into place, but rather it is free-floating within the plastic housing. Whether it makes a connection or not depends on how well its legs are contacting those gold pads in the corners.
https://i.imgur.com/LAM75Lz.jpg
Top side of the dome itself. The 4 outer legs are what make contact with the gold pads that are used to carry electrical signals. The dome itself appears to be Steel. It is also incredibly light, it's no wonder the film has to keep it down.
https://i.imgur.com/ZBi4jau.jpg
Bottom side. That brown part is not corrosion, that's just laser-cutting left-overs from when the dome is manufactured. I checked, all the metal dome have these marks.
https://i.imgur.com/JmWD4DD.jpg
Close-up of the plastic body around the metal dome. Here we see 6 gold pads. All 6 of those are for carrying electrical signals. There is also a large hole close to the oval-shaped gold pad. This is a ventilation hole.
Now, I know what you're thinking. Ventilation hole? Aha! That's where the dust gets in!
Hold your horses, we are far from done.
https://i.imgur.com/o70lCgg.jpg
The plastic body takes a bit of effort to remove, thanks to the fact that it uses 4 plastic legs that are riveted to the underside of the board.
https://i.imgur.com/tqLXY1c.jpg
Once removed, we see that the entire plastic body is surrounded by an adhesive film with no obvious gaps in its seal. This is another dead-end for the dust-ingress theory, since the entire plastic body is sealed around the perimeter. For the sake of thoroughness, I tested the conductivity of all the gold pads; the 4 outer pads along with the oval-shaped one in the middle are all connected and act as a single end of the terminal, while the round central pad is a second terminal. Once these 2 are bridged by a conductive object, like a metal dome, they will register as a keypress.
https://i.imgur.com/EHIkSsn.mp4
Just to give you an idea, You can see my trying to fit my sharpest set of tweezers under the plastic body. At most it budged a bit to the side, but that's because adhesive is fairly flexible. It takes a fair bit of pressure to puncture that plastic film on top.
https://i.imgur.com/WDD2C8b.jpg
Out of curiosity, I also tore apart the thinner small keys to see what the mechanism looked like. It's the same thing, just a smaller version.
https://i.imgur.com/tkg6RMH.jpg
I attempted to test the "Heat Failure" theory with my heat-gun set to 300C and pointed directly at the metal dome. This was a beyond-extreme-case test to see if the key would warp and possibly make contact.
Since MacBooks have god-awful cooling and will heat up to very hot temperatures in order to ensure that the machine stays as quiet as possible (which is a questionable method overall, https://www.youtube.com/watch?v=947op8yKJRY talks about it more), some people suspected that the expansion and contraction of material can cause these keys to stop working.
After leaving it under heat for 2 minutes, it did not move a millimetre. This theory is very unlikely since there are keys that fail that do not sit in the same area as the Processor cooler (which can reach 70-100C pretty easily on these models).
At this point, I finished tearing up the entire top-side of the keyboard, so I turned my attention to the underside.
https://i.imgur.com/IZsaOvE.jpg
The keyboard is covered by a large, layered film material. Based on its thickness, it is likely meant to serve several purposes:
As a heat insulator for the keyboard area.
As an insulator for electrical signals between the Motherboard and the metal frame/keyboard itself.
As a barrier to prevent dust and crumbs from interfering with operation.
https://i.imgur.com/iEdRuZs.jpg
After removing it, I found a small surprise. The keyboard itself sits on one giant PCB (Printed Circuit Board) and even has a fair bit of componentry on it! Quick google search showed that the 4 large chips on the right are for controlling the LED backlight, the pair of smaller chips in the middle are some sort of micro controllers (probably for the keyboard itself), and the components on the left are a mystery; I suspect they're the fan control/PWM (pulse width modulation) circuit for the fan, since the fan connects directly into the keyboard on all new models
https://i.imgur.com/6Pm0Uqd.jpg
Whats this? A dust filter? In my friendly christian teardown? Dust filter indeed. This is one of the finest filters I've seen in years! (pun intended).
After looking at it, it turns out that this dust filter is used for the breathing hole that was pictured in the Switch teardown further up the post.
Another dead-end for the Dust Theory, since the breather hole itself is covered by a very fine mesh.
https://i.imgur.com/hycxJcR.jpg
Here's the tip of a 0.5mm ballot pen for size reference. Most dust and all hairs will not be able to fit between this mesh, which only further solidifies the dismissal of the Dust Theory.
https://i.imgur.com/rVfLEkF.jpg
This is the closest shot of the mesh that I can get. This is with 10x Macro lens + iPhone camera at full zoom. Pen marks for size reference.
https://i.imgur.com/hjIboNB.mp4
Here's a short clip of the alignment of the dust filter with the breather hole along with visible movement from the underside of the metal dome and butterfly mechanism.
https://i.imgur.com/4rtoCUP.jpg
After looking closer at the protective keyboard insulator bit, I noticed that the entire mesh portion is surrounded by an adhesive-material, with absolutely 0 gaps around the hole. This basically puts a dead-end to the last possible entry point for dust, since this entire breather hole is not only sealed by adhesives on both top and bottom, but also a clear film on top side and an extremely fine mesh on the bottom of the switch.
At this point, there should be little reason to believe that dust can get in there, since every possible vector of attack is throughly sealed and/or protected.
Contrary to popular belief, Apple actually took a lot of effort sealing these switches from the elements.
https://i.imgur.com/9pmrI0A.jpg
I found some household dust and threw it on the mesh. As you can see, the mesh is not having trouble stopping these tiny bits.
https://i.imgur.com/j32hfyl.mp4
And finally, here is a demonstration of what happens when the key is assembled and pressed under the most extreme of dusty conditions. I threw literally an entire pile of dust on that breather hole.
Since these switches are pretty much sealed from all angles other than this breather hole, this is where all the air can freely move in the switch. Once assembled, the design of the switch actually very closely resembles that of a conventional speaker, which deals with air pressure inside its sealed chamber by allowing the air to freely enter and exit its port hole. Once the key is pressed, there is a higher air pressure created between the PCB and metal dome. Since this pressure needs to go somewhere to prevent rupturing the plastic film, all of it immediately gets pushed out of this single vent. Any dust that has accumulated on this opening will immediately be ejected from the mesh filter. Bear in mind that the laptop would technically be upside-down if you viewed it from this angle. In reality, the dust would actually fall to the underside of the Logic board, which sits in very close proximity to this breather hole.
Excuse the shit quality, I had to heavily compress and alter the vids quality to make it fit into an upload able GIF.
https://i.imgur.com/i6a1KWK.jpg
See that rivet? There are close to 70 of these holding the keyboard into place, along with a battery that's glued in on-top of the bottom portion. You want DIY repairs? Good luck with that. This is why Apple ships these as a "Top Case Assembly" rather than "Keyboard".At this point, there is no evidence left at all that dust is the cause of failures for this switch, especially not for the Double-Input issue since that entirely relies on how long and how many electrical signals are detected by the keyboard controller. There is absolutely no reason why dust or humidity can cause this, especially with no easy entry points and the general lack of electrical conductivity of both dust and water.
The No-Input issue can still somewhat be explained by a few other theories (Humidity, or oxidation of the underside of the dome), but both these theories still have a lot of holes (breather hole pushes humidity out when key is pressed, gold contacts do not oxidize on their own, corroded material will get slightly worn off when one and pads make repeated contact with dome, the amount of dust and water needed to cause these situations is fairly high, etc).
Why is this teardown so important***?***
It proves that Apple themselves have no idea how to deal with the issue and that dust was either just an excuse to satisfy their customer bases demand for an answer, or their engineers are genuinely nowhere near as smart as everyone thinks they are. I'm not sure which of these two is worse. Considering they've had 4 years to deal with it, i'm leaning more towards the latter.
The way Apple is handling this problem is actually far from good. People think that its nice of them to have a repair program for the issue, but this is actually just a shitty half-assed bandaid fix for the problem. As it stands, the current situation is as follows:
All 12" MacBooks + 2018 Air + all 2016-2018 Pro models will eventually develop keyboard issues, its a matter of time.
All 2016/2017 pros (and 12" 2015-2017) have the extended keyboard warranty program. This program covers these units for 4 years from original purchase date, meaning that 2016 models coverage ends around 2020/2021, depending on exact purchase date, and 2017 models coverage ends around 2021/2022. 2015 12" Macbook coverage is ending between this year and next year, so 2015 12" owners be prepared!
2018 models are not covered by this program! Currently, they rely entirely on their warranty or consumer protection laws, meaning that if you didn't purchase AppleCare or live on a country where Consumer Protection laws suck, you'll only get support for 1 year out of the box.
For any of the above, once your warranty or keyboard program coverage ends, it's $500 USD per failure to replace the entire top case. There is no "cheaper" aftermarket solution, the keyboards themselves are a nightmare to replace and the aftermarket parts are even more likely to fail. Replacing the part will not permanently fix the issue either since Apple only replaces it with identical parts, meaning they're bound to fail again. On top of that, all machines will be classified as vintage 5 years after their original release date. Once that happens, spare parts from apple go bye bye for good and you'll be left only with the cheaper aftermarket parts that are usually more prone to failure, or be stuck buying used parts which are also failure-prone.
Ownership beyond 3-4 years fo these models is pretty much a gamble at best, and ownership for 2018 models without AppleCare is even more of a gamble since there's no repair program support for them and there is 0 guarantee that these models will be added to that keyboard replacement program at all.
As for what the actual cause is, honestly I don't know. My suspicion is that the metal dome experiences metal fatigue and slowly begin to lose connection, or that that little U-shaped cutout in the centre of the dome weakens and starts to easily bounce when pressed, making contact 2+ times. I honestly cannot test this at home, my equipment is woefully inadequate to go that deep.
Macbook owners, please beware. Always have AppleCare, even if paying extra to cover a flaw that should be properly dealt with is morally questionable and a shitty thing to do. Right now is not a good time to be a Macbook owner or buyer, and please consider whether or not you wish to financially support a company that pulls stunts like these.
This law firm is setting up a class action if anybody wants to join: https://www.research.net/r/MacKeyboard
3 notes
·
View notes
Text
my macbook’s trackpad is done for....... time for a macbook pro!
#bro im devastated#was always gonna buy a new one soon anyway but i wanted to save up just a liiiiiil more
0 notes
Text
The Right to Repair is a Libertarian Argument
Recently there has been a lot of discussion and news surrounding the concept known as “right to repair.”
Fundamentally what it means is that I have purchased a product and I have the right to repair my device as well as have access to the parts and knowledge to be able to perform such actions. It’s actually not a new concept as we originally fought for “right to repair” in the beginning of the PC era.
Years ago when you bought a PC, you weren’t allowed to repair the computer, upgrade it, or anything else unless the manufacturer or an authorized third party performed it. So essentially what “right to repair” means is that when I purchase a product; whether it be an automobile, a cell phone, a PC, or anything else that if it breaks I should have the ability to get it repaired either through the manufacturer, third parties, or the ability to attain the tools, knowledge, and components to perform the repair myself.
In fact, if it were not for “right to repair”, my current job at Accunet, where I perform managed service plans for IT, to maintain business networks, wouldn’t exist; nor would many automotive garages, or even cell phone repair stores.
I am a huge “do it yourself” person. I repair my own PCs, I do a lot of my own maintenance on my cars, I even repair my own phones and tablet computers whenever possible. In fact, I used to work in a cell phone repair shop, Code Red Wireless, here in central Ohio, and I used to repair hundreds of Apple devices.
I am that guy when most things break that are electronic they call me up, stop by my house, or shoot me a message and a picture asking for advice or if I can repair it for them. I have done everything from color changing an iPhone, to replacing capacitors on a once dead laptop to bring it back to life. I’ve been taking apart and repairing electronics for many years, since I was little kid, as I have been using a soldering iron since I was as young as seven.
It’s easy to figure out a repair. There are YouTube videos, forum posts, schematics and more, widely available, whether I need to repair my devices or even my own car.
However, there is one major hurdle that usually occurs whenever I am repairing an Apple device; whether it is a Macbook, iMac, iPhone, iPod, or iPad. That hurdle is US customs and the United States Postal Service as well as many government agencies.
Allow me to explain what is happening to me and every single third party repair shop in the USA, Canada, and the European Union.
Apple is lobbying governments around the world to stop third party repair shops by saying they are using counterfeit parts.
It’s reached such a fever pitch that Apple is suing third party stores in the USA and abroad to shut down their entire business model by seizing all of their parts at the borders when they come in.
I have had Apple Macbook trackpads, iPhone screens, buttons, phone backs, and more parts seized by customs with no way to get my money back or the parts I paid for. I’m not alone in this. A store in Norway recently had something similar happen.
Apple has lobbied governments so hard in an effort to prevent third party repairs, that seeing as it’s illegal to import counterfeit screens, many repairers are taking to removing the broken digitizer, which some refer to as the ‘glass’, off and sending them to Chinese factories who take legitimate Apple displays off the digitizer and refurbish them with new glass. Apple has even determined this to be counterfeiting and took this particular shop to court. Fortunately, the court sided with the store owner and he will get his stock back.
Apple has even been so evil in their intent to ban third party repair that they’ve actually released updates that will stop perfectly good devices that have a third party display on them.
Libertarians and conservatives will say that a business has every right to do what it pleases, which I don’t disagree with; however, once you purchase the product and it’s officially under your care and ownership, you should be allowed to do whatever you please to do with said device.
Many libertarians may respond by saying that you should read the Apple terms and conditions, where it says repairs must be done by an Apple store or an authorized Apple repair center.
However what about when you face an issue such as the one Linus Sebastian (a famous YouTuber known for “LinusTechTips”)faced, where he can’t even get Apple to repair an iMac Pro he accidentally broke and had every intention to pay for repairs for. Apple simply refused to do the repairs on a system that’s not even a year old.
Linus released an eight minute video detailing the ordeal and correspondence to give an idea of how stupid this situation is. But when you compound this with the knowledge I have, that Apple has had a horrible system design for their hardware for many years leading to many defects over the years, it begs the question, why does Apple not want me to repair my own devices?
Louis Rossman, is perhaps the single most famous third party repair shop, he has hundreds of videos discussing Apple component level repairs, and the issues with Apple devices, he is also one of the biggest advocates of course for the “right to repair.”
He released a video detailing years of Apple’s flawed designs and their response to fixing these issues.
All the issues he documents are as follows:
A1226/A1260 2007-2008 Macbook GPU failures, warranty service refusal
A1226/A1260 2007-2008 Macbook Pro hinge/frame problem
A1286 Macbook Pro – the “Unibody” myth, glued together pieces fall apart
A1286/A1297 MCP power circuit failure due to poor buck converter design: C7771 issue
iPhone 4 cellular placement fail
iPhone 5 power button problem
A1286 2010 Macbook Pro GPU kernel panics due to same buck converter defect from 2008/2009
A1286 2011 Macbook Pro GPU failure, Apple gets sued over not addressing problem.
Apple gives out badly refurbished boards as warranty replacements for 2011 GPU failures.
2012 Retina Macbook Pro: another motherboard issue (U8900), due to poor soldering/manufacturing method on the GPU buck converter.
Mac Pro GPU failure (again).
iPhone 6/6+ touchscreen issue due to structural issue.
SSD soldered straight into the motherboard+ chip that would kill the macbook, because a power line would short out to ground when the chip dies.
2016 Macbook keyboard reliability issue.
2016 Macbook Battery failure issue.
A1278 Macbook Pro SATA cable failures.
Again, Louis Rossman goes through and breaks down the entire story with one of these issues.
I have had official Apple store repairs go wrong very often, I even had an entire motherboard die within minutes of getting my Macbook (back in 2014), when all I had them do was replace the battery as it was cheaper for them to replace it than for me to buy a new battery.
I’ve had friends give me Apple laptops they had repaired by Apple, and I saw melted plastic on connectors as if they didn’t use any shields. They even sold my friend a refurbished Macbook that had water damage from the very day he opened it and Apple refused to give him a non-water damaged replacement despite it coming that way out of the box.
Louis has documented ten years of wide spread horrible design or functionality flaws that have occurred regularly over a whole decade.
So in conclusion, libertarians and conservatives should work together to enact right to repair legislation just like we have for computers and automobiles, for cell phones and every device we can purchase. The fact is once I have purchased an item and it is in my possession, I should have an inalienable right to do whatever I please with my own property without interference from any government mandate or law passed through some corporate protectionist lobbyist.
The post The Right to Repair is a Libertarian Argument appeared first on Being Libertarian.
from WordPress https://ift.tt/2sPk7VX
via IFTTT
5 notes
·
View notes
Text
Mini Dv Import Software

mean1ng.netlify.app › Best Mini Dv Video Import Software For Mac ▆ ▆
Select the transfer method based on your camera and computer: Connect your Digital8™ or MiniDV camera to the computer using the Audio Video (A/V) cable. Follow the steps in the article How to Transfer the Video to a Computer using the A/V cables. The computer must have A/V input ports or a video capture device. NEW VERSION 1.2.3. NO LONGER DEVELOPED. WinDV is a small and easy to use Windows application for capturing videos from DV device (camcorder) into AVI-files and for recording AVI-files into DV device via FireWire (IEEE 1394) interface. In order to watch or transfer your tapes to your computer, Mini DV tapes require a player or a camcorder that is compatible to record or play MiniDV cassette tapes. This means that you will not be able to play MiniDV tapes on on your home VCR or computer without first digitizing them, or transferring the video off of the tape.
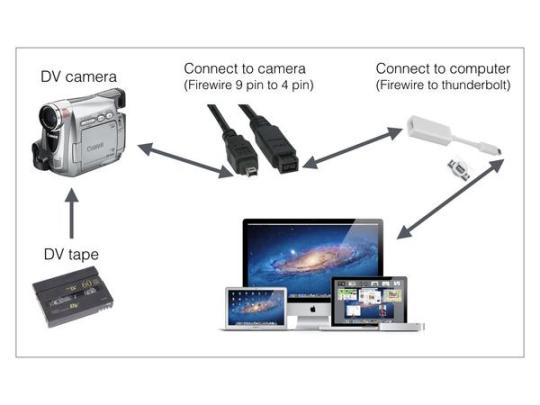
They’re not as popular anymore, but you still may own a camcorder that employs MiniDV tapes, DV, or HDV. These connect to a Mac through FireWire, but remember that fewer and fewer Mac models have FireWire connectors, so you may need an adapter.
Mini Dv Import Software Reviews
Apple sells a Thunderbolt–to–FireWire adapter. And if you happen to have an Apple Thunderbolt display, it has a FireWire port. For the moment, though, let’s assume that you have a Mac with FireWire and a FireWire–capable camcorder. Proceed with the following steps:
Nov 20, 2016 How to transfer Mini DV content and movies from a Panasonic PV-GS85 Mini DV camcorder to a MacBook PRO year 2010 using a firewire thunderbolt with a fire wire 800 to 400 adapter. Mar 06, 2015 Autoplay When autoplay is enabled, a suggested video will automatically play next. Up next Import Mini DV, HDV or DVCAM Tapes to an Apple Computer - Duration: 3:38.
LifeFlix is designed to have no learning curve and just import your MiniDV or HDV tapes to your computer. We believe you shouldn't have to learn about formats, compression, aspect ratios. Jul 08, 2018 I have a number of home movies that I filmed on a Sony Mini DV camera (DCR-TRV20). I would like to import them all to my HP Spectre running on Windows 10. However, Windows 10 does not recognize this device when connected by USB cable and I cannot locate any drivers online that may resolve this issue. Would appreciate your help. Thanks, Marc. May 07, 2015 The.best. method is to connect the camcorder's DV port to the computer's firewire port and import. The resulting imported video file should be in the decompressed DV. LifeFlix 2.5 review: Your old Mini-DV camcorder’s new best friend LifeFlix makes it easy to import Mini-DV tapes from your camcorder to QuickTime movies for digital archiving, or quickly create.
Connect one end of the FireWire cable to your camcorder and the other to an available FireWire port on the Mac.
Switch the camcorder to VTR (shorthand for video tape recorder)mode.
Camcorders vary; some devices call this Play or VCR mode.
Click the Import button on the toolbar or choose File→Import Media.
Choose your camcorder by clicking its name in the Camera section of the iMovie Sidebar.
The import viewer shows the image from the current position of the tape in the camera.
Use the mouse or trackpad to position the pointer in the upper portion of the import window.
If you want to advance from one clip to the next, or go back to look a clip that comes before the one you’re viewing, click the Next button or the Previous button, respectively.
If you happen to be more than 5 seconds deep into a clip, clicking the Previous button takes you to the start of the clip that you’re currently in. To fast-forward or rewind rather than jump from one clip to another, position the pointer over the Next button or Previous button, and hold down the mouse or trackpad button.
Do one of the following and then click OK:
If you want to choose an existing event to import clips into, choose the event from the Import To pop-up menu at the top of the import event.
If you’d rather place the footage in a newly created event, choose New Event from the Import To menu and name the event.
When you’re at the point in the tape where you want your movie to begin importing, click Import.
iMovie imports from where you are to the end of the tape unless you click Stop Import or Close instead.
When you’re done importing, click Close to close the Import window.
Apr 21,2020 • Filed to: Video to Device • Proven solutions
A video file that is created through a digital video camera is known as a DV file. With limited compatibility and playback support converting these files to popular formats like MP4, MOV, and others become important. Using the good program, you can convert DV to MP4, MOV, and other formats in a hassle-free manner.
Part 1. Best Way to Convert DV to MP4 or Other Format
With Aimersoft Video Converter Ultimate all your video conversion tasks can be taken care in a hassle-free manner. The software supports over 500 formats for conversion in lossless quality. You can use it to convert DV to MP4, MOV, AVI, MKV, and many other formats without compromising on the quality. With advanced hardware acceleration, files are converted at a super fast (90X) faster speed. The videos to be converted can be added directly by connecting your camera to the PC. Video download, recording, editing, transfer, DVD burning are additional features.
Happily, there’s no need to learn – the simple drag-and-drop interface makes it possible to start editing videos on your MacBook or any other Apple computer right away. Free hd video editing software mac.
Aimersoft Video Converter Ultimate
Allows converting DV to MP4, MOV, AVI, MKV, and other formats easily.
DV to MP4 and other format conversion supported at super fast speed and with lossless quality.
The built-in editor allows trimming, cropping, cutting, and performing other functions before DV to MP4/MOV and other formats conversion.
Files to be converted can be added from a PC or directly from a DV device.
Download video from YouTube, Vimeo, Vevo, and other 1000 sites supported
Allows burning videos in an array of formats to a DVD disc.
Windows and Mac version of the software are available.
Guide to Convert DV to MP4/MOV and Other Formats using Aimersoft DV to MP4 Converter
01 Run Aimersoft Video Converter Ultimate and load DV videos
Install, download, and open the converter software on your PC. Connect the digital video camera having the files to be converted. At the Convert tab of the software interface, open the drop-down menu at +Add Files and select the device option. The interface will show the videos present on the connected camera. Choose the ones to be converted.
02 Choose the target format
Mini Dv Import Software Online
Best Mini Dv Video Import Software For Mac Download
At the top-right corner, click on the drop-down icon at Convert all files to: option and the list of supported Video, Audio, and Device format appears. Choose MP4, MOV, AVI, or any other desired format and the resolution from the Video list.
03 Convert DV to MP4 format
Click on the Convert All button to start converting DV to MP4 or other selected format. At the Output tab, the computer location where processed files will be saved has to be selected.
An online tool can also be used for converting DV to other video formats in a simple manner. One such program is FreeFileConvert that is free to use and need no installation or registration. Using the tool, your DV files on computer, URL or cloud storage can be added to the interface for the process. Maximum 5 files having a combined size of 300MB is supported for conversion at a time at FreeFileConvert. All popular video, audio, archive, and other file types are supported by the tool. The files once converted can be downloaded to your PC. See the steps below:
Mini Dv Import Software Windows 7
Step 1: On your PC browser, open https://www.freefileconvert.com/dv-mp4. Click on the Choose File button to browse and load DV videos.
Step 2: At the Output format section, choose the desired target format from the supported list.
Step 3: Click on the Convert button to start uploading and converting added DV videos to the desired output format.
Upon process completion, the files can be downloaded to your PC. There is also an option to get the converted file on your email id.
An online converter is a simple and free tool but have a number of disadvantages associated. Some of the major ones are as follows:
Pros:
Import Dv Video From Camcorder
Limitation to the file size and number of files that can be processed at a time
The converted file needs to be downloaded
The site comes with ad
The software is dependent on internet connectivity and speed
No additional features or options for file editing
Although MiniDV gains popularity in personal and semi-professional video recording, there are still some users want to convert MiniDV to DVD due to the following respects:
It uses tape recording as a carrier, which greatly limits the way to store media files.
MiniDV must be played on VCR or camcorder (Mini DV player), but DVD can be accessed on TV, DVD player or other potable devices.
Copy Mini DV/ DV to DVD can protect the footage from degradation.
As a result, you may ask how to convert Mini DV to DVD without losing quality. The whole process is a bit complicated for ordinary users. You should convert Mini DV to digital via computer and a piece of video editing software, and then burn it to DVD. Please read our steps-by-steps guide, you will find things become easy.
>> What Should Prepare Before Converting Mini DV to DVD
>>How to Convert MiniDV to DVD on Mac and Windows?
>>How to Copy Mini DV/ DV Tapes to DVD?
>> Best Format for Backing up Mini DV Tapes
What Should Prepare Before Converting Mini DV to DVD
An AV connecting cable or a FireWire (IEEE1394) cable, the terminals required on the computer respectively are USB terminal and FireWire terminal. You can import video recorded on a Memory Stick via USB cable without a dedicated driver.
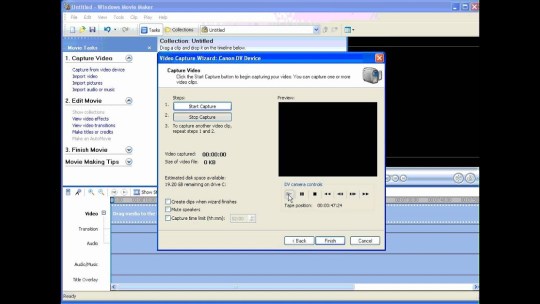
Install a program for capturing MiniDV videos, like iMovie, Tape transfer services, LifeFlix, Final Cut Pro X, VideoStudio, Adobe Premier Pro, Windows Movie Maker (not available on Windows 7, you can free download it from Windows Live Essentials.), Premiere, etc.
Save the file as MPEG-2 or AVI format. When editing is finished, you will probably render the audio/video stream to convert it to the best format.
A Blank and writable DVD disc.
Authorize and convert MiniDV to DVD using DVD burning software, like Cisdem DVD Burner and ImgBurn. If you have a DVD recorder, then you are able to record files from camera via FireWire direct to DVD.
How to Convert MiniDV to DVD on Mac and Windows?
There are two parts for converting MiniDV to DVD on Mac and Windows.
Firstly, you should convert Mini DV to digital format (e.g. AVI or MPEG-2) on computer. Transferring cable and video capture program is necessary. For detailed steps, you can refer to the page: https://www.sony-mea.com/en/electronics/support/articles/00028223. It provides links in a variety of ways
Secondly, you can burn DV camcorder video to DVD with the authoring software. Now, let's focus on how to burn Mini DV to DVD on computer devices.
1. Convert MiniDV to DVD Mac
Cisdem DVD Burner for Mac is one such program designed specifically to assist you to do the digital video (DV, DIV) burning with ease. In addition to converting Mini DV to DVD on Mac, it allows you to burn most popular video formats to DVD in super quality. That the embedded editing features, different styles of menu templates and precise parameter settings will prompt you to complete a satisfactory, perfect DVD from MiniDV.
Best MiniDV to DV Converter for Mac
Burn standard/ HD video, background music, subtitle to any type of DVD
Foolproof drag workflow to create DVD from a variety of file formats
Edit MiniDV video by cropping, rotating and adding subtitles & effects
Offer stylish menu templates, like Holiday, Business, Cartoon, Classic, etc.
Customize menu with rich parameters, such as title, background image, etc.
Adjust MiniDV video aspect ratio to fit the player screen
Free Download
Step 1Add Captured MiniDV/ DV Videos to the Software
Launch Cisdem DV/ MiniDV to DVD converter on Mac after installation.
You can simply drag and drop the AVI or MPEG-2 videos to the gray box on the right, and the loaded video thumbnails will be displayed automatically.
Alternatively, you can click the 'Folder' or 'Media Manager' icon to add target videos.
If needed, use the built-in editor to personalize your MiniDV videos to make them appealing. All you should do is to double click the thumbnail and go to the video editor window. You can change the video size, adjust effects, enable rotation, etc. in the way you favor.
Click the 'Menu' tab to see the list of current DVD menu templates and elements. Choose and apply one for better out looking. For further customization, you can change text, add background music, picture and more.
Preview your videos > insert a blank DVD > ensure the output parameters are well set > click 'burn' icon to convert Mini DV to DVD on Mac. Once complete, you can watch videos on many other devices without MiniDV players.
2. Convert MiniDV to DVD Windows
ImgBurn is a free and flexible CD/DVD/HD-DVD/Blu-ray burning program for Windows. It's capable of writing images to DVD, creating ISO images, burning batch of video files including MiniDV to DVD, and creating DVD/ Blu-ray discs from VIDEO_TS/BDAV/BDMV folders.
Meanwhile, this MiniDV to DVD converter can verify and discover disc for checking its situation and burning quality. In short, 5 main features: Read, Build, Write, Verify, and Discovery. But the defect is that ImgBurn Mini DV to DVD converter comes without customization function.
Step 1. Install ImgBurn on your PC, and open it.
Step 2. Click 'Write files/ folders to disc' option on the main interface.
Step 3. Convert transferred MiniDV files which are in AVI or MPEG-2 format to ImgBurn DVD format, as the software can only burn ready DVD format.
Step 4. Click the 'Browser for a folder' to open converted MiniDV video files
Step 5. Set the max 'Write Speed' low under 'Device' > make sure 'File System' is set to 'ISO9660 + UDF'.
Step 6. Insert a blank DVD into the drive of your PC.
Step 7. Click the 'Burn' icon to convert Mini DV to DVD on Windows.
If you haven't an encoder tool installed, converting AVI or MPEG-2 to DVD format will be troublesome. At the moment, I will recommend DVDFlick (free), 1Click DV to DVD, AVStoDVD to burn MiniDV to DVD.
How to Copy Mini DV/ DV Tapes to DVD?
Copying DV to DVD with DVD recorder is also a viable approach. A DVD recorder can copy any personal video made from camcorder, but it's unable to copy commercial videos due to copy-protection and the price of each DVD recorder is expensive. So if you don't need to copy DV to DVD very often, the first method is more economical.
Step 1. Plug the camcorder into DVD recorder via FireWire (best choice), HDMI (best choice), S-Video (better), or RCA Audio-Video (good).
Step 2. Choose the Input on the DVD recorder that the camcorder is connected.
Step 3. Place the MiniDV tape that you want to copy in the Camcorder, and also insert a recordable DVD into your recorder.
Step 4. Press play on the camcorder, and press record on the DVD recorder. It will start to copy MiniDV tape to DVD.
Step 5. When the copy process is finished, press stop on both devices.
Best Format for Backing up Mini DV Tapes
MiniDV produces a maximum file frame size of 720x480, and DVD is also 720x480. Obviously, therefore, the best resolution for transferring Mini DV to DVD is 720x480. As for the best format, MPEG- 4 or DV-AVI can maintain the high quality, and MPEG-2 is a digital video standard on which DVD is based. Look at the compare table below:
FormatProsConsRecommendAVI
Superb video quality
Can record back to DV tape
Large file size
MPEG-1
Original standard video format to make DVD
Lower video quality
Some DVD players don't support VCD playback
/MPEG-2
Good Quality
Can burn onto DVD disc
Large file size
MPEG-4
Superb video quality
Can burn onto DVD disc
Larger file size
Can have a tryDivX
Good Quality
Small size
Not a standard video format
Can't produce video to DVD
/XviD
Good Quality
Small size
Slightly harder to configure than DivX
/
Conclusion
There you have it, two ways to convert MiniDV to DVD on Mac and Windows. You might wonder which one suits you the best. Admittedly, using DVD recorder to copy DV to DVD can save your time, since it's easy to operate. But considering the money, it also cost much. As for the first way, the steps are a bit too much, thus you need spend more time preparing and finishing for it. Every coin has two sides, so does converting Mini DV to DVD. Just weight the pro and cons, and choose the best executable solution for yourself.
0 notes
Text
Download Itunes For Imac

With a streamlined design and intuitive editing features, iMovie lets you create Hollywood-style trailers and beautiful movies like never before. Browse your video library, share favorite moments, and create beautiful movies that you can edit at resolutions up to 4K. You can even start editing movie. I downloaded a playlist of backing tracks from Karaoke Version from iMac to iPad by going ‘settings’ on my iPad, then tapping on ‘music’ in the left hand menu, turn off ‘Sync Library’, connected ipad to iMac, opened iTunes, then dragged playlist from left hand iMac menu into iPad, showing ounder ‘Devices in left hand menu. The iMac Pro is a discontinued all-in-one personal computer and workstation designed, manufactured, and sold by Apple Inc. It was released on December 14, 2017. While it was sold, it was one of four desktop computers in the Macintosh lineup, sitting above the consumer range Mac Mini and iMac, and serving as an all-in-one alternative to the Mac Pro. Download Apple Windows 10 Boot Camp 6 Driver Bundle (Other Drivers & Tools). You can install the latest version of iTunes for Windows to listen to your music.
33,688 downloads·Added on: January 22, 2017·Manufacturer: Other
Use Windows 10 on your Mac with Boot Camp
You can use Boot Camp to install Windows 10 on supported Mac models that have OS X Yosemite or later installed.
Features supported in Windows 10
Macos install dmg package. The current version of Windows support software (drivers) available from Boot Camp Assistant includes support for the following features of your Mac in Windows 10:
- USB 3
- USB-C
- Thunderbolt
- Built-in SD or SDXC card slot
- Built-in or USB Apple SuperDrive

Your Apple keyboard, trackpad, and mouse
You can install Windows 10 on an internal drive in your Mac. Boot Camp Assistant helps you create a partition on your drive that's compatible with Windows. When you install Windows on a Mac that includes a Fusion Drive, the Windows partition is created on the mechanical hard drive part of the Fusion Drive (not the SSD). Microsoft BitLocker is not compatible with Boot Camp volumes.
After you install Windows, you can install the latest version of iTunes for Windows to listen to your music or play videos. You'll need to authorize iTunes in Windows to play music or videos you've purchased from the iTunes Store.
If some features aren't working when you start your Mac from Windows 10, try reinstalling Boot Camp support software using Boot Camp Assistant.
Mac computers that support Windows 10
The following Mac models support 64-bit versions of Windows 10 when installed using Boot Camp:
MacBook Pro
- MacBook Pro (15-inch, Late 2016)
- MacBook Pro (13-inch, Late 2016, Four Thunderbolt 3 Ports)
- MacBook Pro (13-inch, Late 2016, Two Thunderbolt 3 Ports)
- MacBook Pro (Retina, 15-inch, Mid 2015)
- MacBook Pro (Retina, 13-inch, Early 2015)
- MacBook Pro (Retina, 15-inch, Mid 2014)
- MacBook Pro (Retina, 13-inch, Mid 2014)
- MacBook Pro (Retina, 15-inch, Late 2013)
- MacBook Pro (Retina, 13-inch, Late 2013)
- MacBook Pro (Retina, 15-inch, Early 2013)
- MacBook Pro (Retina, 13-inch, Early 2013)
- MacBook Pro (Retina, 13-inch, Late 2012)
- MacBook Pro (Retina, Mid 2012)
- MacBook Pro (13-inch, Mid 2012)
- MacBook Pro (15-inch, Mid 2012)
MacBook Air
- MacBook Air (13-inch, Early 2015)
- MacBook Air (11-inch, Early 2015)
- MacBook Air (13-inch, Early 2014)
- MacBook Air (11-inch, Early 2014)
- MacBook Air (13-inch, Mid 2013)
- MacBook Air (11-inch, Mid 2013)
- MacBook Air (13-inch, Mid 2012)
- MacBook Air (11-inch, Mid 2012)
Parallels Desktop 16.0.1.48919 Crack increase existing Mac features, but in addition, it may build on Windows methods as well. It combines Persons Bar, a Windows 10. Parallels desktop 13 crack mac is the best software to run virtual machine on your Mac machine. It's a Vmware workstation pro 2017 alternative. Parallels desktop cracked. Parallels desktop 10 crack keygen DOWNLOAD NOW:Parallels Desktop 10 for Mac With Parallels Desktop for Mac, you can.
MacBook
- MacBook
- MacBook (Retina, 12-inch, Early 2016)
- MacBook (Retina, 12-inch, Early 2015)
- iMac
- iMac (Retina 5K, 27-inch, Late 2015)
- iMac (Retina 4K, 21.5-inch, Late 2015)
- iMac (21.5-inch, Late 2015)
- iMac (Retina 5k, 27-inch, Mid 2015)
- iMac (Retina 5K, 27-inch, Late 2014)
- iMac (21.5-inch, Mid 2014)
- iMac (27-inch, Late 2013)
- iMac (21.5-inch, Late 2013)
- iMac (27-inch, Late 2012)
- iMac (21.5-inch, Late 2012)
- Mac mini
- Mac mini (Late 2014)
- Mac mini Server (Late 2012)
- Mac mini (Late 2012)
- Mac Pro
- Mac Pro (Late 2013)
iMac
- MacBook
- MacBook (Retina, 12-inch, Early 2016)
- MacBook (Retina, 12-inch, Early 2015)
- iMac
- iMac (Retina 5K, 27-inch, Late 2015)
- iMac (Retina 4K, 21.5-inch, Late 2015)
- iMac (21.5-inch, Late 2015)
- iMac (Retina 5k, 27-inch, Mid 2015)
- iMac (Retina 5K, 27-inch, Late 2014)
- iMac (21.5-inch, Mid 2014)
- iMac (27-inch, Late 2013)
- iMac (21.5-inch, Late 2013)
- iMac (27-inch, Late 2012)
- iMac (21.5-inch, Late 2012)
- Mac mini
- Mac mini (Late 2014)
- Mac mini Server (Late 2012)
- Mac mini (Late 2012)
- Mac Pro
- Mac Pro (Late 2013)
Mac mini
- Mac mini (Late 2014)
- Mac mini Server (Late 2012)
- Mac mini (Late 2012)
Mac Pro
- Mac Pro (Late 2013)


System Requirements
You need support software (drivers) installed with Boot Camp to use Windows 10. This software is automatically downloaded when you use Boot Camp Assistant. Boot Camp supports 64-bit versions of Windows 10 when used with a supported Mac.
About General Drivers & Tools:
If you install this package, your device will be properly recognized by compatible systems, and might even benefit from new features or various bug fixes.
Please note that, even though other operating systems might also be compatible, we do not recommend you apply any software on platforms other than the specified ones. Doing so might cause the installation to crash, which could even render the device unusable.
When it comes to installing the package, the steps should not be much of a hassle because each manufacturer tries to make them as easy as possible; usually, you must make check for compatibility, get the package, run the available setup, and follow the instructions displayed on-screen.
However, due to the large number of devices out there and the various ways for applying these packages, it would be best if you refer to the installation manual first, to be sure of a successful update.
That being said, click the download button, and apply the present software on your product. Also constantly check with our website to stay up to speed with latest releases.
It is highly recommended to always use the most recent driver version available.
Try to set a system restore point before installing a device driver. This will help if you installed an incorrect or mismatched driver. Problems can arise when your hardware device is too old or not supported any longer.
COMPATIBLE WITH:
Windows 10 64 bit
file size:
1.2 GB
filename:
AppleBcUpdate.exe
CATEGORY:
Other Drivers & Tools
Download Itunes For Mac
Apple iTunes has been redesigned, and figuring out the new interface can be a bit daunting. Copying playlists to an iPhone, iPad, or iPod is a bit different depending on the version you are using. Here’s how it’s done.
Before you are able to drop your playlist onto your iOS device, you have to enable the “Manually manage music and videos” option using these steps:
Connect your iOS device to your computer. On the iTunes starting screen you will find your device as a tiny icon on the small bar underneath the play button. Select that icon.
Select “Summary“.
Scroll down until you see the “Options” menu.
Check the “Manually manage music and videos” option.
Select “Done” and “Apply” changes.
Download Itunes For Mac Free
iTunes 12 – Option 1
Connect your device to the computer.
Select the icon for your device, located at the upper-left portion of the screen.
Select the “Music” option on the left pane.
Ensure the “Sync Music” check-box is selected.
In the “Playlists” section, check the playlists you wish to sync with your iOS device.
Select “Sync” and your playlist should sync.
iTunes 12 – Option 2
Connect your device to the computer.
“Music Playlists” should be listed in the left pane. Select the playlist(s) you wish to sync, then drag them up to your device listed in the “Devices” section on the left pane. They will then sync to your device.
Download Itunes For Mac
iTunes 11
Connect your device to the computer. A button should appear for your device in the upper-right portion of the screen. Click it.
Select Add To… This will make a contents menu available on the right side.
Select “Playlists” at the top of the screen.
Drag any playlist from the left side to the right side.
Click “Done“, then select the “Sync” button in the lower right corner of the screen to sync your changes.
Download Itunes For Mac Big Sur
You have successfully transferred a playlist to your Apple device.
0 notes
Last Seen Blogs

paulsomalk
Paulso

haikyuuwithme
Haikyuu

burlesque-articulation
Insert Blog Title Here

charmipot
My Untold feelings

aliensquiddles
Tripping on Life Itself