#dotenv in node js
Explore tagged Tumblr posts
Visit Tumblr Blog
Explore Tumblr blogs with no restrictions, modern design and the best experience.
Last Seen Tumblr Blogs


Fun Fact
The most popular pages on Tumblr are about Minecraft, GIFs, and David J. Peterson.
Text
Access Environment Variable in Nodejs JavaScript Application | Reading ENV Variable Example
Full Video Link https://youtu.be/dxrNopL1sbQ Hello friends, new #video on #reading #accessing #environmentvariables in #nodejs #projeect #application #tutorial #examples is published on #codeonedigest #youtube channel. @java #java #aws #a
In this video, we will read the environment variable in nodejs javascript project. We will learn what “dotenv” module in nodejs javascript. How to use “dotenv” package in our nodejs javascript project. ** Important Nodejs Javascript Packages or Modules ** Dotenv – DotEnv is a lightweight npm package that automatically loads environment variables from a .env file into the process.env object. To…

View On WordPress
#dotenv#dotenv example#dotenv in node js#dotenv module#dotenv module in node js#dotenv module not found#dotenv nodejs#dotenv package#dotenv package install#dotenv package nodejs#dotenv package.json#dotenv tutorial#dotenv tutorial nodejs#environment variable#environment variables#javascript environment variable#linux environment variables#node js javascript#node js javascript tutorial#nodejs#python environment variables#set environment variables
0 notes
Text
Let’s Create Our Own Authentication API with Nodejs and GraphQL
Authentication is one of the most challenging tasks for developers just starting with GraphQL. There are a lot of technical considerations, including what ORM would be easy to set up, how to generate secure tokens and hash passwords, and even what HTTP library to use and how to use it.
In this article, we’ll focus on local authentication. It’s perhaps the most popular way of handling authentication in modern websites and does so by requesting the user’s email and password (as opposed to, say, using Google auth.)
Moreover, This article uses Apollo Server 2, JSON Web Tokens (JWT), and Sequelize ORM to build an authentication API with Node.
Handling authentication
As in, a log in system:
Authentication identifies or verifies a user.
Authorization is validating the routes (or parts of the app) the authenticated user can have access to.
The flow for implementing this is:
The user registers using password and email
The user’s credentials are stored in a database
The user is redirected to the login when registration is completed
The user is granted access to specific resources when authenticated
The user’s state is stored in any one of the browser storage mediums (e.g. localStorage, cookies, session) or JWT.
Pre-requisites
Before we dive into the implementation, here are a few things you’ll need to follow along.
Node 6 or higher
Yarn (recommended) or NPM
GraphQL Playground
Basic Knowledge of GraphQL and Node
…an inquisitive mind!
Dependencies
This is a big list, so let’s get into it:
Apollo Server: An open-source GraphQL server that is compatible with any kind of GraphQL client. We won’t be using Express for our server in this project. Instead, we will use the power of Apollo Server to expose our GraphQL API.
bcryptjs: We want to hash the user passwords in our database. That’s why we will use bcrypt. It relies on Web Crypto API‘s getRandomValues interface to obtain secure random numbers.
dotenv: We will use dotenv to load environment variables from our .env file.
jsonwebtoken: Once the user is logged in, each subsequent request will include the JWT, allowing the user to access routes, services, and resources that are permitted with that token. jsonwebtokenwill be used to generate a JWT which will be used to authenticate users.
nodemon: A tool that helps develop Node-based applications by automatically restarting the node application when changes in the directory are detected. We don’t want to be closing and starting the server every time there’s a change in our code. Nodemon inspects changes every time in our app and automatically restarts the server.
mysql2: An SQL client for Node. We need it connect to our SQL server so we can run migrations.
sequelize: Sequelize is a promise-based Node ORM for Postgres, MySQL, MariaDB, SQLite and Microsoft SQL Server. We will use Sequelize to automatically generate our migrations and models.
sequelize cli: We will use Sequelize CLI to run Sequelize commands. Install it globally with yarn add --global sequelize-cli in the terminal.
Setup directory structure and dev environment
Let’s create a brand new project. Create a new folder and this inside of it:
yarn init -y
The -y flag indicates we are selecting yes to all the yarn init questions and using the defaults.
We should also put a package.json file in the folder, so let’s install the project dependencies:
yarn add apollo-server bcrpytjs dotenv jsonwebtoken nodemon sequelize sqlite3
Next, let’s add Babeto our development environment:
yarn add babel-cli babel-preset-env babel-preset-stage-0 --dev
Now, let’s configure Babel. Run touch .babelrc in the terminal. That creates and opens a Babel config file and, in it, we’ll add this:
{ "presets": ["env", "stage-0"] }
It would also be nice if our server starts up and migrates data as well. We can automate that by updating package.json with this:
"scripts": { "migrate": " sequelize db:migrate", "dev": "nodemon src/server --exec babel-node -e js", "start": "node src/server", "test": "echo \"Error: no test specified\" && exit 1" },
Here’s our package.json file in its entirety at this point:
{ "name": "graphql-auth", "version": "1.0.0", "main": "index.js", "scripts": { "migrate": " sequelize db:migrate", "dev": "nodemon src/server --exec babel-node -e js", "start": "node src/server", "test": "echo \"Error: no test specified\" && exit 1" }, "dependencies": { "apollo-server": "^2.17.0", "bcryptjs": "^2.4.3", "dotenv": "^8.2.0", "jsonwebtoken": "^8.5.1", "nodemon": "^2.0.4", "sequelize": "^6.3.5", "sqlite3": "^5.0.0" }, "devDependencies": { "babel-cli": "^6.26.0", "babel-preset-env": "^1.7.0", "babel-preset-stage-0": "^6.24.1" } }
Now that our development environment is set up, let’s turn to the database where we’ll be storing things.
Database setup
We will be using MySQL as our database and Sequelize ORM for our relationships. Run sequelize init (assuming you installed it globally earlier). The command should create three folders: /config /models and /migrations. At this point, our project directory structure is shaping up.
Let’s configure our database. First, create a .env file in the project root directory and paste this:
NODE_ENV=development DB_HOST=localhost DB_USERNAME= DB_PASSWORD= DB_NAME=
Then go to the /config folder we just created and rename the config.json file in there to config.js. Then, drop this code in there:
require('dotenv').config() const dbDetails = { username: process.env.DB_USERNAME, password: process.env.DB_PASSWORD, database: process.env.DB_NAME, host: process.env.DB_HOST, dialect: 'mysql' } module.exports = { development: dbDetails, production: dbDetails }
Here we are reading the database details we set in our .env file. process.env is a global variable injected by Node and it’s used to represent the current state of the system environment.
Let’s update our database details with the appropriate data. Open the SQL database and create a table called graphql_auth. I use Laragon as my local server and phpmyadmin to manage database tables.
What ever you use, we’ll want to update the .env file with the latest information:
NODE_ENV=development DB_HOST=localhost DB_USERNAME=graphql_auth DB_PASSWORD= DB_NAME=<your_db_username_here>
Let’s configure Sequelize. Create a .sequelizerc file in the project’s root and paste this:
const path = require('path')
module.exports = { config: path.resolve('config', 'config.js') }
Now let’s integrate our config into the models. Go to the index.js in the /models folder and edit the config variable.
const config = require(__dirname + '/../../config/config.js')[env]
Finally, let’s write our model. For this project, we need a User model. Let’s use Sequelize to auto-generate the model. Here’s what we need to run in the terminal to set that up:
sequelize model:generate --name User --attributes username:string,email:string,password:string
Let’s edit the model that creates for us. Go to user.js in the /models folder and paste this:
'use strict'; module.exports = (sequelize, DataTypes) => { const User = sequelize.define('User', { username: { type: DataTypes.STRING, }, email: { type: DataTypes.STRING, }, password: { type: DataTypes.STRING, } }, {}); return User; };
Here, we created attributes and fields for username, email and password. Let’s run a migration to keep track of changes in our schema:
yarn migrate
Let’s now write the schema and resolvers.
Integrate schema and resolvers with the GraphQL server
In this section, we’ll define our schema, write resolver functions and expose them on our server.
The schema
In the src folder, create a new folder called /schema and create a file called schema.js. Paste in the following code:
const { gql } = require('apollo-server') const typeDefs = gql` type User { id: Int! username: String email: String! } type AuthPayload { token: String! user: User! } type Query { user(id: Int!): User allUsers: [User!]! me: User } type Mutation { registerUser(username: String, email: String!, password: String!): AuthPayload! login (email: String!, password: String!): AuthPayload! } ` module.exports = typeDefs
Here we’ve imported graphql-tag from apollo-server. Apollo Server requires wrapping our schema with gql.
The resolvers
In the src folder, create a new folder called /resolvers and create a file in it called resolver.js. Paste in the following code:
const bcrypt = require('bcryptjs') const jsonwebtoken = require('jsonwebtoken') const models = require('../models') require('dotenv').config() const resolvers = { Query: { async me(_, args, { user }) { if(!user) throw new Error('You are not authenticated') return await models.User.findByPk(user.id) }, async user(root, { id }, { user }) { try { if(!user) throw new Error('You are not authenticated!') return models.User.findByPk(id) } catch (error) { throw new Error(error.message) } }, async allUsers(root, args, { user }) { try { if (!user) throw new Error('You are not authenticated!') return models.User.findAll() } catch (error) { throw new Error(error.message) } } }, Mutation: { async registerUser(root, { username, email, password }) { try { const user = await models.User.create({ username, email, password: await bcrypt.hash(password, 10) }) const token = jsonwebtoken.sign( { id: user.id, email: user.email}, process.env.JWT_SECRET, { expiresIn: '1y' } ) return { token, id: user.id, username: user.username, email: user.email, message: "Authentication succesfull" } } catch (error) { throw new Error(error.message) } }, async login(_, { email, password }) { try { const user = await models.User.findOne({ where: { email }}) if (!user) { throw new Error('No user with that email') } const isValid = await bcrypt.compare(password, user.password) if (!isValid) { throw new Error('Incorrect password') } // return jwt const token = jsonwebtoken.sign( { id: user.id, email: user.email}, process.env.JWT_SECRET, { expiresIn: '1d'} ) return { token, user } } catch (error) { throw new Error(error.message) } } },
} module.exports = resolvers
That’s a lot of code, so let’s see what’s happening in there.
First we imported our models, bcrypt and jsonwebtoken, and then initialized our environmental variables.
Next are the resolver functions. In the query resolver, we have three functions (me, user and allUsers):
me query fetches the details of the currently loggedIn user. It accepts a user object as the context argument. The context is used to provide access to our database which is used to load the data for a user by the ID provided as an argument in the query.
user query fetches the details of a user based on their ID. It accepts id as the context argument and a user object.
alluser query returns the details of all the users.
user would be an object if the user state is loggedIn and it would be null, if the user is not. We would create this user in our mutations.
In the mutation resolver, we have two functions (registerUser and loginUser):
registerUser accepts the username, email and password of the user and creates a new row with these fields in our database. It’s important to note that we used the bcryptjs package to hash the users password with bcrypt.hash(password, 10). jsonwebtoken.sign synchronously signs the given payload into a JSON Web Token string (in this case the user id and email). Finally, registerUser returns the JWT string and user profile if successful and returns an error message if something goes wrong.
login accepts email and password , and checks if these details match with the one that was supplied. First, we check if the email value already exists somewhere in the user database.
models.User.findOne({ where: { email }}) if (!user) { throw new Error('No user with that email') }
Then, we use bcrypt’s bcrypt.compare method to check if the password matches.
const isValid = await bcrypt.compare(password, user.password) if (!isValid) { throw new Error('Incorrect password') }
Then, just like we did previously in registerUser, we use jsonwebtoken.sign to generate a JWT string. The login mutation returns the token and user object.
Now let’s add the JWT_SECRET to our .env file.
JWT_SECRET=somereallylongsecret
The server
Finally, the server! Create a server.js in the project’s root folder and paste this:
const { ApolloServer } = require('apollo-server') const jwt = require('jsonwebtoken') const typeDefs = require('./schema/schema') const resolvers = require('./resolvers/resolvers') require('dotenv').config() const { JWT_SECRET, PORT } = process.env const getUser = token => { try { if (token) { return jwt.verify(token, JWT_SECRET) } return null } catch (error) { return null } } const server = new ApolloServer({ typeDefs, resolvers, context: ({ req }) => { const token = req.get('Authorization') || '' return { user: getUser(token.replace('Bearer', ''))} }, introspection: true, playground: true }) server.listen({ port: process.env.PORT || 4000 }).then(({ url }) => { console.log(`🚀 Server ready at ${url}`); });
Here, we import the schema, resolvers and jwt, and initialize our environment variables. First, we verify the JWT token with verify. jwt.verify accepts the token and the JWT secret as parameters.
Next, we create our server with an ApolloServer instance that accepts typeDefs and resolvers.
We have a server! Let’s start it up by running yarn dev in the terminal.
Testing the API
Let’s now test the GraphQL API with GraphQL Playground. We should be able to register, login and view all users — including a single user — by ID.
We’ll start by opening up the GraphQL Playground app or just open localhost://4000 in the browser to access it.
Mutation for register user
mutation { registerUser(username: "Wizzy", email: "[email protected]", password: "wizzyekpot" ){ token } }
We should get something like this:
{ "data": { "registerUser": { "token": "eyJhbGciOiJIUzI1NiIsInR5cCI6IkpXVCJ9.eyJpZCI6MTUsImVtYWlsIjoiZWtwb3RAZ21haWwuY29tIiwiaWF0IjoxNTk5MjQwMzAwLCJleHAiOjE2MzA3OTc5MDB9.gmeynGR9Zwng8cIJR75Qrob9bovnRQT242n6vfBt5PY" } } }
Mutation for login
Let’s now log in with the user details we just created:
mutation { login(email:"[email protected]" password:"wizzyekpot"){ token } }
We should get something like this:
{ "data": { "login": { "token": "eyJhbGciOiJIUzI1NiIsInR5cCI6IkpXVCJ9.eyJpZCI6MTUsImVtYWlsIjoiZWtwb3RAZ21haWwuY29tIiwiaWF0IjoxNTk5MjQwMzcwLCJleHAiOjE1OTkzMjY3NzB9.PDiBKyq58nWxlgTOQYzbtKJ-HkzxemVppLA5nBdm4nc" } } }
Awesome!
Query for a single user
For us to query a single user, we need to pass the user token as authorization header. Go to the HTTP Headers tab.
…and paste this:
{ "Authorization": "eyJhbGciOiJIUzI1NiIsInR5cCI6IkpXVCJ9.eyJpZCI6MTUsImVtYWlsIjoiZWtwb3RAZ21haWwuY29tIiwiaWF0IjoxNTk5MjQwMzcwLCJleHAiOjE1OTkzMjY3NzB9.PDiBKyq58nWxlgTOQYzbtKJ-HkzxemVppLA5nBdm4nc" }
Here’s the query:
query myself{ me { id email username } }
And we should get something like this:
{ "data": { "me": { "id": 15, "email": "[email protected]", "username": "Wizzy" } } }
Great! Let’s now get a user by ID:
query singleUser{ user(id:15){ id email username } }
And here’s the query to get all users:
{ allUsers{ id username email } }
Summary
Authentication is one of the toughest tasks when it comes to building websites that require it. GraphQL enabled us to build an entire Authentication API with just one endpoint. Sequelize ORM makes creating relationships with our SQL database so easy, we barely had to worry about our models. It’s also remarkable that we didn’t require a HTTP server library (like Express) and use Apollo GraphQL as middleware. Apollo Server 2, now enables us to create our own library-independent GraphQL servers!
Check out the source code for this tutorial on GitHub.
The post Let’s Create Our Own Authentication API with Nodejs and GraphQL appeared first on CSS-Tricks.
You can support CSS-Tricks by being an MVP Supporter.
Let’s Create Our Own Authentication API with Nodejs and GraphQL published first on https://deskbysnafu.tumblr.com/
0 notes
Photo

10 Must-have VS Code Extensions for JavaScript Developers
In this article, I’ll focus on a list of must-have VS Code extensions for JavaScript developers.
Visual Studio Code (VS Code) is undoubtedly the most popular, lightweight code editor today. It does borrow heavily from other popular code editors, mostly Sublime Text and Atom. However, its success mainly comes from its ability to provide better performance and stability. In addition, it also provides much-needed features like IntelliSense, which were only available in full-sized IDEs like Eclipse or Visual Studio 2017.
The power of VS Code no doubt comes from the marketplace. Thanks to the wonderful open-source community, the editor is now capable of supporting almost every programming language, framework and development technology. Support for a library or framework comes in various ways, which mainly includes snippets, syntax highlighting, Emmet and IntelliSense features for that specific technology.
VS Code Extensions by Category
For this article, I’ll focus on VS Code extensions specifically targeting JavaScript developers. Currently, there are many VS Code extensions that fit this criterion, which of course means I won’t be able to mention all of them. Instead, I’ll highlight VS Code extensions that have gained popularity and those that are indispensable for JavaScript developers. For simplicity, I’ll group them into ten specific categories.
Snippet Extensions
When you first install VS Code, it comes with a several built-in snippets for JavaScript and Typescript. Snippets help you write repetitive code quickly. However, you may find these may not be enough. You can easily create your own, or you can simply install an extension that includes a bunch of new useful snippets. A quick tip if you want snippets to show on top of suggestions is to use this configuration:
{ "editor.snippetSuggestions": "top" }
Here are some of the most popular snippet extensions for JavaScript developers. However, I would recommend you install just one for simplicity’s sake.
JavaScript (ES6) code snippets, by Charalampos Karypidis. This is currently the most popular javaScript snippet extension with over 3+ million installs to date. This extension provides ES6 syntax for JavaScript, TypeScript, HTML, React and Vue. All snippets include a final semicolon.
JavaScript (ES6) code snippets in StandardJS style, by James Vickery. This is basically a fork of the above extension for those who prefer StandardJS style convention—that is, the snippets don’t have semicolons.
JavaScript standardjs styled snippets, by capaj. Another StandardJS Styled snippets but this one is more popular with over 72k installs. Originally forked from Atom StandardJS snippets. Contains a huge collection of handy snippets and supports JavaScript, TypeScript and React.
JavaScript Snippets, by Nathan Chapman. A collection of JavaScript snippets with about 33k+ installs to date. This snippet extension supports Node.js, BDD Testing frameworks such as Mocha and Jasmine.
Atom JavaScript Snippet, by Saran Tanpituckpong. With about 26k+ installs to date, the snippets in this extension were ported from atom/language-javascript. JavaScript snippets ported from the atom/language-javascript extension.
Syntax Highlighting Extensions
The latest version of VS Code supports better syntax colorization and is now more in line with the standards set in Atom grammar. Hence, extensions such as JavaScript Atom Grammar are no longer needed.
However, we still have a few syntax highlighting extensions that are quite useful when it comes to certain types of projects and file extensions. Here’s a few:
Babel JavaScript, by Michael McDermott. With over 550k+ installs to date, this extension provides syntax highlighting for ES201x JavaScript, React, FlowType and GraphQL code.
DotENV, by 833,737. With over 833k installs to date, this extension supports syntax highlighting for environment settings — that is, .env files.
Bracket Pair Colorizer 2, by CoenraadS. With 730k+ installs, this extension highlights matching brackets with different colors, helping you identify which bracket belongs to which block.
Linter Extensions
Have you have ever gotten into a debate with your teammates over tabs vs spaces or semicolons vs no semicolons? You’ll realize that people have strong opinions about which coding style to use. Nevertheless, everyone on the same team needs to use the same coding style regardless of their opinion.
However, it’s quite common for programmers to forget which coding styling they agreed to work with. To enforce the rules, we need to use linters that compare your code with the rules you’ve established. You define your rules by picking a popular coding style such as Standard, Google, and Airbnb. You can use them as is or use a configuration file to customize the rules. VS Code doesn’t have a built-in JavaScript linter, so you’ll need to install an extension.
Here are the extensions we have available:
ESLint, by Dirk Baeumer. With over 8 million installs, this is the most popular extension providing support for the ESLint library. In order for the extension to work, your project will need ESLint packages and plugins installed. You’ll also need to specify an .eslintrc, which will specify the rules the extension will use to lint your code .
JSHint, by Dirk Baeumer. With 1.2M+ installs, this extension supports linting with the JSHint library. A .jshintrc configuration file is required for the extension to lint your code.
StandardJS – JavaScript Standard Style, by Sam Chen. This extension (259k+ installs) simply integrates JavaScript Standard Style into VS Code. You’ll need to install standard or semiStandard as a dev dependency in your project. No configuration file is required. You’ll need to disable VS Code’s built-in validator for this extension to work.
JSLint, by Andrew Hyndman. This extension provides linting with the JSLint library. You’ll need to install jslint locally or globally for the extension to work. It has 109k+ installs to date.
If you’d like an overview of available linters and their pros and cons, check out our comparison of JavaScript linting tools.
Node Package Management Extensions
Every JavaScript project needs to at least one npm package, unless you’re someone who likes doing things the hard way. Here are a few VS Code extensions that will help you work with managing and working with npm packages more easily.
npm, by egamma. With over 2.3M+ installs, this extension uses package.json to validate installed packages. If anything is missing or versions are mismatched, the extension will provide you with clickable options to fix the issue. In addition, you can also run npm scripts defined in package.json right inside the editor.
–npm IntelliSense, by Christian Kohler. With 1.9M+ installs, this extension provides autocompleting npm modules in import statements.

Path IntelliSense, by Christian Kohler. With 2.7M+ installs, this extension autocompletes filenames. It also works inside HTML and CSS files.
Node exec, by Miramac. With 168k+ installs, this extension allows you to execute the current file or your selected code with Node.js by pressing F8 on your keyboard. You can also cancel a running process by pressing F9.
View Node Package by Dominik Kundel. With 55k+ installs, this extension allows you to quickly view a Node package source and documentation while you’re working with your code.
Node Readme, by bengreenier. With 52k+ installs, this extension allows you to quickly open an npm package documentation right inside the VS Code editor as a separate tab.
Search node_modules, by Jason Nutter. By default, the node_modules folder is excluded from VS Code’s built-in search. With over 470k installs, this extension allows you to quickly navigate and open files in node_modules by traversing the folder tree.

Source: vscode-search-node-modules
Import Cost by Wix. This displays how much disk space a package is using when you import it. The extension has 562K+ installs.

Source: import-cost
Formatting Extensions
More often than not, we sometimes write code that’s out of alignment with the rest of the code. To fix this, we need to go back and fix the indentation in each line. In addition, we need to ensure braces and tags are properly formatted in a readable format. This process can quickly get tedious.
Luckily, we have extensions that can do the work for us. Please note extensions such as Prettier and Beautify can’t both be active simultaneously.
Prettier Code Formatter, by Esben Petersen. This is the most popular extension that supports formatting of JavaScript, TypeScript and CSS using Prettier. It has over 5.7 million installs to date. It’s recommended you install prettier locally as a dev dependency.
Beautify, by HookyQR. A jsBeautifier extension that supports JavaScript, JSON, CSS and HTML. It can be customized via a .jsbeautifyrc file. It’s now the second most popular formatter, with 4.4 million installs to date.
JS Refactor, by Chris Stead. This provides a number of utilities and actions for refactoring JavaScript code, such as extracting variables/methods, converting existing code to use arrow functions or template literals, and exporting functions. It has 140k+ installs to date.
JavaScript Booster, by Stephan Burguchev. This is an amazing code refactoring tool. It features several coding actions such as converting var to const or let, removing redundant else statements, and merging declaration and initialization. Largely inspired by WebStorm, it has 74k+ installs to date.

Source: vscode-javascript-booster
Continue reading 10 Must-have VS Code Extensions for JavaScript Developers on SitePoint.
by Michael Wanyoike via SitePoint https://ift.tt/2VvpsSb
0 notes
Link
Lightning Web Components is our open source UI framework to build enterprise-scale apps that run on Salesforce, Heroku, Google Cloud Platform, or anywhere else. When running these apps on these different platforms, you can choose your own backend stack and data source, or you may want surface data from Salesforce in them. In this blog post, we will explore some options and considerations when using Salesforce as the data source. Authentication Salesforce provides a comprehensive set of REST and SOAP APIs that can be used to access its data and services from a client or server. The first step before accessing the APIs, is to establish a session with Salesforce. You can either use a username and password, or any of the OAuth flows listed here. Depending on your use case, these flows can be executed by client-side or server-side JavaScript. You can either build this logic from scratch or use external libraries like JSforce. Here are some considerations when deciding on an Authentication Flow for your app. Client Side Authentication You can use the OAuth User-Agent Flow to execute the handshake process using client side JavaScript alone. It involves a simple redirection to the /oauth2/authorize endpoint and takes in the Consumer Key of a Connected App as a parameter. Once the authorization is successful, the access token is encoded in the redirection URL. When you run client-side JavaScript, all the code is executed on the user’s device, so sensitive data like passwords and client secrets are accessible and exploitable. For this reason, this flow doesn’t use the client secret. However, the access token is encoded into the redirection URL which is exposed to the user and other apps on the device. Hence, care must be taken to remove callbacks from browser history. You can call window.location.replace(); to remove the callback from the browser’s history. It is best to use this type of Auth flow when building Lightning Web Components for desktop or mobile apps that have an embedded browser. Once you have the access token, you can pass it in the header of any HTTP requests to access Salesforce APIs. Building and sending a request from client-side JavaScript poses a risk, because the access token becomes available to the client and can be exploited. Therefore, sensitive business logic involving access tokens, usernames and passwords must never be written in client side JavaScript, because they are inadvertently exposed. To increase security and provide a better level of abstraction between your custom application and the APIs, you should use a middleware like Express, MuleSoft or any other ESB of your choice. Server Side Authentication You can use the Web server flow or the JWT Bearer flow to execute the handshake process using server side JavaScript like Node JS or any other stack of your choice. In case of Lightning Web Components, the create-lwc-app tool provides an option to create and use an Express server as a backend. You can choose an OAuth flow that suits your requirements. For instance, you can use the JWT Bearer flow when you want to use a single integration user to access data on behalf of all users. Use cases include showing read-only data (e.g. product catalog) to unauthenticated users. The web-server flow on the other hand can be used for per-user authorization. Use cases include websites where data relevant to the logged in user is shown (e.g. cart, order history etc.). You can also refer to this Trailhead Module that talks in detail about the use cases for different OAuth flows. When running authentication flows on a server, it is expected that the server protects and securely stores all the secrets. In the case of Web Server flow, the client secret that prevents a spoofing server must be stored securely. In the case of JWT Bearer flow, an X509 Certificate that corresponds to the private key of the app must be created and stored in a keystore. These secrets and certificate aliases also have to be configurable (generally using Environment Variables) and should never be hardcoded into your codebase. This also allows you to change them without rebuilding the app and to deploy instances of your app in different environments with ease. When developing locally, for example with Node.js, these are stored in a .env file, which can then be accessed in your code by using libraries like dotenv, saving you the trouble of setting them manually every time. You should exclude sensitive configuration files like .env from version control by referencing them in specific files like .gitignore for git. Data Residency Securing access to Salesforce data doesn’t stop with authentication. Data must be stored and transmitted securely as well. Data on the Salesforce Platform is secured with its core security capabilities like Sharing Model, Object and Field Level Security and optionally Salesforce Shield for encryption and high compliance. Using Salesforce APIs allows you real time access to data without making a copy of it. The data returned by the API is bound by the permissions of the user accessing the API. Depending on your use case, you might want to replicate Salesforce data into a local/managed database. Since you can deploy Lightning Web Components Open Source (LWC OSS) apps on any platform, there are different options that each platform provides for data storage and replication. For example, Heroku Connect is an add-on by Heroku that provides a data synchronization service between Salesforce and Heroku Postgres databases. Add-Ons/Connectors like these are built to securely store tokens, and establish a session with Salesforce when needed. It is important to remember that once data is replicated locally, it is not bound by the same Sharing Model that is present in Salesforce. It is therefore necessary to implement your own access control mechanism. Also, never write the logic that queries for data or filters data based on access controls on the client side, because it can be easily tampered with. In the screenshot below, an if condition is being used by the component to only show the data relevant to the logged in user. This statement can be easily removed using browser tools which would then give the logged in user access to all the data that is being returned by the server. As a best practice, you should always use a middleware to abstract sensitive logic from the client-side and make sure that the middleware returns only the data that’s relevant to the user and nothing more. Summary In this blog post, you’ve learned about different approaches to authenticate to Salesforce from an app built with LWC OSS and what factors determine the approach you take. You’ve seen drawbacks of accessing data from the client side, and how a server can help you secure your implementation. You’ve also seen how the responsibility of data security varies with choice of data residency. However, it is also important to note that this blog post doesn’t exhaustively list all of the options available for secure Salesforce data access, but instead provides general indication patterns and principles that are used. Now it’s time to get hands-on! Below are a few resources to help you get started. Sample Code Lightning Web Components OSS foundation and documentation Trailhead Project: Access Salesforce Data with Lightning Web Components Open Source Trailhead Module: Connected App Basics About the Author Aditya Naag Topalli is a 13x Certified Senior Developer Evangelist at Salesforce. He focuses on Lightning Web Components, Einstein Platform Services, and integrations. He writes technical content and speaks frequently at webinars and conferences around the world. Follow him on Twitter @adityanaag.
0 notes
Text
Build Simple Authentication in Express in 15 Minutes
Building web pages with user authentication can be a huge pain. You typically need to set up some sort of database to manage users even if you're not using the database for anything else. You would then need to store their password hashes, and you almost need a degree on internet security to know the safest ways to do that.
What if I told you it didn't have to be so complicated? Using Okta and Express, I'll show you how to really quickly set up a website that has secure user authentication, without the need for a separate database. Everything you need you could deploy anywhere that you can run Node.
Creating a new app in Express doesn't take a lot of code. You'll need to set up your project structure and install some dependencies, which you can do with just a few commands:
mkdir new-project cd new-project npm init -y npm install [email protected] [email protected] npm install --save-dev [email protected] [email protected]
Edit the "scripts" section of your package.json to look like this:
"scripts": { "start": "nodemon .", "test": "standard" },
Now create a new file index.js :
index.js
const express = require('express') const path = require('path') const app = express() app.set('views', path.join(__dirname, 'views')) app.set('view engine', 'hbs') app.use(express.urlencoded({ extended: true })) app.use('/static', express.static('public')) // @TODO add auth middleware // @TODO add registration page // @TODO add logout route app.use('/', require('./routes/index')) const port = process.env.PORT || 3000 app.listen(port, () => console.log(`App listening on port ${port}`))
Make a few new folders as well:
mkdir -p public/images routes views
Put a fun greeting image in `public/images/greeting.jpg` that you will use to greet users.
Express allows for a templating engine. You already set up Handlebars (hbs) above, so now you can create a couple of views. One will be the HTML skeleton that contains the basic markup, and the other will be your homepage (the index view).
views/layout.hbs
<!doctype html> <html lang="en"> <head> <!-- Required meta tags --> <meta charset="utf-8"> <meta name="viewport" content="width=device-width, initial-scale=1, shrink-to-fit=no"> <!-- Bootstrap CSS --> <link rel="stylesheet" href="https://stackpath.bootstrapcdn.com/bootstrap/4.1.3/css/bootstrap.min.css" integrity="sha384-MCw98/SFnGE8fJT3GXwEOngsV7Zt27NXFoaoApmYm81iuXoPkFOJwJ8ERdknLPMO" crossorigin="anonymous"> <title>Simple Auth in 15 Minutes</title> </head> <body> <nav class="navbar navbar-expand-lg navbar-dark bg-dark"> <div class="container"> <a class="navbar-brand" href="/">Navbar</a> <button class="navbar-toggler" type="button" data-toggle="collapse" data-target="#navbarNavAltMarkup" aria-controls="navbarNavAltMarkup" aria-expanded="false" aria-label="Toggle navigation"> <span class="navbar-toggler-icon"></span> </button> <div class="collapse navbar-collapse" id="navbarNavAltMarkup"> <div class="navbar-nav"> </div> </div> </div> </nav> <main class="container pt-4">}</main> <!-- Optional JavaScript --> <!-- jQuery first, then Popper.js, then Bootstrap JS --> <script src="https://code.jquery.com/jquery-3.3.1.slim.min.js" integrity="sha384-q8i/X+965DzO0rT7abK41JStQIAqVgRVzpbzo5smXKp4YfRvH+8abtTE1Pi6jizo" crossorigin="anonymous"></script> <script src="https://cdnjs.cloudflare.com/ajax/libs/popper.js/1.14.3/umd/popper.min.js" integrity="sha384-ZMP7rVo3mIykV+2+9J3UJ46jBk0WLaUAdn689aCwoqbBJiSnjAK/l8WvCWPIPm49" crossorigin="anonymous"></script> <script src="https://stackpath.bootstrapcdn.com/bootstrap/4.1.3/js/bootstrap.min.js" integrity="sha384-ChfqqxuZUCnJSK3+MXmPNIyE6ZbWh2IMqE241rYiqJxyMiZ6OW/JmZQ5stwEULTy" crossorigin="anonymous"></script> </body> </html>
This layout will get rendered for each view, with the specific view replacing the } tag.
Now you can create the indexview. This will just display the image you put in public/images/greeting.jpg :
views/index.hbs
<div class="d-flex justify-content-center"> <img class="rounded img-fluid" src="/static/images/greeting.jpg" /> </div>
To tell the homepage to use that file when rendering, you'll also need to create a router. You already required routes/index.jsin the index.js file of your app, so now you just need to create that file:
routes/index.js
const express = require('express') const router = express.Router() router.get('/', (req, res) => { res.render('index') }) module.exports = router
The call to res.render('index') tells Express to use the render the index.hbs view and respond with the results back to the client. You can also pass in some context, but it's not needed here just yet.
Now you can run your server with the following command (as you make changes, the server will reload and you'll just need to refresh the page):
npm start
Go to http://localhost:3000 to see your greeting.
You now have a simple web server with a homepage and a lovely greeting image. The next step I promised to show you is to add secure user authentication. This is where Okta comes in to play. Okta is a cloud service that allows developers to create, edit, and securely store user accounts and user account data, and connect them with one or multiple applications. Our API enables you to:
If you don't already have one, sign up for a forever-free developer account.
You're going to need to save some information to use in the app. Create a new file named .env in the root of your application. In it, enter your organization URL.
HOST_URL=http://localhost:3000 OKTA_ORG_URL=https://{yourOktaOrgUrl}
You will also need a random string to use as an App Secret for sessions. You can generate this with the following command:
npm install -g uuid-cli echo "APP_SECRET=`uuid`" >> .env
Next, log in to your Okta developer console, navigate to Applications, then click Add Application. Select Web, then click Next.
The page you come to after creating an application has some more information you need to save to your .env file. Copy in the client ID and client secret.
OKTA_CLIENT_ID={yourClientId} OKTA_CLIENT_SECRET={yourClientSecret}
At the time of this writing, the default application creation page does not allow you to add a Logout redirect URI, but you can add one after creating the application. After creating the application, click Edit, then next to Logout redirect URIs click Add URI. Add a logout redirect URI of http://localhost:3000 and click Save.
The last piece of information you need from Okta is an API token. In your developer console, navigate to API -> Tokens, then click on Create Token. You can have many tokens, so just give this one a name that reminds you what it's for, like "15 Minute Auth". You'll be given a token that you can only see right now. If you lose the token, you'll have to create another one. Add this to .env also.
OKTA_TOKEN={yourOktaAPIToken}
Add Auth Middleware to Your Express App
Okta provides some middleware that will give you information about whether the user is registered or not. It also gives you a login page by default at /login . Add the following dependencies:
In your index.js page, replace the // @TODO add auth middleware comment with the following code:
app.use(require('express-session')({ secret: process.env.APP_SECRET, resave: true, saveUninitialized: false })) const { ExpressOIDC } = require('@okta/oidc-middleware') const oidc = new ExpressOIDC({ issuer: `${process.env.OKTA_ORG_URL}/oauth2/default`, client_id: process.env.OKTA_CLIENT_ID, client_secret: process.env.OKTA_CLIENT_SECRET, redirect_uri: `${process.env.HOST_URL}/authorization-code/callback`, scope: 'openid profile' }) app.use(oidc.router)
Also, make sure to add the following to the very top of index.js . This needs to be there before any other code in order to load your environment variables, so it should be the very first line of the file:
require('dotenv').config()
Create a Registration Page
You should now be able to login by going to /login . This will redirect you to your Okta developer page, and after you sign in you'll be redirected back to the homepage.
For people who aren't registered yet, they'll need a registration page. At the time of this writing, Okta doesn't provide a registration page out of the box, but you can build one pretty quickly. Create a new view for your route:
views/register.hbs
<form method="post"> {{#each fields}} <div class="form-group"> <label>{{this.label}}</label> <input required name="" type="" class="form-control is-invalid" value="" /> <div class="invalid-feedback">{{this.error}}</div> </div> {{/each}} <button type="submit" class="btn btn-primary">Register</button> </form>
You'll also need a new route:
routes/register.js
const okta = require('@okta/okta-sdk-nodejs') const express = require('express') const router = express.Router() const client = new okta.Client({ orgUrl: process.env.OKTA_ORG_URL, token: process.env.OKTA_TOKEN }) // Take the user to the homepage if they're already logged in router.use('/', (req, res, next) => { if (req.userContext) { return res.redirect('/') } next() }) const fields = [ { name: 'firstName', label: 'First Name' }, { name: 'lastName', label: 'Last Name' }, { name: 'email', label: 'Email', type: 'email' }, { name: 'password', label: 'Password', type: 'password' } ] router.get('/', (req, res) => { res.render('register', { fields }) }) router.post('/', async (req, res) => { const { body } = req try { await client.createUser({ profile: { firstName: body.firstName, lastName: body.lastName, email: body.email, login: body.email }, credentials: { password: { value: body.password } } }) res.redirect('/') } catch ({ errorCauses }) { const errors = {} errorCauses.forEach(({ errorSummary }) => { const [, field, error] = /^(.+?): (.+)$/.exec(errorSummary) errors[field] = error }) res.render('register', { errors, fields: fields.map(field => ({ ...field, error: errors[field.name], value: body[field.name] })) }) } }) module.exports = router
To tie this all together, in your root index.js file, make sure to replace the // @TODO add registration page comment with the following:
app.use('/register', require('./routes/register'))
You can now have users register. If they run into an error, it will be displayed with the field that caused the error.
Add a Logout Route
At the time of this writing, Okta's middleware doesn't provide a default /logout route. Luckily, adding one is fairly simple. In your index.js file, replace the // @TODO add logout route comment with:
app.get('/logout', (req, res) => { if (req.userContext) { const idToken = req.userContext.tokens.id_token const to = encodeURI(process.env.HOST_URL) const params = id_token_hint=${idToken}&post_logout_redirect_uri=${to} req.logout() res.redirect(${process.env.OKTA_ORG_URL}/oauth2/default/v1/logout?${params}) } else { res.redirect('/') } })
If you're logged in, this will invalidate the token and delete the user's session. It will then redirect you back to the homepage. If you're not logged in, it just takes you back to the homepage.
Add Links to the New Routes in Your Express App
To more easily expose these routes to the user, you can add some buttons. You'll need to expose the user context to the view to know if a user is logged in or not so you know which buttons to display, and potentially greet the user.
In routes/index.js replace the res.render('index') line with the following:
routes/index.js
const { userContext } = req res.render('index', { userContext })
While you're at it, you can also prevent the user from seeing your greeting unless they're logged in. Change your views/index.hbs file to the following:
views/index.hbs
{{#if userContext}} <h1 class="text-center">Hi {{userContext.userinfo.given_name}}!</h1> <div class="d-flex justify-content-center"> <img class="rounded img-fluid" src="/static/images/greeting.jpg" /> </div> {{else}} <h1 class="text-center">Please log in</h1> {{/if}}
Now to add the buttons. In views/layout.hbs, replace the comment with the following:
views/layout.hbs
<a class="nav-item nav-link" href="/logout">Log out</a> <a class="nav-item nav-link" href="/login">Log in</a> <a class="nav-item nav-link" href="/register">Register</a>
Check out the final product to make sure it works
That's it! In just a few minutes, you went from an empty folder to a secure website with user registration and login. You didn't even have to set up a database! If you want to see the final code sample for reference, you can find it on GitHub.
If you'd like to learn more about Node and Express check out some of these other posts on the Okta developer blog:
If you have any questions about this post, please add a comment below. For more awesome content, follow @oktadev on Twitter, like us on Facebook, or subscribe to our YouTube channel.
via Scotch.io https://ift.tt/2AqUzm1
0 notes
Text
Let’s Create Our Own Authentication API with Nodejs and GraphQL
Authentication is one of the most challenging tasks for developers just starting with GraphQL. There are a lot of technical considerations, including what ORM would be easy to set up, how to generate secure tokens and hash passwords, and even what HTTP library to use and how to use it.
In this article, we’ll focus on local authentication. It’s perhaps the most popular way of handling authentication in modern websites and does so by requesting the user’s email and password (as opposed to, say, using Google auth.)
Moreover, This article uses Apollo Server 2, JSON Web Tokens (JWT), and Sequelize ORM to build an authentication API with Node.
Handling authentication
As in, a log in system:
Authentication identifies or verifies a user.
Authorization is validating the routes (or parts of the app) the authenticated user can have access to.
The flow for implementing this is:
The user registers using password and email
The user’s credentials are stored in a database
The user is redirected to the login when registration is completed
The user is granted access to specific resources when authenticated
The user’s state is stored in any one of the browser storage mediums (e.g. localStorage, cookies, session) or JWT.
Pre-requisites
Before we dive into the implementation, here are a few things you’ll need to follow along.
Node 6 or higher
Yarn (recommended) or NPM
GraphQL Playground
Basic Knowledge of GraphQL and Node
…an inquisitive mind!
Dependencies
This is a big list, so let’s get into it:
Apollo Server: An open-source GraphQL server that is compatible with any kind of GraphQL client. We won’t be using Express for our server in this project. Instead, we will use the power of Apollo Server to expose our GraphQL API.
bcryptjs: We want to hash the user passwords in our database. That’s why we will use bcrypt. It relies on Web Crypto API‘s getRandomValues interface to obtain secure random numbers.
dotenv: We will use dotenv to load environment variables from our .env file.
jsonwebtoken: Once the user is logged in, each subsequent request will include the JWT, allowing the user to access routes, services, and resources that are permitted with that token. jsonwebtokenwill be used to generate a JWT which will be used to authenticate users.
nodemon: A tool that helps develop Node-based applications by automatically restarting the node application when changes in the directory are detected. We don’t want to be closing and starting the server every time there’s a change in our code. Nodemon inspects changes every time in our app and automatically restarts the server.
mysql2: An SQL client for Node. We need it connect to our SQL server so we can run migrations.
sequelize: Sequelize is a promise-based Node ORM for Postgres, MySQL, MariaDB, SQLite and Microsoft SQL Server. We will use Sequelize to automatically generate our migrations and models.
sequelize cli: We will use Sequelize CLI to run Sequelize commands. Install it globally with yarn add --global sequelize-cli in the terminal.
Setup directory structure and dev environment
Let’s create a brand new project. Create a new folder and this inside of it:
yarn init -y
The -y flag indicates we are selecting yes to all the yarn init questions and using the defaults.
We should also put a package.json file in the folder, so let’s install the project dependencies:
yarn add apollo-server bcrpytjs dotenv jsonwebtoken nodemon sequelize sqlite3
Next, let’s add Babeto our development environment:
yarn add babel-cli babel-preset-env babel-preset-stage-0 --dev
Now, let’s configure Babel. Run touch .babelrc in the terminal. That creates and opens a Babel config file and, in it, we’ll add this:
{ "presets": ["env", "stage-0"] }
It would also be nice if our server starts up and migrates data as well. We can automate that by updating package.json with this:
"scripts": { "migrate": " sequelize db:migrate", "dev": "nodemon src/server --exec babel-node -e js", "start": "node src/server", "test": "echo \"Error: no test specified\" && exit 1" },
Here’s our package.json file in its entirety at this point:
{ "name": "graphql-auth", "version": "1.0.0", "main": "index.js", "scripts": { "migrate": " sequelize db:migrate", "dev": "nodemon src/server --exec babel-node -e js", "start": "node src/server", "test": "echo \"Error: no test specified\" && exit 1" }, "dependencies": { "apollo-server": "^2.17.0", "bcryptjs": "^2.4.3", "dotenv": "^8.2.0", "jsonwebtoken": "^8.5.1", "nodemon": "^2.0.4", "sequelize": "^6.3.5", "sqlite3": "^5.0.0" }, "devDependencies": { "babel-cli": "^6.26.0", "babel-preset-env": "^1.7.0", "babel-preset-stage-0": "^6.24.1" } }
Now that our development environment is set up, let’s turn to the database where we’ll be storing things.
Database setup
We will be using MySQL as our database and Sequelize ORM for our relationships. Run sequelize init (assuming you installed it globally earlier). The command should create three folders: /config /models and /migrations. At this point, our project directory structure is shaping up.
Let’s configure our database. First, create a .env file in the project root directory and paste this:
NODE_ENV=development DB_HOST=localhost DB_USERNAME= DB_PASSWORD= DB_NAME=
Then go to the /config folder we just created and rename the config.json file in there to config.js. Then, drop this code in there:
require('dotenv').config() const dbDetails = { username: process.env.DB_USERNAME, password: process.env.DB_PASSWORD, database: process.env.DB_NAME, host: process.env.DB_HOST, dialect: 'mysql' } module.exports = { development: dbDetails, production: dbDetails }
Here we are reading the database details we set in our .env file. process.env is a global variable injected by Node and it’s used to represent the current state of the system environment.
Let’s update our database details with the appropriate data. Open the SQL database and create a table called graphql_auth. I use Laragon as my local server and phpmyadmin to manage database tables.
What ever you use, we’ll want to update the .env file with the latest information:
NODE_ENV=development DB_HOST=localhost DB_USERNAME=graphql_auth DB_PASSWORD= DB_NAME=<your_db_username_here>
Let’s configure Sequelize. Create a .sequelizerc file in the project’s root and paste this:
const path = require('path')
module.exports = { config: path.resolve('config', 'config.js') }
Now let’s integrate our config into the models. Go to the index.js in the /models folder and edit the config variable.
const config = require(__dirname + '/../../config/config.js')[env]
Finally, let’s write our model. For this project, we need a User model. Let’s use Sequelize to auto-generate the model. Here’s what we need to run in the terminal to set that up:
sequelize model:generate --name User --attributes username:string,email:string,password:string
Let’s edit the model that creates for us. Go to user.js in the /models folder and paste this:
'use strict'; module.exports = (sequelize, DataTypes) => { const User = sequelize.define('User', { username: { type: DataTypes.STRING, }, email: { type: DataTypes.STRING, }, password: { type: DataTypes.STRING, } }, {}); return User; };
Here, we created attributes and fields for username, email and password. Let’s run a migration to keep track of changes in our schema:
yarn migrate
Let’s now write the schema and resolvers.
Integrate schema and resolvers with the GraphQL server
In this section, we’ll define our schema, write resolver functions and expose them on our server.
The schema
In the src folder, create a new folder called /schema and create a file called schema.js. Paste in the following code:
const { gql } = require('apollo-server') const typeDefs = gql` type User { id: Int! username: String email: String! } type AuthPayload { token: String! user: User! } type Query { user(id: Int!): User allUsers: [User!]! me: User } type Mutation { registerUser(username: String, email: String!, password: String!): AuthPayload! login (email: String!, password: String!): AuthPayload! } ` module.exports = typeDefs
Here we’ve imported graphql-tag from apollo-server. Apollo Server requires wrapping our schema with gql.
The resolvers
In the src folder, create a new folder called /resolvers and create a file in it called resolver.js. Paste in the following code:
const bcrypt = require('bcryptjs') const jsonwebtoken = require('jsonwebtoken') const models = require('../models') require('dotenv').config() const resolvers = { Query: { async me(_, args, { user }) { if(!user) throw new Error('You are not authenticated') return await models.User.findByPk(user.id) }, async user(root, { id }, { user }) { try { if(!user) throw new Error('You are not authenticated!') return models.User.findByPk(id) } catch (error) { throw new Error(error.message) } }, async allUsers(root, args, { user }) { try { if (!user) throw new Error('You are not authenticated!') return models.User.findAll() } catch (error) { throw new Error(error.message) } } }, Mutation: { async registerUser(root, { username, email, password }) { try { const user = await models.User.create({ username, email, password: await bcrypt.hash(password, 10) }) const token = jsonwebtoken.sign( { id: user.id, email: user.email}, process.env.JWT_SECRET, { expiresIn: '1y' } ) return { token, id: user.id, username: user.username, email: user.email, message: "Authentication succesfull" } } catch (error) { throw new Error(error.message) } }, async login(_, { email, password }) { try { const user = await models.User.findOne({ where: { email }}) if (!user) { throw new Error('No user with that email') } const isValid = await bcrypt.compare(password, user.password) if (!isValid) { throw new Error('Incorrect password') } // return jwt const token = jsonwebtoken.sign( { id: user.id, email: user.email}, process.env.JWT_SECRET, { expiresIn: '1d'} ) return { token, user } } catch (error) { throw new Error(error.message) } } },
} module.exports = resolvers
That’s a lot of code, so let’s see what’s happening in there.
First we imported our models, bcrypt and jsonwebtoken, and then initialized our environmental variables.
Next are the resolver functions. In the query resolver, we have three functions (me, user and allUsers):
me query fetches the details of the currently loggedIn user. It accepts a user object as the context argument. The context is used to provide access to our database which is used to load the data for a user by the ID provided as an argument in the query.
user query fetches the details of a user based on their ID. It accepts id as the context argument and a user object.
alluser query returns the details of all the users.
user would be an object if the user state is loggedIn and it would be null, if the user is not. We would create this user in our mutations.
In the mutation resolver, we have two functions (registerUser and loginUser):
registerUser accepts the username, email and password of the user and creates a new row with these fields in our database. It’s important to note that we used the bcryptjs package to hash the users password with bcrypt.hash(password, 10). jsonwebtoken.sign synchronously signs the given payload into a JSON Web Token string (in this case the user id and email). Finally, registerUser returns the JWT string and user profile if successful and returns an error message if something goes wrong.
login accepts email and password , and checks if these details match with the one that was supplied. First, we check if the email value already exists somewhere in the user database.
models.User.findOne({ where: { email }}) if (!user) { throw new Error('No user with that email') }
Then, we use bcrypt’s bcrypt.compare method to check if the password matches.
const isValid = await bcrypt.compare(password, user.password) if (!isValid) { throw new Error('Incorrect password') }
Then, just like we did previously in registerUser, we use jsonwebtoken.sign to generate a JWT string. The login mutation returns the token and user object.
Now let’s add the JWT_SECRET to our .env file.
JWT_SECRET=somereallylongsecret
The server
Finally, the server! Create a server.js in the project’s root folder and paste this:
const { ApolloServer } = require('apollo-server') const jwt = require('jsonwebtoken') const typeDefs = require('./schema/schema') const resolvers = require('./resolvers/resolvers') require('dotenv').config() const { JWT_SECRET, PORT } = process.env const getUser = token => { try { if (token) { return jwt.verify(token, JWT_SECRET) } return null } catch (error) { return null } } const server = new ApolloServer({ typeDefs, resolvers, context: ({ req }) => { const token = req.get('Authorization') || '' return { user: getUser(token.replace('Bearer', ''))} }, introspection: true, playground: true }) server.listen({ port: process.env.PORT || 4000 }).then(({ url }) => { console.log(`🚀 Server ready at ${url}`); });
Here, we import the schema, resolvers and jwt, and initialize our environment variables. First, we verify the JWT token with verify. jwt.verify accepts the token and the JWT secret as parameters.
Next, we create our server with an ApolloServer instance that accepts typeDefs and resolvers.
We have a server! Let’s start it up by running yarn dev in the terminal.
Testing the API
Let’s now test the GraphQL API with GraphQL Playground. We should be able to register, login and view all users — including a single user — by ID.
We’ll start by opening up the GraphQL Playground app or just open localhost://4000 in the browser to access it.
Mutation for register user
mutation { registerUser(username: "Wizzy", email: "[email protected]", password: "wizzyekpot" ){ token } }
We should get something like this:
{ "data": { "registerUser": { "token": "eyJhbGciOiJIUzI1NiIsInR5cCI6IkpXVCJ9.eyJpZCI6MTUsImVtYWlsIjoiZWtwb3RAZ21haWwuY29tIiwiaWF0IjoxNTk5MjQwMzAwLCJleHAiOjE2MzA3OTc5MDB9.gmeynGR9Zwng8cIJR75Qrob9bovnRQT242n6vfBt5PY" } } }
Mutation for login
Let’s now log in with the user details we just created:
mutation { login(email:"[email protected]" password:"wizzyekpot"){ token } }
We should get something like this:
{ "data": { "login": { "token": "eyJhbGciOiJIUzI1NiIsInR5cCI6IkpXVCJ9.eyJpZCI6MTUsImVtYWlsIjoiZWtwb3RAZ21haWwuY29tIiwiaWF0IjoxNTk5MjQwMzcwLCJleHAiOjE1OTkzMjY3NzB9.PDiBKyq58nWxlgTOQYzbtKJ-HkzxemVppLA5nBdm4nc" } } }
Awesome!
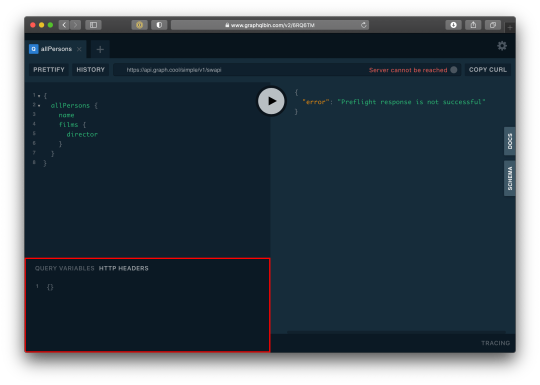
Query for a single user
For us to query a single user, we need to pass the user token as authorization header. Go to the HTTP Headers tab.

…and paste this:
{ "Authorization": "eyJhbGciOiJIUzI1NiIsInR5cCI6IkpXVCJ9.eyJpZCI6MTUsImVtYWlsIjoiZWtwb3RAZ21haWwuY29tIiwiaWF0IjoxNTk5MjQwMzcwLCJleHAiOjE1OTkzMjY3NzB9.PDiBKyq58nWxlgTOQYzbtKJ-HkzxemVppLA5nBdm4nc" }
Here’s the query:
query myself{ me { id email username } }
And we should get something like this:
{ "data": { "me": { "id": 15, "email": "[email protected]", "username": "Wizzy" } } }
Great! Let’s now get a user by ID:
query singleUser{ user(id:15){ id email username } }
And here’s the query to get all users:
{ allUsers{ id username email } }
Summary
Authentication is one of the toughest tasks when it comes to building websites that require it. GraphQL enabled us to build an entire Authentication API with just one endpoint. Sequelize ORM makes creating relationships with our SQL database so easy, we barely had to worry about our models. It’s also remarkable that we didn’t require a HTTP server library (like Express) and use Apollo GraphQL as middleware. Apollo Server 2, now enables us to create our own library-independent GraphQL servers!
Check out the source code for this tutorial on GitHub.
The post Let’s Create Our Own Authentication API with Nodejs and GraphQL appeared first on CSS-Tricks.
You can support CSS-Tricks by being an MVP Supporter.
Let’s Create Our Own Authentication API with Nodejs and GraphQL published first on https://deskbysnafu.tumblr.com/
0 notes
Photo

How to Build and Structure a Node.js MVC Application
In a non-trivial application, the architecture is as important as the quality of the code itself. We can have well-written pieces of code, but if we don’t have good organization, we’ll have a hard time as the complexity increases. There’s no need to wait until the project is half-way done to start thinking about the architecture; the best time is before starting, using our goals as beacons for our choices.
Node.js doesn’t have a de facto framework with strong opinions on architecture and code organization in the same way that Ruby has the Rails framework, for example. As such, it can be difficult to get started with building full web applications with Node.
In this tutorial, we’re going to build the basic functionality of a note-taking app using the MVC architecture. To accomplish this, we’re going to employ the Hapi.js framework for Node.js and SQLite as a database, using Sequelize.js, plus other small utilities, to speed up our development. We’re going to build the views using Pug, the templating language.
What is MVC?
Model-View-Controller (or MVC) is probably one of the most popular architectures for applications. As with a lot of other cool things in computer history, the MVC model was conceived at PARC for the Smalltalk language as a solution to the problem of organizing applications with graphical user interfaces. It was created for desktop applications, but since then, the idea has been adapted to other mediums including the Web.
We can describe the MVC architecture in simple terms:
Model: the part of our application that will deal with the database or any data-related functionality.
View: everything the user will see — basically, the pages that we’re going to send to the client.
Controller: the logic of our site, and the glue between models and views. Here we call our models to get the data, then we put that data on our views to be sent to the users.
Our application will allow us to create, view, edit and delete plain-text notes. It won’t have other functionality, but because we’ll have a solid architecture already defined we won’t have a lot of trouble adding things later.
This tutorial assumes you have a recent version of Node installed on your machine. If this isn’t the case, please consult our tutorial on getting up and running with Node.
You can check out the final application in the accompanying GitHub repository, so you get a general overview of the application structure.
Laying out the Foundation
The first step when building any Node.js application is to create a package.json file, which is going to contain all of our dependencies and scripts. Instead of creating this file manually, npm can do the job for us using the init command:
mkdir notes-board cd notes-board npm init -y
After the process is complete, we’ll have a package.json file ready to use.
Note: if you’re not familiar with these commands, checkout our Beginner’s Guide to npm.
We’re going to proceed to install Hapi.js — the framework of choice for this tutorial. It provides a good balance between simplicity, stability and features that will work well for our use case (although there are other options that would also work just fine).
npm install @hapi/[email protected]
This command will download Hapi.js and add it to our package.json file as a dependency.
Note: We’ve specified v18.4.0 of Hapi.js, as it’s compatible with Node versions 8, 10, and 12. If you’re using Node 12, you can opt to install the latest version (Hapi v19.1.0).
Now we can create our entry file — the web server that will start everything. Go ahead and create a server.js file in your application directory and add the following code to it:
"use strict"; const Hapi = require("@hapi/hapi"); const Settings = require("./settings"); const init = async () => { const server = new Hapi.Server({ port: Settings.port }); server.route({ method: "GET", path: "/", handler: (request, h) => { return "Hello, world!"; } }); await server.start(); console.log(`Server running at: ${server.info.uri}`); }; process.on("unhandledRejection", err => { console.log(err); process.exit(1); }); init();
This is going to be the foundation of our application.
First, we indicate that we’re going to use strict mode, which is a common practice when using the Hapi.js framework.
Next, we include our dependencies and instantiate a new server object where we set the connection port to 3000 (the port can be any number above 1023 and below 65535).
Our first route for our server will work as a test to see if everything is working, so a “Hello, world!” message is enough for us. In each route, we have to define the HTTP method and path (URL) that it will respond to, and a handler, which is a function that will process the HTTP request. The handler function can take two arguments: request and h. The first one contains information about the HTTP call, and the second will provide us with methods to handle our response to that call.
Finally, we start our server with the server.start() method.
Storing Our Settings
It’s good practice to store our configuration variables in a dedicated file. This file exports a JSON object containing our data, where each key is assigned from an environment variable — but without forgetting a fallback value.
In this file, we can also have different settings depending on our environment (such as development or production). For example, we can have an in-memory instance of SQLite for development purposes, but a real SQLite database file on production.
Selecting the settings depending on the current environment is quite simple. Since we also have an env variable in our file which will contain either development or production, we can do something like the following to get the database settings:
const dbSettings = Settings[Settings.env].db;
So dbSettings will contain the setting of an in-memory database when the env variable is development, or will contain the path of a database file when the env variable is production.
Also, we can add support for a .env file, where we can store our environment variables locally for development purposes. This is accomplished using a package like dotenv for Node.js, which will read a .env file from the root of our project and automatically add the found values to the environment.
Note: if you decide to also use a .env file, make sure you install the package with npm install dotenv and add it to .gitignore so you don’t publish any sensitive information.
Our settings.js file will look like this:
// This will load our .env file and add the values to process.env, // IMPORTANT: Omit this line if you don't want to use this functionality require("dotenv").config({ silent: true }); module.exports = { port: process.env.PORT || 3000, env: process.env.NODE_ENV || "development", // Environment-dependent settings development: { db: { dialect: "sqlite", storage: ":memory:" } }, production: { db: { dialect: "sqlite", storage: "db/database.sqlite" } } };
Now we can start our application by executing the following command and navigating to http://localhost:3000 in our web browser:
node server.js
Note: this project was tested on Node v12.15.0. If you get any errors, ensure you have an updated installation.
Defining the Routes
The definition of routes gives us an overview of the functionality supported by our application. To create our additional routes, we just have to replicate the structure of the route that we already have in our server.js file, changing the content of each one.
Let’s start by creating a new directory called lib in our project. Here we’re going to include all the JS components.
Inside lib, let’s create a routes.js file and add the following content:
"use strict"; const Path = require("path"); module.exports = [ // we’re going to define our routes here ];
In this file, we’ll export an array of objects that contain each route of our application. To define the first route, add the following object to the array:
{ method: "GET", path: "/", handler: (request, h) => { return "All the notes will appear here"; }, config: { description: "Gets all the notes available" } },
Our first route is for the home page (/), and since it will only return information, we assign it a GET method. For now, it will only give us the message “All the notes will appear here”, which we’re going to change later for a controller function. The description field in the config section is only for documentation purposes.
Then, we create the four routes for our notes under the /note/ path. Since we’re building a CRUD application, we’ll need one route for each action with the corresponding HTTP methods.
Add the following definitions next to the previous route:
{ method: "POST", path: "/note", handler: (request, h) => { return "New note"; }, config: { description: "Adds a new note" } }, { method: "GET", path: "/note/{slug}", handler: (request, h) => { return "This is a note"; }, config: { description: "Gets the content of a note" } }, { method: "PUT", path: "/note/{slug}", handler: (request, h) => { return "Edit a note"; }, config: { description: "Updates the selected note" } }, { method: "GET", path: "/note/{slug}/delete", handler: (request, h) => { return "This note no longer exists"; }, config: { description: "Deletes the selected note" } }
We’ve done the same as in the previous route definition, but this time we’ve changed the method to match the action we want to execute.
The only exception is the delete route. In this case, we’re going to define it with the GET method rather than DELETE and add an extra /delete in the path. This way, we can call the delete action just by visiting the corresponding URL.
Note: if you plan to implement a strict REST interface, then you would have to use the DELETE method and remove the /delete part of the path.
We can name parameters in the path by surrounding the word in curly braces. Since we’re going to identify notes by a slug, we add {slug} to each path, with the exception of the POST route; we don’t need it there because we’re not going to interact with a specific note, but to create one.
You can read more about Hapi.js routes on the official documentation.
Now, we have to add our new routes to the server.js file. Let’s import the routes file at the top of the file:
const Routes = require("./lib/routes");
Then let’s replace our current test route with the following:
server.route(Routes);
The post How to Build and Structure a Node.js MVC Application appeared first on SitePoint.
by James Kolce via SitePoint https://ift.tt/398Hi0R
0 notes